Category: Photography

  • How to Conquer the Biggest Fear in Street Photography

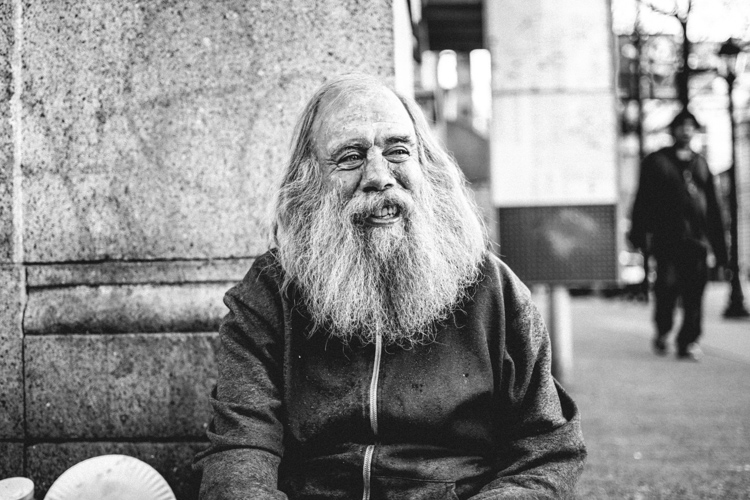
    As a street photographer you may have had fear sometimes taking photos on the street. All of us who spend time in the streets shooting know that not everyone likes when you take photos of them. When photographing strangers, our biggest fear is of people noticing that we are taking photos of them or people complaining about being in the frame.
    How to Conquer the Biggest Fear in Street Photography

    The biggest fear in street photography

    Every time this thought hits your mind, just realize that there’s nothing to be afraid of. I’d say that 99% of the fear and anxiety taking photos of strangers comes from inside you, not from the outside. You need to deal with your fears and know that the biggest problem you could have is someone calling the police (which doesn’t happen really often, at least it’s never happened to me). In most of the countries taking photos on the street is allowed and you don’t need permission. Always check the regulations of the country or the province where you are shooting.

    If you want to photograph kids I’d recommend always asking for the permission of the parents. In a lot countries you can get in trouble really easily for taking photos of minors without permission. If you want to check in which countries you need consent to take photos, please check this link: Countries that need consent.

    Requests to delete the photos
    How to Conquer the Biggest Fear in Street Photography

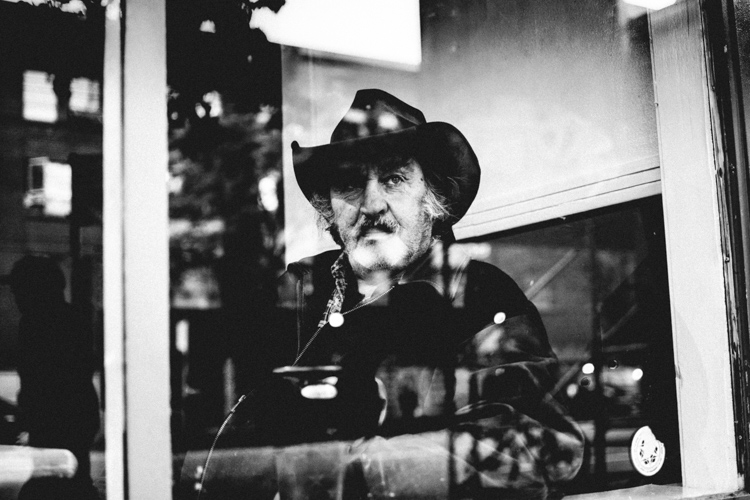
    From my personal experience I have to say that sometimes it’s tricky to take shoots of strangers. Some people have come to me asking to delete the photos in front of them. You don’t necessarily need to do that. As per the law in Canada (British Columbia) I can take photos in public places as much as I like. If I want to publish them it’s different story, but you can take photos without having to be worried about getting in trouble. When people ask me to delete their pictures I do it, not because I’m afraid of them because I don’t want to start arguing with someone and lose time that I could be shooting, and out of respect for that person.

    Advice to help you be invisible

    Since I started shooting I’ve changed my technique a lot. With time you’ll get better and you will feel more confident asking for permission or framing your photo to get an interesting composition.

    I have tried different tips and techniques that you can find on the internet, most of them from Eric Kim (one of the biggest street photographers of our time) and from other photographers like Bruce Gilden, among others.
    How to Conquer the Biggest Fear in Street Photography

    Here is a list of different things people do and my opinion about each of them.

    The shooting from the hip technique

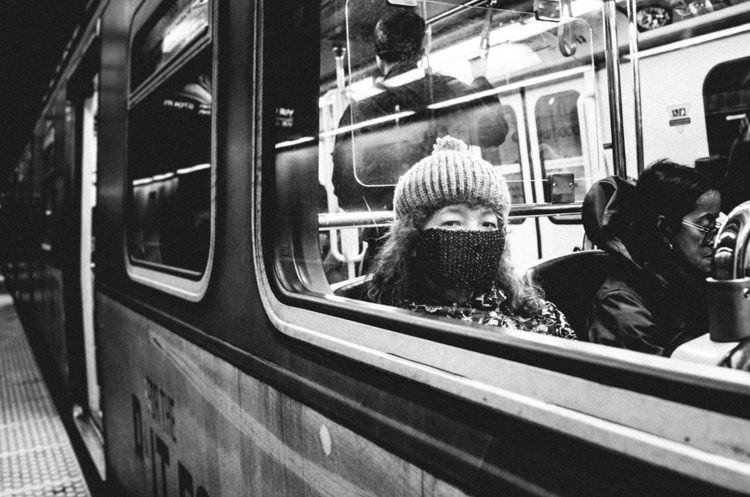
    You’ll find that this way of taking photos helps you at the beginning but it won’t take you really long if all the photos you do are like this. You need to frame your photo and think about what you want in your frame, otherwise you’ll end up just being lucky.

    Shooting from the hip doesn’t allow you to decide, you are just finding something interesting and trying to get lucky pressing the shutter. Let’s be honest, if you want to get good photos don’t do this. Street photography isn’t easy, so you need to be confident and earn the photo. Last but not least it looks pretty shady having your camera on your chest and pressing the shutter when you see something.
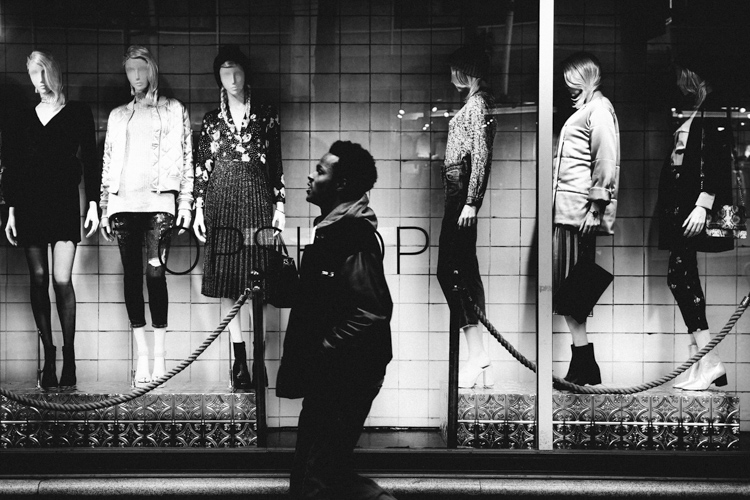
    How to Conquer the Biggest Fear in Street Photography

    Here is my advice to avoid shooting from the hip to give you a better result. What you can do is walk with your camera around like you are shooting a video, people will think that you are just a tourist and won’t care that much what you are doing.

    Dress code

    There isn’t a proper dress code for street photography, but I will recommend you to dress according to the style of shooting you are gonna be doing. If you go to poor neighbourhoods don’t dress fancy. I often dress with damaged or old clothing to fit in more in that kind of environment.

    In case you are shooting in the middle of the city my recommendation would be always dark clothes rather than brighter ones. People won’t notice you that much, and if you want to capture candid moments that’s what you need to blend in more.

    Camera and equipment go as light as possible
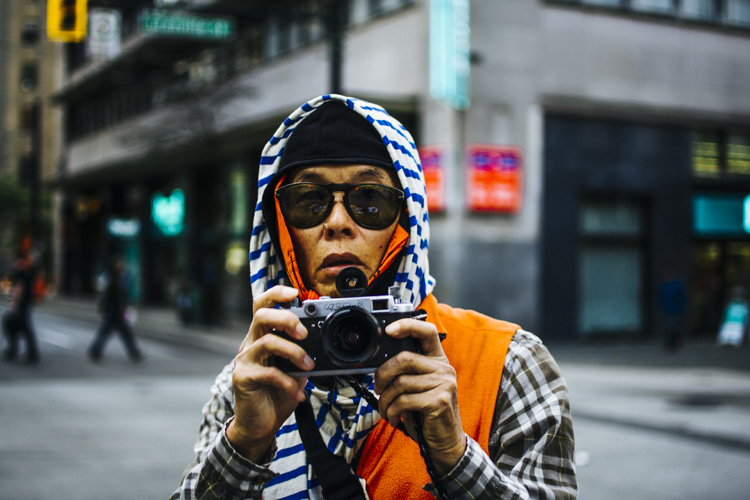
    How to Conquer the Biggest Fear in Street Photography camera gear

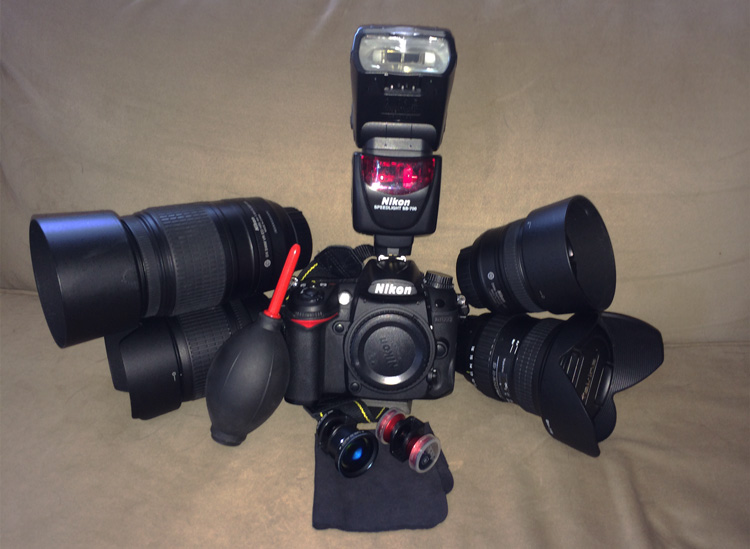
    In terms of camera equipment, you should always go as light as possible. The less you carry the more freedom you will have when you’re shooting. In my case, I bought my first camera about a year ago (Nikon D7200) and even tho I love the camera I realized after a short amount of time that I couldn’t take the camera around. It was too heavy and too noticeable.

    When you are shooting street photography you want to be as invisible as possible, that’s why months later I decided to buy another camera (Ricoh GR II). The advantage of this camera is the fact that it’s super small and I can carry it around all the time. Now I take photos every day, and that helps have no regrets when I see something that I want to shoot.

    My personal experience
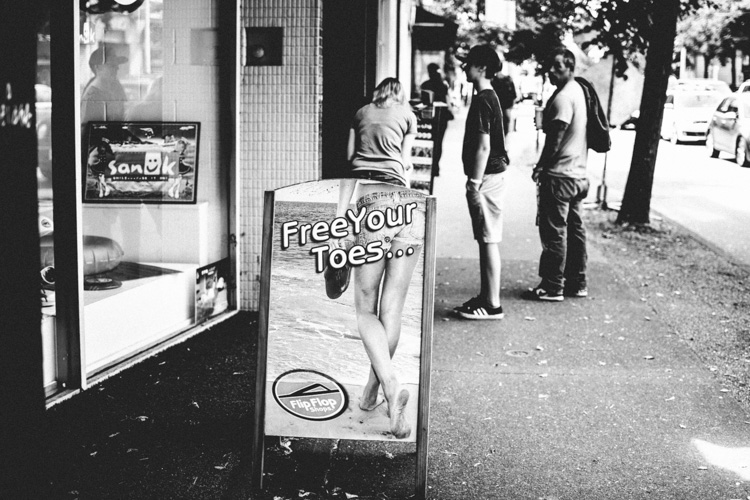
    How to Conquer the Biggest Fear in Street Photography

    Since I started I haven’t had a lot of problems. A bunch of people said no when asking for permission but many others said yes. Sometimes people will yell at you for taking photos and others will try to run away from you, but the more shots you take more confident you’ll feel.

    I’ve experienced more problems taking photos of rich people than poor people. Which is funny to me, people who have less are seemingly willing to give more than those who have everything.

    Rough neighborhood

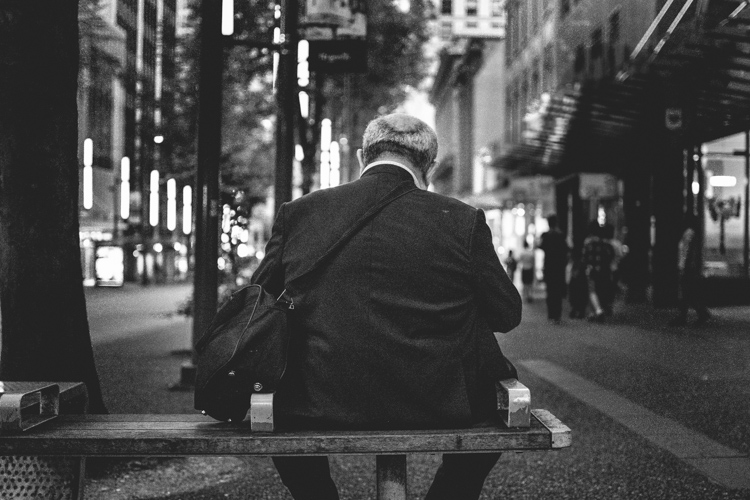
    As a photographer based in Vancouver, I find my inspiration in neighbourhoods like Vancouver East Side which is known for their problems with poverty and drug abuse in some zones. Hastings Street is the part of Vancouver East Side that interests me the most. There is where I take most of my portraits and where I get to talk and share some moments with the people.
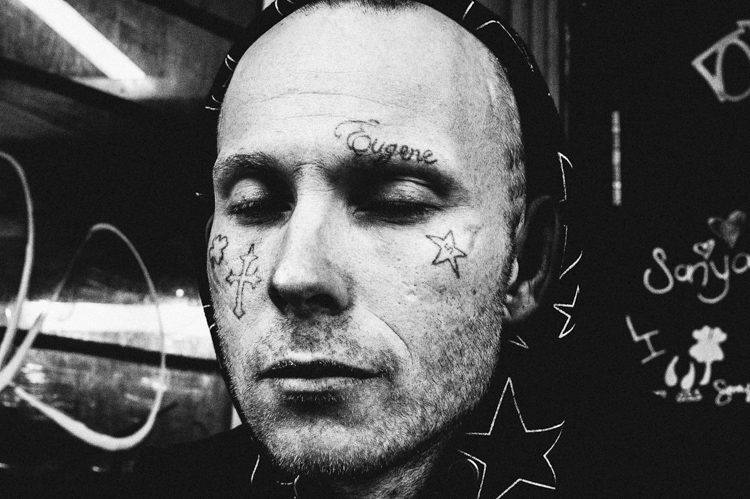
    How to Conquer the Biggest Fear in Street Photography confidence

    In the image above you can see my portrait of a man with tattoos on his face. When I saw him I was by myself and I wished to take his photo. I won’t lie to you I was afraid. Taking photos of people doing drugs or in bad situations is not easy. I get too close emotionally sometimes and feel bad for taking photos of them, like I am stealing something from people who have nothing. But in these cases you need to be strong and see photography not as a weapon but as a way to capture something beautiful and exciting to you. Back to the point, I saw this man and I hesitated taking the picture or not, but eventualy I did.

    I asked him, “Excuse me, I really like the tattoos on your face and I would like to take your portrait, do you mind?”. (Always compliment your subject, it gives you a reason for taking the photo.) The man looked at me seriously and said, “Just one, do it fast because I’m mad.” So I took the photo as fast as I could and after thanking him I left and continued taking photos of other people.

    Be brave but also be safe
    How to Conquer the Biggest Fear in Street Photography

    In most cases when you are in areas where is not always safe you don’t want to take a long time taking the photo so I switched to automatic and just took one frame. The outcome was great from my point of view but it is not always like that. Rushing is not always a friend of success, but in some cases you don’t have an option.

    Many times some of the tough guys you see if you get closer and ask them for a photo you realize how easy is to take photos of them.

    Note from the editor: Always put your own safety first and if you feel it would be dangerous or unsafe to take a photo then do not do so.

    My point with this article is to help you realize it’s okay to take photos of strangers in street photography. Think about Robert Frank, Bruce Gilden, or Henri Cartier-Bresson. They didn’t hesitate when the shot showed up in front of them, the question is, would you?

    googletag.cmd.push(function() {
    tablet_slots.push( googletag.defineSlot( “/1005424/_dPSv4_tab-all-article-bottom_(300×250)”, [300, 250], “pb-ad-78623” ).addService( googletag.pubads() ) ); } );

    googletag.cmd.push(function() {
    mobile_slots.push( googletag.defineSlot( “/1005424/_dPSv4_mob-all-article-bottom_(300×250)”, [300, 250], “pb-ad-78158” ).addService( googletag.pubads() ) ); } );

    The post How to Conquer the Biggest Fear in Street Photography by Camil Adell appeared first on Digital Photography School.
    Digital Photography School

  • How to Create Magic in Your Photos with the Pixelstick

    Who doesn’t want special super powers? Popular culture is awash these days with characters with added extras. To date, these include wizards with magic wands, Jedi’s with light sabers, and now there are photographers with pixelsticks! That’s right, welcome to the future because the pixelstick is here and it’s going to change the way you do photography if you embrace it. The pixelstick enables you to make amazing light paintings in camera, so let’s take a look at it and see why it’s an essential purchase for those who like creative photography.

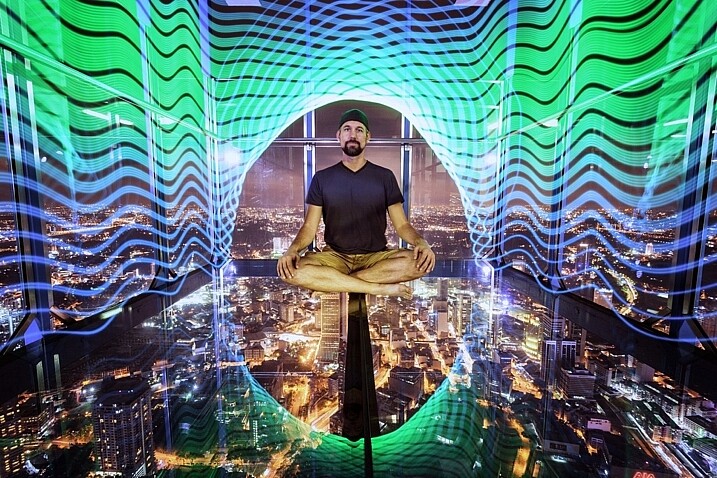
    The light from the pixelstick perfectly framed my friend and fellow DPS write, Pete DeMarco.

    The light from the pixelstick perfectly framed my friend and fellow DPS writer, Pete DeMarco.

    What is light painting?

    Light painting is a technique you can use to create fascinating images. To do it you need to photograph at night, use long exposure, and have a light source. You can divide light painting into two types, those that you do in front of the camera, and those you do with the camera.

    1. Light painting with the camera: Using the camera to light paint is called kinetic light painting and involves techniques such as zoom bursts, or camera rotation.
    2. Lighting painting in front of the camera: You can also move lit or glowing objects in front of the camera during a long exposure, to paint the scene in front of the camera.

    In many cases the first time you do any light painting it will be to spell your name using sparklers or a flashlight. The next step if you became more serious would usually be making light orbs, and other light painting shapes with things like fairy lights. Now there is the pixelstick, which makes light painting both easier to do, and more sophisticated.

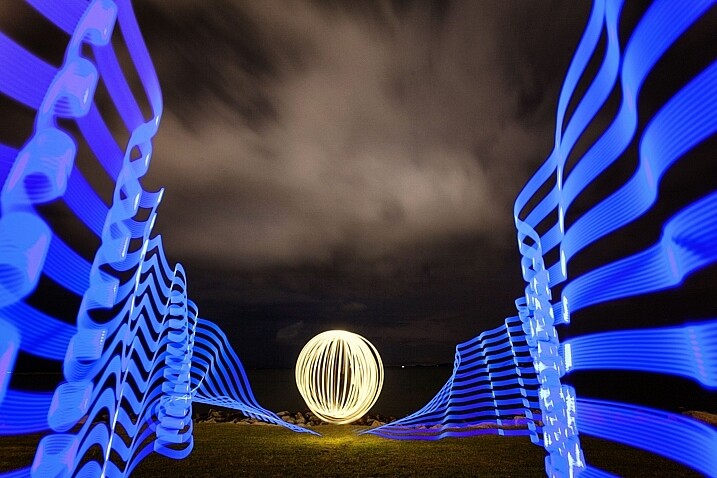
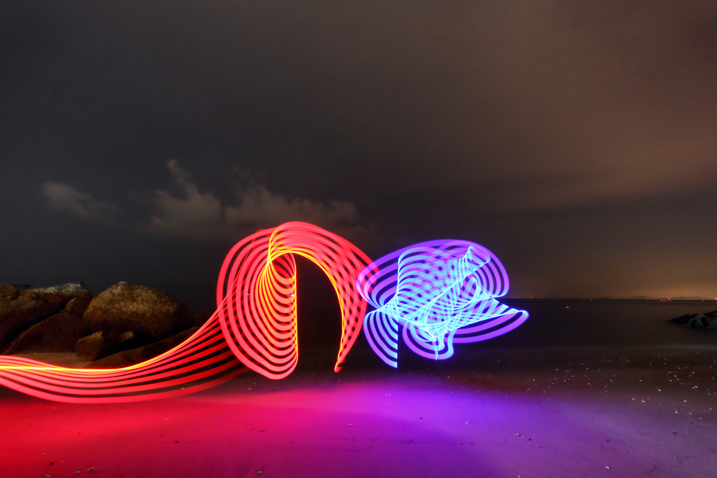
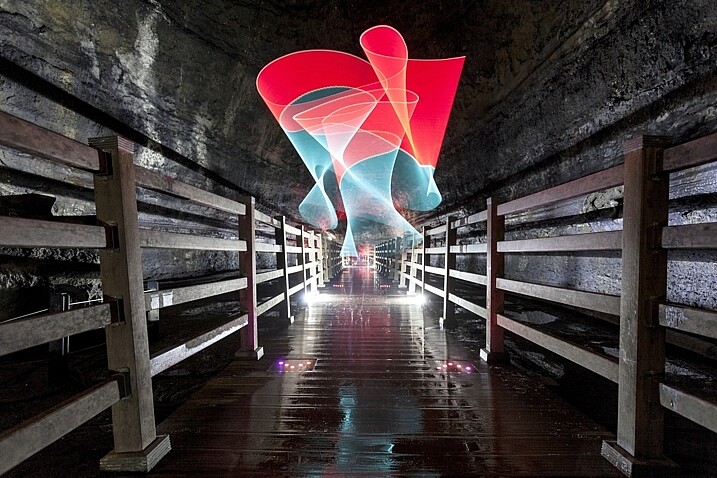
    Light orbs are a lot of fun to create, it's even more fun to light paint with the pixelstick as well.

    Light orbs are a lot of fun to create and it’s even more fun to light paint with the pixelstick as well.

    The game changer, introducing the pixelstick

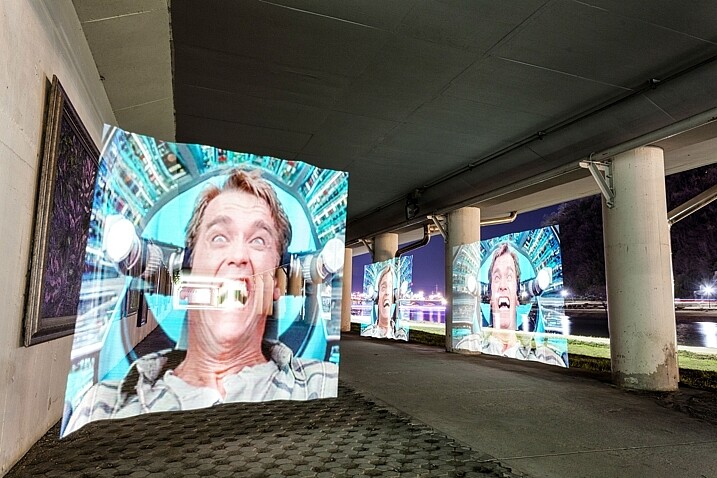
    The pixelstick is the result of the inevitable evolution of light painting, and the advancement of technology. The pixelstick is a product designed and produced by bitbanger labs, following a successful Kickstarter fundraising campaign. The neat thing about the pixelstick is that you can program it to create any light pattern you want, in fact, you can even use it to create light painted pictures.

    How to Create Magic in Your Photos with the Pixelstick

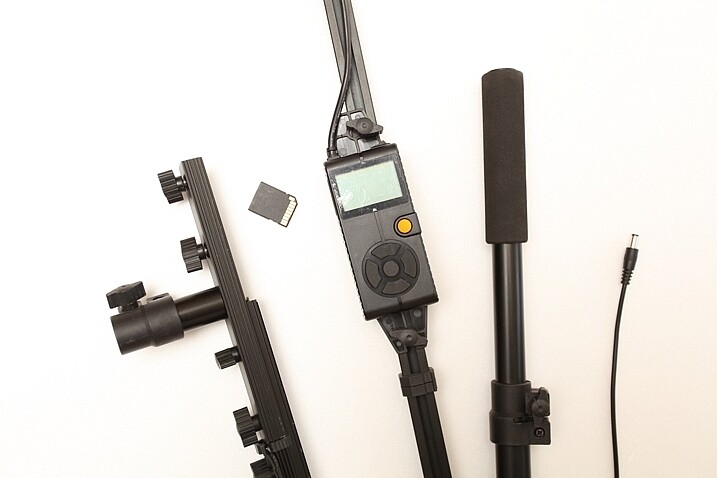
    This is possible through importing BMP files onto an SD card, which can then be slotted into the pixelstick’s operating system. You have control of many useful aspects, brightness of the light, the speed of the pattern transmission, repeat firing of the pattern, white balance, and delayed fire, are some of the useful functions.

    The pixelstick comes with a controller that you can change the light painting with.

    The pixelstick comes with a controller that you can use to change the light painting design.

    Vital stats, what you need to know about the pixelstick

    The pixelstick at full length is great for light painting, but not so good for traveling. It’s fortunate that the design allows you to break it down to half its length, and store it in the bag. But, the length is still too long for hand luggage on a plane, which presents a problem if you plan on using it in more exotic locales. The essential information about the pixelstick and what comes with it are:

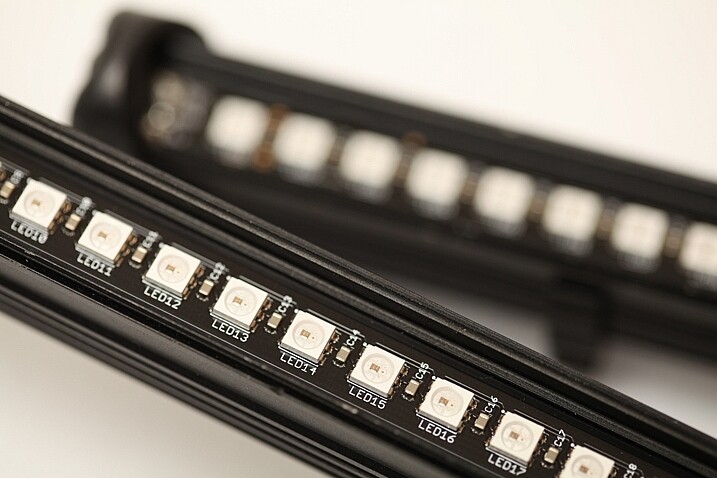
    • Comprised of a strip of 200 RGB LED lights, allowing for a combination of 16 million colors.
    • Has an aluminum case housing, to protect the LEDs from damage.
    • Full-length 187cm (73.5 inches), and a storage length of 109cm (43 inchses).
    • Weight is 1.8kg (4 pounds).
    • The device uses 8 AA batteries.
    • There is a control center with a battery pouch that attaches to the stick, with cables to connect everything together.
    The 200 LED lights on the pixelstick come enclosed in a light weight metal case, this protects them from damage.

    The 200 LED lights come enclosed in a light-weight metal case which protects them from any damage.

    How to do light painting

    Light painting is a long exposure technique, which you’ll need a tripod to achieve. You can follow the steps set out below, or for a more detailed guide check out: Beginner’s Guide to Light Painting .

    1. Choose a location and time of day that will be dark. You need to be able to expose for at least 10 seconds in most cases, so locations with less ambient light are ideal.
    2. Dress in black clothes, this will minimize the chance of you showing up in the photo.
    3. Place your camera on a tripod, and compose your scene. As you’re light painting, make sure there is enough space within the composition set aside for the design. In other words, plan where and how big the light design will be, then make sure it will all be contained inside the frame.
    4. Take the light source into the scene you composed, turn it on, and leave it in front of the camera.
    5. Turn on your camera’s LiveView function, and focus on the light source using manual focus (use the + or zoom button to show a magnified view which will make it easier for you to focus). Leave the camera in manual focus to make sure your focus point remains the same.
    6. Set the camera’s self-timer to 10 seconds, and begin the countdown. If you have a remote shutter release you may prefer to use that to trigger their camera.
    7. While the camera is counting down, move into position in front of the camera with your light source in hand.
    8. Just before the shutter releases, begin your light painting pattern.
    9. Carry out any light painting you wish to do. Then, once you have finished painting, turn off your light source and move out of the frame.
    10. Go back to your camera and wait for the exposure to finish. Check your result and repeat if necessary.
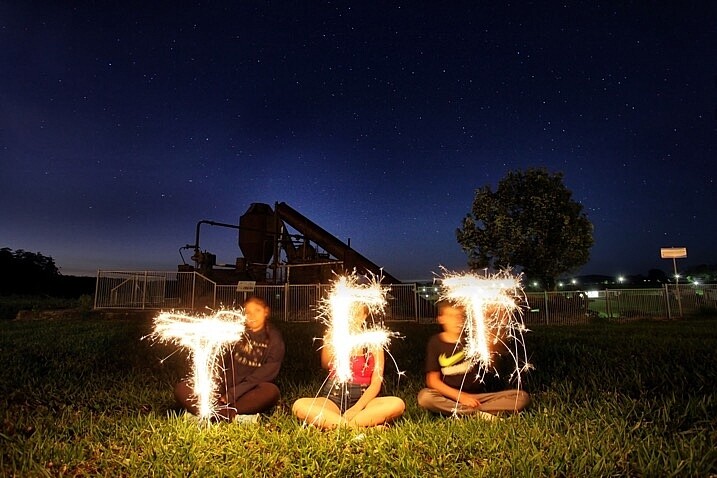
    A lot of people have fun using sparklers to create light paintings. These can look nice, the pixelstick takes you to the next level.

    A lot of people have fun using sparklers to create light paintings. These look nice, but the pixelstick takes it to the next level.

    Using the pixelstick to create abstract light paintings

    There are many different types of light sources, the pixelstick is just one example. However, these effects can also be achieved by using something as simple as a kid’s toy light saber. The focal point of your image is going to be the light painting itself, or perhaps an architectural feature that you’ll emphasize with light.

    How to Create Magic in Your Photos with the Pixelstick

    The main thing is to keep it simple, with the light flowing through the scene. If you over-elaborate and make too many movements then it’s the digital equivalent of scribbling on a piece of paper, and it usually doesn’t turn out well. So when you’re making abstract light paintings, keep these things in mind:

    1. Keep the line flowing. You probably know leading lines work well in photos, and light painting is a great way of introducing some into your frame. Have a plan for the direction the line will flow in your frame, and how it will lead the viewer’s eye to the point of interest.
    2. Use repetition. Having a pattern in your frame and repeating it makes a nice light painting. Repetition often works well for photographs, and the control you have with the pixelstick allows you to do this more easily.
    3. Keep it simple. There is a temptation to overcook (do too much) a light painting. With practice, you’ll find the strongest scenes use a more minimalist approach. A simple rotation of the pixelstick or light saber is often all that’s needed.

    The pixelstick is really good for abstract work. The preset light patterns that come with the stick will help get you going quickly.

    The most effective light paintings can often be when things are kept simple.How to Create Magic in Your Photos with the Pixelstick

    The most effective light paintings happen when things are kept simple.

    The pixelstick for portraits

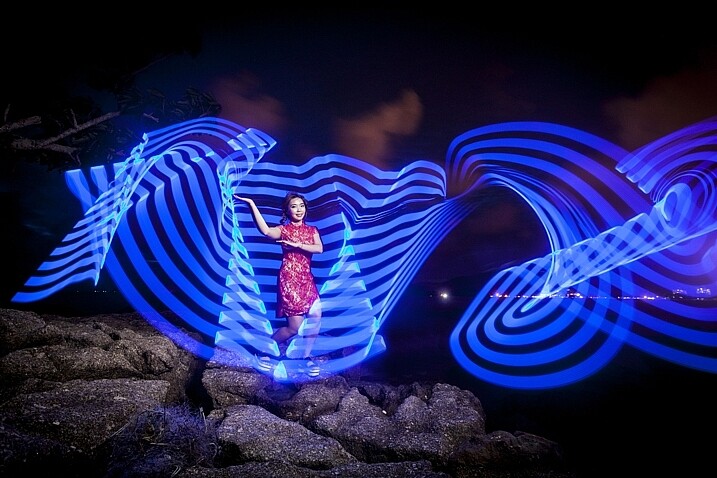
    The pixelstick can be used to frame a model, and/or create leading lines towards the subject making it a powerful tool for portrait photographers. The difficulty you will encounter when shooting long exposures with a model is freezing them so they’re sharp. The pixelstick itself isn’t any better than other light painting tools you can use, but the following tips can help.

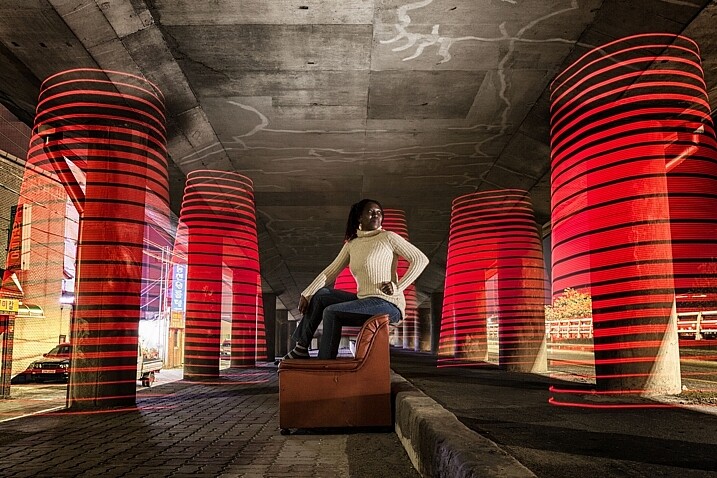
    In this photo a Jinbei 600 flash was used to light the model, while the pixelstick produced the light painting.

    In this photo, a Jinbei 600 flash was used to light the model, while the pixelstick produced the light painting around her.

    • Keep the exposures short. The shorter the exposure, the less chance there is your model will move. This will mean shorter, simpler light paintings.
    • Use strobes to light the model. Using a strobe (flash) to light your model means that any movement in the model is less likely to show.
    • Ask the model to hold still. This is easier said than done, but if your model can hold really still for 20 seconds, then you can create longer more complicated light paintings.
    • Have the model face away from the camera. Any movement of the model’s face will show in the image. So, having the model face away from the camera helps it look less obvious.

    Where the pixelstick really works well is how you make it interact with your model. This may mean that the colors in the light painting contrast with the color of the model’s clothes. Or maybe you can make the model appear to be holding some of the painted light. The creative potential of light painting combined with a model is vast, so you should have fun.

    Asking the model to face away from the camera makes it much easier to mask any movements there may have been. How to Create Magic in Your Photos with the Pixelstick

    Asking the model to face away from the camera makes it much easier to mask any movements there may have been during a long exposure.

    Light painting for product photography

    The customization available with the pixelstick makes it a fantastic choice for product photography. One of the main niche genres is car photography, where the ribbon lines or checkered flag designs can be used.

    This technique is similar to photographing a model, only your product won’t move, which allows for longer exposures. You can program in the name of the product, or even the company’s logo. The pixelstick really beats other types of light painting hands down, as the light design can be made to specifically match the product or branding.

    Cars are great subject for light painting of all forms, the pixelstick gives you even more scope to experiment.

    Cars are great subjects for light painting of all forms. The pixelstick provides more options for experimenting.

    Personalizing your light design

    The ribbon presets, and the downloadable BMP files that come with pixelstick provide a lot of creative variety. But the real fun starts once you begin to add your own designs into the pixelstick. It’s this feature more than any other that gives this tool its power. The creativity is really infinite so here are a few ideas for you:

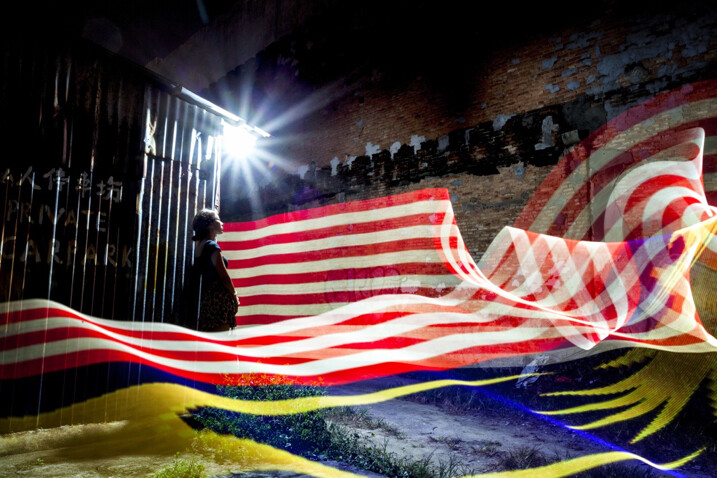
    • Find images through creative commons of national flags.
    • Edit the color scheme of some of the downloadable patterns that pixelstick provides.
    • Photograph textures shots of leaf beds or brick walls and use them to light paint.
    • Use your own landscape photos.
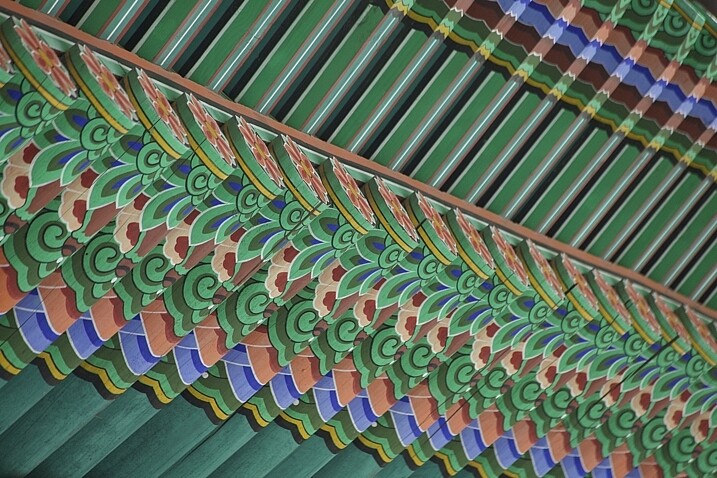
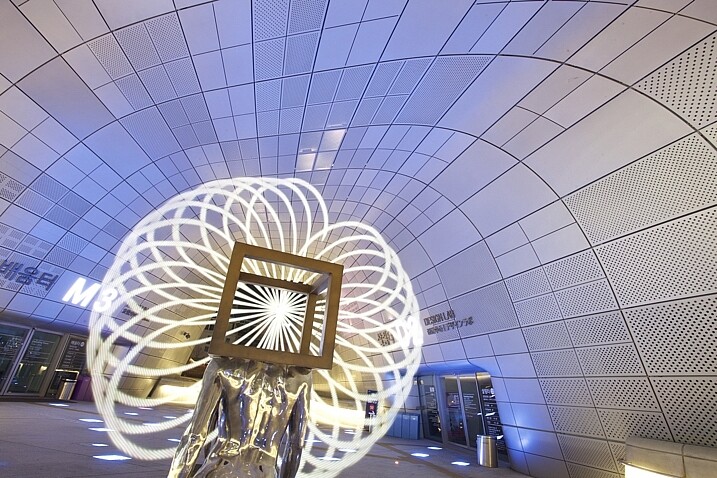
    The texture and patterns of traditional Korean roofing looks beautiful, and made for a great light painting pattern.

    The texture and pattern of this traditional Korean roof made for a great light painting pattern.

    Converting your files for use with the pixelstick could not be easier. Pixelstick has a drag and drop service on their website where you can do this easily. Alternatively, you could design and edit your image with Photoshop. Your image needs to be sized to 200 pixels high, with the length being as long as you desire. Once this is done the file needs to be flipped counter clockwise and saved as a BMP file. When creating a new file, any black areas will appear as blank (no light) when the light painting occurs.

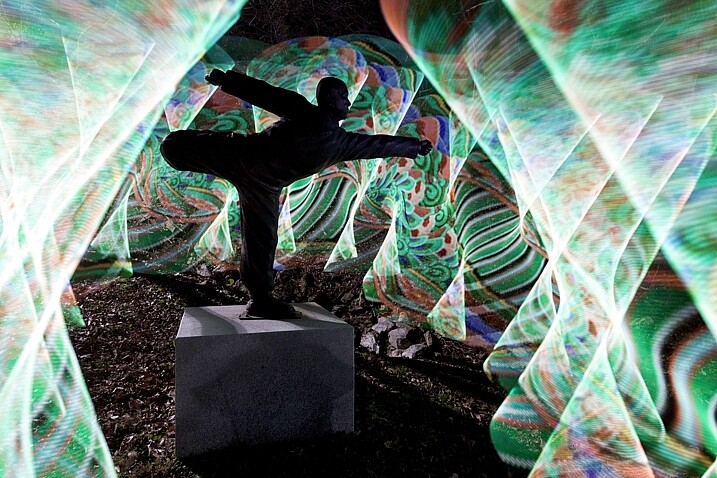
    In this photo the statue of a buddhist grandmaster has been light painted around using traditional Korean patterns as the light source.

    In this photo, the area around the statue of a Buddhist grandmaster has been light painted using the traditional Korean pattern I created (above) as the light source.

    Vibrant videos with the pixelstick

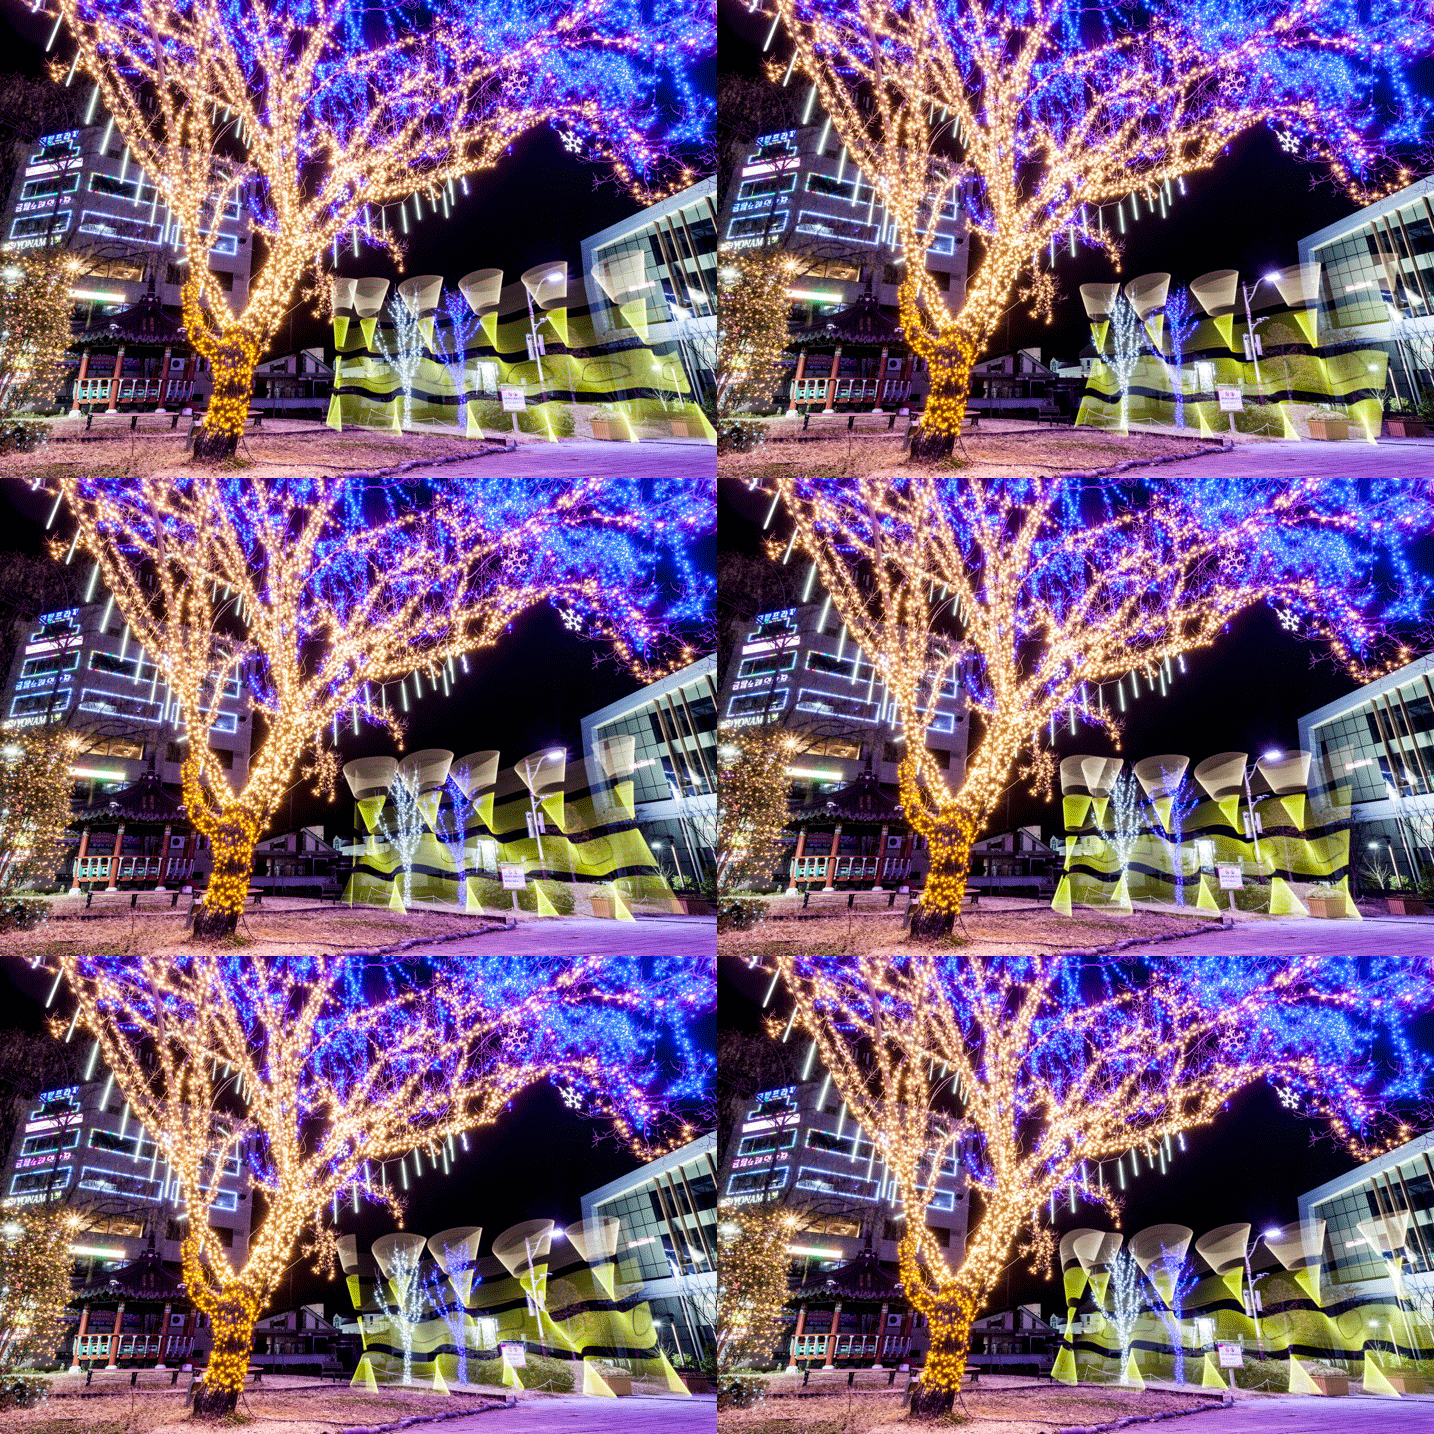
    The pixelstick’s scope of creativity goes beyond still photography, and it can do amazing things for animation. You are going to create a stop motion video with the pixelstick, and use a series of long exposure photos to make this. Think of an animation flipbook, only this is the digital version of that.

    Steps to create an animated GIF

    Animating a single scene with the pixelstick could not be easier. Follow these steps to make an animated gif (like the one below) or perhaps a short video. You don’t need a pixelstick to create this type of animation of course, but you have a lot more options at your fingertips if you do.

    The pixelstick can also be used for make smaller gif animations. The creative potential here is huge.

    The pixelstick can also be used for make smaller gif animations. The creative potential here is huge.

    1. Set your camera on a tripod, and ensure it doesn’t move.
    2. Compose your scene, and decide where your light painting animation will occur.
    3. Use a remote cable shutter release, this will prevent any movement of the camera.
    4. Allow a long enough exposure for you to complete the light painting.
    5. Begin the exposure, and move into the frame to start and complete the light painting.
    6. Repeat the exposure and the same light painting at least 10 times.
    7. Take your camera home, and import the photos to your computer.
    8. You now need to import the files to photoshop. To do this go to file>scripts>load files into stack.
    9. Open the timeline window, and select “create frame animation”. This will import one frame into your animation.
    10. On the right-hand side of the timeline window click the menu option, and select “create frames from layers”. Now reverse the order of the frames.
    11. Hit play and remove any frames that interrupt the flow of your animation.
    12. The file is now ready, export it as a gif file.

    Stop-motion videos

    Creating a longer stop-motion video is very similar to making an animation, in essence, you’re just making an extended version. As opposed to repeating a light painting many times, you may well simply move through a scene when making this type of video.

    It’s better to use a dedicated stop-motion app for making this type of video, with stop-motion studios for windows, and istopmotion for mac being a couple examples of options.

    pixelstick

    One frame from the series used to make the stop-motion video below.

    Conclusion

    The pixelstick really is a magical tool. You can create spellbinding images that will wow your friends if you decide to purchase one. The size of the stick is something of a double-edged sword, thought. It allows for bigger more dramatic light paintings, but it is also harder to transport, even when broken down into its carry bag. Is the pixelstick worth dropping the extra cash on, versus a cheaper D.I.Y. light stick? If you’re serious about improving your light painting, then yes it’s worth the money in my opinion.

    The ability to customize the type of light emitted gives you so much control. Doing this with a DIY light-stick would take many hours, and in many cases would be impossible to replicate what the pixelstick does. At around $ 350, you could spend more money on other photography gear without getting the same level of creative energy you get from this tool. Whether you’re interested in still photos or animation, this will quickly become a vital part of your setup.

    The way you make light interact with it's surrounds can be highly effective.

    The way you make light interact with the surroundings can be highly effective.

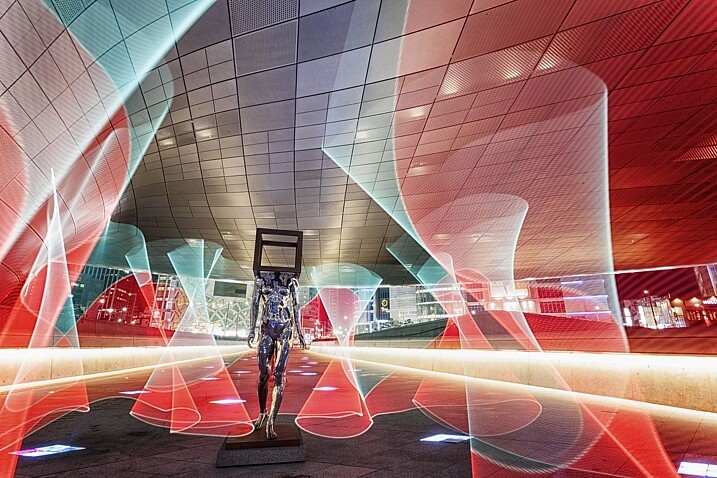
    The light paintings the pixelstick is capable of are highly sophisticated.

    The light paintings the pixelstick is capable of are highly sophisticated.

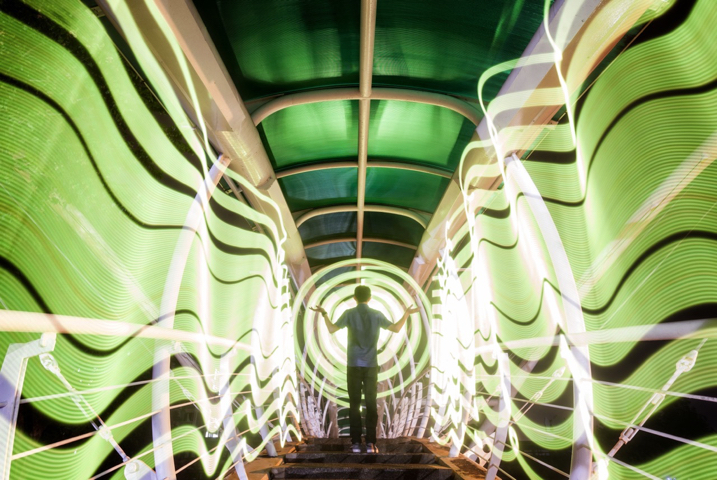
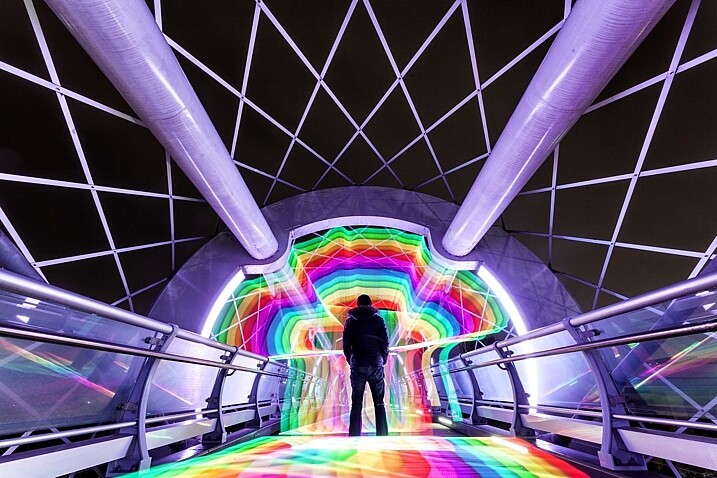
    In this image the pixelstick was used to add repetition to the scene, and an otherworldly feel.

    In this image, the pixelstick was used to add repetition to the scene, and create an otherworldly feel.

    The flow and lines that you can create with the pixelstick make the photo stand out much more.

    The flow and lines that you can create with the pixelstick make the photo stand out much more.

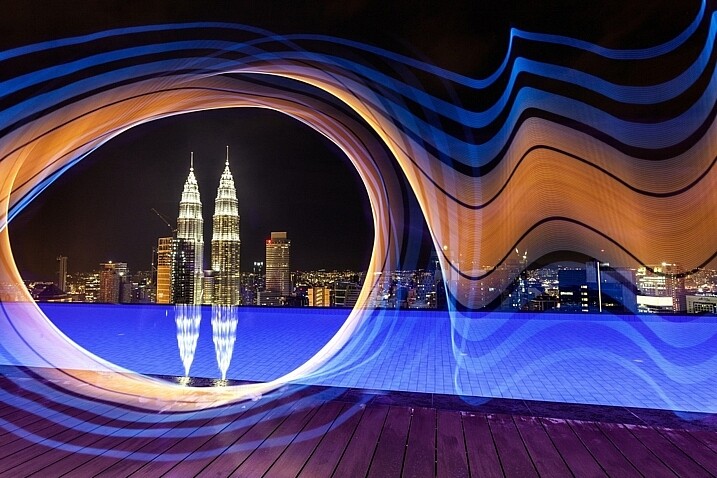
    The petronas towers in Kuala Lumpur are framed using light from the pixelstick, adding a lot of interest to this photo.

    The Petronas towers in Kuala Lumpur are framed using light from the pixelstick, adding a lot of interest to this photo.

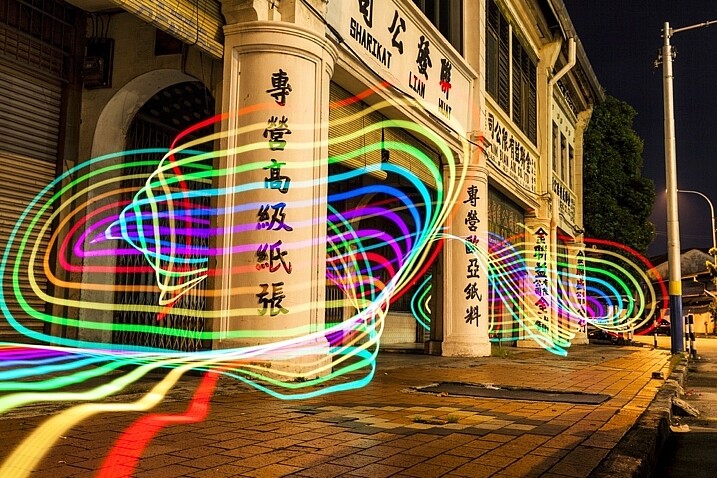
    The light weaves in and out of the pillars, adding direction to this photo.

    The light weaves in and out of the pillars, adding direction to this photo.

    googletag.cmd.push(function() {
    tablet_slots.push( googletag.defineSlot( “/1005424/_dPSv4_tab-all-article-bottom_(300×250)”, [300, 250], “pb-ad-78623” ).addService( googletag.pubads() ) ); } );

    googletag.cmd.push(function() {
    mobile_slots.push( googletag.defineSlot( “/1005424/_dPSv4_mob-all-article-bottom_(300×250)”, [300, 250], “pb-ad-78158” ).addService( googletag.pubads() ) ); } );

    The post How to Create Magic in Your Photos with the Pixelstick by Simon Bond appeared first on Digital Photography School.

    Digital Photography School

  • 3 Ways to Make Selective Color Portraits Using Lightroom and Silver Efex Pro 2

    3 Ways Make Selective Color Portraits Using Lightroom and Silver Efex Pro 2Selective coloring is a post-processing technique where you convert an image to black and white, but leave part of it in color. It has a bad reputation because it can be used to create some truly horrendous images where the only thing on display is the photographer’s lack of ability.

    But the good news is that you can use selective coloring in a far more sophisticated way to create some interesting images. The key is to keep it subtle and to use it only on suitable photos. I like to make selective color portraits, but of course you are free to experiment with other subjects as well (but please, no flowers).

    I prefer to keep my workflow within Lightroom whenever possible as it saves hard drive space and makes the entire photography workflow much simpler. The first two techniques below are for Lightroom, the third uses Silver Efex Pro 2, a free plug-in you can download from Google.

    1. Selective color in Lightroom using the Adjustment Brush

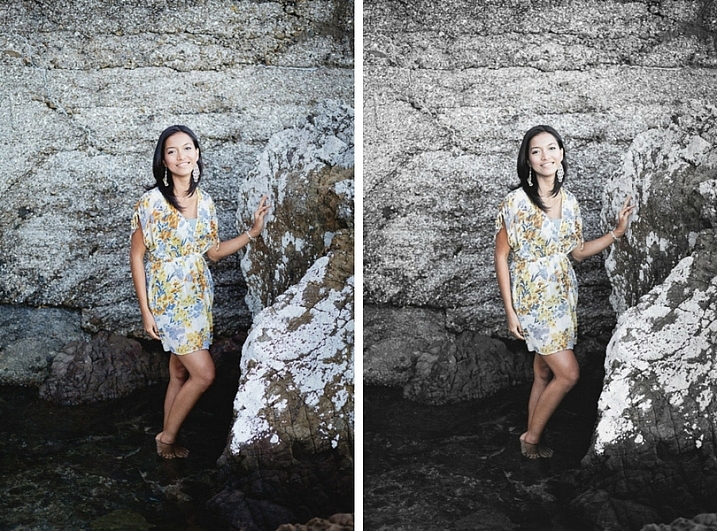
    The first example, below, shows what you can do in Lightroom. This is the portrait that I am going to work with for this technique.

    3 Ways Make Selective Color Portraits Using Lightroom and Silver Efex Pro 2

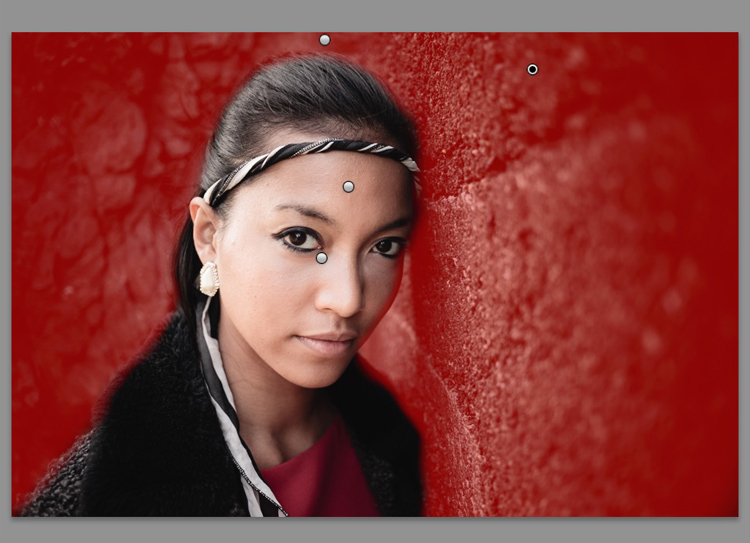
    The simple background means it’s ideal to use for a selective color portrait.

    Start by going to the Develop module and activating the Adjustment Brush tool. Paint in the background to create a mask (as shown below).

    3 Ways Make Selective Color Portraits Using Lightroom and Silver Efex Pro 2

    The mask is shown here in red.

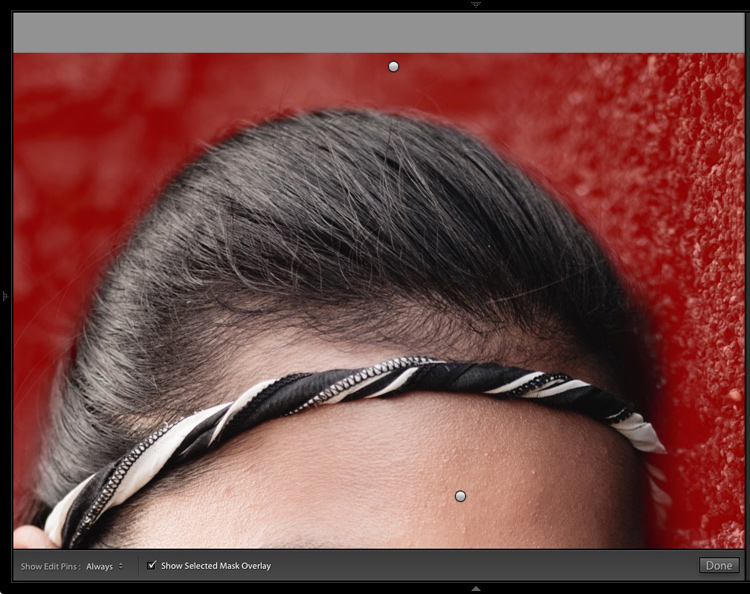
    It may help to zoom in and use a smaller brush around the model for a more accurate mask.

    3 Ways Make Selective Color Portraits Using Lightroom and Silver Efex Pro 2

    View zoomed in so you can mask more accurately around the model.

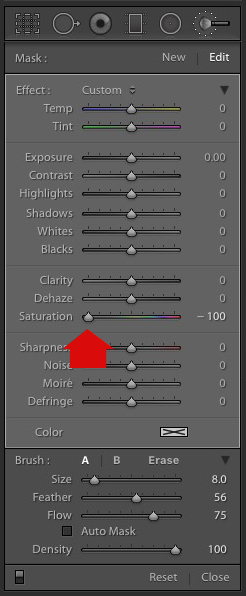
    Go to the Adjustment Brush sliders and set the saturation to zero.

    3 Ways Make Selective Color Portraits Using Lightroom and Silver Efex Pro 2 - set saturation to zero

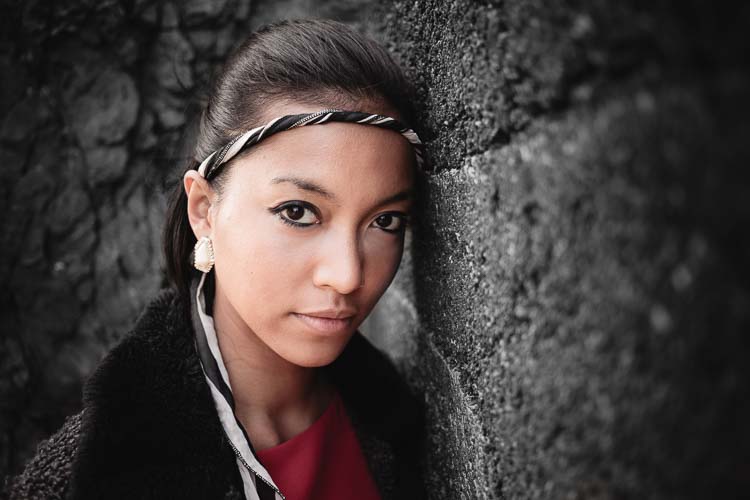
    That removes all color from the background, giving this effect. Don’t forget you don’t have to move Saturation all the way to zero – you can simply lower it to reduce the color intensity of the background. Play around and see what works best for your image.

    Selective coloring in Lightroom

    It’s important that you chose the correct image for this technique to get the best effect. There are several reasons it works well with this portrait.

    • The background is monochromatic. It wouldn’t work as well with a colorful background.
    • The rocks in the background have plenty of texture, which looks good in black and white.
    • Some of the model’s clothes are black or charcoal gray, so introducing this color into the background fits with the overall aesthetic of the image.

    2. Selective coloring in Lightroom using the HSL

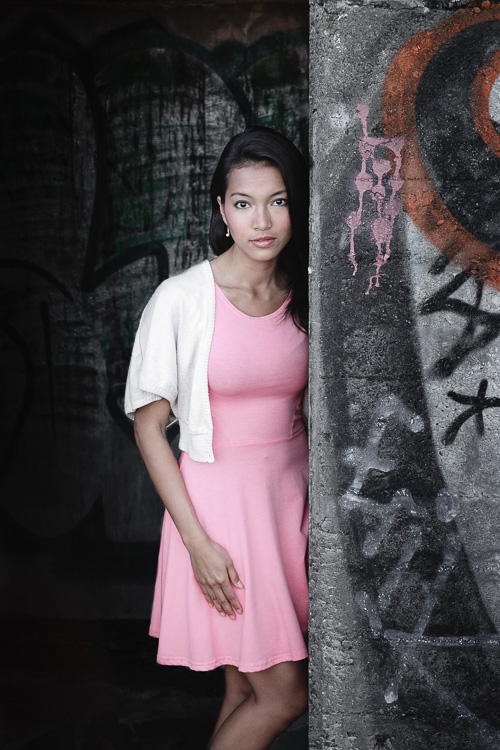
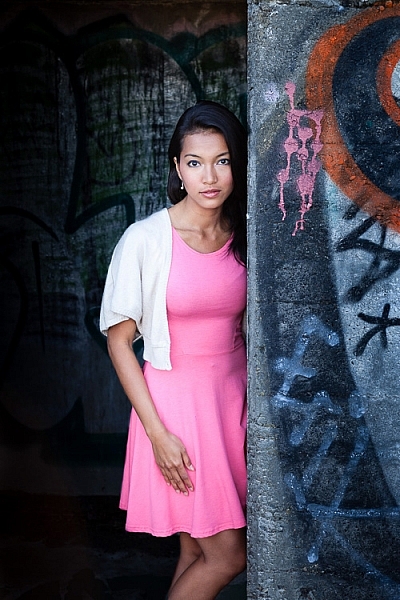
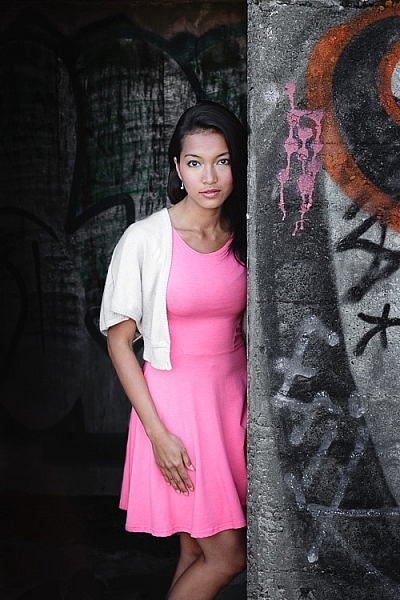
    The next portrait (below) has a more colorful foreground. I’m not going to remove the color completely, but I would like to make it more monochromatic. That will help the subtle colors in the model’s dress and skin to stand out.

    3 Ways Make Selective Color Portraits Using Lightroom and Silver Efex Pro 2

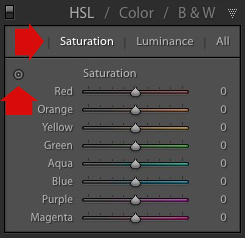
    Go to the HSL / Color / B&W panel in the Develop module. Click the Saturation tab, then the Targeted Adjustment tool (marked below) to activate it.

    Selective coloring in Lightroom

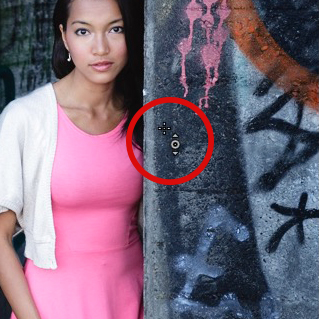
    Move the cursor over part of the image that you want to desaturate. In this case, the foreground has a blue cast that I want to remove, so I chose this spot (marked by the small cross circled in red below).

    Selective coloring in Lightroom

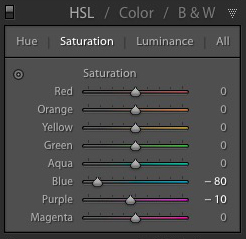
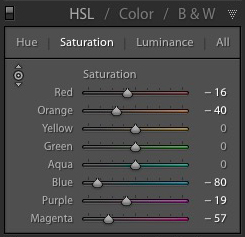
    Click and hold the button as you move the mouse downward. Lightroom reads the pixels under the cross representing the Targeted Adjustment tool and reduces the saturation of those colors across the entire image. The matching color sliders in the HSL panel move to the left. When I did this, Lightroom set Blue to -80 and Purple to -10.

    Selective coloring in Lightroom

    This is the result.

    3 Ways Make Selective Color Portraits Using Lightroom and Silver Efex Pro 2

    I took it further by repeating the technique. This time using the Targeted Adjustment tool on the pink and orange paintwork on the wall, resulted in the following saturation settings.

    Selective coloring in Lightroom

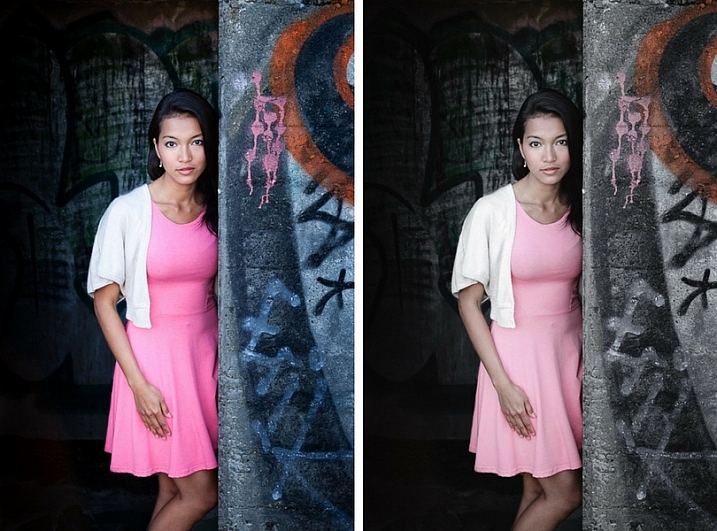
    This is a before and after of the final portrait showing these extra adjustments.

    selective-colored-portrait-01

    Notes:

    One key thing to be aware of is how the colors in your photo are related. In the photo above reducing the saturation of the pink paint affected the model’s dress, which is also pink.

    Reducing the saturation of the orange paint also affected the model’s skin. In this case, it worked out okay, but you should always zoom in and double check, especially when changing the color settings of Red, Orange or Yellow hues, as this can have some strange effects on skin tones.

    3. Selective coloring using Silver Efex Pro 2

    Silver Efex Pro 2 is one of my favorite black and white plug-ins. I’d like to show you how to use it for making a selective color portrait with a subtle effect that almost looks like an old style hand-tinted black and white print.

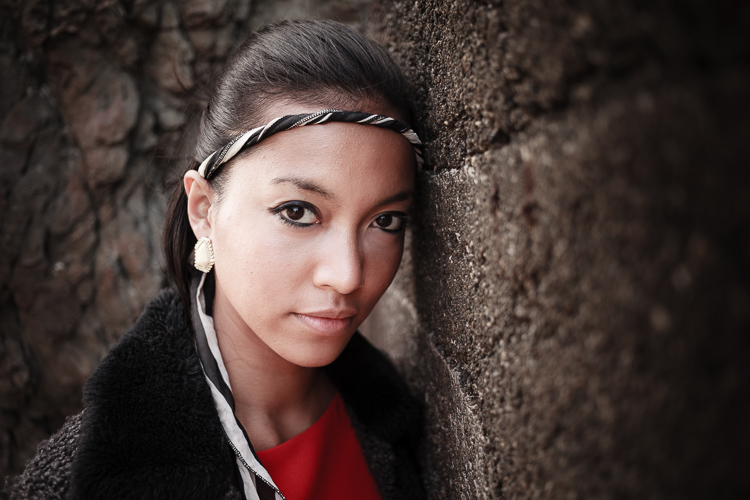
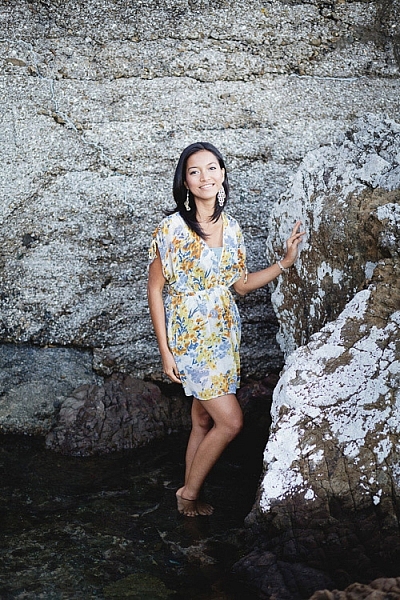
    This is the portrait I’m going to use. It’s a good photo to use as the colors are subtle.

    3 Ways Make Selective Color Portraits Using Lightroom and Silver Efex Pro 2

    If you don’t have Silver Efex Pro 2 already, you can download it for free from the official Nik Collection website.

    Once it’s installed go to Lightroom’s Library module and select the photo you want to edit. Go to File > Edit In > Silver Efex Pro 2 (you can also find this option by right-clicking the photo).

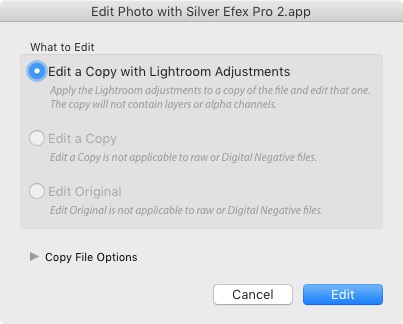
    Select the option that says “Edit a Copy with Lightroom Adjustments” in the next window (it will probably be the only one you can select) and click Edit. Lightroom converts the Raw file to a TIFF file and opens it in Silver Efex Pro 2.

    Selective coloring in Silver Efex Pro 2

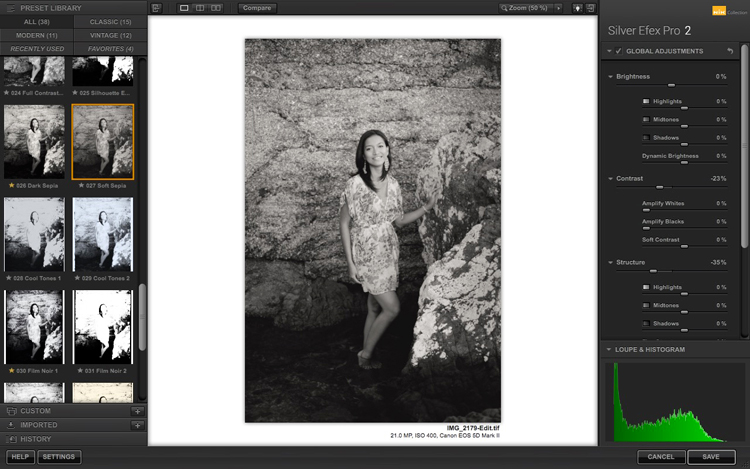
    Your first task in Silver Efex Pro 2 is to decide whether you want to stay with the default neutral black and white conversion or use one of the built-in presets. I selected the Soft Sepia preset (below), then made some adjustments to the tonal values until I was ready to apply selective coloring.

    3 Ways Make Selective Color Portraits Using Lightroom and Silver Efex Pro 2

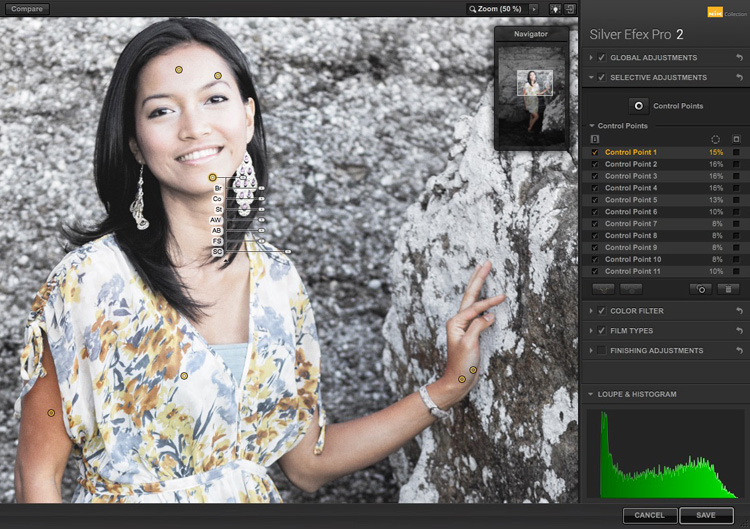
    In Silver Efex Pro 2 you make local adjustments by going to the Selective Adjustments panel and adding Control Points. This screenshot shows seven of the Control Points that I added to this photo. Each one is depicted by a yellow dot.

    Selective coloring in Silver Efex Pro 2

    Using Control Points

    Control Points work by analyzing the color and brightness of the pixels underneath them, then applying the selected effect to the pixels within the circle. In this photo, I moved the Selective Coloring slider (SC) to the right to bring the colors back to the model, but not the background.

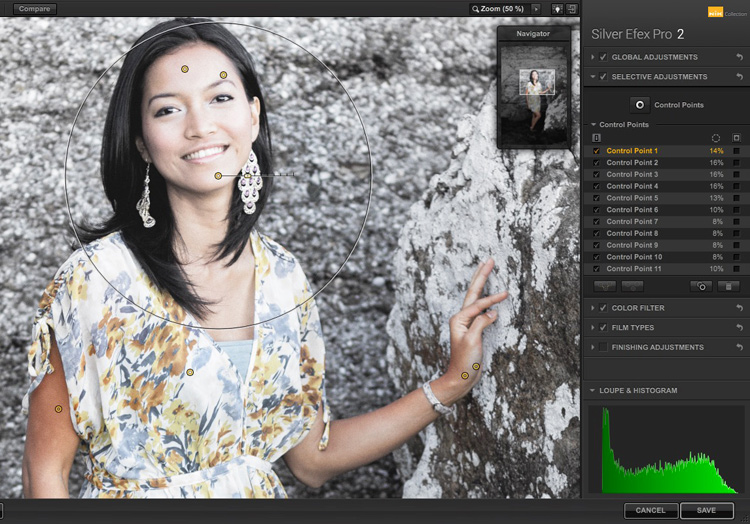
    You control the size of the circle by moving the top slider. Silver Efex Pro 2 displays a circle to show you the area affected by the Control Point.

    3 Ways Make Selective Color Portraits Using Lightroom and Silver Efex Pro 2

    Add multiple Control Points with circles that cover the model but as little of the background as possible. When you are finished, click the Save button. Silver Efex Pro 2 closes, saving the new TIFF file in the same folder as the original file and adding it to the same Collection in Lightroom.

    Here’s the before and after with portrait after selective coloring in Silver Efex Pro 2. Notice it’s very subtle.

    selective-colored-portrait-02

    Conclusion

    Hopefully, this article has shown you how to use selective color in a subtle and sophisticated way that moves on from the garish examples you have probably seen online. Do you have any questions about these techniques? Let me know in the comments below.


    If you’d like to learn more about Lightroom, then please check out my popular Mastering Lightroom ebooks.

    googletag.cmd.push(function() {
    tablet_slots.push( googletag.defineSlot( “/1005424/_dPSv4_tab-all-article-bottom_(300×250)”, [300, 250], “pb-ad-78623” ).addService( googletag.pubads() ) ); } );

    googletag.cmd.push(function() {
    mobile_slots.push( googletag.defineSlot( “/1005424/_dPSv4_mob-all-article-bottom_(300×250)”, [300, 250], “pb-ad-78158” ).addService( googletag.pubads() ) ); } );

    The post 3 Ways to Make Selective Color Portraits Using Lightroom and Silver Efex Pro 2 by Andrew S. Gibson appeared first on Digital Photography School.

    Digital Photography School

  • Tips for Making Natural Light Portraits

    Natural light portraits are honestly one of my favourites, they have this extra feel that studio portraits don’t. Compared to studio portraits, they are much easier – you don’t need to learn all the lighting techniques. They are also much cheaper, you don’t need to buy any strobes, flashes, or light modifiers such as soft boxes beauty dishes. Studio portraits are really fun but they are much more difficult than doing natural light portraits.

    Starting off, making portraits with natural light is a first great step. It will enable you to work on your composition, your communication with your model, and help you build your confidence. Then you can decide whether or not you want to invest in studio equipment.

    Article natural light image1

    Camera gear and settings

    There are some simple tips and tricks to get the most out of your portraits with natural light. But let’s start with camera settings and camera gear first.

    Shoot in manual mode

    The ideal situation is to have total control over your settings, so I would highly recommend using manual mode. I recently wrote an article about using manual mode, so you can go check it out here; How to Use Manual Mode to Make Artistic Choices for Your Photography.

    Shutter speed

    You need a minimum shutter speed of around 1/100th of a second (or faster). This is very important as it helps you avoid blurry images as your model will be in constant movement most of the time.

    Aperture and blurring the background

    To get a soft background blur, you want to use the largest aperture possible – around f/4 works but the ideal would be f/1.8. If you want a larger aperture than f/1.8 the lenses can become quite pricey.

    If you don’t have that kind of lens, you can still get nice results but separation (space) between the model and the background is needed. This really helps to drag the viewer’s attention to the model and avoid any unnecessary distractions. If you want to show the background behind your model then use a smaller aperture. I have an article on how to achieve background blur, I speak about bokeh in more detail there.

    Article natural light bokeh

    What lens to use?

    If you are using a long (telephoto) lens then a large aperture isn’t as critical because you will automatically have some background blur separation. Long lenses are the best for portraits because they compress the subject to background very nicely. Avoid wide angles lenses because they distort the subject’s face and amplify features like the nose or the forehead. Try to use lenses with a minimum focal length of 50mm with a full frame sensor and 35 mm with an APS cropped sensor.

    Article natural light long telephoto lens

    ISO

    For the ISO, choose the lowest possible option taking in consideration that your shutter speed must be 1/100th of a second or higher. Using the light meter in your camera, you can get a fast shutter speed by adjusting your ISO if the lighting conditions are low. But, knowing that you will be using a larger aperture as well, that shouldn’t be a big problem.

    Shortcut – Aperture Priority Mode

    One tip I can give is to use Aperture Priority mode if you are a lazy photographer (or smart?) like me. During an outdoor shoot, the light will change frequently and you will need to adjust your settings whether it’s the shutter speed or the ISO (I usually never adjust my aperture).

    When you are making portraits, you will get into the shoot very quickly and with manual mode you need to constantly change your settings. The probability of missing a lot of good photos because you forgot to adjust your settings is very high. It’s very frustrating when you get the perfect pose only to realize the image is way too dark or way too bright because your settings were wrong.

    I gave up on manual mode because I always forgot, so I now only use Aperture Priority and raise my ISO to 400 to force my camera to use a fast shutter speed. Don’t make the mistake of using ISO 100 in Aperture Priority with low light and ending up getting blurry images.

    Article natural light aperture priority

    Use RAW files and underexpose

    I recommend shooting RAW and underexpose your images slighting using exposure compensation.

    This is very important because sometimes you will accidentally expose for the shadows and that will automatically overexpose your images. The problem with that is that you will lose all the information in the model’s skin tone and if those areas area burned you may not be able to recover detail there.

    A RAW file also lowers the probability of losing any information in your image because you have a bigger margin of recovery. Since you are underexposing your images slightly, you will be able to correct the exposure later in post-production. It’s a bit technical but this is the best way to have all the necessary information in your image, burned-out pixels are the worst enemy a portrait portrait photographer can have.

    Another solution is to turn on the highlight alert for your camera (most entry level cameras have this setting) and every time you take an image, the burned-out pixels (clipped highlight areas) will show up in red (or blink). This is very useful because every time you see this it means that there is no information in that area, it’s just a pure white point which is not recoverable.

    Article natural light shoot raw underexposue

    I underexposed this image to have all the detail in the skin.

    Location and lighting conditions

    One thing you must avoid is taking portraits with harsh light (during the day and facing the sun). This increases the features of the face (emphasizing any blemishes and flaws) with harsh shadows and the result is not flattering. One tip I can give you to help you determine if you will have good light for a portrait is to look at the shadows (on the ground) of people passing by in the streets. If the shadow is very harsh (strong outline), you will probably not get good light but if the shadow is very soft (fuzzy or undefined) then the light is perfect for making portraits.

    One main aspect of natural light portraits is soft light. There are five different possibilities to get beautiful soft light on your model’s face.

    Five lighting options

    #1 – Use window light, it will give you a very nice soft light on your model’s face.

    Article natural light window light

    Portrait taking using natural window light.

    #2 – Take portraits during sunset, you will have the softest light possible.

    Article natural light image7

    Portrait taken at sunset.

    #3 – Take portraits on an overcast day, the sky will become a huge softbox with very soft light.

    Article natural light overcast

    Portrait taken during an overcast day.

    #4 – Take portraits on a street where buildings or apartments are blocking the sun (like an alleyway).

    Article natural light image9

    When it’s bright outside, try to look for buildings that block direct sunlight.

    #5 – Use a light diffuser in the middle of the day, this will turn harsh light into soft light.

    Article natural light image10

    The location doesn’t really matter because most of the time the background will be blurred, but the light is crucial so overtime you want to take a portrait make sure to have one of these different possibilities.

    Conclusion

    I hope that gives you some tips for making natural light portraits. Find a friend to pose for you and try it out. Please share your photos and questions in the comments section below.

    googletag.cmd.push(function() {
    tablet_slots.push( googletag.defineSlot( “/1005424/_dPSv4_tab-all-article-bottom_(300×250)”, [300, 250], “pb-ad-78623” ).addService( googletag.pubads() ) ); } );

    googletag.cmd.push(function() {
    mobile_slots.push( googletag.defineSlot( “/1005424/_dPSv4_mob-all-article-bottom_(300×250)”, [300, 250], “pb-ad-78158” ).addService( googletag.pubads() ) ); } );

    The post Tips for Making Natural Light Portraits by Yacine Bessekhouad appeared first on Digital Photography School.

    Digital Photography School

  • 3 Things I Wish I Knew When I Started Photography

    There are a some lessons that we all learn the hard way. Trial and error, though equally arduous, are still the two most ingraining teachers any of us will ever have. We often learn more from our failures than our successes. But like Newton tells us, at times we move forward only by hefting ourselves onto the shoulders of giants.

    Boldness learn

    More than anything, I wish I would have learned a few things sooner. There are so many lessons that would have benefitted me if I had only understood them on the front end of my trip into the photographic unknown.

    So, in the spirit of solidarity I will share three things I wish someone would have told me when I started photography. Perhaps there were those who tried but for whatever reason I either couldn’t or wouldn’t understand. Hopefully these hard fought teachings will help you move forward and give you the mentality you need to start creating better images. Here they are in no particular order.

    Learning chicago

    The type of camera I would need

    This is a dodgy subject that plagues many who are just starting out, or those who want to get more serious about their photography. I began my journey shooting a 35mm Nikon N65 with a 18-55mm kit lens that I bought when I was 18 years old. It was my first real camera. The late teenager version of me saved his money and paid $ 265 for it but I still felt as though I needed a better camera in order to make better images. That was 15 years ago.

    Even then I was under the impression that I would need a “professional camera” in order to be a professional photographer. If you had asked me then, I wouldn’t have been able to even tell you what a “professional camera” actually was.

    Camera types

    What I wish someone had told me was that the best camera doesn’t exist. The only thing that truly matters is the knowledge to use whatever camera is in your hands to the utmost of its (and your) ability. True, times have changed and imaging technology has advanced alarmingly fast. Some people now earn a living with only the cameras in their smartphones.

    The thing to always remember is that most cameras are capable of producing images of astonishing quality when coupled with a proficient user. Whatever camera you might currently have is likely more than enough. Allow your skills to mature and you will know when it’s time to upgrade.

    Photography create

    What post-processing is – and what it is not

    Before you begin scrolling in horror at the very mention of post-processing let me assure you that this in not a dreaded commentary on what may or may not be considered “Photoshopping.” Instead, we’re going to talk about some misconceptions I had when first beginning to process my images.

    I was under the impression that “getting it right in the camera” was an all encompassing mentality that meant nothing needed to be done after the moment of capture other than showing the image to the world. That is not necessarily true.

    What I wish someone had told me was that all photographs, even analog (film), virtually always benefit from some extent of work after the image has been made. The quote which changed my thinking towards post-processing came from none other than Ansel Adams himself:

    “The negative is the equivalent of the composer’s score, and the print the performance.”

    Journey photography

    The point Ansel was making is that yes you always want to strive to achieve the best exposure you possibly can in-camera so that you have a more complete representation of the scene in order to manifest a final photograph intermingled with your own creativity. Post-processing is not something to be avoided but rather embraced as a logical second step towards achieving your visualization regardless of what that visualization may be.

    Perfection is unattainable

    That’s right. No photograph is perfect and very few photographs are ever elevated to the level of fine art, whatever that means. This was an illusion that burdened me during my early days while learning to create photographs. I had an enormous misunderstanding about what actually went into the production of an image both creatively and technically.

    One thing that I did know, was that my photographs looked nothing like some of the wonderful images I saw online or in photo magazines. I became discouraged, all the while feeling as if I was doing something completely wrong.

    Perfection unattainable

    What I wish someone had told me was that even if you labor in photography for the rest of your life, you will never snap a perfect frame. Your photographs will certainly become stronger as you hone your technique and acquire more capable gear, yes. But don’t think that you will ever reach a day when you can say, “Ah, now I’m perfect. All my photographs will be flawless from here on out.” That day will never come.

    The craft of photography is a practice in personal evolution. It is a journey of constant learning. So take a breath, relax, and enjoy the process for the beautifully weird trip that it is.

    Conclusion

    These are just a few of things that I wish someone had told me when I first began making photographs. Do you have any lessons you have learned that could help others? List them in the comments below!

    googletag.cmd.push(function() {
    tablet_slots.push( googletag.defineSlot( “/1005424/_dPSv4_tab-all-article-bottom_(300×250)”, [300, 250], “pb-ad-78623” ).addService( googletag.pubads() ) ); } );

    googletag.cmd.push(function() {
    mobile_slots.push( googletag.defineSlot( “/1005424/_dPSv4_mob-all-article-bottom_(300×250)”, [300, 250], “pb-ad-78158” ).addService( googletag.pubads() ) ); } );

    The post 3 Things I Wish I Knew When I Started Photography by Adam Welch appeared first on Digital Photography School.

    Digital Photography School

  • 50 Sweet Valentine Gifts for Photographers and Their Sweethearts

    The season for love is here but finding a perfect gift for your lover isn’t easy. Whether you’re an amateur photographer or a real pro, you can give your sweetheart a photography Valentines gift that would be a winner for sure. I know you want to make this Valentine’s day unforgettable. Here I showcase 50 amazingly creative and romantic Valentine Continue Reading

    The post 50 Sweet Valentine Gifts for Photographers and Their Sweethearts appeared first on Photodoto.


    Photodoto

  • How to Make a Low Key Portrait Step by Step

    What does low key mean?

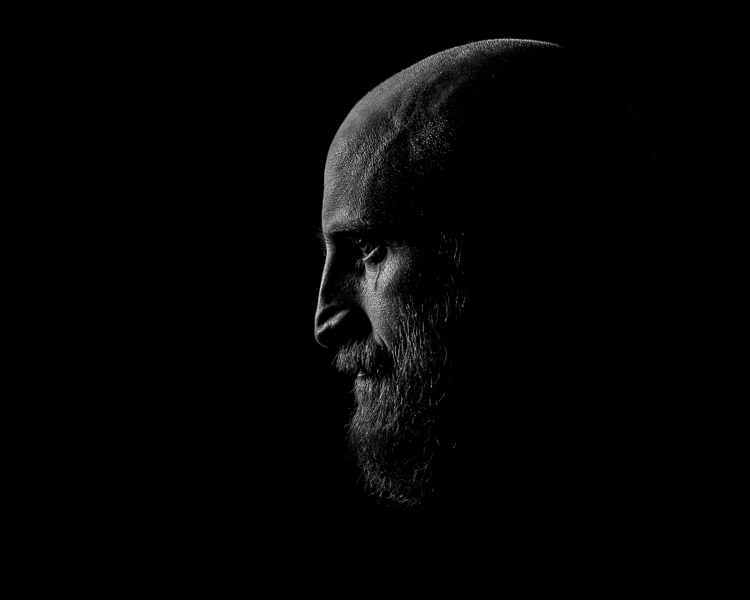
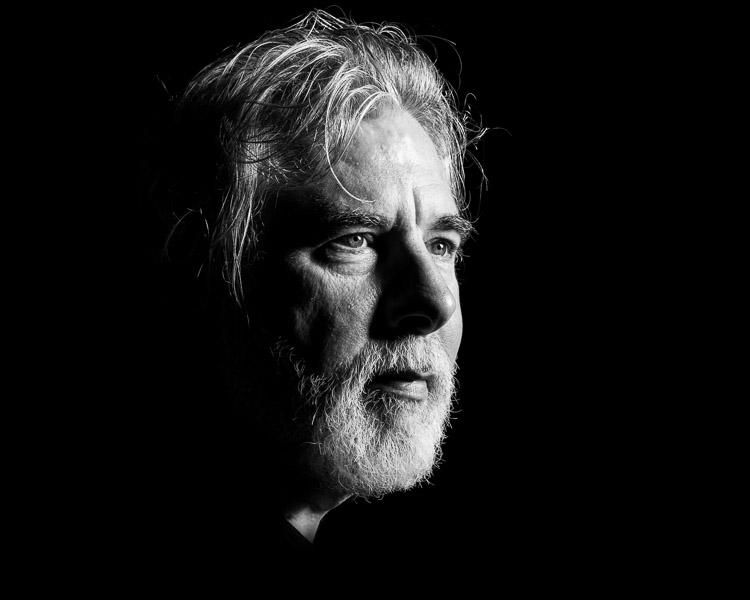
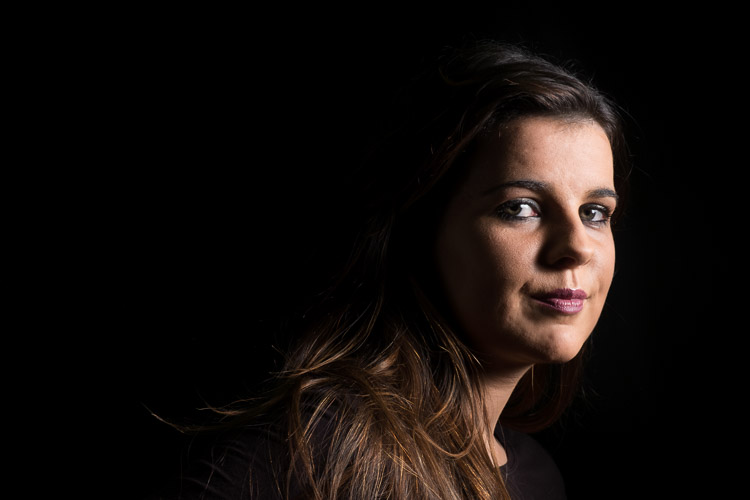
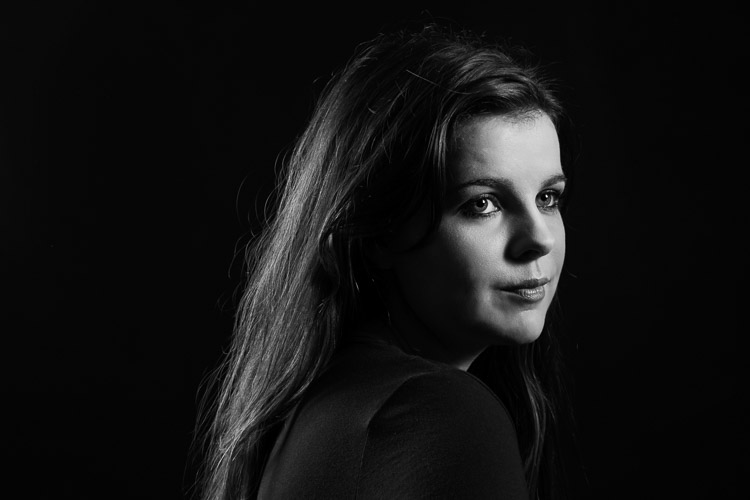
    In a world where the crisp, clean, high key shot dominates, it’s great to see a return to the low key portrait. In comparison to the high key image, where most of the tones are above (lighter than) 50% grey, the low key portrait has tones that are mostly under (darker than) 50%.

    You’re replacing the light, airy feel with a more moody, dramatic look. Looking at your histogram, most of the information is bunched on the left-hand side. That’s not to say that you’re underexposing the subject to get this look. You still need correct exposure on the face. A lot of action movies or thrillers have posters with a low key feel. Think drama and you’re in the ballpark for how a low key portrait will look.

    Low key portrait examples 01

    The background and lighting

    Your background needs to be dark, usually dark grey or black, and the tone of the clothing will be of a darker tone. They don’t need to be black strictly speaking.

    You should set your lighting to create drama. Take your cues from film noir. The photos don’t need to be in black and white, though. However, you may find that the absence of color in low key images can lend itself to this look. As well as choosing dark clothes, avoid ones with patterns, as this will draw attention away from the face.

    Low key portrait examples 02

    Lighting a low key portrait

    You don’t need to use artificial lighting to get a low key portrait. You could use natural light through a window. To get control, you need to close the curtains down to a tiny slit of light. Then, with the room lights off, place your subject in the light and expose for their face.

    The rest of the room will go dark for a naturally lit low key portrait. If you’re in a corner room with a window on each side, you could even do this trick where the second window acts as a backlight. Just narrow the slit in the curtains to control the light for this effect (see below).

    Low key portrait examples 03

    You can also have this control in the studio, so let’s set up and refine a studio portrait.

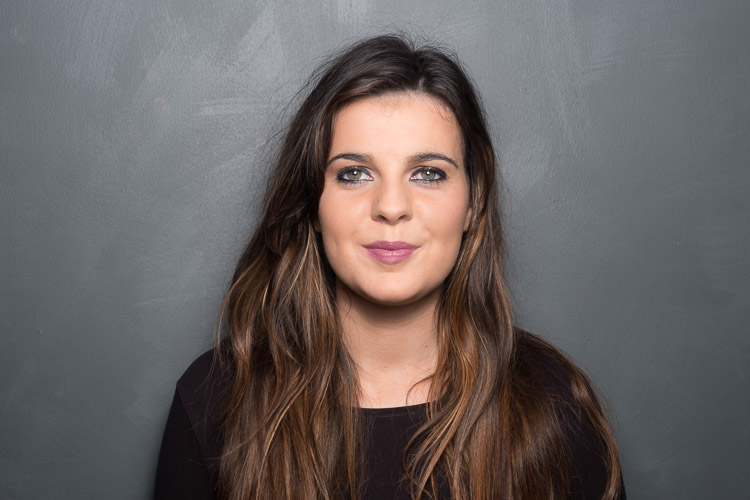
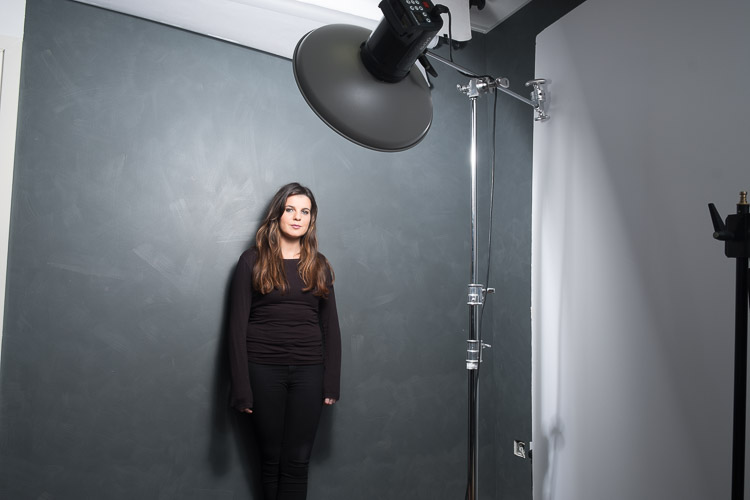
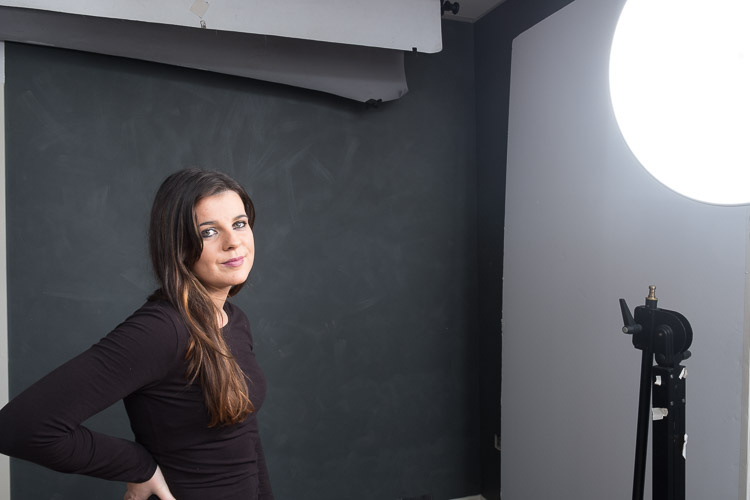
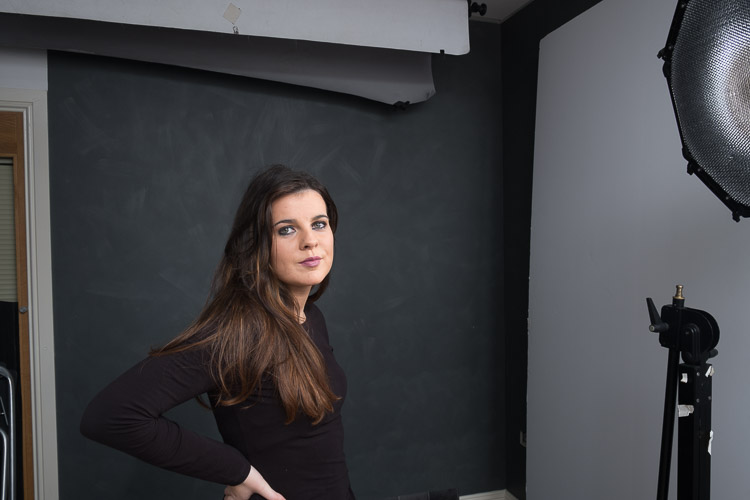
    You’ll need a lighting setup that is flattering and controllable. A strip softbox lets you control the light more, as would a beauty dish. If you don’t have either, you can add some material over the softbox you do have to create a strip light. If you have a grid, even better. As long as you can control where the light goes, you’ll be able to get this down. You can even block your light from the background using a black card (things that block light are referred to as flags).

    Creating a low key portrait from scratch

    For the examples here, I used an Elinchrom BRX500 with a 44cm White Beauty Dish and a white deflector. Like I’ve mentioned, you don’t need to have exactly this gear to get these shots. Gear is only small part of the equation, it’s using the gear that counts.

    Making the background darker

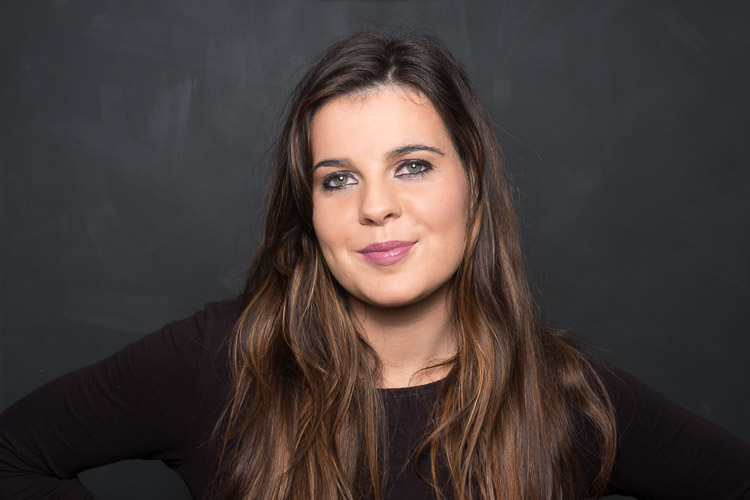
    In this first shot, you’ll see the model against the wall, photographed with a butterfly lighting pattern. Even though the tones are dark, the image itself is too bright for a low key portrait.

    Low key portrait example 02

    Close to the grey wall.

    The Setup

    By moving the model and the light evenly away from the wall, you’ll notice the light on the subject stays the same, but the background gets darker.

    Low key portrait example 03

    Moving the model away from the wall means the light falls off and the background gets darker.

    Move the light to the side

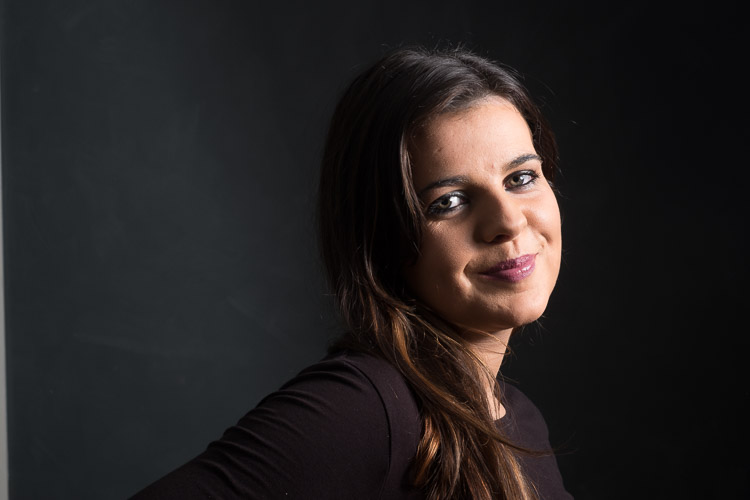
    If you move the light around to the side, into a short lighting position, you’ll see the background darkens even more, and there is an increase in the drama of the shot. We still have light spilling on to our background, though.

    Low key portrait example 05

    Moving the light to the side means even less light falls on the background, darkening it even more.

    Low key portrait example 04

    Add a grid to the light

    By adding a grid to the light, you can control the light even more. The grid restricts the light to whatever is in front of the light only, none bounces around or spills out the sides.

    Low key portrait example 07

    With a grid added to the light.

    Low key portrait example 06

    Light with grid added.

    Add light onto the hair

    You’ll see that the hair is starting to blend in with the background now. This can be a great effect sometimes, but if you want separation between the hair and the background, you need to add fill light in there somehow.

    You could choose a reflector, but a second light offers more control. I’ve added a strip light on the other side of the subject opposite the main light. Make sure that light doesn’t hit your lens or you will get flare. Use a grid or a flag to block it if necessary.

    Low key portrait example 09

    Second light added for her hair.

    Low key portrait example 08

    Light position with main light (with a grid) and hair light (also with a grid) opposite and behind the subject.

    Practice it!

    These examples should get you going towards making your own low key portrait. The trick is to control the light so you darken the environment. Try the curtain trick if you don’t have any lights. You can even use that trick with an off-camera speed light by putting the flash outside the window to replace the natural light for more control.

    Have you done any low key portraits? Have any questions? Please share in the comments below.

    googletag.cmd.push(function() {
    tablet_slots.push( googletag.defineSlot( “/1005424/_dPSv4_tab-all-article-bottom_(300×250)”, [300, 250], “pb-ad-78623” ).addService( googletag.pubads() ) ); } );

    googletag.cmd.push(function() {
    mobile_slots.push( googletag.defineSlot( “/1005424/_dPSv4_mob-all-article-bottom_(300×250)”, [300, 250], “pb-ad-78158” ).addService( googletag.pubads() ) ); } );

    The post How to Make a Low Key Portrait Step by Step by Sean McCormack appeared first on Digital Photography School.

    Digital Photography School

  • How to Use Photoshop to Create Milestone Photos of Babies

    Buried deep in my parents’ basement are boxes of slides with pictures of my siblings and I, when we were kids, all taken with my dad’s Minolta DSLR that has long since been lost to the ages. I have a few scans of those early photos but most of them won’t see the light of day anytime soon. Thus the images that marked the passage of time for me, my sister, and my three brothers are few and far between.

    Baby milestones Photoshop background

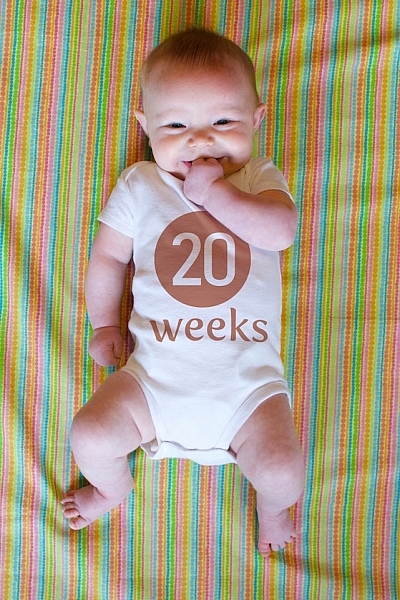
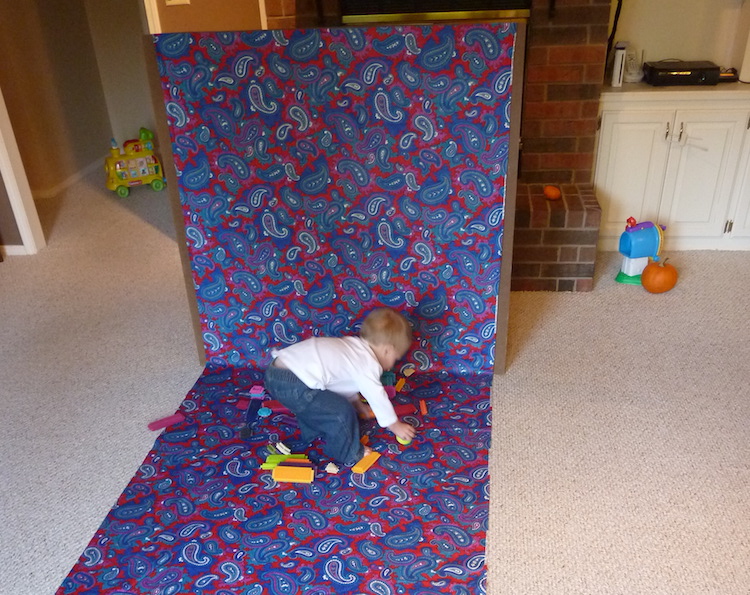
    This picture taken with a pocket camera and the fabric was purchased at a thrift store.

    Thankfully modern technology and the prevalence of digital cameras means babies born today will likely have no shortage of images to mark their early years. One of the most common methods of documenting milestones is to take pictures at weekly or monthly intervals. Often these are augmented with some type of decoration or adornment to indicate the passage of time (e.g. a small chalkboard, a giant sticker on the kid’s tummy, or a number stamped in the corner of the picture).

    There is an incredibly easy, fun, and highly effective way to do this in Photoshop. It only takes a few minutes and produces great results, even if you have never used this program before you should be able to figure it out.

    Preparing for the photo shoot

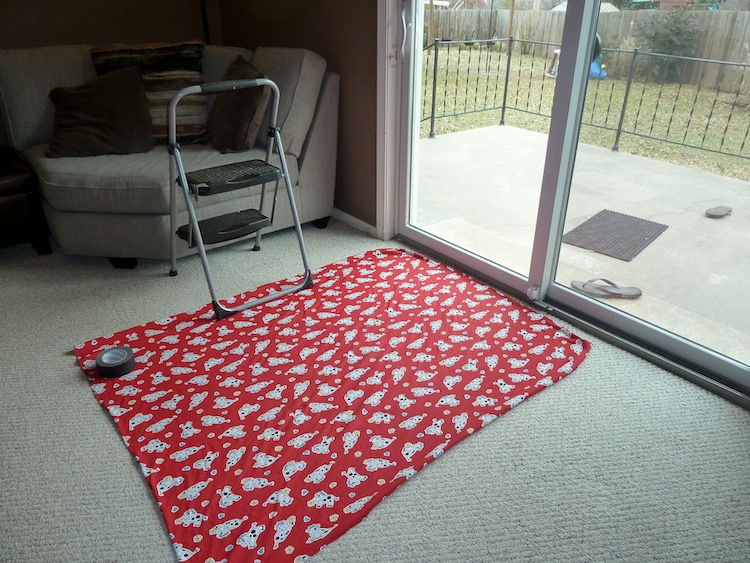
    My wife and I got this idea after reading a post on the popular do-it-yourself blog Young House Love but have tweaked it to fit our style. To get started you will need a few things, many of which you probably already own:

    • Fabric with big colorful prints; Finer-detailed prints are okay, but the bigger and more prominent the pattern, the better it will look when paired with your baby. Don’t spend much money on these since you’ll need a lot if you do a different fabric each week. Pro tip, let the grandparents know you’re in need of fabric. Ours were thrilled to go shopping at thrift stores and send us what they found.
    • White onesies; A t-shirt works better after the first year, but until that time onesies are best because they stretch nice and even across the baby’s body leaving you with fewer wrinkles to contend with in the post-processing phase.
    • Blue painter’s tape;  Used to hold the fabric down to the ground.
    • A big window; Or a glass door, or another similar surface to let in a lot of light.
    • A step stool; so you can get a higher angle.
    • Tape to hold the fabric in place; Blue painter’s tape will work but I like to use Gaffer’s tape (I recommend this brand which is stronger and leaves no residue on the carpet when you pull it off.)
    • A reflector;  We didn’t buy one of these until well into our second child and it’s amazing how much a reflector helps get nice even lighting.
    How to Use Photoshop to Create Milestone Photos of Babies - setup

    It doesn’t take much to prepare for this type of photo shoot.

    The session

    The process works best with two people; one to take pictures and someone else to do multiple jobs like hold the reflector, smooth the blanket, and soothe the baby. Position your child with his or her feet near the light source (i.e. giant window or glass door) and have your helper hold the reflector by the baby’s head to bounce light back. Then get up on the stepstool and start taking pictures! Babies wriggle and squirm around a lot so don’t worry about quantity. It’s better to have too many good ones than to have to redo everything because you only took three shots and the baby was frowning in all of them.

    Photoshop time

    After your pictures are done it’s time to head to Photoshop where the real fun begins. You will need two fonts: Fyra for the numbers and one that you want to use for the letters. I like Fertigo Pro, but almost anything will work, it’s largely a matter of personal taste here.

    Open your photo in Photoshop and it will appear as the background layer. You can leave it as is unless you plan to do any editing such as color adjustments or retouching, though my advice is to keep it simple and avoid all that if possible. You’ve got a newborn and you can’t spend hours editing your photos every single week when there are diapers to change and clothes to wash!

    Add the text

    photoshop-baby-milestones-fyra

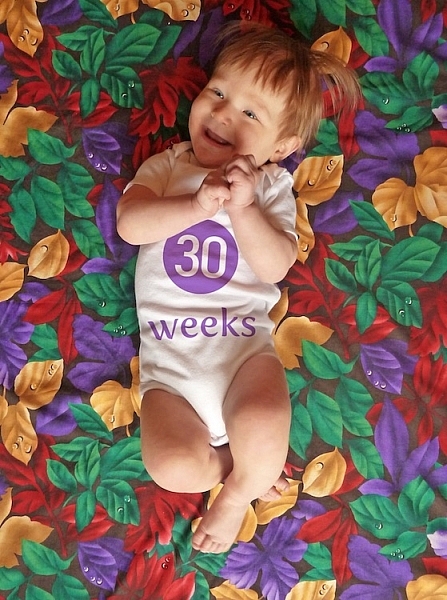
    Click the “T” button in the tool palette to activate the Text Tool, then click anywhere in the picture to create a new text layer. Use the Fyra font and type a letter which will show up as a big circular number – perfect for marking the weeks or months of time that have passed.

    Use the toolbar at the top of your screen to adjust the size of the number, and if you don’t get it perfect you can always change it later using the Transform Tool. Press [enter] to lock in the number, then repeat most of the process for “weeks” by clicking the Text tool, selecting a font, clicking on your baby, and typing the label (weeks, months, etc.) you want.

    How to Use Photoshop to Create Milestone Photos of Babies adding the text

    At this point your picture might look like something the neighbor kid made in Microsoft Paint, but you’re just getting started. The finished version will look much better thanks to the magic of Photoshop.

    Resize and warp the text

    The next step is to customize the size and position of each of the elements. Using the Layers palette select the layer with a single letter, which is actually the number in the picture, and choose “Edit > Transform”. You can now reposition the number where you want it, and resize it by clicking and dragging on one of the corners. Hold down the [shift] key while doing this to maintain the proportions (shape) of the number or else your finished product will look all stretched out. You can even rotate the number by hovering your cursor near one corner until it turns into a cornered arrow and then click and drag.

    How to Use Photoshop to Create Milestone Photos of Babies transform the text

    Repeat the same process for the word you’ve used then with that layer still selected, click the Text tool in your toolbar and manually select the word (in this case “weeks”) itself. Then choose; Layer > Type > Warp Text… and add an Arch style. (You can also click the “Warp Text” toolbar button to do the same thing, see red arrow below.)

    How to Use Photoshop to Create Milestone Photos of Babies warp text

    I like to use just a couple of degrees here, which helps the text simulate a more natural curve that you might see if it were printed across the white onesie directly. Usually, +5 gets the job done just fine.

    How to Use Photoshop to Create Milestone Photos of Babies warp text tool

    Text color

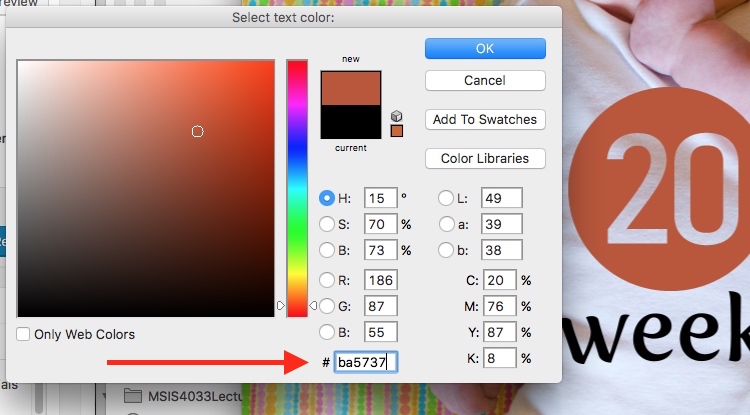
    After that, the next step is to change the color of the text so it complements the fabric on which your baby is laying. Use the Text tool to select either the number or the word (weeks) then click the black box next to the Warp Text button to change the color of the text.

    How to Use Photoshop to Create Milestone Photos of Babies text color

    Use the eyedropper to select a color from the fabric and tweak as necessary. you will also see the color of your text or number, whichever is selected, change as you try out different options. When you find one you like you can click the “OK” button to lock it in place.

    But, before you do that select the six letters and numbers in the # box at the bottom and press [ctrl+c] to copy it. This is the hex code that tells your computer what color is in use, and you will use it again in the next step.

    How to Use Photoshop to Create Milestone Photos of Babies text color

    Repeat the same process for the other layer of text. To get the same color you can either hover the eyedropper over the newly-colored text on the picture or paste the color code (6-digits you copied) into the box at the bottom. When you are finished you will have an image that is close to the final product, but you’re not quite done yet.

    How to Use Photoshop to Create Milestone Photos of Babies

    Blend mode

    Two final editing steps remain before your image is done, the first involves blend modes. These have to do with the way in which layers work together and how one layer’s color can be altered based on how it is combined with the layer below.

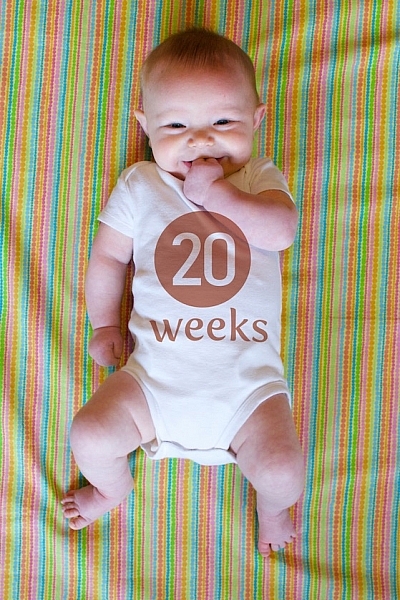
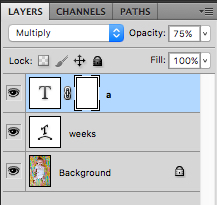
    Use the Layers palette to highlight a text layer and change its blend mode to “multiply” with an opacity of 75%. This will allow some of the texture of the white onesie to show through, and make the text seem like it naturally printed on the fabric instead of just pasted on afterward in a computer program.

    How to Use Photoshop to Create Milestone Photos of Babies blend mode

    Masking

    At this point, you may be thinking about using the eraser tool to fix parts of your image where the baby’s hands obscure the number or text. But trust me, this is not what you want to do!

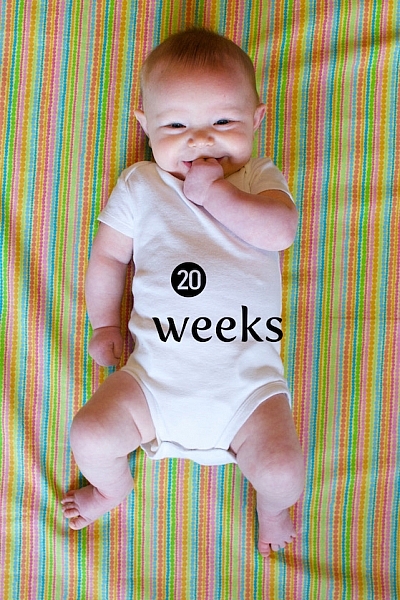
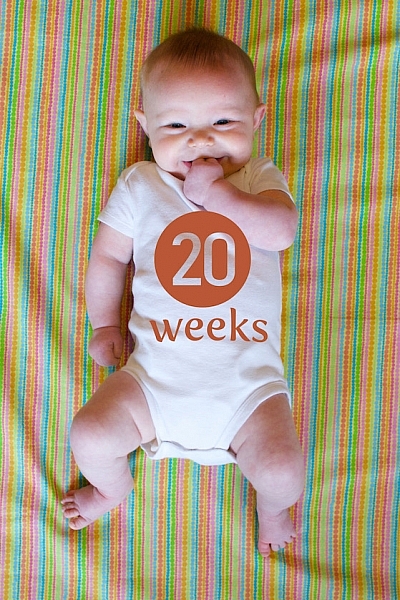
    Photoshop has a fantastic feature called layer masks that let you hide (erase) parts of a layer and even recover (show) them again later if you erase too much. In the example above, you will note that the baby’s arm should be covering up the 20, so the solution is to use a layer mask to remove (hide) that portion of the 20. How to Use Photoshop to Create Milestone Photos of Babies masking

    Click the text layer that you want to edit then choose “Layer > Layer Mask > Reveal All”. Now you will see a white box next to the layer that you can use to show and hide different parts of the layer itself. When you add anything dark to this layer mask it will erase (hide) that part of the layer, and when you add anything white to the mask it will show that part of the layer. This is an incredibly useful feature in Photoshop that you can use in all sorts of ways to edit your images, not just snapshots of your baby with milestone stickers.

    Click the brush tool and start painting over the portion of the layer mask you want to erase, but keep one finger on the “x” key of your keyboard to switch between erasing mode and adding mode. If you accidentally brush over something that you want to keep, press “x” and add it back by painting it back in white! Then press “x” again to go back to deleting (painting with black).

    Press the “z” key to zoom in on your image (and option-z to zoom out) and then “b” to go back to the brush tool. After a few strokes of your brush, your image is ready to share with family and friends!

    How to Use Photoshop to Create Milestone Photos of Babies

    When to stop

    Right here is where I like to stop because the image is, as I like to say, good enough. There are some imperfections that could be cleaned up like using a displacement map to alter “weeks” so it follows all the contours and folds of the fabric, but I have found that these are just not worth my time. To be honest, most people won’t even notice.

    You can easily spend hours using warp transforms, color tweaking, and spot removal to get each picture looking pixel-perfect and ready to print in Baby Cosmopolitan. But parents of newborns have to find a balance between time spent on the computer and time spent with their families.

    How to Use Photoshop to Create Milestone Photos of Babies

    After 52 weeks of doing pictures we used a slightly different setup and reduced our images to once a month with our child standing or sitting instead of lying down.

    Conclusion

    If you have an infant or are expecting one, pictures like this are a fantastic way to mark the passage of time. My wife and I did shots like these with our two boys every week for the first year of their lives, and then every month until they turned two.

    At the time it seemed like a huge hassle to get out the fabric, put a white onesie on, and try to soothe a fussy infant long enough to snap a few pictures every single week. Looking back through them we are so glad we did. When shown in an album side by side these images provide a priceless way of seeing how our kids both grew so much during those early times of their lives.

    If you have a small baby and give this a try, please share your images and/or questions in the comments area below.

    googletag.cmd.push(function() {
    tablet_slots.push( googletag.defineSlot( “/1005424/_dPSv4_tab-all-article-bottom_(300×250)”, [300, 250], “pb-ad-78623” ).addService( googletag.pubads() ) ); } );

    googletag.cmd.push(function() {
    mobile_slots.push( googletag.defineSlot( “/1005424/_dPSv4_mob-all-article-bottom_(300×250)”, [300, 250], “pb-ad-78158” ).addService( googletag.pubads() ) ); } );

    The post How to Use Photoshop to Create Milestone Photos of Babies by Simon Ringsmuth appeared first on Digital Photography School.

    Digital Photography School

  • 10 Tips to Help Photographers Avoid Back Problems

    Studies state that one time or another, about 80% of the world population experiences some kind of back problems or pain. This is either due to nerve and muscular problems, degenerative disc disease, arthritis or some kind of trauma. Age, poor physical fitness and being overweight may explain some causes of back pain, but the main reason responsible is for sure bad posture.

    A lot of jobs require physical efforts like lifting, pushing, or pulling while twisting your spine, but sitting at a desk all day may be just as bad, as a static posture increases stress in the back.

    Nick Haskins

    By Nick Haskins

    Photographers are for sure high-risk candidates to back pain, either for carrying heavy cameras or bags on their necks or shoulders or by spending a long time at their computers editing images. Every photographer I know always complains about how bad their back hurts after a long shooting session or many hours editing images.

    For many years I was one of those photographers with constant back pain. I was always trying to relieve it with pain medication or visits to a chiropractor until the day I woke up with my left arm completely numb. The doctor told me I had two really bad herniated discs in my cervical and that I needed surgery to fix it.

    It was not an easy surgery let me tell you; the recovery was long and painful and it all made me realize that I could have avoided reaching this point if I had paid more attention to my posture. So here are some tips I have learned along the way that can help you take better care of your back while doing your photography work, so you can avoid what I went through.

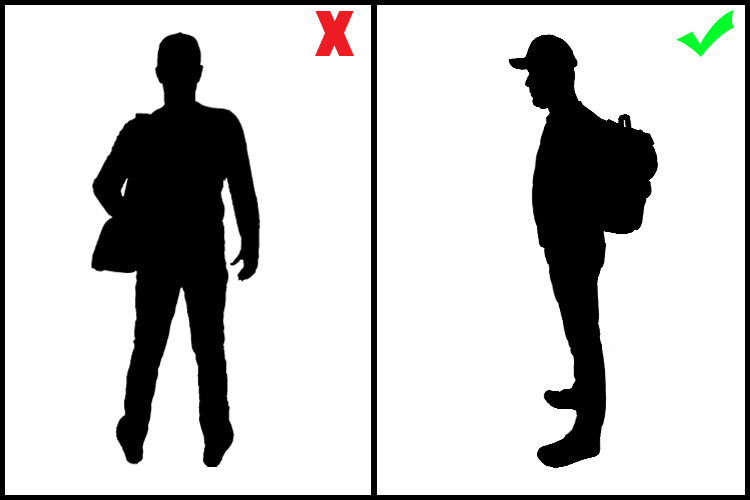
    #1 – Trade your shoulder bag for a backpack

    10 Tips to Help Photographers Avoid Back Problems

    A shoulder bag is a signature style for most photojournalists, and it is indeed practical when you need to have easy access to your equipment while on the move. But it is also a big enemy of your posture, as it puts all the weight in one of your shoulders making your spine curved and unbalanced.

    Backpacks distribute the weight equally on both shoulders, making it a much better solution for carrying your equipment. Rolling trolleys are an even better option, but they are not as practical if you need to move fast and don’t have smooth terrain.

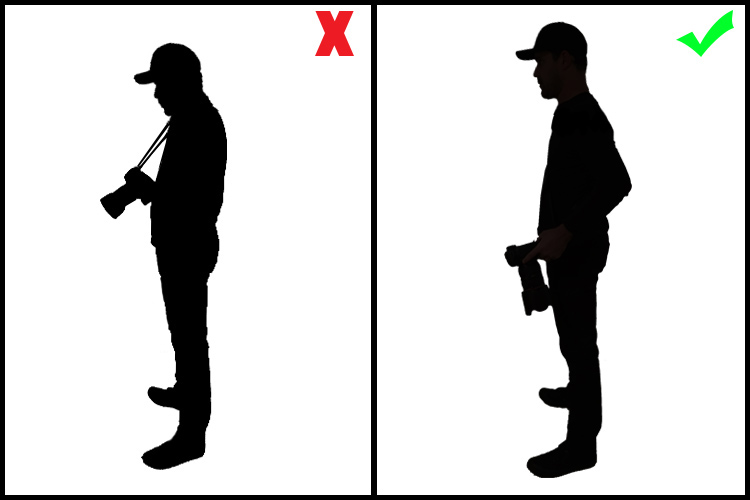
    #2 – Trade the neck strap on your camera for a sling strap

    Having a heavy camera and lens hanging from your neck by a strap is obviously a really bad idea. It causes a lot of stress on your neck, leading to issues with either the spinal discs or in the joints of the cervical spine. Sling straps minimize the impact of the camera’s weight, hanging it from the shoulder and across the torso. This makes it easier for you to move around and reach the camera, reducing the impact on your neck.

    10 Tips to Help Photographers Avoid Back Problems

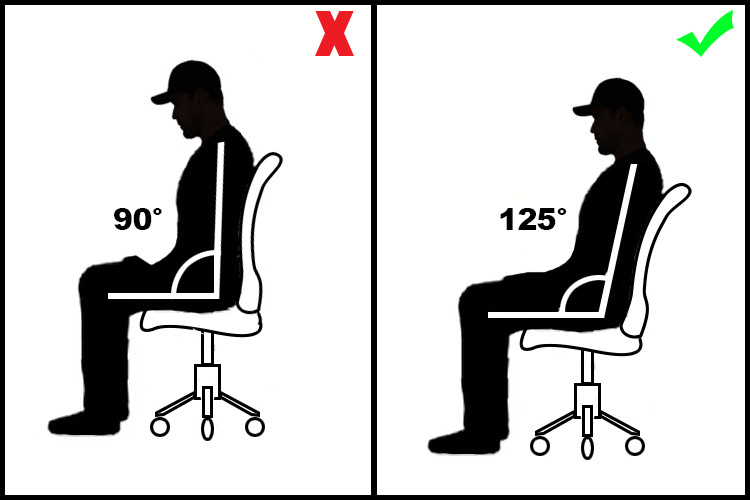
    #3 – Get a good office chair

    If you spend a long time working on your computer, then a good office chair is something you must invest in. It is really important that your chair is adjustable, and can be regulated to your size, and the position you adopt in relation to the table and the computer you are working on.

    The optimal angle position between your legs and back is around 125 degrees.

    10 Tips to Help Photographers Avoid Back Problems

    Also avoid chairs with wheels that cannot be blocked, as they tend to move back and forward leading you to bad posture while seated. Also, avoid arm rests as they might cause pressure on the elbow tendons leading to tendinitis and ulnar nerve compression.

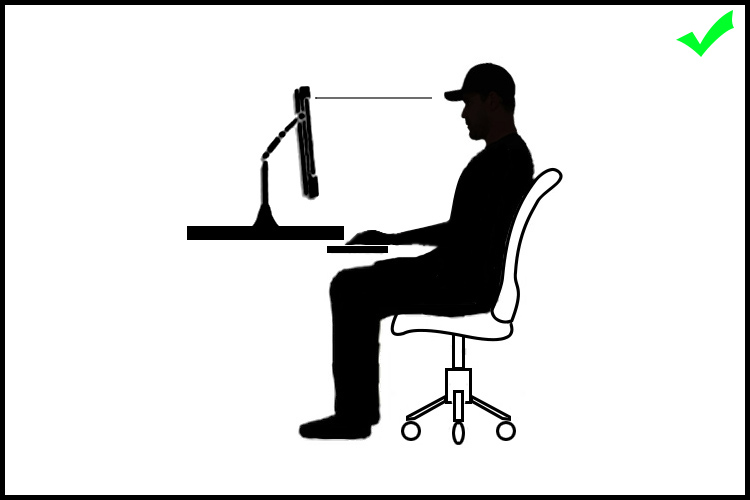
    #4 – Adapt the computer position to your body

    Almost everyone uses their computer in the worst possible position as they are most of the time located very low, especially if it is a laptop.

    Hunching over and looking down for a long time causes really bad stress on the cervical spine and neck muscles, This can lead to a stiff neck, headaches, and in a long run degenerative spinal problems. The correct thing to do is to place your computer monitor in a position that you can look straight ahead without having to curve your neck.

    10 Tips to Help Photographers Avoid Back Problems

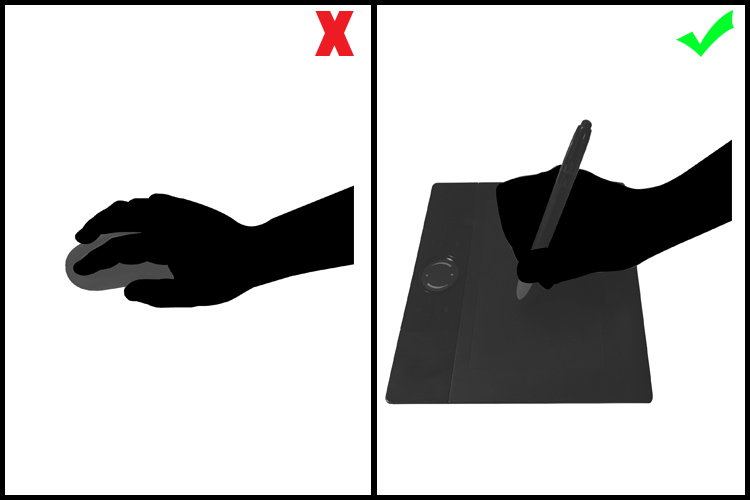
    #5 – Use a pen and tablet instead of a mouse

    A mouse is a fundamental piece of hardware for most people’s computer work, but at the same time, it is a bad ergonomic tool. It forces your hand to stay in an unnatural position, leading in the long run, to hand, wrist, shoulder and arm problems like tendinitis and arthritis.

    The use of a pen and tablet, besides giving you much better control of design functions in image editing software, allows a much more natural hand position, avoiding health problems.

    10 Tips to Help Photographers Avoid Back Problems

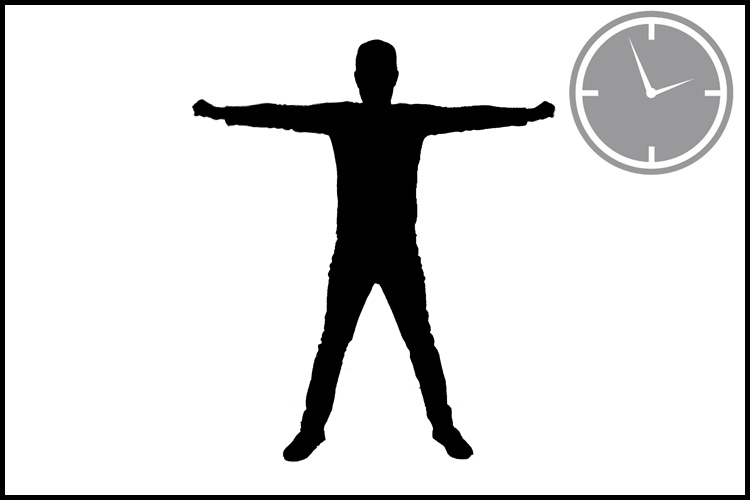
    #6 – Take regular breaks and stretch your body

    A common mistake we all make is to stand in the same position for long periods of time whether it is photographing, driving, standing at a desk, or simply just relaxing on the couch.

    It is fundamental to take small breaks in your daily activities and simply just stretch, allowing the fibers in your muscles to move and avoid cramps and contracting.

    10 Tips to Help Photographers Avoid Back Problems

    #7 – Get your blood flowing

    Poor circulation is the starting point to a lot of really serious health problems. Of course, we would all like to have a healthier life, eat better, and exercise more, but the truth is that it takes a lot of time and discipline.

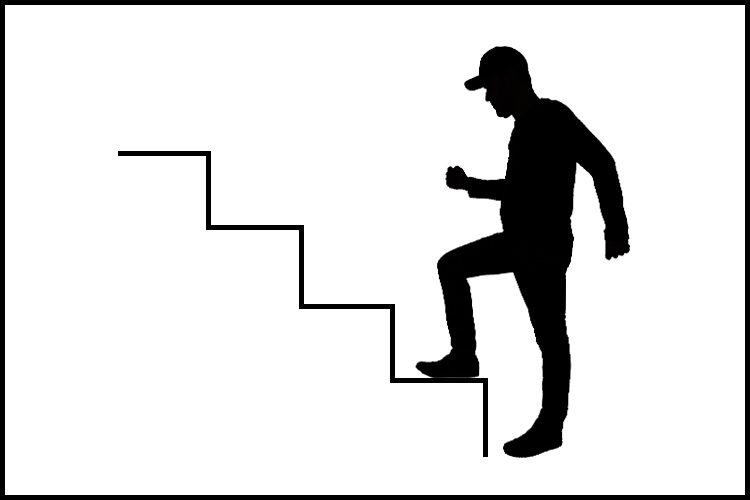
    A great way to overcome this is to turn your regular activities into small exercises.

    Simple things like taking the stairs instead of the elevator, or turn a walk down the street to the coffee shop into a power walk, just by adding more movement to your arms while you walk, can make a big difference in your overall physical condition.

    10 Tips to Help Photographers Avoid Back Problems

    #8 – Always lift with your knees, not your back

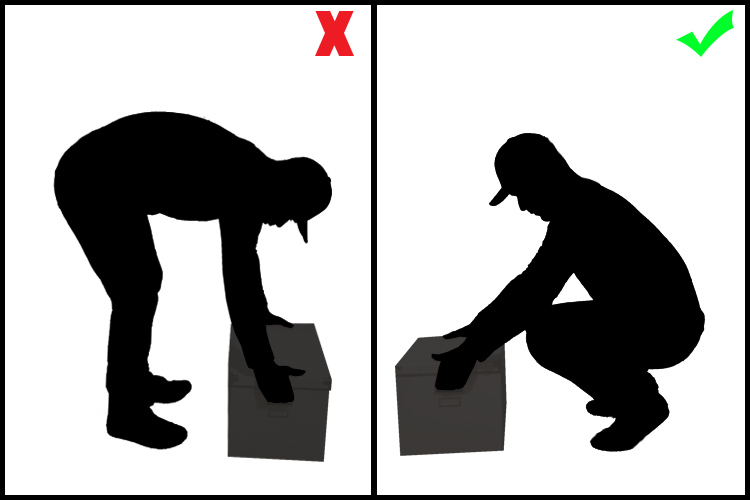
    Most severe back injuries come from trauma or heavy weight lifting. Trying to pick up something heavy from ground level, using just your back, is a true recipe for a disaster like a herniated disk.

    The trick here is to always keep you back straight and use your knees as a lever to lift up the weight. Your legs muscles are much stronger than your back, trust me.

    10 Tips to Help Photographers Avoid Back Problems

    #9 – Adjust your sleeping position

    We spend roughly one-third of our lives sleeping, so if we worry about our posture during the day, we should also worry about our posture while we sleep.

    Most hard working people I know are so tired when they get to bed, that they just lay down, close their eyes and get to sleep right away. Most of the time that’s in really awkward positions and they spend most of the night wrestling with their pillow or sinking in really bad mattresses.

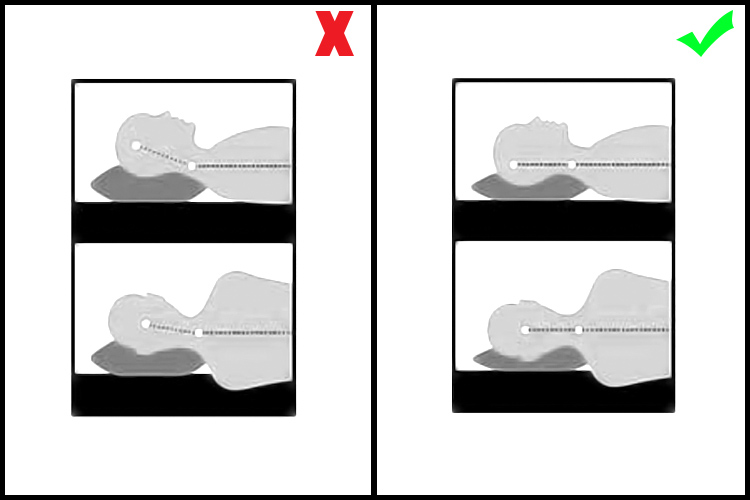
    The best sleeping position is a really controversial discussion as it is a personal thing due to your body shape, weight, breathing difficulties, etc.

    We move a lot in our sleep, but whether you sleep most of the time on your back, side or stomach, always try to have a mattress and pillow that keep your spine as straight as possible. You will rest a lot better and wake up a lot more fresh.

    10 Tips to Help Photographers Avoid Back Problems

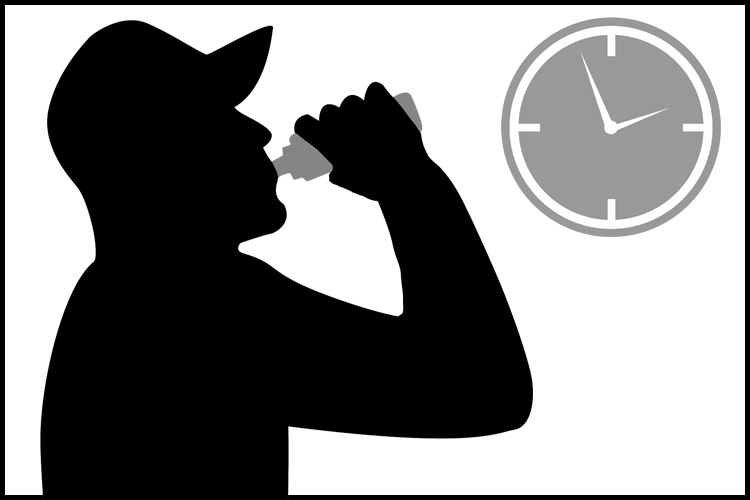
    #10 – Hydrate yourself properly

    Our body is 90% water, but yet we tend to forget how much we need to drink water just to be alive.

    If you are a busy person, it’s not easy to reach the 2 liters per day of optimal water intake. But if you just make an effort and carry a water bottle around with you and drink regularly during the day you will see that your internal organs will function a lot better, your skin will look younger and your joints and bones will not get old so fast.

    10 Tips to Help Photographers Avoid Back Problems

    Conclusion – over to you

    So there it is, a small list of simple tips that might make a significant change in your life.

    They may seem obvious for most people, but the fact is that we are all so busy with our daily life and work routines, that we seem just to forget to take care of ourselves and only realize when it is just too late.

    What about you, do you have some tips we could add to this list to help other photographers avoid back problems?

    googletag.cmd.push(function() {
    tablet_slots.push( googletag.defineSlot( “/1005424/_dPSv4_tab-all-article-bottom_(300×250)”, [300, 250], “pb-ad-78623” ).addService( googletag.pubads() ) ); } );

    googletag.cmd.push(function() {
    mobile_slots.push( googletag.defineSlot( “/1005424/_dPSv4_mob-all-article-bottom_(300×250)”, [300, 250], “pb-ad-78158” ).addService( googletag.pubads() ) ); } );

    The post 10 Tips to Help Photographers Avoid Back Problems by Ivo Guimaraes appeared first on Digital Photography School.

    Digital Photography School

  • When is the Right Time to Upgrade Camera Gear?

    Knowing when to upgrade camera gear can be a little tricky. Picking the right time to upgrade is about knowing who you are as a photographer, and who you want to become.

    When is the Right Time to Upgrade Your Camera Gear?

    What makes upgrading tricky is the pace at which technology advances. New form factors, features, and capabilities will continue to be innovated over the years to come. It’s certainly possible that new trends could make traditional photography obsolete. For example, 360 degree photography is one new trend that has garnered a lot of interest.

    If that wasn’t enough, the amount of money that companies spend on marketing their innovations is continuing to increase. This means that there are more deals, more packages, and more attempts to convince you that it is the right time to upgrade your gear.

    So how do you know when you are actually ready to upgrade your photography gear?

    Five Signs you’re ready to upgrade your camera gear

    Your needs and wants will be different from mine and from that of your neighbor’s so it’s difficult to offer a blanket “This is when you should upgrade” statement. But, there are at least five key things to consider when upgrading your gear.

    When is the Right Time to Upgrade Your Camera Gear?

    1. Your current gear is struggling to keep up with your creative needs

    It’s a good sign that you are ready to upgrade your gear when your current gear fails to give you the results you are looking for.

    When this might be the case is if you are trying to take portraits of people with sharp focus in the foreground and creamy bokeh in the background. If you’re still using the kit lens that came with your camera, odds are the results you’re getting aren’t meeting your needs. In a case like this, buying a new lens might be worth considering.

    2. If you’ve decided to go to a more professional level of work

    When you decide to make the move from hobbyist to being a professional photographer, upgrading could become a viable option. Higher quality gear tends to be more durable and offers more flexibility, both of which are important in a professional setting.

    As an added bonus once you start working professionally you will be able to deduct the costs of your gear from your taxes making the cost of upgrading more bearable.

    3. Your gear is showing its age

    While tomorrow’s technology will always make today’s look old, and upgrading to stay current is not usually the right choice – there will come a time when you gear does get so dated, that upgrading is actually your best option.

    You may even be able to save some money by upgrading to generation body or lens that is a year or two old. This will still allow you to make a leap in terms of the technology that you are using, at a fraction of the cost of jumping to the current generation technologies.

    When is the Right Time to Upgrade Your Camera Gear?

    4. The manufacturer has dropped support

    Sometimes you’ll find out that the manufacturer has dropped support for the product you own. In cases like this, it might be time to consider upgrading. (Note: this means you ignored point #3 above and kept using your aging gear until it effectively died).

    5. Your current gear is “hacked” together to meet a need

    Finally, let’s say that your current gear does what it needs to do to achieve the photographs that you want, but it does so in a way that requires a cumbersome process or a jerry-rigged system. If there’s a solution available that would simplify your current process in a way that saves you time and frustration it’s certainly worth considering an upgrade.

    Two good reasons you are not ready to upgrade

    When is the Right Time to Upgrade Your Camera Gear?

    1. Upgrading when a new model is released

    New model releases are always going to tempt you into upgrading. Marketing teams do a fantastic job at showcasing the new improvements, and how they will enhance your photography. However, rarely will these improvements have a substantial impact on your overall photography. It’s not about whether the new features are better than the ones that you currently have, but will they actually impact the results that you can not achieve with your current camera.

    More concisely – does the new model help justify one or more of the reasons listed above? If not, then it’s probably not worth upgrading at this point in time.

    2. Keeping up with your friends

    As if you need another reason to upgrade – your best photography buddy just did – so now you have to as well. If the reason you’re buying something is because you’re trying to outdo, or one-up someone you know – it’s the wrong reason to upgrade your gear.

    What are other valid reasons to upgrade?

    Read more here:

    • 3 Valid Reasons it Might be Time to Upgrade Your Camera Equipment
    • Ready to Upgrade Your Kit Lens? Tips for Which Lens to Invest in Next
    • Do You Need to Upgrade to the Latest Camera?

    When have you felt the need to upgrade your camera gear? Let us know in the comments below.

    googletag.cmd.push(function() {
    tablet_slots.push( googletag.defineSlot( “/1005424/_dPSv4_tab-all-article-bottom_(300×250)”, [300, 250], “pb-ad-78623” ).addService( googletag.pubads() ) ); } );

    googletag.cmd.push(function() {
    mobile_slots.push( googletag.defineSlot( “/1005424/_dPSv4_mob-all-article-bottom_(300×250)”, [300, 250], “pb-ad-78158” ).addService( googletag.pubads() ) ); } );

    The post When is the Right Time to Upgrade Camera Gear? by John Davenport appeared first on Digital Photography School.
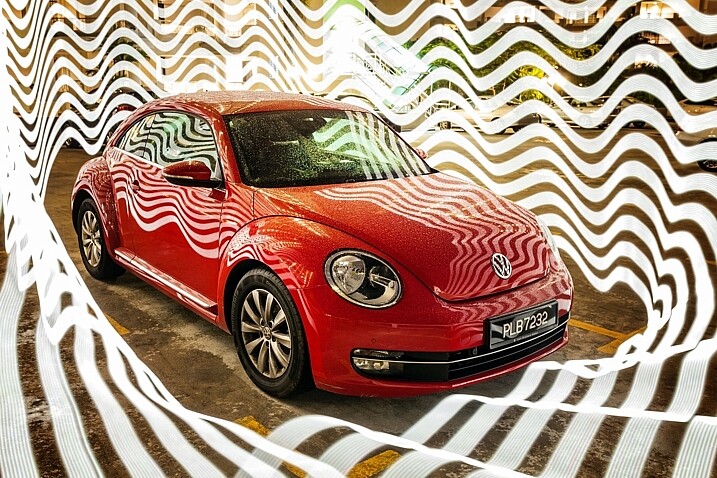

    Digital Photography School