RSS
 

Archive for the ‘Photography’ Category

Gear Review: Canon EOS M50 Mirrorless Camera Kit

19 Dec

The post Gear Review: Canon EOS M50 Mirrorless Camera Kit appeared first on Digital Photography School. It was authored by Anabel DFlux.

1 - Gear Review Canon EOS M50 Mirrorless Camera Kit

The Canon EOS M50 is a compact interchangeable lens camera for aspiring photographers looking for an easy way to boost the quality of their photos and videos. Sporting 4k video capabilities to capture your favorite memories, 24-megapixel vibrant photographs, and Dual Pixel Autofocus system, the Canon EOS M50 is a masterful piece of technology.

Social media mavens can benefit from the camera’s Wifi function that allows users to connect to the Canon Camera Connect app to transfer images to their smart device. From there, you can share and upload from your device directly to various social media sites.

Canon’s newest addition is an excellent introduction to mirrorless cameras. Complete with a lens, its ready to go right out of the box – making it a fantastic holiday season gift for any photography enthusiast. Following is why this camera is so spectacular!

What is a Mirrorless Camera?

Before we get into it, let’s have a quick look at what a mirrorless camera is and how this new technology compares to digital Single Lens Reflex cameras (DSLRs).

2 - Gear Review Canon EOS M50 Mirrorless Camera Kit

The way that a digital SLR camera works is that a mirror inside the camera reflects the light up to the optical viewfinder (which is also how you see the image before you take it). When you release the shutter, the mirror lifts, allowing the light to hit the sensor and capture the image.

In a mirrorless camera, there is no mirror or optical viewfinder. Instead, the imaging sensor gets exposed to light at all times. This method gives you a digital preview of your image either on the rear LCD screen or an electronic viewfinder (EVF).  As such, a mirrorless camera is one that doesn’t require a reflex mirror – a key component of DSLR cameras.

Due to the lack of mirror, the camera is significantly smaller and lighter weight than a DSLR, a very distinct difference between the two. However, DSLRs are well-trusted because of their true-to-life through-the-lens optical viewfinder system, which uses a series of mirrors to reflect light to your eye.

Mirrorless cameras, on the other hand, require an electronic viewfinder or LCD screen for image monitoring. Both are equally spectacular. Each model has their own pros and cons and it comes down to personal choice.

Canon EOS M50 features and specifications

3 - Gear Review Canon EOS M50 Mirrorless Camera Kit

Features

The Canon EOS M50 mirrorless camera sports some very impressive features that would make even the smuggest photographer blush. The EOS M50 delivers improved Dual Pixel CMOS AF for fast, accurate autofocus that helps you get the photo you want right at the moment it happens.

The 24.1 Megapixel (APS-C) sensor is capable of capturing high-resolution image and video. The files grant the user images suitable for enlargements with sufficient resolution for significant cropping. The video capability of this hardy little camera is even more impressive. It has the ability to record in 4K UHD at 24 frames per second. The high-speed 120p mode is possible in HD.

According to the manufacturer, the built-in high-resolution electronic viewfinder features approximately 2,360,000 dots. So, you can see high amounts of detail in whatever you’re capturing.

The vari-angle Touchscreen LCD, which has a flexible tilt range. The tilt range is ideal for high-angle and low-angle shooting so you can get the composition you want without breaking your back. The Canon EOS M50 camera features the new DIGIC 8 Image Processor, which helps improve autofocus performance, enables you to shoot 4K UHD 24p video and aids with many other advanced features.

4 - Gear Review Canon EOS M50 Mirrorless Camera Kit

Specifications

  • Improved Dual Pixel CMOS AF and Eye Detection AF.
  • 24.1 Megapixel (APS-C) CMOS Sensor with ISO 100-25600 (H: 51200).
  • 4K UHD* 24p and HD 120p** for Slow Motion.
  • Built-in OLED EVF*** with Touch and Drag AF.
  • Vari-angle Touchscreen LCD.
  • Built-in Wi-Fi, NFC, and Bluetooth Technology.
  • Automatic Image Transfer to Compatible Devices while Shooting.
  • New DIGIC 8 Image Processor with Improved Auto Lighting Optimizer.
  • Silent Mode for Quiet Operation.

This is only the second EOS M model to have a built-in Electronic View Finder (with the first being the EOS M5). It is also the first EOS M model to offer 4k video, which puts it one step ahead of the EOS M5. The camera also uses a DIGIC 8 processor, rather than the older DIGIC 7 processor.
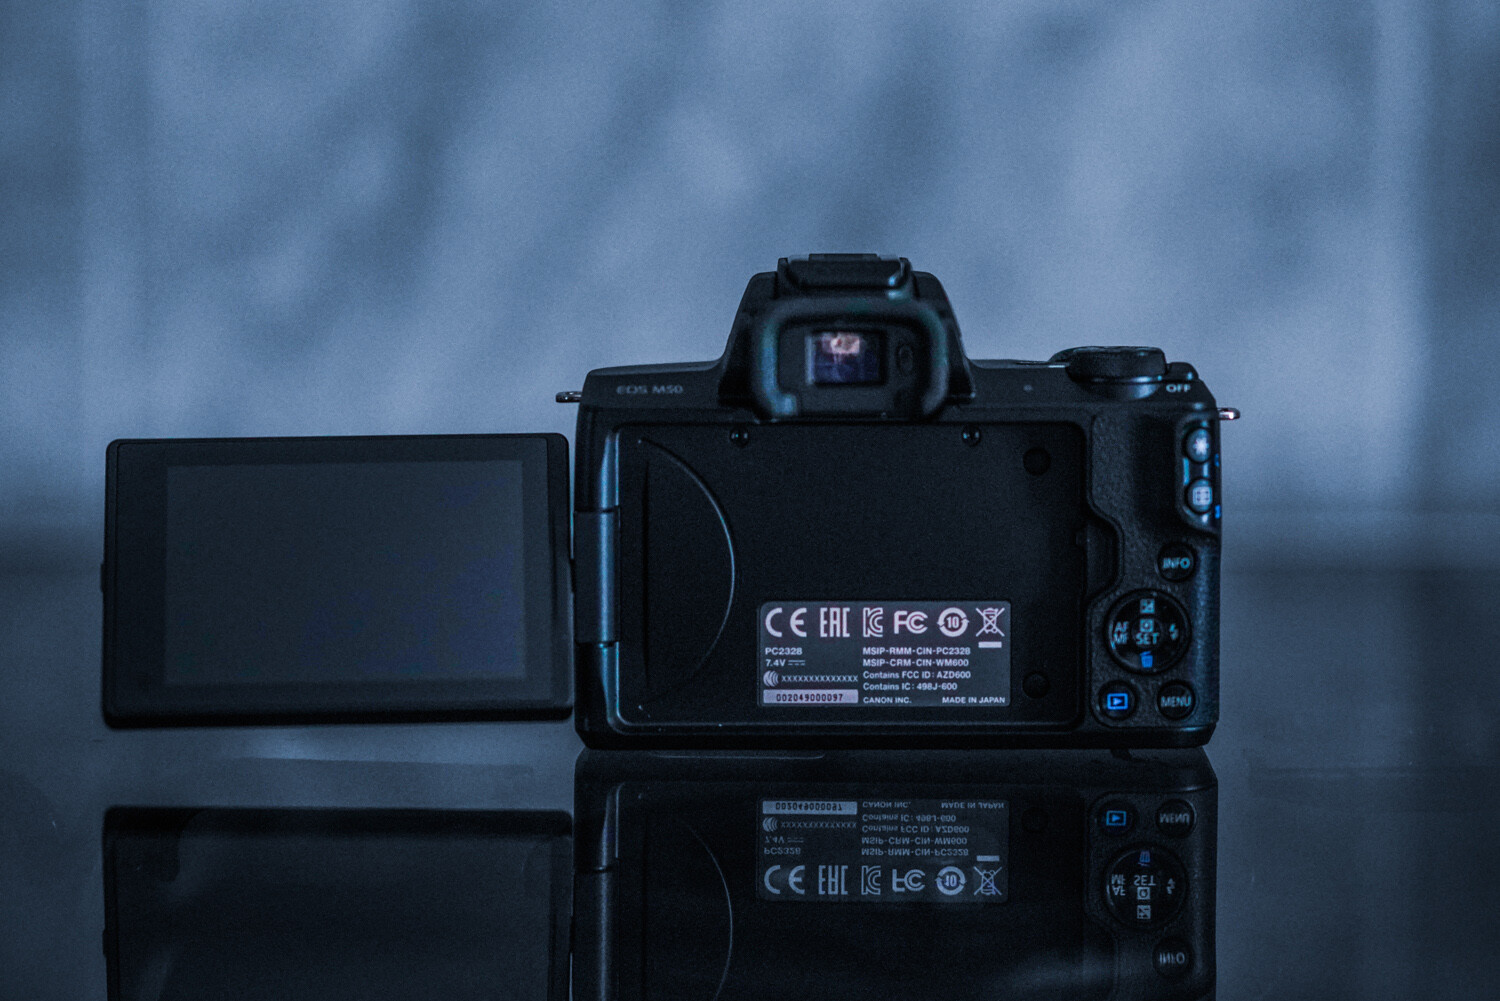
Physical build

5 - Gear Review Canon EOS M50 Mirrorless Camera Kit

This camera’s size is brilliant! It is smaller than my cell phone (Google Pixel). Easy to throw into any bag, purse, or pocket. The body construction consists of polycarbonate rather than a metal body shell, but it still feels robust enough in your hand. The camera features a very comfortable and well-designed grip containing  ‘hooks’ for your second finger and thumb. As a result, the M50 feels surprisingly secure, even when used with one hand.

Much like Canon’s pro-level DSLRs, the controls are well laid-out. The buttons are a decent size and easily located by touch while using the viewfinder. However, the size may be an issue for those with larger hands. My hands are petite, and I find the controls just fine (haha)!

6 - Gear Review Canon EOS M50 Mirrorless Camera Kit

The tilt, vari-angle touch screen is brilliant. This nifty feature has infinite uses. Additionally, the screen can be stowed backward against the camera body to avoid any potential scratches (for those that don’t purchase screen protectors). The built-in viewfinder is very helpful when shooting during the noon sun or other bright conditions. There’s an auto activation when your eye approaches the viewfinder, ensuring that the LCD doesn’t blind you.

Canon has a knack for making its small models handle well and feel professional. The M50 is proof of this.

Autofocus

Canon’s autofocus is what has kept me loyal to the brand for over ten years now. Canon’s Dual Pixel CMOS sensor that the M50 sports mean every sensor pixel is capable of being used for phase detection. Allowing fast autofocus almost wherever the subject gets situated within the frame. The AF system is sensitive down to -2 EV, which means the camera continues to focus in extremely low light.

7 - Gear Review Canon EOS M50 Mirrorless Camera Kit

A new autofocus feature of this model is the eye-detection autofocus. The camera can find eyes on your subject and lock focus on them with the push of a button. It is photographic witchcraft, and I love it. This feature is activated when face detection is turned on, to focus specifically on your subject’s eye.

Do make note that this fun feature is only available in single-AF mode, which means you can’t use it track focus during burst shooting. As can be seen above, the eyes of my dog are nicely in focus (and this was easy to achieve, even when she moved a bit).

I have always preferred the AI Servo | Continuous Focus mode due to the majority of my subjects moving around a lot. Thanks to the ability to use phase-detection anywhere in the frame, this feature is fast and reliable.

Low light capability

8 - Gear Review Canon EOS M50 Mirrorless Camera Kit

As the years’ progress, so does low-light capability. In higher ISO levels, image quality stands up very well at ISO 800. It’s only at ISO 3200 noise, and noise reduction starts to blur away detail. However, the color gets retained well. The higher numbers are passable for smaller reproductions, but you’ll generally find yourself not wanting to move beyond 12,500 max! The autofocus continues to shine even at low-light levels.

9 - Gear Review Canon EOS M50 Mirrorless Camera Kit

Battery life

I have always been a tremendous fan of Canon’s batteries. They always continue to impress me with their longevity. This camera is no exception, despite having an always-on LCD screen! As always, I do suggest purchasing more than one battery, but you can remain confident in this camera lasting you through your entire photo session and photography adventures.

10 - Gear Review Canon EOS M50 Mirrorless Camera Kit

The lens: EF-M 15-45mm f/3.5-6.3 IS STM

The M50 kit comes complete with the EF-M 15-45mm f/3.5-6.3 IS STM, a compact and stylized zoom lens for the mirrorless camera. The lens is very compact and features a side switch to flatten the lens when stored. This feature makes traveling with the M50 kit an absolute breeze.

11 - Gear Review Canon EOS M50 Mirrorless Camera Kit

With the 15-45mm kit lens with its STM focus motor, autofocus is great. It is super-fast, silent, accurate, and excellent for any photography style. The 35mm-equivalent 24-72mm range combines a wide-angle for landscapes and big group photos, with a telephoto zoom for close-ups and detailed headshots.

12 - Gear Review Canon EOS M50 Mirrorless Camera Kit

I found the lens to be reliable, fast, and sharp – no complaints whatsoever!

Final thoughts

13 - Gear Review Canon EOS M50 Mirrorless Camera Kit

The Canon EOS M50 is an excellent entry-level camera for aspiring, beginner, and hobbyist photographers alike. From its variety of features to its portable size and ease-of-use, unraveling this camera under the Christmas tree would excite even the most controlled picture-takers. Plus, having a kit that comes with a lens is just a brilliant bonus!

The post Gear Review: Canon EOS M50 Mirrorless Camera Kit appeared first on Digital Photography School. It was authored by Anabel DFlux.


Digital Photography School

 
Comments Off on Gear Review: Canon EOS M50 Mirrorless Camera Kit

Posted in Photography


Day 2 delivery from The Photography Express

19 Dec

The post Day 2 delivery from The Photography Express appeared first on Digital Photography School. It was authored by Darren Rowse.

Day 2 of The Photography Express

Note: Today’s train is running a little late, so you have less than 24 hours to grab these deals!

You know you took a great photo, but it’s just not popping when you get it on your screen. You’d also rather be out taking more great photos than messing around on the computer any longer.

Today’s delivery from The Photography Express is not one, but two amazing Lightroom presets deals to help you bring out the potential in your photographs in just one click.

Deal #1 Massive Lightroom Presets Bundle from dPS

Today you can pick up a bundle of three of our 101 Lightroom Presets packs for just $ 49  – or individually for $ 19 each.

Each pack contains 101 (or more) Lightroom Presets, carefully crafted by professional photographers to help you save time and get the look you want when post-processing photos in Adobe Lightroom.

Try out some sample presets with our sliders – one of our favourite transformations is “Big Colour Love”.

Save $ 100 when you purchase the bundle for the next 24 hours only!

Learn More

Already have all 303 of the dPS presets? Then check out this beautiful premium bundle . . .

Deal #2 Premium Lightroom Presets from Andrew Gibson

Even more presets to help you create beautiful photos in Lightroom. This set of Andrew’s Faded Glory, SuperBlack and Vintage Portrait Presets work in Lightroom 4, 5 and 6, Lightroom CC (2015), Lightroom Classic CC and the new Lightroom CC for mobile, with both JPEG and Raw files.

Preset Bundle

If you’re wanting to experiment with:

  • the under-utilized and under-appreciated beauty of desaturated colors
  • converting photos to black and white for mood, emotion and expressiveness; and
  • natural looking vintage style portraits

then this premium bundle of presets will give you results in Lightroom with just a few clicks.

Save 58% for the next 24 hours only!

Learn More


Have fun getting creative with your new presets – 2019 will be a fun year!

Both dPS and our trusted partner Andrew Gibson at The Creative Photographer offer 60-day money back guarantees, so you can easily buy now to secure the deal and try out the presets, and if you don’t think they’re for you, we’ll refund you.

Don’t miss the next two deals – sign up here for The Photography Express!

Disclosure: We receive a commission from our partners if you buy via our promotion, but it is at no cost to you. In fact, you’re getting an even better price than usual!

The post Day 2 delivery from The Photography Express appeared first on Digital Photography School. It was authored by Darren Rowse.


Digital Photography School

 
Comments Off on Day 2 delivery from The Photography Express

Posted in Photography


POLL – Do You Use Your Camera for Video?

19 Dec

The post POLL – Do You Use Your Camera for Video? appeared first on Digital Photography School. It was authored by Caz Nowaczyk.

Digital cameras have come leaps and bounds since their inception. They include many fantastic features to enable us to take better quality photos. However, they not only take still images, many now include video functionalities.

Some photography cameras even have 4K video capabilities.

So, we want to know if you use the video settings on your camera?

Do you just play around, use it professionally, or wish you knew how to use it?

We’d love to know.

Note: There is a poll embedded within this post, please visit the site to participate in this post’s poll.

Feel free to tell us more about your answer (why you do or what you do) in the comments below.

If you would like to learn more about making videos with your camera, see this article by Suzi Pratt.


The post POLL – Do You Use Your Camera for Video? appeared first on Digital Photography School. It was authored by Caz Nowaczyk.


Digital Photography School

 
Comments Off on POLL – Do You Use Your Camera for Video?

Posted in Photography


How To Read Your Camera Manual (and why you really, really should!)

18 Dec

The post How To Read Your Camera Manual (and why you really, really should!) appeared first on Digital Photography School. It was authored by Kevin Landwer-Johan.

Camera manuals are notoriously difficult to read and understand. Often they are not read as much, or as well, as they should be. You need to read your camera manual because it contains vital information that will help you to become a better photographer.

How To Read Your Camera Manual Night Camera

© Kevin Landwer-Johan

Just as we need to learn the alphabet before we can learn to read and write, we must learn the basics of operating our cameras in order to take the best photos we can.

Reading it from cover to cover is not necessary. There will not be a test on how much you can remember.

The best way to use your camera manual

Begin to skim with your camera in your hands. Look through the contents and take note of what’s covered. Mark which items you think may be of particular interest to you. Some you will be able to just glance over. Others may be just painfully obvious, like this from the Nikon D800 manual;

“When operating the viewfinder diopter adjustment control with your eye to the viewfinder, care should be taken not to put your finger in your eye accidentally.”

I would add that it’s always a good idea not to put your finger in your eye, even when you are not adjusting your diopter.

If you’ve just bought a new camera and it’s a model you’re not familiar with, you’ll need to pay more attention to the manual. For camera users who are upgrading you will be best to scan the book for what’s been upgraded since your previous model. Sometimes these may be highlighted.

How To Read Your Camera Manual Camera In Hand

© Kevin Landwer-Johan

Break your reading down into bite-size chunks. Don’t attempt to read and understand everything you need to know about your camera in one sitting. It’s a complex piece of equipment. Spread your reading out over a few days or a week.

Give yourself time to practice what you are reading about. Getting hands-on experience will help you retain what you’re learning about and make it much more relatable.

Do not read it all

Choose to learn the essentials first. Find out how to focus it and set the exposure well. There will be various options available to you. Start reading about the ones most applicable to the way you like to photograph.

If you are completely new to photography and not yet sure which exposure mode you prefer, take some time to read through all the options.

How To Read Your Camera Manual Happy Photographer

© Kevin Landwer-Johan

Getting a good start by understanding the basics of your camera leaves you freer to concentrate on photography. Don’t be filling your mind with more than you need to know. At the start you are not likely to need information about producing video, making multiple exposures or how to adjust the customs settings on your camera. These things can wait until you can find your way around your camera comfortably.

Carry your manual with you

Download a PDF of your camera manual to your phone. Take it with you everywhere so you can refer to it when you get stuck with a camera setting.

How To Read Your Camera Manual Chinese Woman Photographer

© Kevin Landwer-Johan

Practical application of the information contained in this little book will help you get to know your camera better. But only if you use it well. Hands on is best.

Once it’s on your phone you can take a few minutes to read a little more on the bus or train or whenever you have a few minutes to spare.

Consider buying a book specifically about your camera (that’s not the manual)

I have purchased books and resources about cameras I own by Thom Hogan. Thom is well known for his incredibly detailed writing about Nikon cameras. I find he’s much easier to read than the camera manuals.

How To Read Your Camera Manual Learning Photography

©Pansa Landwer-Johan

His books are well laid out and the information is broken down so it’s readily consumed.

This may be beyond the needs or wants of many photographers, but for those who have the time and want the resources, picking up a book, other than your camera manual will help advance you towards better picture taking.

Aim to be able to forget it all

As you become more confident and competent with your camera, you will have little need for your camera manual. Well, I would hope that before long you have put what you’ve read to good use and can remember it effortlessly.

How To Read Your Camera Manual Camera In Hand 2

©Pansa Landwer-Johan

Having the ability to pick up your camera and have it ready to take photos in any situation is well worth aiming for. The more you can concentrate on what’s happening in front of you the better photos you’ll obtain.

Gazing down at the camera in your hands as you try and figure out which settings you want to use leads to you missing out. You may be able to take your best photos when you are focused more on what you are making photographs about than what you are making them with.

The post How To Read Your Camera Manual (and why you really, really should!) appeared first on Digital Photography School. It was authored by Kevin Landwer-Johan.


Digital Photography School

 
Comments Off on How To Read Your Camera Manual (and why you really, really should!)

Posted in Photography


How to Take Great Food Photos this Holiday Season

18 Dec

The post How to Take Great Food Photos this Holiday Season appeared first on Digital Photography School. It was authored by Mat Coker.

This holiday season your Instagram feed is going to be filled with photos of people’s food. Many of those photos can look terrible – dark, blurry, and discolored. In this tutorial, I’m going to show you how to take great food photos this holiday season. The principles are simple and apply to the food photos you take all year long.

Window light - How to Take Great Food Photos this Holiday Season

The photo on the left is from a few years ago. I attempted to take a stunning food photo to post online, but the pop-up flash on my camera spoiled things. I knew nothing about light back then! The photo on the right is a combination of soft window light and the warm ambient light of the tree in the background.

1. Presentation

You may have no control over how the food gets presented. Perhaps it gets placed in front of you, and you want to snap a quick picture. However, if you do have control over how the food gets presented, then you should give some thought to it.

Consider things like what color dishes or drink wear do you have available? You could use something neutral in tone, colors that represent the season, or something that accents the food.

2 - How to Take Great Food Photos this Holiday Season

The white plate allows the cookies to stand out from the wood table with similar tones, while the red mug hints at the holiday season.

3 - How to Take Great Food Photos this Holiday Season

This scene is more colorful, mixing the traditional red and green colors of the holiday. This time the table is white to make the colors pop.

2. Light

Light can make or break your food photos. The direction of the light (overhead, front, back, side) and the quality of light (soft or harsh) dramatically changes how your photo looks.

4 - How to Take Great Food Photos this Holiday Season

This photo was taken with nothing but an overhead light. You can see by the crisp shadow that the light is very harsh. It’s good enough and is certainly better than dark and blurry, but I prefer a big soft window light.

5 - How to Take Great Food Photos this Holiday Season

The pop-up flash on my camera was used for this photo. Again, better than nothing. But certainly not as nice as the window light.

For the following photos, I used my daughter’s play food! You can practice with anything you’ve got. I wanted something with even more texture to illustrate the effect of side and backlight.

A large window lights the photos below. The light skims across the cupcake from the side or behind, bringing out texture through highlights and shadows.

6 - How to Take Great Food Photos this Holiday Season

The cookies are placed on the crate, with the window behind or to the side.

7 - How to Take Great Food Photos this Holiday Season

This cupcake is lit by a large window producing soft light. The window is to the right. Notice that the right side of the cupcake is brighter? The light coming from the side helps to bring out some texture and make the two-dimensional photo pop more.


8 - How to Take Great Food Photos this Holiday Season

This cupcake is backlit by the same window. Backlight helps bring out texture too but gives the photo a moodier look.

3. Angle

So you’ve found the perfect colored dishes and you’ve got your light source. Now consider the best angle from which to photograph your food. Generally, I recommend a higher angle, maybe even a bird’s eye view.

9 - How to Take Great Food Photos this Holiday Season

A bird’s eye view is great for food photography, especially if the food is in a deep dish. It allows you to look down from above.

10 - How to Take Great Food Photos this Holiday Season

This is a high angle, though not as high as the bird’s eye view. You are able to see what is on the plate. This photo is less about the food and more about the mood of the scene. I remember being a kid waiting for Thanksgiving or Christmas dinner while the grown-ups bustled around. Everything is so dramatic with plumes of steam rising from the dishes! Steam should be photographed with backlight to help it stand out.


11 - How to Take Great Food Photos this Holiday Season

This face to face angle brings you into direct confrontation with the pile of cookies. They don’t stand a chance!

4. Background

Finally, consider what’s in the background. Your background should be clean and simple or a little bit scenic.

12 - How to Take Great Food Photos this Holiday Season

I snapped a quick photo, only to realize afterward that the background is a mess. I never seem to pay enough attention to the background.


13 - How to Take Great Food Photos this Holiday Season

I grabbed a clipboard off the table and used it as a backdrop to block out the mess. It’s not fancy, but it will do for a quick snapshot.

14 - How to Take Great Food Photos this Holiday Season

This background is intentionally scenic, showing that it’s Christmas time. Bring together color, light, angle, and background to make your food photos look great!

Keep these tips in your pocket all year long!

I learned how to take better photos of my food through trial and error, and learning from professional food photographers.

Whenever I’m inspired by what’s on my plate I set it by the window, pay attention to the background, find its best angle and take a nice looking photo. No more harsh overhead light or pop-up flash!

The post How to Take Great Food Photos this Holiday Season appeared first on Digital Photography School. It was authored by Mat Coker.


Digital Photography School

 
Comments Off on How to Take Great Food Photos this Holiday Season

Posted in Photography


ON1 Photo RAW 2019 Review

18 Dec

The post ON1 Photo RAW 2019 Review appeared first on Digital Photography School. It was authored by Leanne Cole.

This November, ON1 released the latest version of their standalone-editing platform, Photo RAW 2019. It is a sophisticated program aimed toward all levels of photographers from the absolute beginner to the professional. The program is there to help photographers edit their photos to achieve the best possible images.

Many features in the previous version still exist. However, some obvious changes are in the user interface — specifically, the removal of the different modes you had to switch to as you processed your images. They are now much easier to use, and access to each is all done in the same window.

leannecole-on1-photoRAW-2019-001

When you open ON1 Photo RAW 2019

Some of the significant aspects of Photo RAW are still available but have been improved to make them more efficient to use. ON1 have always listened to their users. They find out what their users want the most from the software and use that feedback to make product improvements, via the ON1 Photo RAW Project.

User Interface

One of the biggest changes with Photo RAW 2019 is the basic layout. The Browse section is much the same, except for a few minor changes. However, some of the most significant changes are when you proceed to the photo editing section.

In the past, you have had to go to different modules to make particular changes. In the latest release, you the Develop, Effects and Layers features are all integrated in the same place. You can now move between each of them easily, and more importantly, quickly.

leannecole-on1-photoRAW-2019-002

The User Interface has been updated as well.

You no longer have to wait for changes to get saved when moving from one module to another. In previous versions, when you moved to the Layers module, you lost all of the non-destructive settings used to create your image. However, now you have access to them all the way through the editing process of your image.

When you open your image in Edit Mode, you can see on the right side that it still looks similar to the previous version with Tone & Color windows opened first. However, above it, are now tabs for Develop, Effects, Portrait, and Local. When you want to use aspects that are in a specific tab, you click on it and you are taken to it straight away. You can move around them very quickly.

Above those tabs, is a larger one that has Layers written on it. You can now add layers at any stage of your editing and go back and forth between the other tabs as well.

leannecole-on1-photoRAW-2019-005

Now layers is in the same place as the other tabs.

The new Layers tab is a bonus because you don’t lose any of the previous edits you have done. As you go back to the other tabs everything you have done previously is still there. You can change adjustments and filters at any stage of the process too. This ability is new to Photo RAW and was not available in previous versions.

Effects and Filters

Nearly all the adjustments are now under the Effects Tab. When you click on Add Filter, a new window pops up with a range of filters available for use. While this isn’t new, in the previous version they were split between the Develop and Effects Modules, and you had to keep swapping between them, depending on how you used them.

In the 2019 release, the filters are all in one place under the Effects tab. Along with the existing filters, ON1 have also included some new ones.

leannecole-on1-photoRAW-2019-004

All the filters are now under the Effects tab.

These filters include Curves, Color Adjustments, and Film Grains. Curves is a very welcome addition as it is something that many people use in other editing programs. This filter is addictive. Once you start using it, you want to use it on everything.

Some people enjoy the Film Grain option. It is excellent for imitating the effects of analog film. If you had a favorite film type, you could make your digital images have a similar feel to them.

Color Adjustments give you more options for individual colors in your image. You can saturate or desaturate them. You can also change the hue tones or change the color entirely. If you like that sort of control in your editing, then this filter is perfect for you.

Tool changes

One of the things I have noticed is the tools are now in the left sidebar. In the previous version there were many of them, and as you moved through the modes more appeared.

At first glance with Photo RAW 2019, it appears that there are not as many tools. There aren’t many sitting in the sidebar, but when you click on one, you should also look at the top of the window. There, you can find the settings for each one, and you find other similar tools. You can click on them to use the ones that you like.

leannecole-on1-photoRAW-2019-014

Some of the tools are now located in a different section.

If you have used previous versions and can’t find tools that you previously used, go through each one along the top to see what is available. It looks as though all the original tools are still available. They are merely in a new location.

Text Tool

One of the really exciting additions to the latest release is the Text Tool. You can now add text to images. You can make memes or other designs.

This new feature is excellent for watermarking your image too. Love them or hate them, many people want to put watermarks on their work. It allows them to prove they own the copyright if their image is stolen or used without their permission.

The Text Tool also features a range of font options, and you can choose the size and placement. Like most adjustments, you can change the opacity as well, which is perfect for watermarking.

The Text Tool is a welcome addition to Photo RAW and something that many people are going to like.

leannecole-on1-photoRAW-2019-011

The new Text Tool is a very welcome addition.

Processing RAW images

Some programs are not capable of processing your RAW files; however, ON1 can process these files with Photo RAW. It can process them quickly, and the file sizes are not an issue.

Many of the modern cameras produce images with enormous file sizes. I use a Nikon D850, and the RAW images are often over 50MB. Each image I have processed in Photo RAW 2019 has handled with no problems.

Lightroom Catalogues

Many people who have used Lightroom for years have cataloged all their photos using the platform. Lightroom users may be hesitant to switch to Photo RAW 2019 for fear of losing access to all of these catalogs. However, there are now some new AI algorithms that power Photo RAW giving the user access to all their photos from Lightroom catalogs using the Lightroom Migration Assistant. The Migration Assistant adds the top-level folders in the Folders panel in Lightroom to Cataloged Folders in Photo RAW. All of the photos inside of these folders are cataloged automatically. Your collections and Metadata changes made in Lightroom are migrated and include keywords, descriptions, ratings, labels, orientation, etc.

Lastly, RAW processing and editing settings from Lightroom’s Develop module including crop, retouching, and local adjustments are migrated non-destructively so they can be re-edited in ON1 Photo RAW 2019.

You can also see the photos you have edited in the other program as well. This feature was an essential development for ON1 because it offers users an alternative to paid monthly subscriptions such as Lightroom.

leannecole-on1-photoRAW-2019-013

Now you can access all your photos and catalogs from Lightroom.

Creating HDR images

While HDR Images editing is not new to Photo RAW, the 2019 release has seen some significant improvements to the programs ability to edit them faster. The workflow has improved significantly too.

The process starts the same way – select your images and click on the HDR icon. However, once the images are merged, the changes made to the overall image are not set in stone. Once the HDR is created and opened in the Develop tab, you can continue making other re-adjustments. This feature allows you to alter any mistakes you may have made the first time.

leannecole-on1-photoRAW-2019-006

Creating HDR Images is now easier.

The most significant and best change is how fast your HDR images get processed. It is fantastic and makes them so much easier to do. While other programs make you wait (you can make coffee while it is doing the merging), Photo RAW completes the process before you know it. This feature is an excellent addition for time-poor photographers.

Many of the other features remain, and you can choose various options for how you want your HDR images to appear when the merging is complete. If you are familiar with how ON1 does HDR photos, the previous features remain, with the added bonus of new ones that are sure to impress.

leannecole-on1-photoRAW-2019-008

Make changes anytime.

Focus stacking

If you love macro photography or are keen to get everything in your images in focus, the Focus Stacking feature is a great new feature for you. Photo RAW 2019 allows you to highlight all the images you want to Focus Stack via the Browse section, and you simply click on the Focus icon. The icon is located on the right side of the window.

leannecole-on1-photoRAW-2019-009

Use Photo RAW 2019 to merge images for Focus Stacking.

Photo RAW aligns all your images together and displays a preview of your stacked image. It then blends all the selected images to make a final focus-stacked image. There is a reference panel to ensure you get the image you want.

leannecole-on1-photoRAW-2019-010

All the images are aligned and everything that you want in focus is.

Who is ON1 Photo RAW 2019 for?

The latest version has been designed to appeal to a wide range of photographers who want to edit their photos. Professional photographers can find everything they need to process their photos in Photo RAW 2019. If you have many photos to process, all the tools and adjustments that you used in Lightroom are available. Accessing all those images that you have previously processed with Lightroom is simple.

Hobbyist photographers who want more say on how their final images look may find Photo RAW 2019 brilliant. You can make all those basic adjustments, and more. It is an excellent program for learning layers too.

However, the best part is that many new photographers don’t want to sign up for monthly subscriptions set out by Adobe. The monthly expense can be expensive. With Photo RAW, you can purchase it outright and not have ongoing monthly costs. On top of that, with monthly subscriptions, you aren’t paying for many extras that you may not need.

Support

ON1 have many tutorial videos on YouTube to help you learn how to use the Photo RAW 2019 software if you are new to it. There are also tutorials for the latest release.

If you want more from the program and the company, consider signing up for ON1 Plus. ON1 Plus provides in-depth monthly courses on using ON1 Photo RAW and courses from top photographers. It is something that I would highly recommend.

leannecole-on1-photoRAW-2019-015

ON1 Plus gives you so much more support.

In Conclusion

The latest addition of ON1 Photo RAW 2019 was thoughtfully developed with the use of current user feedback. One of the great things about ON1 is how much they care about their users and try to make sure their software delivers for their needs. This latest release is sure to impress their users.

If you are looking for an alternative to mainstream editing programs, you should consider ON1. It does everything you need and is a program you can continue to learn. No matter what level of photographer you are, Photo RAW 2019 can cater to your editing needs.


Disclaimer: ACDSee is a paid partner of dPS

The post ON1 Photo RAW 2019 Review appeared first on Digital Photography School. It was authored by Leanne Cole.


Digital Photography School

 
Comments Off on ON1 Photo RAW 2019 Review

Posted in Photography


Day 1 delivery from The Photography Express

17 Dec

The post Day 1 delivery from The Photography Express appeared first on Digital Photography School. It was authored by Darren Rowse.

Day 1 of The Photography Express

Welcome to day 1 of The Photography Express where we have the first two of twelve amazing deals (delivered express over six days) that will help you to improve your photography.

Both deals come from our friends at Photozy who consistently create excellent training resources.

Deal 1 is the most popular deal from last year (with a special bonus) and deal 2 is brand new.

Deal #1 Snap! Cards

These printable Snap! Cards are like a “Training Boot Camp” in your Camera Bag (or on your smartphone!).

Photzy Snap! Cards

Easily stored in your camera bag, these printable cards help you quickly and easily recall photography techniques while out in the field.

There are 44 colour coded lessons in 9 main photography areas. Photzy offers a 100% money back guarantee, so there’s no risk in trying them out to see if they’re right for you.

PLUS this year the Snap! Cards come with a special bonus “Creativity Catalog” eBook worth $ 50 USD.

$ 270 total value for just $ 29 USD and for the next 24 hours only!

Learn More

Already have the Snap! Cards? Then check out this gorgeous new eBook . . .

Deal #2 NEW Photographing Fabulous Flowers eBook

THIS is how amazing flower photographs are created!

Check out Photzy’s brand-new eBook and ‘steal’ a step-by-step method for shooting delicate, gorgeous, & perfectly lit Flower Photographs!

This 156-page practical guide is packed with Assignments, Key Lessons, and Self-Check Quizzes! (15 assignments, 26 key lessons, & 70 self-check questions!)

Photographing Fabulous Flowers

Beautiful Flower Photography will be right at your fingertips, once you know the key secrets and professional techniques that are covered in this premium guide.

Just $ 50 $ 19 USD – save 62% for the next 24 hours only!

Learn More

We hope you enjoy your purchases from Photzy as much as thousands of other dPS readers have!

There really is no risk in snapping up these deals, as Photzy offers a 365-day risk-free money back policy!

Don’t miss the next two deals – sign up here for The Photography Express!

Disclosure: We receive a commission from our partners if you buy via our promotion, but it is at no cost to you. In fact, you’re getting an even better price than usual!

The post Day 1 delivery from The Photography Express appeared first on Digital Photography School. It was authored by Darren Rowse.


Digital Photography School

 
Comments Off on Day 1 delivery from The Photography Express

Posted in Photography


Gear Review – Fikaz Sony E-Mount Lens Adapters

17 Dec

The post Gear Review – Fikaz Sony E-Mount Lens Adapters appeared first on Digital Photography School. It was authored by Adam Welch.

Not too many years ago, in a sad and dark time, there weren’t many ways for us adventurous types to branch out in ways we used our photography gear. Namely, our camera lenses weren’t easily usable across platforms. It was possible, but adapters and converters weren’t plentiful or easy to find.

1 - Gear Review - Fikaz Sony E-Mount Lens Adapters

Today, mirrorless, full-frame, and crop-sensor cameras are essentially pairable with many lenses. Adapters for these lenses are relatively easy to find too. So much so, that there is an over-saturation of the lens conversion market making most lens mount adapters affordable for any budget.

Unfortunately, not all lens adapters are created equal. So when Fikaz, a company I had never heard of, approached me to test out some of their new Sony E-Mount (NEX) adapters, I was open-minded but still cautious of yet another lens adapter-maker.

Luckily, all of my reservations about the Fikaz Sony E-Mount lens adapters were unfounded. As it turns out, the two adapters I received were pleasantly high-quality pieces of kit. Let me explain to you what I thought about these nifty little adapters from one of the newest kids on the lens converter block.

As I said, the lens adapter world is a hot commodity right now and being able to use your lenses (especially manual vintage lenses) is currently in vogue. The two adapters I evaluated were the Nikon F (G) to Sony E-Mount and M42 to Sony E-Mount. Both adapters were high quality in both aesthetics and their build.

Nikon F (G) Adapter

Until their recent leap into the full-frame mirrorless realm, and since the late 1950s, all of Nikon’s lens mounts have been variations of the “F” mount. So technically, virtually all Nikon lenses should be compatible with a Nikon F-mount adapter.

The caveat is that later “G” series lenses (read as modern) don’t sport a physical aperture ring on the lens itself. This missing aperture ring means that while the lens is physically shootable with most F-mount lens adapters, there is nowhere for the photographer to change the aperture. A dedicated G-mount adapter comes in handy because the shooter can use the aperture ring on the adapter to physically control the amount of light entering the camera via the lens.

2 - Gear Review - Fikaz Sony E-Mount Lens Adapters

The Nikon F (G) adapter is solidly built and feels extremely substantial in the hand. The aperture controller ring is a nicely contrasting silver against the black frame of the adapter.

3 - Gear Review - Fikaz Sony E-Mount Lens Adapters

4 - Gear Review - Fikaz Sony E-Mount Lens Adapters

The Nikon F (G) adapter was tested using my relatively ancient Nikkor 70-300mm F/4-5.6 lens. Both the lens and camera sides of the adapter fit extremely snug…but not too snug…to the lens bayonet and the camera mount. Absolutely no play or movement was observed.

5 - Gear Review - Fikaz Sony E-Mount Lens Adapters

A well placed and crisply-springy release slider is also present on the adapter which is, again, in the visually pleasing contrasting silver tone. Fikaz has also included a highly visible red bead for easy mating of both the lens and camera with the adapter.

6 - Gear Review - Fikaz Sony E-Mount Lens Adapters

From what I would approximate, the aperture ring, or rather more accurately, the “aperture approximator” ring works in full stop increments with six stops of adjustment. Basing my lens at 70mm and F/4, the apertures provided from the adapter should be approximately F/4, F/5.6, F/8, and so on. The adapter has a visual representation to aid you in selecting aperture size.

7 - Gear Review - Fikaz Sony E-Mount Lens Adapters


8 - Gear Review - Fikaz Sony E-Mount Lens Adapters

Aperture control using the Fikaz Nikon F (G) to Sony E-mount adapter

9 - Gear Review - Fikaz Sony E-Mount Lens Adapters

Aperture control using the Fikaz Nikon F (G) to Sony E-mount adapter


M42 Adapter

I had intended to test the Fikaz M42 to Sony E-mount adapter using a fan-favorite lens, the Helios 44-2. Unfortunately, I realized far too late that my Helios was not in my bag. Seeing as I’m currently 3,000 miles from my test lens, this portion of the review shows my impressions of the build and appearance of the M42 adapter only. Which I must say, is extremely impressive for its price tag.

10 - Gear Review - Fikaz Sony E-Mount Lens Adapters

The M42 adapter from Fikaz is incredibly Spartan in its appearance. The majority of the converter is mostly flat black with accenting bare aluminum areas which cut an understated yet classical form. Like the Nikon adapter, the markings are well executed and quite clean. The threads on the M42 side are very uniform and smooth with no burrs or metal shavings present.

11 - Gear Review - Fikaz Sony E-Mount Lens Adapters

This same level of craftsmanship also holds through for the Sony bayonet end of the adapter which shows no flaws in the cutting or finish of the mount. The perimeter of the M42 adapter sports deep cut serrations offering a superb grip even with gloved hands.

12 - Gear Review - Fikaz Sony E-Mount Lens Adapters

Final Thoughts on the Fikaz Sony E-mount Adapters for Nikon F(G) and M42

In the grand scope of things, both the construction quality and thoughtfulness of design displayed with Fikaz’s first entries into the world of mirrorless adapters impressed me. Hopefully, both the build and looks of the adapters hint at great things to come too.

The Nikon F (G) adapter worked extremely well to allow a large measure of aperture control with newer Nikon lenses and mated perfectly to my 70-300mm test lens. However, I wasn’t able to test the M42 mount with a lens, the build and precision left little doubt that it would also perform well.

That said, there are some things to keep in mind about the M42 (and any other non-AF adapters). Essentially, all that is needed is a mount conversion. There is no real need for the relatively large size of the adapter which can affect infinity focus. While the M42 adapter has an excellent build, it may be beneficial to search for a slimmer “ring” adapter if you are worried about focusing issues.

On that note, the Fikaz adapters both feature black paint on their interior but no flocking to eliminate possible reflections. This shouldn’t be a problem, but maybe a concern for those seeking complete security for lengthy exposures.

Currently, the Fikaz Sony E-mount adapters are available for the following lens mounts: Nikon F (G), M42, Pentax K, and Fuji X mount. I have been informed that Canon EF mount will be available in the future. At the time this review, these adapters have a selling price of around US$ 24, making them a bargain. There are plenty of choices for lens adapters and converters today. Some are high quality and others, well, not so much.

I feel as if Fikaz can now join the ranks of some of the better budget adapters currently on the market. A bonus for those who are looking at a cost-effective way to use their lenses across a wide range of camera systems.

The post Gear Review – Fikaz Sony E-Mount Lens Adapters appeared first on Digital Photography School. It was authored by Adam Welch.


Digital Photography School

 
Comments Off on Gear Review – Fikaz Sony E-Mount Lens Adapters

Posted in Photography


Tips for Setting Up and Photographing Mini-Sessions for Extra Income

17 Dec

The post Tips for Setting Up and Photographing Mini-Sessions for Extra Income appeared first on Digital Photography School. It was authored by Jackie Lamas.

Photographing mini-sessions is a perfect way to generate extra income from both new and returning clients. They can also create buzz and word of mouth during the slow season for many photographers. Knowing how to set them up and photograph them ensures you are successful and offer your clients the best mini-session experience.

1 - Photographing Mini-Sessions

What is a mini-session?

Mini-sessions are sessions that offer your clients a session at a reduced price and usually photographed in less time than a regular full session.

Typically, the sessions run between 30 and 45-minute time slots for each client. It is up to you if you want to offer your mini-sessions to families, individuals, or children. Perhaps you are willing to do all types of photography, which can also create more buzz in different niches.

2 - Photographing Mini-Sessions

Mini-sessions are a reduced price, but it is up to you to factor in costs so that you are still earning enough to generate income for your photography business. These mini-sessions are all about booking volume, and so don’t price it not too low, or you may burn out quickly. Set your price, so you are making enough money, however, not too high where it’s not cost-effective for your clients who perhaps don’t have money to spend on a full session.

How do you set up a mini-session?

It’s important to make sure that you have all of your mini-session details set up and prepped before sending the information out to social media or your client list.

3 - Photographing Mini-Sessions

Before you begin, figure out how much you to charge and what you intend to include in the mini-sessions. For instance, if you are charging $ 250 per session, perhaps you can include an 11×14 wall print. If you are only including digital prints, make sure to state how many your clients receive. Including a product can be an excellent incentive for clients to book rather than just getting a digital product.

4 - Photographing Mini-Sessions

For example, if you’re doing holiday minis, you may include a set of greeting cards. If you are doing beach mini-summer-sessions, perhaps a beautiful wall portrait is the best option. Either way, work out your costs and be sure that you price your sessions accordingly to avoid losing money or just breaking even.

5 - Photographing Mini-Sessions

This is an example of all the different poses you can do in the same location to make the most of the time limit of your mini sessions.

Once you have figured out the basic details of the session, it’s time to determine what season of the year you are planning on having the sessions. Weekend dates are advisable because many people tend to have the weekends off from work and are free from other obligations.

If you plan on doing fall minis, schedule them far in advance so that you have time to edit and deliver all of the materials to your clients before the holidays. For example, scheduling holiday minis from mid to the end of October is perfect because you still have plenty of time before the major holidays to deliver your photos.

6 - Photographing Mini-Sessions

Be sure to schedule enough time slots during the day so that enough clients can have their photos taken without overlap or running into each other. For example, start at 10 a.m. and photograph every hour and a half until 5 p.m., or an hour before the sun sets.

Depending on the season you’ve chosen to do the mini-sessions, you can photograph them all in one particular location or two very different locations to offer variety. For example, you can offer mini-sessions at a park on Saturday and Sunday photograph downtown. Offering two different locations for different days means clients can choose which look they would prefer.

You can also set up just one day, say a Sunday, and photograph in only one location like a park or field.

7 - Photographing Mini-Sessions

Prep before booking a single client

It is essential you be prepared for running mini-sessions. Otherwise, you can get lost in all of the small details. Here is a sample worksheet that you can use so that you can keep track of your mini-sessions.

Keep track of clients, payments, contracts, timeslots, and locations for each session. It can help you not get confused and also keep track of who has paid and who hasn’t.

8 - Photographing Mini-Sessions

Also, prep an exclusive print package for your mini-sessions that include several products. Doing this to send out to booked clients can prepare them just in case they want to buy more photos from you. Giving them an exclusive print package can boost your income and make up the difference for the reduced price of the mini-session.

Having your business ready for the mini-sessions ensures that the campaign runs smoothly and without fuss. Plus, having all of your materials ready, like contracts and product guides, makes you look more professional to both returning and new clients.

9 - Photographing Mini-Sessions

It also less stressful keeping track of all the mini-session details after the shoot and it’s time to edit and deliver.

Remember, photography is an art, but portrait photography is also a business. You must run your business efficiently to avoid burn-out or losing track of information or details.

Create a mini-session campaign

Now that you have all the details, the locations, and the dates set for the mini-sessions, it’s time to get the information out.

10 - Photographing Mini-Sessions

Create a buzz. Send out an email or social media post informing people that you are prepping for a run of mini-sessions and details are coming soon. Doing so gets your clients excited and gives them time to book because you have already informed them.

First, send the information to your existing client list. Give them the chance to book first. Not only does it make it more exclusive but also keeps your current clients happy. Returning clients are much more willing to book than new clients. Send them all of the information about a week before you send it out to new clients. While it gives them exclusivity, it also adds urgency for them to book because someone else may get their slot.

11 - Photographing Mini-Sessions

Returning clients have a higher rate of booking than new clients.

Afterward, send out your mini-session campaign through the best form that brings in clients. Try an email list, social media, or your website. Wherever you get the most traffic and exposure, publish your campaign there.

Continue announcing the campaign. Make sure that you remind people daily through email and social media. Once a time slot gets filled, make sure to update the information. You don’t have to do this every single time, but it can save people from trying to book the same time slot and be turned down.

12 - Photographing Mini-Sessions

Remember, the client who signs the contract and pays the retainer fee is the one who gets booked. People who message but don’t do those two things don’t get booked. Unless you know your client is reliable, don’t reserve the mini-session timeslot. Otherwise, you could miss out on a paying client.

Don’t be afraid of getting to the point! Mini-sessions have a reduced price, which makes them in-demand. Especially among your existing clients! If you get a request for a mini-session, direct them to where they can pay the retainer, and send them the contract as soon as possible.

13 - Photographing Mini-Sessions

You can write them something like this: Thank you so much for wanting a mini-session! I do have that time and date available, however, it’s first-come-first-served. To book your preferred time and date, please go to this link and pay the session retainer. As soon as I receive confirmation, I can send you the contract. I’m excited and look forward to photographing your beautiful family!

It’s short, simple, but to the point. Letting your clients know the steps they have to take to book the mini-session ensures that you filter out the people who are just shopping around. This way you’re not wasting your time.

14 - Photographing Mini-Sessions

How to photograph mini sessions

Mini sessions are wonderful because they usually mean that you have back to back sessions all in the same location. However, it also means that you are out there all day photographing in all types of light.

Prep your gear so that you are ready for any type of lighting situation that can occur during the sessions. For example, bring extra batteries for your flash in case you will be competing with the sun. Bring a reflector to bounce some light. Take a tripod.

15 - Photographing Mini-Sessions

Sessions typically run from 30 to 45 minutes spaced at every hour and a half. This timing gives you at least 30 minutes between sessions to rest, eat a snack and drink some water. It also helps to adjust to new lighting conditions for the next session.

Mini-sessions can enable you to look for new ways to photograph multiple families in the same location. Use their energy to determine which angles and specific locations work best for them. It’s a great time to push your creativity and perhaps experiment new ideas you’ve wanted to try.

16 - Photographing Mini-Sessions

Here you can see all the variations in posing with different family combinations in the same location.

Make sure to set a timer so that you know when it’s time to stop photographing. Put your alarm about 5 minutes before the time is up to ensure you are aware you have a few extra minutes to get any last photos.

Time goes quickly, and your clients may feel like they didn’t have lots of variety or even that you took enough photographs. One thing that I do is I tell them how many photos I’ve taken, which is usually anywhere between 200 and 400 photos. Clients know that they won’t get all of the 200 photos, but they feel more confident that you’ve taken enough for them to choose.

17 - Photographing Mini-Sessions

If you offered your clients a set number of photographs, make sure that you photograph enough to cover that amount. For example, if you’ve offered 50 digital images, make sure you photograph more than double to have enough variety for them.

Making the most out of little time

Mini-sessions go by quickly, and if you have chosen to photograph for 30 minutes, it is important to make the most out of the time.

18 - Photographing Mini-Sessions

Make the most out of your time by having set poses for different combinations during the mini-session.

Prep yourself with 5 – 7 poses that work for all family types and sizes. Try to use poses that don’t require you to move your clients too much and waste time.

The most common set of poses include:

  • the whole family together
  • siblings only
  • parents only
  • each child
  • mothers and daughters
  • fathers and sons
  • mothers and sons
  • fathers and daughters

If grandparents are participating, you can also do the same above combinations with them included. Don’t forget to photograph the grandparents both individually and with only their grandchildren.

19 - Photographing Mini-Sessions

Once you have all of the main portraits taken, allow the children to have a bit of fun. Have them walk with their parents or play so you can capture them in a natural state of joy and happiness.

After the session

Immediately after taking the last photo at the mini-session, give your clients a printed pricing sheet that includes other products you offer. Also, include any exclusive packages you’ve created for the promotion. That way they can keep it in mind before they view a single photo.

20 - Photographing Mini-Sessions

After you’ve completed your mini-sessions, get one or two photos onto social media as sneak previews. Doing so can help drive more interest to your mini-sessions from potential clients.

Also, take the time to send a thank you message to your clients and email the price list again for the mini-sessions. If you have created something exclusively for the promotion, make sure to highlight the top three products. Do this before you show your clients the images so that they can plan how much they want to purchase and which products they like best.

21 - Photographing Mini-Sessions

Use this photo as inspiration for different posing during your next mini-session.

To keep the excitement of the mini-session going, edit and deliver the images to your clients quickly.

If your mini-sessions included a set number of images, allow downloads or choosing for that amount, but include all of the photos that you believe are great. For example, if your package includes 50 edited photographs for your client with only 10 downloadable images, include all 50 in the gallery or sales appointment slideshow.

22 - Photographing Mini-Sessions

Including more photos makes it likely that your clients purchase more than the ones included in the mini-session promotion.

Online versus in person

You have two options for your mini-session image delivery. You can send your clients an online gallery or make in-person sales. It’s up to you which you prefer to do depending on your business style.

23 - Photographing Mini-Sessions

If you do online, be sure you’ve outlined all the parameters regarding the gallery. Have your watermarks in place, limit the downloads to the number you’ve specified and use an expiration date. Also, add email logins to keep track of emails for future marketing.

Also, have your products displayed front and center so that your clients can find them quickly. If your clients have to jump through lots of hoops to get their images, they most likely won’t buy much. Make sure the gallery is user-friendly and easy to access.

24 - Photographing Mini-Sessions

If you have opted for in-person sales, schedule the appointment after you’ve finished photographing the family. Doing so helps settle any delays in delivering photos. Have a physical calendar or use your phone calendar to note the time and date of your in-person sales.

In-person sales can happen at your studio or the client’s home. Take your top products, pricing sheet, and samples along. Include a preview of the images in a premade slideshow that highlights the top 15 photos.

25 - Photographing Mini-Sessions

Work with your clients to choose their favorites from the promotion and any additional products they may want to purchase.

Take an order form and have a secure way to process payments. For example, use a PayPal credit card reader or Square software. Doing so allows clients to pay then and there, avoiding payment excuses. You also look more professional.

Pricing Sheet and Products

I want to highlight pricing sheets and products. I’ve repeated it throughout the entire article. Make it a point to put your pricing sheet and products in front of your client’s eyes at all times.

26 - Photographing Mini-Sessions

Mini-sessions often bring in quick income because you are working in volume. In the long run, what brings you greater income and returning clients is selling prints and products.

Reminding your clients of pricing and products allows them to think about what they would like to purchase. If you only say it once, it doesn’t stick. You’ll need them to see the information at least three times for them to think about buying something other than digital images.

27 - Photographing Mini-Sessions

Send out the pricing sheet and all other selling materials in an email when your client books the session. Send it along with their signed contract or payment receipt. Hand them a printed pricing/product sheet at the end of the session. Be sure to include your logo and any other necessary information such as credit card payment details. When you send the gallery invitation or see them at the in-person sales appointment, give them the pricing/product sheet again.

28 - Photographing Mini-Sessions

It’s important to keep the pricing/product sheet available to them and as a constant reminder to purchase printed products from their session. Having your work displayed in their home also serves as a good referral among friends and family who see their portraits.

In conclusion

Mini-sessions are a great way to drive volume business and get more experience in portrait photography. Price your mini-sessions according to your target market and business model so that you don’t lose money by doing the promotion.

29 - Photographing Mini-Sessions

Remember to get your pricing sheet and product pricing to your clients at least three times to ensure extra income after the sessions have been completed.

Have you photographed mini-sessions before? What was your experience?

The post Tips for Setting Up and Photographing Mini-Sessions for Extra Income appeared first on Digital Photography School. It was authored by Jackie Lamas.


Digital Photography School

 
Comments Off on Tips for Setting Up and Photographing Mini-Sessions for Extra Income

Posted in Photography


How to Make the Most of Creative Shutter Speed in Photography

16 Dec

The post How to Make the Most of Creative Shutter Speed in Photography appeared first on Digital Photography School. It was authored by Simon Bond.

This photo is all about the moment of capture. I used a fast shutter speed to capture it.

One of the most important settings on your camera is shutter speed, and it’s just as important to master this as it is to master aperture. If anything, shutter speed control allows you to become even more creative with your photography. Exciting techniques like light painting and panning both rely on the photographers’ use of this setting. In this article, you’ll learn techniques that need a creative shutter speed, and how you can apply this to your photography. So let’s begin with what shutter speed is, and why it’s important.

What is shutter speed?

A photograph relies on light to become exposed, and shutter speed controls how long that light sources can expose the photo. That means in general, lighter conditions mean fast shutter speeds, and dark conditions mean slow shutter speeds. Shutter speed is also controlled by opening or closing the aperture on your lens, adding filters to your lens, and, in some cases, adding external lighting to your scene. In DSLR camera’s it means the mirror locks up, and in mirror-less cameras, the shutter is merely open. Now, various techniques rely on shutter speed to work. Let’s sub-divide them by the how fast the shutter speed needs to be.

Fast shutter speed

Using super-fast shutter speeds allows you to freeze things that might be faster than the eye can appreciate. That may mean raindrops, wildlife, or photographing sport.

Freezing the action

The shutter speed you’ll need to freeze the action very much depends on what you’re photographing. Concerning creative imagery, you’re looking at freezing things that are too fast for the naked eye, and hence, you’ll get some unusual detail in the photo you’ve taken. Next is a simple guide to the type of creative shutter speed you’ll need to freeze the following types of action:

  • A waving hand – A shutter speed of 1/100th is fast enough to freeze this motion, to be sure use 1/200th
  • A flying bird – 1/2000th will get you a sharp photo of a flying bird.
  • Raindrop splashes – Look to use a shutter speed of 1/1000th or faster to freeze moving water. It’s possible to take water drop photos at slower speeds, but those often use a strobe flash to freeze the water rather than the shutter speed itself.

Freezing droplets of water require a fast shutter speed.

Moment of capture

Getting the right moment is what makes or breaks a photo. It is possible to take good moments of capture at slower shutter speeds, but generally, you’ll want to freeze the action. That means a fast shutter speed, and capturing that moment a baseball player swings their bat, or the archer loses their arrow. In both cases, these need a fast shutter speed to capture that moment.

Handheld photography

While not related to creativity in your photo, shutter speed is all important when it comes to avoiding camera shake. There is a nice rule of thumb that correlates your focal length to the slowest speed you can use handheld. Of course, there are those with steadier hands, and image stabilization helps too. That said, the correlation works like this and is easy to remember. If your focal length is 300mm, you’ll need to use a shutter speed of 1/300th second to avoid camera shake. You can use a much slower shutter speed at wider focal lengths though, so at 50mm 1/50th is adequate.

Creating motion.

Ahead of getting into long exposure, there are the shutter speeds that you can get away with handheld, but slow enough to move the camera and produce motion blur.

Panning is a popular technique, that needs a slower shutter speed.

Panning

This is a great technique and is a good example of how creative shutter speed can be used.

The technique requires a steady hand because it uses shutter speeds that wouldn’t usually get taken handheld. The idea behind this technique is that you follow a moving object with your camera, and take the photo with a slow enough speed to blur the background. You can follow any moving object from a pedestrian walking to a Formula 1 racing car. Amongst the easiest objects to pan with is a cyclist moving at a steady speed. Those new to the technique should practice panning with a cyclist first. A shutter speed of around 1/25th is a good starting point to blur the background while keeping the cyclist sharp.

Motion blur

An alternative strategy is to allow the moving object to blur, and keep the static object sharp. While panning is primarily done handheld, using a tripod for this type of photo achieves better results. In this case, you’ll be looking to show the background motion of things like cars, trains or buses against static objects. That might be people waiting to cross the road, or someone waiting for a bus or train. Once again, a shutter speed of 1/25th is often slow enough to blur the moving object in your frame.

This photo was taken from a moving train. The slower shutter speed created motion blur.

Camera rotation

It’s still possible to give a photo a more dynamic feel, even when everything in your frame is static. You can achieve this feel by moving the camera with a slow shutter speed of around 1/25th. With wide-angle lenses, you can experiment with even slower shutter speeds. However, this may impact your ability to keep a portion of your photo sharp. The idea behind camera rotation is to twist the camera around a central point in your photo while taking the photo. This technique can be used for kinetic light painting when even longer exposures are needed. It can be tricky to achieve because it is a difficult technique to do handheld, and most tripods won’t allow you to rotate around a central point in the way this technique needs. It’s also best to use a wide-angle lens when taking this variety of photo.

Zoom is a good way of giving a photo a more dynamic feel.

Zoom

A zoom burst is another popular way to use creative shutter speed. It is possible with any lens that allows you to change the focal length. So, a kit lens works very well for this technique. With the zoom burst it’s possible to take the photo handheld, but using a tripod gives you better results. While you’re moving the lens and not the camera body, any tripod helps with this type of photo. The aim is to produce motion by zooming into your primary subject matter during an exposure roughly 1/25th in length. Not all locations work well for this photo. For example, a location with lots of sky may not produce much blur. On the other hand, a tunnel with differing levels of light, such as a line of overhanging trees, works great.

Camera rotation can produce interesting effects.

Creative shutter speed for long exposures

At the extreme end of creative shutter speed usage is the long exposure. Here you’re looking at exposure times in excess of one second. There is an awful lot of creativity to be had in this area, so let’s look at what you can do.

Light painting

Light painting is a lot of fun, and among the most creative techniques you can use in photography. There are essentially two ways you can create light paintings. The first is where the light source is turned away from the camera, and you use it to light up an object within the frame. To do this use the light source like a brush, and shine it only on the area’s you wish to light up. The alternative to this is pointing the light source towards the camera. Light painting can be as low tech as using your torch. However, more ambitious forms of light painting include the use of wire wool, or LED light sticks. Light painting photos typically begin at two-second exposures, and if you use bulb mode they can last into the minutes.

You can use light painting to add more interest to a scene.

Kinetic light painting

The difference between kinetic light painting and light painting is that you move the camera, whereas, with light painting, you move the light source. Of course, it’s possible to use random movements of the camera for this. However, the best way is for more controlled movement, and that means camera rotation and zoom.

  • Camera rotation – Very similar to the above technique, but this uses longer exposure times. You’ll need a tripod this time. The technique involves rotating the camera in a nice smooth motion while attached to the tripod.
  • Camera zoom – Once again, following on from handheld zooming, are longer zooms at night taken using a tripod. To learn more about the experimental potential of zoom you can read this article.

This is an example of kinetic light painting. The camera was rotated around the tripod head.

Landscape long exposure

Using long exposure in landscape photography gives you a great way of interpreting a scene in a different way. This is most easily achieved at night, but daytime long exposure is also possible.

  • Neutral density filter – The use of a neutral density filter allows you to take daytime long exposures. This has the potential to transform your scene with moving clouds, and silky water. You will need a strong filter, so an ND110 or ND1000 is needed.
  • Blue hour – As most landscape photographers will know, this is one of the best times to photograph. You’ll be using long exposure because the light levels dictate that. That long exposure allows you to experiment with traffic light trail photography.
  • Astro-photography – Finally, and at the extreme end of long exposure photography, is astro-photography. Those wishing to photograph the Milky Way will need to use exposure times of around 20-30 seconds depending on the equipment you’re using. Another popular technique is to photograph star trails. This can be a sequence of 30-second exposures stacked together. The alternative is to use bulb mode, and exposure for at least 10 minutes!

Long exposure on days with fast-moving cloud creates dramatic skies.

It’s time to hit your shutter!

There are lots of ways to use creative shutter speed. Have you tried any of the above techniques? Are there any techniques you use that are different? As always, we want to hear your opinions. Likewise, we’d love to see any photos you have that showcase the creative use of shutter speed. So go out and try using shutter speed in different ways, and then share your experiences with us in the comments section.

The post How to Make the Most of Creative Shutter Speed in Photography appeared first on Digital Photography School. It was authored by Simon Bond.


Digital Photography School

 
Comments Off on How to Make the Most of Creative Shutter Speed in Photography

Posted in Photography