RSS
 

Archive for the ‘Photography’ Category

How to Develop a Photography Workflow that Preserves Your Images

28 Apr

The post How to Develop a Photography Workflow that Preserves Your Images appeared first on Digital Photography School. It was authored by Karthika Gupta.

“I love spending time in front of a computer working on my images – sorting them, cataloging them and editing them,” said no photographer ever!

Well, maybe a few of us like to be sitting in front of our desk pouring over image after image, shoot after shoot. But let’s face it, as photographers, we would much rather get out there and photograph in the field than be chained to our desk and computers indoors.

How to setup a workflow to protect your images Karthika Gupta

This is where having a good solid workflow that can help you ease the post-shoot process is very important. Workflows are not just for the editing portion of your life as a photographer. In fact, a workflow is something that can help you before, during and even after your photo shoot.

Whether you are a busy professional photographer or an active hobbyist, having a good solid workflow and method of organizing images is crucial.

Having a workflow is even beneficial if you just photograph on your smartphone.

We have all been in situations where your phone runs out of space because you have images from three years ago that you have done nothing with. Sorting through three years worth of data to find images to delete under pressure of missing a key moment is no joke!

I wear many different photography hats as a wedding, lifestyle and travel photographer. So my workflow is slightly different based on the type of session I am photographing. But for the most part, I follow the same series of steps.

Here is my process. Hopefully, you may be able to replicate some or all of these steps to create a process that works for you in your photography.

1. Choice of Gear

Camera

My camera of choice is a Canon 5D MKIII. At this point, I only have one digital camera. I used to have a Canon 5D MKII as my backup, but ever since I starting working with a second shooter for my weddings, I didn’t find the need for my Canon 5D MK II. So I sold it.

For commercial shoots or bigger gigs that require multiple cameras and lenses, I just rent what I need. I am lucky in that I have a big camera store close to home that has all the gear I could need. They even have a studio that I can rent out should I need more space.

Batteries and Cards

I purchased two extra batteries when I was a full-time wedding photographer, and because I sold my backup gear, I am now left with extra camera batteries for my primary camera.

This works really well because I carry all my batteries with me when I am traveling or going to a multi-day event. That way I don’t have to worry about finding a plug point or charging my camera battery in the field.

This was a lifesaver earlier in the year when I traveled to Portugal and lost my power converter/adaptor. Try figuring out how to say power adaptor in a part of the world where you don’t speak the language! I drained out my batteries to the very last percent of battery juice during that trip!

Side tip: try shaking the battery to squeeze out every last bit of battery juice if you are running out of battery life. I’m not joking. I have tried this successfully many times in Portugal to get that last shot before the battery died!

I have 5 x 32GB CF cards, 3 x 16GB CF cards and a handful of 8 GB CF cards. For the most part, all these cards travel with me for a multi-day shoot or a personal travel trip that is several days long.

Part of my pre-shoot workflow includes downloading all my cards, charging my batteries and packing my bag with everything I need the night before.
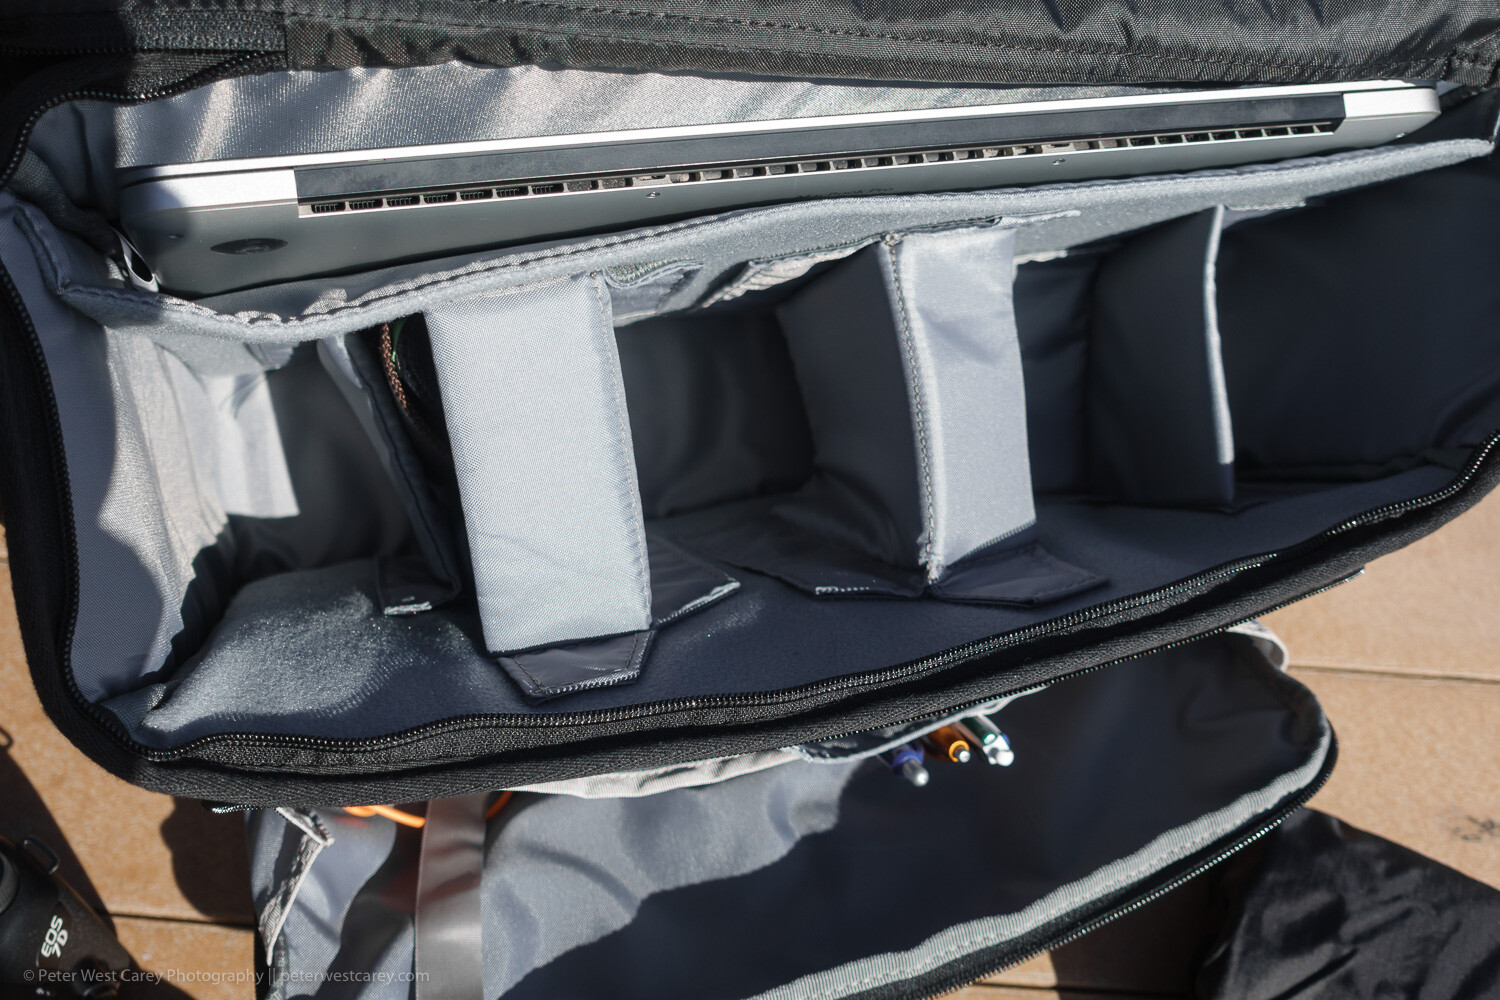
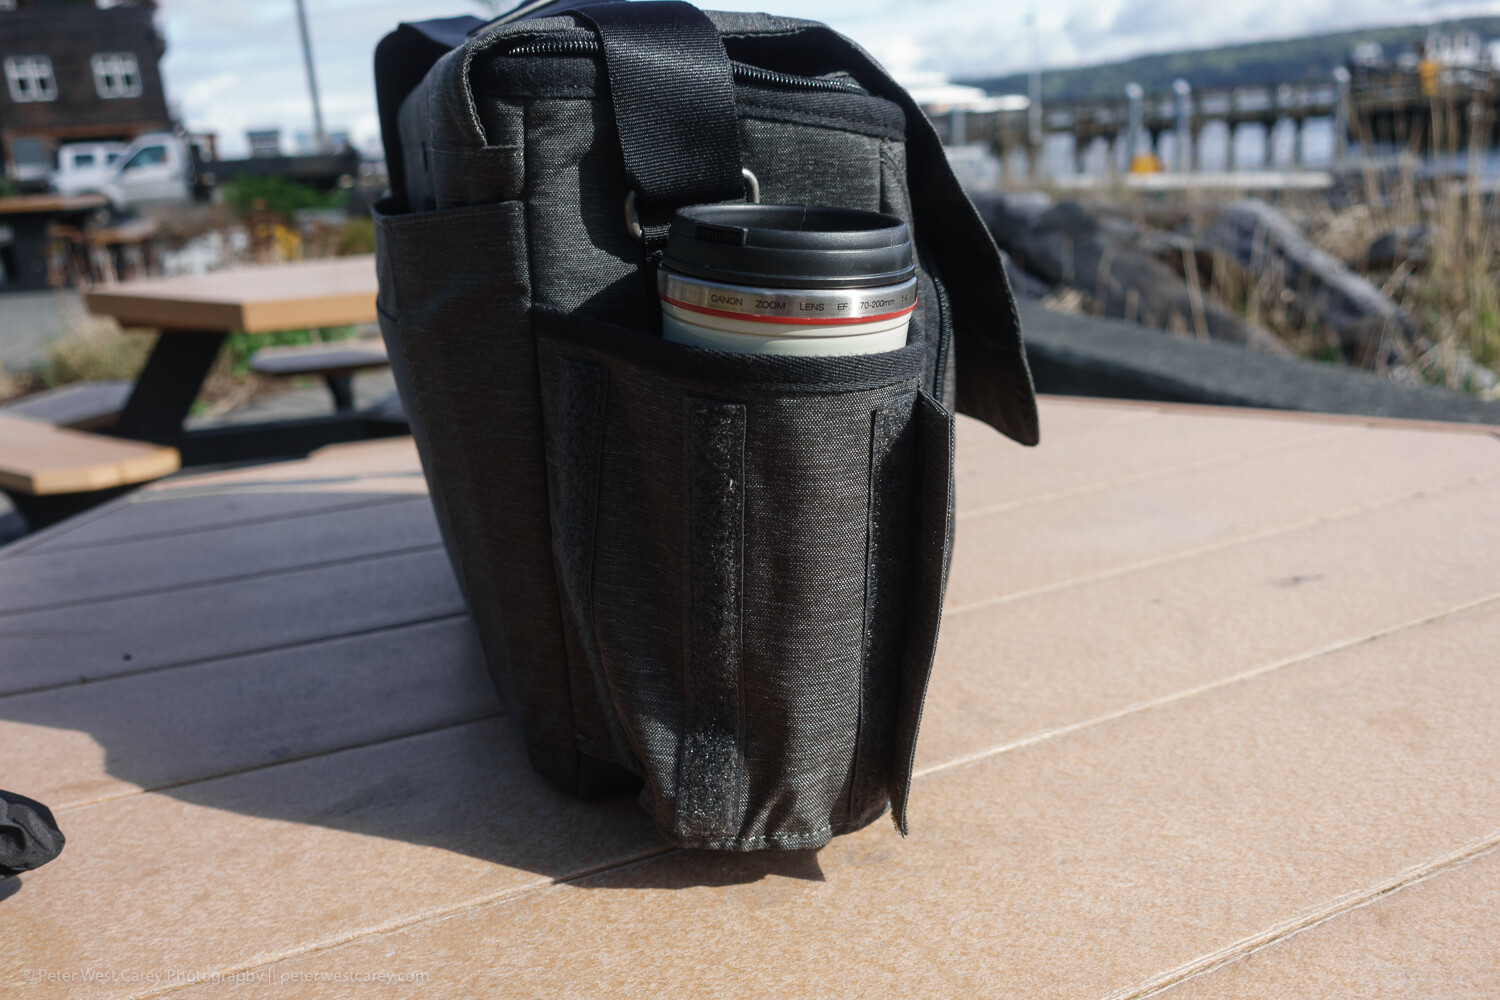
Camera bag

My camera bag is a backpack that I used not just my photography but also for excursions and trips around town. I ditched the proverbial camera bag many years ago when I started traveling with my family of young kids. Carrying a camera bag, diaper bag, and a purse was just not practical. Also, once I got used to carrying a day pack that held all my treasures, it just seems second nature to me to pick that bag up no matter what the occasion.

Since I have just one camera/day pack, part of my workflow is to make sure the bag is empty and ready for the next adventure as soon as I come back home from a shoot/trip or even just going around town.

Luckily, it has enough pockets to store batteries, CF cards and other things like filters, and flashes.

How to setup a workflow to protect your images Karthika Gupta

At a recent class I taught, I loved seeing the diversity in terms of camera bags that everyone was using!

2. During the shoot

There is nothing quite like learning the importance of having a workflow than losing data or content in the absence of one. I learned the hard way when I lost all my images from a shoot on a card that failed. Luckily it was for a family shoot that I could reschedule.

So from that point onwards, I change my camera data card with each logical break in the event I am photographing.

For example, if I am photographing a wedding, I have the getting ready activities on one card, the ceremony on another card and the reception on a third card.

Even though the cards are not full, this gives me the security of losing only a part of the day should anything go wrong.

Of course, my backup for weddings is my second photographer who does the same thing.

For non-wedding related client work, I use a backup SD card in my camera. The Canon 5D MkIII has a dual card slot, so I take full advantage of the technology at my fingertips. If I am on a personal assignment, I change out my cards every night and download the photos onto an external drive.

Another thing that is important to note is how you store used and unused data cards. Figure out a system that works for you in how you separate the two. For me, used CF cards from a photoshoot are placed in a separate pouch from unused CF cards. I place those in another pouch in my camera bag.

In terms of the actual shoot, try and come up with a game plan for what you are photographing. As a wedding photographer, one of the key things I make sure to discuss with my wedding couples is a shot list. A shot list is a list of all the key moments and images that the couple absolutely wants to have taken. Typically these are around photos with family members.

With client and commercial shoots, the clients typically have a list of images they want to get from you. Use this concept of a shot list to list down all the ‘must have’ images you want to get out of a photographic excursion.

Shot lists save you effort, and they help you become more efficient with your time in the field.

How to setup a workflow to protect your images Karthika Gupta 2

Wedding photography can be quite stressful. There isn’t really a do-over option if you mess up. Having a workflow is critical and life-saving for a wedding photographer.

3. After the shoot

When I am back home from a wedding or a lifestyle shoot, the first thing I do is pack away my gear. I separate my camera body from my lenses and pack them away separately. All batteries are removed, including those from my flash. I have heard horror stories where batteries, especially AAAs, have leaked into the flash socket, so I don’t want to have to deal with that mess! Plus I use rechargeable batteries for all my flashes and external lights. Once they are out, I put them back in the case ready to be recharged for the next photography gig.

If I am at a multi-day shoot, all batteries are plugged into the charger slots right away.

These are the steps I take with my images:

  1. I download all the images from my CF cards onto TWO external hard drives, that act as a storage for my RAW images. 
  2. Once the RAW images are successfully transferred to my external hard drive, I go through and spot check the images and the total image count to make sure all the images are moved over.
  3. Images are moved over based on the shoot, location or event. For example a wedding will be downloaded as follows on the primary storage drive:

20190101_ClientNameWedding_GettingReady

20100101_FamilyName_LifestyleShoot

20100101_Personal_VacationLocation_Day01

  1. The secondary drive is less formal and has images just based on the event. For example:

2019

WeddingClientCard01

WeddingClientCard02

FamilyLifestyelShoot

Personal_TripCard01

Personal_TripCard02

  1. I then format the cards in camera. This is done on the camera rather than the computer. The reason for this is because I have found that sometimes all the images are not cleaned out and the card still retains some data that occupies unnecessary space.
How to setup a workflow to protect your images Karthika Gupta

Treating every client shoot like it was a wedding really helped me nail down a process and workflow that works for me. Now it is second nature and something I don’t even have to think about.

4. After the shoot (remote)

When I am traveling for work or pleasure, I carry one WD My Passport Ultra external hard drive and all my camera data cards. Earlier in my career, I would carry two external hard drives and create primary and secondary backups in the field. Now I have found that I don’t photograph as much because I am more thoughtful about what I photograph.

So now I just carry all my cards, and one external hard drive to back them up in the field. I avoid taking an external hard drive when I am just traveling for pleasure or personal work to reduce my load.

When I get home, the RAW files from the CF cards used during the trip are copied over to both external hard drives (primary and secondary) that house all my raw images. They are deleted from the WD Ultra so that it is ready for my next trip.

Early in my photography career, there were times where I would travel with almost every lens I owned, a laptop, two external hard drives, and many camera cards to be safe. Perhaps it is age, or perhaps it is maturity (I like to think it is a little bit of both), but now I try to travel light and take only what is absolutely needed to get the job done.

If I need something along the way, I either borrow, rent or figure out creative solutions to make things work.

How to setup a workflow to protect your images Karthika Gupta

I would argue that personal photos are more important than professional ones – especially as the dedicated photographer of the family. I love documenting our journey for no-one but me!

5. Editing workflow

Eighty percent of my editing happens in Lightroom (LR). Photoshop is used sparingly if I have to make any advanced editing. I have invested in the Adobe Creative Cloud for LR and Photoshop. I’ve installed them on my iMac (my primary editing device), as well as my MacBook Pro (my travel companion).

My Lightroom catalog lives on an external HD. I understand some people have concerns over running a LR Catalog on an external HD, because of potential LR speed issues. So far, I have not experienced any issues with LR in terms of speed by having the catalog on an external HD. However, if you are concerned about speed, then your LR catalog can be put on your computer’s hard drive, and keep a backup on the external HD. A backup of my LR catalog lives on a cloud service that is updated every six weeks.

I used to use iPhoto on my iMac to store all my images and only upload selected images to Lightroom. I tried to use Bridge for a few years to select images that I want to import into Lightroom. Now I use Photos on my Mac to select images that I want to edit and upload them into Lightroom.

I know it is probably easier to just upload all images to Lightroom and sort them via the software to save an extra step. I have one Lightroom catalog that houses all my work since 2012, and so there are quite a few images in the catalog. I had found that when I used Lightroom to sort and select images, it takes forever to load.

My Lightroom catalog is sorted by year, and I use the following naming convention for my Lightroom. I am less worried about the naming convention in Lightroom than I am with my primary and second storage units. This is just my personal preference.

YYYYMMDD_ClientName_TypeoftheShoot.

After editing is complete, I export my client images onto the same WD Ultra external hard drive as my Lightroom catalog.

The client folders get arranged by the date of the session.

This time the naming standard is as follows:

CompanyName_ClientNameEvent_Date

All images have the same naming convention as the folder, along with an image sequence number.

Every few years I go through and delete edited galleries from the external hard drive. I don’t delete client RAW files – just the edited files. I have found myself going back to many client galleries and re-editing images as my style evolves and changes. There is no point in keep multiple copies of the same image.

I use a mix of presets and hand edits for my images. It took me many years to finally come up with a style and method of how I want my images to look. Ninety percent of my edits follow that same process. Every once in a while I drastically change my “look” to keep things fresh.

As a rule, I spend no more than a minute on each image. I would much rather be outside photographing than indoors editing.

How to setup a workflow to protect your images Karthika Gupta

How to setup a workflow to protect your images Karthika Gupta

Exact same image – two different looks. And I love them both.

6. Editing Remotely

I really avoid extensive editing of images in the field. I prefer to focus on documenting and photographing rather than same day edits. I would much rather take a quick snapshot on my iPhone and edit using phone apps for a quick social media preview than spend time and effort in editing in the field.

A couple of years ago, I traveled out of the country for three months over the summer. This was before Lightroom came up with their cloud version. Because I was gone for so long, I took my Lightroom catalog with me on an external drive and used that for 3 months.

Recently, I started using Lightroom Classic and Lightroom CC for my workflow. I primarily used them for working when traveling. When I know I need access to my files for a particular project or a particular job, I upload those files to my Lightroom CC and work on them while on the road. Once back home, I ‘sync’ Lightroom CC as a collection in my Lightroom Classic and have all those edits readily available.

7. Client workflow

I use an external portfolio service to host my images for client work. These client galleries are only online for three weeks, and then they are deleted. My wedding photography packages all include edited images on a personalized flash drive whereas my family portraiture clients have the option of purchasing digital images if they want them for future use.

Every few years I go through and update client galleries and delete old ones. Keep in mind these are just the edited files. My client RAW files are stored indefinitely in case a client comes back after a few years for the images. If you don’t want to delete client images, you can invest in an external cloud storage system.

How to setup a workflow to protect your images Karthika Gupta

In Conclusion

While it might seem like a lot, my workflow has simplified over time. Just as I limit the gear I own and use, I also try and limit the images I capture – for both client and personal work. Having 100 photos of a spectacular sunset no longer make sense to me. I also stick to my workflow because it saves time in the long run.

One of my favorite things to stock up on are external hard drives. Every so often they fail, and I have to replace them. As cloud storage gets more accessible and less expensive, I can see myself moving things over to the cloud and simplifying my process and workflow even more.

I encourage you to use this, or some variation of this workflow and tweak it to make it your own. If you do it consistently and often enough, it becomes second nature and saves you time so you can do what you enjoy doing – photographing.


The post How to Develop a Photography Workflow that Preserves Your Images appeared first on Digital Photography School. It was authored by Karthika Gupta.


Digital Photography School

 
Comments Off on How to Develop a Photography Workflow that Preserves Your Images

Posted in Photography


Your Photographic Legacy: Realizing Your Power as a Photo Maker

28 Apr

The post Your Photographic Legacy: Realizing Your Power as a Photo Maker appeared first on Digital Photography School. It was authored by Adam Welch.

I’ve struggled with how to approach the topic at hand and I remain unsure even as I type. How can I begin to talk about such far echoing ideas? I already know that you and I share a common thread: photography.

realizing-your-power-as-a-photographer-digital-photography-school-adam-welch-1-3

I’ll further assume that if you’re reading this, you are a person who makes photographs regularly. Perhaps that’s the perfect way to start; by knowing that you’re a camera person, just like me.

Being that we’re the same, I hope you understand the scope of what it means to “be a photographer” in an age when cameras are everywhere. Do you understand the power you hold in your hands? It’s the magnitude of this power that we will discuss.

With any luck, these simple truths about our craft will be nothing new. If anything, hopefully, these ideas will be a gentle reminder of the role you play in the photographic legacy.

On the other hand, if you have forgotten these facts or if you’ve never thought about them before, today is an especially important day for you.

Respect for the work…respect for yourself

It’s oddly paradoxical that photography can be so incredibly personal yet at the same time so impersonal. This is especially true of digital photography when often times the work we produce remains essentially intangible and often untouchable.

Where other creators physically intersect with their craft by either drawing, painting, sculpting or carving, we stand alone in a shared uniqueness. We use a machine to bring our expressions to life. We cannot touch what we capture with any sense of immediacy, and yet photography has become one of the most effective methods for bridging what we see with what we feel.

realizing-your-power-as-a-photographer-digital-photography-school-adam-welch-1-2

As photographers, we must grasp the sheer weirdness and complexity of what we do at a basic level. Our work is part science, part soul, part philosophy and as such should be respected for the beautiful oddball of the visual arts that it truly is.

Furthermore, you should have immense respect for yourself and your fellow practitioners of photography. Not through any sense of superiority but rather a feeling of camaraderie.

We compete on occasion, sure. We envy or criticize each other at times. With the internet being the internet, it’s quite easy to pick apart the work of others instead of building it up. We’re only human. Still, the fact remains that we will advance more by positive attitudes and tasteful critique than through thoughtless criticism and negativity.

I can assure you that we’re all in this madness together.

Photography is the servant of history

Imagine for a minute a couple of historic images in your mind. Ali standing over Frazier. That child running from a napalm strike in Vietnam. The aftermath at Kent State. A lone man staring down a tank in Beijing. Einstein sticking his tongue out for the camera.

All these moments, for better or worse, are solidified in history through photographs. Photography carries monumental weight for bringing awareness to the beauty and horrors present in the human condition.

Arguably, photography is the greatest asset for documenting history that the world has ever known.

realizing-your-power-as-a-photographer-digital-photography-school-adam-welch-1

Every photograph is made by a man or woman who was present at the exact moment these events took place. For better or worse, the presence of a camera has been the catalyst for social, political and environmental change for nearly two centuries.

Where would we be without the photographs which move us to action and change the way we think about the world?

Photographers can strike fire anywhere with a single photograph.

Possessing the ability to potentially impact the entire course of civilization by what we do should fill us with a measure of pride, wonderment and ultimately a sense of apprehension. Think about that the next time you go out with your camera.

You can make a difference through your photography at any time and in any place.

You represent every photographer

If you bear with me, I find it’s necessary to share a quick story about a woodworker friend of mine; a story, which as it turns out, became the reason for me penning this article.

A few weeks ago I witnessed a rather nasty situation play out on social media between my friend and another woodworker. Without injecting my own opinion, it was obvious that the attitude shown towards my friend was met with universal disapproval by most of the commenters.

I was fascinated (and comforted) by the fact that what seemed to trouble people the most was the blatant disrespect which was being exhibited by one craftsperson to another.

My mind immediately jumped to the manner we as photographers conduct ourselves, both on and offline, and how that conduct impacts the public perception of photographers.

realizing-your-power-as-a-photographer-digital-photography-school-adam-welch

As cameras become more and more available to the masses, it’s important to comprehend that we are all practitioners of an art form that dates back to the early 19th century. That’s quite the legacy. What I mean by this is that the way we interact with our subjects and our environment while we practice our craft can be just as important as the photographs we produce.

I have witnessed photographers moving “flying stones” at Racetrack Playa in Death Valley just so their shots couldn’t be replicated. On countless occasions, I’ve watched as cars back up behind a person who parked in the highway to make photos bears.

Perhaps most alarming of all, I have observed shockingly pretentious attitudes exhibited by professional photographers upon those deemed “beneath” their perceived level of skill.

realizing-your-power-as-a-photographer-digital-photography-school-adam-welch-2

Be courteous and respectful to others, especially fellow photographers. Always be willing to pass on what knowledge you have about the craft. Keep in mind that we are stewards of our art and tend its flame for many generations of photo makers to come.

Never fall victim to the kind of indifferent behavior that would belittle the legacy of photography.

Final thoughts….

So, what’s the endgame here?

The keyword is “realization.”

Realize that the role photography plays in the world cannot be overstated, and your part in that story is just as important.

The way we approach photography is very much a reflection of how we approach life and each share similar outcomes.

Be mindful that you always remember the impact of the photos you make and how far the manner by which you make those photos truly reaches. Photographs carry a unique duality which occupies a cloudy space among other art forms.

Our cameras have the power to make, record and even change history, but without you, a camera is just a camera.

Remember the power you have as a photographer and wield it accordingly.

The post Your Photographic Legacy: Realizing Your Power as a Photo Maker appeared first on Digital Photography School. It was authored by Adam Welch.


Digital Photography School

 
Comments Off on Your Photographic Legacy: Realizing Your Power as a Photo Maker

Posted in Photography


Weekly Photography Challenge – Dogs

27 Apr

The post Weekly Photography Challenge – Dogs appeared first on Digital Photography School. It was authored by Caz Nowaczyk.

This week’s photography challenge topic is DOGS!

Andreas Wagner

Go out and capture your little doggy friends doing those awesome things they do – like running, jumping, barking, eating your sofa, etc. They can be color, black and white, moody or bright. You get the picture! Have fun, and I look forward to seeing what you come up with!

Joe Caione


Check out some of the articles below that give you tips on this week’s challenge.

Tips for Shooting DOGS

How to Take Better Action Photos of Dogs

Five Tips for Creative Pet Photography

Why Taking Pictures of Your Pets Will Help Make You a Better Photographer

6 Tips for Working with Unruly Animals in Pet Photography

5 Adorable Pet Photos [and How to Make your Shots even Cuter]

4 of the Best Lenses for Creative Dog Photography


Weekly Photography Challenge – DOGS

Simply upload your shot into the comment field (look for the little camera icon in the Disqus comments section) and they’ll get embedded for us all to see or if you’d prefer, upload them to your favorite photo-sharing site and leave the link to them. Show me your best images in this week’s challenge.

Share in the dPS Facebook Group

You can also share your images in the dPS Facebook group as the challenge is posted there each week as well.

If you tag your photos on Flickr, Instagram, Twitter or other sites – tag them as #DPSdogs to help others find them. Linking back to this page might also help others know what you’re doing so that they can share in the fun.

The post Weekly Photography Challenge – Dogs appeared first on Digital Photography School. It was authored by Caz Nowaczyk.


Digital Photography School

 
Comments Off on Weekly Photography Challenge – Dogs

Posted in Photography


How to Make Well Exposed Photos Every Time – Part Three – Post-Processing for Exposure Optimization

26 Apr

The post How to Make Well Exposed Photos Every Time – Part Three – Post-Processing for Exposure Optimization appeared first on Digital Photography School. It was authored by Kevin Landwer-Johan.

Digital photography allows us an incredible scope to work on our computers to enhance and manipulate images. Optimizing your exposures during post-processing can make a dull, flat-looking photograph into a much more vibrant and interesting one.

How to Make Well Exposed Photos Every TimeMarket Guy

© Kevin Landwer-Johan

My approach to post-processing most of the time is to make my photos look as they did when I captured them or with some variation to the background tone. Because our eyes see more dynamic range than our cameras, this means I am working to balance my exposure and the way the light looks in the photo.

RAW or Jpg?

If your photos are saved only as jpg’s, your camera will have made certain tweaks to them already. It may have added some sharpening, color balance, contrast tweaks and possibly manipulated them in other ways. Jpg images as designed to look good straight out of your camera and may require little or no post-processing.

If you do decide to work on your jpg files, you will face limitations because of the file quality. As your camera saves jpg files, it compresses them and discards some of the information from the photos. Jpgs are technically lower quality which means they do not stand up to as much post-processing as RAW files do.

RAW files contain all the information your camera captured when you pressed the shutter release. They do not look great when you first see them because the camera has not altered them at all during the capturing and saving process.

To make a RAW file look good you must make some adjustments manually or use a preset or Action to make them for you. The technical quality of a RAW file is superior because there is no data lost from what your camera recorded. You have a greater capacity to be able to manipulate these files without losing quality.

How to Make Well Exposed Photos Every Time Temple and Big Sky

© Kevin Landwer-Johan

Choose your best photos

From each series of photographs you make I hope that you will have a number of exposure options to choose from when you sit down at your computer. Picking the best images to work on is the first part of post-processing.

Naturally, you’ll be wanting to pay most attention to the main subject in your photo. Is it exposed the way you want it to be? Can you see that there’s sufficient detail in those areas of your composition?

In some cases, such as when you’ve made a silhouette or are using low-key lighting and high contrast, you may have little or no detail in your subject. This is okay if that’s what you want.

However, if exposing for detail was your intention, and there’s not enough in your photo, look at the pictures where you used different exposure settings.

Your background exposure is also important. Does it enhance and support your main subject? Is it too bright or too dark? Again, look to see if there is detail. When there’s no detail, because of overexposure or underexposure, it will be more difficult to manipulate these areas.

How to Make Well Exposed Photos Every Time Attractive Young Photographer

© Kevin Landwer-Johan

Make use of the histogram

Your histogram gives you information about the tonal values in your images. It shows you where the most detail is and if you have lost detail in the bright or dark parts of your compositions.

If your histogram is bunched up to the left or the right of the chart, with the graphic touching the top, this means there will be no detail recorded in those areas.

If you can see a histogram bunched to the right and hitting the top, you will have lost detail in the highlights. If it’s bunched to the left and hitting the top, you have lost detail in the dark areas.

If your main subject is within this range and you wanted it to contain detail, you will need to choose a photo with a different exposure setting to work on.

How to Make Well Exposed Photos Every Time Hill Tribe Girl

© Kevin Landwer-Johan

Using presets or manual manipulation

Lightroom and Photoshop come with presets and Actions. These can be used to help balance your exposure. You can also download many more or make and save your own. These tools can enhance and speed up your post-processing workflow.

I often chose one of a variety of presets as I begin to post process a photograph. Rarely do I apply a preset without then tweaking it further. Every exposure you make is different, so to get your photos looking their best some manual manipulation is usually best.

Working your highlights and shadows

Having been careful to expose your main subject well, you may already be happy with its tone value. However, some parts of your composition may still need tweaking to get them looking the way you want.

How to Make Well Exposed Photos Every Time Happy Hat Wearer

© Kevin Landwer-Johan

Your intention is the most important. How do you want your photograph to look?

Here are two examples of different manipulations made to the same RAW file.

Example one: Dark background

I wanted to make the background darker so the roses would stand out. Using a preset I made in Lightroom, I then made further manual adjustments. I controlled the Blacks, Dehaze, Contrast, and Shadows sliders.

When making this kind of adjustment to manipulate the background of your image, pay attention to your main subject also. These sliders make universal changes to your photos so affect your main subject as well.

With a light-toned main subject and a predominantly dark background, the changes I made did not have much effect on the roses.

How to Make Well Exposed Photos Every Time Lightroom Dark

I then opened the photo, with the Lightroom adjustments, in Photoshop. At this stage, I darkened the lightest part of the photo to lower the overall tone range.

There are many techniques you can darken or lighten specific areas of a photo. I prefer to use the Dodge and Burn tools set to a low exposure to do this. I also used the Patch tool to remove a few of the brighter areas in the background.

As a result, the background is darker, and the highlights on the rose are not so bright.

How to Make Well Exposed Photos Every Time

Example Two: Light Background

To render a lighter, softer look, I took the Dehaze slider towards the left, and the Shadows towards the right. I added a little more Black and some Contrast, otherwise the image looked too flat.

Next, using Photoshop, I tweaked the highlights a little so they were not so bright.

How to Make Well Exposed Photos Every Time Roses

In both of these examples, my main objective was to enhance the roses because they are my main subject.

The background tone is also important. Between the two examples, there is the most difference in the tone of the background. This has a large impact on the overall feel of the photo.

Conclusion

As with all post-processing, there are a variety of methods you can use to gain similar results. Here I have demonstrated a few techniques I am comfortable using.

Concentrating primarily on the tone of your main subject in relation to the background is a good place to start when post-processing. Once you have made adjustments you are satisfied with, you can then move on and make other changes to your photos if you wish.

Aim to expose your main subject the way you want at the time of making your photos. Doing so allows you more flexibility to make changes in post-production and not lose quality. If you are stuck working with a main subject that’s either underexposed or overexposed, you will be limited in how much you can achieve.

Experimentation is the best way to discover how you like to work with photo manipulation software. There is no right or wrong way to work with your photos so long as you achieve the result you want.

You may also like

  • How to Make Well Exposed Photos Every Time. Part 1 – Seeing the Light
  • How to Make Well Exposed Photos Every Time. Part Two: Managing Your Exposure


The post How to Make Well Exposed Photos Every Time – Part Three – Post-Processing for Exposure Optimization appeared first on Digital Photography School. It was authored by Kevin Landwer-Johan.


Digital Photography School

 
Comments Off on How to Make Well Exposed Photos Every Time – Part Three – Post-Processing for Exposure Optimization

Posted in Photography


Makeup Essentials for Photographers Part I – The Tools

25 Apr

The post Makeup Essentials for Photographers Part I – The Tools appeared first on Digital Photography School. It was authored by Mark C Hughes.

Makeup! Before I took photographs (and as a guy), I rarely used or had to use makeup, so I had very limited personal experience with it. That being said, I have taken portrait photographs of beautiful women that have been professionally made up, and I can honestly say it really makes a difference through the lens of a camera.

The best makeup is always barely noticeable – you only focus on the subject. It is truly a skill to do makeup well. Getting a good makeup artist to help with your portraits will always make the images better. However, in many cases, a makeup artist is not available, so the next best thing is to do it yourself to help deal with specific issues and get better results.

Made up Model

Best results

For the best portrait shooting results, you want subjects that are well rested and healthy. You also want interesting locations, great lighting, and skill behind the camera.

Although the last three are things you have control over, you generally have limited control over your subjects.

Other than suggesting your subjects be well hydrated and rested, there is little you can do to change your given subjects. Makeup can help improve the overall appearance of your subject by balancing skin tones, correcting most skin imperfections and even change the perceived shape of a subject’s face.

Well-applied makeup will also boost the effects of good lighting and minimize retouching.

Same model different makeup

Nothing new

Fashion and glamour photographers have long known the benefits of makeup and often employ a makeup artist on their sets. Most portrait photographers don’t have the budget or benefit of a makeup artist on location particularly if you are only doing one or two portraits.

Usually, the portrait photographer is working with the makeup that the subject shows up with (or lack thereof).

Any corrections are often done in post-production to deal with shine, blotchy skin, and uneven skin tones.

However, with a few makeup items supplied and a bit of practice, any photographer can develop enough skill to apply basic makeup and improve a portrait straight out of the camera (SOOC).

All subjects benefit from a little makeup (female, male and other), as long as they are human.

Even males benefit from a little makeup

Basic requirements

Let’s consider the basics of a useful makeup kit, simple application techniques, and hygiene requirements.  Makeup artists will spend lots of money on equipping their kits, but you only need a few items to apply simple makeup before a portrait session.

There are, however, two important things you need to consider before putting together your own makeup kit.

Makeup will make many women feel special

First, poor quality products generate poor results. You don’t need to purchase the very best products but getting cosmetics from a reputable makeup store, a cosmetics counter at a department store or a pharmacy with a larger cosmetics section will produce better results. You can purchase online, but it is best if you know what you are getting.

As a male photographer purchasing cosmetics, be prepared for comments from some stores about getting stuff for your wife or girlfriend mostly because men buying makeup is less common.

Men will often be unaccustomed with makeup

Secondly, people are becoming more considerate of products that have fewer animal byproducts and are free of animal testing. Most people do not want weird stuff on their faces, and you will want to be respectful of people’s wishes.

Brushes and applicators

Ideally, you should have three brushes – a face brush, blush or powder brush, and a concealer brush. Brushes need to be soft durable and able to be easily cleaned. Generally, it is a good practice to purchase good quality synthetic brushes. Always ensure that the larger brushes are very soft and pliable.

Brushes and Applicators

The face brush is the largest and fluffiest of all the makeup brushes. They are often about 2 inches wide with bristles curves into a rounded shape.  The blush or powder brush is a medium-sized soft brush that is about 1 inch wide with curved edges. The third brush is a concealer or lip brush which is small, about 0.25 to 0.5 inches wide with tapered ends.

In addition to brushes, wedge-shaped disposable sponges are handy for all sorts of things. Cotton swabs are indispensable but buy a brand name because inexpensive bands tend to cause more of a mess than they clean up. Disposable hand towels (thicker than paper towels) are useful for cleaning up. Finally, blotting film or facial blotting paper is the last disposable item you need for a brush/applicator.

The cosmetics

Although there is a lot of makeup out there, this kit is not intended to replace a makeup artist, it is just to help you, so you can get away with a surprisingly small collection of cosmetics to pull it together. There may be additional things but start with the basics.

Cosmetics

Translucent loose-setting powder will have a very light skin tone color in the jar but applies neutrally on almost all skin tones. These powders are often mineral based.

Concealer is an inexpensive staple for any makeup kit. You can get smaller collections, but often you can get a wheel or concealer palette that has multiple colors to adjust for skin tones.

Blush or bronzer is used to give the cheeks a little color and make you look a little suntanned as well.

Rice powder is a very fine, light, loose white or very pale powder use for absorbing excess oils and highlighting features. It should almost be invisible and is not expensive.

Lip gloss can be super simple and does not need to be a bold color. Just a simple stick of clear lip gloss or slightly tinted balms will do the job.

Great results straight out of the camera

Cleaning and sanitizing products

For non-makeup people, the importance of cleaning up hands, brushes, and cosmetics cannot be understated. You really need to keep everything clean, particularly if you intend to use the makeup for more than one person (but even then you need to clean up your brushes).

Key staples are hand sanitizer, a brush cleaner (baby shampoo will do), and a cosmetic sanitizer. Use unscented hand sanitizer to keep your hands clean before and after every makeup application.

The brush cleaner is essential to keep the brushes functional. Finally, the cosmetic sanitizer gets applied to the cosmetics after use. Isopropyl alcohol in a spray bottle works but tends to discolor the makeup with repeated use. It is best to get a proper sanitizing mister made especially for cosmetic products.

Makeup as an art

Applying makeup takes skill. To become skilled, you need to practice. Before you start applying makeup to a paying subject, you need to practice on someone who doesn’t mind you practicing on them. There is a reason why makeup artists are paid well for their work. It is hard, and they make it look easy.

Couples will enjoy it too

Conclusion of Part I

With all this equipment you are ready to help your clients look better for their portraits. In part 2, we cover the techniques and basic skills to apply makeup to your clients. The intent is not to make you a makeup artist, but to help smooth features and improve the look of your portraits straight out of the camera. That way, you don’t have to spend a lot of time post-processing your images.

It doesn’t replace a true makeup artist’s work


The post Makeup Essentials for Photographers Part I – The Tools appeared first on Digital Photography School. It was authored by Mark C Hughes.


Digital Photography School

 
Comments Off on Makeup Essentials for Photographers Part I – The Tools

Posted in Photography


How Using Movies Can Inspire Your Photography

25 Apr

The post How Using Movies Can Inspire Your Photography appeared first on Digital Photography School. It was authored by Glenn Harper.

One of the best ways to “improve” at photography is to look at a lot of pictures. Ask yourself why some photos work and others don’t. This is easy to do with the endless photo books and magazines available. You can also learn a lot from the world of cinema. Use movies to inspire your photography!

bleach bypass filter effect

The bleach bypass effect originated from movies.

Many of the tricks and techniques used in movies are transferable to stills photography. It might be the lighting, the color contrast, the depth of field or the camera angle that gets your attention. Watch your favorite movies and see what you can learn, but also consider watching films you wouldn’t normally watch. Note the names of directors and observe their style.

Lighting

Lighting is obviously an important part of cinematography, but it’s not always discussed in the same terms that photographers are used to. For instance, there is “motivated” and “unmotivated” lighting. The former uses a light source within the frame, whereas the source of unmotivated lighting is unknown to the viewer.

Photographers often leave artificial light sources out of frame. So not doing so and improvising with various lights (e.g., headlamps) makes your pictures instantly more movie-like.

A classic movie lighting technique is three-point lighting. By lighting the subject from the front, back, and side, cinematographers create modeling and separate their subjects from the background. The strongest light is the key light, while the other light sources are fill lights.

Stills photographers are familiar with the hardness and softness of light. Soft light generally comes from a large light source and hard light from a small one. Soft light is often more desirable, but the harsh shadows caused by hard lighting are useful in horror or film noir-style movies.

Inspiring your photography with movies - film noir

A small light source (e.g. table lamp) placed near the subject creates big, bold shadows – film noir-style.

Film Noir

Popular during the 1940s and 50s, and still a reference for today’s movie-makers, film noir uses low-key lighting and often a small light source to create long or bold shadows. You’ll see other tricks, too, like low camera angles to emphasize power in lead actors and instill fear in the viewer. Modern interpretations of film noir are “neo-noir” movies.

Inspiring your photography with movies - film noir

Almost film noir with the banister shadow cast onto the wall via an artificial light.

Color

Cinematographers, like photographers, use various tricks to separate elements in the frame. One way to do this is by using complementary colors to create color contrast. A common example is the orange and teal grading seen in many movie and TV scenes.

orange and teal grading, movie effects, toning

Orange and teal grading, which can be achieved in numerous ways with varying degrees of subtlety. This is still very common in movies and on TV.

Orange and teal are opposite each other on a color wheel, like all complementary colors. These hues are useful for emphasizing skin tones against a dark background, but they also work well in beach scenes, sunsets and sometimes street views.

Color Contrast in Photoshop CC

The latest version of Photoshop CC includes the Adobe Color Themes extension, which can be used to find perfect complementary colors and paint them into photos. This technique works best in unfussy pictures, where you may want to create eye-catching color contrast between two main elements. You might paint a wall green, for instance, to complement a red subject in the foreground.

Inspiring your photography with movies - Adobe Color Themes extension

The Adobe Color Themes extension showing the complementary color for this Harley Davidson paintwork.

You can also create these color contrast effects at the raw stage using split toning or calibration sliders in Lightroom or ACR. The channels sliders in Photoshop are another possibility, as are gradient maps. Try creating a gradient map by dialing in your own choice of complementary colors!

Camera Angles

Even as beginners, photographers soon realize that camera angles are important. In tall buildings, a sloping camera angle emphasizes height and has a disorienting effect on the viewer. Look at stills from Spiderman movies to see this! Buildings are very often diagonal in the frame. Or there’ll be several converging buildings to create a dizzying effect.

The Dutch angle (or Dutch tilt)

In movie terms, slanting the camera to create a diagonal perspective is called a “Dutch tilt”. You’d use it for the reasons described above, although not only with buildings. It wrong-foots the viewer and creates a feeling of tension, uneasiness or instability. Sometimes it conveys a psychological malaise in the subject. The Dutch tilt is a feature of film noir movies, too, as another means of unsettling viewers.

Inspiring your photography with movies - the Dutch tilt, the Dutch angle

The Dutch tilt.

Soft focus effect

In old movies, and not-so-old TV series, leading ladies were often shrouded with a soft-focus effect. Then we’d cut to the rugged leading man in sharp relief. Aside from its romantic quality, this effect has a smoothing effect that conceals skin blemishes and flatters the subject. The idea of routinely beautifying women for “the silver screen” is a little controversial today, but use of soft focus isn’t limited to portraits.

soft focus photo effect - Gaussian blur

Marcel Proust can be my soft-focus model. Note how his bronze skin is smoother in the upper part of the photo. This is a simple Gaussian blur edit.

A subtle soft-focus effect can work quite well with scenery and it’s a useful way of remedying over-sharpening in web photos. Ideally, that shouldn’t happen, but sometimes resizing introduces a slight crunchiness in pictures (as does sharpening without your glasses on).

One easy Photoshop method for a soft-focus effect is to create a duplicate layer, apply Gaussian blur to that layer with a value of about 10 and then reduce opacity. For a dreamy look, you can use an opacity of about 30-50%, but a much lower value will take the edge off sharpening in a web image.

Evoke a film genre

Even if you’re not directly copying a movie technique, you can still try to capture the feel of a movie genre. For instance, a war movie might have somber colors and a grainy look, while you could use a strong vignette and cool or dark tones to suggest a horror movie. Vignettes force the viewer’s eye along a specific path, so they can evoke a nightmarish loss of control if the subject matter lends itself to that treatment.

horror movies, macabre photos

Heavy vignetting and a somber tone get somewhere near a horror movie feel.

Choosing lenses

Cinematographers choose lenses for similar reasons to stills photographers: image quality, lens speed, practicality. They might use a fast telephoto zoom in less controllable situations (e.g. documentary shooting), but often they use prime lenses.

You can buy into the cinematic look with what used to be called a standard lens – the 50mm prime. These are relatively cheap, though the faster, more expensive models (e.g. f/1.4) sometimes have more pleasing bokeh. And you can close them down a stop or two for sharper results than cheaper lenses at the same aperture. Still, the affordable 50mm f/1.8 is always a great buy. It’s also less prone to focusing problems than ultra-fast lenses.

Shame the modern cars ruin the vintage feel of this photo. I took it with a Sigma 50mm f/1.4 lens, which was well known for its creamy background “bokeh”. Any 50mm lens is useful.

Other prime lenses to consider include a wide-angle 28 or 35mm (or equivalent) and a fast “portrait” lens of between 80 and 105mm. The ability to use a wide aperture gives you more creative choice and helps isolate subjects, though clearly this is not always a cinematic aim.

Studying movies

You can learn a lot about photography just by closely studying movies. If you watch DVDs or Blu-ray discs, you might have the director’s commentary as an extra feature. This gives fascinating insight into the reasons scenes are shot the way they are. A director has the last say in framing and how a movie looks, although the cinematographer also has creative input (e.g. in lighting a scene).

10 Well-Shot Movies

Here are 10 movies from many that I admire for their photography:

  • Casablanca (1942)
  • Lawrence of Arabia (1962)
  • Chinatown (1974)
  • Apocalypse Now (1979)
  • The Shining (1980)
  • Amélie (2001)
  • Children of Men (2006)
  • No Country for Old Men (2007)
  • The Tree of Life (2011)
  • Mr. Turner (2014)

A more extensive list is here. It helps if the subject matter appeals to you, but dedication can overcome this.

Inspiring your photography with movies - DVDs

An unforgettable movie still and a brilliantly shot horror film: The Shining. I don’t tend to watch horror films, but I’ve seen this many times.

Closing shot

The aim of this article is just to get you thinking about movies and how you can use them to inspire your own photography. Look at the style of different directors, the way they frame pictures and the colors they use. Look for their patterns across several movies. Check out the lighting.

I was taking photos for years before I made a connection between stills photography and movies. I spent my formative years gazing at photo magazines without often reading the accompanying text. Since then, movies and their media have evolved. They’re more accessible.

Everything in life may influence our photography on some tangential level, but if you make a conscious effort to understand and repeat cinematic techniques, those that you admire will ingrain themselves in your pictures.

Has your photography been influenced by movies? Feel free to share some of your shots in the comments below.

The post How Using Movies Can Inspire Your Photography appeared first on Digital Photography School. It was authored by Glenn Harper.


Digital Photography School

 
Comments Off on How Using Movies Can Inspire Your Photography

Posted in Photography


Creating Spectacular Photo Displays with Digital Projectors

24 Apr

If you are reading this, it is likely that you take copious amounts of photographs. A few years ago, families would gather around their Kodak carousel slide projector and look at 35 mm slides of family vacations. There was something that was almost magical about seeing images on the big screen in living color. Really, back then, a homemade slideshow Continue Reading

The post Creating Spectacular Photo Displays with Digital Projectors appeared first on Photodoto.


Photodoto

 
Comments Off on Creating Spectacular Photo Displays with Digital Projectors

Posted in Photography


5 Tips for Shooting Fine Art Photography

24 Apr

The post 5 Tips for Shooting Fine Art Photography appeared first on Digital Photography School. It was authored by Jeremy Flint.

Fine-art photography is a term given to describe ‘photography created according to the vision of the artist as a photographer.’

In this context, photography is utilized as a way of bringing to life an image that only exists in the artist’s mind.

Rickshaw rider, Kathmandu, Nepal © Jeremy Flint

In essence, the goal of fine art is to express an idea, a message or an emotion rather than representational photography as found in photojournalism, documentary or commercial photography. Generally, it is more subjective than objective in nature.

With the concept of fine-art photography in mind, here are 5 tips to help you shoot fine art photography:

1. Check the weather

As simple as it may seem, one thing to do when shooting fine-art photography is to check the weather. You will find having good light can help to transform mundane scenes into remarkable images.

On occasion, you may turn up at a location and get lucky with the weather. However, particularly for fine-art landscape photography, weather forecasts help you to decide when the light is right to shoot on a certain day and when to avoid getting caught in heavy downpours.

2. Be creative

Being creative is one of the best ways to develop fine art photography. Putting your unique vision into your work helps you create fine art photos you can be proud of. For example, trying to show the landscapes you witness with the best impact and emotion is a proven method of developing fine art.

I recommend asking yourself what fine art do I want to capture and what do I want to convey in my images?

This is purely a personal choice where you can create an image that connects with how you are feeling at that moment in time or a unique and interesting way of embracing and documenting your chosen subject and showing this as an art form through your photos.

3. Choose a subject to stimulate the viewer

This brings me on to my next tip, choose a subject to enthuse the viewer. Finding a subject that connects with the audience can lift an image from ordinary to great. This could be anything from abstract details such as those found on rustic doors, textures of flowers or water droplets to interesting patterns.

It could also be something that can be challenging to recognize or is easily identifiable. Whatever you choose, select a topic that interests you.

4. Use colors or moods for fine art

The paintings you often see in exhibitions and galleries are considered to be forms of fine art and often demonstrate different themes and moods. Therefore, my next tip is to shoot photographs with a painterly approach using color or moods.

Color can be utilized to evoke emotion and is an excellent way of putting life into your fine art photography. Using colors such as blues and oranges can help evoke cooler or warmer tones, respectively. Bright and warm colors can add energy and an overall positive feeling, whilst cooler tones can be calming and relaxing.

You can achieve different feelings in fine art photography by capturing something dark and moody or bright and uplifting. Reducing your exposure compensation is a great way of making your images darker and more dramatic. Increasing exposure can evoke vitality. Using contrast is also a good way to create mood as it provides variety in tones.

Namibia

5. Use motion blur

Being experimental with fine-art photography is a wonderful way to achieve great pictures, and one way to do this is through motion blur. You can practice this technique in several different ways; you can photograph moving subjects, or you can move your camera when you release your shutter.

Zebras, Tanzania

Capturing moving subject’s over a period of time can create motion in the image. This technique tends to work well where either the subject or background is still, and the other is moving, giving contrast.

You can also develop continuity in an image by physically moving your camera, either up, down or sideways as you press the shutter. You will find that even by zooming your lens in while you take a photograph can create movement in your images.

Hyena Pan, Tanzania

Conclusion

In conclusion, fine-art photography is a great way to express your own ideas and vision in an interesting and subjective way. It offers the opportunity to be creative and stimulate the viewer using themes, moods and motion blur.

With these tips, go out and take some pictures of what you perceive to be fine art and share your images with us below.

The post 5 Tips for Shooting Fine Art Photography appeared first on Digital Photography School. It was authored by Jeremy Flint.


Digital Photography School

 
Comments Off on 5 Tips for Shooting Fine Art Photography

Posted in Photography


ThinkTank Vision 15 Camera Bag Review

24 Apr

The post ThinkTank Vision 15 Camera Bag Review appeared first on Digital Photography School. It was authored by Peter West Carey.

ThinkTank’s Vision 15 camera bag is one in a line of stylish camera and computer shoulder bags built for photographers who want a functional bag that looks good walking down the street. It’s designed for someone who wants easy access to their gear and isn’t looking for a backpack.

Key features

The Vision 15 has a host of features that I enjoyed while testing. These include:

Fits a DSLR mounted on a long lens

I love my 28-300mm L lens (the same size as a 70-200mm f/2.8 or 100-400mm L lens) and this bag does a grand job of storing it while attached. ThinkTank, in their literature, mentions leaving the camera unattached, but I found the combination just barely fits, with easy, quick access.

Canon 6D mounted with 28-300mm L lens alongside Canon 10-22mm lens

Side view with padding removed

Great organization for extras

Inside the spacious main compartment is space enough for a few lenses and speedlights. There are both vertical and horizontal padded dividers to protect your shorter lens stacked one on the other.

All the dividers have velcro on each side, so they can be attached to either long side of the bag or to other dividers. I usually travel with a long lens attached and a wide angle lens stored. This means I have room for: smaller Sony RX-100 V, waterproof cover (included with bag), battery pack for phone and tablet, glasses case, power brick for laptop and DJI Osmo Pocket. And there is still more room in there.

It can handle a portable office

If your bag is not just for your camera, but for all the other items you want with you on a shoot or day out of the office, this bag can carry most of it.

The Vision 15 can manage a 15″ laptop and a 10″ tablet. The laptop sleeve is padded on the back and bottom while the tablet slot is found on the zippered front pocket.

That front pocket has a host of other slots to hold pens, business cards, large phones, cables, and keys (with a tether and clip so that don’t get lost). And it still has ample pocket space for books, batteries, chargers and all the other little things that join you on the road.

An added bit of security to the main compartment

While the generous top flap of the bag keeps the elements at bay, a secondary zippered flap will help keep prying hands away. The flap has velcro to help hold it in place, meaning it will open when the main flap opens and close when it closes. Or zip up the inner flap for an added sense of security. It can also be tucked under the main flap to keep it out of the way for quicker access.

Expandable bottle holder

This little design aesthetic impressed me when I wasn’t expecting it to. Velcro keeps the bottle holder closed when not in use, reducing the chance that it will get caught on something. Plus it looks more stylish this way.

But when you need to hold your coffee or water bottle, just expand the pocket to one of two sizes for a (nearly) custom fit.

Tough, coated bottom

While the bag’s fabric is stylish and does a good job of resisting stains and water, the bottom is made of beefed-up waterproof tarpaulin. This tough option makes for easy clean up when the bag is placed in anything but the most pristine locations. A quick wipe with a damp cloth keeps it clean and your contents dry.

Front and back book/papers pockets

On the back of the bag is a large pocket for books or notebooks. This is a great spot to place quick-at-hand items, and I use it for my calendar and main notebook.

On the front of the bag is a smaller pocket. While you could fit a book in there, it presses against the organizer pocket behind it. While is looks good in photos, it’s not useful for thick items.

Generously padded shoulder strap and carry handle

The bag comes with two main modes of transport: a padded shoulder strap and a carry handle on top. The padding on the shoulder strap is generous and the strap itself has a wide range of adjustment for a variety of torsos. However, the top carry handle only works when you remember to clip the top flap shut. Still, it is a secure way to get the bag in and out of your car for a quick grab.

It fits easily under a seat on a plane

I’ve tested the bag under economy coach seats on 737s and smaller planes with ease. There is ample room and the bag doesn’t scratch along the underside of the seat.

Not so artful tripod holder

On a bag like this, the tripod attachment goes in the only location it can; on the bottom. ThinkTank uses their attachment straps (which can be removed when not in use, as shown above) to allow for a variety of tripod sizes. There’s really no other place for a tripod to go and the clips do an adequate job.

Roller Bag Passthrough

For those who love their roller bags for airports, the back of the Vision 15 has a slot for your roller bag handle to pass through.

Limits

While this bag has a lot going for it, I find the pockets get full fast. Even just throwing a Mindshift card wallet into the front pocket will expand it enough to press on the other pockets. Toss in a charger and Miops cable release as pictured above and you quickly start puffing the bag up, unlike a backpack-style bag.

Vision 15 with rain cover attached

Don’t expect to comfortably carry a full-size tripod on the bottom of this bag. The length would make things unwieldy. Also, with the tripod attached, you suddenly don’t have an easy way to set down the bag.

In use

I tested the bag in use on my job for a month, which included travel on four different flights up an down the West Coast. Its smaller form factor (compared to my normal backpack) is welcome as it packs into my car trunk easily and was effortless to remove, thanks to its clean lines and lack of straps like a backpack.

Opening and accessing contents is straightforward and I left the velcro attachment connected on the inside lid most of the time. Yet, when I had to set the bag down a couple of times in less than ideal situations, that inner zipper was nice to employ. I never did use the rain cover but I am glad they shipped the bag with a black cover to keep it stylish.

Conclusion

The ThinkTank Vision 15 is a very useful shoulder bag. While it can’t quite hold all I like to carry (no space for a drone), it holds all you need on a day-to-day basis when away from the office all day. It easily holds a long lens as well as battery packs, chargers, cards, tablet and laptop. It can easily handle four lenses and a flash, while the padded shoulder strap makes carrying that load bearable.

While the Vision 15 is sized for a 15″ laptop, they have two other, smaller sizes (which cut out the space for a tablet) that might fit your particular setup better.


The post ThinkTank Vision 15 Camera Bag Review appeared first on Digital Photography School. It was authored by Peter West Carey.


Digital Photography School

 
Comments Off on ThinkTank Vision 15 Camera Bag Review

Posted in Photography


A Short Introduction to Basic Photo Editing for Beginners

23 Apr

The post A Short Introduction to Basic Photo Editing for Beginners appeared first on Digital Photography School. It was authored by Lily Sawyer.

If you’re a beginner, using editing software can be a daunting prospect. What if you can’t get a handle on the technology? What if it’s too complicated a process? What if it’s just too time-consuming? What if the images turn out horrible? So many what ifs! I get it; I’ve been there. In this article, I’m offering a very simple way of delving into editing if you’re a novice. These are basic principles that I hope will set you in good stead for more fancy editing in the future!

dps-basic-editing-tutorial-final-image

First things first.

You need to be able to see what is a good image and a bad image. The key is in your perception.

If you think heavily edited images are the perfect image, then your editing will lean that way and vice versa. If you think an overly-tinted image is perfect, then that would be your bar for perfection. We all have a bias towards something. However, for editing, I think we need to try and be as neutral as possible and leave our personal preferences for the moment.

To be able to see things objectively, we need to:

  1. See the differences between over-exposed and under-exposed images and decide as to what is the correct exposure
  2. Understand white balance where white looks white, as it should, and not yellow or blue or orange
  3. See the contrast between dark and light
  4. Decide on the noise

Once we have a basic grip of the above, then editing will be a breeze, and we can get more creative from a solid image base or what I’d like to call a clean edit.

But first, a word on shooting format. Shoot in RAW.

The images below are the original RAW images opened in Bridge without any edits applied.

You can see there is a choice of Adobe color profiles. See the difference between the standard profile below left and the color profile used on the image on the right.

You can choose which profile you prefer.

dps-basic-editing-tutorial-profile

To successfully understand the above, and make the edits towards them, it is important that you shoot in RAW format. If you shoot in JPEG, you are allowing the camera to process the image, discard pixels the camera deems unnecessary, and accept the color adjustments the camera has made. With a JPEG image, you have less control, are working on a great loss and compression of pixels at the very start and an already compromised image color.

You can read more about RAW processing in Bridge here.

Having said that, someone who is a really good, seasoned, experienced photographer may well shoot JPEGS and achieve the desired image they want. I am not there yet!

Secondly, the type of camera you use affects the original images you get.

A full-frame camera gives you the 35mm sensor – wider, more space, more light hitting the camera sensor and more pixels. What you see through the lens is pretty much what you get. A crop-sensor, on the other hand, works in the opposite way. The lens only allows you to use a portion of the sensor so that a 35mm lens mounted on a crop-sensor camera will only give you the point of view of a 52mm lens equivalent – a more zoomed-in longer focal length. You are losing some width, some light and some pixels.

Let’s dive in!

1. Correct exposure

Correct exposure means getting the balance right between the 3 components of the exposure triangle. Namely: aperture, shutter speed, and ISO. Balancing all three correctly will give you a perfectly exposed image. That means no blown highlights or details are lost entirely in the shadow or darker areas of the image that should still be visible.

A most useful tool in determining whether your exposure is perfect is to look at the histogram when you are editing. Alternatively, you can view the histogram when you have just taken the photo as there is also a histogram on the LCD of many cameras these days. Simply put, a histogram is a representation of the tonal value distribution across your image in the form of a visual graph. Just by looking at a histogram (that graph on the top right corner of the image below), you can immediately tell whether there is an even spread of tonal values on the image judging from the troughs and crests on the graph or a stark contrast.

If the image you shot has incorrect exposure, then editing is your solution. You can move the sliders on your editing software to increase exposure if the photo is too dark or decrease your exposure if the photo’s too bright. You can usually recover some blown highlights in the case of overexposure.

dps-basic-editing-tutorial-color-raw

Take a look at the image above. This is the RAW image opened in Bridge. You can see it’s a little bright with the histogram showing a tall mountain almost touching the right edge. When the histogram touches both left and right edges, this would indicate the dark and light parts of your images are clipped and therefore there is overexposure and underexposure in the image. This is an okay image as nothing touches the edges, but it is too bright for me.

The image on the left below shows an overexposed image with the exposure turned up and the image on the right shows an underexposed image with the exposure turned down. See what the histogram is doing in these images.

dps-basic-editing-tutorial-color-raw

2. White balance

Simply put, white balance is the adjustment on your camera that reads the color temperature of the light you are shooting in in relation to neutral white. A perfect white balance should show white to be white as perceived in reality and there are no color casts that distorts the whiteness of white. You can, however, go for a warm white or a cool white by adjusting the white balance sliders. Generally speaking, what you don’t want is for white to look too yellow or orange or too cold like with a strong blue cast. Compare both photos below: too cool on the left and too warm on the right.

dps-basic-editing-tutorial-color-raw

3. Contrast

There is nothing rocket science about contrast in my opinion. It is simply to do with the strength of the blacks on the photo. After the adjustments above, our photo is still looking very flat. All that’s needed is a fiddle on the blacks, shadows, highlights and light areas. Just remember not to clip your blacks or whites or if you want a bit more contrast, not too much clipping. You can also use the curves tab (the one that shows a grid with a curvy line) for contrast adjustments.

dps-basic-editing-tutorial-finish

I also played with the other sliders to get the result I wanted on the images above. Just do so gently – a touch here and there rather than extreme adjustments.

Remember, you are only after a clean edit at this stage. The images above show the same edits on the standard and color profiles. The results are different so deciding on your color profile matters.

4. Noise and Sharpening

If you click on to the third tab which shows two black triangles, you get to the panel where you can adjust noise and sharpening. Again, gentle adjustments are needed here.

It is vital to view your photo at 100% so you can see what the adjustments are doing to the image.

Luminance has to do with the smoothness of the pixels. You don’t want to go too much, or you lose definition.

Color has to do with how much the RGB pixels show up and extreme adjustments will either strip your image of color or make the pixels appear too saturated.

dps-basic-editing-tutorial-sharpening-noise

Conclusion

Now I have a clean edit, there is still so much I can do to this photo. The eyes are a tad soft so I will need to adjust that. I could add vignettes or change the appearance of the background. I could add sunflares or textures. The possibilities are endless. But most of that has to happen in Photoshop.

I hope this has helped you understand the basics of editing.

Please share your comments below or if you have any questions!

The post A Short Introduction to Basic Photo Editing for Beginners appeared first on Digital Photography School. It was authored by Lily Sawyer.


Digital Photography School

 
Comments Off on A Short Introduction to Basic Photo Editing for Beginners

Posted in Photography