The post Gear Review: Tamron 70-180mm f/2.8 for Sony appeared first on Digital Photography School. It was authored by Suzi Pratt.
Earlier this year, the highly anticipated Tamron 70-180mm f/2.8 telephoto lens finally hit the shelves. Made for full-frame Sony E-mount cameras, this lens is very compact and affordable, coming in at more than half the price of the Sony G-Master version. What are the pros and cons of getting this lens? Read on to find out!
The Tamron “Holy Trinity” is complete
Photographers often refer to the “holy trinity” of zoom lenses that cover a wide range of focal lengths. Traditionally, the holy trinity consists of a wide-angle lens (16-35mm), a midrange lens (24-70mm), and a telephoto lens (70-200mm). Tamron has been working on their own version of the holy trinity that includes the 17-28mm f/2.8, 28-75mm f/2.8, and now the 70-180mm f/2.8.
All three of these Tamron lenses complement each other in that they are very affordable, compact in size, and even use the same filter thread size of 67mm. The low cost is probably the most attractive feature. You can have the Tamron holy trinity of f/2.8 lenses for just under US$ 3,000. In comparison, buying all three Sony G-Master lenses would cost a whopping US$ 7,000.
Canon 5D Mark III with Canon 100mm f/2.8 – 1/60 sec, f/7.1, ISO 400
Specs
The formal name of this lens is the Tamron 70-180mm f/2.8 Di III VXD. Tamron claims this is the “world’s lightest and most compact package,” and it’s hard to disagree when comparing this lens to similar focal lengths. The lens is 5.9 inches (149mm) long and weighs 1.8lbs (816 grams). The Tamron 70-180mm also has moisture resistance and weather sealing.
This is an autofocus lens with two rubber barrels – one controls focus and the other zooms. The front part of the lens extends when zoomed in. There is just one minimal locking switch on the lens to keep it from extending when not in use. No other physical buttons or switches are on the lens. The minimum focusing distance is 33.5 inches, however, you can focus down to 10.6 inches when using manual focus at 70mm.
One last thing to mention about this and every Tamron lens is the 6-year warranty for USA residents. The warranty period is much longer than Sony’s and just about any lens manufacturer out there.
Canon 5D Mark III with 100mm f/2.8 – 1/60 sec, f/7.1, ISO 400Canon 5D Mark III with 100mm f/2.8 – 1/60 sec, f/7.1, ISO 400Canon 5D Mark III with 100mm f/2.8 – 1/60 sec, f/7.1, ISO 400
Ease of use
The Tamron 70-180mm f/2.8 is very easy to use, especially if you’ve ever shot with a 70-200mm f/2.8. In practice, it’s almost not fair to compare these two lenses. The Tamron is considerably smaller and lighter than any 70-200mm f2/.8 on the market. It weighs 1.46 lbs lighter than the Sony G-Master, and it easily fits inside of medium-sized bags that a traditional 70-200mm lens would never fit into. Thus, it’s no longer a second thought on whether this lens should be packed on a hiking trip, or whipped out to shoot a quick photo.
To keep the lens small, 20mm was shaved from the long end which might be a problem if you really need to be shooting at 200mm. However, Sony full-frame shooters have the option of shooting in APS-C mode to get a zooming effect (roughly 270mm with the 1.5 crop factor). When shooting with a high-resolution camera such as the Sony a7rIV and its 61 megapixels, you also have more megapixels, so cropping is a viable option.
The autofocus performance on this lens is phenomenal. You have access to all of the autofocus features in your Sony E-mount camera including face and eye detect for humans and animals.
Autofocus was snappy and accurate when shooting a still or moving subject. This lens feels just like using a native Sony lens in a much lighter and cheaper body.
Like the rest of the lenses in the Tamron holy trinity, the 70-180mm is missing image stability built into the lens. Tamron claims it isn’t needed because many Sony full-frame cameras come with in-body image stabilization (IBIS, or SteadyShot).
While this might seem like a downside, Tamron might be onto something. In practice, the 70-180mm shot incredibly stable handheld video, even at 180mm. Stills photography was also very sharp and spot-on in every scenario. Along those lines, let’s talk about image quality.
When reviewing images, the Tamron 70-180mm f/2.8 leaves little to be desired. Photos are tack sharp and crisp with excellent color. Thanks to the lens coating, there is also very little ghosting and flare, even in the most backlit conditions.
Conclusion
This is a rather short review, because there honestly isn’t a lot to say about this lens other than it is impressive on every level. If you want an ultra-compact f/2.8 telephoto zoom at a very affordable price, this is the one for you.
However, you’ll want to act fast since this lens has been back-ordered ever since it was announced, and for good reason.
The post How to Use Photography Filters for Amazing Long Exposure Landscapes appeared first on Digital Photography School. It was authored by Simon Bond.
One of the most competitive genres in photography is landscapes. In this article, you’ll learn how to add creativity to your landscapes by using filters. The use of filters will allow you to create masterpiece long exposure landscapes, and you’ll learn what’s needed to do this. So read on and discover tips and tricks to get the best results.
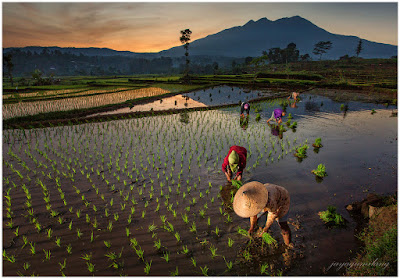
Using the correct exposure length meant an interesting foreground from the movement of water.
What is long exposure photography?
One of the key settings on your camera is the ability to control the exposure length. If you’re new to photography, the chances are you’ll not have tried long exposures yet. You’ll need a tripod, but once you begin taking long exposure photos, the creative potential is massive.
Long exposure photos are those that last for over one second in length, and typically don’t last more than thirty seconds. There are some situations where even longer long exposures can be taken. These can last minutes. To take these photos, you need to use bulb mode on your camera.
Filters come in varying strengths.
How to use filters for long exposure landscapes
The use of filters to produce these long exposure landscapes will increase your options. They allow you to take long exposure daytime photos (where there is lots of light), and, if you wish, even longer night time long exposures.
You can use different grades of filters to give you the ability to take photos of different exposure lengths. Of course, the time of day is a massive factor as well, with night time an easier time to take long exposures.
Filters you can use during the day
The filter you’ll need to use to take long exposure landscapes during the day is the ND filter. These are neutral density filters, which are abbreviated to ND filters.
These filters work by blocking out the amount of light that comes into the camera. They should do this without changing the color tone of your image, which is why the filter is considered neutral. The strength of these filters range.
Filters can be used to lengthen the exposure, and produce “silk water”.
Weak ND filters
These are the ND2, ND4, and ND8 filters. They’re more often used with flash photography, but you can use them to extend exposure length during the day. In low light situations like under tree canopies, or as the evening draws in, using one of these filters may allow you to take a long exposure.
Circular Polarizer (CPL) filter
In a similar fashion to the weak ND filters, you can use a CPL filter in a low light situation to turn a half-second exposure to a one or two-second exposure. This can be long enough to dramatically change the nature of moving water during an exposure.
Strong ND filters
These filters are designed for longer exposures, the typical filters you can use are the ND110 and the ND1000. Filters like this will allow you to take exposures longer than five seconds or more even during the middle of the day.
Using an infra-red filter is an interesting way of creating landscapes.
Infrared filters
Infrared filters block out all light except infrared.
The exact light they block comes with the name of the filter. The Hoya R72 filter blocks all light except the light of a wavelength of 720 nanometers. This translates to a filter that’s even stronger at blocking out light than the ND1000.
You will, of course, be taking an infrared photo, but this will then be a long exposure that can often be minutes long.
Filters you can use during the night
The need to use filters for night time long exposure is not as extreme.
You’ll almost certainly be able to carry out long exposures with no problem, except perhaps during the transition from day to night. Here, the filters you’ll likely use are the weak ND filters or the CPL filters, with the intention of turning a medium-length long exposure into a longer long exposure.
However, the need to use a strong ND filter can occur. This happens when you want an exposure that lasts several minutes. Usually, you would not take an exposure of this length, but in order to get cloud motion across the sky, this length of exposure can be needed.
Flattening the water makes for a serene landscape.
Stacking filters
The more extreme long exposure landscapes will require filter stacking. Stacking filters means placing one filter on top of another to combine their strength.
Those wanting to take an ultra-long daytime long exposure, that produces cloud motion, often need to stack an ND110 filter with an ND1000 filter.
Stacking filters gives you an extra level of control over the length of your exposure. This happens by blocking more or less light. One thing to be careful of when stacking is vignetting. When using screw-on filters, there is a greater risk of this, caused by stacking too many filters on the front of your lens.
How long to expose for?
The aim of adding a filter to the front of your lens is to lengthen the exposure. Learning the correct strength of filter you need to apply is therefore important.
To know how strong the filter should be, you will need to decide what type of long exposure landscape you wish to take. The following is a list of photo types you could take during the daytime.
Silky water – An exposure of one second is long enough to produce the silk water effect at places like waterfalls.
Water motion – The motion of water and the length of exposure is a sliding scale. At half a second, it’s long enough to capture motion from waves going in and out at a beach. A longer exposure can then be used all the way up to the exposure length needed to flatten the sea. It’s not always desirable to completely flatten water, as some turbulence can look nice.
Flattening the sea – An exposure longer than ten seconds will be enough to flatten the sea.
Cloud motion on a calm day – With slow-moving clouds, an exposure of minutes will be required.
Cloud motion on a windy day – On a windy day, an exposure of over 15 seconds is likely to be long enough. However, you will need to experiment with the conditions you have on the day.
Getting cloud movement across your landscape can take very long exposures.
Time for long exposure landscapes!
The take-home message is to know how long an exposure you need, and use the correct filter on your lens to allow this length of exposure.
Do you enjoy long exposure photography, or are you yet to learn about the genre?
If you have examples of your work you would like to share, please share them in the comments section. These could be from your archives or images you take after reading this article. So get out with your tripod, and create some long exposure magic!
The post How to Use Photography Filters for Amazing Long Exposure Landscapes appeared first on Digital Photography School. It was authored by Simon Bond.
The post Sony Announces Brand-New, Ultra-Wide, 12-24mm f/2.8 Lens appeared first on Digital Photography School. It was authored by Jaymes Dempsey.
Sony has officially announced its FE 12-24mm f/2.8 GM lens, which is impressively wide, and offers a very fast aperture for such a wide-angle zoom.
While Sony did release a 12-24mm zoom back in 2017, it packed an f/4 maximum aperture, which just doesn’t offer the same low-light utility as a wide-angle f/2.8.
But now, with the new 12-24mm f/2.8, Sony shooters have the opportunity to work with an ultra-fast wide-angle lens, which is perfect for any sort of night photography, and astrophotography in particular.
In terms of the lens’s specs:
A lens offering a maximum f/2.8 aperture is bound to be somewhat large, but Sony has kept both the size and the weight fairly reasonable:
5.5 in (137mm) long, 29.9 oz (847 g) heavy.
This means that landscape photographers and travel shooters won’t have too much trouble carrying the 12-24mm f/2.8 around in their bag.
The lens comes with a permanent hood, and the front element is unsurprisingly big, which means you won’t be able to use standard filters. However, Sony has designed the lens with a rear filter mount, which allows photographers to work with cut gel filters.
As for the optics:
Given that this is a GM lens, you can expect quite a lot, and early reviews seem to bear this out. The Sony 12-24mm f/2.8 is incredibly sharp, in the centers to the corners, both wide-open and stopped down.
Now, if you’re in need of a fast wide-angle zoom, you have two main options:
The new Sony 12-24mm f/2.8.
Or the Sony 16-35mm f/2.8 GM, which is a very impressive lens in its own right.
Ultimately, picking between these lenses will come down to personal choice, but the extra 2 mm on the wide end can be pretty significant, especially for landscape and astrophotographers.
That said, while the Sony 12-24mm f/2.8 is a truly excellent new piece of glass, the cost ensures that only the most serious of photographers will be able to add it to their bags.
It’ll ship in mid-August with a starting price of around $ 3000 USD.
Bottom line:
If you’re looking for a pro-level, fast, wide-angle lens for landscape photography, then this is going to be a good option, assuming you can afford the price.
The post Sony Announces Brand-New, Ultra-Wide, 12-24mm f/2.8 Lens appeared first on Digital Photography School. It was authored by Jaymes Dempsey.
The post 7 Things Van Gogh Can Teach Us About Photography appeared first on Digital Photography School. It was authored by Anthony Epes.
In keeping myself motivated as a photographer, I love to look for inspiration from all across the creative spectrum. Today I want to share some ideas with you from the painter Van Gogh that I hope will bring some exciting new ideas for your photography.
I love who I am when I am taking photos. It is one of my favourite things, and I would imagine it’s the same for you.
To have my camera in my hand, exploring, finding beautiful light, and capturing interesting people I meet along the way, is immensely satisfying and massively fun.
However, life often gets in the way (who’d have thought it!), and I get distracted and lose my creative energy.
For example, I have too many conversations with my accountant, or I am doing a lot of admin or rushing around doing the tasks that are super important to make my life function but aren’t conducive to creativity.
I have been a photographer for over two decades, and I know that making time for being creative is really good for me. Of course, it’s good for my career as a whole, but more than anything, it makes me happy!
And don’t we always need more things to be happy about?
These ideas are timeless because they remind us what we love to do, and why – take photos, be creative, and make things.
I’ve also included some ideas that are reassuring – offering guidance on some of the common challenges that we all face as creative people.
So let’s get started!
1. “I am always doing what I cannot do yet, in order to learn how to do it.” Vincent Van Gogh
One thing I regularly hear from people when they arrive on my photography workshops is how they can’t do things.
It could be: I can’t be creative! Or I can’t shoot on manual, it’s impossible for me!
To me, this is just a habitual way of thinking that is not based on facts. Just because we can’t do something now, does not mean we will never be able to.
It is therefore an uncomfortable and unfamiliar feeling for us to be faced with things that we don’t understand, and so we really struggle with learning.
Photography almost always shows us the things we have struggled in the past to do. Because photography is a unity of skills – the ethereal concept of creativity and the highly technical world of cameras, computers, and post-processing software.
Many of my students fall into two camps: those who are comfortable with the technical, but not the ‘arty/creative’ side of photography. Or the reverse: very intimidated by tech, gear, etc but very comfortable with the idea of being creative.
If, though, we want to get really confident in photography (and we should because otherwise, why would you be drawn to this medium?), we have to overcome the discomfort and look to learn about these things we struggle with.
Here I can offer some inspiration. It is possible for anyone to learn anything. No one is too far gone, too un-creative or un-technical. It just comes down to belief. Can you believe you can find ways to learn what you need to learn to become comfortable and confident shooting?
If you say yes, you are halfway there. Saying yes to learning is the first step.
“Men often become what they believe themselves to be. If I believe I cannot do something, it makes me incapable of doing it. When I believe I can, I acquire the ability to do it even if I didn’t have it in the beginning.”Mahatma Gandhi
And how about we just decide to be people who are learning new things? Be like Van Gogh and always be doing things we don’t know how to do.
2. “Seek only light and freedom and do not immerse yourself too deeply in the worldly mire.” Vincent Van Gogh
This talks about how much we need to detach ourselves from normal life, and the endless tasks of our lives in order to create. Being creative connects us to the world in a completely different way to how we normally live.
In ‘normal’ life, we are living on the surface. We are doing a lot, we are being busy, we are jumping from task to task. We are responding. And that’s all totally necessary to take care of our lives.
But it is not the only way to live. It’s the least enriching, and least satisfying way to live.
And it’s definitely not the mode to be in when you’re being creative.
When you are out shooting, when you are creating something, it has to come from a different part of you. Because taking photos is the work of the soul, not the mind.
It’s diving deep into yourself and using everything you are, everything that you’ve experienced, known and loved, and bringing that out in your images.
But real life knocks very loudly and getting yourself into your creative flow state can be challenging. Even I, a professional photographer who shoots all the time, find it hard sometimes to switch off my mind when it starts reminding me about my mundane daily tasks.
So what I do when I am finding it hard to connect to my inner creative spirit, the inspiration I seek when I am out shooting is finding other ways to stoke my creativity.
That either involves going out into nature, searching for beautiful light or looking at other artists and what they have created.
I also love to read about what my favourite artists have said about making things, because it helps inspire me and helps me leap into a state of wanting to go out and create beautiful photos.
When Van Gogh said “The only time I feel alive is when I’m painting,” feels mostly very true to me.
We are rarely totally living in the moment, totally alive to everything that is around us, connecting to the world that we see.
Totally normal of course, we all do it. But I also think it’s important to carve out time to have those moments of deep fulfillment, of connection, deep beauty, and joy. This is what photography brings into my life. The chance to slow down, to see and be present for what life is.
3. “If you hear a voice within you say ‘you cannot paint,’ then by all means paint, and that voice will be silenced.” Vincent Van Gogh
Photography is an inner game.
Taking good photos has nothing to do with your current skills or your ability to nail sharpness or your exposure. It’s everything to do with what you believe about yourself and what you believe is possible for you.
If you start with this idea of not being able to do something, you won’t be able to do it. You have to overcome that mind of yours that loves to remind you of your inadequacies.
But it is also to say that all people who create, have fear. You are not alone when your mind tells you you’re not much of a photographer, or you might as well as give up because your photos are boring.
Your job is to ignore whatever rubbish your mind is saying about your photography, as Van Gogh says, and silence your mind by doing.
Creativity comes from such a magical and mysterious place– you can’t just find it anywhere. You can’t quantify it or set an exam for it. The fact that there is often no way to quantify if your photos are any good can create some anxiety.
The way to overcome this is to just get started. Just go out and shoot. Don’t worry if it’s going to come out well or not. Don’t pre-analyze what you may or may not achieve or what you are or are not.
The mind is clearly an incredible organ, but it’s not always on your side. It can dissuade you from doing things you love before you’ve even got started, so regardless of the outcome, go out and shoot and love the experience.
4. “Be clearly aware of the stars and infinity on high. Then life seems almost enchanted after all.”Vincent Van Gogh
It’s really easy to get so familiar with our world that we stop seeing what is beautiful and awe-inspiring in the world around us. It’s normal to see your everyday environment and not be inspired by what’s there. Our eyes get dulled to the familiar world around us.
That’s often why we travel or go to new places, to see new things.
But here is a big change we can make right here and now in our photography. When we are prepared to really find the magical and beautiful in life, wherever we are; when we can learn to be impressed and excited about what is, we will see more and more opportunities for photos.
We don’t need to travel or find new things to be inspired to shoot, we just need to connect with what is enchanting in this crazy, wild, and incredible world.
5. “Painting is a faith, and it imposes the duty to disregard public opinion.” Vincent Van Gogh
In many ways, I think learning photography now is harder than in the past. And that’s not because there are so many photographers, or because of smartphones, etc. Instead, it’s because of the amount of information out there, and the multitude of opinions.
The internet has given us so much incredible access to information and to communities and groups where we can share our photos. But often, instead of it being an empowering experience, it can become disheartening. You can get into the habit of judging your photos on how many ‘likes’ they receive.
When you post your photos online, you can get a whole raft of opinion back that is often useless for your photography.
People who aren’t necessarily any more experienced than you will share their random thoughts. (And I can guarantee there are very few professional photographers hanging out online doing constructive criticism on photos.) It’s also so easy to get dissuaded by what other people say about your images.
To make something unique and interesting, and to shoot with creative freedom, you need to be very careful about where you get feedback and who is giving it. You need to give most of your time creating images. Then find people you really trust – whose photography you admire – and seek feedback from them.
That’s how you can learn to grow and get better as a photographer.
6. “It is looking at things for a long time that ripens you and gives you a deeper meaning.” Vincent Van Gogh
Photography often becomes viewed as a series of technical tasks that need to be learned. To learn the way of the camera is to unlock all the gifts of photography.
For me that couldn’t be further from the truth.
The camera is merely the tool to execute your vision. That’s not to say the tool doesn’t have lots of cool and exciting features. I mean, I love tech, and I love what it can do. However, all of that gear is not going to get you great shots if you don’t know how to see, use your imagination, and bring feeling to your photos.
The key to accessing amazing photos all around you is to start to really learn to see.
You might say – but of course, I can see what’s around me! But you would be wrong. There is so much visual information around us, that our brain blocks out most of what is there. What we end up seeing is a mere fraction (less than one percent) of what is going on around us.
What is even more surreal is that because of how our brains like to make our lives as easy and simple as possible and to create habits in how we think and do things, we often see the same things over and over. We don’t notice the different things in our environment.
If you think about a street you’ve maybe walked down hundreds of times and all of sudden you have the urge to look up to the tops of the buildings. And it’s like – wow, I don’t remember seeing that.
This happens all the time with everything in our world.
Therefore, it is a good job as a photographer, to learn to open our awareness. Learn to see beyond what our brains feed us. Learn to look for a long time, and pay attention to what is around us.
This helps to develop our patience too. Developing patience in looking for shots is a great skill to nurture as a photographer. I find people are usually too quick to move on from a scene or a subject.
When we are patient and take that extra time working on a scene or subject, we often find more qualities of the subject are revealed. More ideas spring to mind too. Perhaps things in the moment change; like the light or things moving around the subject, thus, changing the possibilities of the photo.
Learn to really look at the world and it will open up so many incredible facets to your photography.
7. “If you truly love nature, you will find beauty everywhere.” Vincent Van Gogh
Completely.
I don’t just mean nature in a traditional sense – the beautiful flowers, people, or landscapes. It’s when we bring the idea of beauty into our photography that we see that we can capture what is beautiful to us, in any guise.
For me, it’s often the interplay of cities and nature. The smash of orange fruit on the tarmac. The gorgeous colors of the sunrise above a housing complex. Or the dramatic, metallic grey of a sky before a storm.
I would actually expand this idea to say there is beauty in all things, you just need to develop your ability to see and find it all around you.
Conclusion
I hope you found these ideas from Van Gogh useful for your photography. I would love to know what you thought, and if any of these ideas felt like they inspired or taught you something valuable. Please let me know in the comments below. Thanks for reading!
The post 7 Things Van Gogh Can Teach Us About Photography appeared first on Digital Photography School. It was authored by Anthony Epes.
The post Canon Officially Announces Two DSLR-Crushing Options: The EOS R5 and EOS R6 appeared first on Digital Photography School. It was authored by Jaymes Dempsey.
After months of waiting, it’s finally official:
Canon is releasing two new R-series mirrorless cameras, both of which will ship before the summer is out.
The Canon EOS R5
The first of these is the highly-anticipated Canon EOS R5, a full-frame body that offers 8K video, 20 frames-per-second shooting via the electronic shutter (12 fps via the mechanical shutter), in-body image stabilization, and dual card slots (1 CF and 1 UHS-II SD).
But while we’ve reported on plenty of R5 details, it’s only now, thanks to Canon’s announcement, that we can fill in any knowledge gaps.
The Canon EOS R5 will pack a 45-megapixel sensor, which makes the R5 the highest-resolution camera in Canon’s mirrorless stable, and the second highest-resolution camera in Canon’s full-frame lineup (just after the 5DS/5DS R pair, both of which sport 50.6 megapixels). Combine this with the 20/12 fps shooting speeds, and you’ve got yourself some truly awesome capabilities, both for landscape and other high-resolution shooting, as well as for serious action photography.
The EOS R5 is also equipped with top-notch autofocus features, including Canon’s Dual Pixel CMOS AF II technology, human and animal eye detection, and a whopping 1053 AF zones.
Much of the debate around mirrorless versus DSLRs has centered around electronic viewfinder capabilities, so we’re happy to reveal that the EOS R5 will offer a class-leading 5.76M-dot EVF, which is a significant step up from the (excellent) EVF on the EOS R, and puts the EOS R5 on par with the Sony a7R IV and the Panasonic S1R. This will ensure a better all-around shooting experience with an extremely life-like display and may satisfy even some of the more pro-OVF photographers.
Canon also notes that the EOS R5 will offer “weather, drip, and dust sealing on par with the EOS 5D series,” which suggests that the EOS R5 should be able to handle shooting in difficult weather, a requirement for landscape and wildlife photographers in particular.
Bottom line:
The EOS R5 is the best kind of generalist camera, one that suits nearly any genre of photography, from action to wildlife to landscape and more, and does it all at the highest level.
Of course, a camera this powerful doesn’t come without a significant price tag, but the EOS R5 will drop at a reasonable $ 3900 USD (body only).
The Canon EOS R6
As for the Canon EOS R6, you get a lot of the same features, but with a lower ($ 2500 USD) price tag.
This includes in-body image stabilization, identical autofocus specs, and dual card slots (albeit 2 UHS-II SD compared to the 1 SD/1 CF design on the EOS R5).
As you might expect, Canon has made several cuts compared to the EOS R6, primarily in terms of resolution. The R6’s full-frame sensor includes just 20.1 megapixels, the EVF offers a (still-respectable) 3.69M-dot resolution, and video capabilities top out at 4K/60p.
Canon also claims that weather sealing is “on par with the EOS 6D series,” which isn’t especially comforting for more serious shooters, but which is better than nothing and should be able to hold up in light rain or snow.
In many ways, the EOS R6 feels like the far more compelling option compared to the R5, at least for non-professional shooters. For nearly $ 1500 USD less, you get powerful IBIS, dual card slots, blazing-fast shooting speeds, impressive autofocus, and 4K/60p video (which is more than enough for even more serious videographers). You can also expect an excellent high-ISO performance from the EOS R6, as implied by its expansive native 100-102400 ISO range (compared to the 100-41200 ISO range on the EOS R5).
The main disappointment here is the 20 MP sensor, which feels low compared to the EOS R5, the EOS R, the EOS RP, and the 6D Mark II (all of which sit at 26 MP and above). But 20 MP is enough for most purposes, and the bigger pixels should guarantee top-notch low-light performance.
Lenses
Canon has also officially announced a Canon RF 100-500mm f/3.5-7.1L IS telephoto lens ($ 2699 USD), an RF 600mm f/11 IS STM ($ 700 USD), an RF 800mm f/11 IS STM ($ 899 USD), and an RF 85mm f/2 Macro IS STM ($ 600 USD).
Note that these cameras and lenses will begin shipping at various points over the next few months. You can expect the EOS R5 before July is out, however, and the EOS R6 toward the end of August.
Comparison video
So if any of these cameras or lenses interest you, go ahead and put in a preorder! You don’t want to miss out.
Now over to you:
What do you think about this announcement from Canon? Are you more interested in the EOS R5 or the EOS R6? And will you consider purchasing any of the lenses? Share your thoughts in the comments!
The post Canon Officially Announces Two DSLR-Crushing Options: The EOS R5 and EOS R6 appeared first on Digital Photography School. It was authored by Jaymes Dempsey.
The post Tips and Tricks to Achieve a Graffiti Effect in Photoshop appeared first on Digital Photography School. It was authored by Ana Mireles.
Are you a fan of street art? Creating a graffiti effect is a great way to give an urban look to your designs or photos. In this article, I’ll show you some tips and tricks to get more realistic results using Photoshop.
Prep Work
You’ll need to do a little prep work to get you started on your way to making a realistic graffiti effect in your images.
Reference images
Whenever you’re recreating something that’s based on real-life, it is good practice to have a reference. Create a library from your own photographs or use online resources like Pinterest. That way, you have a visual guide to make your graffiti effect as realistic as possible.
Resources like Pinterest are great for finding graffiti resource images.
Get a photo of a wall
First, photograph the wall you want to use for your graffiti effect. (If you can’t photograph one yourself, look to stock libraries or free-use images online.) There are no specific rules to follow, but the more texture it has, the better the effect will look. For example, you can use a brick wall, a rough concrete wall, a corrugated iron fence etc.
Then you need to create a black and white version of your image that is highly contrasted. This will serve as your displacement map.
There are many ways to do this, so feel free to use your own technique. I like to add adjustment layers. Use the Hue/Saturation to make it greyscale by moving the saturation slider all the way to the left. Then add a Brightness/Contrast one to increase the contrast.
Once you’re done, save it as a PSD format for later use.
Create your graffiti
There are many types and styles of graffiti: Blockbuster, Throw up, Tag, Stencil, Piece, etc. If you want to achieve a good graffiti effect, you should pick one of them for your work. I don’t intend for you to be a street art expert, nor do I pretend to be one, that’s why you can use the reference pictures. That way, the effect will be more realistic.
1. Blockbuster
This is one of the most common text-based graffiti. In simple words, it’s the one that has colorful chunky letters with thick borders.
If you want to buy or download a specifically designed graffiti font, you’re welcome to do it. If you want to make it more unique, you can also use a default font and modify it.
Using the Text tool, you can choose your font in the Options bar. Type your text, and it will be created in a separate text layer. If you right-click on that layer, choose “Convert to Shape.”
Once it’s a shape, you can modify it using the pen tool.
In the toolbar, under the Pen tool, you’ll find the Convert Point tool. With it, you can drag any of the anchor points to modify the shape.
Select and drag any of the anchor points to change the shape of the letters to what you want.
Note: Using the pen tool, you could create the letters from scratch too, but unless you’re a painter or a graphic designer, it’s easier to have something to get you started.
Now, using Layer styles, add the colors, edges, and shadows to mimic the effect from the graffiti you chose.
2. Stencil
Another style of graffiti is Stencil. This can be as easy or complex as you want it to be. It’s often one color (but can be more) and without internal details or depth. So, a basic way to do them is by using the Shape tool. You can use predetermined shapes or create your own with the Pen tool.
Just like you did for the text, use the Convert Point tool to modify your shapes at any time.
3. Piece
The third choice you have is to use a photograph in order to create a Piece (as in masterpiece). For this, you just go to File->Place and select the image of your choice. This will open it as a Smart Object.
A graffiti piece is more of a drawing, so it will be less detailed than a photograph. To get a better result, you can turn it into a painting or a cartoon before you apply the graffiti effect.
Try using the filter’s gallery to simplify your work. Go to Filter > Filter Gallery and apply different styles until you find the one you like. Notice that you can build up many of them if you feel like experimenting.
Finishing Touches
Once you have chosen the type of graffiti effect you would like to use, there are a few more steps to make it realistic.
1. Displacement Filter
It doesn’t matter if you did a Blockbuster, a Stencil, or a Piece, you need to integrate it into the wall in order to make a graffiti out of it. This is where the displacement map you created in the prep work comes into play.
Just go to Menu->Filters->Distort->Displacement. In the pop-up window, select the values you want. I’ll use a value of “10” in both. Click “OK” and it will open a window for you to browse your files.
Choose the grayscale image of the wall you did in the prep work and apply it.
To fully incorporate this ‘distorted’ image into the wall, right-click on the empty part of the layer and choose Blending Options from the menu. Then use the “Blend If” sliders until you’re happy with the results.
2. Adding perspective
This step is completely optional, but if you want to give more depth, you need to add a vanishing point. For this, make a new layer that merges all of the other by pressing Shift+Ctrl+Alt+E for PC or Shift+Command+Option+E for Mac.
Now select it and go to Edit->Transform->Perspective. Pull one of the corners up and stop when you’re happy with the result. Apply the transformation and your Graffiti effect is ready.
The finished artwork uses Blockbuster, Stencil and Piece graffiti effects.
Conclusion
Graffiti is a very rich and complex art form that is very difficult to sum-up in just one article. However, I hope these tips and tricks will help you achieve a real graffiti effect.
There really is a lot of material to get creative in this area, so try it out, and have fun. Share your results and tips in the comments section.
The post Tips and Tricks to Achieve a Graffiti Effect in Photoshop appeared first on Digital Photography School. It was authored by Ana Mireles.
The post This Drone Photography Checklist will Ensure You Never Miss Your Shots appeared first on Digital Photography School. It was authored by Matt Murray.
Capturing stunning images with your drone is incredibly exciting. But with so many things to think about before you take off, there can also be some nervousness wrapped up with that excitement. The first few times I flew my drone, I struggled to remember everything. Did I put a memory card in the drone? How strong would the wind be? Did I charge all the batteries? Did I need permission to launch my drone at the beach? Trying to keep track of all these issues was exhausting, but the one thing that made my life much easier was keeping a drone photography checklist with my backpack.
A drone photography checklist can help you get the most out of every flight.
The process of checking through this list the day before a planned flight – as well as just before I left home – helped me to be calmer and better prepared.
Below is my drone photography checklist to ensure that you don’t forget anything and are flying as safe as possible.
1. Before you leave the house
Planning for your flight should start before you leave the house, preferably the day before the flight. There are three things I typically check: air space, location and the weather conditions.
Make sure you have permission from the landowner to launch your drone.
a. Airspace
This is quite possibly the most important check you’ll need to do: are you legally allowed to fly your drone in the airspace above your launch location? And if so, to what height can you ascend to? Do national limits apply or is there a local restriction?
Making sure you understand the laws that govern airspace where you fly your drone is incredibly important and can potentially save you a lot of trouble.
Even if you are allowed to legally fly in the airspace, it’s important that you keep watch for other aircraft.
If you are able to fly in that airspace, you also need to check who else could be flying there too. Take a look at your proposed launch location using Google Maps – are there any helicopter pads, airports or airfields in the vicinity? Are there any model aircraft clubs or paragliding locations nearby? Is it a popular place that other drone enthusiasts might use? You need to take all these issues into consideration when planning your flight.
b. Location
As well as considering the airspace where you plan to fly, you also need to take into account what local laws govern the flying of drones in the city, state, or region you’re in. Even if you can technically fly in the airspace, local laws or rules may ban drones flying at those locations. For example, many national parks in Australia do not allow drones.
Another factor to consider is if you need the landowner’s permission to take off at your proposed launch location. Many local councils publish information on their websites regarding places you can and can’t launch your drone from. It’s always best to check beforehand well ahead of time, especially if you need to apply or seek permission before your flight.
c. Weather conditions
It’s always a good idea to check the forecasted weather conditions ahead of time. Many weather websites predict wind speeds for the next few days – this is invaluable for drone owners. If the predicted wind speeds are too high, it may be necessary to delay your flight.
Weather websites can predict wind conditions for the next few days, which invaluable for drone owners.
Also, keep an eye on other weather conditions. For example, is there any rain on the radar map? Are thunderstorms predicted? For morning flights, what are the chances of fog limiting visibility?
Also, think about the possibility of bright sunshine impairing your ability to see your drone in the sky or view the device that controls your aircraft.
2. Equipment
A drone photography checklist is also very handy for keeping track of your equipment. A checklist can help you to remember to pack everything you’ll need, as well as making sure your equipment is ready for your flight.
Your drone photography checklist can also include a list of accessories you need to take with you such as launch pads and neutral density filters.
First of all, check that all of your batteries are fully charged the day before the flight. This can take some time, so doing it half an hour before you plan to leave the house is not a good idea.
Next, check your drone over to make sure that it’s in perfect working condition. This includes making sure the propellers are not damaged or have nicks in them.
Next, check that you have all of your accessories packed and ready to go. The accessories I pack include a set of neutral density filters, a launchpad, and, of course, at least one memory card.
Make sure your memory cards have enough space on them to record multiple videos and images during your flight. Also, check that you’ve copied the contents of the memory card to your hard drive if you decide to format it beforehand.
Keep your drone software up-to-date: check for any updates 24 hours before your planned flight.
Finally, check that the device you use to control your drone (smartphone or tablet) is fully charged and that you have the latest drone software updated on it, ready to go.
3. At your launch location
When you arrive at your launch location, it’s important to have a good look around and assess the area where you’ll fly. Even after you’ve done your homework about the airspace, the location and the weather, there still can be significant risks.
Take a look around when you arrive at the location: what risks are present? Are there any power poles? Are there groups of children playing nearby? Check if there are any dogs off leash in the vicinity. Here in Australia, we also have the possibility of birds swooping you or your drone.
Make sure you keep watch around you while flying for other distractions such as children and animals.
If you have a launch pad, set it up somewhere flat away from other people. Some people also carry bright cones to mark out a small area to warn other people that a drone will be taking off and landing in the vicinity.
Start your device and your drone. Make sure you calibrate your compass before the flight and that the drone records the home point at your launch location.
Double-check your memory card is inside the drone – there is nothing more annoying than going to take a photo or a video before realizing it’s in your bag on the ground. Take a look at the lighting conditions: do you need to use an ND (neutral density) filter? If so, which one is best suited to the light today?
Before you take off, also make sure your smartphone or device is set to “do not disturb’ mode.
Take into account that bright sunshine during your flight can impair your ability to see your device effectively.
As you fly your drone, keep an eye out for other aircraft in the airspace, the weather conditions, and people or animals on the ground near your location. If it’s safe to do so, try to take a range of different shots with your drone. If you need ideas, check out my article, 7 shots to incorporate for better drone photography.
4. Post-flight
After your flight is completed, ensure everything is turned off correctly in the right order. Inspect your aircraft and propellers for damage.
Have a checklist of the items you brought with you and tick them off as you pack everything away. Drone ND filters are very small – you don’t want to leave one behind at your launch location.
When you get home, have a regular routine of how you pack your kit away. If you plan on flying again soon, put your batteries on charge again.
Copy your images and videos from your micro SD card ready for your next flight. If you have two or three verified copies of the images, at that point, you may wish to format your memory card, ready for your next flight.
Have a shot list of images you’d like to capture during your flight.
Conclusion
A drone photography checklist is a great idea to keep you prepared and to ensure you are taking reasonable steps to fly safely and legally. Instead of worrying that I have forgotten to do something while driving to my location, I now head out confident that I have taken steps to prepare for the flight.
I start working through the checklist 24 hours before any planned drone activities. This gives me plenty of time to get things sorted, as well as providing me with some reassurance that I am a responsible drone flyer. My checklist is also a big help when packing my gear before the flight, and when packing up afterward.
I’d encourage you to create your own list to print out and keep with your drone backpack, ready to check before you take to the skies. What else would you add to your drone photography checklist? Tell us in the comments below.
Drone checklist summary
You can download the PDF drone photography checklist here to keep and print out. That way, you will never miss getting your shots. Alternatively, you can just refer to the list below.
Airspace
Am I legally allowed to fly my drone in the airspace above this location?
What is the maximum height I can fly my drone at this location?
Will other aircraft be in the vicinity? (planes, helicopters, hot air balloons, drones, model aircraft, paragliders).
Location
Do I need the landowner’s permission to launch my drone at this location?
Will there be a lot of people at this location? How will I keep my drone away from other people? Will there be distractions such as dogs, children or birds?
Equipment
Are all of my drone batteries charged?
Does my memory card have enough space for images and videos for my next flight?
Is my smartphone or device fully charged? Does it have the latest version of the drone operating software on?
Is my drone in perfect working order? Are the propellers clean with no issues?
Do I have all the accessories I need? E.g. Cables, launch pad, ND filters.
Weather
What is the estimated wind speed for the time of my flight? Will I need to take any extra precautions due to the wind speed?
Are any storms or extreme weather events expected? Will bright conditions make it difficult to view my device?
Ensure all items (drone, ND filters, propellers) are accounted for.
The post This Drone Photography Checklist will Ensure You Never Miss Your Shots appeared first on Digital Photography School. It was authored by Matt Murray.
Go out and take some photos of historic buildings. Do exterior shots, interior shots, and close-ups of details. Get down low and shoot high for extreme angles.
So, if you are lucky enough to be somewhere you can photograph some historic buildings, capture them in any way you like. Alternatively, go through your catalog and find your best historic building photos!
Play with post-processing too – try split-toning, black and white or sepia.
Slot photos together, like I do to see how images work together as a series too.
Take them with your camera or smartphone.
The choice is yours! I look forward to seeing what you share
Check out some of the articles below that give you tips on this week’s challenge.
Tips for photographing HISTORIC BUILDINGS
Simply upload your shot into the comment field (look for the little camera icon in the Disqus comments section) and they’ll get embedded for us all to see. Or, if you’d prefer, upload them to your favorite photo-sharing site and leave the link to them. Show me your best images in this week’s challenge.
How to Tell Stories with Architecture Photography
6 Helpful Tips for Doing Interior Architecture Photography
Tips for Different Approaches to Architecture Photography
6 Tips to Take Your Architecture Photography to the Next Level
Architecture: Photographing Exterior Details
How to Achieve Great Black and White Photos in Editing
How to Use Color Temperature in Black and White Conversions
How to Create Silky Split Toned Black and White Photos Using Luminosity Masks
Get Low and Aim High – How to Use Low-Angle Photography to Great Effect
Share in the dPS Facebook Group
You can also share your images in the dPS Facebook group as the challenge is posted there each week as well.
If you tag your photos on Flickr, Instagram, Twitter or other sites – tag them as #DPShistoricBuildings to help others find them. Linking back to this page might also help others know what you’re doing so that they can share in the fun.
The post Weekly Photography Challenge – Historic Buildings appeared first on Digital Photography School. It was authored by Caz Nowaczyk.
The post 4 Ways to Create Awesome Infrared Images appeared first on Digital Photography School. It was authored by Simon Bond.
A really interesting form of photography that can transform your images is infrared photography. This form of photography has been around for a long time, and today, you’ll discover how to make your own infrared images. Anyone can do this, and it’s possible to do with minimal or even no extra equipment at all. So read on and find out how you can enhance your photographs today.
Infrared works very well as a long exposure, especially with moving water.
1. Infrared photography with an infrared filter
The first and most accessible way for photographers with a digital camera to get into infrared photography is to buy a filter. Filters work by filtering out all light except infrared. This will lead to an infrared image rendered onto your camera sensor.
The imperfect solution
Using a filter is the quickest route into this genre of photography, but it’s not without it’s problems. The fact is your camera is built to resist infrared light, a fact that has both positive and negative results for you as a photographer. Let’s take a look at some of the factors you’ll need to consider.
Camera sensor – Different cameras will work better or worse when it comes to infrared photography with a filter. This comes down to how strong the filter that blocks infra-red light hitting your camera sensor is. A strong filter will mean you’ll need longer exposures, and the results are not always as strong.
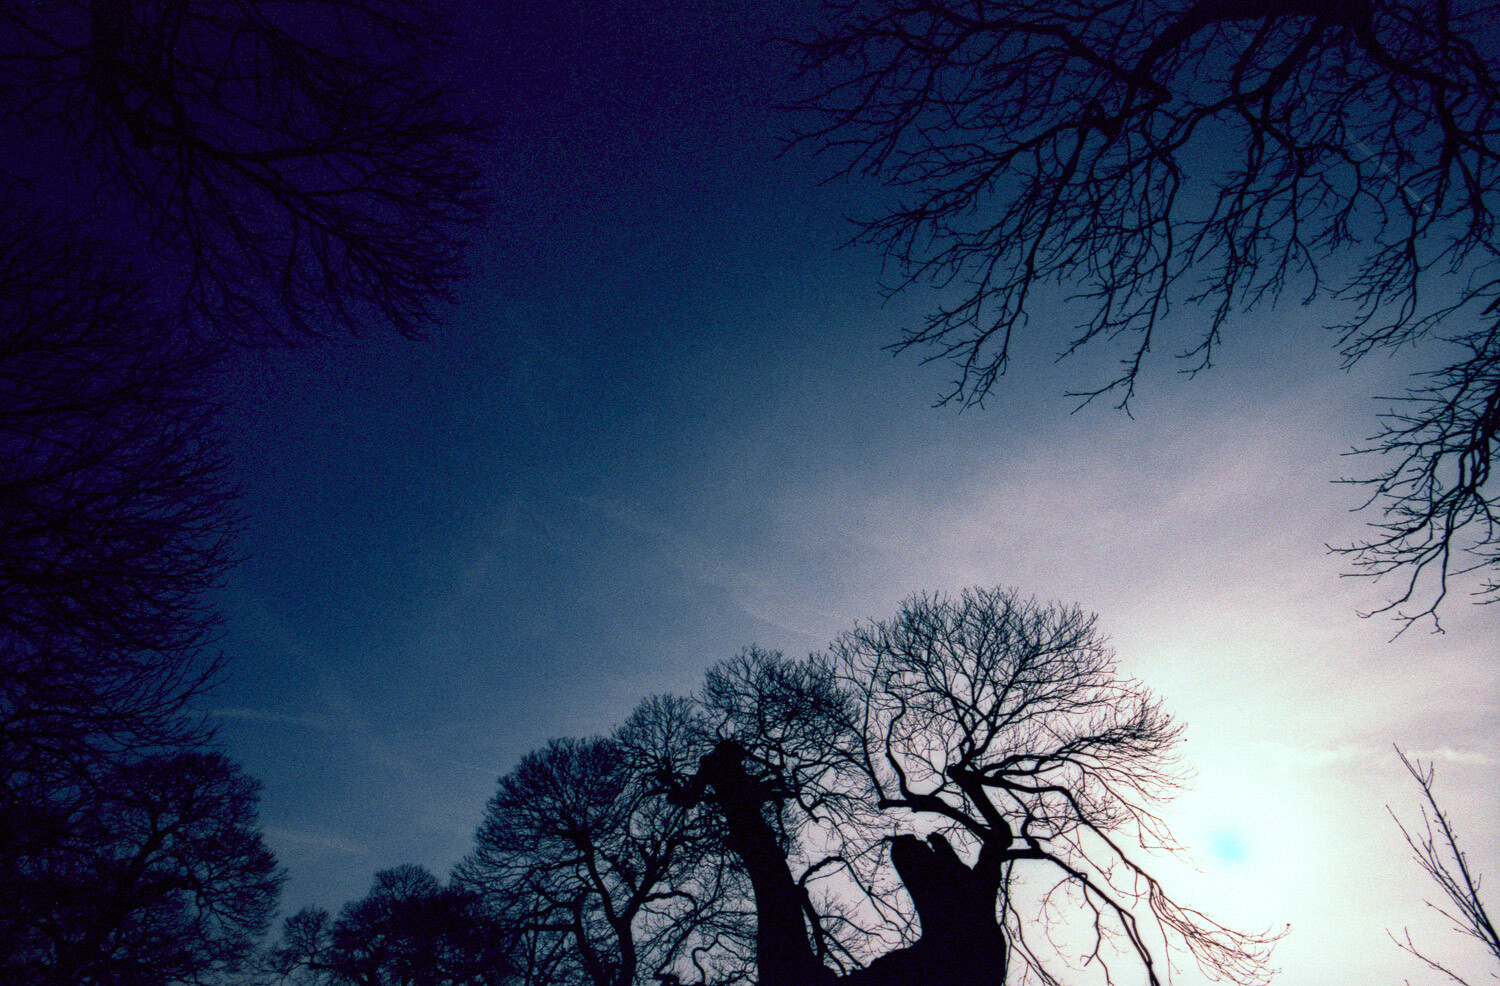
Light leaking – With the long exposures needed it’s important to cover area’s of the camera that allow light in, other than of course the lens. If you fail to do this you’ll find light leaks in, effecting the outer area’s of your image. The most obvious area that needs covering on a dSLR camera is the viewfinder.
Camera noise – If your camera is not sensitive to infrared light you’re going to have two choices, both will lead to digital noise on your image. Those choices are upping the ISO, to allow a shorter long exposure, or exposing for several minutes in bulb mode.
In this photo the clouds in the sky work very well for infrared. There is also a lot of green leaves photosynthesizing.
The need for long exposure
As mentioned infrared photography with a filter requires long exposure, however this can often really add to your image. You’ll need a tripod, a way for triggering your shutter remotely, and you’ll need to cover your camera to prevent light leaking in. Using long exposure is often the choice of many landscape photographers anyway, so what will you gain? If you’re photographing anywhere with moving water or clouds, then you’ll capture their movement with long exposure. Coastlines and seawater are somewhat different in that it will flatten the water, again often a desirable effect.
This image shows an infrared photo without white balance adjustment.
Which filter?
There are plenty of options when it comes to filters you can buy. Obviously, as with different manufacturers, the results will vary, and you’ll need to choose a filter that suits your style. However, all of these filters will do the same thing, and that is filter out infrared light. The photos in this article were produced using the Hoya R72 filter.
The white balance
To get to your desired result with an infrared filter, you’re going to need to adjust the white balance. You’ll usually want to do this in post-processing, however, it’s also possible to do it in-camera.
The method needed to do this in-camera is as follows:
Compose your photo and aim at some grass that is well-lit by the sun – it needs to be photosynthesizing.
Use an exposure of 10 or 20 seconds – enough to correctly expose the photo.
During the exposure, which in this case can be handheld, move the camera around so you get a blurred photo.
Your image should now be red, with no sharp portions to your photo.
Now go to your camera’s white balance settings.
Select the custom white balance option.
Select the photo you have just taken, and use this to set the custom white balance. It will now set everything that is red in your image and make it white.
In this scene, I adjusted the camera’s custom white balance.
Post-processing required
If you chose not to use the camera’s custom white balance, then you’ll now need to process your image. You’ll have a RAW image that is mostly red. You can now decide whether to process for a color infrared image, or a black and white one. In both cases, you’ll need to adjust the red and blue channels to achieve this.
Post-processing is used here from the red image above, and a color infrared was produced.
2. Modify your camera to produce infrared images
Those more serious about infrared photography can look into modifying their camera. It’s important to mention that once modified, your camera will only be useful for infrared photography, so don’t get this done with your main camera.
Those that go down this road often have a second camera body, which they’re prepared to dedicate to infrared photography.
What’s involved?
Remember that most camera manufacturers produce cameras that block out infrared light? You will modify your camera to remove that infrared blocking filter in front of your camera sensor and put an infrared filter in place. That’s the process, and now your camera will be sensitive to infrared light.
What are the advantages?
You can now use this camera more like a regular camera, instead of only being able to take long exposure photos. That means techniques like panning and infrared are possible. You’ll be able to use fast exposures to capture moments. In other words, you will regain full artistic control of your camera, just now it only photographs in infrared.
Cityscapes can work well with infrared. This one has a sepia tone.
3. Film photography and infrared
Infrared images have been produced for a long time, and certainly predate digital photography. It’s possible to take beautiful infrared images with film, though you’ll need to get film that specifically for this form of photography.
An infrared filter used on a digital camera won’t be needed this time, as the film itself exposes for infrared light. However, you may well consider using filters anyway. The same filters that enhance regular black and white photos can also do the same for infrared. That means the classic yellow, orange, and red filters should be in your camera bag. Should you choose to use an infrared filter this will certainly work, but again it will block most of the light, meaning you’ll be taking a long exposure.
The technique creates a dreamscape mood for your photos.
4. Producing infrared images in post-processing
The last method to produce infrared images is post processing.
That means you can choose any of your existing photos, and process them to replicate the infrared effect. It’s worth choosing a photo that would work well if it were photographed as an infrared.
Think of a landscape photo with plenty of green foliage, and a blue sky with one or two clouds. Those wishing to learn how to process their images in this way can do so by reading this article.
Long exposure and reflection on water is a good combination.
Time to create your infrared image dreamscapes!
This article has given you all the information needed to create infrared images, or where to find that information.
Have you tried out this form of photography? If so, which of the above methods did you use, and do you have a preference?
Infrared photography is fun. If you’re waiting to get out on a sunny day, why not try the post-processing route? If you have any infrared images already, why not share them in the comments? We love to see your images!
The post 4 Ways to Create Awesome Infrared Images appeared first on Digital Photography School. It was authored by Simon Bond.


You must be logged in to post a comment.