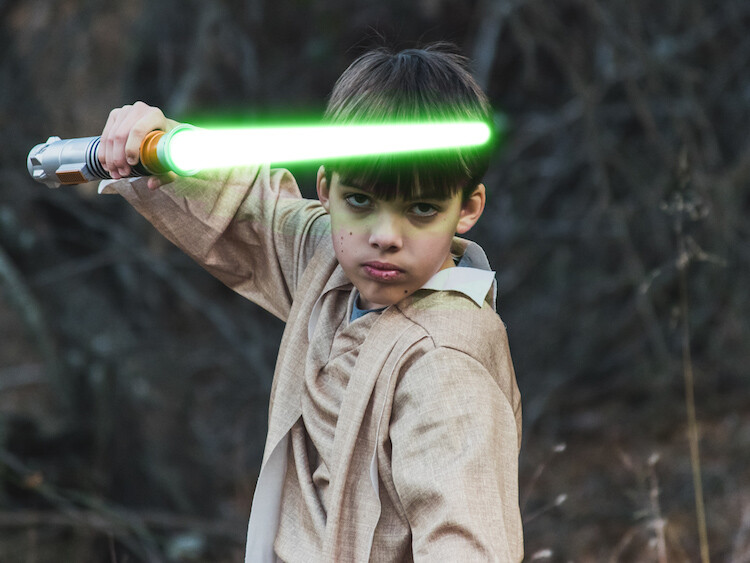
Do your kids love Star Wars? Do you love photography? If so, here’s a great opportunity to join forces and turn your kids into Star Wars heroes or villains by giving them the ultimate Star Wars weapon, the lightsaber.

All you need to awaken the force are these three steps:
- The setup
- Capturing the shot
- Light up your sabers using Photoshop
BONUS tip – The Jumping Jedi
Step #1 – The Setup
For the setup, you will want to make sure that the photographs of your kids look as close to a Star Wars scene as possible. Don’t just take a picture of your kids wearing a t-shirt standing in the kitchen. Luke Skywalker doesn’t light up his lightsaber in a kitchen. Your kids will have a lot of fun getting into character, so spend some time on the setup.
Costumes
You can buy costumes for your kids on Amazon. Here are the costumes used in this tutorial.
- Luke Skywalker
- Rey
- Kylo Ren
- Lightsabers
- Total customs cost ~ $ 40-70
Location
For the location, you will want to find a place that looks like it could be a scene in any of the Star Wars movies. The easiest location to use would be a park with trees, and no noticeable man-made objects in sight.

Step #2 – Capturing the Shot
Action shots
For action shots of a lightsaber battle, you will want to use a fast shutter speed of at least 1/500th of a second, and set your camera to continuous (burst) shooting mode. This will allow you to freeze the action of the battle and take multiple shots in sequence to ensure you capture the best of the action.

Shutter speed was 1/800th of a second.
Portraits
For the portraits, give your kids some epic poses to follow. To give you ideas for creative poses, do a Google images search for the Star Wars character of your choice. This will also help your child get more into the character. For example here are some for Rey.

Do basic edits to the image
After you capture the image, you will need to make a few adjustments to the image to make it stand out. This can be done in Adobe Lightroom and is the final step before your photo is ready to go into Photoshop for the lightsaber effect.
For the look of Star Wars, a few basic edits, such as increasing the contrast and the clarity will help give it a rough and grungy look that Star Wars is known for.

Notice the differences between the before and after of this image by making a few basic edits in Adobe Lightroom.
Step #3 – Light your sabers up in Photoshop
Adding the lightsaber effect is the last and final step in making turning your kid into the Star Wars character of their dreams. This process should take about five minutes per photo once you have done it a few times.
Part 1: Prepare the layer
Start by creating a duplicate layer by pressing CTRL/CMD + J.

Select the icon to create a new fill or adjustment layer, and from that menu select Hue/Saturation. Then, move the lightness slider to -100 to make it black.

Select CTRL/CMD + E to merge the adjustment layer and duplicate layer. Next, set the blending mode drop down to Screen.

At this point, your layers are prepped and ready to add the lightsaber.
Part 2: Add the lightsaber by using the brush tool
Select the brush tool, and adjust the size and hardness of the brush. The size of your brush will vary based on the size of the lightsaber and your image. Set the hardness of the brush to approximately 50%.

Begin to add your lightsaber using brush strokes. Select the end point of the lightsaber, then hold down shift, and click the other end of the lightsaber to draw a straight line. Repeat these lines multiple times to fill in the lightsaber with brush strokes. You will likely need to add free-form brush strokes around the base of the lightsaber to fill it in.

Illuminate the lightsaber
The next step allows you to illuminate the lightsaber. Create three duplicate layers of the lightsaber by selecting CTRL/CMD + J three times. For each layer, you will then select Filter > Blur > Gaussian Blur. But, each layer will be set to a different radius setting. For this image, we used 5, 15, 35, 75 for each respective layer. Note, that the amount of Gaussian Blur needed may vary based on the size of your image. Adjust these numbers as needed to ensure you have a nice glow from the lightsaber.

Select all of the duplicate layers (do not select the background), and merge them into one layer by pressing CTRL/CMD + E. Then set the blending mode to Screen.

Add color to the lightsaber
It’s now time to add color to your lightsaber. Select the icon to create a new fill or adjustment layer, and choose the option for Color Balance. Activate the clipping mask so that you only add color to the lightsaber, not the entire image. You can choose any color of your choice, but in this example, we are working with green.
You will want to add the color selection to each option for Shadows, Midtones, and Highlights. Adjust the color slider up or down based on the color preferences for your lightsaber. For this photo, we set shadows, midtones, and highlights to green at around +65.

Your lightsaber is now complete, but there is still one more important step to get a realistic photo. You need to add some glow to the subject from the illumination coming off of the lightsaber.
Part 3: Add the reflective glow from the lightsaber
Select the background or base layer. Click the icon to create a new fill or adjustment layer, and choose the option for Color Balance. Choose the same color as you used for your lightsaber, but this time as you adjust the color for Shadows, Midtones, and Highlights, it will work best if you emphasize the color around the highlights more than the shadows or Midtones. For this photo, we used Shadows +32, Midtones +38, and Highlights +70

Add a vector mask and then select CTRL/CMD + I to hide all of the color balance. Select the brush tool, and make it a soft edge brush with an opacity around +18. This will allow you to brush in a soft reflection of glow to parts of the image that make it look realistic.

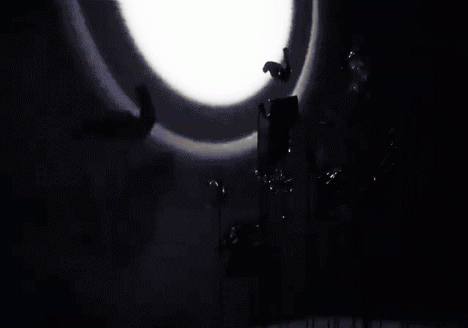
Bonus – Jumping Jedi
A bonus tip that you may want to use in your Star Wars photo shoot is a jumping Jedi. With a few simple tricks, you can give the illusion of your Jedi jumping high into the air over a swinging lightsaber.
First, make sure you use a tripod as you will need the camera to be completely stationary for two different shots. You can have your Jedi jump off a chair at the same time that his enemy swings his lightsaber. Then remove the chair and capture a shot of the exact same scene, but this time without the chair or characters in the shot (tripod use is important for image alignment later).
The second shot should be empty with the exception of the background because it will allow you to take the chair out of the original picture to create the illusion of a jumping Jedi.

Here’s how it’s done in Photoshop.
Start by opening both photos as layers. You will want the empty background shot to be set as the base layer and the action shot as the top one. Select the top layer of the action shot, and click Layer > Layer Mask > Reveal all.

Select the brush tool, and make sure that your foreground color is set to black, which will allow you to brush away the top layer to reveal some of the base layer. If your foreground color is set to white as opposed to black you can switch it to black by clicking X. Simply brush over the chair (make sure you are painting on the mask NOT the layer) to make it disappear.

Add the lightsaber effect from above, and you have the illusion of a jumping Jedi.

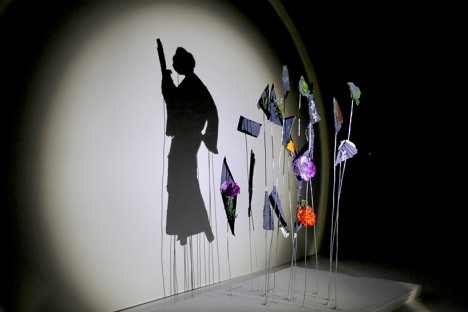
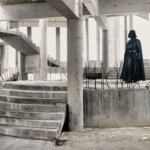
Below are some additional examples of the final images from this Star Wars project to give you additional ideas for action shots and portraits to bring your characters to life.


Finally
You can watch this whole process in the follow short video as well:
Note: thanks to my co-author on this article, David Kahl.
Try to awaken the force in your family by giving them a lightsaber and following this tutorial. In addition, leave a comment with any other fun photography projects that you have captured with your kids or family. Share your images if you give this a go, we’d love to see them!
googletag.cmd.push(function() {
tablet_slots.push( googletag.defineSlot( “/1005424/_dPSv4_tab-all-article-bottom_(300×250)”, [300, 250], “pb-ad-78623” ).addService( googletag.pubads() ) ); } );
googletag.cmd.push(function() {
mobile_slots.push( googletag.defineSlot( “/1005424/_dPSv4_mob-all-article-bottom_(300×250)”, [300, 250], “pb-ad-78158” ).addService( googletag.pubads() ) ); } );
The post How to Turn Your Kids into Star Wars Characters Using Photoshop by Paul Fontanelli appeared first on Digital Photography School.

Digital Photography School


You must be logged in to post a comment.