Blog

  • 5 Tips for Doing Portrait Photography in Busy Locations

    I live in London and it’s a pretty big city with an array of location choices when it comes to portrait photography. There are beautiful parks, many are vast and rolling, dotted around the city; you almost feel like the country is never more than an hour away. There are canals and rivers with boats and ships within easy reach. There are hilltops offering astounding views of the rising skyline and various parts of the city. And of course, there’s architecture that’s so impressive weaving itself across the city, the fabric of London life with a culturally diverse population traversing the criss-cross of alleys and roads. It’s a fast and busy place.

    Some of my couples prefer such busy locations that remind them of the hustle and bustle of the place or of icons and landmarks that they love. Here are 5 tips for you on how to photograph a portrait while walking through a busy city. Embrace the buzz of activity, the age-old structures and new glass skyscrapers that loom over you as you go about your daily business of life, work, and play.

    #1 Scout out the location and look for pockets of photo spots

    5 Tips for Doing Portrait Photography in Busy Locations

    Communicate with your portrait clients and give them some location ideas and options from which they can choose. Get them involved in the process as this helps them get excited, look forward to the photoshoot and own it too!

    This is also a good opportunity to discuss outfits, as clothing is really important to the overall look and feel of the images. For this photoshoot, we had an area in mind, but with two very different locations in terms of ambiance and style.

    Originally the couple wanted an old ruined church which has stunning walls and old architecture and some greenery. This also gave a really cozy country feel, soft light, and almost enchanting ambiance. However, they had already decided on their outfits and had bought them specifically. I felt that these outfits would work better in a fun city walk photoshoot rather than the old church ruins.

    5 Tips for Doing Portrait Photography in Busy Locations

    Match the location to the subjects

    Just a stone’s throw away was the Leadenhall Market. It is built-up, old, colorful, busy and with a very city-feel, yet smart too. I suggested to them this would be the perfect location and after thinking about it they agreed. The forecast was also rainy and the market is a covered area so that was a good option for shelter.

    The main idea was to walk the streets in this part of town and find pockets of photo spots that appealed to them. I know the area well as I shoot quite a few weddings in the city, so I was able to lead them to areas where I thought there were interesting spots to make portraits.

    It’s a nice experience walking the streets, being part of the everyday goings-on, the mundane and the special alike.

    5 Tips for Doing Portrait Photography in Busy Locations

    We were also specifically on the lookout for British icons and landmarks as the couple was visiting from America. So we asked Waterstones, a British book retailer if we could take some pictures inside. They agreed. This leads me on nicely to my next tip…

    #2 Incorporate icons and landmarks

    We chose boutique shops and food stops that were traditional and well-known in the area and used their shop windows as backdrops. Incidentally, the guy’s name is Tom and we passed this quaint Bar called Old Tom’s Bar – just a perfect location for him.

    It’s important that you know a little about what your couple likes so you keep your eyes peeled for anything that appeals to them. In this case, Tom is English and he likes his beer so we stopped by the Tavern for a drink!

    5 Tips for Doing Portrait Photography in Busy Locations

    5 Tips for Doing Portrait Photography in Busy Locations5 Tips for Doing Portrait Photography in Busy Locations

    Get permission

    There are places where it would be wise for you to ask permission first before going in for some photos. Usually, the shopkeepers are helpful and allow you to do so if you are quiet, non-disruptive and quick. However, others refuse and that is perfectly fine – don’t take it personally.

    In the market, there was a lady shining shoes. She had a traditional shoe-shine set-up which would have been perfect for some photos, but she refused consent so we didn’t push. Other places are public and open and you can take snaps, just like any tourist would, to your heart’s content. The spot on the left is one such place. The photo on the right was taken from across the road, a fair distance to the building as permission is needed if you go too close!

    5 Tips for Doing Portrait Photography in Busy Locations

    #3 Leverage the busy-ness

    There is just no getting away from people on crowded, busy streets. Often, it’s a waiting and asking game. You either wait for people to walk past and clear your space, or you ask them to move away. Again, politely and with great gratitude, if they happily oblige.

    You can leverage this busy-ness by incorporating motion into your images such as this one below. It could take several attempts to get it right as this can be a very difficult setup with no planning ahead or anticipation of what is to come.

    Of course, if things don’t go to plan in shots such as this, there is always Photoshop!

    5 Tips for Doing Portrait Photography in Busy Locations

    Adding motion with a long exposure and blurred moving objects can add a sense of the hustle and bustle of the city to your images.

    #4 Do something fun and quirky

    Keep the photoshoot lighthearted and fun by finding some unusual spots and asking your couple to do some quirky things if they are open to that. Like this image below standing in between the huge exhaust installations with the BEL-AIR sign in the background pretending to get blown away! Don’t forget to capture some safe, normal shots too like the one below it, just in case.

    5 Tips for Doing Portrait Photography in Busy Locations

    5 Tips for Doing Portrait Photography in Busy Locations

    We found this old chapel with sculptures (below) and thought it would be funny if they copied the poses of the sculptures as another quirky shot. This turned out to be one of their favorite spots from the day too.

    The photoshoot is more than just taking pictures, it is an experience as well, so aim to make it easy and fun.

    5 Tips for Doing Portrait Photography in Busy Locations

    #5 End on a high note

    As you are shooting, don’t forget to include “indicators” in your conversations as to how far you are into your photoshoot, what other plans you may have in terms of location or shots such as individuals, action, walking away, etc. Tell them how far along you are into your plan, if you are are already nearing the end of the shoot, whether this is this your last location and your last shots, and when it’s a wrap.

    Couples appreciate knowing where the markers are in the photoshoot. Some people just cannot handle more than half an hour so markers and indicators help them through it. Others like long photoshoots that could well run beyond the agreed duration and you need to keep tabs on your time so these markers work well for you too. As much as possible though, do not look at your watch!!!

    Lastly, end on a high note with lots of laughter if possible. If you achieve this, it greatly helps in reinforcing good photoshoot memories so that there will be a “next time” for another photoshoot with you! Your couple will look back at this day and remember good vibes, not so much the other trying parts like the weather, how cold it was, the hassle of waiting for people to get out of the way, and so forth. When you show your couples their image gallery, end with happy photos too! And that’s a wrap!!

    5 Tips for Doing Portrait Photography in Busy Locations

    5 Tips for Doing Portrait Photography in Busy Locations

    I hope you enjoyed this little article and do share any tips you may have which have not been covered above!

    The post 5 Tips for Doing Portrait Photography in Busy Locations by Lily Sawyer appeared first on Digital Photography School.


    Digital Photography School

  • Have your say: Best zoom lens of 2017

    This year saw plenty of new lenses released, including several excellent zooms. We’ve used a lot of them, but we want to hear from you – what were your favorite zoom lenses of 2017?

    Articles: Digital Photography Review (dpreview.com)

  • Why Every Photographer Needs a 24-70mm Lens

    Fondly known as the “walk around lens” by professionals and hobbyists alike, the 24-70mm lens is the staple of any photography kit! A lens that offers diversity and functionality, its range makes the 24-70mm lens a remarkable companion for a vast array of photo shoots. From wide captures to close-up portraits, and everything in between, this lens is one that many photographers jump for immediately.

    Camera brands such as Canon, Nikon, Pentax, Sony, Sigma, and Tamron understand this and have offered a rather wonderful selection of 24-70mm lenses from which to choose. Several professionals actually own more than one 24-70mm, as this lens has the potential of becoming the most used glass in your photographic arsenal.

    Why Every Photographer Needs a 24-70mm Lens

    Why? Well, it’s awesome of course! The benefits of the 24-70mm lens are as priceless as our love for it. Here are some of the reasons why you want to have this lens in your bag.

    No Learning Curve

    The focal range of the 24-70mm lens is greatly inspired by the human eye. As such, this lens allows brand new photographers to learn with more ease than some other types of lenses due to its lack of distortion.

    It is much easier to study composition when you can photograph similarly to how your eye sees naturally. Some wide angle lenses have a curve to the glass, which causes the subjects to warp when improperly photographed. The 24mm aspect of this lens offers no ultra-wide angle distortion while still offering a rather wide capture, perfect for simply concentrating on the best arrangement of elements.

    There is equally little trouble with the rest of the focal range. The range passes through 50mm, a commonly used focal length for portraiture. The 70mm offers a very nice zoomed close-up. This lens is a great stepping stone to a variety of focal lengths, such as the 70-200mm lens.

    Why Every Photographer Needs a 24-70mm Lens

    Close Focusing Abilities

    This lens is absolutely excellent for a subject that happens to be in close proximity to the glass. The minimum focusing distance does vary depending on models, but it averages 38 centimeters (15 inches) from the glass. To give perspective on how close this is, the average focusing distance for most lenses is 48 centimeters (19 inches), although this is affected by whether your camera is full frame or not, the type of lens, etc.

    Although the 24-70mm is not a macro lens (whose minimum focusing distances are around 20 centimeters), it can still take beautiful close-up photographs of flowers and other favorite macro subjects.

    Why Every Photographer Needs a 24-70mm Lens

    Versatile Range

    Arguably the most important benefit of the 24-70mm lens is its versatility. The range offers limitless possibilities, with an added boost of immense adaptability in the face of various photo shoots.


    You can easily go from a wide angle to a zoom with this beauty, acclimating as quickly as your subjects change. This lens also allows you to capture a large variety of shots per session without the need to consistently change your lens. Considering our photography game with clients is primarily speed and efficiency, the 24-70mm will quickly become your best friend for this reason alone.

    The versatility allows you to pack just this one lens when you go gallivanting across the world on vacations or destination shoots, an ideal prospect in and of itself. The 24-70mm lens is also a favorite of wedding photographers, as it allows them to capture precious moments without lapsing to change out gear. As previously touched upon, the focal range also covers the significant focal lengths in the photography world, such as the 50mm and the 70mm.

    Why Every Photographer Needs a 24-70mm Lens

    Robust and Comfortable Build

    Most 24-70mm lenses are rather robust little creations, with a comfortable build to last. Knowing that this lens is referred to as the walk around lens, most brands have ensured that your faithful companion is able to outlast most of your adventures.

    From weather protection offered by some manufacturers, to solid and sturdy bodies, the 24-70mm is ready for most anything you can throw at it. This lens is also rather comfortable to hold, considering it isn’t very long nor terribly short.

    Why Every Photographer Needs a 24-70mm Lens

    Size

    Of course, we cannot discuss build without talking about size. At an average size of 3.28 x 3.28 x 4.86 inches and weight of approximately 2 pounds (900g), the 24-70mm is neither the largest nor the heaviest lens on the market. Quite the contrary, this lens happens to fit into most cases and isn’t the world’s worst hassle to carry.

    In comparison to the rest of my kit, my 50mm (f/1.2) lens weighs more despite being shorter. To add even more praise, I have been easily able to put this lens with a camera body into a regular old purse. The amount of use and adaptability you can accomplish with this lens greatly outweighs any physical burdens of transporting it and many would argue that this lens is the same size as the average, most common lenses.

    Why Every Photographer Needs a 24-70mm Lens

    Now that the 24-70mm has (hopefully) won you over, there comes the burden of choosing which one to get. There are a variety of different 24-70mm lenses, ranging not just by brand, but also by aperture and weight. Here are some, just to name a few:

    Canon

    Canon’s collection of lenses is home to the Canon EF 24-70mm f/2.8L, Canon EF 24-70mm f/2.8L II USM, and Canon EF 24-70mm f/4L IS USM Lens. The f/2.8 aperture version is the most commonly seen 24-70mm lens, due to its beautiful depth of field and low light capabilities (remember, the wider the aperture, the more light the lens lets in!).


    The EF 24-70mm f/2.8L (above left) is the predecessor of the newer EF 24-70mm f/2.8L II USM (above middle), and those on a budget may do well looking into the original lens which landed an iconic spot in Canon’s lineup. The updated version features improvements to image sharpness, vignetting, and AF speed. That being said, these improvements come at a rather substantial price tag. When pairing with a camera body that features advanced auto-focus systems, the version II is significantly faster than its predecessor. However, if you own one of the older bodies, you won’t see a significant difference. Like version I, version II features weather sealing with a front filter in place, which separates this lens from its competitors.

    Canon’s EF 24-70mm f/4L IS USM Lens (above right) is another option. Although it does not feature a 2.8 aperture, the addition of image stabilization may sway some to purchase this version. Some of the benefits of this lens over its f/2.8 companion are reduced size/weight, image stabilization, and much lower cost. Another huge benefit is maximum magnification (MM). The 24-70 f/4L IS features an impressive 0.70x magnification (compared to 0.21x for the 24-70L II) which means it can double as a macro lens in a pinch.

    Nikon


    Nikon has the AF-S NIKKOR 24-70mm f/2.8E ED VR ($ 2396 USD) and AF-S NIKKOR 24-70mm F2.8G ED ($ 1796 USD), with a $ 600 difference between them (at the time of writing this article). The 24-70mm f/2.8E ED VR is on the larger size of the 24-70mm array of lenses, being an inch longer than its predecessor and a bit wider. However, both of these lenses are extremely sharp in practical use, a wonderful testament to the models. Unfortunately, there is quite a bit of vignetting at the wider apertures. The f/2.8E ED VR version features image stabilization and vibration reduction, unlike the 24-70mm F2.8G ED.

    Tamron

    Tamron is home to their 24-70mm f/2.8 DI VC USD Lens, which is still one of the only f/2.8 24-70mm lenses with image stabilization. Tamron’s vibration control system allows this lens up to 4-stops of camera shake compensation. The ability of this lens to capture sharp images of static subjects in low light is extremely beneficial, given its low light capability. This lens is also significantly more cost-effective than the Canon lenses. Sadly, you can expect anywhere from 2-3 stops vignetting on a full-frame camera, wide open, depending on the focal length. However, this lens is quite sharp and was noted to out-perform Nikon’s 24-70mm not too long ago. Unfortunately, the AF has been said to not always be consistent.

    Note: Read reviews for lenses before you make any decisions.

    Sigma

    Sigma has the Sigma 24-70mm F2.8 DG OS HSM ART. This lens is significantly heavier than some of the other 24-70mm lenses mentioned, primarily the Canon 2.8 version II. The build quality is excellent given the comparatively affordable price tag. This lens features built-in vibration reduction just like the Tamron equivalent, and a minimum focusing distance of 37 centimeters.

    For more on other 24-70mm lenses see these dPS reviews and comparisons:

    • Lens Comparison 24-70mm f/2.8 Canon Versus Tamron
    • Field Test and Thoughts: Tamron 24-70mm F/2.8 Di VC USD G2 Lens
    • Writer’s Favourite Lens – Nikon 24-70 mm F2.8

    Your turn

    Now that you’ve learned of the wonders of this charming lens, what are you waiting for?!

    Have you used a 24-70mm lens before? What are your favorite things about it? Please share in the comments below.

    The post Why Every Photographer Needs a 24-70mm Lens by Anabel DFlux appeared first on Digital Photography School.


    Digital Photography School

  • Have your say: Best high-end ILC of 2017

    Time is running out to vote for your favorite cameras and lenses in our year-end Readers’ Choice Awards! In this category, we’ve rounded up the seven of the best high-end interchangeable lens cameras for enthusiasts and pros.

    Articles: Digital Photography Review (dpreview.com)

  • Transform Your Images with a Click – 62% off these Lightroom Presets Today

    We’re at day 5 of our dPS 12 Days of Christmas and today we have one that we know many of you who use Lightroom will LOVE. It’s 62% off any of our Lightroom Presets bundles!

    If you have ever looked at other people’s beautiful images and have wondered, “Why don’t mine look like that?” Then you’ll find todays deals perfect for you.

    These beautiful presets have been created by some of our favourite photographers to save you a whole lot of processing time.

    They will help you convert your photos from average to amazing with just one click.

    Here’s the deal – 101 Lightroom Presets for just $ 19 USD:

    Normally $ 49 – today you can pick up any one of these 101 presets packs for just $ 19 USD (62% off).

    • 101 Lightroom Presets by Cole Joseph – to take your landscapes and people photos from average to amazing… including 7 high quality collections
    • 101 LANDSCAPES Lightroom Presets by Todd and Sarah Sisson – for all scenery seasons including a bonus toolbox of stackable presets
    • 101 Lightroom PORTRAITS Presets by Rachel Devine – including 67 different presets and 36 different portrait brushes

    These collections have been created exclusively for dPS by professional photographers to make your photos “pop” and save you time getting the look you want.

    With these collections and a few clicks in Lightroom, people will be wondering why their images are not as stunning as yours!

    Each one contains 101 presets – at just $ 19 USD that’s around 18 cents per preset. Whether you just grab the one pack or all three you’ll love todays deal.

    Bonus Parter Offers

    Anyone who picks up any of the offers during these 12 days of offers gets to take advantage of your exclusive DPS Christmas Deals Bonus Offers, like todays featured bonus where you can pick up Perfectly Clear Complete for just $ 89 USD.

    Christmas Deals:
    Bonus Offers

    Bonus Offers

    Brought to you by

    ON1
    Athentec Perfectly Clear
    KelbyOne
    New York Institute of Photography

    The post Transform Your Images with a Click – 62% off these Lightroom Presets Today by Darren Rowse appeared first on Digital Photography School.


    Digital Photography School

  • iPhone X sample gallery

    $ (document).ready(function() { SampleGalleryV2({“containerId”:”embeddedSampleGallery_7669073668″,”galleryId”:”7669073668″,”isEmbeddedWidget”:true,”selectedImageIndex”:0,”isMobile”:false}) });

    The iPhone X shares the iPhone 8 Plus’ camera specs with two notable exceptions: both of the X’s main cameras are stabilized, and the telephoto lens boasts a brighter F2.4 aperture. Additionally, the X’s front-facing ‘TrueDepth’ camera makes it possible to take selfies using Portrait Mode. Take a look at what Apple’s newest flagship device can do.

    See our iPhone X sample gallery

    Articles: Digital Photography Review (dpreview.com)

  • Trump administration reinstates mandatory drone registration

    President Trump has signed a bill that reinstates mandatory drone registration in the US, reversing a court ruling from earlier this year that eliminated the requirement. Mandatory drone registration was first established in the U.S. in late 2015 by the FAA, but the requirement was reversed earlier this year by the U.S. Court of Appeals for the District of Columbia Circuit after it ruled that the FAA lacked authority over such devices.

    The reinstatement was included in the National Defense Authorization Act; although whether or not Trump was aware of its inclusion when he signed the bill into law is unclear.

    In a statement provided to TechCrunch, an FAA spokesperson praised the registration requirement, saying:

    We welcome the reinstatement of registration rules for all small unmanned aircraft. Ownership identification helps promote safe and responsible drone operation and is a key component to full integration.

    Operators in the U.S. must register their drone if it weighs between 0.55lbs and 55lbs. The FAA’s registration website currently states, “You will be subject to civil and criminal penalties if you meet the criteria to register an unmanned aircraft and do not register.” Drones weighing more than 55lbs must be registered by paper rather than online.

    The agency provides full aircraft registry details here.

    Articles: Digital Photography Review (dpreview.com)

  • How to photograph the northern lights

    After publishing my recent 2017 Gear of the Year article, in which I highlighted a lens I used for shooting the aurora borealis, numerous people reached out to ask if I would write a follow-up article on how to photograph auroras. So, I decided to team up with DPReview contributor, astrophotographer, and aurora tour guide, José Francisco Salgado, to share some insight into capturing this amazing natural phenomena.

    The aurora is the Earth’s own special effects show, seen here from Grundarfjörður, Iceland.
    ISO 2500 | 30 sec. | F2.8
    Photo by José Franciso Salgado

    What causes the lights?

    The Northern Lights, or aurora borealis, are natural displays of light that occur in the upper part of Earth’s atmosphere due to interaction between charged particles from the Sun and the Earth’s magnetic field and atmosphere.

    The Sun releases charged particles (including electrons) into space in a continuous stream, called solar wind, as well as in sudden and violent releases called Coronal Mass Ejections. Several days after leaving the Sun, these particles can reach our planet. Most are deflected by the Earth’s magnetic field, but some find themselves inside the magnetic field and populate reservoirs within the field. Different events, including interactions with the solar wind, accelerate these particles towards an oval around the magnetic poles.

    The Northern Lights are produced when these charged particles, guided by the magnetic field of the Earth, precipitate through the atmosphere and collide with nitrogen and oxygen. These collisions lead to atomic processes called ionization and excitation, which result in the emission of lights of varying color. A corresponding phenomenon in the southern hemisphere is called the Southern Lights, or aurora australis.

    The aurora occurs when charged particles, guided by the Earth’s magnetic field, collide with nitrogen molecules and oxygen atoms in the upper atmosphere.
    ISO 6400 | 3 sec. | F2.8
    Photo by José Francisco Salgado

    Getting to where the auroras are visible

    Auroras are typically produced in a band known as the auroral zone, which can be 3° to 6° wide in latitude and between 10° and 20° from the geomagnetic poles. This means that auroras are normally seen at very high latitudes (north and south). The region where auroras occur at any given time is called called the auroral oval. Auroras are also produced in the dayside of the Earth, but since sunlight is about a million times brighter this renders them invisible during the day.

    Although it’s easier to see auroras at higher latitudes, solar activity can cause the auroral oval to enlarge, making them visible at lower latitudes, including the northern regions of the continental US. Since geomagnetic activity responds to solar activity several days later, it’s possible to forecast auroral activity to help with your planning.

    NOAA provides long-term (3 days) and short-term (30 min) aurora forecasts online. Also, there are several alert systems including email notifications from spaceweather.com or smartphone apps that can provide alerts when the aurora is active at your location, such as My Aurora Forecast & Alerts (iPhone; Android) and Aurorasaurus (iPhone; Android).

    NOAA’s 30-minute forecast shows the intensity and location of the aurora forecast for the time shown at the top of the map.

    When Northern Lights are forecast to be visible, find an open field with an unobstructed view of the north. If you don’t want to wait for that to happen, or if you want to see the most intense aurora, you’ll need to move to higher latitudes. Before traveling to a particular northern location, consider three factors:

    • Is the location within the auroral zone?
    • Is the weather usually clear at that location during the month you’re planning to visit? (Clouds occur at much lower altitudes than auroras, which occur above 100 km.)
    • Will local light pollution impede your observations and photography? The website Lightpolutionmap.info can be of assistance here.

    Some locations to consider are:

    • Fairbanks, Alaska
    • Yellowknife, NT, Canada
    • Churchill, MB, Canada
    • Outside Reykjavik, Iceland
    • Norwegian Lapland, Norway
    • Swedish Lapland, Sweden
    • Finnish Lapland, Finland
    • Stewart Island, New Zealand
    • Ushuaia, Argentina
    • Antarctica
    Photographing the Northern (or Southern) Lights is not very difficult, but you do need to get to a location where you can see them. One of the advantages of shooting from frozen lakes in Yellowknife, Canada, is the unobstructed views they provide of the entire sky.
    ISO 5000 | 5 sec. | F2.8

    Remember, locations at extreme latitudes will have almost no nighttime close to the summer solstice, so avoid visiting these place from mid-April to mid-August in the northern hemisphere, or mid-October to mid-February in the southern hemisphere.

    Equipment

    There’s no ‘correct’ gear for taking pictures of the auroras, but having the right equipment can translate into higher quality images and provide more creative options.

    Camera: A camera with a full frame sensor will provide better high ISO performance than those with smaller sensors. That said, modern sensors are extraordinarily good, and it’s possible to get great aurora photos even if you don’t have a full frame sensor, so don’t let that stop you. On a recent trip, some friends of ours captured great aurora pictures using a Sony RX100 III, a camera with a 1”-type sensor.

    This photo was captured using a Sony RX100 III, a camera with a 1″-type sensor. The Big Dipper and Ursa Major can be seen in the sky behind the aurora.
    ISO 3200 | 6 sec. | F1.8
    Photo by Steve and Colleen McClure

    Lens: A fast, wide lens will let you capture as much light as possible. Anything wider than 24mm will work, though a 14mm or 16mm lens will allow for more dramatic shots. A lens with a maximum aperture of F2.8 is a good starting point, but faster is better. For example, a lens with an aperture of F1.8 has 2.5x the light gathering ability of a F2.8 lens. That’s a big difference in low light.

    Tripod: Exposures are usually measured in seconds, so a sturdy tripod is a must. ‘Sturdy’ is the key word. It doesn’t have to be a fancy, state of the art carbon fiber model. As long as it holds your camera steady it will do the trick.

    There are some optional accessories worth considering as well. If you plan to capture time-lapse sequences, an intervalometer is required, and these are included on many cameras today. A remote trigger, such as a cable release or smartphone app, will make it easy to trigger the shutter without touching your camera. Finally, since you’re working in the dark, a headlamp that allows you to see what you’re doing while leaving your hands free to work will be useful. (Fellow observers will appreciate you using a headlamp with a red light.)

    Footage from The Legend of the Northern Lights, a film shot and produced by José Francisco Salgado to augment symphony orchestra concerts. These time-lapse sequences were shot in 2014 with the Nikkor 14-24mm f/2.8G lens on a Nikon D4 and D3s.

    Taking photos

    Shooting aurora isn’t technically difficult, but every night is different and you may need to experiment a bit. It’s best to operate your camera in manual mode, with manual focus, for predictable, consistent results.

    File format: Set your camera to capture Raw files. This provides the best image quality and the most latitude for making adjustments in post processing, particularly useful if you need to tweak settings like exposure or white balance. Don’t depend on a manufacturer’s baked-in Jpeg profile.

    Focus: Focusing directly on the aurora is little bit like trying to focus on smoke. Fortunately, relative to your position, the aurora is effectively at infinity. It may be tempting to just rotate the focus ring on your lens to the infinity marker, but on many lenses that’s really more of an approximation.

    Aurora in Canada’s Northwest Territories.
    ISO 3200 | 4 sec. | F2.8
    Photo by Dale Baskin

    If you’re focusing at night, use your camera’s live view feature. Point the camera at the brightest star you can see, magnify the view to the maximum, and rotate the focus ring until the disk of the star looks the smallest. Once you think you’ve achieved critical focus, take a test shot and review the image for sharpness. If adjustment is needed, repeat.

    Once focus is achieved, a useful technique is to lock the focus ring in place with gaffer’s tape to prevent it from moving. Alternatively, you can place marks on the lens with a marker in order to return the ring to the same position. These methods can also be used if you want to focus on a distant object during the day and save the focus position for later.

    Aperture: Set your lens to its widest aperture to let in as much light as possible. If you’re concerned about optical performance wide open you can stop the lens down a bit, but doing so will quickly reduce the amount of light reaching the sensor. If at all possible, shoot at F2.8 or wider.

    Shutter speed: Optimal shutter speed will depend on the brightness of the aurora and how quickly it’s moving. A short shutter speed will capture detail and structure that would otherwise be averaged out over a longer exposure. On the other hand, a slight motion blur can make an aurora photo more aesthetically pleasing. Take a few test shots to find the optimal balance, but 5-10 seconds is a good starting point to work from.

    If the lights are dancing around quickly, shorter shutter speeds will let you capture more of the detail and structure of the aurora that would be otherwise be averaged out in a longer exposure.
    ISO 1600 | 3.2 sec. | F1.8
    Photo by Dale Baskin

    ISO: Set your ISO to the highest level that gives you acceptably clean results on your camera. This will allow you to keep shutter speeds as low as possible in order to capture more detail in the aurora. Depending on conditions, you may be able to get by with ISO 800, though you may have to go to 6400 or higher.

    Long exposure noise reduction: If you’re planning to take individual photos, turning this on will provide some benefit; however, it will effectively double exposure time while the camera shoots a dark frame. If you plan to shoot time-lapse sequences, leave this feature off to avoid long delays between exposures.

    Other considerations

    Embrace the landscape. Part of what makes the aurora interesting are the remote places where it’s frequently seen. In Alaska, photos may contain mountains. In northern Canada, it might be silhouettes of trees in the taiga forest. Iceland might present you with glaciers. Each place is unique and part of the story behind the photo.

    Embrace landscape features and even man-made objects to enhance your aurora photos.
    ISO 6400 | 8 sec. | F2.8
    Photo by José Francisco Salgado

    When creating compositions, think about other features or objects you could include. Snow and water can reflect light from the aurora, though in very different ways. Man-made structures can provide interesting elements in a scene or silhouettes. Since a wide aperture will produce a shallow depth of field, avoid objects close to the camera unless you want them to be way out of focus on purpose.

    Know your equipment. Depending on where you are, aurora can quickly go from being a slow, undulating wave to a rapidly moving, multi-colored light show. Be prepared to shift gears and adjust your settings quickly to avoid missing great photo opportunities.

    Finally, be patient. Mother Nature works on her own schedule, and you’ll need to work around it. If at first you don’t succeed, keep trying. It’s worth it.


    José Francisco Salgado, PhD is an Emmy-nominated astronomer, science photographer, visual artist, and public speaker who creates multimedia works that communicate science in engaging ways. His Science & Symphony films through KV 265 have been presented in 200 concerts and lectures in 15 countries.

    José Francisco is a seasoned night sky and aurora photographer and filmmaker. If you would like to view, photograph, and learn about the Northern Lights then you can inquire about his Borealis Science & Photo Tours in Yellowknife, Canada.

    You can follow him on: Flickr, Instagram, 500px, Facebook, and Twitter

    Articles: Digital Photography Review (dpreview.com)

  • Shooting K?lauea Volcano, Part 2: Grounded

    In the first part of this series, I talked about shooting Kilauea’s lava surface-flows using a drone. Now, I’d like to take a step back and talk about shooting the lava in a more traditional method: using a DSLR on the ground.

    If you’re inside the Hawaii Volcanoes National Park and can’t fly a drone, this is the only affordable way of shooting the surface flows. But even if a drone is an option, shooting from the ground is different and will give you unique opportunities and some challenges.

    Shooting with a DSLR might be the least technically challenging way of shooting the lava in Kilauea, but it’s not as easy as you might think.

    First of all, there’s the challenge of traversing the lava on foot. You’re basically walking on very hard, sometimes jagged terrain, and moving from point to point searching for compositions can be strenuous. As I’ve mentioned before, it’s a 7-8 km hike to get to the surface flow area, but there’s much more hiking on location to get the actual shots.

    When shooting, you often want to get as close as possible to the lava, in order to get more detail and/or a desired perspective. This might be a problem in some cases, as the lava is about 1100 degrees Centigrade, and this temperature can be felt very well even from several meters away.

    In some of the shots, I felt like I was inside an oven. I had to find my composition quickly, take a few images, and run away, since staying there would become unbearable after several seconds.

    This particular shot has a slightly narrower depth of field than I’d like it to have. The reason is that lava was flowing underground very close to where I was standing, and because of the intense heat, I didn’t have the time to set the tripod. I had to shoot hand held and run for my life!

    Protective gear is very important. The bare minimum would be a long-sleeve shirt, sturdy, ankle-high hiking boots, long pants and, of course, gloves. The latter are needed both because the skin on your hands is struck by radiating heat from the lava, and because the tripod can get very hot after staying near the lava for some time. I would also recommend a beanie to protect your forehead and ears from the heat.

    Don’t neglect listening to your body—if you ignore the heat and the pain, you might find yourself with second-degree burns. I’ve mentioned it before, but a good guide is very important when hiking to dangerous surroundings, and can keep you in the safe zone (if you so wish).

    Last but not least, there’s the heat-haze problem. The heat creates this well-known blur, which means some shots cannot turn out sharp, no matter how well-focused they are.

    A decent solution can be waiting for the wind to blow the hot air and supply a short relief from the haze, but the wind doesn’t always cooperate. You’re left with the option of talking multiple shots in hope that some turn out relatively sharp. Another approach is using the haze to your benefit in an artistic way. It surely conveys the feeling of heat to the viewer.

    The Hawaiian sunset is brief, which means the really good light is short-lived, and after that’s gone you’re going to need a tripod to keep stable. This naturally makes shooting much more cumbersome, and prevents the shoot-and-run-away technique mentioned above. The upside is that there’s beautiful contrasty details to be shot, which makes for good abstracts.

    Regarding photographic equipment, I mostly used the telephoto end of my focal-length range. One lens I didn’t use was my 11-24mm, since it was way too wide, and the 16-35 was also left in the bag most of the time. The lenses I used the most were my 24-70mm and especially my 70-300mm.

    The latter enabled me to get the intimate details of the lava from a safe (or rather possible) distance.

    Next time I’ll talk about shooting the lava from a boat.


    Erez Marom is a professional nature photographer, photography guide and traveler based in Israel. You can follow Erez’s work on Instagram and Facebook, and subscribe to his mailing list for updates.

    If you’d like to experience and shoot some of the most fascinating landscapes on earth with Erez as your guide, take a look at his unique photography workshops in locations such as southern Iceland, Northern Iceland, The Lofoten Islands, Patagonia, Greenland, Namibia and the Faroe Islands.

    More in The K?lauea Series:

    Part 1: How to Melt a Drone

    Selected Articles by Erez Marom:

    • Parallelism in Landscape Photography
    • Winds of Change: Shooting changing landscapes
    • Behind the Shot: Dark Matter
    • On the Importance of Naming Images
    • On Causality in Landscape Photography
    • Behind the Shot: Lost in Space
    • Behind the Shot: Spot the Shark
    • The Art of the Unforeground
    • Whatever it Doesn’t Take

    Articles: Digital Photography Review (dpreview.com)

  • What to do When it Starts to Rain – Are you Prepared to Keep Shooting?

    I live in a country where the climate is described as temperate. This is just another euphemism for not so great weather! Typically, the seasons sort of merge together and the annual rainfall can dampen anyone’s spirits, pun intended.

    It was when living in Paris, France for a couple of years that I truly understood the real meaning of the four seasons. Spring in Paris is actually spring – chilly but with clear blue skies and sunshine. And in summer, my favorite season, it is gloriously hot.

    Rain and water, in general, are not a good mix when it comes to camera equipment, especially when it comes to your camera bodies and lenses. But there are times when you can get caught literally out in the rain. So what do you do? Panicking is an option, albeit not a practical solution.

    What to do When it Starts to Rain - Are you Prepared to Keep Shooting?

    In this article, I aim to provide some useful tips to keep you and your gear protected from the elements. The following tips are for when you find yourself caught out in a light rain shower that doesn’t last long, but want to stay on location to continue shooting.

    The first thing to do before stepping outside your door is to check the weather forecast. If you have to travel to your chosen destination, the weather may change when you arrive, so be prepared for that. Most smartphones have a weather app built-in. I recently downloaded the rain radar app. It’s free too (for Android here – for iOS as well, just search for the right one for your area).

    5 Useful items to have in case it rains

    1. Rain pack and a towel
    2. Lens hood
    3. Camera rainsleeve or a Ziplock bag
    4. Silica gel packs
    5. Umbrella
    What to do When it Starts to Rain - Are you Prepared to Keep Shooting?

    Hiking boots plus my stuff bag which has my waterproofs and a towel.

    Preparation is key here. Inevitably, when shooting outdoors, you are at the mercy of the weather. I have a designated rain pack that I can throw into the boot (trunk) of my car along with my hiking boots. I use this type of bag so as I can stuff my waterproofs and towel inside at short notice. Plus, the bag itself takes up so little space for storing away afterward.

    What to do When it Starts to Rain - Are you Prepared to Keep Shooting?

    My waterproofs & hiking boots ready to go in the boot of my car

    What to do When it Starts to Rain - Are you Prepared to Keep Shooting?

    My handy stuff bag, otherwise known as a dry bag for storing scuba fins!

    The towel is for wiping surface water off your gear, especially your tripod legs, before collapsing the legs down. Or indeed yourself!

    What to do When it Starts to Rain - Are you Prepared to Keep Shooting?

    Handy anti-rain items for cameras

    The humble lens hood can sometimes get overlooked for its usefulness. This small lightweight bit of plastic is key in not only preventing unwanted strong light hitting the lens at an angle, which produces lens flaring and ghosting. It can also help stop the rain from hitting the front of the lens element. Another bonus for the lens hood is protecting your expensive glass against a fall or knock.

    Another permanent fixture in my camera bag is the camera rainsleeve by OP/TECH USA. However, I haven’t yet had to use it but knowing that it’s there is reassuring. It is probably the cheapest camera gear item you will ever buy. I think it’s worth paying $ 6.95 USD. It is inexpensive and takes up so little room in your camera bag. Of course, you can always improvise and use a ziplock bag instead.

    What to do When it Starts to Rain - Are you Prepared to Keep Shooting?

    Camera Rainsleeve by OP/TECH USA – a great inexpensive solution to protect your camera in the rain.

    Moisture absorbent silica gel packets, the little 5g packets that are used for storage or dispatch of electronic products. I tend to keep them when I get a parcel delivered, so I have a couple in my camera bag at all times. You can also buy these silica gel packs online quite cheaply too.

    What to do When it Starts to Rain - Are you Prepared to Keep Shooting?

    Silica Gel Sachets – a handy item in your camera bag for keeping moisture away from your camera. Just make sure to check them from time to time for wear and tear. Inside the sachets are very small hard translucent gel balls, which can get lodged in unusual places.

    Tip: Do check these little sachets from time to time for wear and tear. Recently, I had one split open not in my camera bag but in my laptop case. I tried to insert a flash drive into the USB Port. The USB key wouldn’t insert completely. Thankfully, I didn’t try to force it. I couldn’t see anything obvious when I checked the USB Port. However, when I got a flashlight to have a better look. I could see this very small translucent ball stuck in the corner. Luckily, I was able to get it out without damaging the USB Port.

    Cover yourself too

    Last but not least on my list is the ubiquitous umbrella. If you are by yourself, you might be able to hold a small umbrella to protect your camera while shooting. A little awkward at best but it could work in a pinch. On the other hand, if you are with someone else. It’s ideal, as he/she can hold the umbrella over you and your camera.

    Umbrellas also act to protect your subjects from getting wet. On one occasion, I used my shoot-through-white umbrella to protect my model from getting wet. It also acted as a great backdrop for the shot.

    What to do When it Starts to Rain - Are you Prepared to Keep Shooting?

    Girl holding a white see thru umbrella that I used to keep my model dry and it provided a great backdrop too.

    Tip: An umbrella can be used as a great prop for an image. For example, a red umbrella or a differently shaped umbrella can really add an interesting dimension to your image.

    Summary

    Shooting outdoors does indeed bring its own challenges but with a bit of planning and having a few essential items to hand, all may not be lost. We can’t control the weather, so at best all we can do is prepare for it.

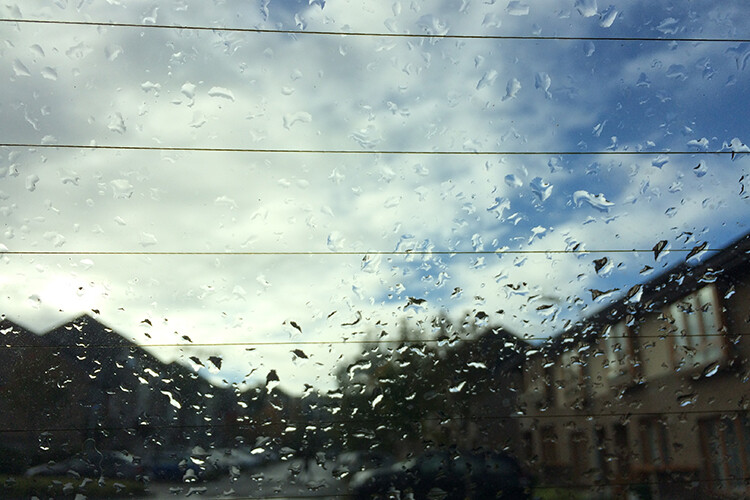
    For example, for the shot of the Sony camera inside the waterproof case (see top photo). The camera is sitting on the bonnet (hood) of my car and I was nice and dry underneath the front porch of my house four feet away. If the rain persists or is simply too heavy to venture out, use this time to take actual shots of the rain against the window of your house or car.

    Before

    After

    Before

    After

    What makes these shots more interesting is the type of background and the light reflecting off the rain droplets. For example, in the following image. I was in my own car and shot the car in front of me with my iPhone. I switched the wipers off to let the rain build up on the windscreen. The lights from the oncoming traffic gave it this Blade Runner abstract type shot.

    Before

    After

    Disclaimer: I wasn’t driving the car when I took these shots. The traffic was at a standstill.

    I hope you found this article useful. I’d love to hear your tips and advice on how you battle the elements when out shooting in the rain or other inclement weather. Please leave your comments below.

    The post What to do When it Starts to Rain – Are you Prepared to Keep Shooting? by Sarah Hipwell appeared first on Digital Photography School.


    Digital Photography School