Blog

  • Fujifilm X70 Shooting Experience: Taking it to the streets

    Fujifilm X70 Shooting Experience

    The first thing you’ll notice about the Fujifilm X70 is that it looks an awful lot like an X100T. The second thing you’ll notice is how similar some core specifications are to an established cult classic among street photographers, the Ricoh GR II. And despite featuring retro-inspired dials-on-dials design coupled with a 16MP APS-C sensor and 28mm equiv. F2.8 lens, the X70 turns out to be very distinct from both of those cameras in real-world use.

    Basics and Handling

    The X70’s X-Trans APS-C CMOS sensor is lifted from the X100T and offers the same 16.3MP resolution and hybrid AF system. The lens is new though – it’s a fixed 18.5mm (28mm equiv.) F2.8 prime with two aspherical elements tucked behind a 9-bladed aperture diaphragm. Exposure is taken care of courtesy of a leaf shutter, allowing for near-silent operation, and if for some reason you need to be even quieter, the electronic shutter goes all the way to 1/32,000. That’s a good thing for general daytime shooting as well, since the X70 doesn’t get a built-in ND filter like the X100-series.

    Fly by night. SOOC JPEG, Classic Chrome mode. Photo by Carey Rose. F4 | 1/60 | ISO 200

    The buttons and dials on the X70 leave a little to be desired. For the most part they function just fine, but the dials feel a little less-than-premium: kind of a halfway point between the X-A / X-M and X100-series of cameras. The buttons have positive feedback, but are a little too flush with the body. In fact, though you can reassign the movie button to something else, it’s so flush that it’s incredibly difficult to press. I’ve found that it’s easiest to ignore it. Also, because the screen protrudes a bit when folded against the body, it gets in the way of you pressing the left-most button on the four-way controller. The playback buttons might seem oddly placed on the top of the touchscreen, but they actually work well there.

    All-in-all, though, the act of controlling core settings on the X70 is very similar to the experience of using the X100T, which is to say it works both very quickly and very well.

    One-man dance party. SOOC JPEG using Monochrome mode. Photo by Carey Rose. F5.6 | 1/60 | ISO 1000

    The X70’s rubberized front and rear grips are grippy and well-sculpted, and the camera feels comfortable and secure even in one hand. That said, the aperture control ring around the lens and the articulating touchscreen encourage two-handed operation.

    Performance

    But using two hands won’t slow you down with the X70. In fact, not much will. The 0.5-second startup time (high performance mode) of the X70 means that the camera is ready to shoot very quickly. This is about three times faster to start up than the GR II and means that subjectively, the X70 just feels more responsive when shooting out and about.

    Play time. Processed to taste from Raw using the Pro Neg Standard color profile in ACR. Photo by Carey Rose. F2.8 | 1/125 | ISO 200

    Focus times in Single-AF for the X70 are also on the sprightly side (at least for Fujifilm). The hybrid AF system does usually undergo a slight hunt before locking focus, but the live view never freezes up. Of course, street shooters will miss a thorough implementation of snap focus, but Single-AF was usually fast enough that we didn’t miss it anyway.

    So while overall Single-AF speed is good, accuracy tended to vary more than we’d like. The focus would sometimes shift slightly in frames taken in immediate succession, even in daylight. To be fair, I found this mostly when shooting with the contrast-detect-only AF points near the edge of the frame. Your mileage may vary. This focus shifting didn’t affect my images much for web viewing, but I definitely noticed it on even a moderate-sized monitor.

    The combination of close focus and a mild wide angle mean you can get pretty close to your subject, have some background isolation, and still have some context in the scene overall. SOOC JPEG using Classic Chrome mode. Photo by Carey Rose. F5.6 | 1/125 | ISO 1250

    Continuous AF isn’t really a strong point for cameras of this general type and price point. With the X70 in single-point AF-C mode, you’ll get some lag if your subject is too quick, along with a whole lot of hunting. AF-C + Zone, which uses the PDAF area in the center of the frame works better, but the PDAF area is too small for really meaningful subject tracking. AF-C + Wide / Tracking does a reasonably good job of identifying the subject to track, but you’ll often get excessive and incessant hunting behind and in front of the desired subject. This was noticeable even if the subject wasn’t moving.

    I ended up using the X70 in the same way as I use other Fujifilm cameras – in AF-S mode. 

    The First Fujifilm Touchscreen

    What really sets the X70 apart from both the X100T and the GR II is its tilting touchscreen, a first on any Fujifilm X-series camera. Sure, it’s made it really easy for me to take unflattering couch selfies, but it mostly makes for a very discreet shooting experience. Using the X70 with the screen as a waist-level finder, you can touch to acquire focus anywhere in the frame and capture your scene without ever lifting your head. Uninterested passers-by will assume you’re texting or maybe fiddling with dials on your hipster film camera, and if someone does actually pay you some attention, it just looks like you’re going a little heavy on the chimping.

    Just chimping, bro. Processed to taste in Raw using the Monochrome preset in ACR. Photo by Carey Rose. F5.6 | 1/60 | ISO 400

    The tilting screen also helps when it comes to getting the most out of the 28mm field of view that the X70 offers. Unlike a 35mm or a 50mm, a 28mm focal length requires some careful attention to foreground and background elements to keep your images from feeling too flat. Being able to easily frame subjects from ground-level or above my head helped me get a little more accustomed to 28mm, a focal length I normally tend not to gravitate towards.

    Image Quality

    The sensor inside the X70 is quite literally nothing new. Though this 16.3MP X-Trans sensor is getting a little long in the tooth, overall dynamic range and noise performance are still very good, and as we’d expect, very comparable to the closely-related 16MP sensor in the GR II. We prefer the rendering from Fujifilm’s X-Trans sensor in JPEG mode, but Raw files from the more conventional filter array in the GR are easier to handle. 

    Camouflage. Processed to taste from Raw using the Pro Neg Standard preset in ACR. Photo by Carey Rose. F2.8 | 1/60 | ISO 1000

    The lens on the X70 though is an all-new design, but in both the studio and the real world, we found the lens on our particular X70 to be noticeably less sharp than that on the GR II. Of course, this could be an outlier (we are using a very early production model camera) but we’ll keep an eye on it and do a control test with another sample as soon as we can. 

    It’s worth noting that the lens on the X70 doesn’t offer a dedicated macro mode. It doesn’t really need to. The close focus distance of 10 cm (~4 in) allows you to get a little more creative with your compositions as well as get some reasonable subject separation despite the vaguely unimpressive maximum aperture.

    Overall Impressions

    It’s time for a talk. SOOC JPEG, shot in monochrome mode. Photo by Carey Rose. 1/60 | F2.8 | ISO 2500

    Time to be brutally honest. The spec sheet on the Fujifilm X70 isn’t all that exciting. We’ve seen the sensor, processor and autofocus system before. The lens, a new design, only opens to F2.8. It’s appreciably smaller than an X100T, but is more ‘coat pocket’ than ‘jeans pocket.’

    In spite of all of this, the Fujifilm X70 is a thoroughly enjoyable and engaging camera to use. Full disclosure: I feel the same way about the GR II, but using it is a completely different experience. If you have a GR II and like it, there’s really not enough of a reason to dump it for the X70. If you like your X100-series but were looking into a more portable option like the GR II, the X70 is definitely worth a look. Strictly speaking, these two cameras are capable of achieving very similar results. But as the files between them have their own unique signature, so does the handling, and handling is a very personal matter indeed.

    So in the end, is there room for two similarly-specced street-focused APS-C shooters in the marketplace? Time will tell, but with the X70, Fujifilm has created a compact, responsive camera that in terms of both specification and design, is greater than the sum of its parts.

    Additional Content

    Fujifilm X70 Updated Samples Gallery

    $ (document).ready(function() { SampleGalleryV2({“containerId”:”embeddedSampleGallery_6897602972″,”galleryId”:”6897602972″,”isEmbeddedWidget”:true,”standalone”:false,”selectedImageIndex”:0,”startInCommentsView”:false,”isMobile”:false}) });


    Studio Test Scene Comparison

    Articles: Digital Photography Review (dpreview.com)

  • Ricoh partners with 360° content social platform Spinnable

    Ricoh has partnered with Spinnable, a social sharing platform dedicated to 360-degree content. The partnership allows Ricoh Theta S owners to directly upload 360-degree videos recorded with the camera to Spinnable. The Spinnable platform is currently available as an iOS app, and will soon be launched for Android, Samsung Gear, and desktop, as well.

    The Ricoh Theta S is a consumer handheld camera that records 360-degree high-definition video via a 14MP image sensor, wide-angle lenses, and Ricoh’s own ultra-small twin-lens folded-optical system. Currently, Theta users can only upload their creations to YouTube, Google Street View and Ricoh’s website. Spinnable opens up another option to Theta users, who will be able to view and pan around within the video using either their phone’s integrated gyroscope or by swiping a finger.

    In a press statement on Wednesday, Spinnable co-founder and CEO Mark Demarest said, ‘Although Spinnable is hardware agnostic, we’ve chosen the Ricoh Theta S as the first camera to directly integrate with Spinnable because of its compact form factor, image quality and price point.’ Spinnable users can now purchase the Ricoh Theta S directly through the app, as well.

    Press release:

    Ricoh Theta S Offers an Immersive 360° Experience With Spinnable for Social Media Content

    LOS ANGELES, Feb. 10, 2016 — Spinnable, an immersive technology company for 360 Social Sharing, today announced a strategic alliance with Ricoh, creator of the Theta S. Spinnable and the Ricoh Theta S — the first handheld camera to capture truly spherical 360-degree images and high-definition (HD) video — make it easy for anyone to create, consume and share content in full 360 degrees, capturing what is going on all around them, not just what is in front of them.

    Spinnable is working with Ricoh Imaging Americas Corporation to bring a massive shift in the way people experience media, while making production accessible to artists, brands, and the mass-market.

    Spinnable users can use the Ricoh Theta S to capture and then directly upload images to the Spinnable app, which is currently available for iOS, and will soon be available for Android devices. Once in the app, the media can be moved with theswipe of a finger, or by panning, using the phone’s gyroscope. The Ricoh Theta S camera can also be purchased through the app.

    “Although Spinnable is hardware agnostic, we’ve chosen the Ricoh Theta S as the firstcamera to directly integrate with Spinnable because of its compact form factor, image quality and price point,” said Mark Demarest, CEO and Co-Founder, Spinnable.

    The Ricoh Theta S captures the entirety of a scene in a high-resolution photo or video, in a sleek, pocket-sized design. It records high-resolution spherical images of nearly 14 mega-pixels and HD video at 30fps, with a maximum recording time of 25 minutes. Its high quality images are enabled by an enlarged image sensor and wide-angle lenses that allow more light through Ricoh’s proprietary ultra-small twin-lens folded-optical system. 

    “Spinnable is creating a new, highly engaging way for consumers, companies and artists alike to share life’s experiences with one another, and our Ricoh Theta S is the ideal camera to capture this content,” said Jim Malcolm, president, Ricoh Imaging Americas. “We are excited to be a part of the new and growing Spinnable community.”

    Spinnable is also enabling musicians, athletes and celebrities to provide fans with a more intimate, immersive look into their lives, from backstage, on the court, and in the studio, to red carpet events, and those beloved everyday selfies. With these relationships, Spinnable will be creating content that can be accessed exclusively through the app. The company will also be launching live-streaming events in 360 degrees directly through the app.

    Articles: Digital Photography Review (dpreview.com)

  • 27 Interpretive Images that Represent Time

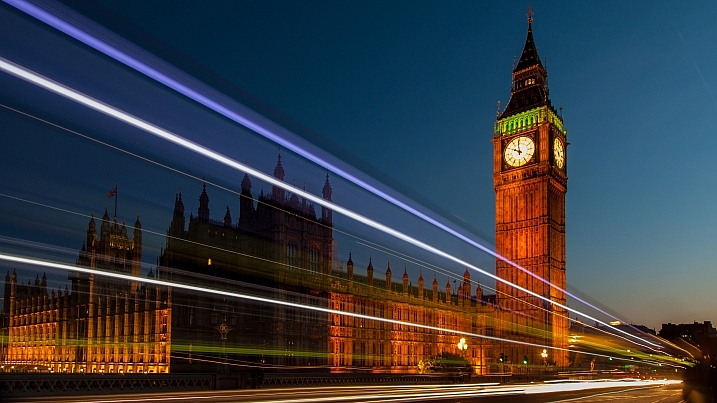
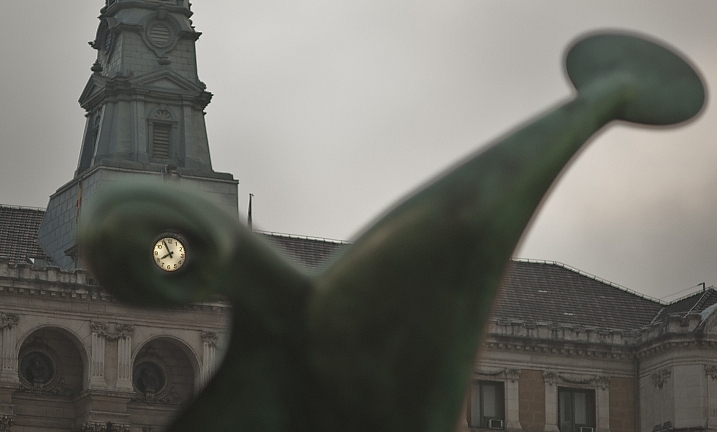
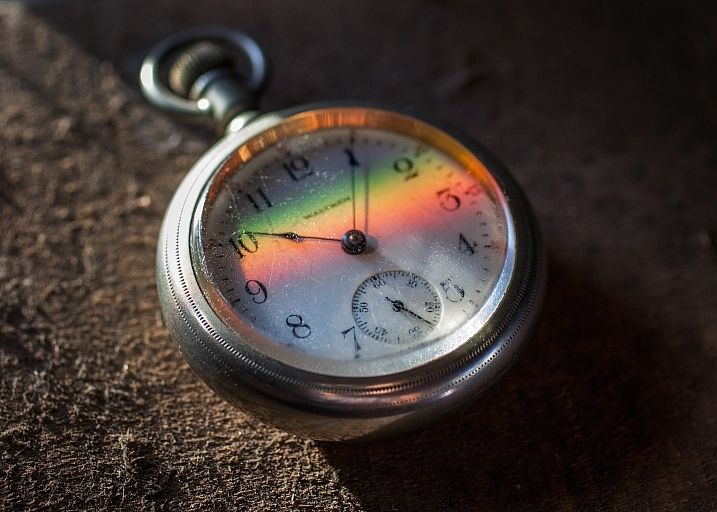
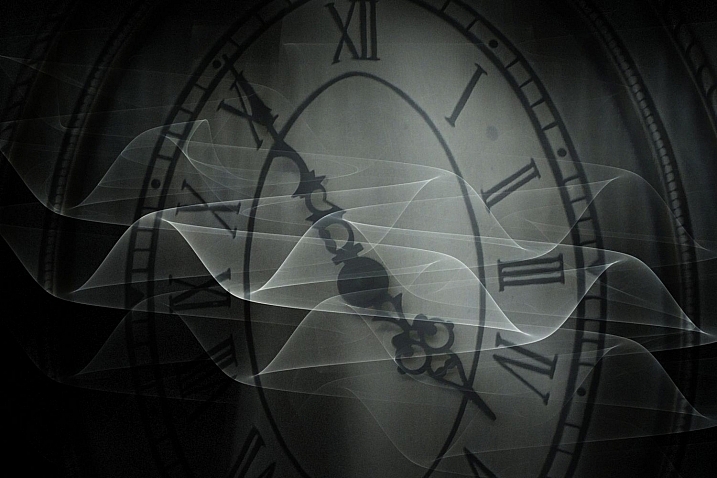
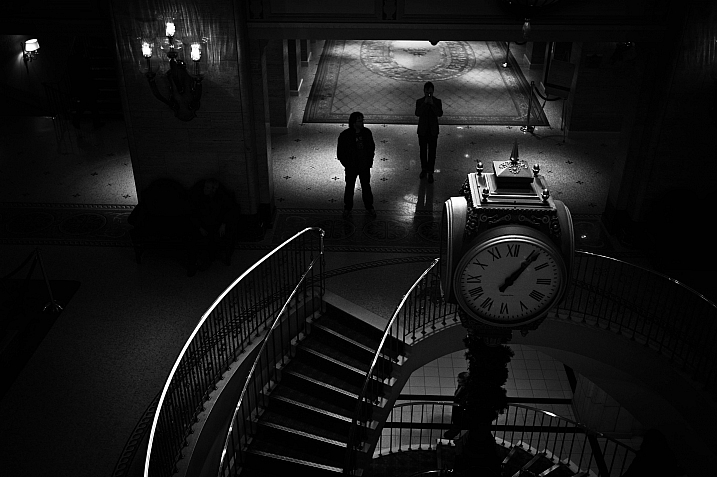
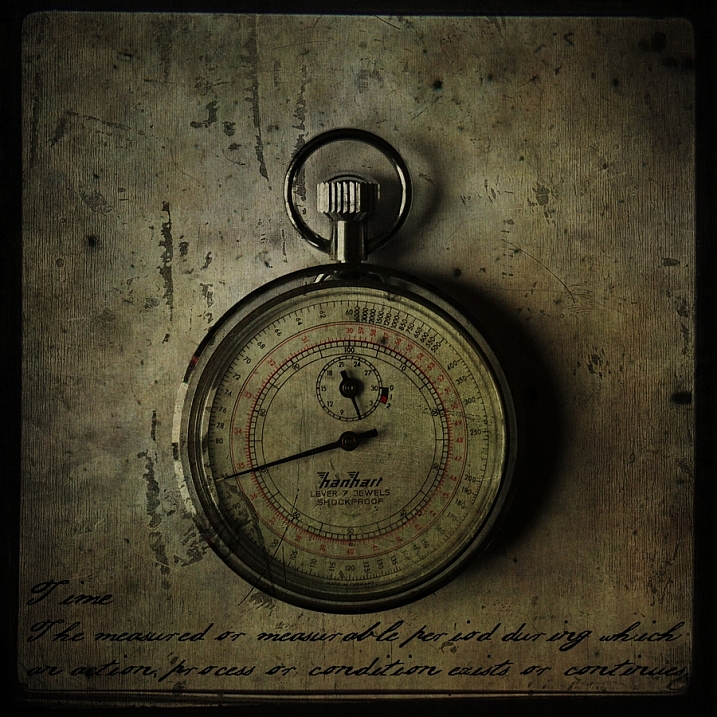
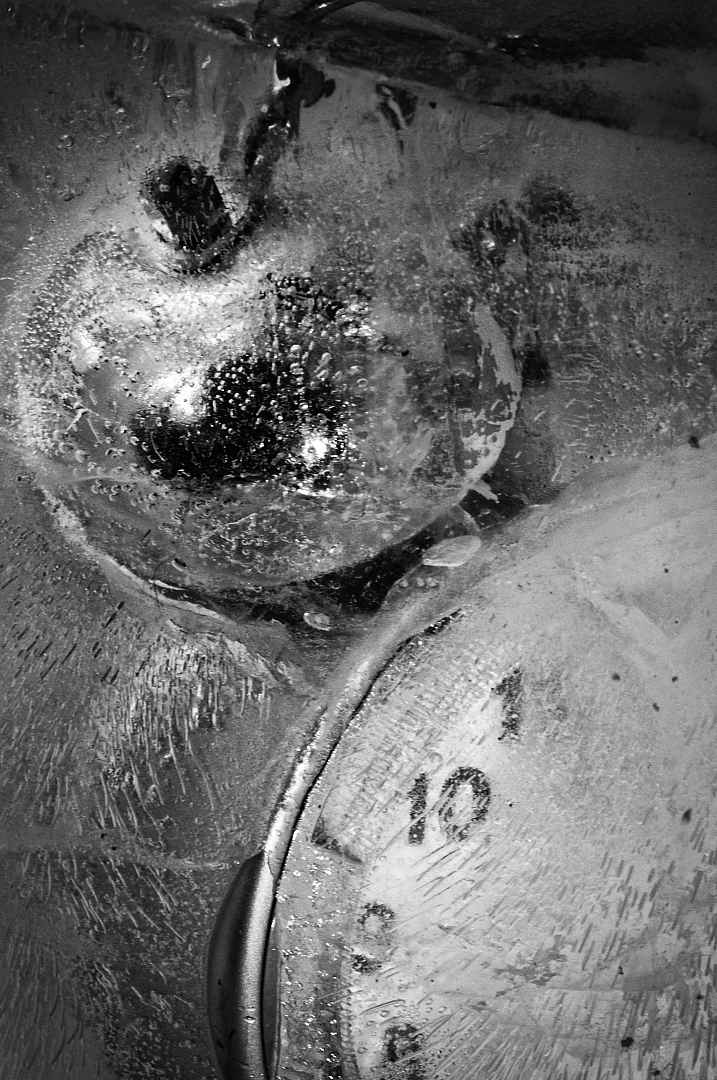
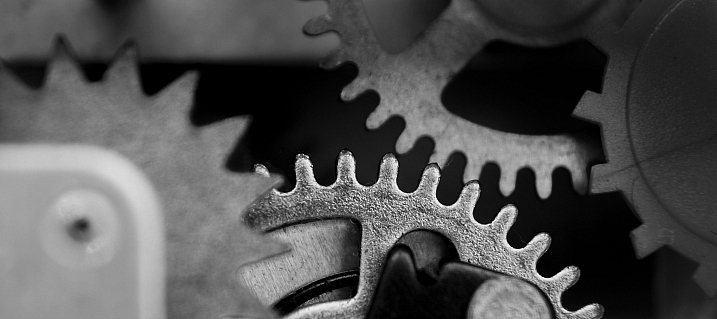
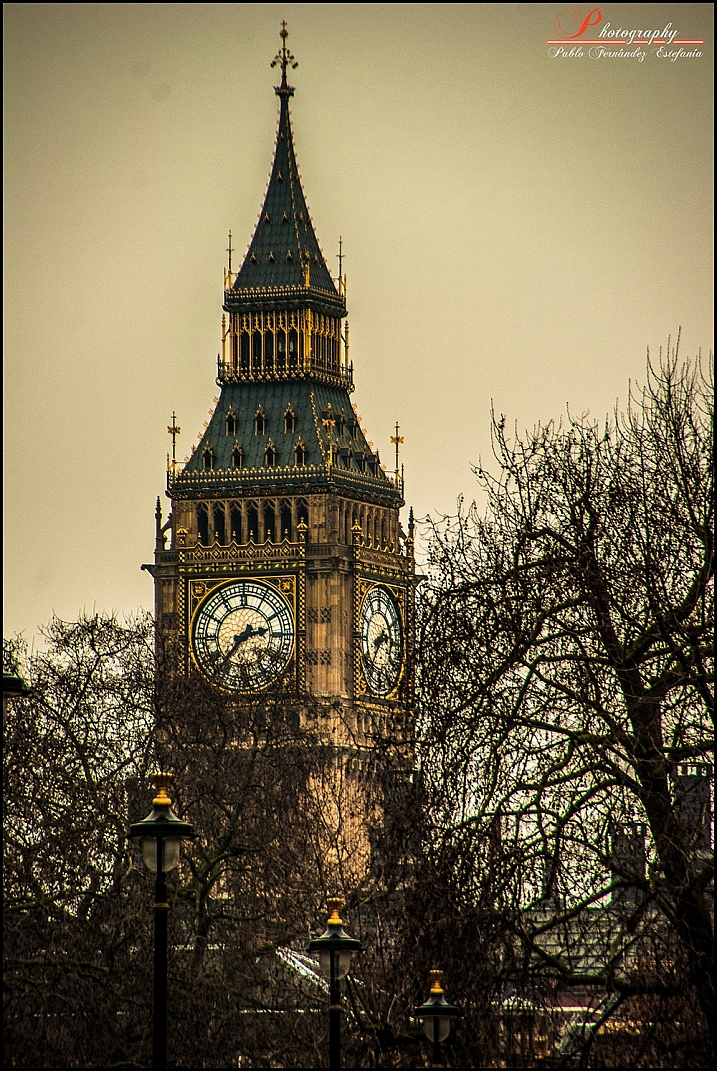
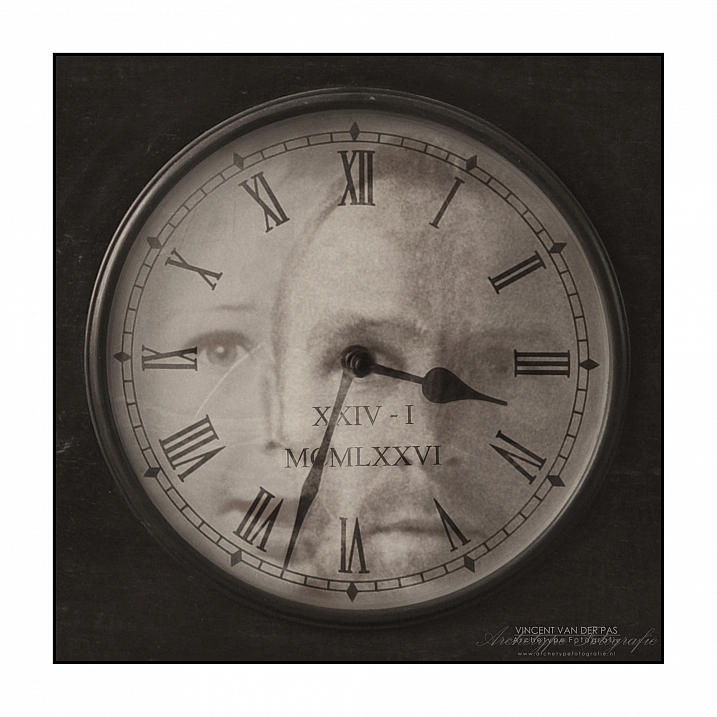
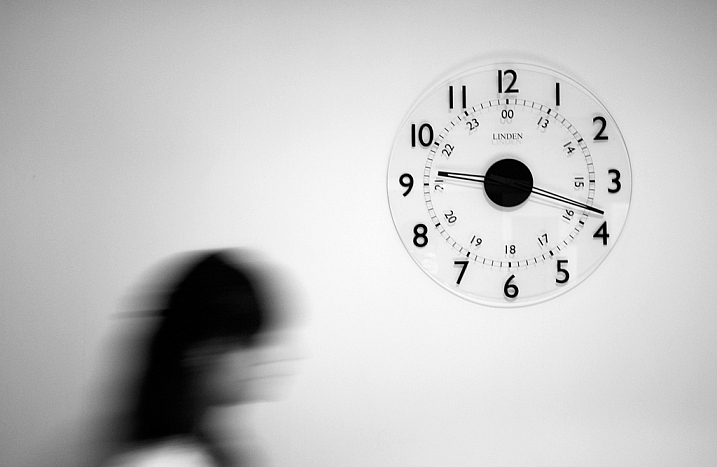
    Okay technically this is 26 images and one really cool time lapse video that represent things related to time. Some are actual clocks or time pieces, yet others are more interpretive, mystical – such as long exposure photography, light trails and stars.
    See where these photographers went – around the clock.

    Christian Schirrmacher

    By Christian Schirrmacher

    Arne Bornheim

    By Arne Bornheim

    Paul Gravestock

    By Paul Gravestock

    Sacha Fernandez

    By Sacha Fernandez

    Vaidotas Mišeikis

    By Vaidotas Mišeikis

    Julen Landa

    By Julen Landa

    Robert Couse-Baker

    By Robert Couse-Baker

    Eddi Van W.

    By Eddi van W.

    Elvin

    By Elvin

    Bo Insogna, TheLightningMan.com

    By Bo Insogna, TheLightningMan.com

    Paolobarzman

    By paolobarzman

    John Fowler

    By John Fowler

    Luis Argerich

    By Luis Argerich

    Kat...

    By Kat…

    Philip Edmondson

    By Philip Edmondson

    Mikael Tigerström

    By Mikael Tigerström

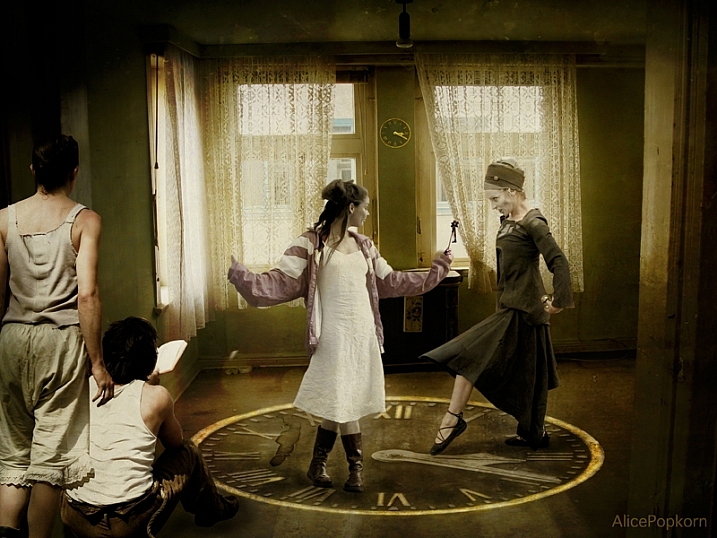
    Alice Popkorn

    By Alice Popkorn

    Charlie Wales

    By Charlie Wales

    Pablo Fernández

    By Pablo Fernández

    Vincent_AF

    By Vincent_AF

    Tekke

    By Tekke

    Stefanos Papachristou

    By stefanos papachristou

    Atilla Kefeli

    By Atilla Kefeli

    Ian Sane

    By Ian Sane

    Joe Penniston

    By Joe Penniston

    Michael Shaheen

    By Michael Shaheen

    googletag.cmd.push(function() {
    tablet_slots.push( googletag.defineSlot( “/1005424/_dPSv4_tab-all-article-bottom_(300×250)”, [300, 250], “pb-ad-78623” ).addService( googletag.pubads() ) ); } );

    googletag.cmd.push(function() {
    mobile_slots.push( googletag.defineSlot( “/1005424/_dPSv4_mob-all-article-bottom_(300×250)”, [300, 250], “pb-ad-78158” ).addService( googletag.pubads() ) ); } );

    The post 27 Interpretive Images that Represent Time by Darlene Hildebrandt appeared first on Digital Photography School.


    Digital Photography School
  • Techart brings AF to Leica M lenses on Sony’s a7 II and a7R II

    $ (document).ready(function() { SampleGalleryV2({“containerId”:”embeddedSampleGallery_6307530870″,”galleryId”:”6307530870″,”isEmbeddedWidget”:true,”standalone”:false,”selectedImageIndex”:0,”startInCommentsView”:false,”isMobile”:false}) });

    Chinese company Techart has produced an adapter that works with the phase detection AF system of Sony’s a7 II and a7R II cameras to create an autofocus effect for Leica M mount lenses. The adapter ring sits between the body and the lens and uses a motor to drive the entire lens back and forth until sharp focus is found. The company claims focus is usually acquired within a second, and that the depth of the adapter can actually increase the close-focusing range of some focal lengths, allowing users to get closer their subjects.
    Focal lengths of 50mm and wider need to be set to their infinity position while mounted on the adapter, and focus is found as the adapter pushes and pulls the lens closer and further away from the sensor. The sensor lets the adapter know when the subject is sharp, and the hunting stops. Lenses with longer focal lengths may need the user to do some of the work with the focusing ring on the lens, and then the adapter will finish the job.

    The process only works with Sony’s a7 cameras that support phase detection systems, and the company says the adapter does not work for video. Single shot and continuous AF modes are available however, and the system can deal with lenses that weight up to 700g / 1.5lb. A smartphone app that connects with the adapter allows users to store information about up to 10 different lenses, which the adapter can then communicate back to the camera, so its 5-axis image stabilization system can be utilized.

    $ (document).ready(function() { SampleGalleryV2({“containerId”:”embeddedSampleGallery_1213732129″,”galleryId”:”1213732129″,”isEmbeddedWidget”:true,”standalone”:false,”selectedImageIndex”:0,”startInCommentsView”:false,”isMobile”:false}) });

    Techart says that, with add-on adapters, the device can work with other lens mounts that have long flange depth, such as the Leica R, and Contax/Yashica systems. The Techart PRO Autofocus Leica M Adapter for Sony E camera will cost $ 349. For more information and more sample images visit the Techart Pro website.


    Press release:

    Techart unveils the World’s First Autofocus Adapter for Manual Focus Lens, the Techart PRO AF Leica M lens adapter for Sony E mount cameras

    Techart, the Chinese adapter manufacturer who has previously launched the first Contax G autofocus adapter for Sony E cameras, has unveiled the world’s first Autofocus adapter for Manual Lenses named ‘Techart PRO’. The Techart PRO adapter is able to drive the manual Leica M lenses to reach focus by using the focusing system in Sony A7II and Sony A7RII, giving an unprecedented new user experience for all Leica M lenses owners.

    Techart PRO has adopted the z-shift technology where the Leica M bayonet is able to extend and retract. The distance between the lens and the camera sensor is hereby changed in order to reach the focus. The mechanism is quite similar to Contax AX system where the flange distance is changed for autofocusing. Techart PRO has electronic contacts to communicate with the Sony A7II and Sony A7RII and uses its PDAF
    system to measure focus. The built-in motor will then drive the bayonet forward by a maximum of 4.5mm and reach the focus point for shooting.

    Techart PRO is super light and powerful. The adaptor weighs only 133g and is able to drive a lens system as heavy as 700g. Apart from pairing up with the Leica M lenses, users can also further adapt lenses with longer flange distance (e.g. Leica R, CY, PK, MD, etc) with add-on adapters and enjoy the autofocusing experience with other manual lenses. Techart PRO supports both AF-S and AF-C modes and it can also serve as a close focusing adapter which can reduce the minimal focusing distance of the lenses.

    A complimentary mobile app will be available for users to save 10 sets of lens data to the adapter and perform firmware upgrade via bluetooth.

    Techart PRO is an evolutional product which can give users a completely new experience with their manual lenses. The fast and precise focusing allows users to take quick and sharp photos with their favourite manual lenses. More product information and testing videos can now be found via our official website.
    (http://www.techartpro.com/)

    Pricing and Availability
    The Techart PRO Autofocus Leica M Adapter for Sony E cameras is currently available for pre-order at our official website (http://www.techartpro.com). The recommended retail price is USD 349/pc. Free shipping will be provided during the promotion period. Delivery will commence from March onwards and will be shipped from our US/UK/Hong Kong warehouse. 1-year warranty is included.

    Articles: Digital Photography Review (dpreview.com)

  • Cambo introduces Canon EOS lens plate with aperture control for Actus view camera system

    $ (document).ready(function() { SampleGalleryV2({“containerId”:”embeddedSampleGallery_4644059846″,”galleryId”:”4644059846″,”isEmbeddedWidget”:true,”standalone”:false,”selectedImageIndex”:0,”startInCommentsView”:false,”isMobile”:false}) });

    Cambo has devised a new Canon EF/EF-S lens plate for its Actus view camera system that allows users to control aperture settings on Canon EOS lenses. The Cambo Actus system is designed to deliver a view camera style of shooting to some mirrorless camera bodies, consisting of a lens plate and a body plate with bellows and a monorail in between.

    As EOS lenses have no manual aperture control, a plain mounting plate will only allow the lenses to be used at their widest aperture setting. The new ACB-CA plate however has electronic contacts that allow it to communicate with the lens, and a finger wheel so the photographer can dial in required aperture settings. An OLED display shows aperture values as well as the focal length in use, even when a zoom is mounted. 

    The ACB-CA adapter will provide tilt, shift, swing, rise and fall movements between the front and rear standards with an EOS lens and a mirrorless camera mounted, though other lens systems allow movements with Nikon and Canon DSLR bodies. The Actus-DB system allows digital backs to be used.

    The new ACB-CA plate for Canon EOS lenses costs £950 / $ 1299, while the Actus body costs £1400 / $ 1900. For more information visit the Cambo website.


    Press release: 

    NEW Cambo Actus Canon Auto Lens Mount

    Cambo has released the NEW ACB-CA adapter for Canon EF lenses for use on the ACTUS mini view camera. The adapter has built-in electronic controls for setting and operating the aperture of Canon EF lenses.

    Normally when a Canon auto iris lens is removed from the camera body the lens aperture is wide open. The ACB-CA communicates with the lens and enables the user to adjust the aperture, giving you full control.

    This adapter has an internal battery for continuous use and features an OLED display which shows the preset or set aperture together with the focal length of the lens. The communication is accurate, such that the display will also show the focal length of zoom lenses.

    The adapter accepts lenses fitted with Canon EOS bayonet, in combination with the ACTUS view camera. The ACB-CA adapter is finished in black to match the ACTUS-B camera version.

    This ACB-CA lens adapter is designed to work with mirrorless* camera bodies, such as the Sony A7 series, Fujifilm X series and Canon M series. When mounted on the Actus the adapter will tilt and swing within the lens image circle that is being used. The rear rise/fall and left/right shift will operate as normal, again within the lens’s image circle.

    *Mirrorless camera bodies have the imaging sensor further forward enabling the lens to focus at infinity or closer.

    Check via the Cambo Configurator the compatibility between cameras, lenses and adapter when using the Cambo Actus.

    The ACB-CA adapter is available now from stock £790.00 excluding VAT and shipment. For further information contact CamboUK on 07863 116150 or cambouk@gmail.com .

    Articles: Digital Photography Review (dpreview.com)

  • How to Create Awesome Portrait Lighting with a Paper Bag an Elastic Band and a Chocolate Donut

    Paperbag main 717

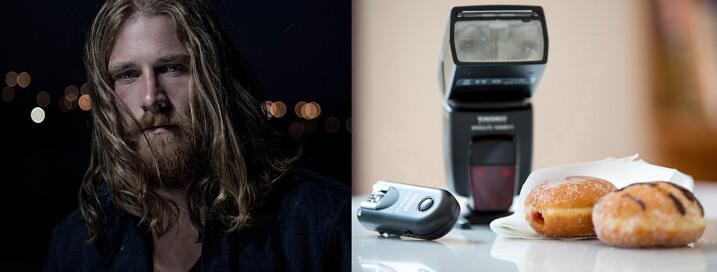
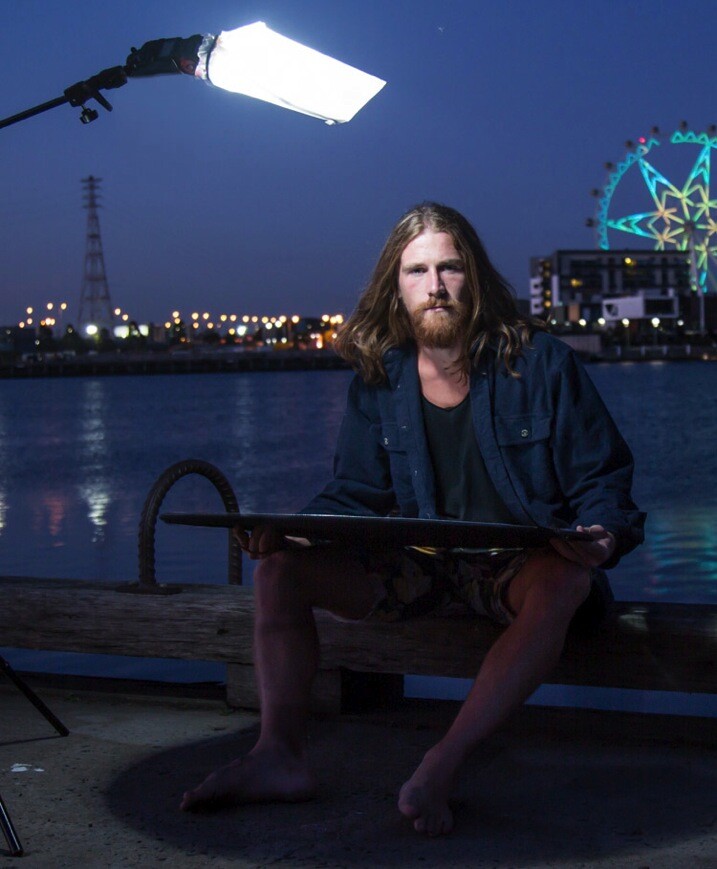
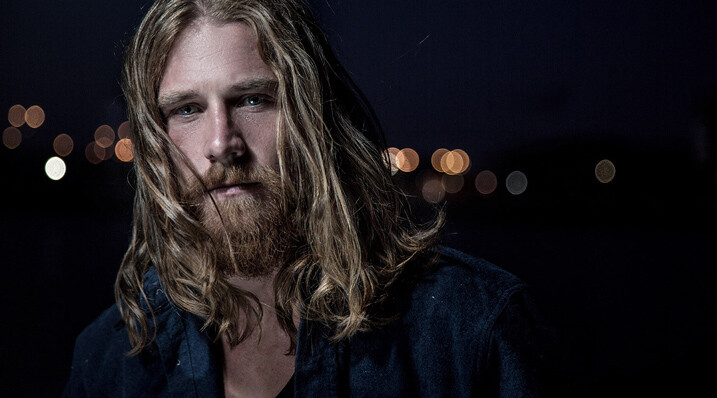
    I photographed Luke Deslandes with a homemade modifier and a lighting kit that can be created for less than $ 200

    One of my favourite TV series from the 90s was MacGyver, an action-adventure series about a US government secret agent with a fabulous mullet, who improvised and built complicated devices from household objects such as rubber bands, paper clips, pens and a Swiss Army knife.

    The show was so incredibly popular that the term MacGyver made its way into the dictionary:

    MacGyver (v): To make or repair (an object) in an improvised or inventive way, making use of whatever items are at hand:

    • He MacGyvered a makeshift jack with a log.
    • He has a shock of short red hair and a pair of rectangular-framed glasses, MacGyvered with duct tape.

    The other week I was caught short on a night shoot because I’d misplaced my small softbox modifier, and needed to come up with a way to soften and control the from my speedlight to create portrait lighting.

    I searched my entire kit and car, found nothing useful, then I asked myself, “What would Macgyver do?”. I rummaged through my bag and found a chocolate donut (Nutella filled, so good!) in a white paper bag, and a hair elastic which would be perfect substitutes for the softbox I’d forgotten to bring to the shoot.

    The really cool thing about lighting is that the basic principles will work with any kind of light, regardless of budget, or the type of modifier used. So whether you’re working with a $ 150 lighting kit (similar to the one I used for these images) a $ 1,500 hit, or $ 15,000 one, the light will still react in the same way.

    light-modifers

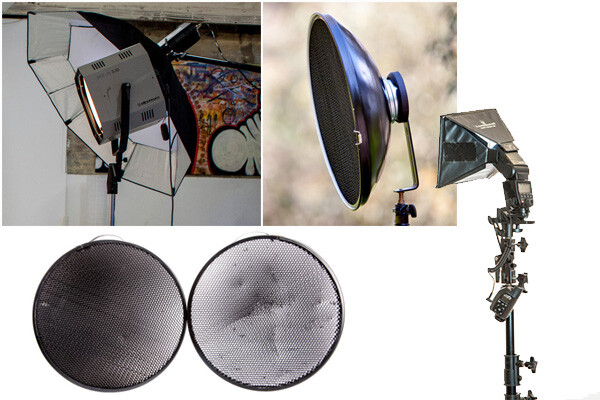
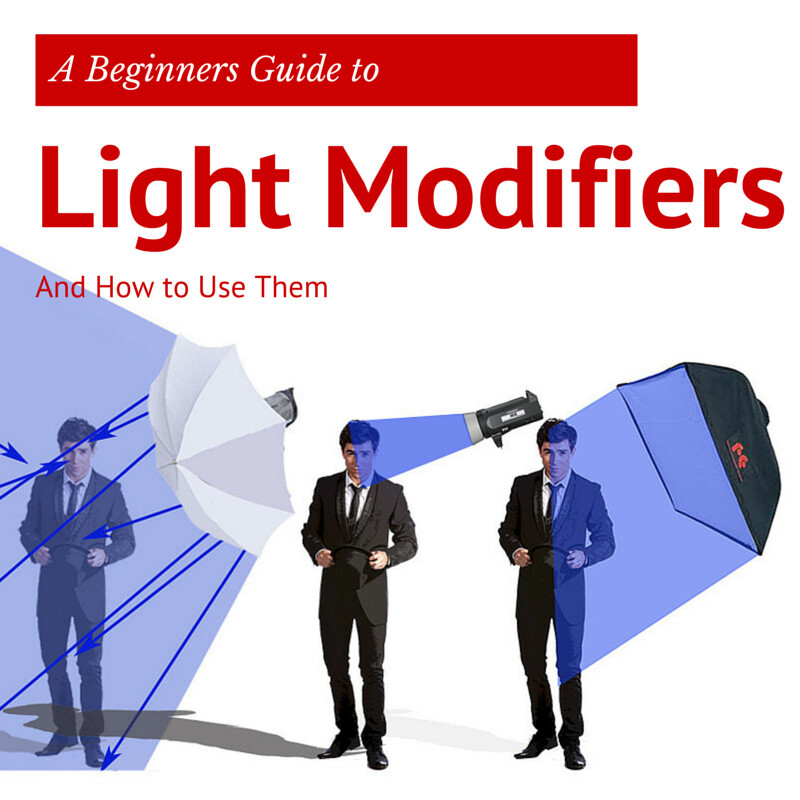
    One of the best lessons I learned from working with film and television crews is that ordinary household objects can be used to shape and train light. I’ve seen soft light created using sheets of Perspex, calico, and even shower curtains. A light modifier is basically designed to do two things:

    1. It controls the shape of the flash
    2. It controls the quality of light coming from the flash

    Light Shapers SQ copy

    Some modifiers, like umbrellas, will spread the light over a large area and soften the quality of the light. Other modifiers like grid spots contain the light to a very small area and create a hard quality of light (click image above to read more).

    The main differences between the high-end options, and MacGyvered lighting are: light quality, consistency, and build. A light modifier that has been cobbled together using found objects is not going to look pretty, and you may attract some odd looks from passers by. On a positive note, I believe a MacGyvered light modifier is a perfect way to get your head around how lighting works, and to vary your lighting styles without having to empty your bank account.

    This is how I created my mini softbox using a paper bag, an elastic band, and a chocolate donut.

    The Gear

    Boom 750
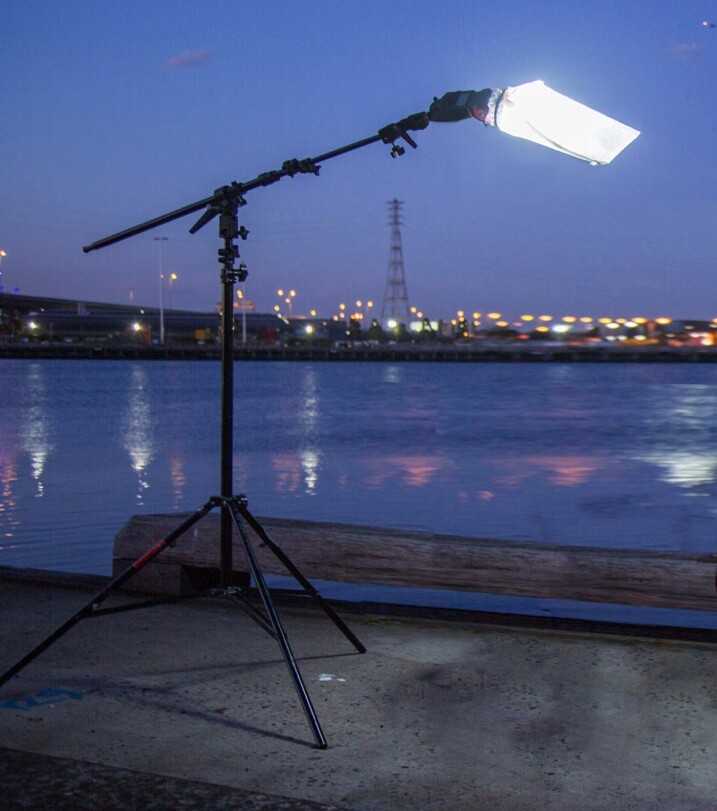
    Booms are an awesome way to add light above your model, as they allow the freedom to work without stands getting in the way of your shot. Using a boom is also the best way to position the light exactly where you want it.

    I’ve created this lightweight location boom by using a mini-boom arm on an umbrella bracket, attached to a light stand. Always remember to use a weight on the light stand, to avoid it tipping over in high winds. You can buy a sandbag, or MacGyver your own using two-litre drink bottles filled with water in a canvas bag.

    A cheaper alternative to the boom is to use a light pole, and to ask a friend to hold it for you. If you are new to working with off-camera flash, I suggest you read one of my previous blog posts: A Beginner’s Guide to Working With Flash Off-Camera.It will walk you through the step-by-step technique of shooting with off-camera flash .

    • A Yongnuo YN-560II speedlight – under $ 80
    • Yongnuo RF-603N flash triggers $ 30
    • CowboyStudio umbrella mount bracket with swivel tilt bracket $ 16
    • LumoPro LP605 compact 7 foot stand with ground spikes $ 45
    • Sandbag $ 7
    • LumoPro mini-boom/reflector arm $ 40
    • Tripod
    • Nutella donut in a white paper bag – you can use plain donut but they are not as good! <$ 1
    • One Hair elastic <$ 1
    • Canon 5DMK111 (use your own camera)
    • Canon 24-105mm L series (use the lenses you have already)

    The Way

    Paperbag 2 717

    Carefully remove the donut from the bag, being careful not to get any Nutella smeared on the bag. Divide the donut into two equal portions. Offer one half to your model and eat the other half. If you can’t find Nutella donuts in your neck of the woods, you can substitute with any other pastry served in a white paper bag.

    If you prefer a cleaner style of shooting, just ask for an extra bag when you buy your donut. You can also skip this part altogether, but it’s not as much fun, and just find a white paper bag similar to the one I’m using (see below). They vary in size and thickness so look for bags that are free of any advertising.

    Paperbag 3 717

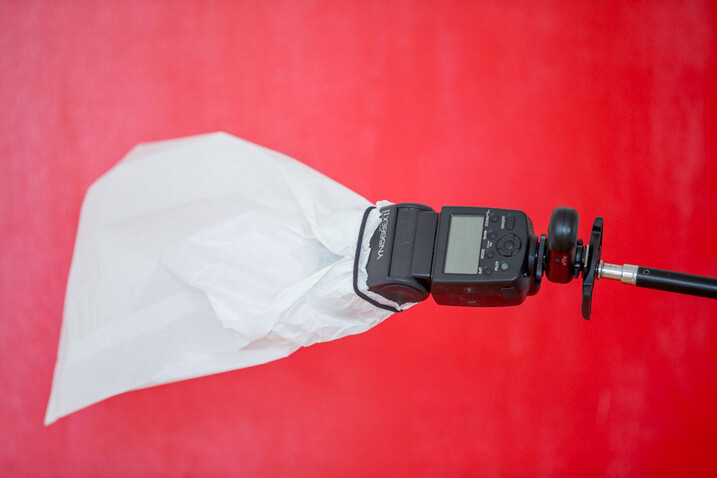
    Place the bag over the flash and secure using the hair elastic. Electrical tape will also work, but it tends to leave a sticky residue on the flash.

    Paperbag 4 717

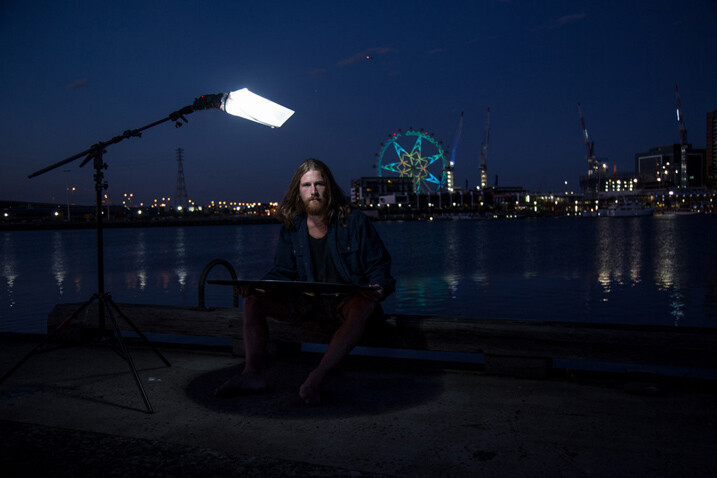
    Position the light directly above, and slightly to one side, your model’s head. This lighting style is called loop lighting. I think it’s a flattering style because it leaves the face in partial shadow, and creates the illusion that the face is slimmer.

    It’s called loop lighting because of the loop-shaped shadow the nose casts on the side of the model’s face. How prominent the shadow is, depends on how much fill light is used. I use this style of lighting for 80% of my studio and location shoots, as I believe it is one of the most natural-looking lighting techniques.

    Paperbag 5

    Adding Fill Light

    Using one light from overhead looks great, and adds definition to the model’s bone structure. As I prefer a softer lighting style, I’ve also added a white reflector to my shot.

    I placed the reflector on Luke’s (my model) lap because I was shooting very tight headshots. If I were shooting a ¾ or full-length portrait, I would position the reflector on the ground, just out of the shot. The reflector fills in the shadows caused by the flash overhead. You can modify the amount of fill light by how close you place the reflector in relation to your light source. The closer the reflector is to the light, the more evenly lit your portrait will look. If you prefer more contrast or mood to your lighting, move the reflector further away from the light or don’t use one at all.

    Paperbag_6-717

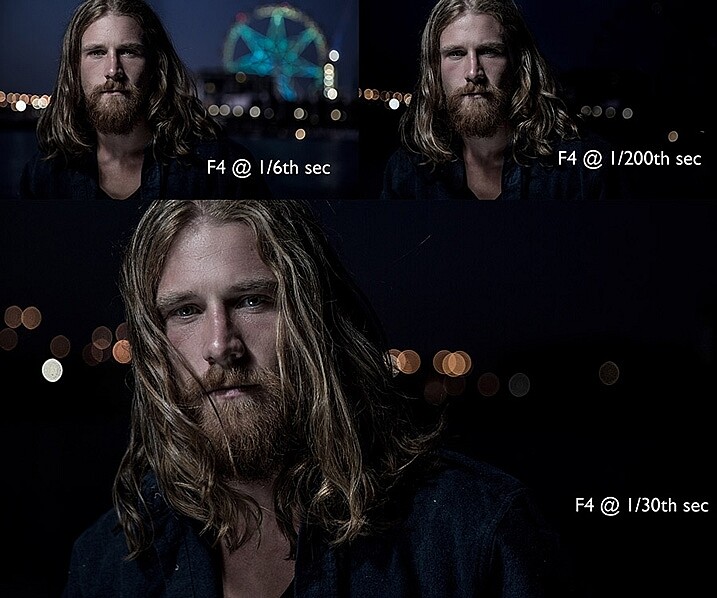
    Changing the shutter speed controls how much ambient light there is in the image. To create a brighter background, I selected a shutter speed of 1/6th second. Shooting at 1/200th of a second removes most of the ambient light and creates a moodier image. I wanted to create the goldilocks effect, not too heavy, and not too light, but just right.

    The Final Image

    Paperbag final 717

    Here are a few more awesome Macgyver lighting hacks that my podcast listeners have shared with me.

    Ping pong balls and empty toilet rolls

    Brett Ferguson 01

    This gorgeous image by Brett Ferguson was created with a light modifier Macgyvered together with a ping pong ball and empty toilet rolls.

    Brett Ferguson 02

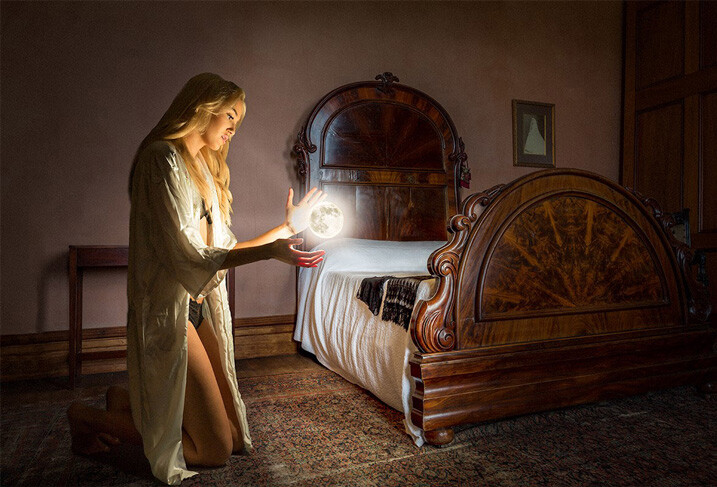
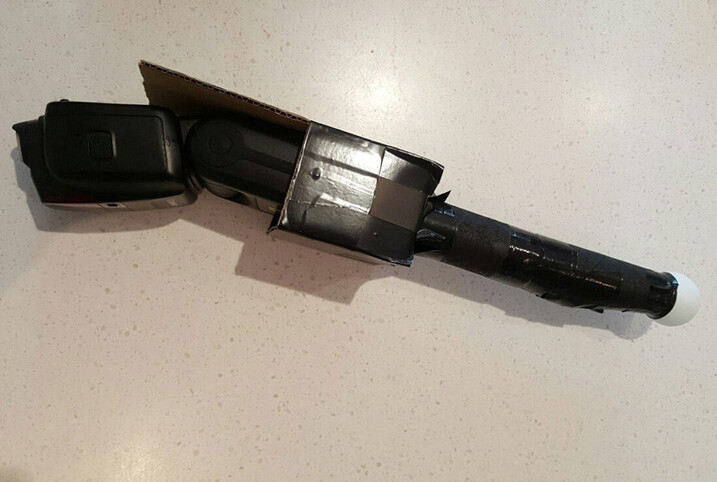
    Hey Gina Milicia, here is a Macgyver light modifier for you. I needed a spot light source to light the model in a convincing way. It was really important to have a soft glow, and realistic shadows, to emulate what the moon would look like. I used a ping pong ball at the end of two empty toilet rolls and then rigged some cardboard to hold the flash. The flash head fits in nicely, and the centre of the toilet rolls are white, allowing it light up to the ball. This image (edited) was shot at 47mm on a 24-70mm f2.8L II lens on a Canon 5D3 at 1/80th, f/3.5 and ISO 500.

    You can see a larger version of the finished image at www.brettferguson.com.au.

    The Pringles gridspot

    GlennDube 717

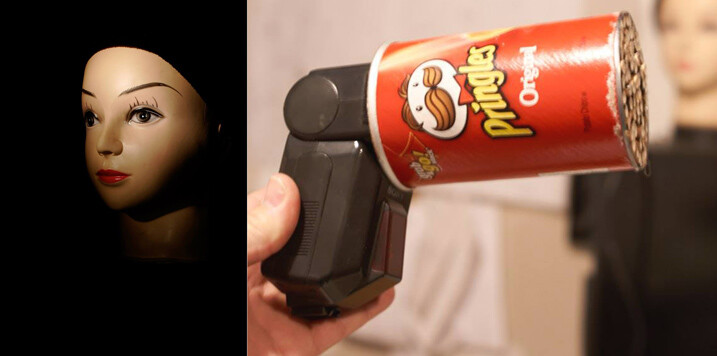
    Photographer Glen Dube has Macgyvered this brilliant grid spot using a Pringles container and straws.

    This is basically just a Pringles can, with the bottom cut out and replaced by straws, hot glued in place. But I found coloured straws tainted the light, luckily my wife found some paper straws that have a nice bright white inside. The end of the can you get the chips out slides right over all the flashes I have, except this really old Vivitar that has the zoom function on the outside. Pringles has been helpful in providing a variety of lengths of cans for us.

    The length (and diameter) of the straws determines the size of the spot and there are even online calculators. I found the flashes zoom function has little effect but the calculators are accurate for determining the spot sizes. The paper straws let you have a sharper fall off (as the plastic straws are translucent and spill light outside the circle). I used 60mm straws, which at 1 meter (3′) gives me a 180MM (7.1″) diameter spot that gets wider the farther away the light is from the subject.

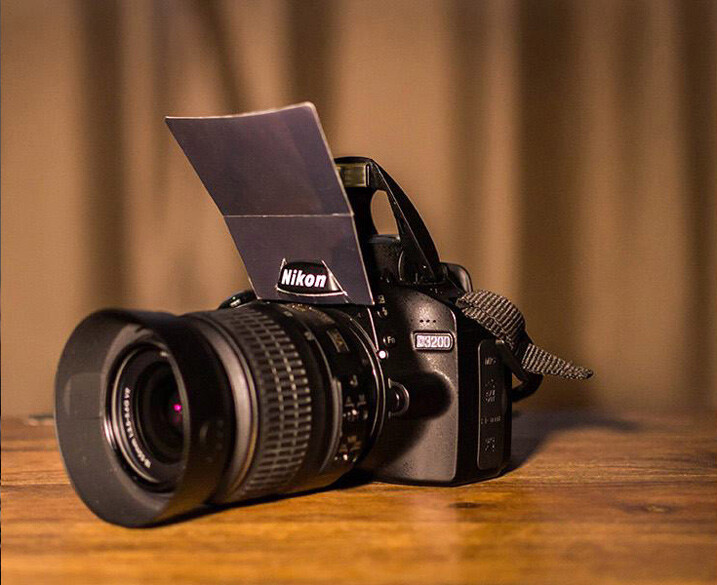
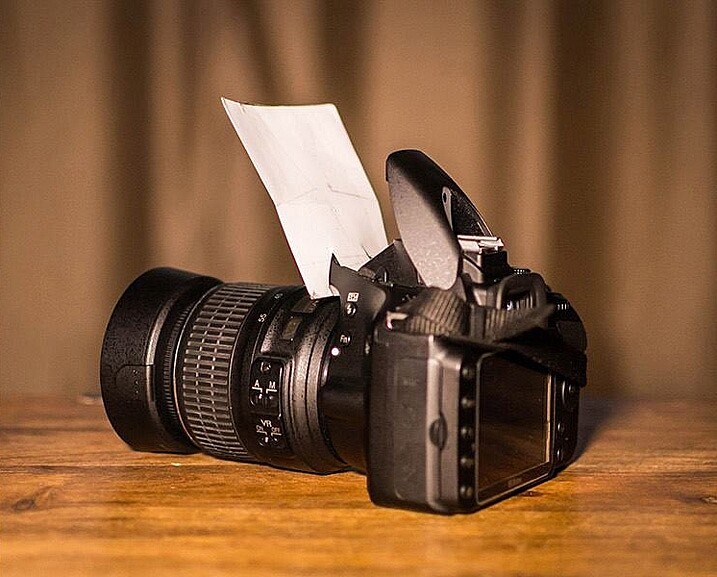
    Pop-up flash modifier

    Andrej Valko 717

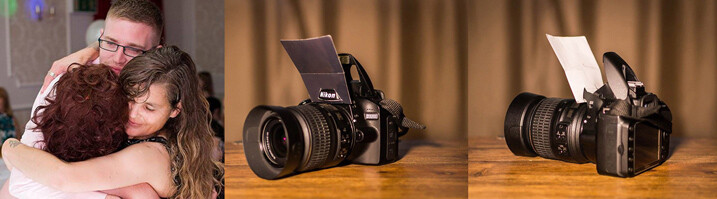
    Photographer Andrej Valko created this really simple portable pop-up flash modifier using cardboard.

    I saw this idea a couple of years ago – a bounce card for the on-camera flash. I thought: how hard can it be to make one. So I did – I printed black on one side of heavy photo-paper so it didn’t look conspicuous from the front. It was white on the other side to bounce light. I taped it with clear tape so it reflected light more efficiently (it also made it a bit more durable), and I cut it to suit my camera.

    Andrej Valko 2

    Andrej-Valko-3

    It was easy to mount (it just slid in), easy to carry (in a back pocket just like a business card) and it bounced light off the walls and ceiling, as well as off my face! And I, the crazy photographer, shot a wedding reception with just the bounce card! (I didn’t have a single flash unit at the time.) I still cannot believe I actually used this to shoot a wedding.

    The drawer liner modifier

    MikeHickman 2 717

    Photographer Mike Hickman created this modifier using a translucent drawer liner.

    My “ugly” modifier created from translucent drawer liner which I have used almost exclusively during events, including weddings. The idea came from here.

    Cost is about $ 10 for a full liner made by Contact, and attached with Velcro strips for about an additional $ 6. Makes three or four, depending on size. Also, folds up to stick in your pocket when changing locations and I have two in my camera bag at all times. Can’t do that with too many other modifiers!

    There are so many awesome ways to MacGyver light modifiers. Do you have one you are particularly proud of? I’d love to see it. Please share your ideas in the comments below.


    fastflash_bookIf you want to learn more about using flash for creating portraits, pick up Gina’s brand new dPS ebook: Fast Flash for Portrait Perfection. Now on sale for an introductory price for a limited time only.
    googletag.cmd.push(function() {
    tablet_slots.push( googletag.defineSlot( “/1005424/_dPSv4_tab-all-article-bottom_(300×250)”, [300, 250], “pb-ad-78623” ).addService( googletag.pubads() ) ); } );

    googletag.cmd.push(function() {
    mobile_slots.push( googletag.defineSlot( “/1005424/_dPSv4_mob-all-article-bottom_(300×250)”, [300, 250], “pb-ad-78158” ).addService( googletag.pubads() ) ); } );

    The post How to Create Awesome Portrait Lighting with a Paper Bag an Elastic Band and a Chocolate Donut by Gina Milicia appeared first on Digital Photography School.


    Digital Photography School

  • Kipon to produce Canon EF to Sony E-mount adapter with AF and slot-in ND grads

    Chinese lens adapter manufacturer Kipon has said it is producing a new model that will allow Canon EF lenses to fit on Sony E-mount mirrorless bodies while maintaining their AF functionality. The Kipon EF-S/E AF ND lens adapter also comes provided with a slot-in four-stop graduated neutral density filter that can be fitted into the body of the ring. Sitting between the optics and the camera, the filter will be protected from stray light and in theory will remain clean, so it should deliver better image quality than had the same filter been fitted over the front of the lens.

    The company has not released very much detail about the forthcoming adapter, but it does promise that the phase detection AF system will operate at ‘high speed’. Perhaps significantly, the company is showing a picture of the adapter alongside a pair of slot-in filters, so we might hope that other filters will become available at a later date.

    The Kipon EF-S/E AF ND adapter will go on sale from 15th March 2016, and will cost $ 428.

    For more information visit the Kipon website.

    Articles: Digital Photography Review (dpreview.com)

  • Saving Face: ‘Ghost Facade’ Preservation Worse Than Demolition?

    [ By WebUrbanist in Architecture & Cities & Urbanism. ]

    ghastly grafted facade example

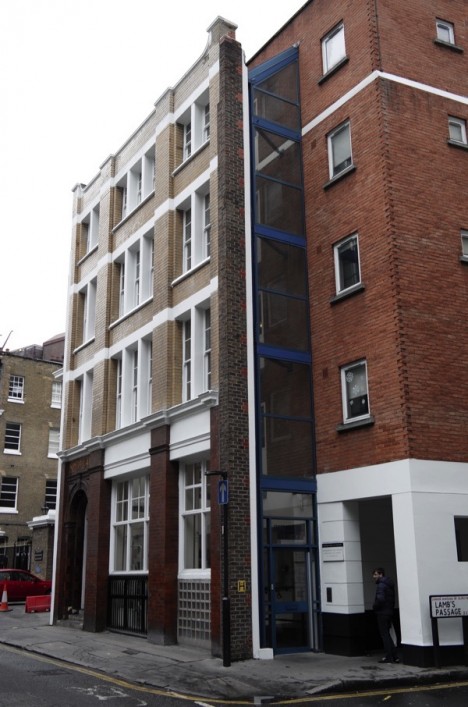
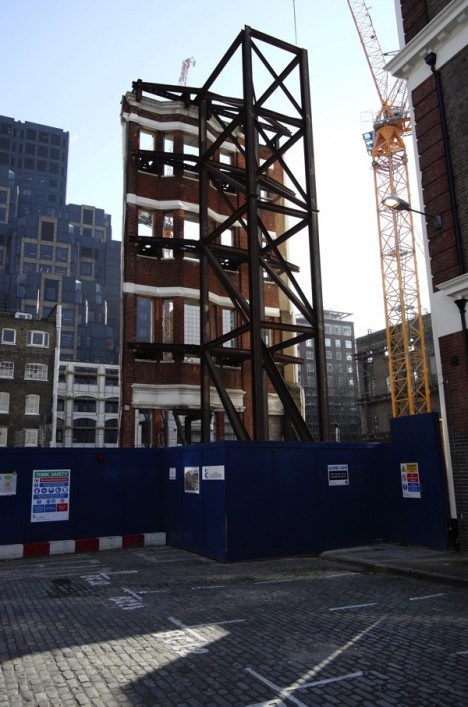
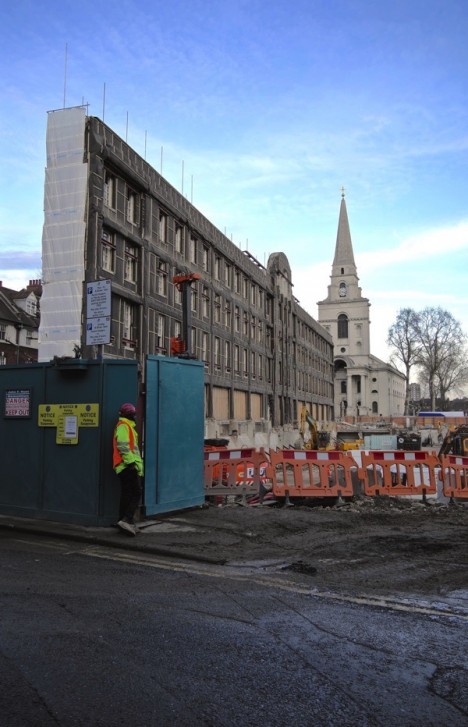
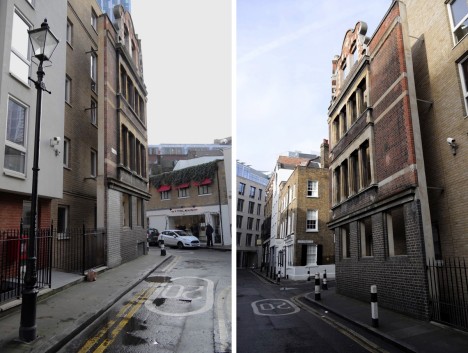
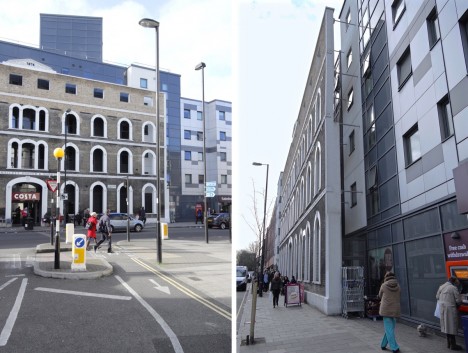
    London is filled with grafted facades, nearly two-dimensional artifacts held in place while updated buildings are constructed behind them; many seem to haphazardly half-disguise the boring new structures on which they are grafted. While other cities have done similar, the sheer volume of them in this East End neighborhood is astonishing.

    facade combination abomination

    The writer behind Spitalfields Life, a web publication, does not mince words in reacting to this partial approach to preservation, which “threatens to turn the city into the back lot of an abandoned movie studio …. As if I were being poked repeatedly in the eye with a blunt stick, I cannot avoid becoming increasingly aware of a painfully cynical trend in London architecture.”

    facade ghost grafting

    In further criticisms, The Gentle Author bemoans the results as a compromise between “cowed planning authorities” and “architects … humiliated into creating passive-aggressive structures.” Perhaps this gives insufficient credit to architects, some of whom also fall guilty to facadism at times, and have been known to prioritize the exterior over the plan, skin over skeleton, form over function.

    facade stabilized new structure

    It is dangerous to suppose that preservation is necessarily binary. Compromises are almost inevitably made over time to keep architectural functional, through essential electrical and plumbing retrofits to more debatable code-related upgrades and updates. There is also a case to be made that the streets are a public room of which buildings are the walls, so preserving facades (properly, at least) can maintain the public’s experience of a place.

    facadism preservation

    Nonetheless, whether you approve of the general approach or cannot see the apologist’s point of view, it is hard to argue against the examples: the executions documented by The Gentle Author range from mediocre to outright terrible. In short: there may be a right way to approach preserving facades as part of new structures, but many architects are doing it wrong.

    Share on Facebook


    [ By WebUrbanist in Architecture & Cities & Urbanism. ]

    [ WebUrbanist | Archives | Galleries | Privacy | TOS ]


    WebUrbanist

  • 40+ Free & Premium Lightroom Presets You Shouldn’t Miss

    Presets can be a Lightroom user’s best friend. When you are editing hundreds or thousands of photos any time you can save in post processing is extremely valuable. Making use of presets is one of the best ways to streamline your workflow and save time in the editing process. You can either create your own presets, download free presets, or Continue Reading

    The post 40+ Free & Premium Lightroom Presets You Shouldn’t Miss appeared first on Photodoto.


    Photodoto

  • Understanding Normal and Cross-Type Focusing Points

    Look through the viewfinder of any DSLR camera and you will see several dots, or squares, that represent individual points at which the camera is capable of focusing. The purpose of these focusing points may seem fairly obvious, but not all of them are created equal. When you press the shutter button (or back button) halfway, some of these points will light up, indicating that everything at that specific spot is crystal clear and your photo will be nice and sharp.

    However, the speed at which your camera can focus on one of the points, as well as how accurate the focus will be, depends greatly on whether the individual focusing point is a single or cross-type. Understanding the differences in how they operate can help you decide which ones to use to take better photos.

    cross-type-focus-sensors-joy-of-the-waters

    Most DSLR cameras use what’s called a phase-detection focusing system – whereas most mirrorless cameras, point-and-shoots, and mobile phones use a separate system called contrast-detect. In a DSLR, most of the light coming through the lens is reflected upwards by the mirror, to the optical viewfinder, which lets you see precisely what the camera lens sees.

    However, a tiny bit of light is also sent downward to a series of sensors that are capable of figuring out whether the image is in focus. The science behind this involves splitting the incoming light, and comparing two beams, to essentially see if they match up. If not, an electronic signal is sent to the focusing motor, to adjust the lens until the image is in focus. All this happens in a fraction of a second, but these fractions matter in photography, and can often be the difference between a tack-sharp image and a blurry shot.

    I used my camera's cross-type focusing points to make sure this picture of a holstein cow was tack sharp.

    I used my camera’s cross-type focusing points to make sure this picture of a holstein cow was properly focused.

    The problem with traditional phase-detecting systems is they get a bit stumped if there are a lot of vertical lines in the spot where they are trying to focus. To see how this works for yourself, print a sheet of paper on your computer, with nothing but vertical lines. Tape it to a wall, and try to focus on it with your camera. If you are using one of the focusing points on the outside edge of your camera’s viewfinder, your lens will likely spend a few seconds hunting for focus but will probably never find it. However if you turn the paper sideways and try again your camera will likely get things focused fairly easily. This is because when light is sent to the phase-detection sensors in your camera, the sensors don’t have enough information to determine focus, if all it sees is vertical lines.

    While most of the time when you are out taking pictures, you are probably not shooting images of vertically-lined paper, this example does illustrate how your camera’s autofocus can get slowed down, and become unreliable under certain conditions. Ironically, in this test, your camera will find focus much better if you use the live view function. That employs a contrast-detection focusing method which is also used in most mirrorless cameras, and while it is a bit slower, can have some advantages over traditional phase-detect systems.

    Test your camera's focus sensors with nothing but a lined piece of paper.

    Test your camera’s focus sensors with nothing but a lined piece of paper.

    To address this issue, most camera manufacturers have implemented cross-type focusing sensors that work fine when focusing on images with horizontal and vertical patterns. On high-end models (like the Nikon D5 or Canon 5D Mark III) there are several clusters of cross-type focusing sensors, but lower-end models (like the Nikon D3200 and Canon Rebel T3i) usually have just one, right in the center. This means that the center autofocus point will likely be significantly faster, and more reliable, than the points on the edge. You can see the results yourself by repeating the test from earlier with the center focus point, instead of one on the perimeter of your viewfinder.

    Using your camera's cross-type sensors can help ensure your pictures are perfectly focused.

    Using your camera’s cross-type sensors can help ensure your pictures are perfectly focused.

    The real-world implications of this are quite significant, and may very well change how you approach your photography. Many people use an automatic setting that allows their camera to look at all the available focus points, and determine which one should be used to set the focus. But, if you know that the the cross-type points will give you consistently better results, you might try using them more often.

    This is especially useful with sports and fast action, but other types of photography situations can benefit from utilizing cross-type points also. Portrait, family, and wedding photographers often utilize the focus-and-recompose method to nail focus with a cross-type sensor, then shift their camera’s field of view to get precisely the composition they want. If you shoot landscapes you might not need speedy autofocus, but using your camera’s cross-type sensors may help your focus be more accurate.

    Of course all this doesn’t mean that the normal focusing sensors on your camera are worthless, just that knowing which ones are cross-type can often give you an advantage you might not have otherwise had.

    My Nikon D750 has 15 cross-type sensors all in the middle. To get this shot I used a cross-type sensor to nail focus and then recomposed by slightly shifting my camera to the right.

    My Nikon D750 has 15 cross-type sensors, all in the middle. To get this shot I used a cross-type sensor to nail focus, and then recomposed by slightly shifting my camera to the right.

    One other point worth noting is that mirrorless cameras use phase-detection focusing more than they used to, and some are implementing cross-type sensors too. Just because this technology started with DSLRs does not mean it will be forever limited to these types of cameras, and as manufacturers continue to innovate we will likely see more, and better, focusing options in the years ahead.

    To help you figure out how many cross-type focusing points your camera has, you can do a little searching online, or look at the list below. I have compiled some data based on the more popular camera models for you:

    Canon

    • 70D, T6/T6i: 19 points, all cross-type
    • 60D, T5/T5i, T4/T4i: 9 points, all cross-type
    • T3/T3i, T2/T2i: 9 points, 1 center cross-type
    • 6D: 11 points, 1 center cross-type
    • 7D: 19 points, all cross-type
    • 7D Mark II: 65 points, all cross-type
    • 5DSR, 5D Mark III: 61 points, 41 cross-type in 3 columns (middle, left, and right-side)

    Nikon

    • D3300, D3200, D3100: 11 points, 1 center cross-type
    • D600, D610, D7000, D5500, D5300, D5200: 39 points, 9 cross-type (clustered in center)
    • D750, D810, D7100, D7200: 51 points, 15 cross-type (three center columns)

    Sony

    • a6000: 179 points, 15 cross-type
    • a77II: 79 points, 15 cross-type
    • a77: 19 points, 11 cross-type
    • a7II: 117 points phase detection, PLUS 25 cross-type points
    • a7R II: 35mm full frame: 399 points (phase-detection AF) APS-C: 357 points (phase-detection AF) / 25 points (contrast-detection AF)

    Pentax

    • K-5: 11 points, 9 cross-type
    • K-3: 27 points, 25 cross-type

    Have you ever tried using cross-type focusing points? What have your results been like, and what other tips and tricks do you have for other dPS readers? Leave your thoughts in the comments section below.

    googletag.cmd.push(function() {
    tablet_slots.push( googletag.defineSlot( “/1005424/_dPSv4_tab-all-article-bottom_(300×250)”, [300, 250], “pb-ad-78623” ).addService( googletag.pubads() ) ); } );

    googletag.cmd.push(function() {
    mobile_slots.push( googletag.defineSlot( “/1005424/_dPSv4_mob-all-article-bottom_(300×250)”, [300, 250], “pb-ad-78158” ).addService( googletag.pubads() ) ); } );

    The post Understanding Normal and Cross-Type Focusing Points by Simon Ringsmuth appeared first on Digital Photography School.


    Digital Photography School