Blog

  • Van Gogh’s Iconic Bedroom Brought to Life & Available to Rent

    [ By WebUrbanist in Boutique & Art Hotels & Travel. ]

    van gogh 3d

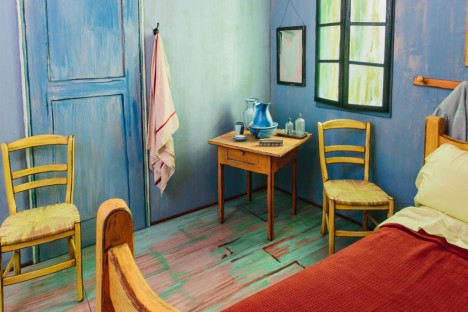
    The Art Institute of Chicago has brought one of the most famous paintings of Vincent Van Gogh to life like never before: a complete replica realized in three dimensions and available as a rental to art fans in for a night of surrealistic immersion. The details, furniture and decor have been painstakingly drawn from the image, right down to crooked chairs, suspended paintings and heavily brush-stroked colors.

    van gogh original yellow bedroom

    For rent on AirBNB, the project is part of a larger exhibition around Van Gogh’s various bedroom paintings made in the late 1880s, one of which was made during a stay at an asylum. The recreated room is located in the River North neighborhood of Chicago, next to one of the AIC’s campuses.

    van gosh 3d recreated

    At just $ 10 a night, this place is likely to rent out entirely if it has not already. For whatever reason, the space also comes with a television and internet connection, though authentic experience-seekers may want to skip those, turn down the lights and just enjoy a night living inside of a classic work of art. The exhibit runs through early May and features over 30 of the master’s works.

    van gogh interior replica

    More from the AIC: “Van Gogh’s life was short and nomadic. By the time he died, at the age of 37, he had lived in 37 separate residences across 24 cities, mostly as a boarder or a guest dependent on the hospitality of family or friends. In 1888, he finally moved into the only home he truly considered his own: his beloved ‘Yellow House’ in Arles.”

    van gogh rental exhibit

    “Of his many bedrooms, Van Gogh immortalized only the one from the Yellow House—three times in fact. He first painted the room in 1888 shortly after his move to the Arles and then painted the composition twice more in 1889: once to record the first version that had been damaged when his home flooded and then again as a gift for his mother and sister.”

    Share on Facebook


    [ By WebUrbanist in Boutique & Art Hotels & Travel. ]

    [ WebUrbanist | Archives | Galleries | Privacy | TOS ]


    WebUrbanist

  • FlatCam prototype eliminates lens using pinhole-like sensor mask


    A team of researchers at Rice University are developing a thin, lensless camera called FlatCam, which replaces the traditional lens with a grid-like coded mask essentially made of multiple pinholes positioned directly over the sensor. From there, raw data from the camera – which looks nothing like an actual image – is sent to a computer where an algorithm demultiplexes the raw sensor measurements to reconstruct a photo.

    FlatCam was developed by Richard Baraniuk and Ashok Veeraraghavan, and while it isn’t likely to replace traditional cameras, FlatCam could find use in a variety of applications where present imaging technology isn’t suitable. Due to its lensless design, FlatCam is thinner than a dime and can be ‘fabricated like microchips,’ decreasing costs.

    Offering an example of possible future applications, Baraniuk explained, ‘We can make curved cameras, or wallpaper that’s actually a camera. You can have a camera on your credit card or a camera in an ultrathin tablet computer.’ The team’s paper details more potential applications, including surveillance, foldable cameras and wearable devices. They’ve even created a couple of video clips using the prototype camera.

    In its present form, FlatCam produces 512 x 512 pixel images; however, the team expects better algorithms and improved manufacturing will one day result in higher resolutions. One of the salient issues mentioned in the paper surrounds noise: a linear demultiplexing system invariably adds noise from all the mathematical operations, with higher spatial frequencies experiencing even more ‘noise amplification’ that ultimately limits resolving ability. These are issues the researchers are actively working on.

    The researchers recently talked about FlatCam on NPR’s All Things Considered; the episode can be streamed here.

    Via: Rice University

    Articles: Digital Photography Review (dpreview.com)

  • Mattel ThingMaker: New Device Lets Kids 3D-Print Their Own Toys

    [ By WebUrbanist in Gadgets & Geekery & Technology. ]

    mattel thingmaker

    Toy-maker Mattel has announced a 3D printer with a novel application: a way for children to make their own custom toys using a simple digital interface. The app, designed by Autodesk, is easy to learn, fast to use and simple enough even younger kids can use it. The gadget itself is priced at $ 300.

    3d home printer

    The ThingMaker program comes with a number of templates and basic characters that can be customized in terms of color and texture, but also allows for from-scratch designs. Each design can be saved for future editing and printing as well, in standard formats that work with or beyond the printer.

    3d custom toy printer

    Finished objects are only one piece of the puzzle, however: the idea is to also allow for printing, connecting and assembling larger creations from smaller parts. Ball-and-socket joints can be easily included for attachment purposes, helping facilitate complex dolls and action figures. Eventually, Mattel may also facilitate combinations and accessories associated with existing branded toy lines, like Barbie and Hot Wheels.

    3d printer interface

    Various safety measures have been included to keep kids safe, from an automatically-locking door to a retractable print head. For liability reasons they are listing it as a device for kids ages 13 or older.

    mattel device

    “In today’s digital age, it’s more important than ever for families to transcend the digital world and make their ideas real,” said Aslan Appleman, senior director, at Mattel. “ThingMaker pushes the boundaries of imaginative play, giving families countless ways to customize their toys and let their creativity run wild.”

    Share on Facebook


    [ By WebUrbanist in Gadgets & Geekery & Technology. ]

    [ WebUrbanist | Archives | Galleries | Privacy | TOS ]


    WebUrbanist

  • Sony develops 22MP smartphone sensor with on-chip AF processing and video IS

    Sony has announced a 22.5MP Exmor RS imaging sensor for smartphones. The new stacked 1/2.6″ CMOS sensor, called IMX318, is smaller than most used by current smartphones and includes on-chip processing for AF and video image stabilization. Sony has used pixels measuring 1.0µm, allowing for a smaller sensor with higher resolution to be included in likewise slimmer mobile devices. For comparison, this sensor is 20% smaller than the 1/2.3″ chip commonly used in smartphones.

    Like many current smartphone sensors, the IMX318 uses phase-detection AF elements combined with contrast-detection to create ‘hybrid AF,’ and the company claims AF reporting 0.03 seconds. According to Sony, IMX318 has such an efficient data interface that pixels can be read at 30 fps from across the entire surface. This allows the company to use the whole 22.5MP resolution for video recording – although the footage is scaled to 4K – and full resolution stills to be captured during video shooting. HD movies can be recorded at up to 120 fps, and 720p footage at 240 fps.

    While this sensor is most suitable for the smartphone market, the technology could soon move into larger sensors for compact, mirrorless and DSLR cameras. IMX318 will go on sale in May, according to Sony, at a price of ¥2000/$ 17.50/£12.30 per unit. For more information see the Sony website. Below, you can see the sensor’s image stabilization system in action. 

    Press release:

    Sony Announces a New Type 1/2.6 22.5 Megapixel Exmor RS™, the Industry’s First*1 Stacked CMOS Image Sensor with Built-in Hybrid Autofocus and 3-Axis Electronic Image Stabilization

    Tokyo, Japan – Sony Corporation (“Sony”) is announcing the commercialization of a new Exmor RS™ image sensor for smartphones and other devices that require increasingly better cameras and thinner form factors. The IMX318 is a type 1/2.6 stacked CMOS image sensor with 22.5 effective megapixels, and it boasts a more compact size, greater image quality, and higher performance. This new Exmor RS is the industry’s first*1 to be equipped with built-in high-speed hybrid autofocus (“AF”), as fast as 0.03 seconds*2, and built-in 3-axis electronic image stabilization technology for video. Sony aims to begin shipments for this new CMOS image sensor in May, 2016.

    *1: According to Sony research (as of February 16, 2016)
    *2: The time it takes to bring the picture into focus when the distance from the sensor surface to the subject is reduced from 2m to 2cm, given high-light conditions (2,000lux or higher).

    The IMX318 boasts a stacked structure and the industry’s smallest unit pixels, which measure 1.0?m (micrometers) in size. With this, the image sensor achieves a compact, type 1/2.6 size suitable for inclusion into smartphones, while still realizing a high resolution of 22.5 effective megapixels, among the top in the industry. This new image sensor not only boasts enhanced resolution, but it also matches its predecessor in image quality despite the IMX318’s smaller size and unit pixels (IMX230 predecessor model: type 1/2.4 sensor with 1.12?m unit pixel size). Additionally, Sony has succeeded in equipping the IMX318 with cutting-edge digital imaging features, namely high speed built-in hybrid AF and 3-axis electronic image stabilization for video, a first*1 for the industry. With this image sensor, the user can capture image stills of those decisive moments reliably in high quality, as well as high resolution video without fear of blur.

    Main Features

    1. The industry’s smallest unit pixel size at 1.0?m, achieving compact size (type 1/2.6) while realizing 22.5 effective megapixels high resolution

    As smartphones grow ever thinner, so too are image sensors growing increasingly more compact. In line with this trend, Sony has developed a miniscule 1.0?m pixel sensor that, despite its small size, realizes high image quality. To accomplish this, Sony employed manufacturing technology that improves light utilization efficiency, as well as circuit design technology that eliminates noise, a root cause of deterioration in image quality. With this innovation, Sony has realized an image sensor that delivers high quality images, while also boasting small optical size and a high resolution of 22.5 megapixels. Night shots have long been a weak point for the compact cameras used in smartphones, with the lack of light translating into excessive visual noise. The IMX318 addresses this weakness and realizes beautiful photography in nighttime conditions.
    *
    No drop in image quality from the IMX230 predecessor model (Left: 1.12?m unit pixel size) to the IMX318 (Right: 1.0?m unit pixel size), despite the latter’s smaller size

    2. The industry’s first*1 image sensor with built-in hybrid AF, as fast as 0.03 seconds*2, and 3-axis electronic image stabilization

    Hybrid AF
    Hybrid AF, which merges image plane phase detection AF with contrast detection AF, has previously been realized through the combination of an image sensor and an application processor. But with the IMX318, Sony has created the industry’s first*1 stacked CMOS image sensor with hybrid AF built into the sensor’s internal signal processor. The IMX318 leverages Sony’s high-speed AF technology that has been honed over many years, boasting an AF as fast as 0.03 seconds*2 (and as fast as 0.017 seconds when shooting video at 60fps). With this power in hand, the user can capture those decisive moments reliably in focus, whether shooting stills or video.
    *
    When shooting with hybrid AF: 0.03 seconds
    (Time required for focusing)
    Image plane phase detection AF: Utilizes dedicated image plane phase detection AF pixels embedded throughout the image sensor pixel array.
    Contrast AF: Works off the contrast of the subject.

    3-axis electronic image stabilization for video
    With the IMX318, Sony has also created the industry’s first*1 stacked CMOS image sensor with image stabilization functionality built into its internal signal processor. This sensor leverages the image stabilization technology that Sony has cultivated over its years developing cameras, realizing smooth 4K*3 videos with little camera shake by making effectively use of the signal output obtained from the external 3-axis (pitch, yaw, and roll) gyro sensor*4. Sony’s unique image stabilization technology incorporated into the IMX318 corrects not only camera shake, but also lens distortion, making for more beautiful videos. Furthermore, because image stabilization is achieved by processing within the hardware of the image sensor, less power is used than when it is accomplished by software processing in the external application processor. Since it enables smooth video shooting, this image sensor is suited for incorporation into not only smartphones, but also a variety of other products that tend to generate substantial camera shake, such as aerial drones used for image capture.

    *3: QFHD (3840 x 2160)
    *4: Gyro sensor: instrument that determines angular velocity through inertia.

    3. 4K and high frame rate video recording, through high-speed communications leveraging the latest MIPI specifications

    Sony elected to adopt the MIPI (Mobile Industry Processor Interface) Alliance’s latest C-PHY 1.0/D-PHY 1.2 specifications for this image sensor’s interface. With this interface, the IMX318 is able to achieve more power efficient and faster data transmission from the image sensor to the application processor. As a result, even at the high resolution of 22.5 megapixels, transmission is realized for all pixels at 30fps. This enables seamless switching between high resolution video and still image photography, realizing the best of both worlds. Since the image sensor can transmit greater-than-4K resolution images for all pixels to the application processor, the user can capture 22.5 megapixel still images even while in the middle of recording video in 4K*3 at 30fps

    Articles: Digital Photography Review (dpreview.com)

  • ZY Optics launches improved Speedmaster F0.95 35mm lens, claiming 30% better resolution

    The new model (right) is smaller and lighter than the original version of the lens (left)

    The Shenyang Zhongyi Optical & Electronic Company Limited has introduced an updated version of its super-fast 35mm lens for APS-C-sensor cameras that it claims has better resolution and reduced chromatic aberrations. The manual focus Mitakon Speedmaster 35mm F0.95 II is also smaller and lighter than the original model, with a length of 60mm instead of 82mm, a filter thread of 55mm instead of 58mm and a weight of 460g/1.06lb compared to 680g/1.5lb.

    The latest version uses a new optical design that features 11 elements in 8 groups, and includes a single extra-low dispersion element, two extra-high refractive index elements, and three elements made in high-refractive glass. The company says the new design produces 30% more resolution via better overall sharpness and reduced chromatic aberrations. Performance wide open is also greatly improved, ZY Optics says.

    A click-less aperture ring makes the lens suitable for video recording, so it is a shame the Micro Four Thirds system isn’t supported in the initial offering. Fuji X, Sony E and EOS-M camera system owners will be provided for though.

    The lens costs $ 599, and you can learn more on the ZY Optics website.

    Press release:

    ZY Optics releases the improved Zhongyi Mitakon Speedmaster 35mm f/0.95 Mark II for Sony E / Fuji X / EOS-M cameras

    Shenyang China, Feb 14, 2016 – Zhongyi Optics (ZY Optics) has released an improved version of their first f/0.95 lens, Zhongyi Mitakon Speedmaster 35mm f/0.95 Mark II. The mark II verison features a drastic improvement of sharpness, better control of chromatic abberations and much compact size. The new version comes with a Fuji X / Sony E / EOS-M mount and is able to cover the image circle of APS-C sized sensors.

    Zhongyi Mitakon Speedmaster 35mm f/0.95 Mark II is a ultra-fast prime lens which provides a 35mm-equivalent focal length of around 53mm in APS-C cameras. A maximum aperture of f/0.95 makes it extremely convenient to shoot at a low light conditions without flash. The new optical design incorporates a 11 elements in 8 groups structure, including 1pc of Extralow disperson elements, 2 pcs of Extra-high Refractive Index elements and 3pcs of High Refractive Index elements. This structure effectively improved the image resolution by 30% compared to the previous version from corners to corners. This also controls the chromatic abberations very well and deliver excellent image sharpness even at f/0.95.

    The new Speedmaster 35mm f/0.95 is light and compact. The total weight is reduced from 680g to 460g, making it an ideal companion for the compact mirrorless cameras. Manual focus design and a click-less, silent aperture ring promote smooth handling and are especially well-suited to video applications. The lens is built in metallic enclosure with additional protective process and finest finishing, which gives extra durability and aesthetic.

    Pricing & Availability
    Mitakon Speedmaster 35mm f/0.95 is now available to purchase at ZY Optics authorized resellers and at our official website (http://www.zyoptics.net/). The Recommended Retail price is USD 599.

    Articles: Digital Photography Review (dpreview.com)

  • Tips for Removing Digital Noise in Lightroom

    One of the most significant advantages that modern cameras have over their film-based counterparts of days gone, by is their ability to change how sensitive they are to light with the touch of a button.

    Back in the days of film you had to decide ahead of time whether you wanted to shoot at ISO (then called ASA) 100, 200, 400, or in extreme cases, 800. If you were going to take pictures outdoors, a roll of 24 or 36 exposure, 100 or 200 film would work fine, but woe betide the unsuspecting photographer who wandered inside a dimly-lit building with that same film still in his or her camera. To change sensitivity, and shoot in the new lighting conditions, you had to shoot the rest of the pictures on a given roll of film, remove it from your camera, and hope you brought some ASA 400 or 800 film with you.

    Nowadays you just spin a dial on your camera to instantly switch between ISO values like 100 or 200, that work great in broad daylight, to ultra-high values like 6400 or 12,800, that would be positively unthinkable with film. It’s not all sunshine and roses though as one of the biggest issues with high ISO values is that of digital noise. Even the newest cameras produce pictures with noise and grain when shooting at high ISO values, but thankfully Lightroom can help mitigate some of the effects of this noise.

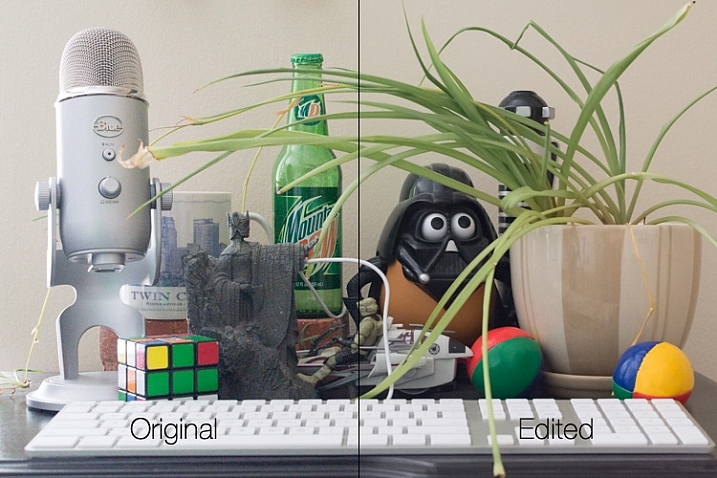
    Shot at ISO 5000, the original image was too noisy for practical use. Lightroom enabled me to clean things up significantly.

    Shot at ISO 5000, the original image was too noisy for practical use. Lightroom enabled me to clean things up significantly.

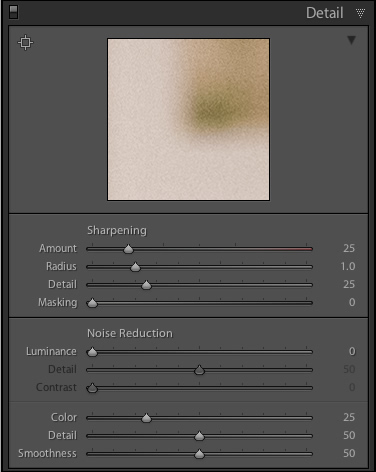
    To get started with the noise reduction options click on the Develop module, then find the Detail panel on the right side. Note: this process works best if you shoot in RAW, not JPG.

    You will find several options that can seem a bit confusing and overwhelming at first. You can experiment all you want, by just moving the sliders around to see what effects they have on your pictures, but it also helps to examine each one individually, to know precisely what they do. You will also see the Sharpening options, which are related to noise reduction, but I’m not going to focus on them specifically just yet. Before you look at the sliders themselves in the noise reduction area, it’s important to understand the two types of noise that are produced when taking a picture, Luminance and Chroma.

    lightroom-noise-reduction-develop-panel

    Luminance noise

    This kind of noise affects the brightness, but not the color, of individual pixels. If you had a picture of a dark grey piece of paper with a great deal of luminance noise it would appear similar to old-school television static with lots of light and dark fuzz.

    Chroma noise

    This shows up as oddly-colored pixels, scattered throughout an image, almost like someone has tossed a handful of red, blue, and green grains of sand at it. Lightroom calls this “Color” noise, but it’s just another term for Chroma noise.

    Both types of noise are byproducts of how digital image sensors capture data, and while they can be corrected somewhat in Lightroom and other post-processing software, it’s almost impossible to completely remove noise from a picture while still ending up with a usable image. Lightroom does give you some tools to get your digital noise under control, and if you know what you’re doing you can get some fairly decent results. Using separate controls for luminance and chroma noise, in combination with some sharpening adjustments, can help you salvage what you may think is a useless picture. As an example, here’s a picture that I took at ISO 6400, without any noise reduction applied.

    35mm, f/5.6, 1/60 second, ISO 6400

    35mm, f/5.6, 1/60 second, ISO 6400

    Not bad, right? If this is what ISO 6400 looks like, you might as well shoot like this all day long! Well, before you go and spin your ISO dial all the way up to Ludicrous Mode, you might want to take a look at the same 24-megapixel image zoomed in to 100%.

    lightroom-noise-reduction-scene-no-noise-reduction-100-percent

    Ow, my eyes! The noise, it hurts! Not only is the picture full of color blotches, but shooting at ISO 6400 has resulted in an image that is far less sharp than it could be at a lower ISO. A great deal of color noise is evident on the torso of the figure, as well as the slanted lines on the left side, and you can see lots of luminance noise in the green letters on the right side too.

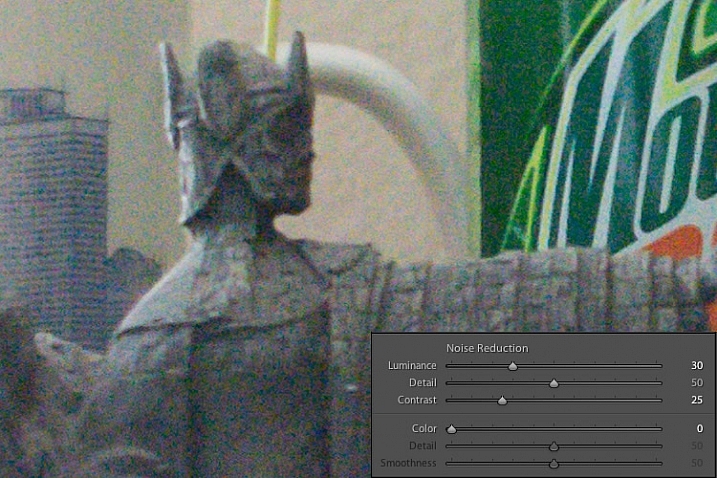
    This noise is not always visible when you shrink  your files down to share online, but if I were to print this picture it would look like my cat threw up on the paper. Lightroom can help us fix things, and a good place to start, in this case, is with the luminance slider at a value of 30.

    lightroom-noise-reduction-scene-luma-noise-reduction-100-percent

    Much of the black and white static has been removed, but there are still splotchy patches of color scattered throughout the image, which can dealt with using the color slider next. Before you start thinking that this is a magical cure-all for your noisy images, take a closer look at the picture. Much of the details have been lost, or blurred, such as the lines on the side, and the patchwork of the figure’s tunic.

    You can mitigate these effects somewhat by using the detail and contrast sliders, but again the results are not going to be ideal. Detail acts as sort of a threshold control, allowing you to tell Lightroom what should be treated as noise and what should be left in. I usually leave this slider at 50 but you can experiment with it to get the results you need. The contrast slider helps bring back some of the edges that have gotten blurry, thanks to the noise reduction algorithm, and even though I have set it to 25 in this example, you can clearly see that much of the edge contrast is not as good as the noisy original. Move this slider too far though, and your photo will start looking fake and artificial, so you’ll have to find a good balance depending on your needs.

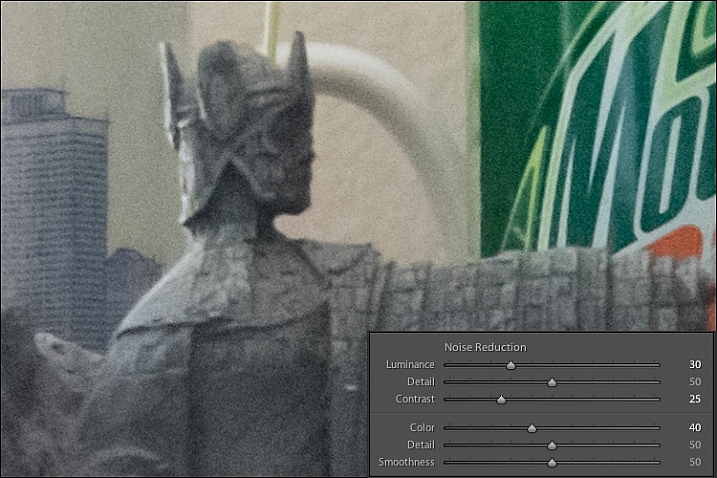
    To continue with the noise reduction, the color slider can be used to get rid of the weird splotches of red, green, and blue, but again you are going to see some tradeoffs.

    lightroom-noise-reduction-scene-chroma-noise-reduction-100-percent

    The results look fine at first, and you may notice that Lightroom automatically applies some degree of Color noise reduction (value 25) to every photo by default. This is because low-grade Color noise reduction is almost always good to have, and generally won’t result in too many tradeoffs for the image as a whole. In this case I used a value of 40, to show the effects a bit more. Even though the result is decent, you might notice something else that’s missing, if you look at the soda bottle label on the right-hand side. Compare it to the original picture and you will see that along with removing some of the color noise Lightroom has actually removed some color from the whole photo.

    The Detail slider slider, similar to its counterpart in Luminance noise reduction, acts as somewhat of a threshold so you can tell Lightroom what is, and is not, noise to remove. The Smoothness slider is a fairly recent addition to Lightroom, and can be used to control what’s known as “low-frequency” color noise. Basically, slide it to the right to remove larger splotches of noise or to the left to keep these more intact.

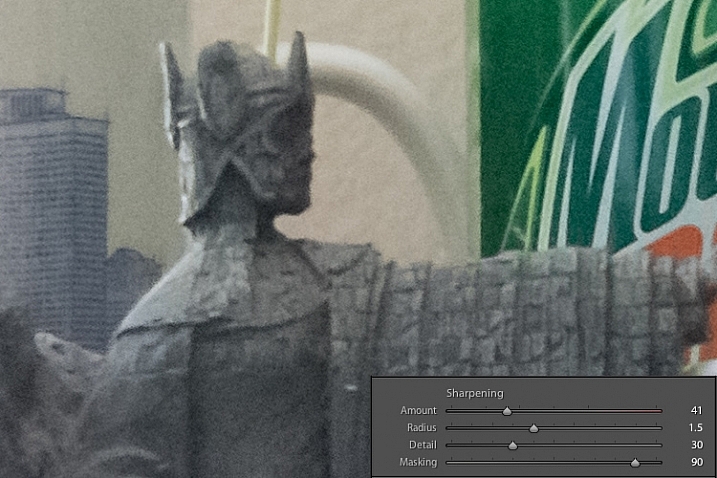
    Every time you use Lightroom’s noise reduction tools you will deal with tradeoffs, and one of the most significant of these is the overall sharpness of the image. Photos with more noise reduction will almost always be softer, particularly where there are sharp contrasting edges, and you can bring a bit of this back by using the sharpening tools.

    Here’s yet another 100% crop of the image above with the same noise reduction employed in the previous image, but with added sharpening.

    lightroom-noise-reduction-scene-sharpened-100-percent

    After a bit of sharpening, the detail in the lines on the left side has returned, and so has the texture of the tunic, but the lower-left corner is still a muddy mess of grey, whereas in the original noisy picture it was more defined. Here’s both the original and edited image side-by-side which might help you get a macro view of how these noise reduction and sharpening tools can affect a picture.

    lightroom-noise-reduction-scene-both

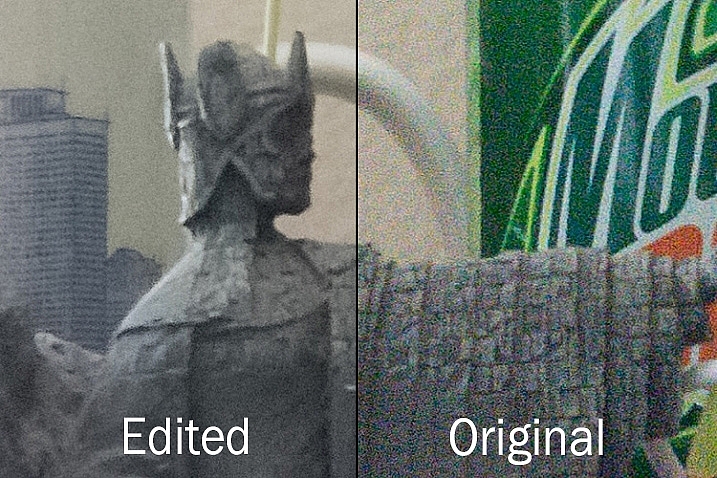
    At first glance you might not notice too many differences, but one of the most glaring problems with the edited picture is the complete lack of texture on the wall behind the scene, as well as a smoothness to the plant that is almost unnatural. Here’s a side-by-side zoomed in to 100%.

    lightroom-noise-reduction-scene-no-noise-reduction-100-percent-before-after

    Is it worth these tradeoffs to get a photo with less noise? That question can only be answered by you, but one rule of thumb I like to follow, is that a noisy image can be corrected and edited in postproduction, albeit somewhat imperfectly. A blurry image cannot be fixed.

    So, if there is a situation in which I find myself having to choose between a faster shutter speed and higher ISO (i.e. more noise), or a slower shutter speed and lower ISO (i.e. less noise) I’ll usually err on the side of noise, if the slower shutter speed would result in an image that is too blurry.

    I also make liberal use of my camera’s auto-ISO feature, which allows me to set a minimum shutter speed and a maximum ISO value. That way I can concentrate on adjusting the aperture to get the composition I want, and always know that my pictures will be free of blur, even if does mean there will be a bit of noise I have to clean up in Lightroom.

    The light here was quite dim which required a high ISO value. I didn't mind a slightly noisy image that was sharp and in focus, because I was able to get rid of most of the noise in Lightroom.

    The light here was quite dim, which required a high ISO value. I didn’t mind a slightly noisy image that was sharp and in focus, because I was able to get rid of most of the noise in Lightroom.

    One final note worth mentioning is you can also use Lightroom’s local adjustments like the Radial Filter, Graduated Filter, and Adjustment Brush to apply noise reduction in specific areas of an image only. However, this is a bit limited, in that these adjustments only perform luminance noise reduction, so you might still be left with some ugly colored spots, that can only be removed using the global adjustments in the detail panel of the develop module.

    What are some of your favorite tips and tricks for removing noise? I’d be interested to hear any thoughts you have in the comments section below.

    googletag.cmd.push(function() {
    tablet_slots.push( googletag.defineSlot( “/1005424/_dPSv4_tab-all-article-bottom_(300×250)”, [300, 250], “pb-ad-78623” ).addService( googletag.pubads() ) ); } );

    googletag.cmd.push(function() {
    mobile_slots.push( googletag.defineSlot( “/1005424/_dPSv4_mob-all-article-bottom_(300×250)”, [300, 250], “pb-ad-78158” ).addService( googletag.pubads() ) ); } );

    The post Tips for Removing Digital Noise in Lightroom by Simon Ringsmuth appeared first on Digital Photography School.


    Digital Photography School

  • 5 Must-Have Lenses for Wedding Photographers and Why

    Have you ever wondered which lenses are in a wedding photographer’s bag? There is a plethora of choice when it comes to lenses, and lens companies come up with new products all the time. Many photographers are attracted to these bright and shiny things and end up with a mammoth collection of lenses, many of which hardly see the light of day. If you have to pare back to the absolute necessities, and are allowed five lenses in your wedding photography bag, these are the ones that I would recommend. I have been a professional wedding photographer for seven years now, and deciding on these five took some time, and serious consideration over the course of my career.

    They are:

    1. The 70-200mm f/2.8
    2. The 24-70mm f/2.8
    3. The 85mm prime
    4. The 35mm prime
    5. A macro lens (105mm or 60mm for Nikon, 100mm or 60mm for Canon)

    Let’s look at each individually to see why.
    5-must-have-lenses-wedding-photographer_0001

    #1 – 70-200mm f/2.8

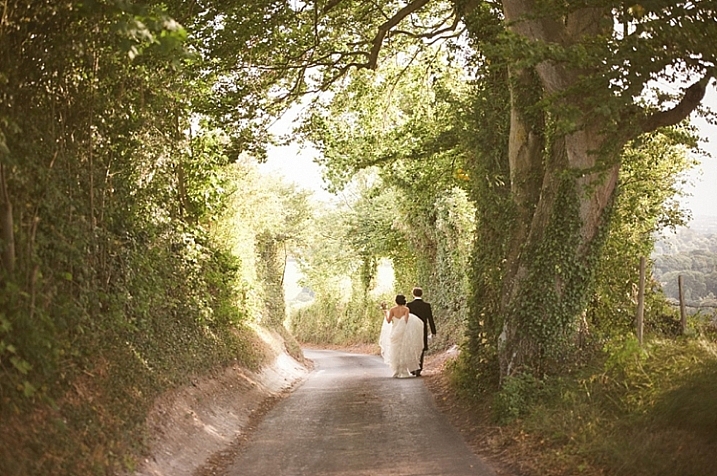
    It’s big, bulky and heavy but I wouldn’t do a wedding without this lens. The 70-200 f/2.8 is my workhorse when it comes to weddings. It is a versatile lens that gives you amazing sharpness at all focal lengths. The bokeh is beautiful, especially at 200mm, even with a stopped down aperture due to the compression caused by the long focal length.

    This lens makes a wedding photographer invisible. You don’t have to be so close to people’s faces; you can capture candid expressions and serendipitous moments from a fair distance away. This lens is especially useful during the ceremony, where you would rather be far away and out of sight, or hidden behind a wall or door. It allows you to capture the exchange of rings, vows, and kiss discreetly.

    5-must-have-lenses-wedding-photographer

    If you require a longer zoom while being at the same fair distance, you can choose to photograph in DX mode (if you shoot full frame and your camera offers this option) on your camera, and the lens will give you 1.5x distance more, making 200mm into a neat 300mm zoom. If you do this, make sure that you have enough pixels for the crop, in case you feel the need to straighten or change your composition in post-processing.

    For example, of you are shooting with a 12MP camera such as the old Nikon D700 on FX mode, when you convert to DX mode the camera becomes a 5MP camera, which is below the minimum amount of pixels you can have – 6MP – to be able to enlarge prints to a decent size. If you have to crop in post-processing, this will not give you enough pixels to be able to safely do so without compromising print output sizes.

    5-must-have-lenses-wedding-photographer

    However, if you are photographing with a Nikon D810 in DX mode, your image goes from 36MP to 15.3MP but still leaves you enough wiggle room for minimal, and sensible cropping if necessary. If you use this functionality, don’t forget that when photographing in DX mode on a full frame camera, or when using a DX lens, the camera only uses the center of the sensor. So if you forget to compose accordingly in camera, you will get a nasty surprise after you have taken the image: cut off heads and limbs, and badly cropped compositions are some examples. When using DX lenses, the rest of the unused sensor area is blacked out but when using FX lenses in DX mode, this is not the default and you would still see the entire full-frame sensor if you don’t change your settings.
    5-must-have-lenses-wedding-photographer

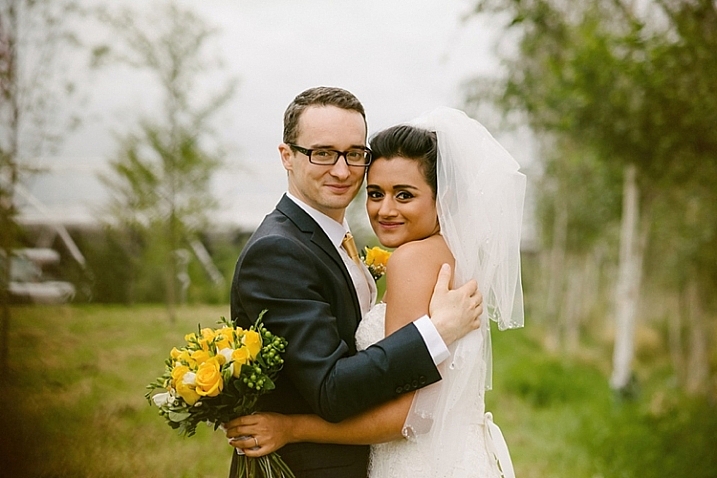
    The 70-200mm is an excellent focal length for flattering portraits. When photographing at 200mm, I typically stop down to around f/4 or f/5.6 at a shutter speed of 1/200-1/400th, and the sharpness of the image is stunning against a creamy bokeh background. This lens also has a built-in lens collar you can use to steady it when hand holding, or attaching it to a tripod stand. Without a tripod, you can steady yourself as much as possible by leaning against something immovable like a wall, or on a stable surface such as a table, or keeping your arms pinned against something sturdy to reduce camera shake, especially when using this lens for portrait work at the longer end of the focal length.
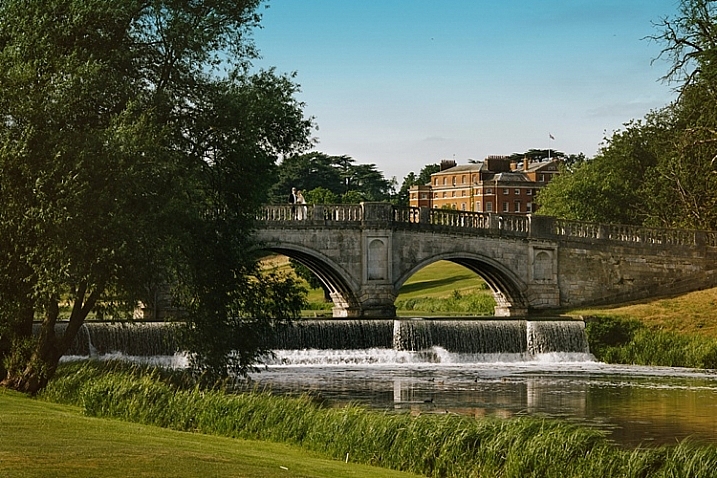
    5-must-have-lenses-wedding-photographer

    5-must-have-lenses-wedding-photographer_0033

    You can now get a f/4 version of this zoom lens (for Nikon, Canon has always had one) at a vastly cheaper price compared to the f/2.8. I personally do not have the f/4 version but if you’re on a budget, and you don’t mind not having the option to photograph at a wider aperture, then I see no reason why you should not get the f/4. It is lighter and smaller, understandably so because it has less glass elements compared to its more expensive counterpart, and may not only suit the budget better, but also lessens the bulk you have to carry at a wedding.
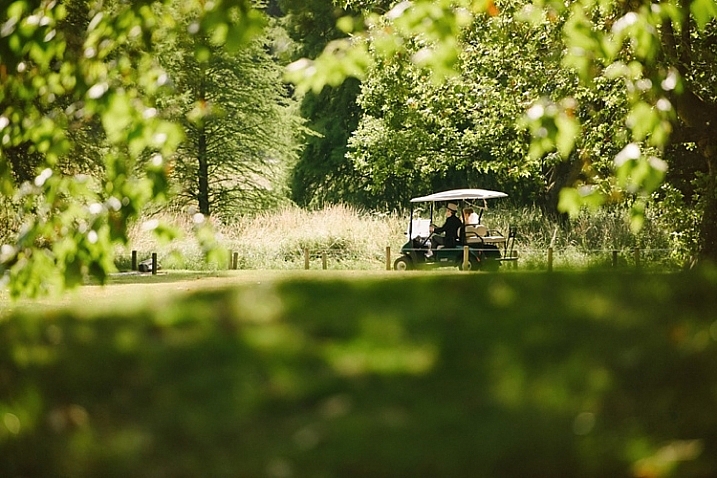

    5-must-have-lenses-wedding-photographer

    5-must-have-lenses-wedding-photographer

    #2 – 24-70mm f/2.8

    The 24-70mm f/2.8 offers the focal length versatility needed when you are photographing on the go, which is what wedding photographers need for most of the day. You can use this lens to capture wider location scenes, candid photos of people, guests arriving, people milling and chatting while waiting for the ceremony to start or during the wedding breakfast, some decorations and details, the first dance, and the leaving photos, to cite just a few.
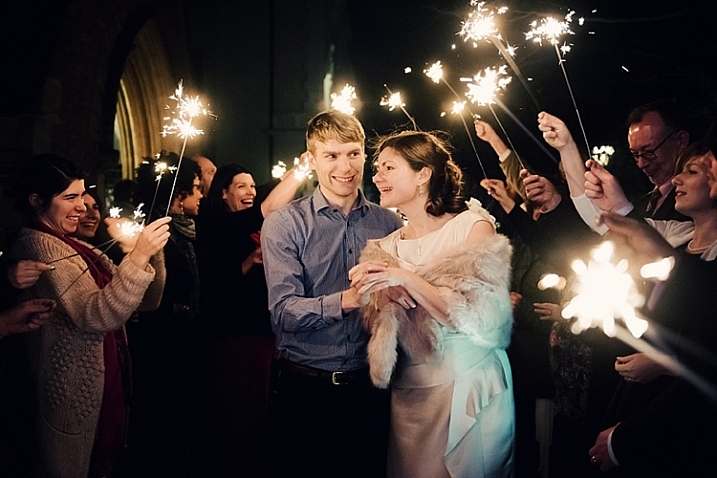

    5-must-have-lenses-wedding-photographer

    5-must-have-lenses-wedding-photographer

    I use this lens for photos that do not require close portrait work, although it can definitely be used as one. The 50-70mm range will yield pleasing results, like the image directly below. However, my preference is to use prime lenses for portraits. The 24-70mm lens sees a whole lot of action during the wedding day, and is definitely my other workhorse for capturing people, wider shots, and behind-the-scenes.

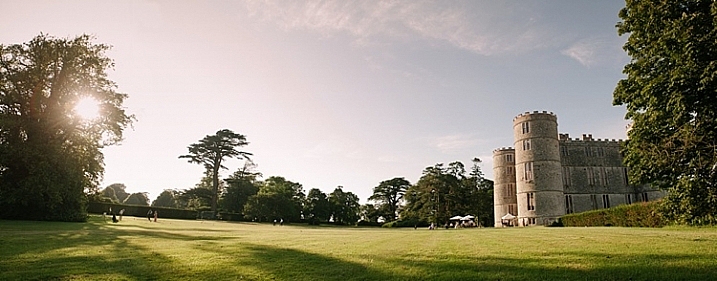
    5-must-have-lenses-wedding-photographer

    5-must-have-lenses-wedding-photographer

    Many photographers include a much wider lens for location photographs such as the 14-24mm f/2.8. While I would love to add this lens to my arsenal, this is not an absolute necessity, in my opinion. With the 24-70mm, you can photograph location scenes wide enough – but should you need to capture a wider scene, you could photograph a few images and stitch them together in Photoshop as a panorama. This is easy enough to do by making sure the exposure setting for the series of shots are the same, and you stand on a fixed point, inching your way across the panorama. You can do the same for a photograph of all the guests too. These would be the only times I would need an ultra wide angle lens for a wedding, hence I cannot just yet justify adding it to the list of must-haves.
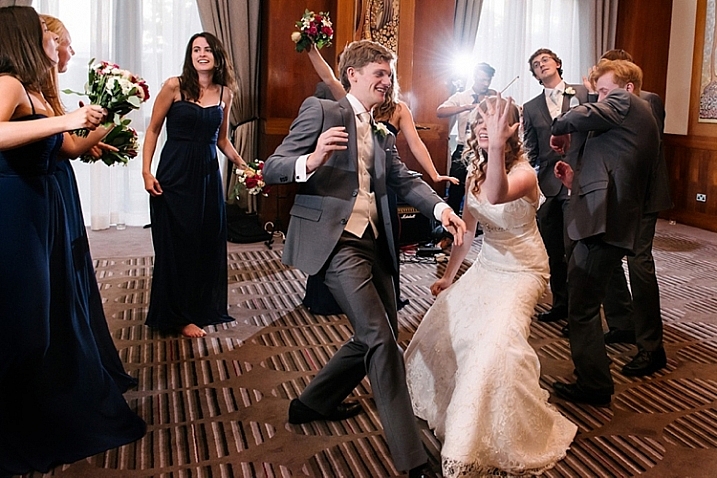
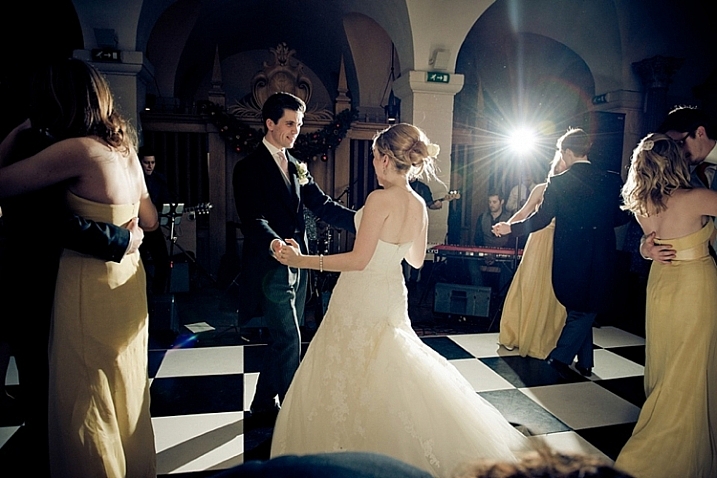
    5-must-have-lenses-wedding-photographer

    5-must-have-lenses-wedding-photographer

    #3 – 85mm prime

    This is my all-time favorite lens, and the one I use for portraits of the bride and groom, bridesmaids and groomsmen, individual guests or small groups, and the list goes on. As a fixed lens, this requires more work on your part – you have to zoom in and out with your feet. But, the extra effort is worth it – the portraits are cleaner, the backgrounds are creamier, and it is a fabulous lens in very low light conditions.
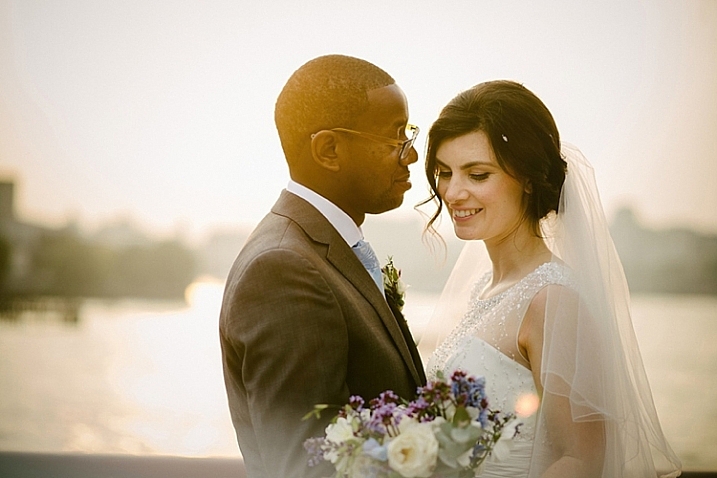
    5-must-have-lenses-wedding-photographer

    The best thing I love about this lens is that it is tack sharp from the sweet spot on. Accurate, light sensitive, great results on skin, this is my go-to lens, and it never leaves my bag. Being a prime lens, the 85mm is fast, small, and extremely reliable.
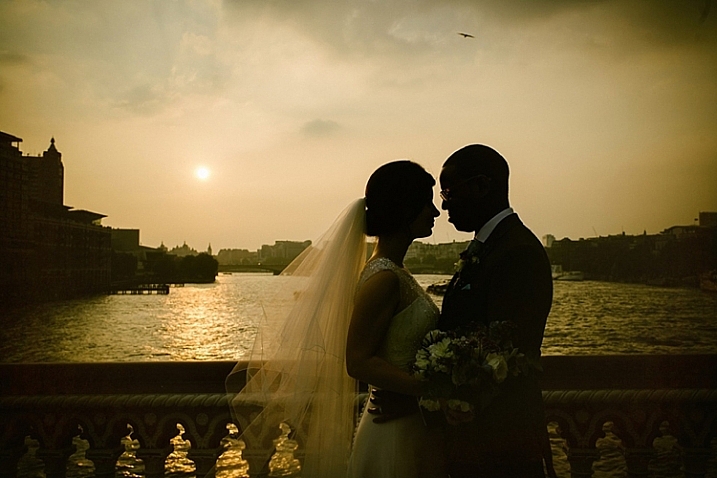
    5-must-have-lenses-wedding-photographer

    I have photographed an entire wedding of a relative (as a guest) using only this lens. I was asked on the day if I could cover the wedding and I agreed, with only the D700 and 85mm combination in hand, which I carry with me most times for personal snapshots, and photos of my family. The photos from that wedding are published in one of the UK’s top wedding blogs: proof that you can photograph a wedding with what you have, given that you know your gear well enough.
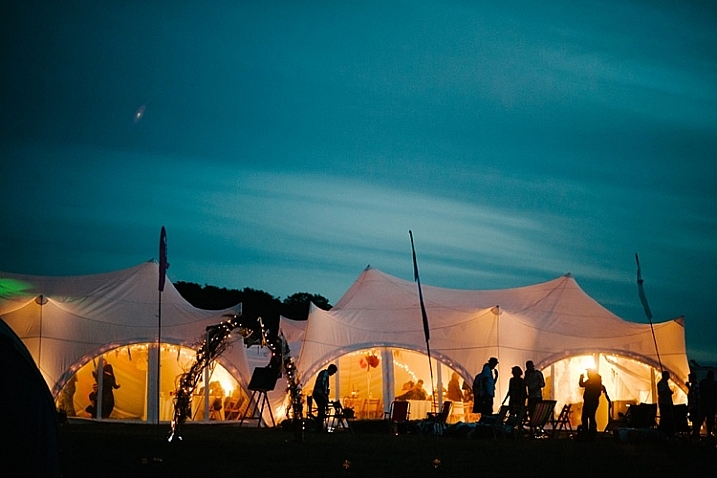
    5-must-have-lenses-wedding-photographer

    The 85mm for Nikon comes in either an f/1.8 ($ 479 USD) or f/1.4 version ($ 1595 USD), with a huge price difference between the two, due to the glass elements and optics (Canon also has an f/1.2 available, it’s $ 1999 USD). However, many photographers are divided between which lens is better. I have the f/1.8, and it has always performed marvellously for me. The f/1.4 has been on my lens list forever, and while I could buy it as the 85mm is on my necessity list, I have held off given that I have never felt the need to upgrade.
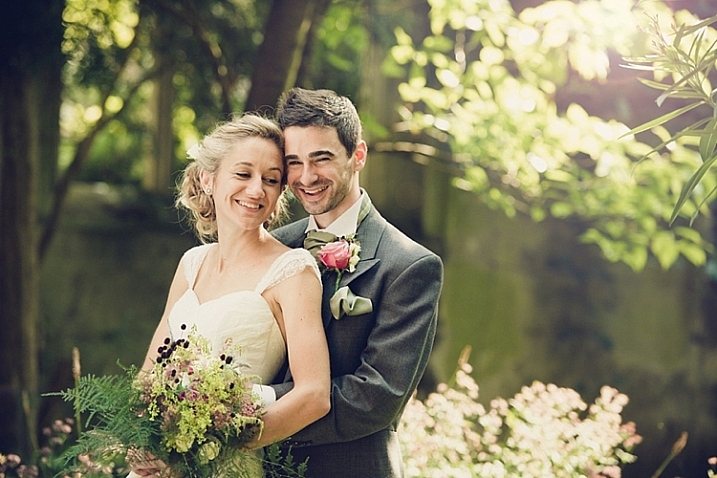
    5-must-have-lenses-wedding-photographer

    #4 – 35mm

    One of my early serious lens investments was this amazing 35mm f/1.4. If there is a lens I can always rely on, it’s this one. This is an ultra versatile lens that you can use to photograph the bride getting ready – the time when wedding photographers are usually under pressure to capture everything from location, the myriad of accessories, details, candid shots, the dress, the natural interactions between the bride and her loved ones, and group portraits – in a very short amount of time and more often than not, in small spaces like cramped hotel rooms. It is also perfect for photographing wider scenes, and you get images without the exaggerated distortions that you get with the 24mm.
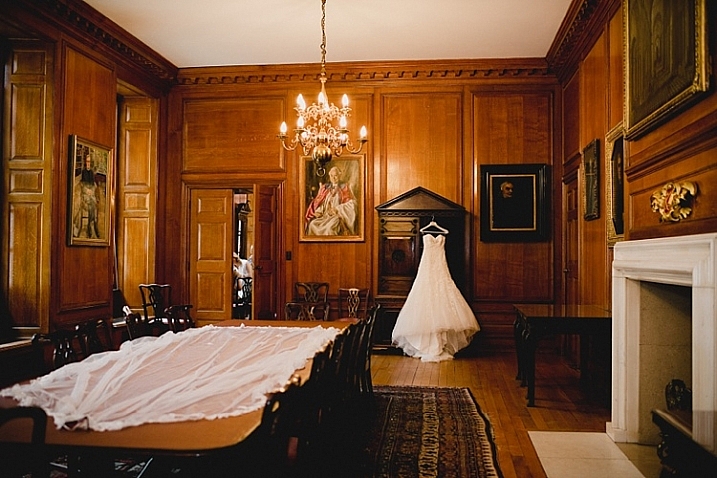

    5-must-have-lenses-wedding-photographer

    5-must-have-lenses-wedding-photographer

    This lens is super fast and sharp, and has yet to fail me. With this lens you can get close, with 0.3m (11.7″) minimum focusing distance – very handy when you are in in a crowded space. As if that weren’t enough, this lens opens up to f/1.4 which can let you photograph in extremely low light, especially if you are so pressed for time and space to use off-camera flashes. Even though the 35mm focal length is already covered by the 24-70mm, the difference between f/1.4 and f/2.8, in its ability to allow more light in (two more stops of 4x the light), cannot be underestimated.
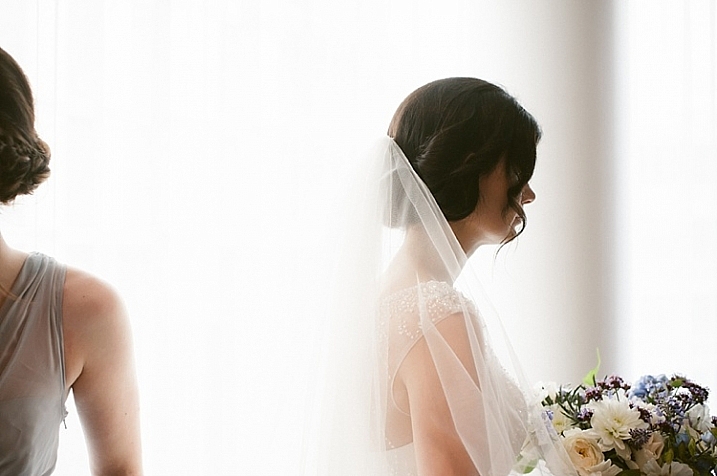
    5-must-have-lenses-wedding-photographer

    5-must-have-lenses-wedding-photographer

    The 35mm also comes in f/1.8, a DX lens you can purchase inexpensively (under $ 200). You may wonder why the astronomical difference in price compared to the professional f/1.4 counterpart. First of all, you cannot use the DX lens on a full frame camera without losing pixels, and without the 35mm focal lens becoming a 52.5mm, which can be very limiting in tight spaces. Secondly, the 35mm view is close enough to what the eye naturally sees which people say is around 40mm in loose terms, and I like that view. As a wedding photographer, it allows you to capture images that gives the viewer the impression that they could have been there, seeing the same view themselves. This is an important element in any wedding photography, specifically that with a documentary style, in my opinion.
    5-must-have-lenses-wedding-photographer

    If you ever get to physically hold each lens in your hands at the same time, the enormous price difference won’t even be in question. The f/1.4 is considerably heavier, and much bigger than the pocket-sized f/1.8. But, don’t be fooled by appearances. The f/1.8 is also an outstanding lens with exceptional performance in its own right, and for crop sensor cameras may be more than sufficient, and is most definitely easy on the budget.
    5-must-have-lenses-wedding-photographer

    5-must-have-lenses-wedding-photographer

    If you already have the 50mm and your budget is constrained, then the 50mm could replace 35mm on this list. It is also an incredible lens. Although the 50mm doesn’t give you as much room to maneuver in smaller spaces as the 35mm, the bokeh on the 50mm is stunning and it’s impressively sharp too, which is one of the top benefits of prime lenses. Like the 35mm, the 50mm is also available in f/1.8, f/1.4, and for Canon f/1.2.  The price difference is meagre between the f/1.8 and the f/1.4, then it jumps up to a whopping figure with the f/1.2.

    5-must-have-lenses-wedding-photographer

    5-must-have-lenses-wedding-photographer

    #5 – 105mm (100mm) or 60mm macro lens

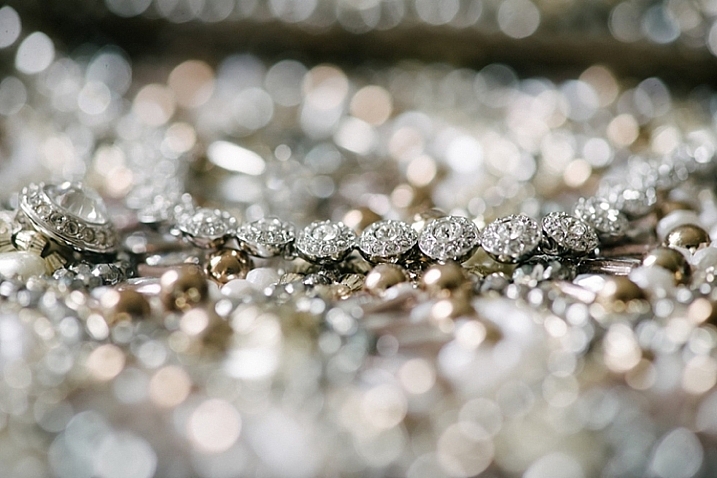
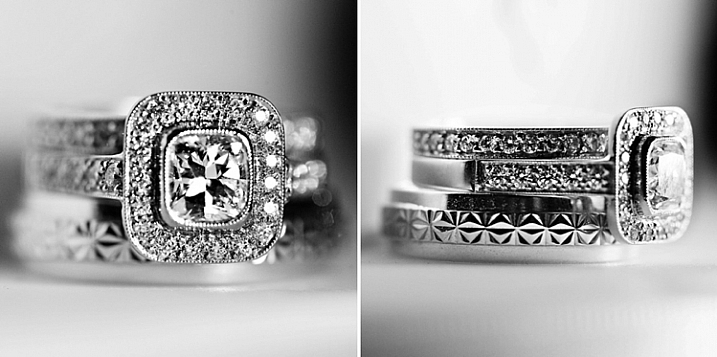
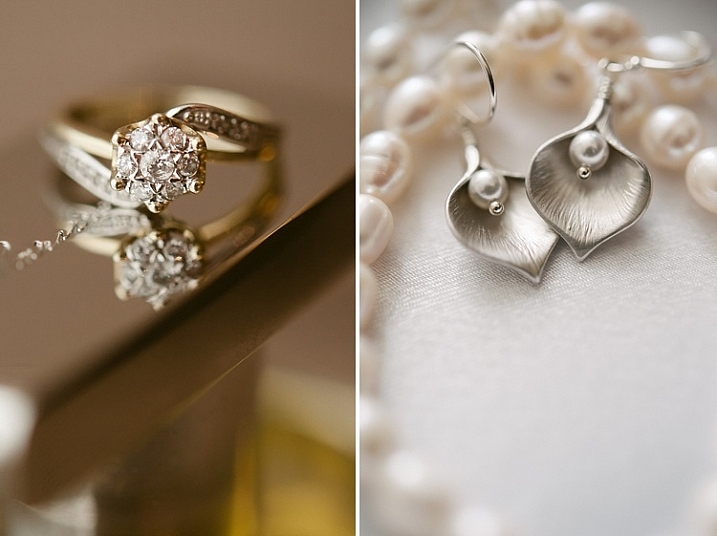
    A macro lens is a must for you as wedding photographer, if you want to capture amazing images of rings in close detail. You can also use this lens for photographing jewellery and other accessories when the bride is getting ready. If the bride’s dress is adorned with jewels, the macro lens would also be ideal to photograph the details. In addition, macro lenses are also great to use for portraits if you do not require an aperture wider than f/2.8. This makes it a versatile lens to carry around, especially the 60mm which looks and feels minuscule compared to the 105mm (100mm for Canon). Both lenses can also stop down to f/32, which is handy, especially when photographing location landscapes in extremely bright sunlight.
    5-must-have-lenses-wedding-photographer

    5-must-have-lenses-wedding-photographer

    Some photographers use the 105mm as a close substitute for the 70-200mm, if the latter is just too out of reach.  You can use the 105mm in DX mode which gives you 157.5mm, long enough to enable you to still be very inconspicuous at a wedding. It is also smaller and lighter, and opens up to f/2.8, as well as doubles up as a macro lens.

    5-must-have-lenses-wedding-photographer

    5-must-have-lenses-wedding-photographer

    Do you have other must-have lenses in your wedding camera bag? Please share them here below.

    googletag.cmd.push(function() {
    tablet_slots.push( googletag.defineSlot( “/1005424/_dPSv4_tab-all-article-bottom_(300×250)”, [300, 250], “pb-ad-78623” ).addService( googletag.pubads() ) ); } );

    googletag.cmd.push(function() {
    mobile_slots.push( googletag.defineSlot( “/1005424/_dPSv4_mob-all-article-bottom_(300×250)”, [300, 250], “pb-ad-78158” ).addService( googletag.pubads() ) ); } );

    The post 5 Must-Have Lenses for Wedding Photographers and Why by Lily Sawyer appeared first on Digital Photography School.


    Digital Photography School

  • Surrealism and intimacy: fine art portraiture with Fritz Liedtke

    Professional photographer Fritz Liedtke’s work spans the worlds of film and digital, from editorial and commercial work to fine art. A native of Edmonds, WA, Liedtke became fascinated with the creative possibilities and surrealism presented by modifying the focal plane of 4×5 cameras in high school and college. In this presentation, Liedtke guides us through a recent project titled ‘Astra Velum’ (Veil of Stars), wherein he focused on photographing individuals whose faces were peppered with freckles.
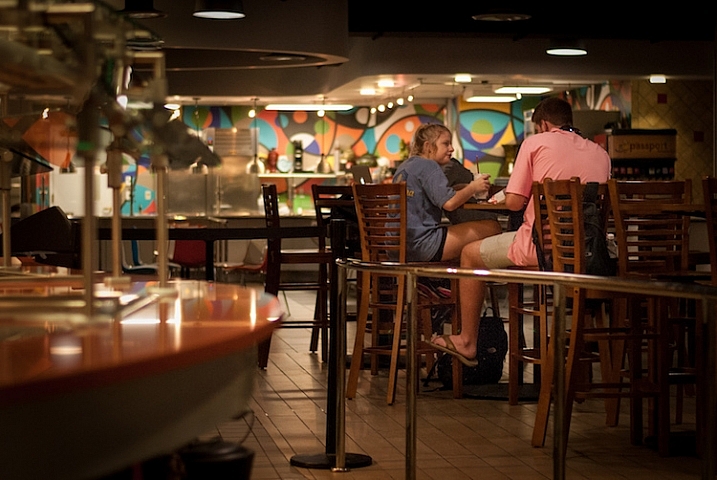

    ‘I wanted to try to create something beautiful out of something that many people see as blemishes,’ Liedke says. Of course, not everyone feels that way about their freckles, but throughout his project, Liedtke noticed that many people he put in front of his camera didn’t necessarily feel like they fit in with the overall concept of American ‘beauty culture,’ with its focus (pun intended) on near-flawlessness.

    Liedtke takes us through his post-processing and printing techniques, as well as guiding messages for those looking to start out on a personal project of their own. Keep your eyes open for interesting people to photograph, set goals for yourself, and perhaps most importantly, ‘don’t be afraid,’ Liedtke says. ‘Most people will be flattered that you want to photograph them.’

    Articles: Digital Photography Review (dpreview.com)

  • Augmented Reality: Aerial Footage of Distorted Alien Landscapes

    [ By Steph in Art & Drawing & Digital. ]

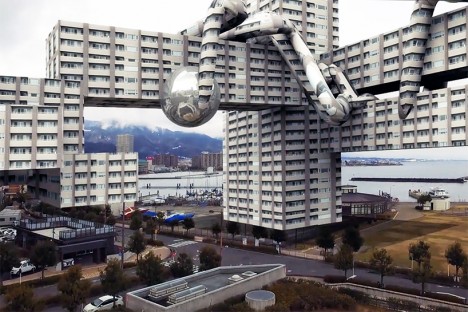
    alien landscapes 1

    “Technology can help nature understand itself,” says AUJIK, a self-proclaimed cult that melds faux mythologies, fictitious landscapes and wildly distorted architecture with a philosophy they call “animism for the Digital Age.” The quasi-spiritualist Japanese collective gives us a look into the world of their imagination via simulated drone footage, swooping us over and through their vision of nature awakened in a new way by technological integration.

    alien landscapes 4

    aujik 14

    “Since the late 2000’s, the online presence of mysterious nature/tech cult AUJIK quietly spread across video platforms featuring proposed active members and fabricated histories. These virtual appearances suggest decades-old lineage through theoretical schematics outlining their transgression emission, citing faux reports arguing the life of inanimate matter and modern forms of animism from fictional anthropologists and philosophers.”

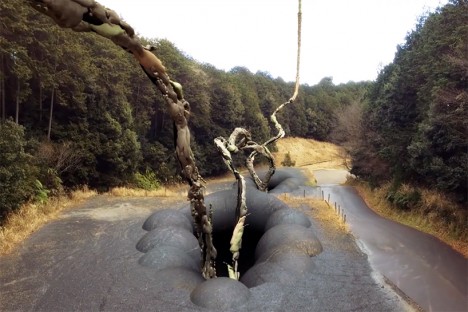
    alien landscapes 2

    alien landscapes 3

    alien landscapes 5

    “For AUJIK, nature is divided into Refined and Primitive categories. This separation presents a conflict that is the root of all chaos in the world, and in order to reach a sublime state, AUJIK generates rituals to harmonize the organic and synthetic realms. Refined nature consists of evolved technology such as robotics, artificial intelligence, cybernetics, DNA manipulations, and body enhancements. The Primitive includes fauna, flora, and the Earth itself with its precious stones, minerals, and metals.”

    aujik 12

    aujik 13

    aujik 11

    Natural settings, rocks, plants and even living creatures become something more than themselves, infused with a new power, growing in a way that they never actually could in our current reality, bound as it is by the laws of physics. Digital forces invade and transform everything from dark forests to dense cities, warping the architecture, creating a bizarre parallel universe.

    Share on Facebook


    [ By Steph in Art & Drawing & Digital. ]

    [ WebUrbanist | Archives | Galleries | Privacy | TOS ]


    WebUrbanist

  • Picasa will be phased out in favor of Google Photos

    Last year, Google rolled out a stand-alone Photos app with unlimited storage, stirring up rumors that its photo editing application Picasa’s days were numbered. Sure enough, in a statement on Friday Google announced that Picasa will be phased to make way for Google Photos, detailing what it hopes will be a more uniform photo experience. The change will take place ‘over the coming months.’

    Google said in a statement, ‘We believe we can create a much better experience by focusing on one service that provides more functionality and works across mobile and desktop, rather than divide our efforts across two different products.’ To that end, Picasa users with web albums should log into Google Photos, at which point all the content will automatically be available in Photos.

    Users who aren’t interested in switching to Google Photos will be given a ‘new place’ to view, download and delete Picasa Web Albums, without the organization, creation and editing tools. Further details on where users will access their Picasa content aren’t provided.

    Support for the Picasa desktop app will end March 15. The Picasa Web Album changes will being rolling out on May 1.

    Via: Google Picasa Blog

    Articles: Digital Photography Review (dpreview.com)