Blog

  • Sigma Mount Converter MC-11 adapts Sigma lenses to E-mount cameras, supports autofocus

    $ (document).ready(function() { SampleGalleryV2({“containerId”:”embeddedSampleGallery_5668726877″,”galleryId”:”5668726877″,”isEmbeddedWidget”:true,”standalone”:false,”selectedImageIndex”:0,”startInCommentsView”:false,”isMobile”:false}) });

    Sigma has announced an adapter for Sony E-mount cameras, making it possible to use Sigma’s most recent lenses in Canon and Sigma mount on full-frame or APS-C E-mount bodies. The MC-11 adapter is able to use phase detection AF with adapted lenses, and makes use of both camera and lens stabilization when present. An LED display on the side of the mount provides compatibility information of attached lenses. The adapter also communicates EXIF data to the camera body, and retains profiles of compatible lenses – those included in Sigma’s Global Vision line – to optimize AF performance. 

    Sigma has not announced pricing or availability at this time.

    Press release:

    New Sigma Global Vision Lens Mount Converter Expands High-Performance Lens Options for Sony Cameras

    Brings Sigma’s Global Vision Lenses to the Sony E-Mount Camera Family

    KANAGAWA, JAPAN — February 23, 2016 – Sigma Corporation of America, a leading DSLR lens, camera, flash and accessories manufacturer, today announced the release of its new high-performance Sigma Global Vision lens converter – the Mount Converter MC 11 – for Sony E-mount, full frame and APS-C sensor cameras. With the new MC-11, Sony camera users will be able to utilize 19 Global Vision lenses in Sigma Canon Mount (EOS) and Sigma Mount (SA).

    “There are many challenges to designing high-quality mount converter and topping the list is aptly handling phase detection AF in newer cameras and this is where the Sigma MC-11 is groundbreaking in its support for the Sony E-mount systems,” states Mark Amir-Hamzeh, president of Sigma Corporation of America. “The new Sigma MC-11 mitigates complications with a purpose-built lens control data system engineered for maintaining superior AF functionality. So the growing number of Sony E-mount camera users who have been asking for more lens options, now have access to a large pool of lenses that fully embody Sigma’s signature quality and performance.” 

    The Sigma MC-11’s sleek LED display lets Sony users know if the attached Sigma lens is compatible and whether or not the MC-11 needs to be updated for that specific lens. Its internal control data system keeps detailed information on each compatible Sigma lens, automatically optimizing performance of AF drive, aperture control and other critical lens functions. The MC-11’s internal control data system also maintains continuity with key camera functions that control brightness and correct transverse chromatic aberration, distortion, and more. The complete compatibility with both Sigma lens OS and Sony in-camera OS ensures correction of camera shake and other stability issues and when used with in-camera stabilization, MC-11 allows angle shake correction in the lens. The integrated flocking helps prevent internal reflections and reduction in lens performance. In addition, the MC-11 retains important EXIF data ensuring users can analyze every detail of their lens setting. 

    The Sigma MC-11 converter can be updated with the latest compatible lens information from a workstation or laptop using the Sigma Optimization Pro software and Sigma USB Dock (sold separately).

    For more information on the Sigma MC-11 converter please visit www.sigmaphoto.com/mount-converter-mc-11

    Articles: Digital Photography Review (dpreview.com)

  • DL or No DL? What you need to know about the Nikon DL compacts

    Three’s company

    Are compact cameras still relevant? Nikon seems to think they can be, if they’re good enough. It’s announced three premium compacts, all built around 20.8MP 1″-type BSI CMOS sensors its latest, ‘EXPEED 6A’ processor. If that sensor spec sounds familiar, it’s because the Nikon J5 uses a very similar…probably the same…one.

    The firepower in that new processor results in 4K video capture capabilities and bursts up 60 fps without AF, and 20 fps with. Combine this speed with a hybrid AF system that uses 105 phase-detect and 171 contrast-detect points (the same one found in the 1-System), and you should have three seriously capable compacts.

    When we sat down with Nikon reps back at CES 2016, they explained how engineers developed the three in unison, but targeted each camera’s focal length range toward a very specific customer. However, all three customers are expected to be DSLR shooters looking for a smaller, lighter alternative for everyday shooting. As such, all three can shoot RAW, offer Adobe RGB, can utilize Nikon i-TTL Speedlights, and use a menu system very similar to that found in their pro and enthusiast DSLRs.

    Meet the family

    The three cameras that make up Nikon’s DL line of premium 1″-type compacts include the DL24-85, DL18-50 and DL24-500. They may not have the most exciting or creative names, but at least they’re straightforward. As you might have guessed, the 24-85 offers a 24-85mm equivalent F1.8-2.8 lens and is the standard zoom compact of the bunch. Reasonably fast on the wide end, this camera has a lot of appeal as an everyday pocketable shooter.

    The DL18-50 is the first 1″-type camera to have an ultra-wide lens which, in this case, is a 18-50mm equiv. It also features an impressively fast 1.8-2.8 aperture range, and sits as the DL’s wide/normal option. And on the tele end you have the DL24-500 F2.8-5.6. It isn’t as fast as the other two and certainly isn’t pocketable, but it is easily offers the most versatile focal range of the three.

    Yet more choices

    Style-wise, the DL24-85 and DL18-50 may seem oddly familiar. The concealingly small dial on the back looks a lot like those on the Nikon 1 series bodies, but from the front, they look almost as if Nikon’s borrowed the leftover tooling from Panasonic’s LX5. This is no bad thing – the LX5 was a really classy little enthusiast compact, but we thought it was faintly amusing, given how fiercely Nikon has protected its industrial design in the past.

    We’re joking, of course, and there’s no such precedent for the DL24-500 – perhaps because its design resembles every other superzoom on the market. It’s pretty difficult to make an interesting-looking superzoom, just as it’s difficult to make an interesting looking SUV. And often inadvisable to do so.

    How do they compare?

    We’ve had to approximate how the available F number on each lens will decline, as you zoom in, but even with these approximated values, you can see that the DL24-85 sits between the lens range of the Sony Cyber-shot RX100 Mark III and IV, and that of Canon’s Powershot G7 X II.

    The graph should also make clear just how unusual the DL18-50’s lens is. 18mm equivalent is significantly wider than any of the other 1″ sensor compacts currently on the market, yet it’s bright and able to reach a relatively practical 50mm equivalent focal length.

    As usual, we’ve plotted these graphs to show both equivalent focal length and equivalent aperture.

    Reaching for it

    The DL24-500 joins an already impressive group of 1″ sensor superzooms, including the Sony RX10 II, Panasonic FZ1000 and Canon G3 X. These cameras are undeniably popular, especially amongst travel photographers. From its specs alone, the DL24-500 certainly seems like a competitor. Its 4K capture and slow motion video options compete directly with some of the most stand-out specs from the RX10 II (which we recently gave a Gold Award to).

    All of these cameras offer considerably better image quality than conventional, small-sensor superzooms. So, although they can’t boast >80x on the little metallic stickers they wear on camera store shelves, they still offer a degree of reach that will be suitable for a huge variety of shooting situations.

    And again, the factor that could set the Nikon apart from its competition is its Hybrid AF system. If the DL24-500’s AF system offers similar performance to that of 1-Series cameras (and there’s little reason to think it wouldn’t), the competition will have good reason to be concerned.

    Super steady

    Each of the three DL compacts offers a secret power, specific to their zoom range and unique to each. In the case of the DL24-500, its super power is Sports VR for added stability when panning at the tele end. Of course, all three cameras have Dual Detect Optical VR and historically, Nikon cameras have impressed us with their stabilization, especially the Nikon P900 superzoom. So we definitely have high expectations for the DL24-500.

    Of course, what good is VR and reach if you don’t have quality glass? All three Nikkor lenses have fluorine coatings to keep away moisture and grime, and the 18-50 is the company’s first compact to have a Nano Crystal Coat, which reduces flare and ghosting.

    The everyday pocket cam to beat?

    The Sony RX100 series of cameras has long been viewed as the pocketable premium compacts to beat. The most recent Sony RX100 IV in particular impressed us. But the Nikon DL24-85 has us ready to reconsider the crown.

    The two cameras share a whole lot of similar specs, including 4K video capabilities, optical image stabilization, fast burst rates with continuous AF, and tilting LCDs. They both offer 20MP 1″-type sensors and very similar focal range, though the Nikon does have a bit more reach.

    But the two do vary in some key areas. While the Sony has a pop-up EVF, you’ll have to pony up for an optional tilting model on the DL18-50 and 24-85. Conversely, the DLs all have touchscreen OLED displays, while the RX100s use non-touch LCDs. 

    But an even bigger difference can be found when looking into each camera’s AF system: the Sony uses a contrast-detection AF system, while Nikon uses a hybrid approach (combining depth-aware phase detection with high-precision contrast detection). But before you dismiss the Sony entirely, it’s worth noting that the RX100 IV really impressed with its AF capabilities during our testing. So, while the Nikon DL24-85 should  be able to outperform the Sony, we’ll just have to wait until we get one in to know for sure.

    Nice and close

    The DL24-85 is the only DL of the three to offer a 1:1 macro mode (its secret power). It can be accessed by turning the zoom ring all the way to the right to the S.macro position. In the macro mode, users have a 35mm equiv. field of view. And while all three cameras offer a manual focus mode, the DL24-85 also has a focus bracketing feature, which should be particularity useful for macros.

    Unfortunately, the ring around the lens barrel of the DL24-85 is not customizable (same goes for the other DL’s). It can only be used for manual focusing.

    Wide street shooter

    The DL18-50 is the widest DL of the bunch, and while its 18-50mm focal length may not appeal to casual shooters, street photographers are sure to be enticed by its range and fast lens. Its tilting touchscreen allows for tap-to-focus and, we assume, tap-to-shoot capabilities that should suit that ‘decisive moment’ shooting style.

    This camera’s focal range will also likely appeal to architecture and landscape shooters. To further tempt said group, it has a built-in perspective control feature that can be used to distort the image to correct for perspective distortion.

    Unlike the other two, it doesn’t have a built-in flash – perhaps because it would be too difficult to offer such wide coverage without some clever optics and a lot more distance away from the lens.

    Touch, see, shoot and share

    Touchscreens can be great, especially when paired with physical control points (this way you can choose). All three DLs offer 1.04M-dot OLED touch displays. The displays on the DL24-85 and DL18-50 can tilt, while the display on the DL24-500 is fully articulating. This only adds to the DL24-500’s appeal as a video-centric all-in-one.

    The DL24-500 also offers a 2.4M-dot OLED electronic viewfinder, while the other two cameras accept the the rather bulky accessory DF-E1 tilting electronic viewfinder with the same XGA resolution. 

    The three DLs are also Wi-Fi and Bluetooth enabled, allowing them to take advantage of Nikon’s ‘SnapBridge’ technology, first unveiled to the world at CES 2016 during the company’s press event announcing the D500. ‘SnapBridge’ allows a camera to stay connected to one’s smart device via low power Bluetooth connection, without the need to reconnect. It’s worth noting that while we’ve written about SnapBridge in the past and are excited by its implication, we have yet to try it. The cameras also support NFC, for quick and easy pairing with Android devices.

    Where they fit on the 1″ scale

    Here’s how they fit into the wider market. We don’t yet know exactly how their apertures will change as you zoom, so we’ve had to approximate them here.

    The pricing is exactly as we’d expect: the DL24-85 with its fast standard zoom is a direct competitor for Sony’s RX100 III and Canon’s G7 X Mark II. It doesn’t have a viewfinder, as the Sony does, so it’s no surprise to find it’s being pitched at $ 150 lower than the RX100 III’s launch price and $ 50 below the Canon’s.

    Meanwhile, the DL24-500’s long, increasingly slow lens makes it look like Nikon is targeting the same customers as the G3 X. And, guess what? The Nikon MSRP is exactly the same as the Canon’s, at $ 999.

    Finally, although it shares a lot in common with the 24-85, there’s a premium to be paid for the DL18-50. With no direct rivals, and the challenges of making such a fast, wide lens, it’s no surprise that it’s to be launched for $ 849.

    In summary

    It’s interesting to see how these new models fit in to the market. Ever since Sony announced the RX100, manufacturers have been developing ever more variations and options around the 1″ sensor. Since most cameras take at least two years to develop, it’s still relatively early in the timeline, but with the arrival of Nikon there are now four manufacturers building large sensor compacts.

    So far we’ve seen Sony focus its RX100 series on the idea of a small camera with a large sensor and a bright lens, with zoom range being the trade-off being made. Canon very much followed suit with its G7 X models. And the Nikon DL 24-85mm, with its F1.8 – 2.8 is clearly targeting the same potential buyers.

    Meanwhile, Sony, Panasonic and Canon have all developed riffs on the large bodied, long zoom theme. Sony’s RX10 (both I and II) opt for constant aperture zooms, while Panasonic’s FZ1000 gives greater range that gets slower as you zoom. Nikon’s DL 24-500mm is much closer to Canon’s G3 X, in offering still more zoom by letting the aperture drop even further.

    As such, the standout camera in this group is the DL 18-50. It’s fast (F1.8-2.8), ultra-wide to just-beyond-normal zoom range is unique, and offers an exciting option for wide-angle shooters looking for a pocketable camera with what should be good image quality. Whatever our reservations have been in the past about Nikon compacts, the image quality has usually been very good.

    Articles: Digital Photography Review (dpreview.com)

  • How to Choose the Best Lens for Travel and Street Photography

    If you were to ask me what the best lens for street and travel photography is, the first thing I would advise you to do, is to think about what you need from the lens. In my case, the following criteria are important to me –  your list, of course, may differ.

    • The lens should be small, lightweight, and unobtrusive.
    • The optical quality must be excellent.
    • Autofocus performance needs to be very good.
    • As I sometimes shoot in low light, a wide aperture is a must.

    Best lens for street and travel photography

    These criteria should point to several lenses that may be suitable for you. Perhaps you own these lenses already – in which case the next step is to take them out into the street, and take some photos with them. This is important, because you may find that in practice, the lens you prefer to use is different from the one you thought might be best.

    For example, you may think that a zoom lens will come in useful because of the convenience of being able to quickly adjust focal length. But in reality, find that you prefer a prime lens with a wider aperture for shooting in low light, or using selective focus.

    On the other hand, you may be approaching this exercise with the intent of choosing a lens to buy. It’s difficult to test a lens if you don’t already own it, although you may be able to borrow or rent it. If you can’t do that, the next best thing to do is to go online and do some research. Read some reviews of the lens. Look for articles written by photographers whose photos you like, who also use the lens you’re considering. Go onto Flickr and see if there is a group dedicated to the lens. Explore some good quality forums, ask the members if anybody owns the lens, and what they think of it.

    My favorite lens

    By now you are probably wondering what is my favorite lens for street and photography. The answer is – the Fujinon 35mm f/1.4 lens. To be honest, this has come as a surprise to me. When I first bought into the Fujifilm camera system, I thought that I would either prefer a short telephoto lens (such as the 56mm f/1.2) or a moderate wide-angle (like the 18mm f/2 pancake lens) for street and travel photography.

    But in practice, I’ve found that I prefer the 35mm. It has received a lot of praise since it was released with the X-Pro-1 several years ago, and is a standard prime lens (for APS-C cameras). The angle-of-view is very similar to that of a 50mm lens on a full-frame camera, or a 25mm lens on a Micro four-thirds camera.

    So, why has this lens worked so well for me? The short answer is that it is extremely versatile. I prefer to take the simple approach to street photography, and that means reducing the number of choices that I have to make. Using a prime means I don’t have to think about focal length, yet the versatility of this lens means I can use it a number of different ways.

    For example, when photographing people I can keep my distance and frame the person in the context of their environment.

    Best lens for street and travel photography

    Or I can get closer and concentrate more on the person.

    Best lens for street and travel photography

    I can also get close to the subject for a tight detail shot, like this one.

    Best lens for street and travel photography

    Standard lenses for street photography

    Working distance is a term used in macro and close-up photography to describe how far the lens is from the subject. You can apply this concept to street, and travel photography too. If you are using a telephoto lens, you will be farther away from the subject. That’s great for not being noticed, but it can also lead to a kind of detached feeling in the image. The viewer can tell you weren’t close to the action, and there may be a sense of lack of involvement in the scene.

    A wide-angle lens forces you to get in closer to fill the frame. The closer you get to somebody on the street, the more likely they are to notice you, and react to the camera in some way. This is not necessarily a bad thing (Bruce Gilden has taken this confrontational style to an extreme) and using a wide-angle lens definitely shows involvement in the life of the street. It’s also an approach you can take if you like to go up to people, and ask permission to take their photo first.

    The standard lens falls in-between these two extremes. It lets you get close enough to be involved in the scene, but not so close that people are overly bothered by what you are doing. It helps you blend in to what is a very common thing these days – people taking photos on the street (although most often with camera phones, not actual cameras).

    Best lens for street and travel photography

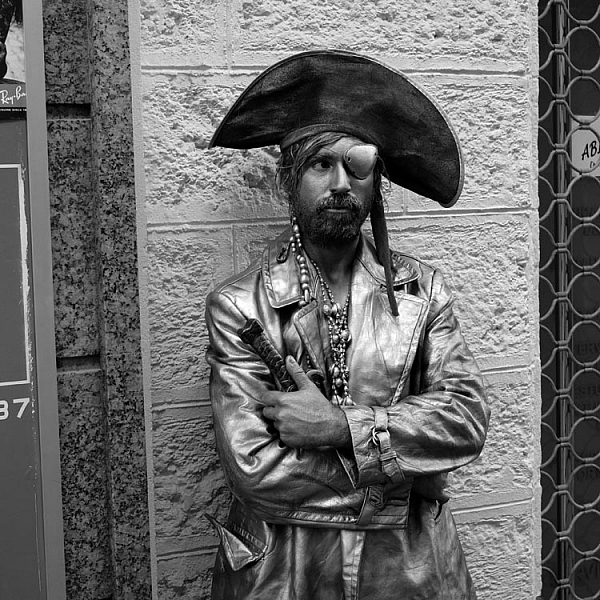
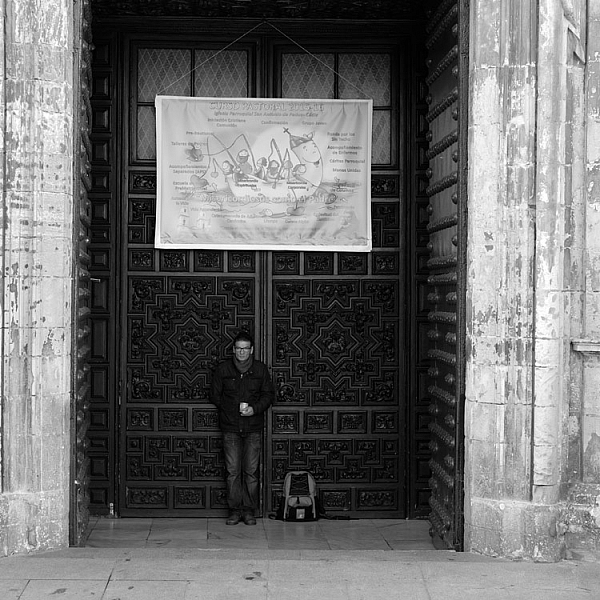
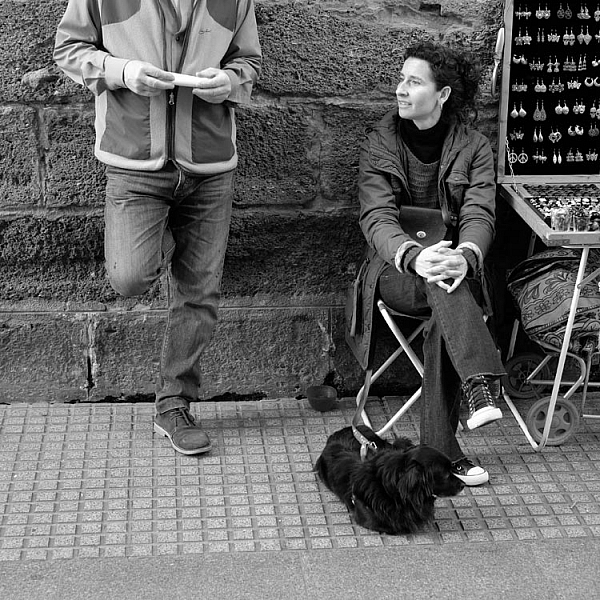
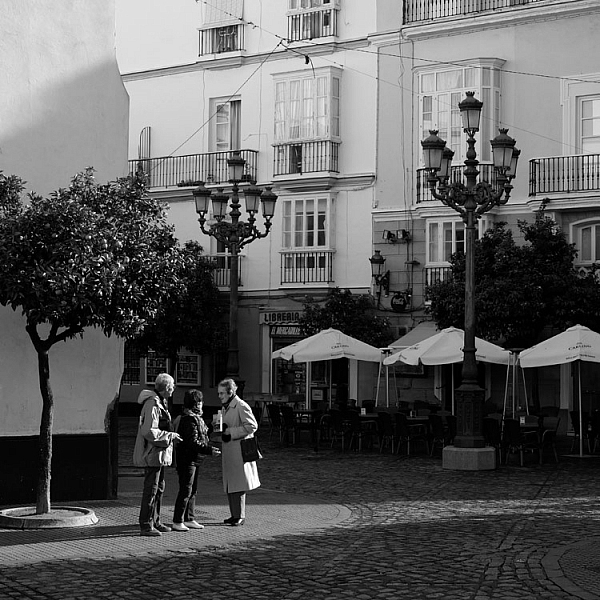
    By the way, all the photos in this article were taken in the Spanish city of Cadiz, and I wanted to show the people in context, with the historical buildings in the background, in at least some of the photos. The 35mm lens worked very well for this.

    So, for me, the 35mm lens is a clear favorite for travel and street photography. But, what about you? What lenses do you prefer to use? Please let me know in the comments, I’d like to hear your thoughts.


    Mastering Lenses photography ebookMastering Lenses

    My new ebook Mastering Lenses: A Photographer’s Guide to Creating Beautiful Photos With Any Lens shows you how to get the best from the lenses you own already. A comprehensive guide to exploring the creative potential potential of wide-angle, normal and telephoto lenses, it’s also the ultimate buying guide for readers thinking about purchasing a new lens for their camera. Please click the link to learn more or buy.

    googletag.cmd.push(function() {
    tablet_slots.push( googletag.defineSlot( “/1005424/_dPSv4_tab-all-article-bottom_(300×250)”, [300, 250], “pb-ad-78623” ).addService( googletag.pubads() ) ); } );

    googletag.cmd.push(function() {
    mobile_slots.push( googletag.defineSlot( “/1005424/_dPSv4_mob-all-article-bottom_(300×250)”, [300, 250], “pb-ad-78158” ).addService( googletag.pubads() ) ); } );

    The post How to Choose the Best Lens for Travel and Street Photography by Andrew S. Gibson appeared first on Digital Photography School.


    Digital Photography School

  • Sigma announces 30mm F1.4 for E-mount and Micro 4/3 and 50-100mm F1.8 Art for APS-C

    $ (document).ready(function() { SampleGalleryV2({“containerId”:”embeddedSampleGallery_8227781120″,”galleryId”:”8227781120″,”isEmbeddedWidget”:true,”standalone”:false,”selectedImageIndex”:0,”startInCommentsView”:false,”isMobile”:false}) });

    Sigma has added two new fast-aperture lenses to its Art and Contemporary lineups. 

    For owners of Canon, Nikon and Sigma APS-C bodies there’s the 50-100mm F1.8 DC HSM Art, which is equivalent to 75-150mm. This lens has a redesigned Hyper Sonic Motor, nine-blade rounded aperture and internal zoom. Being a weighty lens (1490g/3.3lbs), it also has a built-in tripod socket.

    The other lens is for Sony E-mount and Micro Four Thirds bodies, and it’s a fast 30mm F1.4 prime, equivalent to 45mm and 60mm, respectively. This lens uses a stepping motor for fast and quiet focus during video and weighs just 263g/9.3oz. 

    The 30mm F1.4 will ship in mid-March at an MSRP of $ 339, while the 50-100mm F1.8 is expected in late April priced at $ 1099.

    Press release:

    Sigma Expands Its Global Vision Lens Line With Two New High-Performance Lenses

    50-100mm F1.8 DC HSM Art and 30mm F1.4 DC DN Contemporary 

    50-100mm is first constant aperture F1.8 telephoto zoom; 30mm represents first affordable F1.4 high-performance lens for mirrorless cameras

    KANAGAWA, JAPAN — February 23, 2016 – Sigma Corporation of America, a leading DSLR lens, camera, flash and accessories manufacturer, today announced the addition of two high-performance APS-C format lenses to the Sigma Global Vision product line: Sigma 50-100mm F1.8 DC HSM Art Lens and the Sigma 30mm F1.4 DC DN Contemporary Lens. 

    “Sigma’s aim is to provide high-performance lens options that lead with innovation and break new boundaries for every photographic scenario our customers can dream up,” states Mark Amir-Hamzeh, president of Sigma Corporation of America. “These new lenses build on Global Vision’s great IQ technology and reflect this goal, delivering immense value, quality and performance that the Sigma brand is known for.”

    Sigma 50-100mm F1.8 DC HSM Art

    Building on the groundbreaking Sigma Global Vision 18-35mm F1.8 DC HSM Art Lens, the new Sigma 50-100 F1.8 (75-150mm on 35mm format) mid-range zoom lens embodies the same engineering prowess to deliver outstanding prime lens-like results. Factoring in the APS-C image circle of 1.5x, the 50-100mm F1.8 covers three popular short tele prime focal lengths: 85mm, 105mm and 135mm. Like the 18-35mm F1.8, the new 50-100mm F1.8 maintains a constant F1.8 aperture yielding exceptional brightness and resolution throughout the zoom, while simultaneously maintaining focus as the lens is zoomed, a feature videographers will greatly appreciate. 

    Sigma Art Line Image Technology Innovation

    • Features three FLD (F Low Dispersion) glass elements, one SLD (Special Low Dispersion) glass element, and one high-refractive index, high-dispersion glass element to minimize aberrations.
    • Redesigned and enhanced, the new Hyper Sonic Motor is 30% slimmer and provides fast and accurate AF.
    • Highly durable polycarbonate diaphragm made with fluorine; blades feature carbon feather film offering exceptionally smooth operation even during continuous shooting.

    Outstanding Zoom Lens Maneuverability

    • Inner focusing and zoom design offer versatile shooting options
    • Tripod socket for stable, comfortable operation
    • Features 21 elements / 15 groups, Minimum Aperture: F1.6, 82mm filter thread, Minimum Focus Distance: 37.4in, Dimensions: 3.7×6.7, Weight: 52.6oz

    The new Sigma 50-100mm F1.8 Art will be available in Canon, Nikon and Sigma mounts. For more information, please visit www.sigmaphoto.com/50-100mm-f1-8-dc-hsm-art.

    Sigma 30mm F1.4 DC DN Contemporary 

    Combining outstanding optical performance and compact design, the new affordable Sigma 30mm F1.4 DC DN Contemporary Lens brings immense value to mirrorless cameras. Boasting superior image quality with F1.4 brightness, the versatile lens covers a wide range of photo and video capture scenarios, delighting users with its beautiful bokeh effects. 

    Contemporary Line Performance and Value

    • Represents first affordable F1.4 performance lens for the mirrorless market
    • Sigma engineered quality within a sleek compact design
    • Fast, smooth AF stepping motor designed to support video
    • Features one aspherical element and one double-sided aspherical element producing imaging quality comparable to the Art line.
    • Features 9 elements / 7 groups, Minimum Aperture: F16, 52mm filter thread, Minimum Focus Distance: 11.8in, Weight: 9.3oz, Dimensions: 2.6×2.9in.

    The new Sigma 30mm F1.4 DC DN Contemporary Lens will be available in Sony E-Mount and Micro Four Thirds mount. For more information, please visit www.sigmaphoto.com/30mm-f1-4-dc-dn-c.

    Sigma Global Vision lenses including the new 50-100mm F1.8 DC Art and 30mm F1.4 Contemporary lenses can be updated with the latest lens software from a workstation or laptop using the Sigma Optimization Pro software and Sigma USB Dock (sold separately).

    Tested for Optimum Performance

    Sigma lenses are born of well-thought-out design concepts, exceptional Japanese craftsmanship and manufacturing, and advanced lens performance testing and evaluation. To this end, Sigma has developed its own A1 proprietary MTF (modulation transfer function) measuring system using 46-megapixel Foveon direct image sensors. Even the most elusive high-frequency details are within the scope of Sigma’s quality control inspections. Every Global Vision lens is A1 tested, analyzed and approved before leaving the factory ensuring maximum performance out of the box.

    For more information on Sigma’s industry leading testing, please visit http://blog.sigmaphoto.com/2012/a1-mtf-testing-for-new-sigma-lenses/

    Specialized Mount Conversion Services 

    Ensuring continued ROI, Sigma will convert the current mount of your Sigma Global Vision lens to another of your choice. Sigma lenses currently from the Contemporary, Art or Sports line, in Sigma, Canon, Nikon, Sony, Pentax mounts can be converted to Sigma, Canon, Nikon, Sony or Pentax*.  Mirrorless lenses can be converted to Micro Four Thirds and Sony-E Mount. They cannot be converted to either an APS-C or a Full Frame format.  *For specific details, please visit http://www.sigmaphoto.com/service-support/mount-conversion-service

    Sigma 30mm F1.4 DC DN Contemporary and 50-150mm F1.8 Art specifications

      Sigma 30mm F1.4 DC DN | C Sigma 50-100mm F1.8 DC HSM Art
    Principal specifications
    Lens type Prime lens Zoom lens
    Max Format size APS-C / DX
    Focal length 30 mm 50–100 mm
    Image stabilisation No
    Lens mount Micro Four Thirds, Sony E (NEX) Canon EF, Nikon F (DX), Sigma SA Bayonet
    Aperture
    Maximum aperture F1.4 F1.8
    Minimum aperture F16.0
    Aperture ring No
    Number of diaphragm blades 9
    Aperture notes Rounded blades
    Optics
    Elements 9 21
    Groups 7 15
    Special elements / coatings 1 aspherical and 1 double-sided aspherical Three FLD, one SLD, one HRI elements
    Focus
    Minimum focus 0.30 m (11.81″) 0.95 m (37.4″)
    Maximum magnification 0.14× 0.15×
    Autofocus Yes
    Motor type Stepper motor
    Full time manual No
    Focus method Internal
    Distance scale No
    DoF scale No
    Physical
    Weight 265 g (0.58 lb) 1490 g (3.28 lb)
    Diameter 65 mm (2.56″) 94 mm (3.7″)
    Length 73 mm (2.87″) 171 mm (6.73″)
    Sealing No
    Colour Black
    Zoom method Rotary (internal)
    Power zoom No
    Filter thread 52.0 mm 82.0 mm
    Hood supplied No Yes
    Tripod collar No

    Articles: Digital Photography Review (dpreview.com)

  • How to Choose the Best Black and White Photo Printer

    In the digital age, color accompanies most of the images we come across during our daily lives. So when it’s intentionally missing, as is the case with artistic black and white photography, people take notice. Monochrome photography is popular in the fine arts for a variety of reasons, many of which come down to how it emphasizes different aesthetic components Continue Reading

    The post How to Choose the Best Black and White Photo Printer appeared first on Photodoto.


    Photodoto

  • Urban Microscape: Build Your Own Miniature Metropolis

    [ By Steph in Design & Products & Packaging. ]

    microscape 1

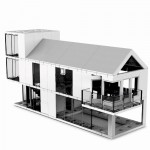
    Display your own little corner of your favorite city – or the entire metropolis of Manhattan – on your wall or table, scaled down to 1:5000 and simplified in white monochrome. ‘Microscapes’ are 3D-printed tiles developed from up-to-date aerial scale data so they can evolve along with built environments, including buildings still under construction or in planning phases. The designers are kicking off their campaign with New York City and will expand to other major cities across the United States and the world once their Kickstarter campaign is complete.

    microscapes 10

    microscape 2

    microscape 3

    The entire island of Manhattan is available in the form of individual, 6” square tiles, but to collect all 200, it would cost you a rather shocking $ 25,000. But early backers on the campaign can get a single tile of their choice, featuring some of Manhattan’s most popular locations, for a pledge of $ 65 or more. Each tile captures roughly half a square mile of the city.

    microscape 4

    microscape 5

    microscape 7

    microscape 8

    The tiles are made from biodegradable, non-toxic white thermoplastic derived from cornstarch and range in height according to whatever section of the city you’ve chosen, up to 5.5 inches tall for the highest skyscrapers. The campaign is already generously over-funded, but you’ve still got a little bit of time left to snag a pre-order of your own.

    Share on Facebook


    [ By Steph in Design & Products & Packaging. ]

    [ WebUrbanist | Archives | Galleries | Privacy | TOS ]


    WebUrbanist

  • Hiding in Plain Sight: 17 Secret Spaces from Safes to Pubs

    [ By Steph in Design & Fixtures & Interiors. ]

    hidden gun safe 2

    If you don’t have a Narnia-themed playroom hidden behind a wardrobe, a zombie-proof shelter accessible via your kitchen island or a gun safe under your 900-pound bulletproof couch, you just aren’t living. Some of these hidden rooms, secret passageways and cleverly concealed storage spaces are probably a bit excessive, but who doesn’t wish their house contained at least one of these cool features?

    Real-Life Bat Cave: Hidden Garage in San Francisco

    hidden garage

    In San Francisco, where private parking spaces are just as rare and precious as affordable housing, one house in Haight-Ashbury took the situation into their own hands in a way that wouldn’t upset the city council. The base of the Haight-Ashbury house is indistinguishable from the rest of the historical Victorian facade, but at the push of a button, it reveals a hidden four-car garage.

    Narnia-Themed Playroom Hidden Behind Wardrobe
    hidden wardrobe narnia 1
    hidden wardrobe narnia 2

    hidden wardrobe narnia 3
    When building a new house, the parents of one particularly lucky nine-year-old girl realized there was some extra space next to her bedroom and decided to have a bit of fun with it instead of just using it as storage or sealing it up. A tiny doorway concealed in the back of a wardrobe leads to the small Narnia-themed playroom complete with a mural that stretches up onto the ceiling.

    Storm Shelter Under a Kitchen Island
    hidden storm shelter kitchen island

    In some parts of the country, having a storm shelter is just as essential as having a bedroom. A company called GFS Storm Shelters came up with a brilliant way to fit one into a home – by placing it under the kitchen, with the entrance hidden under an island. While its actual usage might be a bit mundane, it’s fun to imagine it functioning as a hideaway during the zombie apocalypse or just a fun secret. Hopefully there’s another exit that leads directly outdoors in case a real tornado takes the entire house down on top of it.

    Porthole to a Playroom
    hidden porthole 1

    hidden porthole 2
    A circular porthole that blends right into the faux wood floor of this modern home spits you out onto a slide that curls down into a colorful playroom.

    Covert Concepts: Fireplace Door & Storage
    hidden fireplace door

    Anyone searching your home for valuables probably wouldn’t think to check the usually-decorative panels on a wooden fireplace surround, making this a pretty safe place to keep items you’d like to conceal.

    Next Page – Click Below to Read More:
    Hiding In Plain Sight 17 Secret Spaces From Safes To Pubs

    Share on Facebook


    [ By Steph in Design & Fixtures & Interiors. ]

    [ WebUrbanist | Archives | Galleries | Privacy | TOS ]


    WebUrbanist

  • 8 Tips to Improve Your Photography by Creating Instead of Taking Photos

    If you’re like most photographers you use your camera to capture a moment; you see an interesting subject, so you photograph it to the best of your ability. But a worthwhile experiment is to try staging a photo. Rather than waiting for all the elements to perfectly arrange themselves, take control and create the moment yourself.

    It’s an important lesson in thinking about the story and composition, and it’ll improve your photography in no time. I spent three years photographing everything in sight, but it was only after taking control of my images that I was able to turn my hobby into a profession.

    Field of Dreams

    Creating a photo can be as simple, or elaborate, as you wish. If you’re interested in street photography, this could involve asking an interesting stranger to pose in a particular place or way. For macro photography, setting up a backdrop behind a pretty flower can make the subject more dynamic. For portraits it could be a photo of your child dressed in their favourite costume, acting out a scene in your backyard. As long as you have actively directed the subject in some way.

    Elements to consider are:

    1. Story
    2. Subject
    3. Setting and location, era, time of day
    4. Props
    5. Wardrobe
    6. Pose
    7. Lighting
    8. Framing / Composition and angle, lens used

    Let’s break these down one by one.

    #1 – Story

    What’s happening in your photo? What’s your subject or character doing? A story isn’t always necessary, but having answers to these questions certainly helps make it more engaging, and gives you an idea of what extra elements can help enrich the story.

    In “Return of the Sword” (below) I was playing with the idea of King Arthur’s Excalibur, and I wanted my character’s reflection to look as if it were offering her the sword. To be able to tell this story I needed to have the right prop, costume, and location, to help the viewer understand what was happening, and associate it with the original story.

    Return of the Sword

    #2 – Subject

    Who is your character? What physical attributes do they need to have? If you have a willing family member or friend on hand, that’s great! Otherwise you can recruit models through places like ModelMayhem. However, your subject needn’t be a person, an object or an animal are fine too.

    I shoot self-portraits, primarily because it’s convenient, but I’m certainly no classic beauty, so I try to disguise my face as much as possible. In “Red Runs” below, I wanted to show Red Riding Hood running through a forest, followed by a wolf, so my character needed a red cape and blonde hair. This was easily achieved with the help of a blonde wig and my dog, Koda.

    Red Runs

    #3 – Setting

    Where and when is your story taking place? To find interesting locations, assess your local area for unique landmarks. Use Google Maps to discover what’s nearby, then use your car and your feet to explore further. If your goal is to photograph an interesting insect, your where might be in front of some black cardboard to cut out the background clutter, and your when might be early morning when the light is soft and appealing.

    In “Siren’s Sorrow” below, I used an impressive local relic, the Gayundah Shipwreck, to tell the story of a regretful mermaid. I shot at sunset to add interest to the sky, and I wanted the time period to be non-specific, so I was sure not to include any objects in the shot, that would anchor it in time. There were many walkers passing by, and an active construction site overlooking the area, but you’d be surprised how quickly you stop being self-conscious when you start doing self-portraits.

    Siren s Sorrow

    #4 – Props

    Having your subject interact with something will make your shot more interesting and further your story. You can buy props from cheap used clothing shops, eBay, or just use things you have lying around the house. If you’re going for something simple, spraying water on a flower adds interest, as does adding people to a landscape.

    In “The Blue Girl” I wanted to tell the story of a girl who had cried for so long, that she filled a room with tears, and turned it into an ocean. I placed polyfill behind her head for the clouds, and added birds and a friend’s model ship, to give interest to the scene.

    The Blue Girl

    #5 – Wardrobe

    What would your character be wearing? I have a rack full of costumes, specifically to be used in photoshoots, that I’ve bought from eBay and op shops, but you needn’t get this involved. My main considerations are usually whether the outfit suits the story, and if its colour will contrast with the surroundings, to make it stand out. If my face will be seen, I generally wear basic make-up I’ve applied myself.

    In “Dance of the Jacarandas” I used a $ 30 wig from eBay, and a $ 5 dress I bought at a local theatre’s costume sale. The dress was the perfect colour and shape, to make my character look like a Jacaranda flower.

    Dance of the Jacarandas

    #6 – Pose

    What would your character naturally be doing in their story? Are they powerful or submissive? I tend to shoot the main pose, and then do a few variations so I have options to work with.

    In “I Tried to Drown My Sorrows”, I wanted to show a girl who looked like she’d fallen into a glass. The pose had to be compact to fit in the glass, yet rigid to show the shock of the fall. I did this by jumping around in my backyard, then flipping the image upside down so I was falling instead of jumping. The movement caused by jumping makes the pose more dynamic and my hair look like it’s floating.

    I Tried to Drown My Sorrows

    #7 – Lighting

    Lighting can be tricky, and expensive, so it’s always best to start out with natural light, positioning your subject so the light sculpts their features. Shoot early, or late in the day, and aim for overcast or cloudy days to avoid harsh shadows (unless that’s what you want). You can start experimenting cheaply with lamps and candles.

    I usually like to work with natural, overcast lighting, because it makes compositing easier. But, in “Self-Destruct” I wanted the character to look as if she were burning the world down, so I shot as the sun was rising which would make the landscape a warm orange.

    Self Destruct

    #8 – Framing

    Do you want a wide shot to see the location, or a tight shot to really focus on your subject? Do you want to shoot from low down to make them look powerful, high up to make them look submissive, or straight on to let the image alone tell the story? Do you want the whole scene in sharp focus, or do you want the background to be blurry?

    I shot the three elements (sky, character, flowers) of “Time Flies” straight on, so they were easy to composite together. I cropped the image so the girl filled the frame, but removed her face to add mystery to the image. The loosely pointed hand directs the eye around the scene.

    Time Flies

    Summary

    When planning your image, try sketching out your idea beforehand, as this helps you visualize what it will look like, and if any extra elements are needed to strengthen your story. My images often take on a life of their own, different from my original concept, so don’t get too disheartened if your shoot doesn’t work out. You’ll still have learned a ton of things from the experience that you can use next time.

    Naturally your concepts don’t need to be as involved, or as heavily Photoshopped as mine, but I’m certain you’ll find the process of creating something from your imagination incredibly fun and rewarding. I’d love to see the results of your own staged shoots, please share in the comments below.

    Rosewater

    googletag.cmd.push(function() {
    tablet_slots.push( googletag.defineSlot( “/1005424/_dPSv4_tab-all-article-bottom_(300×250)”, [300, 250], “pb-ad-78623” ).addService( googletag.pubads() ) ); } );

    googletag.cmd.push(function() {
    mobile_slots.push( googletag.defineSlot( “/1005424/_dPSv4_mob-all-article-bottom_(300×250)”, [300, 250], “pb-ad-78158” ).addService( googletag.pubads() ) ); } );

    The post 8 Tips to Improve Your Photography by Creating Instead of Taking Photos by Hayley Roberts appeared first on Digital Photography School.


    Digital Photography School

  • Takeout Shakeout: 10 Abandoned Chinese Food Restaurants

    [ By Steve in Abandoned Places & Architecture. ]

    abandoned_chinese_restaurant_1a
    What’s on the menu at these abandoned chinese restaurants? Stereotypical architecture and signs displaying near-racist “oriental” fonts, for starters.

    Maybe we shouldn’t be so quick to play the race card – countless structures in the orient are more flamboyantly exaggerated than the worst of these over-the-top chinese restaurants. Besides, show us an “ethnic” eatery that DOESN’T lay on the “culture” with a trowel: setting the mood for a foreign-style feast means ya gotta go there.

    abandoned_chinese_restaurant_1b

    abandoned_chinese_restaurant_1c

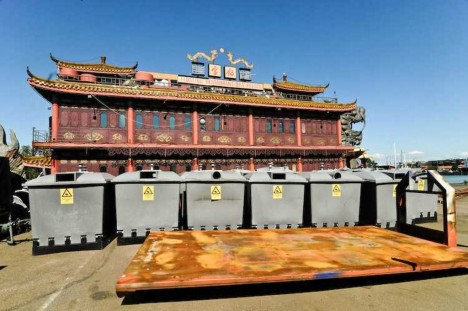
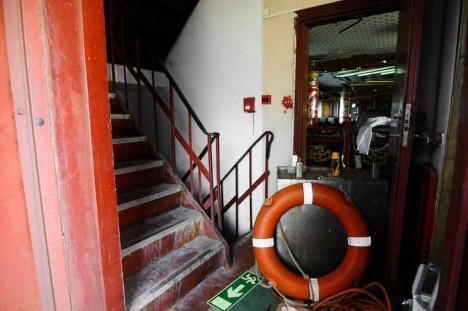
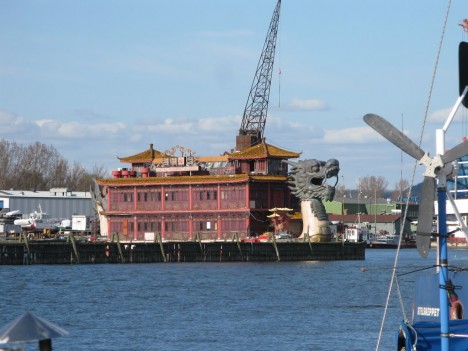
    That said, chinese restaurants have a tradition of going the extra mile when it comes to cultural embellishment. Take the Floating Restaurant Sea Palace in Gothenburg, Sweden. Moored at the Gullbergskajen docks since 2002, the dragon-headed (and tailed) restaurant soon went bankrupt and was abandoned by its owners.

    abandoned_chinese_restaurant_1d

    abandoned_chinese_restaurant_1e

    After becoming a hangout for homeless people, the City complained and forced the owner, John Wang, to relocate the barge to the comparatively inaccessible Gullbergsvass marsh. Wang states he intends to repair and relaunch the restaurant but as of May 2013, no action had been taken.

    Oh Man…

    abandoned_chinese_restaurant_3a

    abandoned_chinese_restaurant_3b

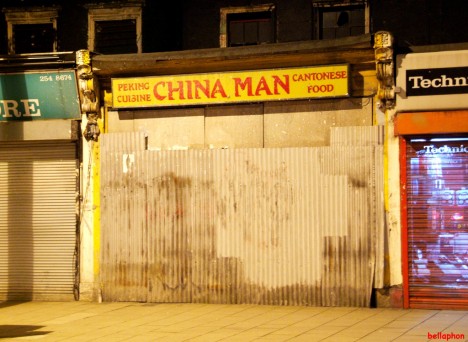
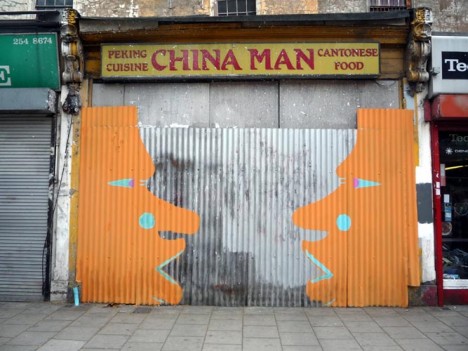
    The good news is that this visually wrong-on-many-levels chinese restaurant in east London, UK is abandoned. The bad news is, nobody thought to remove – or at least cover – that distressing sign. OK, we get it, it was “the olden days” (note “Peking”) and nobody batted an eyelash but puh-lease… we expected better of you, Hackney. Flickr user Fat Les (bellaphon) snapped the offensive ex-eatery on March 17th of 2010 while runABC posted an artistically decorated version that ignored that glaring eyesore of a sign.

    No JOY in Dublin

    abandoned_chinese_restaurant_2d

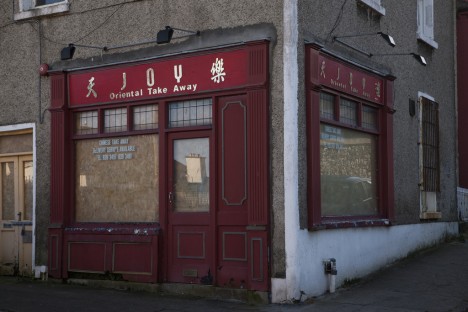
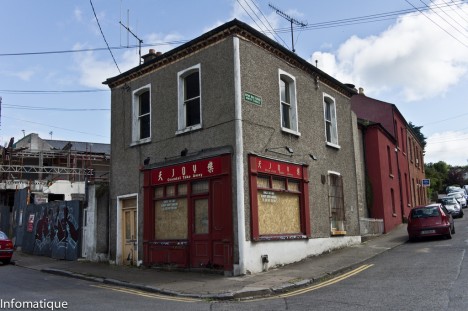
    Flickr user William Murphy (infomatique) snapped the abandoned JOY Oriental Take Away restaurant on January 30th of 2010, then again a year later, and returned for yet another shot in July of 2011. It would seem restaurant turnaround in Dublin, Ireland isn’t exactly brisk. What a Seamus.

    Remember the Mein

    abandoned_chinese_restaurant_4a

    Who can say when the above uber-decrepit Sun Sun Chow Mein restaurant on Frederick Douglass Boulevard in NYC’s Harlem closed… can anyone living even recall eating there? In any case, Flickr user Margie & James snapped this warts-and-all photo of the abandoned business way back in 2001 – it was demolished sometime after 2004.

    Next Page – Click Below to Read More:
    Takeout Shakeout 10 Abandoned Chinese Food Restaurants

    Share on Facebook


    [ By Steve in Abandoned Places & Architecture. ]

    [ WebUrbanist | Archives | Galleries | Privacy | TOS ]


    WebUrbanist

  • Winter Kayaking on the Lower St Vrain Creek

    February 11, 2016. I did some scouting and a little bit of paddling on the lover St Vrain Creek. First, I checked some potential launching spots, i.e., bridges, below I-25 highway. Then, I ended up paddling upstream from the county […]
    paddling with a camera