Blog

  • CP+ 2016: shooting the Pentax K-1 in Yokohama

    Introduction

    Yes, we have already posted a fair amount about the full-frame Pentax K-1, and no, this does not mean that we are in Ricoh’s pocket. But what Ricoh did offer us was a pre-production K-1 at CP+ 2016 in Yokohama, and the freedom to do whatever we wanted to with it (except post full-resolution images, for now). How could we not take advantage of that? 

    The full-frame Pentax K-1 has been years in the making, and they’ve made it pretty darn good.

    I am not a Pentaxian, just to get that out of the way. In fact, I’m not really a ‘fanboi’ of any particular brand, though I do continue to own, use and abuse Nikons of the not-so-distant past. That said, I’ve spent a lot of time with the K-3 II and 20-40mm F2.8-4 Limited lens, and the feature set combined with value for money make that camera pretty cream-of-the-crop. I loved the fast continuous shooting speed, large (for APS-C) optical finder, comfy grip, in-body image stabilization, and the confidence of shooting with a truly weather-sealed camera and lens in your typical Seattle downpours.

    But it just didn’t click with me. Maybe it was the shutter sound. Maybe it was the inconsistencies I experienced with the autofocus. Regardless of any quirks, and regardless of how technically great a camera might be, I admit that I find little photographic inspiration through using a device I don’t truly love and enjoy. I’m always searching for cameras that I connect with on some intangible level that makes me want to go out shooting, and unfortunately, the K-3 II didn’t fit that bill. Back onto the gear shelf it went.

    And then, on the last day of CP+, Barney handed me a Pentax K-1 and told me I had until the end of the day to shoot with it. So I did. I didn’t come away with my greatest work ever, which I’ll blame more on the jet lag than the camera. No, more importantly, I liked the K-1, I had fun with it, and it made me want to keep wandering and keep shooting, even as I approached my end-of-day deadline and crossed the 10-mile mark on my phone’s sketchy pedometer. 

    Pentax digital, all grown up

    That firmware version is why we aren’t allowed to publish any full-res samples from the camera.

    It’s true at this point that a great many mirrorless cameras are highly capable, represent fantastic value, and are home to some pretty impressive tech. Despite this, for a lot of my more serious work, I keep coming back to the good old-fashioned DSLR. That’s something that Pentax excels at, and it shines through with the K-1.

    I will try to keep from repeating too much information that’s already been well-covered in our Pentax K-1 First Impressions review, but a little repetition is necessary, if only for context. The body feels extremely well-built and sealed. The grip is excellent and makes holding this heavy camera a breeze. The control system is customizable, but even without much customization, everything is sensibly laid out. It reminds me of a mix of some of the best bits of both Canon and Nikon thrown onto a single camera body. If that sounds a bit confusing, it can be. But after some time with the camera, it comes together nicely.

    The colors from the Pentax K-1, particularly reds, are very nice indeed. Watch for white balance that strays to the cool side, though, which has been corrected here. Photo by Carey Rose. Taken on an old Pentax SMC 24mm F2.8 lens, processed to taste from Raw. F4 | 1/200 | ISO 100

    The actual shutter might be bigger than previous Pentax DSLR’s, but it isn’t appreciably louder – in fact, it’s soft but not silent, though still with some of that Pentax-ness from APS-C models thrown in. It’s nice in that you get an affirmative, audible signal that you’ve taken a photograph, but you don’t have to deal with a loud ‘clack’ that you get from many other high-end full-frame bodies (though admittedly, many of those have a ‘quiet’ mode that sometimes helps).

    What’s new, what stands out and what actually matters

    So, we’re only allowed to show you VGA samples, but let’s see what we can do with that.

    Dynamic range

    First of all, as to be expected, dynamic range from this sensor is excellent. For the image below, I used a base ISO of 100 and exposed for the sky, pulled the overall exposure up over two-and-a-half stops, lowered the highlights back down, and raised the shadows even more. Though there is some grain in the shadow areas, it isn’t obtrusive, and there is no banding of any kind. (Ignore that pretty heavy vignetting from the non-spec hood on the old manual Pentax 24mm F2.8 I was using).

    I could have gone even more overboard with the HDR look by not pulling those blacks so far down, but this way of processing is a personal preference. I find that adding some contrast back in can partially negate the flatness that can occur with heavy shadow pushing.

    Original, out-of-camera JPEG. F8 | 1/640 | ISO 100 Processed through Adobe Camera Raw, with the following adjustments: exposure +2.65, highlights -100, shadows +85, whites +15, blacks -67.

    That weird screen

    The tilting screen may seem gimmicky, and it kind of is. But it still works really well.

    After watching Barney dangle the K-1 from its screen on the trade show floor (Ricoh said I could do it! – Ed.), I had a little more confidence in the design of Pentax’s new screen articulation mechanism. After pulling it around, slamming it back in, and treating it more or less like the tilting and articulating screens on any other DSLR, I’ve got to say that it’s really no more or less fiddly than a screen that fully articulates out to the side. In certain situations, such as having the camera on a low tripod and at an odd angle for astrophotography, I could see how it could be an advantage over more traditional mechanisms. Still, for a camera as sealed as the Pentax K-1 is purported to be, I’d be a little wary of getting too much moisture, dirt or mud behind there, if for no other reason than what some well-placed grit might do to the tiny ball joints. But overall durability over time still remains to be seen.

    The articulating screen allowed me to get a lower angle in portrait mode without forcing me to crane my neck like an OVF or traditional tilting screen would. Photo by Carey Rose. Cropped and resized out-of-camera JPEG, taken on the Pentax 28-105 F3.5-5.6. F5.6 | 1/500 | ISO 200

    Focusing

    There’s not really much point in showing you samples at VGA resolution of autofocus tracking from a slow-aperture kit zoom. So I won’t. But I will say that for me, it worked better than or on par with previous Pentaxeses, with a high degree of accuracy. This isn’t a sports camera and it won’t keep up with fast action or erratic subjects, but tracking, say, individuals walking down the street works just fine.

    In what will go down as the worst product photo of all time, you can see the lenses I was able to use with the K-1 around Yokohama. I’m not a particularly big fan of kit zooms, but this one was sharp and felt better-built than I’m used to. It goes without saying that the all-metal primes felt great, even if I had to stop them down a bit for optimal performance.

    One thing to note – the autofocus points are somewhat few for today’s market (33), and the spread is a little strange. With the camera in landscape orientation, there’s more than enough flexibility across the horizontal axis, but the vertical spread seemed limiting to me. Your mileage may vary.

    Single-AF works quickly and accurately as well. For this, I pre-focused on the railing and fired off a quick burst. 4.4fps is a bit faster than you might think, but if you’re used to the blazing speed of the K-3 II, you might be a bit disappointed. Taken on the Pentax 28-105 F3.5-5.6 lens. Photo by Carey Rose, processed to taste from Raw. F5.6 | 1/640 | ISO 100

    So, then, let’s talk about what it’s like to use some old manual-focus primes on this 36MP digital beast. In two words, it’s pretty good.

    Manual-focusing using only the viewfinder and confirmation light works fairly well, if not as well as using an actual split prism, or maybe live-view focus with peaking. Of course, the K-1 has live view with peaking, but since I had such limited time with the camera, I opted to use a method Pentax users are quite proud of. It’s called ‘catch-in-focus.’

    This method, enabled through a custom menu function, allows you to hold down the shutter release as you rack the lens through the range where the image would be in focus. Make sure you’re in continuous shooting mode, and the camera will fire a burst when it detects you’ve reached the ‘in-focus’ range, and assuming a high enough shutter speed and moderate enough focus-racking speed, this method works very well, even for candids.

    As far as metering with primes pre-dating even the SMC-A lenses, you place the camera in manual, dial in your desired aperture, and hit the green button on the rear of the camera. It will stop down and meter a shutter speed for you. Of course, you’ll still need to remember your apertures – it doesn’t record them in the Raw file. But, as I said, these are really old primes. Later SMC-A lenses may (and probably will) offer more functionality. One other downside of older primes, as we’ve mentioned before, is that they might not seem as amazing on 36MP as they did on film. But you can always downsize your files, stop the lens down, or do what I did: ignore it and get on with shooting.

    For the ‘catch-in-focus’ feature, I held down the shutter button, and racked focus on the old manual-focus 24mm F2.8 lens until the camera detected focus and fired off this candid portrait. Because I was mistakenly only in single-shot mode, the resulting shot was very slightly front-focused. But for 36MP paired with a lens older than I am, I found it more than acceptable. Photo by Carey Rose and processed to taste from Raw. F2.8 | 1/125 | ISO 200

    The moving sensor

    The Pentax K-1 isn’t the first full-frame camera to have a moveable sensor for stabilization, but it is the first to offer a mode that Ricoh calls Pixel Shift Resolution. As we’ve explained before, this mode works by taking four offset shots that increase color resolution by shooting the scene with a different colored capture pixel for each shot. The end result should be that you end up with better resolution, and potentially less noise at medium/high ISO sensitivities.

    The video below gives you an idea of how long the whole process takes – and thus why it may work with things like rustling leaves, but not larger movements such as cars driving through your scene. It also shows a noticeable increase in fine detail.

    As for stabilization, it works, as expected, rather well. And it’s not just for stabilizing telephoto shots: stopping down (a lot), I was able to pull off a 1/30 exposure in daytime for some blur on the carnival ride, while maintaining details elsewhere in the frame. Of course, shooting at F29 will rob you of some overall sharpness. I should have remembered some ND filters.

    Slight motion blur on the ride while maintaining detail elsewhere courtesy of a stabilized sensor and slower-than-normal shutter speed. Photo by Carey Rose, processed to taste from Raw. 1/30 | F29 | ISO 200

    The wrap

    As so often happens with these shooting experience pieces, it comes down to two fairly simple questions. Who is this camera for, and will they buy it? It seems there’s a bit of variety here.

    Old-school lenses and old-school motorcycles have a lot in common. Yes, they’re often imperfect and idiosyncratic. But they’re also charming, with character that can be hard to find in the modern age. Photo by Carey Rose, processed to taste from Raw. Taken on the SMC Pentax 50mm F1.7. F-something (forgot this one) | 1/400 | ISO 100

    Pentax has said that the K-1 is primarily targeted at existing Pentax owners. But then they priced it at an MSRP of $ 1,799. At that price, it seems to me they might be targeting just about anyone.

    Whether you need a full-frame camera is a matter of personal choice, and needs. Many people don’t, and that is totally fine. In fact, for a good number of photographers, the increase in depth-of-field control is as much a disadvantage as it is an advantage. 

    But for Pentaxians especially, who may have a good number of lenses that are inherently limited by the crop factor of the company’s APS-C DSLR cameras, the K-1 is a godsend. It represents a return to glory for all those Pentax primes. And for those of us on the sidelines who perhaps shoot different systems, the Pentax K-1 represents a great many things. 

    It represents an increase in competition, which always bodes well for the consumer. It offers some features, such as sensor-shift capability for increased color resolution, Astrotracer, and its uniquely articulating rear screen, that no other manufacturer can meet in any form. 

    If you’re a Pentaxian, time to pop that cork – the K-1 is the camera you’ve been waiting for, and then some. Photo by Carey Rose. Taken on the SMC Pentax 24mm F2.8, processed to taste from Raw. F4 | 1/125 | ISO 200

    And Pentax has a few decent modern prime lenses and a growing number of professional-grade zoom lenses to help make the K-1 even more relevant. Hell, given a Pentax K-1 and a 43mm F1.9 Limited, your average prime-lens shooter (this photographer included) would have a killer combination for just about anything. 

    From what I’ve seen from its files, the Pentax K-1 has earned its position as a flagship camera for the Pentax brand (excluding the 645Z of course). Not so long ago, if you were an advanced amateur photographer and looking to break into the ‘full frame’ DSLR market, I would have told you to go put your hands on a Canon 6D or Nikon D610 and pick what feels best. Now, for a very similar price, I’m comfortable adding the Pentax K-1 to that list as well.

    Until next time, Yokohama. Thanks for hosting us. Photo by Carey Rose, processed to taste from Raw. F5.6 | 1/500 | ISO 200

    Articles: Digital Photography Review (dpreview.com)

  • Getting Started with Long Exposure in Fashion Photography

    Editor’s note: Once you try to use long exposure in fashion photography, you’re likely to do it again and again. Not only can it bring outstanding results in terms of originality of your images, but it’s also a great way to add a funny bone to your portrait sessions and thus, get more natural, sincere model looks. In this post, Continue Reading

    The post Getting Started with Long Exposure in Fashion Photography appeared first on Photodoto.


    Photodoto

  • Raw workflow goes mobile: Hands-on with Adobe Lightroom for Android 2.0

    Unlike iOS, Android supports the capture and processing of Raw photos. Chances are that if you own a late model mobile device running either Lollipop or Marshmallow, you should now be able to use the Adobe DNG Raw format, the headline feature in the recently updated Lightroom for Android 2.0. We tried out the new Raw workflow, from mobile to desktop and back again. Read more

    Articles: Digital Photography Review (dpreview.com)

  • Tips for Minimizing Reflections When Photographing Through Windows

    Have you ever wanted to take a photo through a shop window, but couldn’t work out how to cut the reflections? Or been up on an observation deck, trapped behind glass that had so many stray lights shining into the glass, that you couldn’t get a good shot of what was on the other side?

    LeanneCole-photography-through-glass-1028

    It is hard to take photos through glass and not get lots of unwanted reflections.

    Glass can be one of the hardest things to take photos through. It doesn’t seem to matter where you move, you will find more reflections. Then just when you think you have the perfect shot, you put it on the computer only to find that they are still there.

    Shop Windows

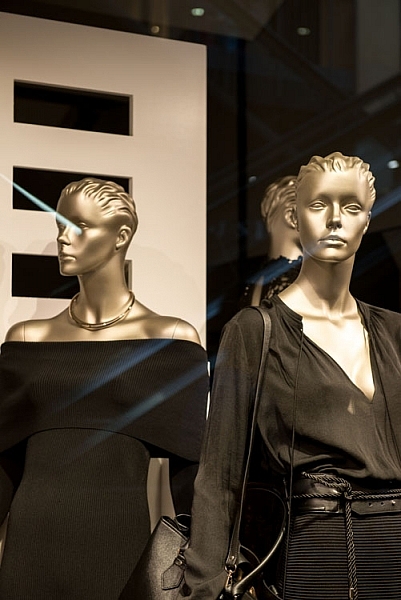
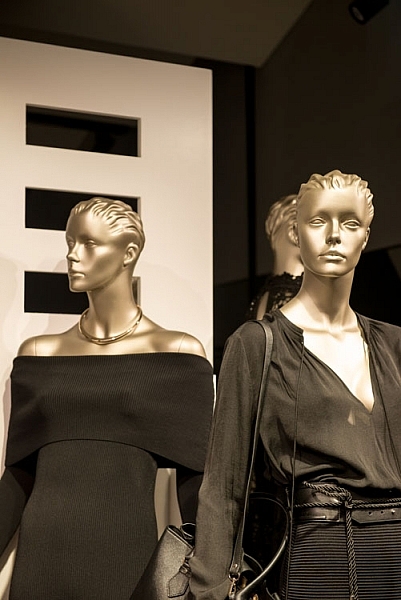
    One of the most commons places to take photos, is through shop windows. But, they are often in well-lit places, and they are tough because you will be getting reflections from all directions. There are ways of minimizing the reflections, and things you can do to help prevent them.

    Polarizering Filter

    A polarizer filter will help reduce the reflections. It may not remove them all, but it will help you to eliminate many of them. Take the images below, it has all the lights on the outside of the store reflected in the glass, and with a polarizing filter.

    LeanneCole-photography-through-glass-1036

    The reflections of the lights from outside the shop can be seen on the glass.

    LeanneCole-photography-through-glass-1037

    The reflections have been removed by the help of the polarizing filter.

    A circular polarizing filter was put on the lens, and in order to remove the reflections, it was turned until they just disappeared. Take a look at the image above right, the filter has helped remove many of them.

    It doesn’t always work, but it can help reduce reflections. In some cases, you are going to find that reducing them is better than having them ruin your images.

    Using a Lens Hood

    If you can get your lens right up to the glass of the window so that it sits on it squarely, it can stop any unwanted reflections from getting in front of the lens. However, it means that you can only take photos of what is directly in front of the camera, what do you do if you want to take some at an angle? There is no doubt that once you move it on an angle you will start to see reflections.

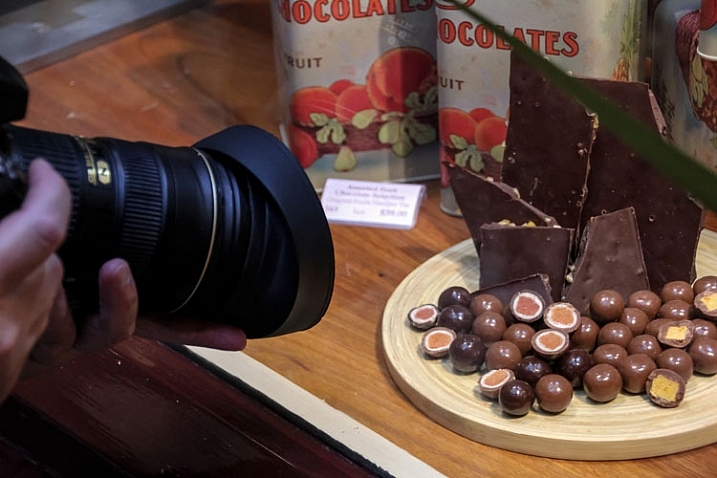
    You want to be able to create a seal around the end of the lens, and a rubber lens hood can do that. Look at the following photo, you can see one on the lens.

    LeanneCole-photography-through-glass-1038

    The rubber lens cap is on the lens, and pushed against the window.

    The advantage is the flexibility, and how you can move it around and change the angle of your lens. The following two images show one with reflections, and one without. The latter is the one taken using the rubber lens hood.

    LeanneCole-photography-through-glass-1034

    Reflections on the glass are apparent here.

    LeanneCole-photography-through-glass-1035

    The rubber lens hood has eliminated the reflections.

    They used to be very common and a lot of people would have the rubber hoods for their lenses, but slowly the hard plastic ones have taken over. It is good to see that if you hunt around on the internet, you can still find them. The one used for this demonstration was found on Ebay.

    Trams, trains and cars

    There are numerous places you could use it, and on a recent trip to the mountains around Lake Tahoe, it would have been great in the tram up Squaw Valley. The glass in the tram had so many reflections it wasn’t worth trying to get any photos. It was the same on the tram that runs from Roosevelt Island to New York.

    Trains and other moving vehicles have the same problems with windows and reflections. The rubber lens hood would help you to get an image free of any distracting reflections. However, there is one place in Melbourne where it wouldn’t help at all.

    Eureka Skydeck

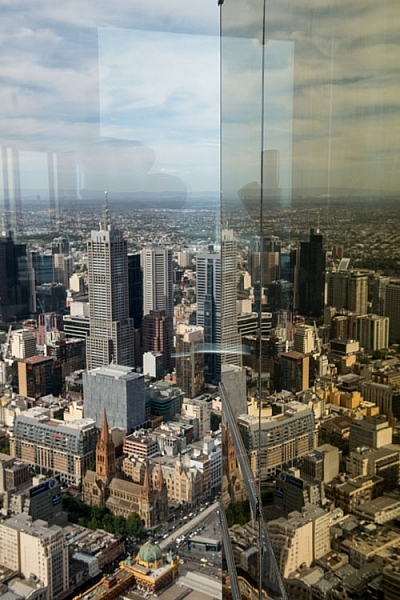
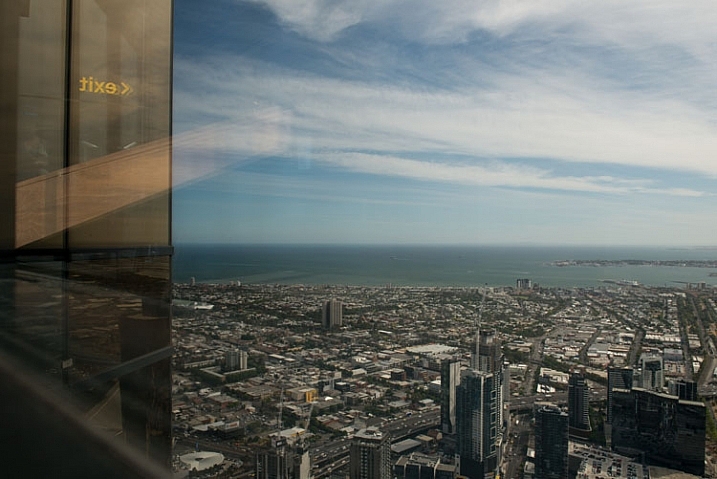
    In Melbourne there is an observation deck that is 88 floors up, Eureka Skydeck, that provides some stunning views of Melbourne. It is a great place to see the city, but a terrible place to take photos.

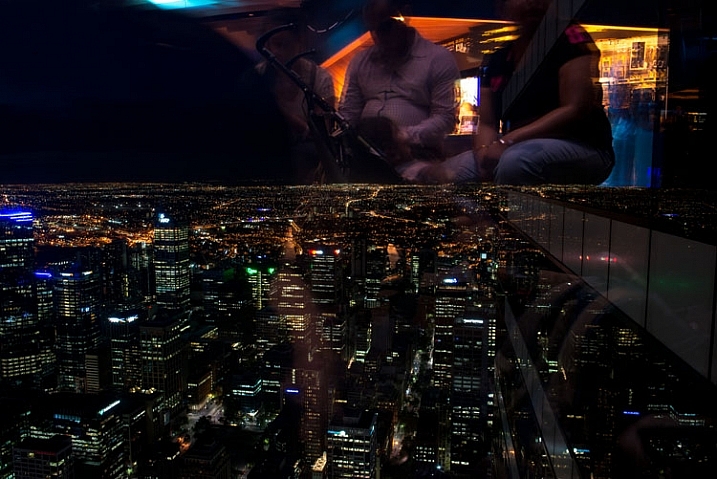
    There is glass all around, and it reflects everything else in it. The one place where you can go outside has mesh across it and for most cameras the holes in it are not big enough to take photos through. At night there are lights on the floor that create their own effects on the windows.

    If you go up to the glass to take photos, you will find that if you use the rubber lens hood method won’t work as there are two panes of glass. You might get rid of the reflections off the first pane, but there is not much you can do with the second.

    Here are two images, the first was taken during the day and you can see the reflections. The second image was taken at night and you can see all the lights that are there reflected in the glass.

    LeanneCole-photography-through-glass-1027

    Taken during the day and you can see the reflections.

    LeanneCole-photography-through-glass-1030

    At night the lights inside reflect everywhere, and you can also get portraits shots, whether you want them or not.

    Like everything in photography, there are always ways to get around problems.

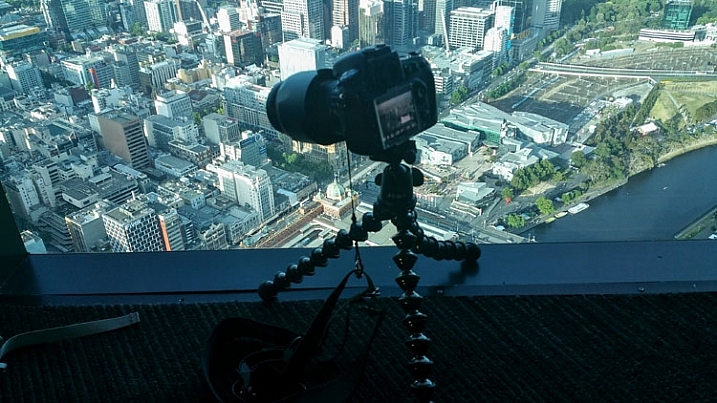
    To eliminate the reflections, you will need to put your camera on a tripod, or something similar, for the following image a GorillaPod was used. It was placed close to the ground, as you can see in the image. At the Eureka Skydeck they have lights in the floor, so you have to make sure that light isn’t coming from under the camera.

    LeanneCole-photography-through-glass-1025

    The camera on the gorillapod on the floor.

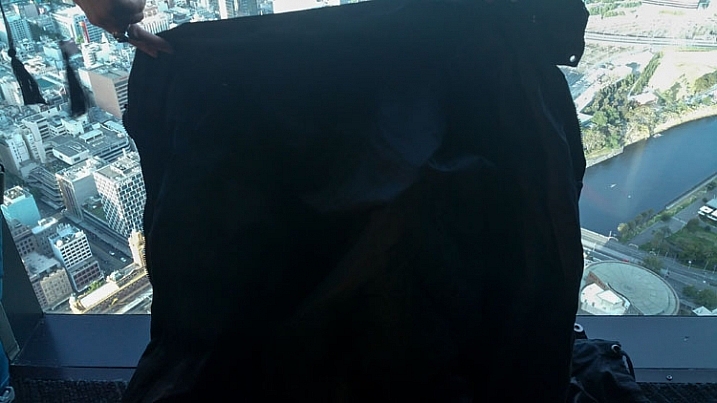
    Set up your image and create a seal around the camera with fabric, you could use a piece of black cloth. It needs to be dark as a lighter colour will reflect as well. For these images a lightweight black jacket was held up against the window, to help prevent the reflections. You want to be able use the fabric or jacket to create a closed-in area around the camera, so you don’t get unwanted views in your image. Look at the following image.

    LeanneCole-photography-through-glass-1026

    The jacket is placed around the camera to stop reflections.

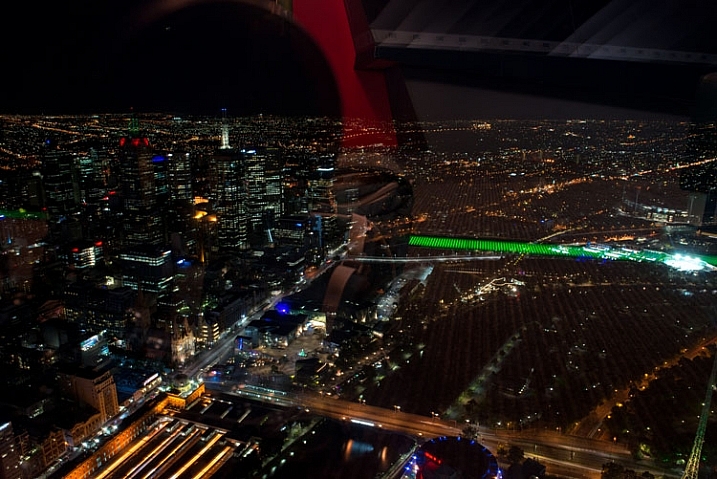
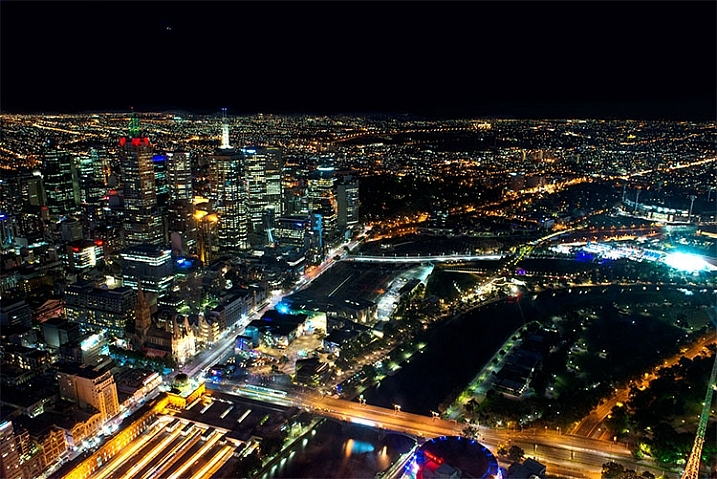
    Of course no system is going to be foolproof, but, if you compare the following two images, you can see that it does make a big difference. The first image was done without any protection, and the jacket was used for the second one.

    LeanneCole-photography-through-glass-1033

    This image has had nothing done to stop the reflections.

    LeanneCole-photography-through-glass-1032

    This was taken using the above method with a jacket to block the reflections.

    You have to judge each situation as you get to it. While one technique might work in one place, it may not work elsewhere. There is no doubt that glass and windows are one of the hardest objects to photograph through, a bit like photographing a mirror. Take care, and I hope the next time you are taking photos of a shop window, you get some great photos.

    googletag.cmd.push(function() {
    tablet_slots.push( googletag.defineSlot( “/1005424/_dPSv4_tab-all-article-bottom_(300×250)”, [300, 250], “pb-ad-78623” ).addService( googletag.pubads() ) ); } );

    googletag.cmd.push(function() {
    mobile_slots.push( googletag.defineSlot( “/1005424/_dPSv4_mob-all-article-bottom_(300×250)”, [300, 250], “pb-ad-78158” ).addService( googletag.pubads() ) ); } );

    The post Tips for Minimizing Reflections When Photographing Through Windows by Leanne Cole appeared first on Digital Photography School.


    Digital Photography School

  • Fuji X-Pro2: All Your Questions, Answered

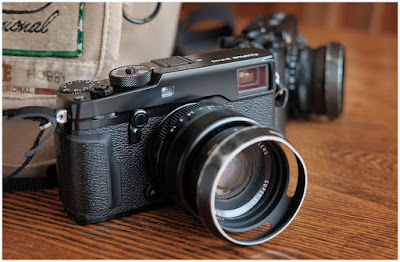
    After years of waiting, the Fuji X-Pro2 ships on Thursday, March 3rd. I have been shooting with a pre-production unit since October, and have a pretty good feel for its strengths and weaknesses.

    Last week on Twitter I held an AMA (Ask Me Anything) about the new flagship camera. Scroll down for your questions — all of them, edited only for clarity — and my answers. If you're on the fence, hope it helps.

    Cheers,
    DHRead more »
    Strobist

  • Mobile Cabins: Go Off Grid in These 12 Rustic Modern Designs

    [ By Steph in Architecture & Houses & Residential. ]

    mobile cabins walden 2

    Load up a prefab cabin on a truck and drop it virtually anywhere you want to be. Rustic lodgings in remote locations aren’t what they used to be now that modern mobile housing is available in so many forms and price ranges, from tiny houses on wheels costing just $ 11,000 to ultra-narrow habitable garden sheds to cabins shaped like actual logs to take the typology to its extreme.

    Escape Vista
    mobile cabin escape vista

    mobile cabin escape vista

    mobile cabin escape vista 3

    mobile cabine scape vista 4

    The Escape Vista is a 160-square-foot, cedar and cortex steel cabin on wheels that can be towed to the location of your choice to take advantage of its many large windows offering views of your surroundings. There’s room for one or two, and despite its small size, you’ll have a bed, kitchen, dining or work table, lounge area and bathroom. The open interior is finished with aspen wood, and luxury features include solid butcher block tops, designer faucets, integrated solar power, a washer/dryer combo and a pop-up flatscreen television. It starts at $ 39,900.

    Pircher Oberland
    mobile cabins hangar

    mobile cabins hangar 2

    mobile cabins hangar 3

    mobile cabins hangar 4

    Hangar Design Group created this prefabricated, mobile metal-clad cabin for Picher Overland to blend into rocky mountain environments. Vertical wooden siding on either end mimics tree trunks, and the interior is lined in natural wood flooring and synthetic stone-toned tiles.

    Flake House by Olgga Architects
    mobile cabin flake house

    mobile cabins flake house 2

    mobile cabins flake house 3

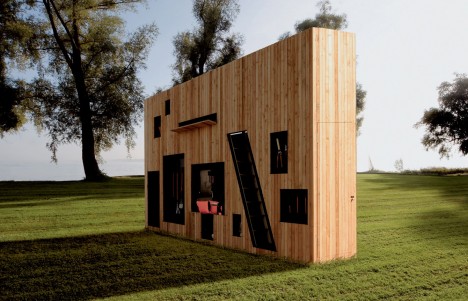
    This nomadic dwelling by Olgga Architects is like a modern take on the log cabin, camouflaged on the outside by fully-round timber siding. It stands on the site of Frossay in France, open to anybody who needs a simple shelter overnight. The proposal is “based on the concept of the ‘foil’, where the wooden structure is broken in two halves establishing a radical spatial boundary while materializing an unexpected entry sequence. an object, recalling a broken branch, whose unconventional scale is the main idea of the project: to be built-up, taken down, moved, pt down, left behind or taken along, inhabited or left to its surrounding.”

    The Wedge: Luxury Rolling Cabin
    mobile cabin wedge 1

    mobile cabin wedge 2

    mobile cabin wedge 4

    mobile cabin wedge 5

    This 400-square-foot luxury turnkey cabin by Wheelhaus features a spacious bedroom with a king-sized bed, standard-sized bathroom, fireplace, large windows, high ceilings and a private deck. Base prices start at $ 89,500.

    Next Page – Click Below to Read More:
    Mobile Cabins Go Off Grid In These 12 Rustic Modern Designs

    Share on Facebook


    [ By Steph in Architecture & Houses & Residential. ]

    [ WebUrbanist | Archives | Galleries | Privacy | TOS ]


    WebUrbanist

  • The Not So Decisive Moment – How to Increase Your Chances of Getting the Best Shot

    To a certain extent Henri Cartier-Bresson has a lot to answer for. Yes, he’s certainly one of the photography greats, and his work has inspired countless photographers, but his book “ The Decisive Moment ” and the meaning of its title, is frequently misunderstood by many, and has created a whole raft of confusion.

    Many photographers have made the assumption that Cartier-Bresson was referring to a sort of magic moment, where the photographer manages to instinctively see a perfectly formed image in a fraction of a second, bring the camera up to their eye, and take the image in its perfect form, before moving on. Interestingly, the French version of the book is called “Images on the Run”, which seems to almost suggest the opposite. This couldn’t be further from the truth, and a study of his contact sheets tells a rather different story.

    001

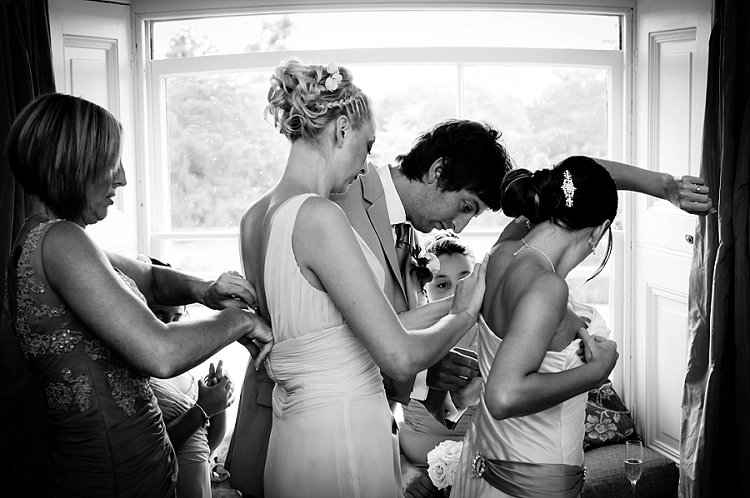
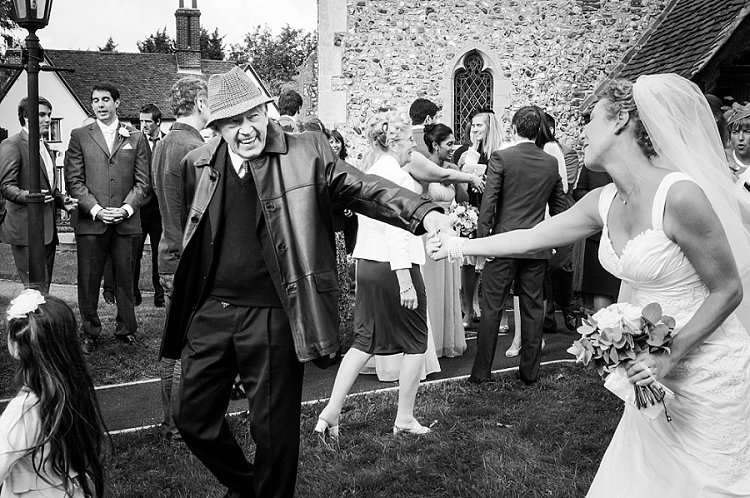
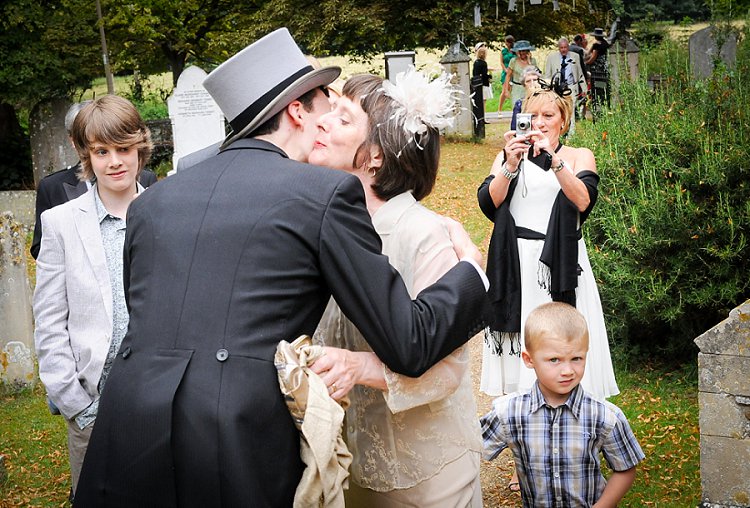
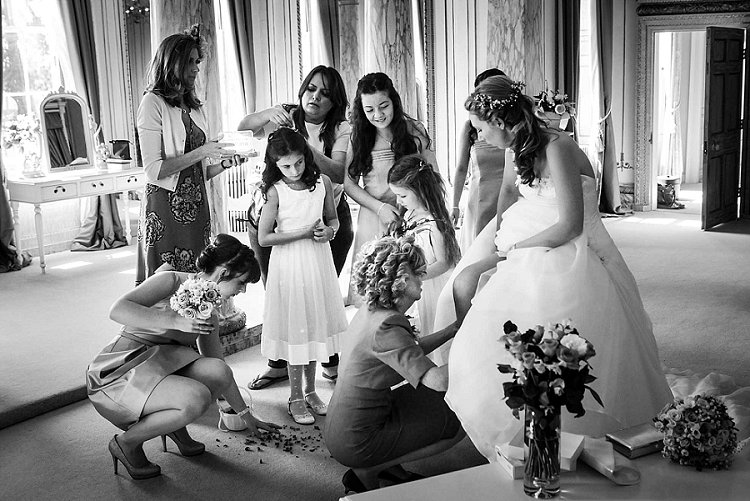
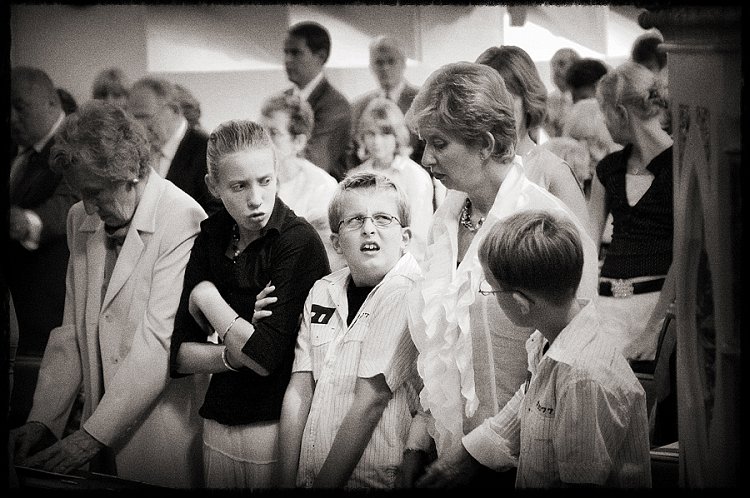
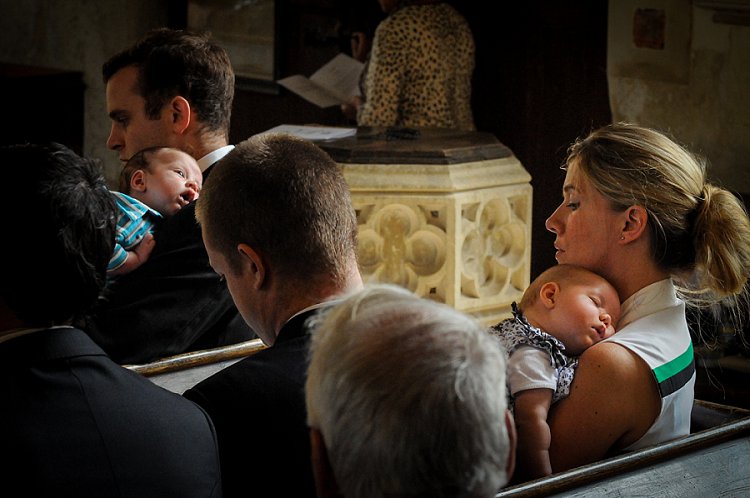
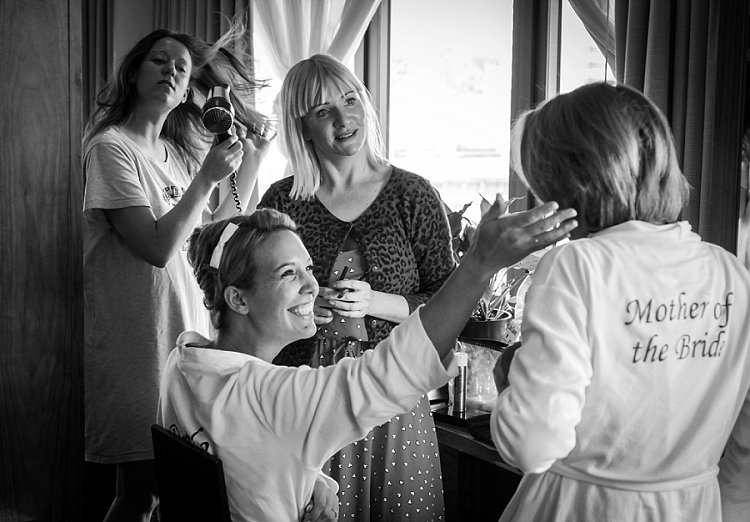
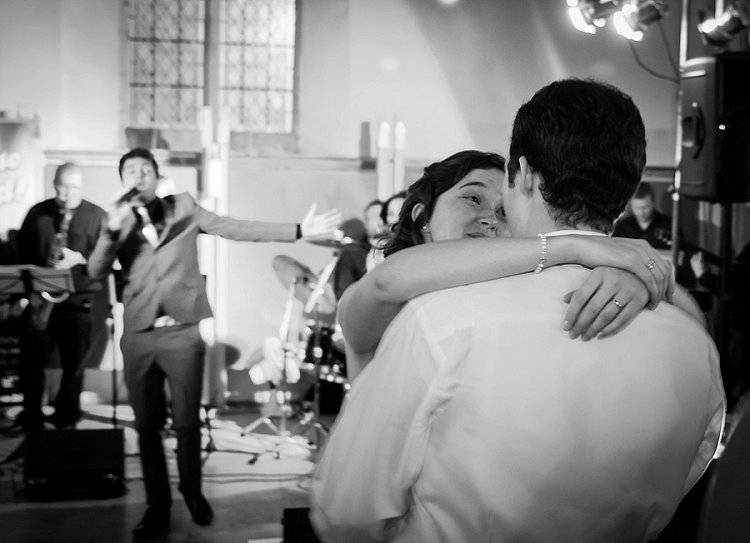
    I’ve been photographing weddings professionally in a photo journalistic style, for well over 10 years. When I started out, I too thought that capturing these types of images was simply about looking and reacting. However, I soon learned that by taking control and being proactive, rather than reactive, I could significantly increase my chances of getting the shot.

    There really isn’t a magic formula, and is possible to stack the odds in your favour, to greatly improve your chances of getting the image. Sometimes it really is luck and good reactions, but more often than not, the techniques outlined below will produce more consistent and predictable results.

    Set up your camera

    On a very practical level, it’s vital that you have the right camera, and that it’s set up correctly. It must be quick, with virtually no shutter lag at all. You’ll also need to get used to timing your shutter actuations. This can be done with practice, by repeatedly photographing moving objects, such as passing cars or bikes, until you’ve completely gotten the feel of the timing, and speed of the shutter release. This is vital, as the coordination between your eye, the shutter release, and the camera needs to be instinctive, to achieve the split second timing that’s needed.

    You might find that shooting with a prime lens is faster as well. Using a zoom will inevitably waste precious seconds zooming in and out, it’s often quicker to just move. You might also find that the focus on a prime lenses is a bit quicker, and that you compose better with a prime attached to the camera, rather than a zoom.

    002

    As far as camera settings are concerned, again, it’s all about anticipation. Set up the camera, wait, and shoot. Often this will mean using a number of auto controls – have a go at using auto ISO, auto white balance (to be corrected from the RAW files in Lightroom) and generally shoot in aperture priority mode. For this type of photography, the moment is far more important than your choice of depth of field, and even having the camera on full programme mode is okay. It’s all about emotion and expression, timing and anticipation, and the fewer distractions you have to achieve this goal, the better. If you are a manual shooter, then setting the exposure in advance is critical.

    Finally, it’s also worth mentioning, that having a camera that writes to the memory card reasonably quickly, is important too. You’ll likely need to fire off several shots relatively rapidly, and waiting for the camera to write the card is a pain. Often buying faster, high quality cards is the answer, maybe changing the camera to record slightly smaller jpegs might work – again the priority is timing, speed, and anticipation for this type of photography. If you need to sacrifice using massive file sizes, to gain the speed you need, then so be it.

    003

    Pre-planning and envisioning

    Think about where the type of pictures you want are likely to happen. It’s hopeless to randomly go out looking for photographs, you really have to put yourself in the best situation, at the best time, to increase your chances of getting the pictures you’re after. If you are a street photographer for example, then you’ll probably want to head out in the middle of the day, maybe on a weekend, when the streets are more likely to be filled with people. There will be many more interactions, and your chances of success are higher. It all begins with deciding exactly what type of pictures you want, and where the most likely place are that you will get them.

    Once you are in place, also pre-visualizing the types of shots you want, will give you focus and purpose. If you’re photographing at an outdoor market for example, how about setting yourself the task of photographing human connections, maybe as people are chatting, handing over money or goods, etc? Or how about looking for interesting juxtapositions between shop window displays, and people standing or passing in front of them? This may all sound rather prescriptive but, by setting yourself some parameters, you’ll get your creative juices going, focus your attention, and increase your chances of success. There’s nothing worse than not knowing what you want, randomly taking pictures, waiting for something to happen.

    004

    Set the scene

    It’s important to look for the elements in the image that you can actually control. For example, finding some nice light, a great background, or a place where an image will work well compositionally. Having set the stage, it’s then simply a case of waiting for something to happen on the stage, to complete the picture. This is so much better than looking for something to happen in hunting mode, where you are trying to react to things all over, and have no control over any of the photographic elements. The chances of getting a strong image with the former method, are significantly higher. It might take longer, and you may shoot fewer frames, but the overall quality of the end result will be better.

    Work at the image

    Looking at his contact sheets, Cartier-Bresson always took several exposures of the same scene or moment. He very rarely got the shot in one take, and it’s a great relief to realize that he worked the scene. This means that you need to take a number of frames, in fairly quick succession – not on continuous (burst) shooting mode, but close enough together to record subtly different expressions, juxtapositions of people in the frame, and changes of angle and composition. You should aim to keep moving – try the shot a little to the left, then the right, maybe a step forward or back, or a little higher or lower. Photography should keep you fit, and you should always be moving. You can then go through the different frames once they are downloaded, and select the strongest image.

    005

    Being unobtrusive and body language

    Generally people will be aware that you’re taking pictures. I don’t think that it’s a particularly good approach to stalk your subject from behind a huge 400mm lens, it’s much better to use something smaller and less intrusive, to be closer to the subject and more involved in what’s going on. You can even interact with people as you’re taking pictures, which makes you much less threatening, and consequently people will behave in a much more natural and relaxed way in front of you and your camera.

    Being non-threatening can be as simple as smiling, looking relaxed, keeping your body language open and friendly, and just being respectful of people’s personal space. Yes, you’re an observer, but you have to observe from a position of being emotionally and physically involved. You’ll gain much more acceptance from your subjects, and the pictures will be more authentic and natural. That’s not to say that your presence should influence the scene in any way, it’s just that you have to be accepted, to be able to photograph people behaving naturally. If your subjects insist on fake posing, and smiling for the camera, you need to work harder.

    A great way of making this work is to move in and out of the scene really quickly – essentially this means waiting for a scene to unfold a little distance from you. As the moment is about to happen, walk towards the scene, camera ready to go. Very quickly, shoot as you are close to the action, then continue to walk out of the scene. If you combine this with unobtrusive body language, you can remain essentially invisible.

    006

    Eye contact

    Human eye contact is a powerful communication which you can use to your advantage. I think that people can almost sense when they are being watched, and avoiding eye contact (in a non-threatening way) can be a powerful technique. If you want to photograph a group of people, it’s amazing how close you can get to them, if you seem to be diverting your attention to something else. It’s then often possible to get the shot without disturbing them, as they feel as though your interest is elsewhere. We also naturally have an inclination to look at our subject as we take the camera down from our eye, so try to avoid doing that. You’ll be much less intrusive and conspicuous to your subject, particularly if you seem to be focussing your attention on some other subject away from them.

    Insert Image 007 MISSING??

    Anticipation

    This means simply imagining what could happen next, you need to become an expert in human behaviour, and be ready for what you think is about to happen. Often, with a bit of practice, you’ll be right, and you’ll have prepared yourself to get the shot.

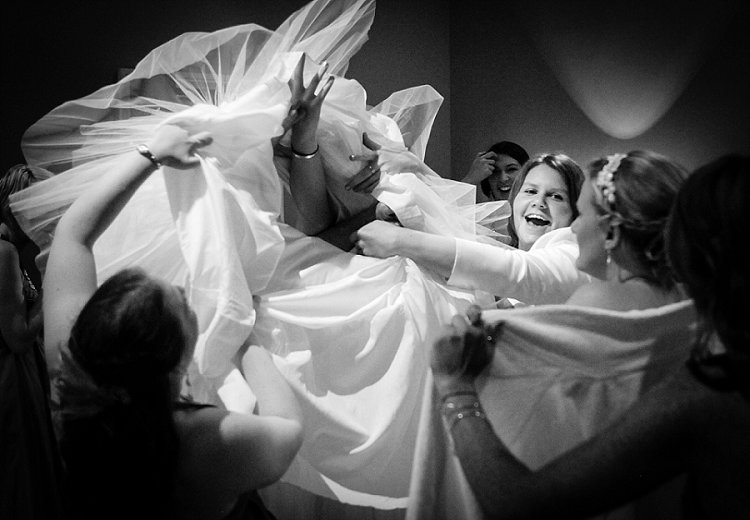
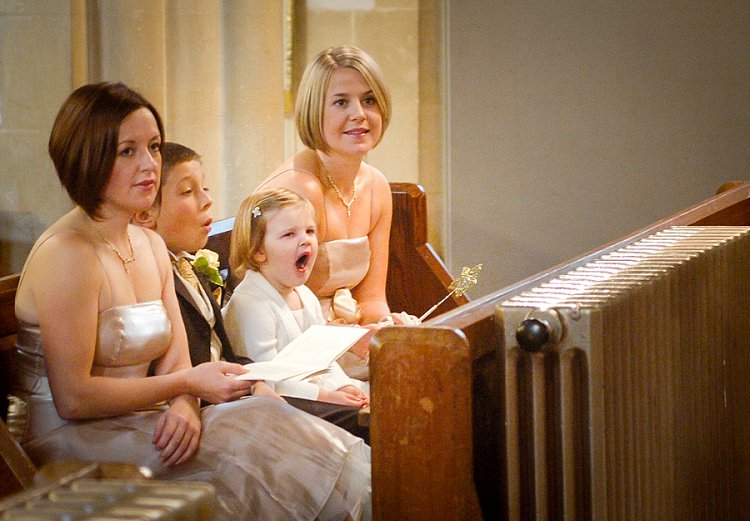
    As an example, part of my job as a wedding photographer, is to take pictures of people laughing and enjoying themselves. Good expressions are vital, and getting the timing right is the key. I listen for people telling an amusing tale, that will inevitably end in laughter. It’s no good waiting until they are laughing to bring the camera to my eye and take the shot – I need to be ready beforehand, and choose my moment. It’s also worth saying that often there will be laughter at the original joke, then someone will but in with secondary after joke, creating even more hilarity, which often makes an even better image than the first one – so be patient and wait.

    The same principal can be applied to all sorts of situations – imagine what is going to happen next, prepare for it, and photograph it, if and when it happens. Often something else will happen, so you also need to be prepared to be flexible. Make sure that when you get what you were expecting, that something else even better doesn’t happen and you miss it.

    008

    No chimping

    The moment is often after when you think it’s going to be – just as you are checking your screen. This is what I call the chimping effect. Many, many times I’ve taken an image, had a quick look down at the screen on the back of the camera, only to realize that I have just missed something better. Don’t look at the screen. Keep your camera ready, and always wait – even if you think you’ve got the shot.

    Similarly, you will often miss great shots, just at the point when you are tired and have given up. You need to keep going and going – I know that the longer I shoot, the more high quality images I will get. I also know that by having a complete break for five minutes or so every hour, I am able to keep quick and alert for longer. However it’s weird the number of times that I have just given up on a scene, that something suddenly interesting happens.

    009

    When it looks like there’s nothing to photograph – think again

    Very rarely is there not a photograph to be taken somewhere – it comes down to the photographer’s skill in making images. This is particularly hard with transient, and moving subjects like people. But, people do constantly interact, do things, and move around. It might be that you can’t get the exact image you have in mind, but try to think more laterally, and look for something completely different. In a situation like this it becomes a case of mind over matter, work at keeping your creative thinking fresh and flexible, and you will find an image somewhere.

    Practically speaking, changing lenses, moving position, or trying a new technique can spark some creative thought. However, very often it’s just a case of looking and waiting… then looking and waiting some more. There are always images to be had, often they are small fleeting moments, but they are always there.

    010

    It’s behind you

    This isn’t a joke. Weirdly, and frequently, I’ll be looking for an image in front of me, not having much luck, then realize that I should have been looking the other way. Often just turning right around, will present a completely new range of photographic possibilities. Sometimes the picture really is just behind you – you only need to turn around and look.

    Primary and secondary subjects making the moment

    Try to make a photograph by adding another element in the frame, i.e. having a primary and secondary subject. It could be that both subjects make an okay picture on their own, but if they are combined into one image, they become much stronger. If the image explores a relationship between the two subjects it’s even better. Maybe one offers a commentary on the other, or there is an echoing of shape or gesture.

    011

    Waiting, waiting and waiting

    I’ve mentioned being patient several times, and the amount of time spent looking and waiting for success in this type of photography is phenomenal. Never give up – just wait, poised for action. Linger a little longer, just outside your comfort zone you might well find that there are a number of great images to be had.

    As with anything, practice is the one thing that will really make a difference, and this can be both photographic practice, as well as observational practice. Try to develop skills in reading people, anticipating moments in your everyday life, and practice your observational skills. Combine this with the other techniques above, and you will soon find that you are able to make some of these seemingly magic moment images happen. You will have become proactive in your photography, rather than reactive, and your success rate will be considerably higher.

    You Decide

    So I urge you to give these tips a try, and see if you can come away with better candid images. Please share your thoughts and experiences in the comments below.


    googletag.cmd.push(function() {
    tablet_slots.push( googletag.defineSlot( “/1005424/_dPSv4_tab-all-article-bottom_(300×250)”, [300, 250], “pb-ad-78623” ).addService( googletag.pubads() ) ); } );

    googletag.cmd.push(function() {
    mobile_slots.push( googletag.defineSlot( “/1005424/_dPSv4_mob-all-article-bottom_(300×250)”, [300, 250], “pb-ad-78158” ).addService( googletag.pubads() ) ); } );

    The post The Not So Decisive Moment – How to Increase Your Chances of Getting the Best Shot by Andrew Hind appeared first on Digital Photography School.


    Digital Photography School

  • CP+ 2016: Sigma MC-11 adapter allows DSLR Sigma lenses full range of AF modes on Sony bodies

    While photographing and filming our way through Sigma’s booth this year at CP+ 2016 in Yokohama, one rather understated product may have just stolen the show for a number of Sony shooters, as well as our Technical Editor Rishi Sanyal.

    Put simply, the Sigma MC-11 adapter allows the use of Sigma-mount and Canon-mount Sigma lenses, such as the excellent Sigma Art 35mm F1.4, to be adapted to Sony bodies with no autofocus compromises whatsoever. That means Sigma is the first brand of DSLR lenses to support Eye AF and Lock-On AF modes on Sony cameras, as well as smooth phase-detection in video. What’s more, they work really well.

    Don’t believe us? We didn’t believe it at first either. Watch the video and see for yourself why this is a huge step forward in realizing truly hybrid camera systems: where you can pair the best lens with the best camera body – for you – without severe compromises.

    Pricing and availability of the Sigma MC-11 adapter has yet to be announced.

    Articles: Digital Photography Review (dpreview.com)

  • Upgrading a classic: Canon 100-400mm F4.5-5.6L IS USM Mark II review

    Canon 100-400 F4.5-5.6L IS USM Mark II Review

    The king is dead, long live the Mark II. After 15 long years, Canon finally upgraded one of the biggest-selling telezooms of all time – the 100-400mm F4.5-5.6L IS USM. The Mk II version has the same headline specifications but with enhanced features and improved performance all-round. While the new model is better for sure, when comparing the Mk I and Mk II side by side it quickly becomes clear just why it took Canon so long: the MkI version was, and still is, a decent lens. It’s always been very popular too, and known for holding its value well on the used market, so Canon was in no rush to change a winning formula.

    The 100-400mm Mk II retains the same focal length and F4.5-5.6 overall maximum apertures as the original model. Both lenses change up to F5 at around the 125mm mark, and the Mk I then goes to F5.6 at 250mm while the Mk II holds on slightly longer, making the final switch at just over 300mm. Apart from a little extra weight, the physical dimensions are basically unchanged, but everything else is new and upgraded. There’s a totally new state-of-the-art optical design with more elements, a much-improved image stabilization system, a minimum focusing distance that’s been cut in half and faster autofocus drive. Build quality has been taken up a notch, now with a full set of weather seals, and the push-pull zoom control (unloved by some) is swapped for a more conventional twist-ring. It’s finished in Canon’s newer light gray L-color, as opposed to the old creamy-white. 

    Headline features

    • Improved optical design with 21 elements in 16 groups (versus 17 in 14 for Mk I)
    • Upgraded image stabilization with 4-stops benefit (vs. 2-stops)
    • Twist-ring zoom control (vs. push-pull)
    • Extensive weather-resistant seals (vs. partly sealed)
    • Faster USM autofocus drive
    • Close focusing down to 98cm, 0.31x magnification at max focal length (vs. 180cm, 0.2x)
    • Same size as Mk I, though slightly heavier at 1570g (vs. 1380g)

    Canon now offers the broadest selection of telezooms of any brand, at a variety of price points. In the premium sector, there are four 70-200mm L-grade zooms, with a choice of F2.8 or F4 maximum apertures, with and without image stabilization. The 70-200mm F2.8 L IS USM Mk II is relevant here as it works well with 1.4x or 2x extenders, as an alternative to something longer.

    More recently, Canon added a third lens to its options in the versatile 70-300mm category, with the 70-300mm F4-5.6L IS USM being an excellent zoom that is essentially a scaled-down version of the 100-400mm Mk II (and considerably cheaper, too). There is also the Canon 200-400mm F4L IS USM with its unique built-in 1.4x extender, though the stratospheric price puts it in a rather different class, and Canon has a couple of excellent prime telephotos in this focal length range, too. The image-stabilized 300mm F4L IS USM and 400mm F5.6L USM both hail from the same era as the original 100-400mm Mk I, and have also stood the test of time well.

    Looking at other brands, the Nikon AF-S 80-400mm F4.5-5.6G ED VR is a close rival to the Canon 100-400 II in terms of specification, design and high performance. Likewise, the Sony 70-400mm F4-5.6 G SSM II for A-mount is another proven performer. Both lenses feature a slightly wider angle of view at the short end, but have notably longer minimum focusing distances than the Canon 100-400 Mk II. Compare Nikon vs Sony performance data here.

    Surprisingly, no third-party manufacturer currently offers anything similar, though anyone in the market for an extra-long lens should be sure to check out the trio of 150-600mm F5-6.3 superzooms from Sigma (which has two versions) and Tamron that have caused quite a stir, bringing new standards of performance to this market segment at an affordable cost. But while they might appear to cover much the same ground as the Canon 100-400mm Mk II on paper, they’re very different in the hand – much bigger, much heavier, and arguably, harder to get the most from. The new Nikon AF-S 200-500mm F5.6 E ED VR and as yet unproven Pentax D FA 150-450mm F4.5-5.6 ED DC AW also fall into the larger/heavier category, and with longer minimum focusing distances compared to the Canon Mk II.

    Angle of View

    100mm F4.5, full-frame (Canon 5DS R)

    400mm F5.6, full-frame (Canon 5DS R)

    Shire Hall, Cambridge, UK, is one of my favorite subjects for comparisons (also used for the Tamron 16-300mm VC review) though unfortunately it was partly obscured by scaffolding on this occasion.  Sharpness is very high, and unusually consistent – throughout the zoom range, at all apertures, and across the frame. It’s at larger apertures where the Mk II shows most sharpness improvement over the MkI. The images above are both at maximum aperture, F4.5 at 100mm and F5.6 at 400mm, using a Canon 5DS R (full-frame), and are shown without any software corrections applied for chromatic aberration, distortion or vignetting.

    The 100-400mm zoom range, with a generous 4:1 ratio, provides a 24.4° to 6.2° angle of view on full-frame, measured across the diagonal from corner to corner. It’s very versatile and well suited to a wide range of popular subjects, including all kinds of field sports, and wildlife from safaris to zoos. At a motor race or air display, the spectator fences are often lined with Canon 100-400mm zooms. Compared to a fixed focal length lens, when photographing sports or anything where the shooting distance varies, you can zoom to pull in subjects from a distance, then zoom back when the action gets closer. Longer focal length settings are also perfect for sniping candid portraits, say at a wedding or other social occasion. At the shorter end, while it may not be the obvious choice for portraiture, at around 100-135mm it’s just about perfect on full-frame.

    $ (document).ready(function() { SampleGalleryV2({“containerId”:”embeddedSampleGallery_7167562452″,”galleryId”:”7167562452″,”isEmbeddedWidget”:true,”standalone”:false,”selectedImageIndex”:0,”startInCommentsView”:false,”isMobile”:false}) });

    ABOVE: With a broad 4:1 zoom range, unusually close focusing, and excellent image-stabilization, the Canon 100-400mm Mk II can turn its hand to more than just sports and wildlife. It’s sharp at all focal lengths and apertures. Check the fly on the flamingo’s beak – the fine veins on its wings are barely more than 1-pixel wide (Canon 5DS R, monopod, 400mm F5.6, 1/250 sec, ISO 400).

    The Canon 100-400mm Mk II goes very well on APS-C cameras like the Canon 7D Mk II, with its excellent AF and fast frame rate. The 1.6x crop factor gives more effective reach and creates a megazoom 160-640mm equivalent angle-of-view. The Canon 100-400mm Mk II is also compatible with the Canon 1.4x extender, though it will only autofocus on higher-end Canon DSLRs that retain AF up to F8 (currently 7D Mk II, 5D Mk III, 5DS/R, 1DX/II). The 2x extender will physically fit, but all AF functions are disabled.

    Articles: Digital Photography Review (dpreview.com)

  • DJI’s Phantom 4 boasts improved camera optics and obstacle avoidance

    $ (document).ready(function() { SampleGalleryV2({“containerId”:”embeddedSampleGallery_8627299961″,”galleryId”:”8627299961″,”isEmbeddedWidget”:true,”standalone”:false,”selectedImageIndex”:0,”startInCommentsView”:false,”isMobile”:false}) });

    DJI has updated its flagship drone lineup with the Phantom 4, which offers automatic obstacle avoidance and ‘dramatically’ improved camera optics. With a 12MP sensor and F2.8 lens the Phantom 4 is capable of Raw still shooting and 4K/UHD video at 30p as well as new machine vision technology adding subject tracking and object avoidance. Flight time has increased to 28 minutes – and the price has increased to $ 1399 compared to the Phantom 3 Professional’s original $ 1259 MSRP.

    The DJI Phantom 4 is now available for pre-order through DJI.com and Apple.com. Orders are expected to ship March 15.


    Press release:

    DJI Launches New Era of Intelligent Flying Cameras

    DJI, the world’s leading maker of unmanned aerial vehicles, on Tuesday launched the Phantom 4, the first consumer quadcopter camera (or “drone”) to use highly advanced computer vision and sensing technology to make professional aerial imaging easier for everyone.

    The Phantom 4 expands on previous generations of DJI’s iconic Phantom line by adding new on-board intelligence that make piloting and shooting great shots simple through features like its Obstacle Sensing System, ActiveTrack and TapFly functionality.

    “With the Phantom 4, we are entering an era where even beginners can fly with confidence,” said DJI CEO Frank Wang. “People have dreamed about one day having a drone collaborate creatively with them. That day has arrived.”

    The Phantom 4’s Obstacle Sensing System features two forward-facing optical sensors that scan for obstacles and automatically direct the aircraft around the impediment when possible, reducing risk of collision, while ensuring flight direction remains constant. If the system determines the craft cannot go around the obstacle, it will slow to a stop and hover until the user redirects it. Obstacle avoidance also engages if the user triggers the drone’s “Return to Home” function to reduce the risk of collision when automatically flying back to its take off point.

    With ActiveTrack, the Phantom 4 breaks new ground, allowing users running the DJI Go app on iOS and Android devices to follow and keep the camera centered on the subject as it moves simply by tapping the subject on their smartphone or tablet. Perfectly-framed shots of moving joggers or cyclists, for example, simply require activating the ActiveTrack mode in the app.

    The Phantom 4 understands three-dimensional images and uses machine learning to keep the object in the shot, even when the subject changes its shape or turns while moving. Users have full control over camera movement while in ActiveTrack mode – and can even move the camera around the object while it is in motion as the Phantom 4 keeps the subject framed in the center of the shot autonomously. A “pause” button on the Phantom 4’s remote controller allows the user to halt an autonomous flight at any time, leaving the drone to hover.

    By using the TapFly function in the DJI Go app, users can double-tap a destination for their Phantom 4 on the screen, and the Phantom 4 calculates an optimal flight route to reach the destination, while avoiding any obstructions in its path. Tap another spot and the Phantom 4 will smoothly transition towards that destination making even the beginner pilot look like a seasoned professional.

    The Phantom 4’s camera, still the world’s best aerial-optimized 4K imaging device, has undergone an upgrade that includes improved optics for better corner sharpness and reduced chromatic aberration. The Phantom 4 also has DJI’s signature Lightbridge video transmission system onboard, allowing users to see what their camera sees in HD and in real-time on their smart devices at a distance up to five kilometers (3.1 miles).

    The Phantom 4’s form factor, still the classic quadcopter style pioneered by DJI, has been redesigned and redefined to emphasize elegance and smoother, more-aerodynamic lines. Its frame incorporates a lightweight composite core to provide enhanced stability and more-agile flight. The core now features a redesigned gimbal that provides more stability and vibration dampening, and has been repositioned for a better center of gravity and to reduce the risk of propellers getting in the shot.

    Refinements to motor efficiency, power management and a new intelligent battery have extended the Phantom 4’s flight time to 28 minutes, which means more time in the air to capture professional photos and video.

    DJI crafted the Phantom 4 with reliability in mind, including redundant inertial measurement units (IMUs) and dual compasses onboard. It uses new push-and-lock propellers that are faster to install and more secure in flight.

    In addition to intelligence and ease-of-use, the Phantom 4 is built for fun. Its new “Sport Mode” for advanced flyers gives a taste of what drone racing feels like. In “Sport Mode,” the Phantom 4 can fly 20 meters per second (45 miles per hour) and ascends and descends more rapidly than in other modes. The craft’s acceleration and top speed in “Sport Mode” also mean it can reach locations for shots faster and capture shots you couldn’t get before.

    “Though the Phantom 4 is easy to use, let’s not forget it is a high-performance aircraft powered by unparalleled DJI technology,” said Senior Product Manager Paul Pan.

    The Phantom 4’s U.S. retail price is $ 1,399.

    Pre-orders for the Phantom 4 will start March 1 on DJI.com and Apple.com, and customers will begin receiving their units on March 15. The Phantom 4 will also be available in-store at DJI’s flagship stores and Apple stores around the world starting March 15. Phantom 4 pre-orders from DJI’s other sales partners will commence on March 23, with availability from April 1.

    Articles: Digital Photography Review (dpreview.com)