Blog

  • 4 Things You Can Learn From Film and How to Apply Them to Your Digital Photography

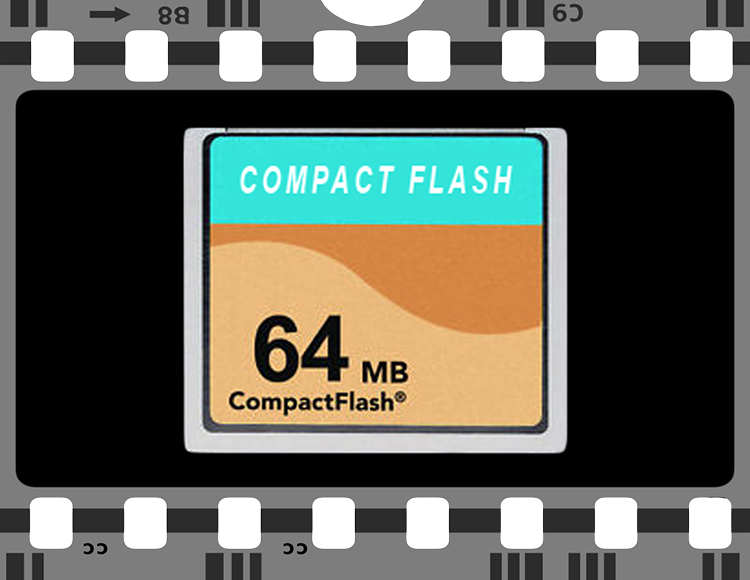
    Since the introduction of digital cameras, photography is becoming more and more popular amongst everyone. This is largely due to the fact digital has dramatically reduced the cost of taking photos, as they no longer required to be developed, and the recording media (SD or CF cards) can be reused. Another fantastic advantage of digital, is the instant replay it gives you of the photo just taken, giving you the option to correct any flaws in the image. This is something that could not be done with film, and each photo taken would cost money; regardless of how great it was, or was not.
    Digital Film

    Digital technology has come so far in the last several years that it is out-performing film on almost every level; for example, camera’s can now go up to ISO 3.2 million – an ASA (film equivalent to ISO) level that was never even considered during the films days.

    But does this mean that film is useless, and has nothing to offer? Absolutely not. Regardless of whether film is making some sort of a resurgence or not, there are still many things that film can teach you about photography, that digital simply cannot. Here are some thing that shooting with film can teach you better than what digital capture can do:

    1. SELF CONFIDENCE

    With the immediacy of the feedback that digital cameras provide you, it is all too easy and tempting to continually check your camera’s LCD to see how your photo has turned out. This tendency to keep looking at the LCD is often referred to as chimping. You may chimp for various reasons, ranging from ensuring your photo is correctly exposed (the most common reason), in focus, or seeking self-gratification that you’ve done a good job.

    Now, imagine you were photographing with film. You would not be able to see your photos straight away; you’d have to wait a week or even two! You would not be able to see if the photo was correctly exposed, or pat yourself on the back about getting a great frame – at least not right away!

    Film taught photographers to read the light and tones within their environment, and to learn how to use their tools correctly. This built confidence within photographers to trust in their own abilities and decisions. It meant that photographers would worry less about receiving positive reassurance on the photo they’d just taken; they knew that they had exposed and focussed correctly and kept going. There was no ,”Hold on, I’ll just check to make sure your wedding dress is correctly exposed”, or “I missed that shot because I was checking my exposure.”
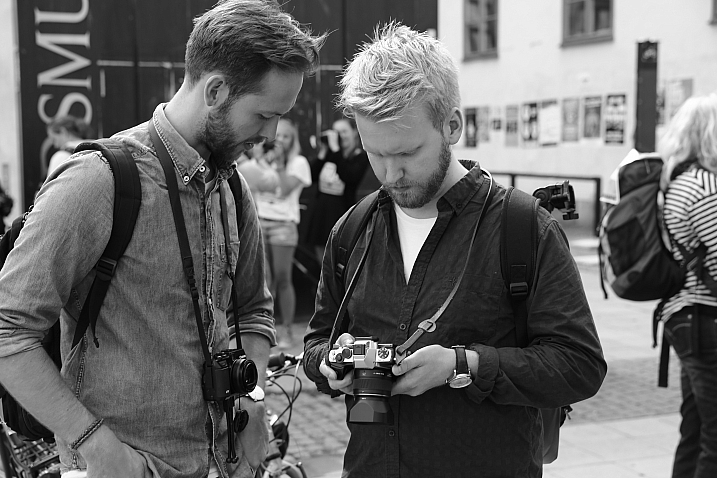
    Fredrik Holmberg

    By Fredrik Holmberg

    So why is chimping a bad habit? Because it says that you are not that confident in your own abilities and judgement, and you need the constant reassurance that you are doing a good job. It results in you potentially missing a great opportunity for a photograph, as your attention has now shifted from your subject to your camera. Wedding, sport, and action photographers may miss a critical moment, a defining moment, if they are always looking at their screen. If you’re looking at your screen, you’re not ready for the moment and you most certainly are not taking photos.

    For portrait photographers, taking your camera way from your eye breaks that connection between yourself and your subject. It also says that you’re more interested in the result than you are them.

    Apply this to your digital photography

    To increase your confidence in your own abilities, I challenge you to only look at your LCD once or twice the next time you’re out photographing. These times should really only be to help you achieve the exposure you wish. If the lighting conditions are consistent, there is no reason you should need to look at your LCD again.

    2. PUSH YOURSELF MORE

    All too often you may see an outstanding result on the back of your camera. You stop taking photos because you are convinced that it cannot be bettered; only to see your friend take a better image right next to you. The instant replay of your work on the back of your camera can often prevent you from pushing yourself just that little bit further, and getting that great shot. That instant replay didn’t exist on film cameras, so photographers didn’t know if they had “the shot” or not; they had to keep pushing themselves to ensure that they did get it.

    Calvinnivlac

    By calvinnivlac

    If you’re tempted to keep looking at your screen, I’d encourage you to turn preview or replay to off in your camera menu. If you are still tempted to press play and have a sneaky peek, tape a little piece of paper or card over the screen so you cannot see the image.

    Apply this to your digital photography

    Do not be tempted to keep looking at your screen, and being satisfied with what you see after the first one or two frames. Keep going. Perhaps you could try different angles, settings, lighting etc., but you should always keep pushing a little further to get a better shot. Even if it is just three or four additional frames.

    3. YOU THINK MORE

    Taking a photo with digital cameras costs nothing; just the minuscule amount of electricity the camera needs to operate and a little bit of storage. Memory cards can hold thousands of photos – far more than the 36-exposure roll of film. But that limitation of 36 exposures can teach you something that digital cannot – discipline.

    John Goode

    By John Goode

    Think about the last time you went out taking photos. How many did you come back with? I would bet that you might have hundreds of photos to go through, maybe even thousands. Now, divide that number by 36. That’s how many rolls of film you went through. When you have such a limited number of exposures until you have to change your roll (which takes a lot more time than switching memory cards, by the way), you don’t just take photos every time you see something you like. You look at the subject or scene and consider it more carefully. In doing this, you evaluate if it is indeed worth taking a photo of or not.

    Apply this to your digital photography

    Try shooting with a smaller memory card like 1gb, or even smaller if you can find some old cards. Limit yourself to 36 shots per day or per outing. Do not delete images as you go, only fill the card or your limit of shots and no more. It will help you be more intentional with your shooting. If you are always deleting images, that defeats the purpose of having a smaller card!

    4. GREATER VARIETY IN YOUR WORK

    Have you ever gone through photos that you’ve taken and realized that you took so many images of the same thing, with little or no difference between many of them? Do you find it boring going through your photos sometimes because there is such little variation in so many images? With film, each frame cost more money than digital, so photographers made each frame count.
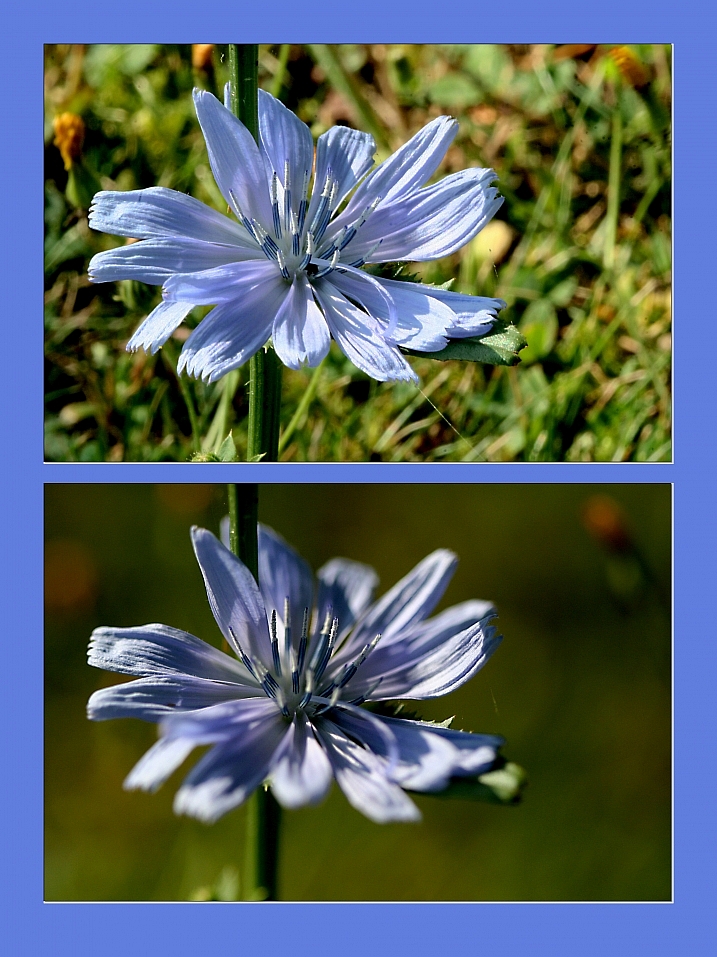
    Phil

    By Phil

    Apply this to your digital photography

    Do you really need 10 photos of the same object, from the same angle? No, you don’t – those 10 frames are all the same, so therefore are really just one photo taken ten times. You can still have 10 photos of the same subject, but vary them; try different angles, focal length, exposures. Even try photographing it with a different lens (wide angle versus telephoto). Make each frame different to the next, and make each frame count. Not all the images will work out, but you will have much more variety in your work from the same number of subjects. It will also help you greatly in the future when deciding on what approach to take for your next subject.

    Summary

    So there you have it, some simple and practical things that shooting with film can teach you better than digital. If you have a film camera laying about collecting dust, why not pick it up, put a fresh roll of film in (extra points if you shoot on slide film) and start using it? It will be quite a strange sensation using a film camera and the the images you take may not be that fantastic to start. Should you stick with it, it will help you on your journey to improving you photography and in my experience, nothing is more satisfying that nailing a photo on film over digital.

    googletag.cmd.push(function() {
    tablet_slots.push( googletag.defineSlot( “/1005424/_dPSv4_tab-all-article-bottom_(300×250)”, [300, 250], “pb-ad-78623” ).addService( googletag.pubads() ) ); } );

    googletag.cmd.push(function() {
    mobile_slots.push( googletag.defineSlot( “/1005424/_dPSv4_mob-all-article-bottom_(300×250)”, [300, 250], “pb-ad-78158” ).addService( googletag.pubads() ) ); } );

    The post 4 Things You Can Learn From Film and How to Apply Them to Your Digital Photography by Daniel Smith appeared first on Digital Photography School.


    Digital Photography School

  • Zeiss unveils super-wide Batis 18mm F2.8

    $ (document).ready(function() { SampleGalleryV2({“containerId”:”embeddedSampleGallery_1690428628″,”galleryId”:”1690428628″,”isEmbeddedWidget”:true,”standalone”:false,”selectedImageIndex”:0,”startInCommentsView”:false,”isMobile”:false}) });

    Zeiss has added the 2.8/18, a super wide-angle autofocus lens, to its Batis line for Sony E-mount. The full-frame lens joins the current 25mm F2 and 85mm F1.8 offerings. The 18mm lens provides the same dust and weather seals as its siblings, along with an OLED to display focus distance and depth of field information.

    The Batis 18mm F2.8 comprises 11 elements in 10 groups, and four of those elements are aspheric on both sides. The lens provides a minimum focus distance of 0.25m/9.8in. Weighing in at 330g/0.74lb it measures 80mm/3.1in in length.

    Scheduled to arrive in May, the Zeiss Batis 2.8/18 will cost $ 1499/€1260. 


     Press release:

    New ZEISS Super Wide-Angle Lens with Autofocus

    ZEISS Batis 2.8/18 Expands Full-Frame Lenses for Sony Cameras with E-Mount

    OBERKOCHEN/Germany, 14/04/2016.

    The ZEISS Batis 2.8/18 expands the Batis range of lenses with a super wide-angle lens. For the Sony1) á system with E-mount the new lens, which features a diagonal angular field of 99 degrees, is currently the shortest full-frame fixed focal length with autofocus. The new ZEISS Batis 2.8/18 with innovative OLED display to show focus distance and depth of field is also impressive thanks to its high image quality across the entire image field. The lens will be available from May 2016.

    “The ZEISS Batis 2.8/18 follows on from the highly successful first two focal lengths the ZEISS Batis 2/25 and the ZEISS Batis 1.8/85. In spite of the extremely wide angle, we have succeeded in adapting the image quality of the ZEISS Batis 2.8/18 perfectly to the two different lens types,” says Dr. Michael Pollmann, Product Manager of ZEISS Camera Lenses. “With the expansion of the ZEISS Batis range of lenses, we are offering creative and discerning photographers yet another professional tool,” says Pollmann. With the ZEISS Batis 2.8/18 customers can now enjoy the super wide-angle full-frame lens they’ve been waiting for. 

    A vast range of applications

    The new ZEISS Batis 2.8/18 is impressive on account of its high image quality across the entire image field. “By virtue of the large diagonal angular field of 99 degrees, this lens is ideal for capturing unique images in landscape, architectural and astro photography and for impressive interior shots of small spaces,” continues Pollmann.

    Features for discerning users

    The super wide-angle camera lens has 11 lens elements in ten groups and draws on the ZEISS Distagon optical design. Four of the lens elements are aspheric on both sides and seven are made from special types of glass. The Floating Elements design permits constantly high image performance in the focal plane – from the minimum object distance to infinity.

    The new ZEISS Batis 2.8/18 also features an innovative OLED display to show focus distance and depth of field depending on the camera sensor used. “The electronic display is easy to read even in low light,” explains Pollmann. The fast, quiet AF drive with linear motors keeps the subject sharply in focus. In addition to the autofocus, a handy, rubberized focus ring supports precise manual focusing – meaning the photographer has full creative freedom when it comes to image composition. ZEISS Batis lenses are also equipped with dust and weather seals, allowing them to be used in even the harshest weather conditions. All ZEISS Batis lenses support all the operating modes and functions of the current range of E-mount cameras.

    The origins of the name Batis

    Since 2013, new ZEISS lenses in one series have been given the same family name that conveys a common identity. These family names have been derived from the Latin names for birds. The name Batis is derived from a small bird that is found in the forests and scrub of Africa. These birds are characterized by great speed, excellent reflexes and boast a plumage rich in contrasts. Metaphorically speaking, this also applies to the ZEISS Batis lenses, whose fast autofocus enables photographers to capture stunning shots rich in contrasts.

    In addition to the ZEISS Batis range of lenses, there are two further ZEISS ranges for Sony E-mount cameras: the ZEISS Touit and the ZEISS Loxia. 

    Available from May 2016

    Orders are now being accepted for the ZEISS Batis 2.8/18. The lens will be available from May 2016. The suggested retail price is €1,260 or US$ 1,499 (excl VAT) 2).

    Zeiss Batis 2.8/18 specifications

    Principal specifications
    Lens type Prime lens
    Max Format size 35mm FF
    Image stabilisation No
    Lens mount Sony E (NEX)
    Aperture
    Aperture ring No
    Optics
    Elements 11
    Groups 10
    Special elements / coatings 4 aspherical, 7 'special glass' elements
    Focus
    Minimum focus 0.25 m (9.84)
    Maximum magnification 0.11×
    Autofocus Yes
    Motor type Linear Motor
    Full time manual Unknown
    Focus method Internal
    Distance scale Yes
    DoF scale Yes
    Physical
    Weight 330 g (0.73 lb)
    Diameter 78 mm (3.07)
    Length 80 mm (3.15)
    Sealing Yes
    Colour Black
    Filter thread 77.0 mm
    Hood supplied Yes
    Tripod collar No

    Articles: Digital Photography Review (dpreview.com)

  • Meyer-Optik launches Kickstarter campaign for 50mm ‘Soap Bubble Bokeh’ Trioplan lens

    $ (document).ready(function() { SampleGalleryV2({“containerId”:”embeddedSampleGallery_3223429076″,”galleryId”:”3223429076″,”isEmbeddedWidget”:true,”standalone”:false,”selectedImageIndex”:0,”startInCommentsView”:false,”isMobile”:false}) });

    German optical manufacturer Meyer-Optik Gorlitz has begun a Kickstarter campaign to raise funds to produce a modern 50mm F2.9 version of its Trioplan lens. The Trioplan design is known for its exaggerated circular bokeh which earned it the nickname ‘Soap Bubble Lens’ in its original version. The company has recently released a 100mm F2.8 Trioplan after a similar Kickstarter campaign that raised almost $ 360,000. On this occasion the company is hoping to reach an initial target of $ 50,000 – which is going swimmingly, as it met that goal within hours of the campaign going live.

    The new lens will be an updated version of the company’s original 50mm Trioplan but using glass from the Schott factory and with modern coatings and production standards. The new 50mm Trioplan also has a movable front element that allows much better close focusing and a maximum reproduction ratio of 1:4.

    The lens uses a basic Triplet design with three elements in three groups with a 12-bladed iris designed to help produce smooth and circular out-of-focus highlights at all apertures.

    Meyer Optik plans to produce the manual focus lens in mounts for:

    • Canon EF
    • Nikon F
    • Sony
    • FujiX
    • Micro Four Thirds
    • M42
    • Leica M (rangefinder not supported/focusing via live view)

    The expected price is $ 1299 though discounts can be had by backing the Kickstarter campaign. For more information visit the Meyer-Optik Gorlitz website.


    Press release:

    Today Is the Day.
    Support the Historic and Innovative Trioplan 50 Now!  

    We just launched our Kickstarter for the Trioplan f2.9/50, a special new lens that returns the tradition of a versatile soap bubble bokeh lens to the Meyer Optik line up. Order the art lens that you will always keep attached to your camera body now!  In addition to its regular focus element, the Trioplan f2.9/50 features a second front focus element that opens a whole new horizon of creativity to the world of photography.

    These elements and the quality of the glass used takes the legendary Trioplan 50mm soap bubble bokeh lens to a wider variety of creative photographic situations, including events, travel, street, nature, portraits, macro and so many more scenes.  

    The new Trioplan f2,9/50 is the one lens you can use for every situation. It is ultra compact and features an innovative front focusing element putting incredible amounts of creative opportunity into the palm of your hand. The movable front lens reduces the minimum focusing distance to less than 30 cm (under 12 inches) and raises the image ratio up to 1:4.

    This feature takes the Trioplan 50 into the Macro-Spheres.  Carrying a heavy set of lenses is something that most photographers choose to shed at some point, but they do not want to cut back on their creativity. We give you the best of both worlds in one lens – with only 200 g or about 7 ounces — it has never felt so light to be this prepared.

    The Trioplan 50 produces smaller, finer soap bubbles that turn into a small swirl effect in the corner of the image. Sharpness and contrast are also the highest yet of any Trioplan lens.  

    Surprisingly, for a 50 mm lens it is a perfect tool for portraiture especially including awesome landscapes in the image. Moreover the possibilities in street photography are awesome and the macro capabilities are stunning. This is more than just a nostalgic art lens. It is the most modern innovative lens you can imagine.

    The lens will be available with mounts for
    * Canon EF
    * Nikon F
    * Sony
    * FujiX
    * Micro Four Thirds
    * M42
    * Leica M (rangefinder not supported/focusing via live view)

    The most creative historic lens you have ever held in your hands is available to Kickstarter Backers starting at $ 449!

    The lens is estimated list price is $ 1299. Restore 100 Years of Tradition with the Most Versatile Soap Bubble Bokeh Lens.

    What better way to bring back the Trioplan lens than with the most versatile version possible, the f2.9/50 with its new innovative front variable element? Innovating upon the classic, modernizing the traditional, extending soap-bubble bokeh creativity to a new modern era. Help us bring back the Trioplan 50. Pledge your support now !  Click the Link to visit our Kickstarter campaign.

    Sincerely,
    Dr. Stefan Immes and the whole MOG team.

    Articles: Digital Photography Review (dpreview.com)

  • Major Leica SL firmware update brings better AF, new top shutter speed

    Leica has introduced firmware version 2.0 for its SL (Typ 601) camera that brings a major change to the camera’s focusing as well as a new top shutter speed of 1/16,000sec. The firmware takes the number of AF points available in single point mode from 49 to 529. Leica claims it has also made improvements to the autofocusing system’s speed, accuracy and tracking abilities.

    Exposure compensation gets a new access point with the update and can now be controlled via the top dial and the thumb wheel on the camera’s rear, while the longest exposure timed by the camera goes from 60 seconds to 30 minutes. The company says that it has created a new top shutter speed of 1/16,000sec by using the fast-reactions of the aperture in the system’s SL lenses.

    General image quality of JPEG files is also said to have been optimized, as has the focus peaking feature, and Raw files can now be magnified in review mode.

    For more information see the Leica firmware download page.


    Press release:

    Leica releases firmware update 2.0 for Leica SL mirrorless camera system

    New firmware enhances camera performance, handling and workflow

    Leica Camera has released a new firmware update for the mirrorless Leica SL camera system. Firmware version 2.0 can be downloaded by registered Leica SL owners from the Leica Owners’ Area (https://owners.leica-camera.com). Alternatively, customers can bring their camera to any Leica Store or Leica’s Customer Service department in the UK, for a complimentary update service.

    The numerous new features included in firmware update 2.0 have been designed to further improve the performance of the Leica SL and enable a faster photographic workflow. For example, the autofocus function has been revised and optimised. Already impressively fast in combination with SL-Lenses, it now offers even faster focusing, increased precision and optimised subject tracking. A further enhancement increases the number of AF focusing points available for the single point AF setting to 529.

    Also new in firmware 2.0 is direct exposure compensation controlled by the top dial and the click wheel on the back of the camera, in the three automatic exposure modes, P, T and A. The firmware update also extends the range of shutter speeds. Timed exposures of up to 30 minutes can now be captured automatically without additional support and, thanks to the fast, electronically-controlled aperture of the lenses, exposures can be made with the highest shutter speed of 1/16,000s.

    Additional improvements have been introduced with regard to JPG quality, white balance, the video menu, Auto ISO options and the focus peaking function. Pictures taken in DNG format can now be magnified for better image evaluation, and the camera is also now compatible with all Leica flash units. An update to the app to allow the use of the optimised functions, and three noise reduction settings, complete the improvements provided by this latest firmware update.

    More information can be found at uk.leica-camera.com.

    Articles: Digital Photography Review (dpreview.com)

  • NASA astronaut Jeff Williams showcases ISS photography equipment

    NASA astronaut and Expedition 47 flight engineer Jeff Williams posted a video recently detailing some of the equipment he uses to capture his incredible view of the planet from the International Space Station. So what kind of specialized gear does one use in space? Turns out the crew uses ‘regular photography equipment’ to capture still images and videos, with the Nikon D4 being one of several cameras used. A variety of lenses are used as well, including the massive 800mm lens (with 1.4x teleconverter, no less) shown in the video.

    In addition to the photography equipment, Williams introduces viewers to the Cupola, the ‘window on the world’ that gives astronauts a full view of Earth from a single vantage point. Other windows are used to capture handheld photos and videos as well, and Williams explains that some videos are animated panoramas made from stitched still images.

    You can see Williams’ photos on his Instagram and Facebook pages.

    Via: SLR Lounge

    Articles: Digital Photography Review (dpreview.com)

  • DxOMark Mobile report: HTC 10 rises to the top

    Announced earlier this week, the HTC 10 is the Taiwanese manufacturer’s latest flagship model and comes with a top-end camera specification. A 1/2.3-inch 12MP sensor is combined with a fast F1.8 aperture and optical image stabilization. The attention to camera spec detail has evidently served the device well, as it shoots to the top of DxOMark’s mobile rankings to share the first spot with the Samsung Galaxy S7 edge.

    Articles: Digital Photography Review (dpreview.com)

  • Rainbow Nests: What Wasps Build with Colored Construction Paper

    [ By WebUrbanist in Art & Sculpture & Craft. ]

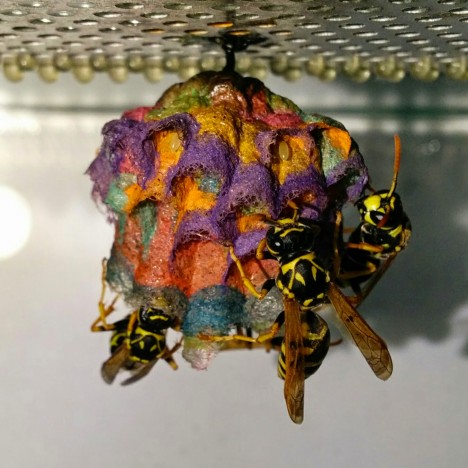
    colored wasp nests

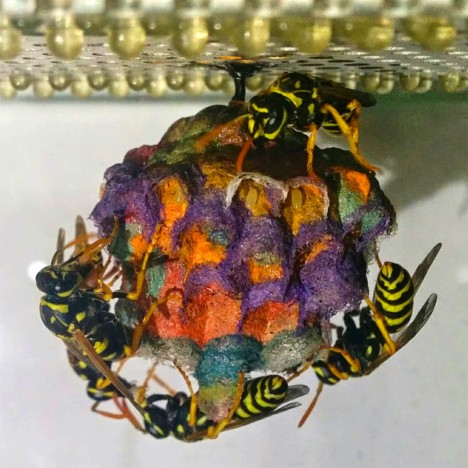
    Worker wasps build with the materials available in their environment, including different hues and shades of paper, which can lead to radical rainbow homes when properly apportioned.

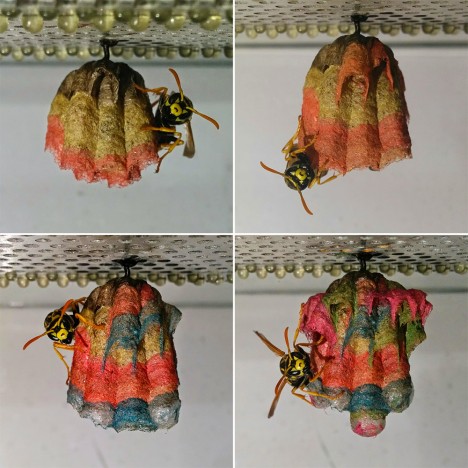
    colored paper creations

    Biology student Mattia Menchetti began giving a group of European paper wasps a variety of colored papers in a specific sequence in order to facilitate their creation of colorful nests.

    colored wast colony

    The effect is quite compelling, but wasps are not the only creatures that can take on colors from their surroundings and incorporate them – bees and ants have been known to as well.

    bee honey france mandm

    In one instance, an M&M production plant in France was found to be responsible for changing the color of honey created by a local bee hive. Apparently, the honey tasted fine, but of course, putting such oddly colorful honey on the market is a tough sell.

    colored ant drink

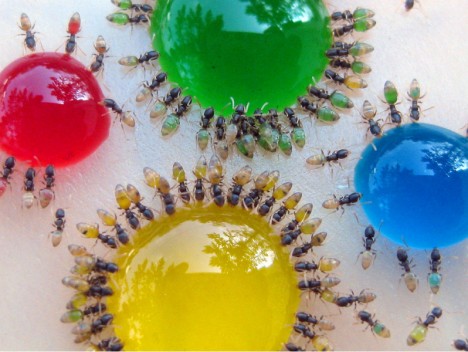
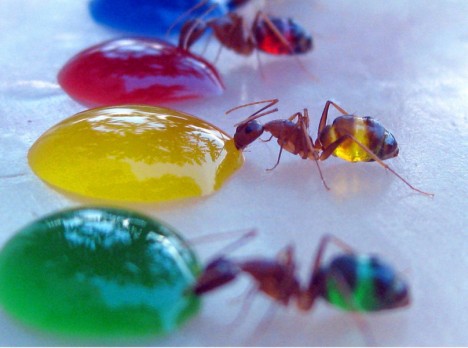
    In another instance, we can see the effects of giving colored sugary water to translucent ants, whose bodies then take on the spectrum of looks found in their drinks.

    colored ant colony

    In this case, a scientist named Mohamed Babu from Mysore, India shot a series of photos of the colony consuming this liquid sugar water (via Colossal).

    Share on Facebook


    [ By WebUrbanist in Art & Sculpture & Craft. ]

    [ WebUrbanist | Archives | Galleries | Privacy | TOS ]


    WebUrbanist

  • Beginner’s Guide to Buying Filters

    Use of neutral density and graduated neutral density filters

    Neutral density filters help you achieve extreme long exposures, while graduated neutral density filters help balance exposure between a bright sky and a dark foreground. Both were used in this image. The exposure time was three minutes.

    For most photographers, their first experience with a filter is when it is suggested they purchase a UV or Skylight filter to protect their lens. It’s usually much later that beginning photographers find out about the other filters available to them, and what they can be used for.

    Once you’ve decided to add a filter or filters to your camera bag, however, you’ll be faced with a myriad of choices regarding the various brands, materials, and types of filters that are available to you. Many times, the gut instinct is to purchase the cheapest filter that will do the job. The reality is, however, that there are many factors to consider when purchasing a filter, and buying the cheapest one on the rack that does what you want, it to is not usually a good idea. There is often a difference in the quality of the materials used, even when both filters appear to be made of the same things.

    In An Introduction to Filters for DSLRs, you’ll find a breakdown of the different kinds of filters, and their uses. Here, I’d like to try and demystify the differences between filters, and why similar looking filters might have drastically different price points.

    Screw-in versus drop-in filters

    Drop-in and screw-in filters

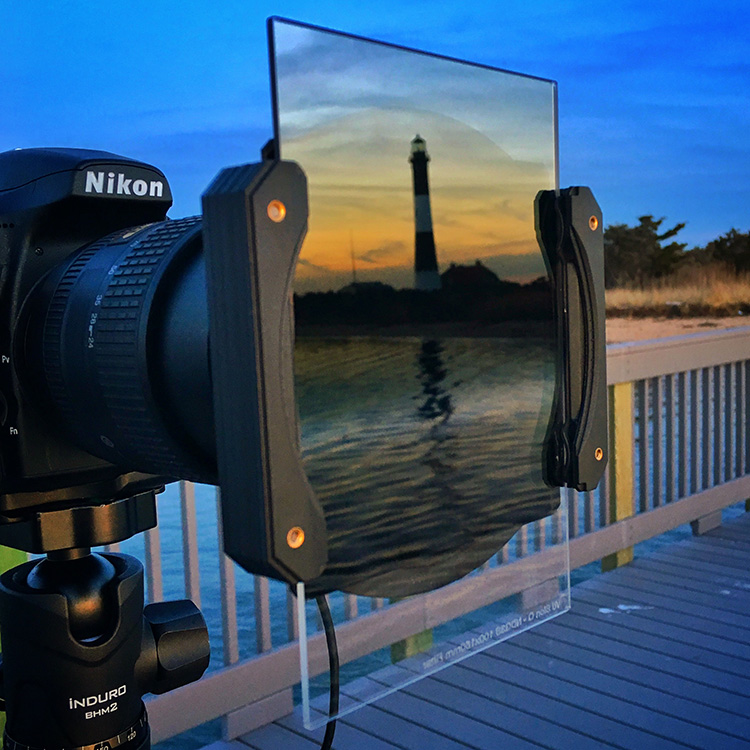
    First of all, there are two basic types of filters: screw-in and drop-in. The former mount directly onto the lens via the threads on the front, whereas the latter drop-in type are square or rectangular in shape, and require a filter holder and mounting ring that attaches to the front of the lens. Certain types of filters are available as both a screw-in and drop-in filter.

    Screw-in filters are constructed of glass with a metal ring. The quality of the glass can vary, even within the same brand, depending on whether you’re going with a high end filter or a value priced one. The metal of the ring can vary as well, as they can be made of brass or aluminum. Cheaper filters usually have an aluminum ring. It’s a soft metal that is more easily dented if dropped, or bent if put under pressure. This could cause the filter to jam when mounting it to your lens. The most popular screw-in filters tend to be polarizers, UV, and neutral density filters.

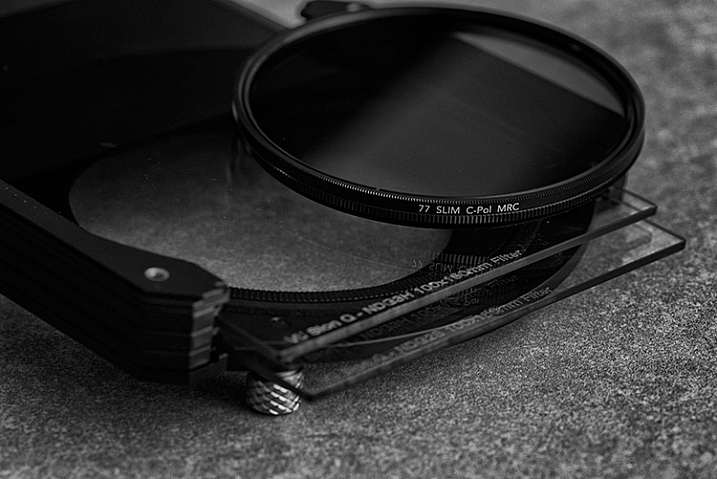
    The other type is what’s known as a drop-in filter. These are square or rectangular pieces of glass that are typically inserted in a holder that is mounted onto the lens. Often, the holder, or mounting ring, can also accommodate a screw-in polarizing filter, as well as two or three drop-in filters in front of that, allowing you to combine the effects of a polarizer, a neutral density filter, and/or a graduated neutral density filter.

    While graduated neutral density filters are available as both a screw-in or a drop-in, the drop-in style allows for more precise placement of the gradation, and thus allows for more creativity. Drop-in filters are generally part of system, or have compatibility with one. Some examples include: the Lee filter system, Vü Sion Q system, Formatt-HItech, and Cokin P and Cokin Z filter systems. You’ll want to ensure that the system you invest in has the filters you need available, and that it’s compatible with your size camera.

    Materials used

    You may notice when shopping for filters, that there is a wide range of prices, for the same types of filters. The primary difference in cost is related to the material used in the filter. Other materials used to make filters include optical resin, which is more of a plastic material, and polyester. Polyester filters are generally used for color correction or soft focus effects, while optical resin is used as a more cost effective option compared to glass, especially in the case of drop-in filters such as graduated neutral density filters.

    The more expensive filters often use a top quality glass, such German Schott Glass, which is generally color neutral and distortion free. Some filters by their nature need to be made from glass, such as polarizers. The differences in the material are related to the chemical makeup of the glass, thickness, and coatings used.  Where thickness is concerned, the thinner the filter the better, as thinner glass reduces any possible distortion.

    Use of a polarizing filters

    A polarizing filter not only helps make the sky bluer, but also controls reflections on shiny surfaces, such as buildings.

    In the case of polarizers: in cheaper filters, the polarizing material is sandwiched between glass; while the polarizing material is bonded directly to the glass in more expensive ones. This reduces the chance for air pockets, and other irregularities that could affect the image quality in a negative way. Again, the quality of glass can vary widely between a budget-priced filter, and top quality one.

    I have used both high quality glass filters, and optical resin ones. While the glass is more fragile if dropped, it tends to resist scratching more effectively than resin. However, optical resin can be considerably less costly than glass, for the same type of filter. For instance, a Formatt Hitech 3-stop soft edge graduated neutral density filter lists for about $ 80, while Vü Filters 3-stop Soft Edged Graduated Neutral Density Filter,  which is made of Ultra White German Schott glass, retails for $ 224. There are different grades to optical resin filters as well. This Lee 0.9 (3-stop) Soft ND Grad Filter, made from optical resin, lists at $ 146.

    While any of these filter will provide good results, with higher end lenses, you may notice a distinct difference between a higher quality and thus higher priced filter, and one that cost less.

    Coatings

    In the days of film, filters did not need to be coated in the way they do for the digital age. Film was a more forgiving medium, which didn’t pick up flare or reflections the way a digital sensor does. For this reason, multi-coatings have become incredibly important in filter manufacturing. Higher quality filters will use these coatings to reduce flare, and increase light transmission. An uncoated filter will suffer from a loss of light. Some filters have a single coating, which is better than nonr, but not as good as a multi-coated filter. For digital if you were to take the same shot three different times, with an uncoated, a single coated, and a multi-coated filter, the difference should easily be visible in the image. In addition to minimizing flare and increasing light transmission, coatings also help maintain good contrast and color reproduction. Filter manufacturers will also use coatings that help make the filter easier to clean, and more scratch resistant.

    Many photographers will debate whether or not filters are necessary, with those who say no doing so out of fear that the filter will degrade image quality. I use filters often, especially in my landscape work. There is no true digital substitute for a polarizing filter, and neutral density and graduated neutral density filters provide for effects not easily duplicated in post-processing. The key is to ensure you are using a quality filter, that is free from color shifts and distortion, and properly coated for digital. I’m not saying you have to spend top dollar on a filter, just understand what the differences are, so you can make an educated decision.

    Drop-in filter system

    A drop-in filter system allows use of square or rectangular filters. This is advantageous when using graduated ND filters, so you can adjust the placement of the gradation.

    So do you own and use filters? What buying tips do you have for newbies? Which are your go-to and favorite filters? Please share in the comments below.

    googletag.cmd.push(function() {
    tablet_slots.push( googletag.defineSlot( “/1005424/_dPSv4_tab-all-article-bottom_(300×250)”, [300, 250], “pb-ad-78623” ).addService( googletag.pubads() ) ); } );

    googletag.cmd.push(function() {
    mobile_slots.push( googletag.defineSlot( “/1005424/_dPSv4_mob-all-article-bottom_(300×250)”, [300, 250], “pb-ad-78158” ).addService( googletag.pubads() ) ); } );

    The post Beginner’s Guide to Buying Filters by Rick Berk appeared first on Digital Photography School.

    Digital Photography School

  • Flexible sheet camera concept could lead to bendable capture devices

    Researchers at Columbia University are working to produce a flexible sheet camera with stretchable lenses. The program aims to create very thin, high resolution cameras that can be wrapped around surfaces like car panels. Currently in concept form, the sheet lens array that such a camera might use has been developed to produce a seamless image on a flexible sensor when it is bent or wrapped around a physical object.

    The focus of the research is in creating flexible lenses that are capable of changing shape (and hence the effective focal length) as they are stretched and compressed so that the imaging sensor can record a detailed image whatever the field of view.

    With fixed lenses, gaps appear between the coverage of the lenses as the substrate is bent (left), but in the researcher’s flexible lens example (right) the lenses bend with the substrate and offer continuous coverage of the subject.

    In previous attempts at flexible lens arrays only the substrate has been flexible, and as the sheet of lenses has been bent gaps have appeared in the subject coverage as the angle between the lenses increased beyond their individual field of view. These gaps lead to aliasing artifacts in the final image that can’t be corrected in post-processing software. In this new concept the lenses are also flexible and they stretch as the sheet bends, altering their focal length and providing better sampling of the subject.

    So far the research has successfully produced a sheet of silicone with lenses molded on one side and a diffuser behind a sheet of apertures on the other. The apertures act as a low pass filter ensuring light from each molded lens reaches only one point on the viewing diffuser.

    Images created with the substrate bend by different degrees, showing how the field of view changes

    The system hasn’t actually been used with a sensor yet, but the study did use it to project images on to the diffuser screen to determine how effective it would be. Bending the sheet increased and decreased its field of view, or effective focal length, and the images were displayed without missing areas. All that is required now is a flexible sensor to go with it.

    An array of lenses was formed by pouring silicone into a metal mold

    The intention of the project is to work towards finding a way of making sheets of lenses to work with photosensitive materials that will record images when wrapped around real-world objects. The researchers want ultimately be able to produce these sheet cameras in roll format at a low cost so that the sheets can be cut to size to suit specific uses.

    The released information suggests a sheet camera could be wrapped around the panels of a car to give the driver a view from all angles. Alternatively sheet cameras could be used by consumers to take normal pictures but with the user bending the sheet to alter the field of view, or zoom effect, of the system.

    For more information see the project’s page on the University of Columbia website.


    Press release:

    Flexible Sheet Cameras With Elastic Optics

    In this project, we pursue a radically different approach to imaging. Rather than seeking to capture the world from a single point in space, our goal is to explore the idea of imaging using a thin, large, flexible sheet. If such cameras can be made at a low cost (ideally, like a roll of plastic sheet), they can be used to image the world in ways that would be difficult to achieve using one or more conventional cameras. In the most general sense, such an imaging system would enable any surface in the real world to capture visual information. While there is significant ongoing work on the development of flexible image sensors, our interest here is in the design of the optics needed to form images on such sensors.

    At first glance one might imagine that a simple lens array aligned with a flexible detector array would suffice – its field of view (FOV) can be varied by simply bending it. What is perhaps less apparent is the fact that, in a curved state, the FOV can end up being severely under-sampled. This under-sampling leads to a captured image that is not bandlimited. Thus, the Nyquist sampling criterion is violated and the image will suffer from aliasing artifacts when reconstructed. It is important to note that these artifacts cannot be removed via post-processing since scene information is lost during image formation.

    To address the above aliasing problem over an entire range of sheet curvatures, we propose the design of a deformable (elastic) lens array. We show that, if designed carefully, the deformable lenses of the array will change shape (and hence focal length) under bending forces in a way that mitigates aliasing. A remarkable feature of our design is that the lens array can achieve aliasing compensation passively, without the use of any per-pixel actuation or control. Our optics can be combined with a flexible sensor array to obtain a complete sheet camera. This project was supported by the Office of Naval Research (ONR).

    Articles: Digital Photography Review (dpreview.com)

  • World’s Tallest Tower: Dubai Superstructure by Santiago Calatrava

    [ By Steph in Architecture & Cities & Urbanism. ]

    worlds tallest tower 1

    Edging out the record-holding Burj Khalifa by just a hair, the world’s tallest tower is set to rise into the Dubai skies by 2020 as the crown jewel of a new waterfront development. Neofuturist starchitect Santiago Calatrava, known for dramatic sweeping structures with complex engineering, won an international competition to design the as-yet-unnamed superstructure offering panoramic vistas of the city in February, and new images and details have just been released.

    worlds tallest tower 4

    worlds tallest tower 2

    Taking design inspiration from the contours of a lily flower, the tower features Calatrava’s signature illuminated cables stretching from its length to the floor of the plaza. Floor after floor of luxury boutique hotel rooms lead higher and higher into the air, topped with the ‘pinnacle room’ observation space. Lushly planted decks envisioned as recreations of the Hanging Gardens of Babylon offer additional views.

    worlds tallest tower 3

    worlds tallest tower 5

    The shimmering spire is meant to be a landmark for Dubai Creek Harbour, a new district that developers hope will become a trendy new residential and leisure destination for the city, and a new tourist attraction completed in time for the Expo 2020. It’s a flashy addition to Dubai’s many flashy projects, from those that have actually been built to those that have been squashed and abandoned. Calatrava calls it “a symbol of an abiding belief in progress.’

    worlds tallest tower 6

    Since so many of Dubai’s announced projects never actually get off the ground, it remains to be seen whether this tower will end up snatching the crown from the 2,722-foot-tall Burj Khalifa, a mega-tall skyscraper completed in 2009 as part of another large-scale mixed-use development.

    Share on Facebook


    [ By Steph in Architecture & Cities & Urbanism. ]

    [ WebUrbanist | Archives | Galleries | Privacy | TOS ]


    WebUrbanist