Blog

  • 7 Ways Custom Photo Backdrops Can Promote Your Business

    How could you photograph a love story in Paris having less than $ 50 at your disposal? Or make local moms stand in line at your photo studio without running an expensive marketing campaign? That’s totally possible if you pay attention to one single element of your studio setup – background. Read on to find out how other photographers are successfully Continue Reading

    The post 7 Ways Custom Photo Backdrops Can Promote Your Business appeared first on Photodoto.


    Photodoto

  • HTC 10 is the first smartphone with OIS in front and rear cameras

    Taiwanese smartphone maker HTC has today launched its latest flagship model, the HTC 10. While the predecessors we tested were frankly disappointing in the camera department, looking at its specs it seems like the 10 has the potential to turn things around for HTC. Read more

    Articles: Digital Photography Review (dpreview.com)

  • Step by Step How to Use HDR Merge in Lightroom

    HDR merge in Lightroom
    There are lots of plug-ins that you can use with Lightroom to create High Dynamic Range (HDR) images. Photomatix and HDR Efex Pro are two of the best known, and MacPhun’s Aurora HDR (Mac only) is a new application that has received good reviews.

    But, if you have Lightroom 6 or CC, you can create HDR images right within Lightroom itself, without having to buy a plug-in. There are several advantages to using Lightroom for your HDR conversions:

    1. You save money. Most HDR plug-ins are not free, and are an additional cost for you.
    2. Lightroom’s HDR merge creates natural looking HDR images. Not everybody will see this as an advantage – but if you want to create garish, over-saturated images the aforementioned plug-ins will help.
    3. You don’t need a lot of bracketed images. Two seem to be enough (you can use more if you want, or if you have a really contrasty scene), one exposed at -2 stops, the other at +2 stops.
    4. The final HDR image is saved as a DNG file. Not only is this smaller than a TIFF file, but you can process it in Lightroom the same as you do with any other DNG or Raw file. The main difference is that the Exposure slider runs from -10 to + 10 stops, rather than the normal -4 to +4. There is also much more information in the file for Lightroom to work with, when you make adjustments with the Shadows and Highlights sliders (and local adjustment tools like the Graduated and Radial filters).
    5. You can take bracketed sequences hand-held, and Lightroom will align them automatically. Having said that, I’ve found the best results come from bracketed photos taken with a tripod mounted camera.
    6. There is less noise in shadow areas than you would expect from a regular, single photo.

    Lightroom HDR merge in action

    Let’s look at a couple of practical examples to see how it performs.

    Start in Grid View in the Library module, and select the images you want to merge. Alternatively, you can select the images in the Filmstrip in the Develop module. Then, go to Photo > Photo Merge > HDR. Or, right-click on one of the selected photos and select Photo Merge >HDR.
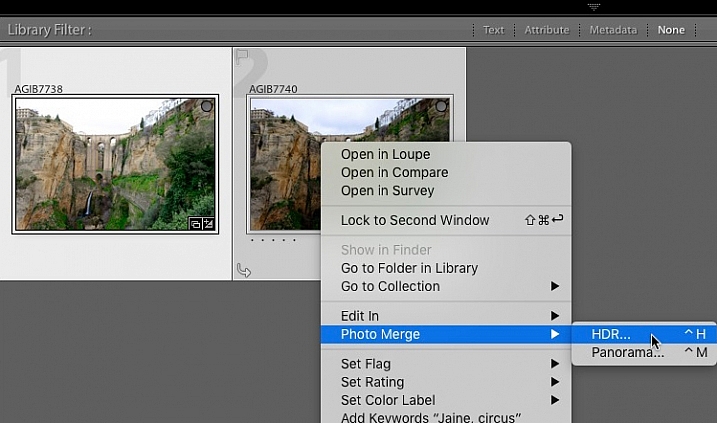
    HDR merge in Lightroom

    The HDR Merge Preview window opens, and Lightroom creates a preview of the HDR image. This may take some time, especially if you have selected several images. The Auto Align and Auto Tone boxes are ticked, and the Deghost Amount is set to None, by default. Lightroom remembers the last settings used, if you have changed them.

    Auto Align is useful if the camera moved between exposures (for example if you hand-held the camera) and Auto Tone performs a similar function to the Auto Tone settings in the Basic Panel of the Develop module.

    I find HDR merge works best with the Auto Align and Auto Tone boxes ticked (see below). If there is subject movement between frames you can set Deghost Amount to Low, Medium, or High (trial and error is the only way to see what works best, and is different for each set of images).
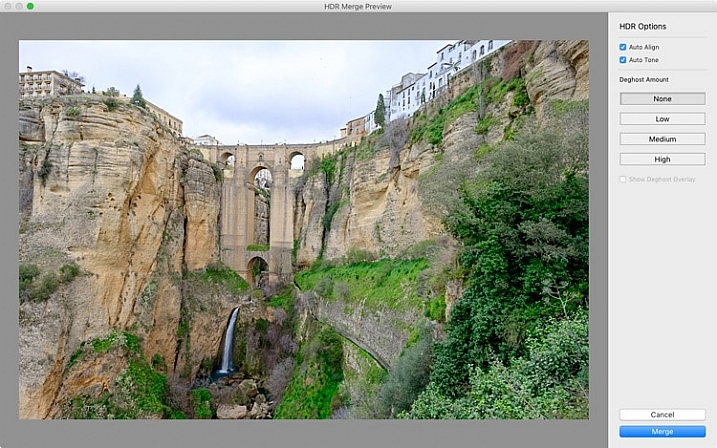
    HDR merge in Lightroom

    You may be surprised to learn that there are not many settings to adjust. This is deliberate, as the aim is to let Lightroom produce a natural looking HDR image, which you can then process in the Develop module to achieve the desired look.

    You can set Deghost Amount to Low, Medium, or High if you see any ghosting (double images) in the image. Ghosting takes the form of lines, white patches, or other artefacts caused by subject movement taking place between frames (such as trees blowing in the wind, clouds moving across the sky, or people walking through the scene).

    You can’t zoom in to a 100% in the preview mode, so you may only become aware of ghosting once you move on to the Develop module and zoom in to 1:1 magnification. You can simply go back and reprocess the images if you notice ghosting at that stage. Tick the Show Deghost Overlay box, to reveal the areas in which Lightroom has detected and attempted to clean up ghosting (it is shown in red).

    Click the Merge button when you’re done. Lightroom saves the merged image as a 32-bit DNG file, with the suffix -HDR appended to the file name, and takes you back to the module where you started. From there you can edit the image as normal in the Develop module.

    This is the result from my HDR merge. I used two photos, bracketed one stop apart. That’s not a lot, but it was a cloudy day and what I wanted was a photo that captured detail in both the landscape and the sky. On a sunny day you would use images that were bracketed further apart.
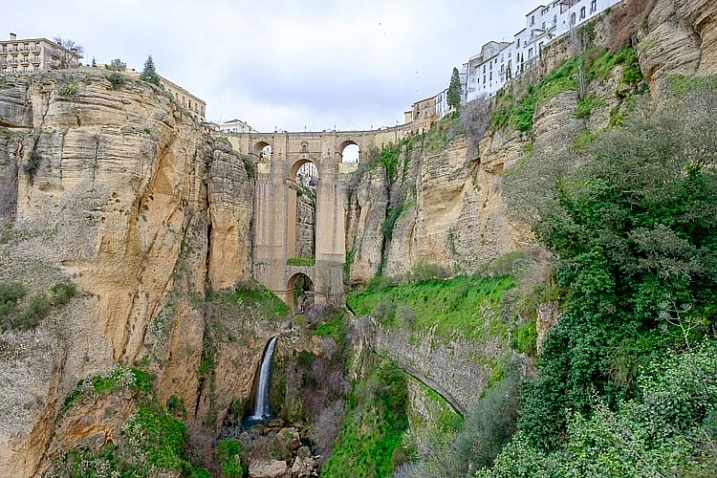
    HDR merge in Lightroom

    The result should be treated as a starting point in your processing – a new Raw file that you can edit in the Develop module to achieve the desired effect. In this case photo was too light, so I darkened it, made some tonal adjustments, and increased clarity. This is the result.
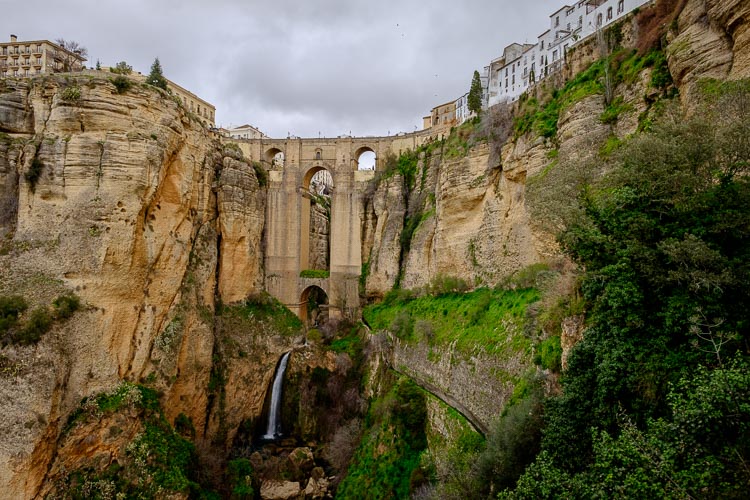
    HDR merge in Lightroom

    The screenshot below shows a comparison between the HDR image (right) and the same photo taken without any exposure compensation (left). As you can see, merging two exposures has allowed me to capture the details in the grey clouds. If, at this stage, you think the image has too much of an HDR feel, you can use the Basic Panel sliders, or local adjustments, to alter the tonal values. For example, you can increase Shadows or the Blacks setting to add contrast, so you don’t have the unnatural detail in every shadow effect that typifies overdone HDR.
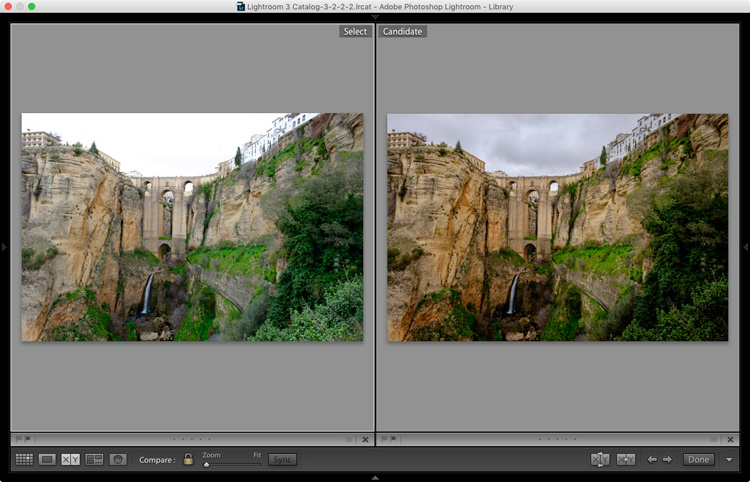
    HDR merge in Lightroom

    Here’s another example, this time with photos taken in the sun, and a much greater brightness range. These two photos were taken at +1 and -1 stops respectively.
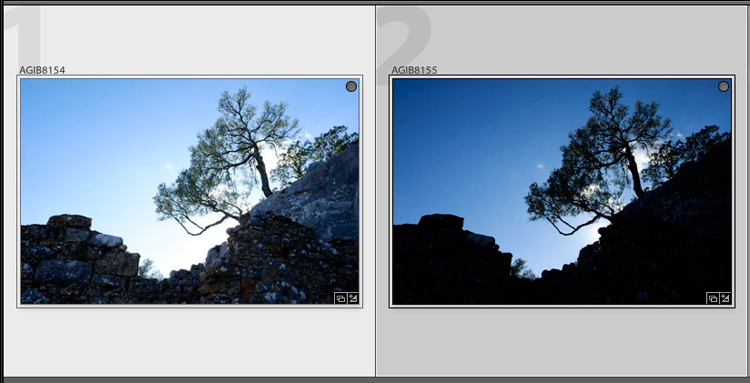
    HDR merge in Lightroom

    This is the result that Lightroom gave after the HDR merge process.
    HDR merge in Lightroom

    Below is how it looks after editing in the Develop module. The differences are subtle, I just made the image a little darker, and moved the Highlights slider to zero, to bring out as much detail in the clouds as possible.

    HDR merge in Lightroom

    High contrast example

    Here’s another example, this time taken with three photos with a total of seven stops difference in exposure. You probably don’t need to make the exposure differences that drastic, but it’s always interesting to try.
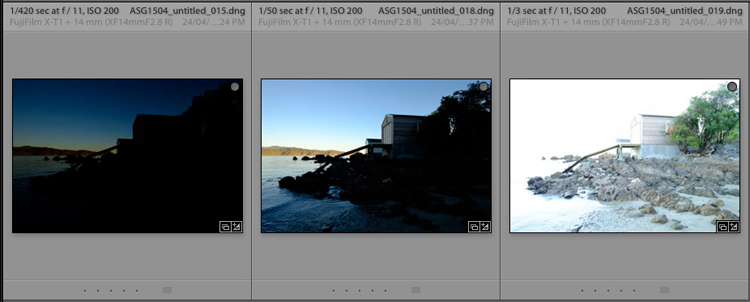
    HDR merge in Lightroom

    Here’s the result.

    HDR merge in Lightroom

    The water looks different in each version of the photo so I set Deghost to High. The deghosted area (shown in red below) covers all of the water – when I compare the three original images I can see that Lightroom has used the water from the first photo in the sequence, avoiding the ghosting that would be caused by merging three photos with a different level of water in each shot.
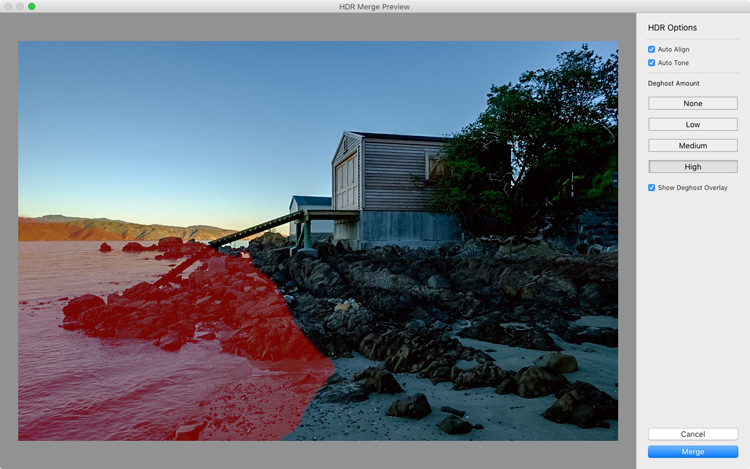
    HDR merge in Lightroom

    Can’t find your new HDR file?

    By the way, if you’re not sure where to find the newly created HDR file, set Sort to File Name in Grid View, and it will appear next to the first image in the sequence (also make sure you are in the folder of originals, not inside a collection).
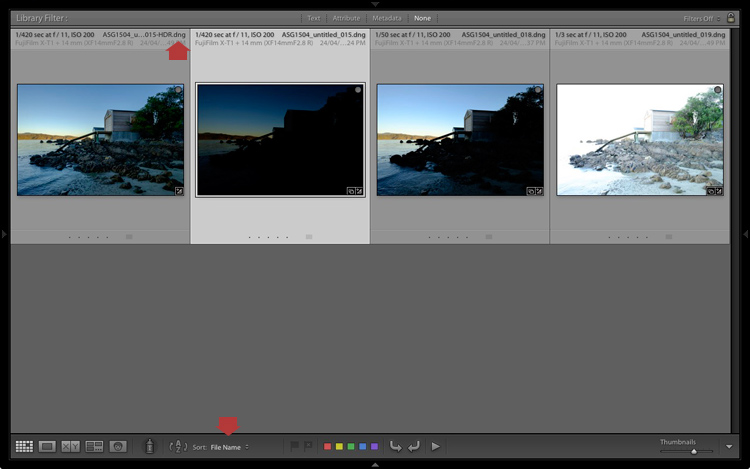
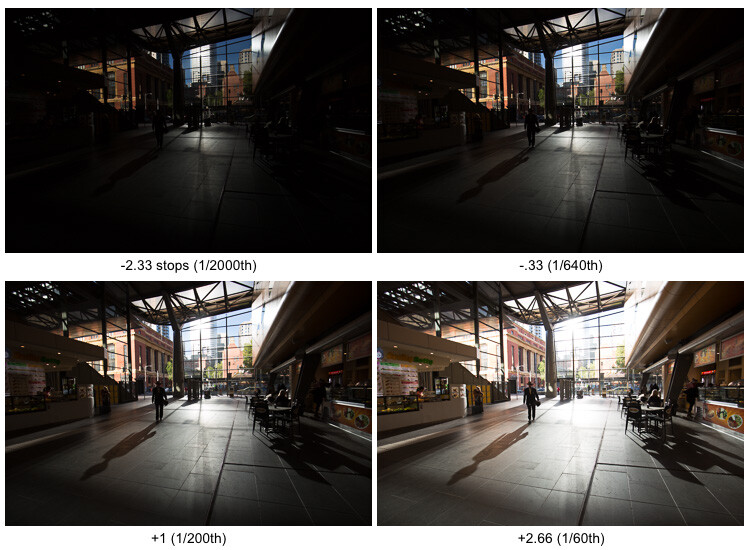
    HDR merge in Lightroom

    Here's an extreme contrast example

    Here’s an extreme contrast example – a tototal 5 stops bracketed to keep details in the buildings outside, and capture some inside.
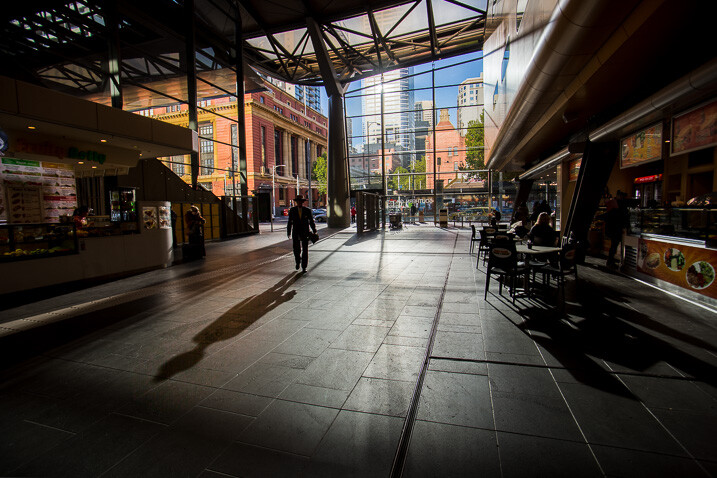
    The final HDR merged and edited version.

    The final HDR merged and edited version.

    Final notes

    You should be aware that it is best to carry out the HDR merge process with files that haven’t yet been edited in the Develop module, as Lightroom only retains some of the adjusted settings. These are taken from the most selected photo and applied to the HDR image. They are listed below (all other settings are returned to their default):

    • Presence sliders (Saturation, Vibrance and Clarity).
    • HSL / Color / B&W panel
    • Split toning panel
    • Detail panel
    • Lens Corrections (excluding Upright)

    Lightroom also requires access to the original photo files. It can’t create a HDR image from Smart Previews alone.

    Over to you

    Have you tried Lightroom’s HDR merge tool? If so, what did you think? Is it a worthwhile addition to Lightroom’s toolset or would you prefer to use a plug-in. Please let us know in the comments below.

    Mastering Lightroom

    If you’d like to learn more about Lightroom, then please check out my Mastering Lightroom series of ebooks.

    googletag.cmd.push(function() {
    tablet_slots.push( googletag.defineSlot( “/1005424/_dPSv4_tab-all-article-bottom_(300×250)”, [300, 250], “pb-ad-78623” ).addService( googletag.pubads() ) ); } );

    googletag.cmd.push(function() {
    mobile_slots.push( googletag.defineSlot( “/1005424/_dPSv4_mob-all-article-bottom_(300×250)”, [300, 250], “pb-ad-78158” ).addService( googletag.pubads() ) ); } );

    The post Step by Step How to Use HDR Merge in Lightroom by Andrew S. Gibson appeared first on Digital Photography School.


    Digital Photography School
  • Student takes 2016 Zeiss Photography Award top prize

    $ (document).ready(function() { SampleGalleryV2({“containerId”:”embeddedSampleGallery_3406645931″,”galleryId”:”3406645931″,”isEmbeddedWidget”:true,”standalone”:false,”selectedImageIndex”:0,”startInCommentsView”:false,”isMobile”:false}) });

    A 25-year-old photojournalism student beat a host of professionals to Zeiss’s €15,000 top prize in its first Zeiss Photography Awards. Tamina-Florentine Zuch’s project about train travel in India took her six weeks to shoot, and explores how the nation behaves on the world’s most extensive railway network. Zuch wins Zeiss lenses to the value of €15,000, and will receive her prize during the Sony World Photography Award ceremony in London this month.

    Zeiss says its inaugural competition, with the theme ‘Meaningful Places’, attracted 22,000 images from 3139 photographers across 116 countries and was successful enough that the company will repeat the exercise next year.

    Runners up in the competition included Melanie Hübner (Germany), Francisco Salgueiro (Portugal), Patricia Ackerman (Argentina), Helen Mountaniol (Ukraine), Jorge Lopez Munoz (Spain), Erez Beatus (Australia), Lasse Lecklin (Finland) and each of them will have their work shown at the Sony World Photography Awards exhibition.

    For more information on the awards, and to see the entries of all of those shortlisted, visit the Zeiss Photography Award website.


    Press release:

    ZEISS award for new perspectives

    The winner of the first-ever ZEISS Photography Award has been chosen. The prize goes to Tamina-Florentine Zuch from Hannover with her photo series documenting a train journey through India.

    “Meaningful Places” was the theme of the first-ever ZEISS Photography Award “Seeing Beyond,” which invited professional photographers and ambitious amateurs to showcase for the first time their talent to a renowned jury and to the broader public. The contest attracted 3,139 photographers from 116 countries – from Albania to Zimbabwe. A total of 22,000 images were submitted. “The results are superb – we were really excited by the breadth and quality of the applications,” praised Scott Gray, CEO of the World Photography Organisation, which organizes the ZEISS Photography Award.

    In Tamina-Florentine Zuch, 25, the ZEISS Photography Award has found a worthy winner. Zuch, a student of photojournalism and documentary photography in Hannover, traveled through India by train last year for a period of six weeks. Her pictures show children sleeping in hammocks in stuffy train carriages, men risking their lives as they ‘surf’ railway cars, and exotic landscapes as they pass by. Her “Indian Train Journey” brings this journey to life. Some of the images, which are very intimate, demonstrate Zuch’s photographic mastery at such a young age, her patience, and her sensitivity and tact in dealing with subjects from a completely different culture. “Tamina Zuch has an incredible eye for composition, light and a feel for the right moment. She combines these characteristics again and again in her pictures,” said Steve Bloom, one of the three jurors, enthusiastically. “‘Indian Train Journey’ is a very personal and poetic journey that is told by a fresh, young voice,” added Hans-Peter Junker, juror and editor-in-chief of the reportage magazine View.

    As the winner, Zuch will receive ZEISS lenses of her choice for a total value of EUR 15,000, as well as an offer to cooperate further with ZEISS. Seven other photographers – Melanie Hübner (Germany), Francisco Salgueiro (Portugal), Patricia Ackerman (Argentina), Helen Mountaniol (Ukraine), Jorge Lopez Munoz (Spain), Erez Beatus (Australia), Lasse Lecklin (Finland) – made it to the shortlist, which gives them the opportunity to present their work at the Sony World Photography Awards Exhibition at Somerset House in London from April 22 to May 8, 2016.

    In 2017 the ZEISS Photography Award will enter a new round, with a different theme. “We want to create a platform for photographers to show their art and their idea of creation to an interested public, and to pay tribute to that,” said Dr. Winfried Scherle, Executive Vice President Consumer Optics Business Group of Carl Zeiss AG. And Scott Gray praises: “The ZEISS Photography Award provides photographers with an exciting opportunity to expand their creative boundaries. We look forward to working with ZEISS on more contests in the coming years.”

    Articles: Digital Photography Review (dpreview.com)

  • Expanding the ISS: Inflatable Space Hotel Room Sent into Orbit

    [ By WebUrbanist in Boutique & Art Hotels & Travel. ]

    space hotel room

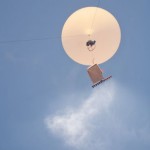
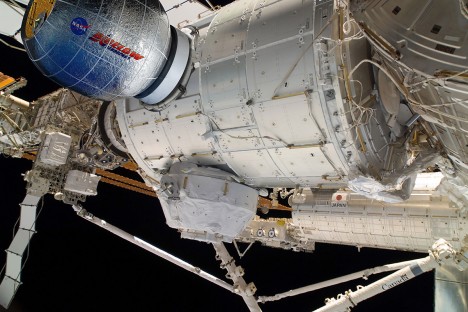
    A new space hotel room will be the first addition to the International Space Station in years, part of a test to see whether inflatable rooms can serve as more compact and space architecture on demand, unlike rigid frame space hotel concepts.

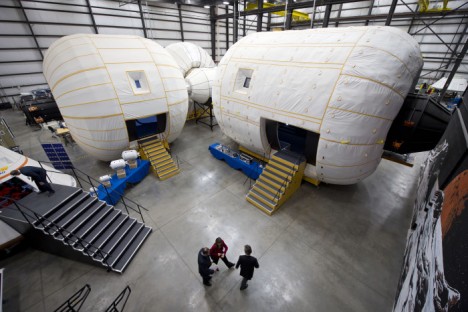
    The Bigelow Expandable Activity Module (BEAM) developed by an aerospace company in Las Vegas is comprised primarily of a light and flexible fabric that unfolds when inflated, creating a bubble-shaped room. The eventual plan: use this as a prototype for space tourism, creating housing when and where it is needed both attached to and beyond the ISS.

    NASA Deputy Administrator Lori Garver is given a tour of the Bigelow Aerospace facilities by the company's President Robert Bigelow on Friday, Feb. 4, 2011, in Las Vegas.  NASA has been discussing potential partnership opportunities with Bigelow for its inflatable habitat technologies as part of NASA's goal to develop innovative technologies to ensure that the U.S. remains competitive in future space endeavors. Photo Credit: (NASA/Bill Ingalls)

    Launched into orbit with help from SpaceX, the module is lighter and more compact, thus more cost- and fuel-efficient to ship, and, when not in use: it can also fold back down for storage. A testing period over the next few years will help researching astronauts evaluate its performance, including its ability to withstand micro-meteoroid impacts, radiation and temperature fluctuations.

    Share on Facebook


    [ By WebUrbanist in Boutique & Art Hotels & Travel. ]

    [ WebUrbanist | Archives | Galleries | Privacy | TOS ]


    WebUrbanist

  • Facebook’s open source Surround 360 captures 3D-360 video at up to 8K

    $ (document).ready(function() { SampleGalleryV2({“containerId”:”embeddedSampleGallery_7094366011″,”galleryId”:”7094366011″,”isEmbeddedWidget”:true,”standalone”:false,”selectedImageIndex”:0,”startInCommentsView”:false,”isMobile”:false}) });

    Facebook has introduced the Surround 360, which captures 3D, 360 degree video using a total of 17 cameras and can output resolutions of up to 8K per eye. Unusually, Facebook will be making both the camera and processing software open source to give developers the opportunity to improve both.

    The Surround 360 itself features 17 synchronized cameras: 14 horizontal, a fisheye on top and two more on the bottom. Each camera has a global shutter (which eliminates rolling shutter) and has been designed for long periods of operation without overheating. Raw Bayer data is captured, which is later processed in the stitching software. All 17 cameras are bolted onto an aluminum chassis so everything stays in place.

    Facebook says it has used Point Grey industrial cameras in the Surround 360, which hints at the use of Sony 2nd generation Pregius CMOS sensors with global shutters. The lenses used are 7mm F2.4 lenses designed for up to 1″-type sensors, which could even mean the use of the latest Sony IMX253 or IMX255 chips. If that’s the case, then these lenses are roughly equivalent to 19mm.

    With incredible amounts of data coming from all of those cameras Facebook uses a Linux-based PC with a RAID 5 SSD array that shares the writing out across eight drives simultaneously. The company has made controlling the camera rig easy, via a web-based interface that allows users to adjust shutter speed, exposure, frame rate and gain.

    The stitching software uses the concept of optical flow to resolve disparities between what pairs of cameras can see. The company says this method is ‘mathematically trickier’ than traditional systems, but yields better results. The end results are 3D/360 videos which can be output at 4K, 6K or 8K per eye. Videos can be viewed on Oculus Rift and Gear VR headsets using Facebook’s Dynamic Streaming codec. Videos can also be output and shared on Facebook and other websites.

    A big part of the Surround 360’s story is that Facebook is opening up both the camera blueprints and processing software to developers, stating that ‘we know there are ideas we haven’t explored’ and ‘we know from experience that a broader community can move things forward faster than we can.’ The company says that the design and code will be on GitHub this summer.

    More technical information can be found on Facebook’s developer site, while consumer-friendly info about the camera can be found here.

    Articles: Digital Photography Review (dpreview.com)

  • Machine 3D-Paints ‘New’ Rembrandt After Studying the Master

    [ By WebUrbanist in Art & Drawing & Digital. ]

    remnant design diagram

    As part of The Next Rembrandt, a multi-year collaborative project, a team of engineers trained a computer not only to understand the works of this famous Dutch master but also to expand his portfolio. Ultimately, the machine created a portrait that is at once brand new and yet also looks (and feels) like a lost original work of Rembrandt Harmenszoon van Rijn.

    next rembrandt studied painting

    An incredible combination of both machine learning and 3D printing, the project involved digitally tagging data in scanned versions of the artist’s various known pieces. Resulting patterns were subsequently explored by computers, including: brush strokes, approaches to organic detail and uncanny ability to depict human emotions.

    next rembrandt new original lost work

    The result is an algorithmic creation that mirrors the style of the master and depicts a Caucasian male in his thirties, with facial hair, black clothes, a white collar and a hat, facing to one side.

    lost remnant detail view

    Humans input those general parameters, but did not have a say in the look or feel of the final print. A 3D texture was added to the work based on the height and depth of paint applied to Rembrandt’s actual works.

    next rembrandt

    The two-year project was a collaboration between Microsoft, financial firm ING, Delft University of Technology and two Dutch art museums – Mauritshuis and Rembrandthuis. A public exhibition of the portrait is planned and details of the display will be released at a later date.

    From the project creators: “It’s been almost four centuries since the world lost the talent of one its most influential classical painters, Rembrandt van Rijn. To bring him back, we distilled the artistic DNA from his work and used it to create The Next Rembrandt. We examined the entire collection of Rembrandt’s work, studying the contents of his paintings pixel by pixel. To get this data, we analyzed a broad range of materials like high resolution 3D scans and digital files, which were upscaled by deep learning algorithms to maximize resolution and quality. This extensive database was then used as the foundation for creating The Next Rembrandt.”

    Share on Facebook


    [ By WebUrbanist in Art & Drawing & Digital. ]

    [ WebUrbanist | Archives | Galleries | Privacy | TOS ]


    WebUrbanist

  • Swirly bokeh: Lensbaby announces Twist 60 lens

    Lensbaby has announced the Twist 60, a new lens for creative photography. From what we can see, the Twist 60 is all about bokeh. The 12 aperture blades and a maximum aperture of F2.5 should give a soft, well-rounded bokeh with good separation of the subject from the background, but the real ‘twist’ is just that – the twist. Specifically the twisty, swirly bokeh. Lensbaby claims the lens is modeled after Joseph Petzval’s Classic 19th-century design, giving photographers the ability to introduce and control that distinctive circular bokeh that is unique to Petzval-type lenses.  

    We are interested to see how this lens performs, as it is almost half the price of similar lenses recently announced and it is available (via the Lensbaby Optic Swap System) in a wide variety of mounts.

    $ (document).ready(function() { SampleGalleryV2({“containerId”:”embeddedSampleGallery_1483721425″,”galleryId”:”1483721425″,”isEmbeddedWidget”:true,”standalone”:false,”selectedImageIndex”:0,”startInCommentsView”:false,”isMobile”:false}) });

    The Twist 60 is available for pre-order starting April 12, 2016 and is currently offered in Canon, Nikon, and Sony E mounts. It is priced at $ 279.95/£196 for the full lens or $ 179.95/£126 for the Twist 60 Optic (for use with other Lensbaby Optic Swap System lenses).


    Press release:

    Lensbaby’s New Twist 60 Lens Exudes Pure Magic of Vintage Photography

    Company’s love of old lenses inspires new creativity with classic image elements optimized for full frame photographers
     
    Portland, OR – April 12th, 2016 – Lensbaby, makers of award-winning creative effects lenses, optics and accessories, today announced the availability of the Twist 60 lens. Twist 60 helps creative photographers find their visual voice by seeing the world differently.
     
    This metal-bodied 60mm f/2.5 lens with gold anodized accents creates powerful portraits, spotlighting subjects by freeing them from their background and surrounding them with swirly blur and enhanced vignette. The brighter the aperture, the greater the swirl and the greater the vignette.
     
    “Twist 60 embodies our love of old lenses and their unique ways of helping photographers discover creative possibilities,” said Craig Strong, Lensbaby Co-Founder & Chief Creative Officer. “True to an 1840 design by Joseph Petzval, this lens reveals striking separation between subjects and their background, a quality that modern lens designs lack.”
     
    Twist 60 Lens specs:
    ? 12 blade f/2.5-22 aperture
    ? 60mm focal length
    ? Twisty, swirly blur
    ? Recommended for use on full frame cameras
    ? Available in Canon EF, Nikon F, and Sony E mounts
    ? 4 elements in 3 groups
    ? Filter threads: 46mm
    ? Black anodized body with gold anodized aperture ring
    ? Minimum focus distance – 18”
     
    Availability
    Twist 60 lens retails for $ 279.95 and is available via pre-order beginning April 12, 2016 (shipping May 5th, 2016). Twist 60 Optic will also be sold separately for use with other Lensbaby Optic Swap System-compatible lenses. It retails for $ 179.95. For best results, when using it in a tilting Lensbaby such as the Composer Pro, photographers should shoot with Twist 60 pointed straight ahead. Lensbaby products are available at lensbaby.com, B&H, Adorama, and from select specialty photo stores worldwide.
     
    About Lensbaby
    For over a decade, photographers have relied on Portland, Oregon based Lensbaby to help them break free of routine, tinker, and open themselves up to unexpected results – dancing, playing and delighting in what’s possible with a creative lens and their imagination.

    Lensbaby makes award-winning creative effects lenses, optics and accessories that follow this philosophy, including the Velvet 56, a versatile portrait and macro lens; their unique Optic Swap System, which lets photographers swap their optic and tilt their lens for limitless effects; and mobile lenses that transform everyday smartphone photography. Lensbaby products are sold and distributed worldwide. For more information, visit www.lensbaby.com

    Lensbaby Twist 60 specifications

    Articles: Digital Photography Review (dpreview.com)

  • Review: Lastolite 6×4 Foot Panelite Collapsible Reflector with Translucent Diffuser

    review-lastolite-panelite-diffuser-0803

    How many times have you heard that there are certain times of day you shouldn’t photograph people? For example, at midday in harsh sunlight. The logic is pretty sound. Direct, hard light can lead to unflattering shadows and ultra high contrast, which can result in unsatisfactory portraiture. However, if you follow this advice blindly, and only wait for the golden hours each day, you’re missing out on an enormous amount of time that could be spent photographing people.

    There are several options to combat this problem, but one of the easiest and most effective, is a piece of gear called a diffusion panel.

    What is a diffusion panel?

    At its most basic, a diffusion panel is a piece of translucent material that allows harsh direct light to pass through it, so it effectively becomes a light source of its own. This softens the light and can allow you to obtain great, flattering, natural light portraits, in unfavorable conditions.

    review-lastolite-panelite-diffuser-2745

    There are many types of diffusion panels available ranging from very small, handheld ones, to giant ones that are many meters across and require dedicated stands.

    When size matters

    Small diffusion panels are useful, and if you happen to have a 5-in-1 reflector, you probably already have one. These are indispensable for still-life and tabletop work; however, in terms of portraiture, their small size often limits them to closely cropped images and headshots.

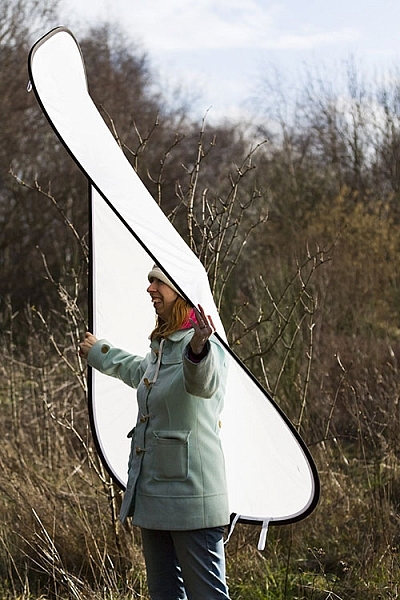
    This is where the Lastolite Panelite Reflector comes in. At 6×4 feet (1.8m x 1.2m) it’s large enough to cover enough area for full length portraits. At $ 128 retail, its price also means that it isn’t way out of reach for the serious portrait photographer.

    Putting it through its paces

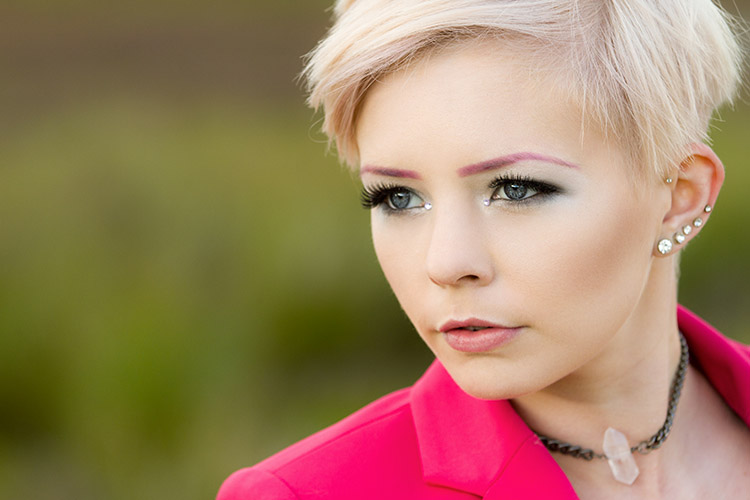
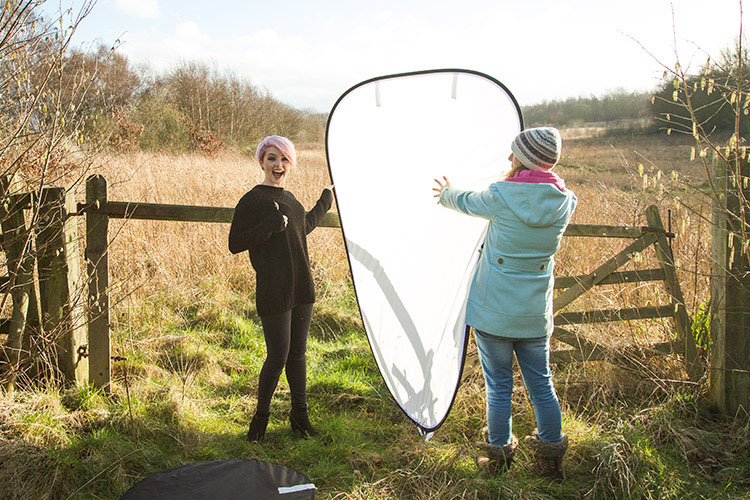
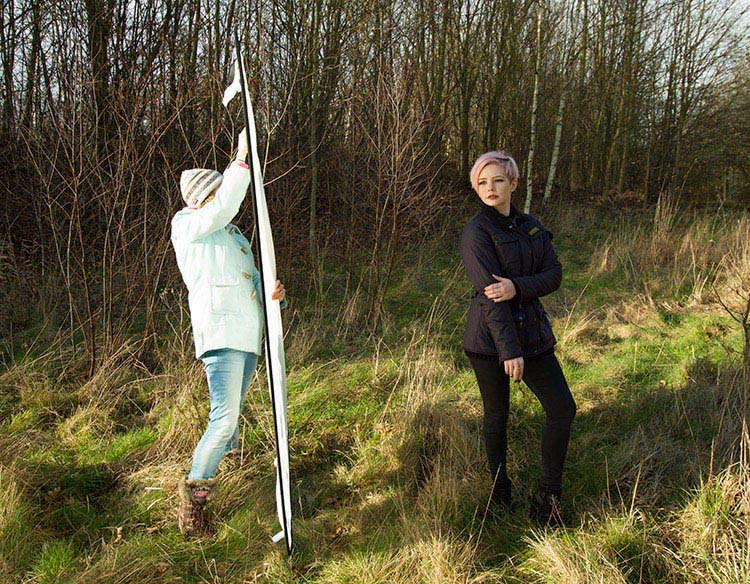
    To test it out, I took the Lastolite Panelite Reflector out on location, at mid-afternoon on clear days. The sun was low at this point, but still very harsh, and the high contrast would have been difficult, if not impossible, to manage without a modifier.

    review-lastolite-panelite-diffuser-0385

    By Diffusing the sun back lighting the scene, you can even out the exposure of the highlights and shadows which is far more pleasing for portraits.

    review-lastolite-panelite-diffuser-0569

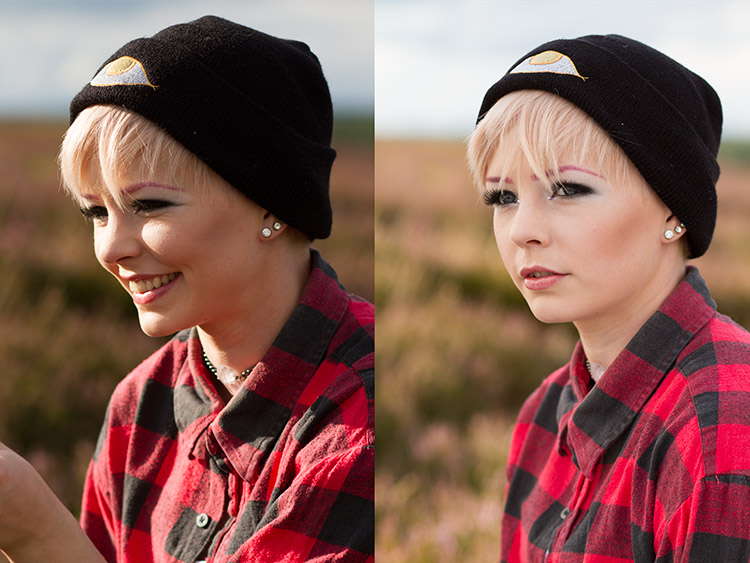
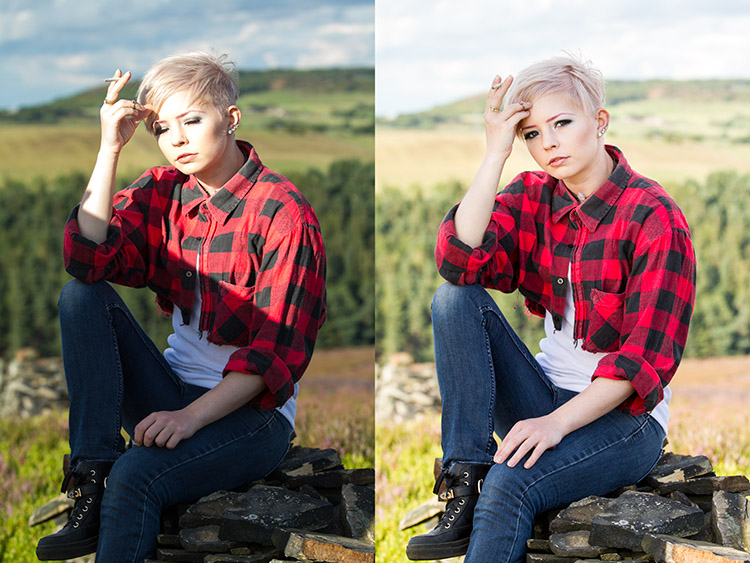
    On the left, the bottom half of the image is shaded by the diffuser. You can see the two stop difference in exposure. In the image on the right, you can see how the hard directional sunlight has been softened (note that more exposure was needed overall so the background was also brightened in the process).

    review-lastolite-panelite-diffuser-2621

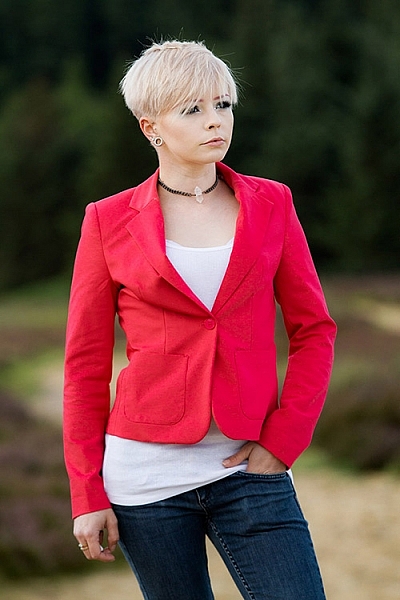
    Apart from the unflattering shadows in the left hand image, the direct sun made it painful for the model to look into the camera. With the diffusion panel (right image), her eyes were shielded from the harsh light.

    review-lastolite-panelite-diffuser-2734

    In the left hand image, the extreme contrast from the back lighting made exposing for the rest of the image a nightmare. By diffusing the back light, the exposure was evened out, but still allowed for a pleasing rim light (image above right).

    Let’s look at some of the pros and cons of using this light panel.

    PRO: Two stop diffusion

    review-lastolite-panelite-diffuser-2737

    By reducing contrast, the loss of two stops of light can be a huge help in some scenarios.

    When working with the extremes of bright sunlight, it can be difficult to get away from small apertures like f/16. This is a problem because these settings won’t allow for a shallow depth of field. By reducing the light on your subject by two stops with the diffuser, that hypothetical aperture of f/16 becomes f/8 and makes background blur much easier to control.

    PRO: Size

    review-lastolite-panelite-diffuser-2656

    This thing is huge. It’s not the biggest on the market, but it’s big enough for full length portraits, which is a major plus. I did not yet have the opportunity to test it on groups of people, but I believe it should work well for up to four people, with careful control.

    review-lastolite-panelite-diffuser-0734

    The ability to diffuse a large enough area for 3/4 and full length portraits is a big plus.

    PRO: Portable

    Like a lot of Lastolite’s product, the diffusion panel is collapsible, and folds up to a tiny fraction of its size. Packed in its case, I would compare it to the surface of a medium sized cafe table. Combined with its light weight, it’s easy enough to throw in the back of a car, and carry along on location with you, without strain.

    PRO: Price

    At $ 128, this is not a budget tool. However, for photographers serious about location based portraiture, the Lastolite Panelite Reflector comes in cheaper than lighting modifiers of moderate quality and unlike those, this doesn’t require lights to go with it.

    CON: Extra hands

    The Lastolite Panelite Reflector is large, and you will find it very difficult to manage without an assistant to hold it for you. If it needs to be held much higher than ground level, you may well need two people. It may be possible to rig it to some stands, but this leads into the next point.

    CON: Be wary of wind

    review-lastolite-panelite-diffuser-2695

    A small gust of wind sparked a several minute struggle to regain control over the panel.

    The only real problem I came across while testing the Lastolite Panelite Reflector was that the slightest gust of wind will send it flying, and folding in on itself. Whoever is holding it for you needs to have a sure grip on it, and even then the whole process is still irksome.

    If you’re into slapstick, this can be hilarious to watch, but any time spent trying to get the diffusion panel to play along, is time not spent taking photographs.

    CON: Dirt

    Like white reflectors, softboxes and white umbrellas, the Lastolite Panelite Reflector is really, really white and will be hard to clean when it inevitably gets dirty.

    Overall thoughts

    review-lastolite-panelite-diffuser-0640

    If nothing else, when used head on, the Panelite Reflector creates some interesting catch-lights.

    To sum it up easily, the Lastolite Panelite Reflector does exactly what it says on the tin. It’s portable, creates a beautiful diffused light, and is relatively affordable. Although, it can prove tricky to handle under some conditions, I found the results to be well worth the extra logistics and effort, and I am looking forward to a long an extended relationship with it in my photographic arsenal.

    googletag.cmd.push(function() {
    tablet_slots.push( googletag.defineSlot( “/1005424/_dPSv4_tab-all-article-bottom_(300×250)”, [300, 250], “pb-ad-78623” ).addService( googletag.pubads() ) ); } );

    googletag.cmd.push(function() {
    mobile_slots.push( googletag.defineSlot( “/1005424/_dPSv4_mob-all-article-bottom_(300×250)”, [300, 250], “pb-ad-78158” ).addService( googletag.pubads() ) ); } );

    The post Review: Lastolite 6×4 Foot Panelite Collapsible Reflector with Translucent Diffuser by John McIntire appeared first on Digital Photography School.


    Digital Photography School
  • Impossible Photography: 15 Reality-Bending Images Defy Logic

    [ By Steph in Art & Photography & Video. ]

    erik johansson 1

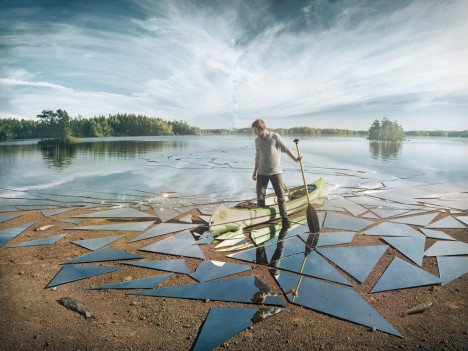
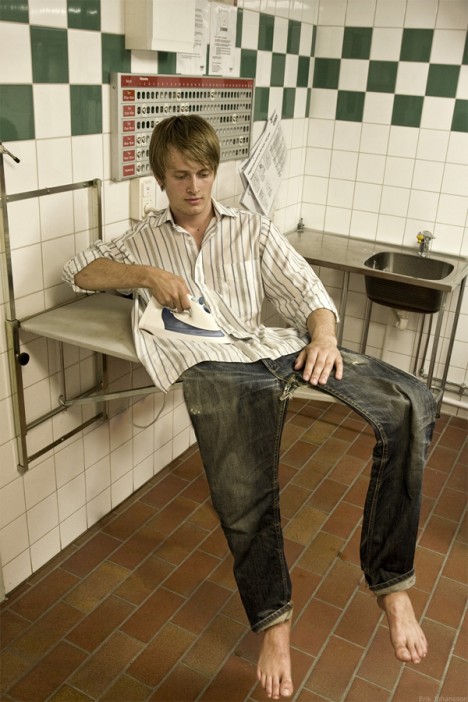
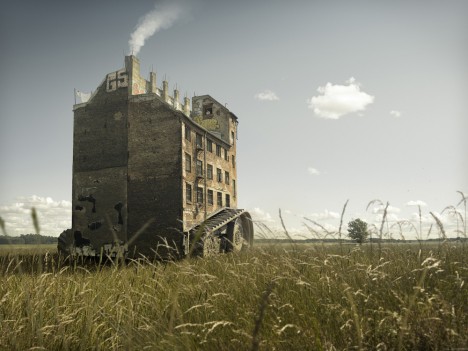
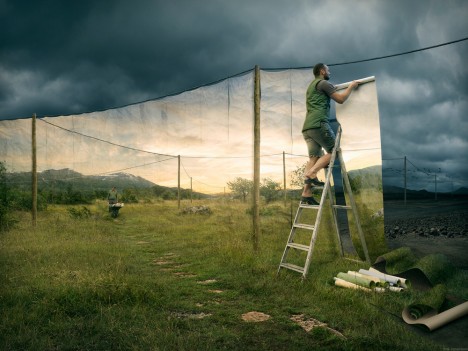
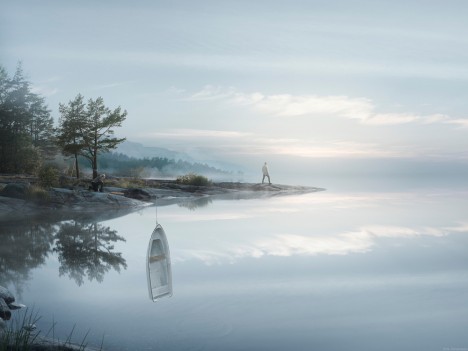
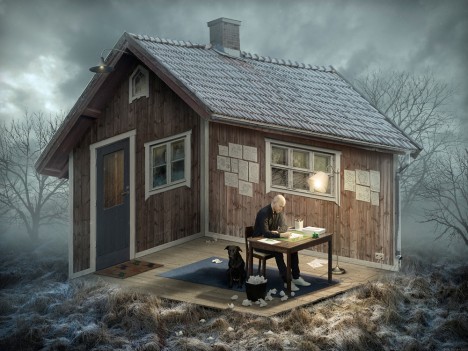
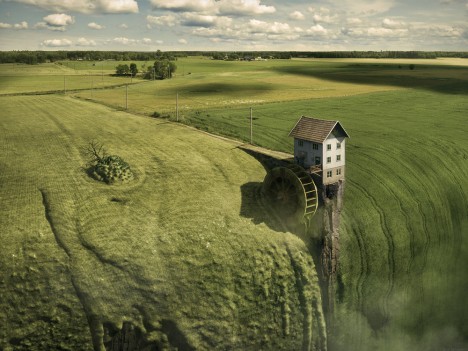
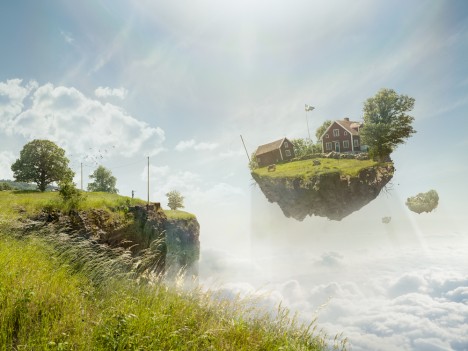
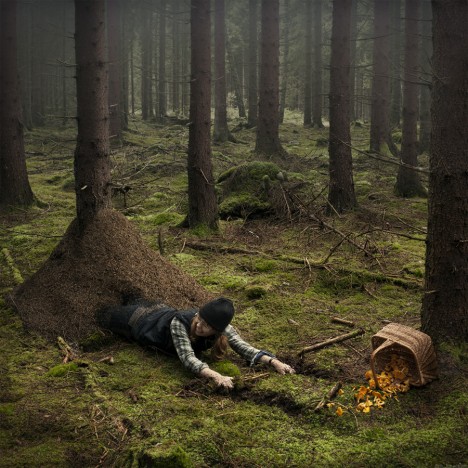
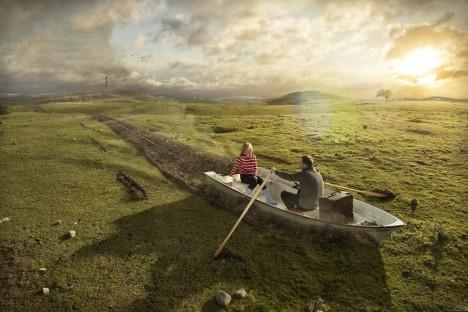
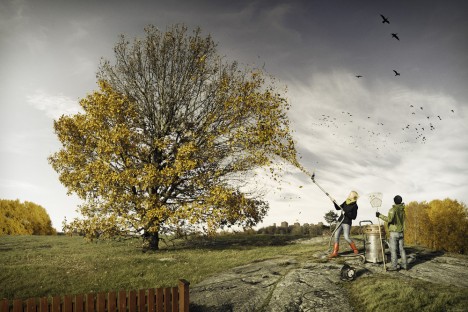
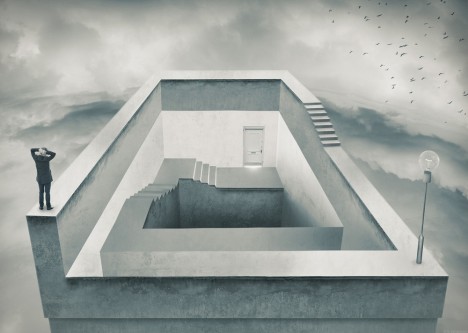
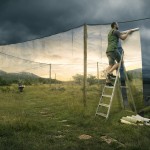
    A floor is a ceiling, a lake is made of shattered glass, carpets of grass cascade over the edge of the world and buildings sprout wheels and wander away in the fantastically surreal world of Erik Johansson. The photographer has spent much of the last decade refining his reality-bending image manipulation techniques, combining dozens of real photos to create effects that are often hyperrealistic yet physically impossible. As unlikely as it may seem, Johansson uses no CGI, stock photos or digital illustrations in his work – each image is a complex collage of his own photographs, captured on his Hasselblad HD5-40 camera.
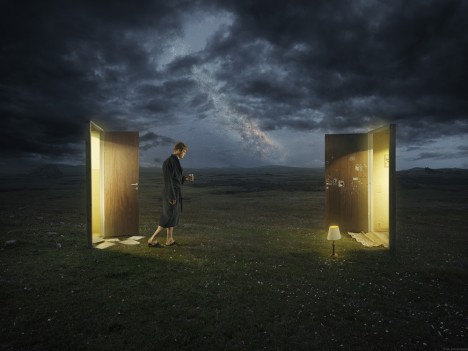
    erik johansson 12

    erik johansson 13

    erik johansson 14

    On his YouTube channel, the artist offers behind-the-scenes videos for many of his works so we can see just how each one is assembled. For his newest piece, ‘Impact,’ Johansson carefully cut four massive mirrors into fragments, arranged them in a field and photographed his model standing among them in a kayak. Photos from this shoot are ultimately blended with images of a lake and additional studio photos of cracked mirror shards.

    erik johansson 2

    erik johansson 3

    erik johansson 4

    erik johansson 5

    erik johansson 6

    Depicting just about every step the artist takes during the process, the videos are just as impressive as the final images and make it clear that the arduous process requires many hours of retouching. Johansson even leaves in the parts where he experiments with various effects and ideas that don’t make it to the final version.

    erik johansson 7

    erik johansson 8

    erik johansson 9

    erik johansson 10

    As he explains on his website, Johansson is interested in capturing ideas rather than moments, but with the goal of making each one look as realistic as possible, saying “The only thing that limits us is our imagination.”

    Share on Facebook


    [ By Steph in Art & Photography & Video. ]

    [ WebUrbanist | Archives | Galleries | Privacy | TOS ]


    WebUrbanist