Blog

  • For Everyman and Everywoman: Peak Design Everyday Messenger Bag Review

    Peak Design Everyday Messenger
    $ 249.95 | peakdesign.com | Buy Now

    Peak Design isn’t a company that’s satisfied with the status quo. The San Francisco-based accessory design firm aims to produce highly functional and stylish photo gear, designing each detail from the ground up. The company has run a number of successful Kickstarter campaigns to help bring their designs into production, and that’s exactly how the Peak Design Everyday Messenger bag came to be. With a focus on style, substance and pockets for everything, the bag has been created specifically for photographers but can be used as a messenger bag by anyone with gear to haul.

    The company was born out of the founder’s frustrations while traveling the world in 2010 with his camera gear. Peak Design’s ‘re-think the basics’ approach carries through in the Everyday Messenger, in ways that are immediately obvious – and some that aren’t. From its angular appearance to a proprietary closure system, no detail is too big or small for the company’s designers to re-think and re-tool. 

    Inside and out, it’s obvious Peak Design has put effort into producing a bag that aims to get photographers of all levels through their day, whether they’re on a shoot or on the way to work. Take a look at what sets the Everyday Messenger apart, and whether or not its fresh approach indeed translates to a better bag for everyone.

    Specifications

    • Empty bag weight: 2.5lbs
    • Average Outer dimensions: 30 x 43 x 18 cm / 12 x 17 x 7 in
    • Colors Available: Charcoal and Heritage Tan

    In Use

    The Everyday Messenger bag is comfortable to carry. I carried this bag while traveling on a couple of weekend trips, as well as around town for work and for shoots. I found it easy to use and comfortable to wear for the most part. A reversible, seatbelt style adjustable strap distributes the weight whether you decide to wear it as a traditional messenger bag, a low slung messenger bag, pop it on one shoulder or use the stabilizing straps as a waist belt.

    Folks who are familiar with Peak Design’s camera straps will be familiar with the quick adjusting aluminum handle conveniently allowing you to adjust the length of the strap with one hand. This is a great feature for photographers who tend to hold their camera in one hand and might need to adjust their bag as they move along.

    A patent-pending MagLatch closure system allows you to open and close the bag using one hand, and four latches allow the bag to expand and contract. A magnetic catch will close the bag shut and then a quick pull down on the latch lets you open and close the bag. The closure system did take a little getting used to, and when I filled the bag with my DSLR and a couple of lenses it didn’t feel as secure as I’d hoped; I felt the need to double check the latch to make sure it was closed and catching properly. I found when the bag wasn’t as wide or full, for example when I was using a mirrorless camera system versus a wider-bodied DSLR, that it became easier to manage. However, having to double-check the latch didn’t deter from how much I liked the other features.

    The bag does tend to get a bit bulky and cumbersome if filled to maximum capacity, however for someone who over 6′ tall that is likely not an issue. 

    Thoughtfully designed flexible inserts allow you to configure interior compartments however you want. The Everyday’s dividers are unique – while other camera bags offer rectangular foam pads that can be arranged to create space within a camera bag, the Everyday offers three 8-sided inserts. They are pre-folded so you can bend and flex them to your heart’s content, configuring custom areas to contain and protect your gear.

    One of the bag’s best features is how the inserts fold over to create a box-like area, allowing you to store gear on top of each other. I managed to store an 85mm lens, protected by the folded insert, throw a flash on top of that, with my camera body with a 24-70mm lens right next to it, and then another lens in the next compartment. It became a well-filled bag and I was confident that all was secure and protected.

    A convenient waterproof zipper allows access to the interior of the bag while wearing it, making it easy to grab gear on the go. You don’t have to take the bag off and put it down to get out your camera or a lens, rather just unzip and you can have your hands on your camera in no time. I did find it easier to pull out my camera body from the center of the bag rather than have it placed over to the side of the bag and wrestle the camera body from there. 

    A zippered front pocket has eight color-coded interior mesh pockets: four red, four green, meant to denote which batteries and memory cards are fresh and which are spent. I found this system really user-friendly, and it’s just one more thoughtful detail that Peak Design has included for photographers. The front pocket zips all the way open and folds down to access whatever you have stored inside, or you can just zip down the top part and still get to your gear. 

    Inside the main compartment is an interior pocket, perfect for passports, travel documents, phones, cash, credit cards, travel papers, small notebooks. This pocket is also conveniently accessed through the top zipper opening.

    There is another smaller pocket on the inside flap of the bag but even better, behind that pocket is a built in carry option for most tripods. One of the tripod’s legs can slide through the back of the pocket, and with the flap closed the tripod can be carried braced on the front of the bag. This bag really does have hidden features everywhere.

    Photo courtesy of Peak Design

    The bag’s stabilizing straps tuck away into side pockets and behind them are additional pockets – perfect for a lens cap. But of course, there’s more: within one of those pockets is a tether with one of Peak Design’s anchor links that can be used to keep track of your keys.

    On either side of the bag are anchor straps that can be used in conjunction with Peak Design’s quick-release Capture camera clips. As I didn’t have one of the clips I wasn’t able to test this out, and while it seems like a good idea in theory as someone who is shorter than average this might make the bag slightly unwieldy for me.

    A zippered protected compartment holds a 15 inch laptop, and if you need, an additional pocket will hold a tablet or notebook. This bag is not super-flexible and the addition of a 15″ laptop makes it less so. Carrying photography gear and a laptop became a near impossibility for me, however, as it became too heavy and cumbersome.

    The material is waxed, weather-proofed and looks smart too. I felt totally comfortable that my gear was protected while having to venture out in a downpour.

    Summing Up

    I enjoyed using this bag with and without my camera gear. It easily fit my DSLR, plus a couple of long lenses, or I’d put my laptop into the back pocket with a portable drive, plus a couple of notebooks and head off to a coffee shop. Where I found the bag worked less well for me was when carrying my laptop and DSLR plus lenses. I did that while traveling and found that carrying all of that gear for too long was just too heavy. 

    There is no getting around the fact that the Everyday Messenger bag is big, and just because you can pack it to its limit doesn’t mean you necessarily should. Flexibility of the bag becomes a little more limited with a 15″ laptop in the back pocket. When the bag was full, I found myself double checking the Mag-Latch closure system just to make sure it was catching and closing.

    The team at Peak Design seems to have thought of almost every detail and while the Everyday Messenger Bag is not cheap, it is certainly possible to use this as your everyday-everything bag, and you will certainly get your money’s worth.

    What we like:

    • Comfortable shoulder strap
    • So many pockets make it functional and versatile
    • Sturdy and well-designed
    • Capture Clip anchor points on the sides of the bags
    • Plus Peak Design offers a lifetime guarantee, for fabric, straps or zippers that fail, not for normal wear and tear obviously

    What we don’t like:

    • Can feel too big if you are smaller or shorter in stature
    • Bag becomes quite cumbersome with both a 15″ laptop and DSLR + lenses
    • Having to double check the closure system when the bag was more full

    Articles: Digital Photography Review (dpreview.com)

  • Travels in China: Photographing the landscapes and people of Guilin and XiaPu

    $ (document).ready(function() { SampleGalleryV2({“containerId”:”embeddedSampleGallery_0533137695″,”galleryId”:”0533137695″,”isEmbeddedWidget”:true,”standalone”:false,”selectedImageIndex”:0,”startInCommentsView”:false,”isMobile”:false}) });

    A seasoned travel photographer knows that there’s hard work involved in getting the best photos from a trip. So when Ken Koskela arrived in China on a 17-day trip, he wasn’t exactly planning on a relaxing vacation. He rose at 4 AM each day to get himself into position to photograph sunrise over the rivers, rice terraces and mountains of Guilin and XiaPu. Then, spending his afternoons with a guide, he interacted and photographed residents of the villages in the region, and spent evenings capturing sunset.

    He operated on an average of four hours of sleep per night, but his hard work paid of in memorable images that capture the beauty of the region and its people. Take a look at a few images here and head to Resource Travel for the full story. Do you sacrifice sleep for great shots when you’re traveling? Let us know in the comments.

    Articles: Digital Photography Review (dpreview.com)

  • 14 Essential Rain Photography Tips for Creating Dramatic Images

    Wherever you travel, you are always free to take that perfect shot from the best angle. Not when it’s pouring down heavily, though. Winter is not always the best climate for comfortable outdoor photography. But guess what, if you are a clever photographer, you can take even better photos in the rain than on sunny days. Cold and stormy weather Continue Reading

    The post 14 Essential Rain Photography Tips for Creating Dramatic Images appeared first on Photodoto.


    Photodoto

  • Shot With #PhotojojoIris

    We put our Iris Phone Lenses into the hands of a few of our favorite Instagrammers. Just look at what they with ‘em!

    Impressed? Grab your own set, and take $ 20 off with the coupon Iris20off.

    Buy Now or Learn More

    And, if you don’t have an iPhone 6, no sweat. Scroll along to see more phone lens options.

    (…)
    Read the rest of Shot With #PhotojojoIris (0 words)


    © laurel for Photojojo, 2016. |
    Permalink |
    No comment |
    Add to
    del.icio.us

    Post tags:


    Photojojo

  • Weekly Photography Challenge – City Skyline

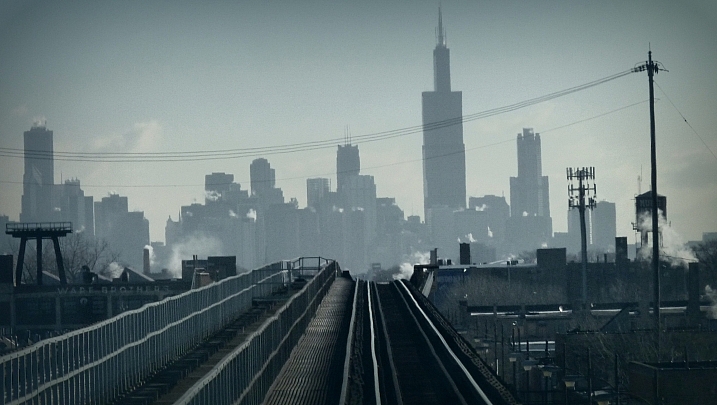
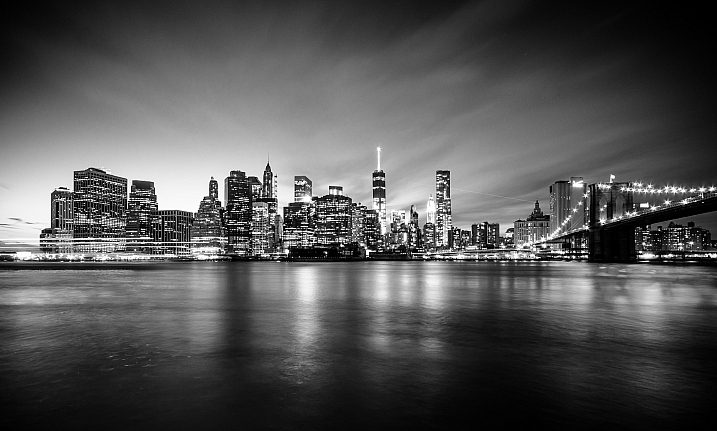
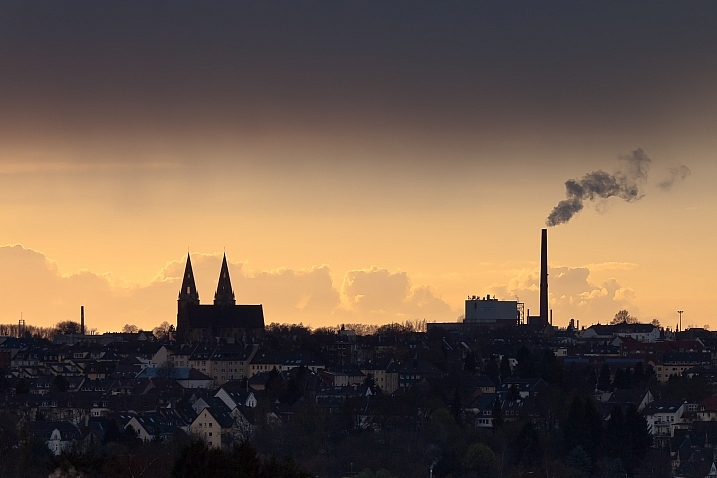
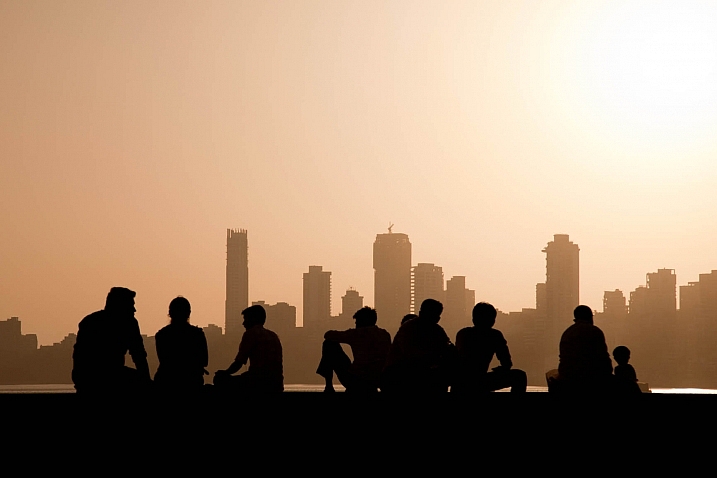
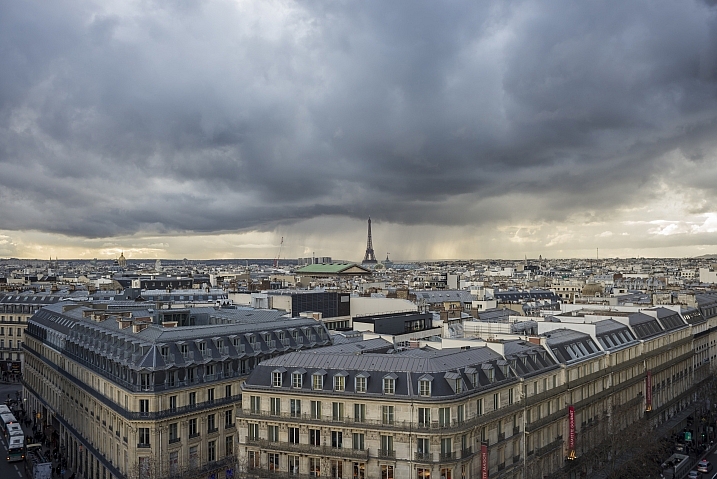
    Whether you live in a big metropolis or a small town, your urban center will have a skyline of some kind. The outline of the buildings that make up the main part of town make up the skyline.

    Barnyz

    By barnyz

    Rennett Stowe

    By Rennett Stowe

    Weekly Photography Challenge – City Skyline

    You can see 25 more example of city skyline photos here.

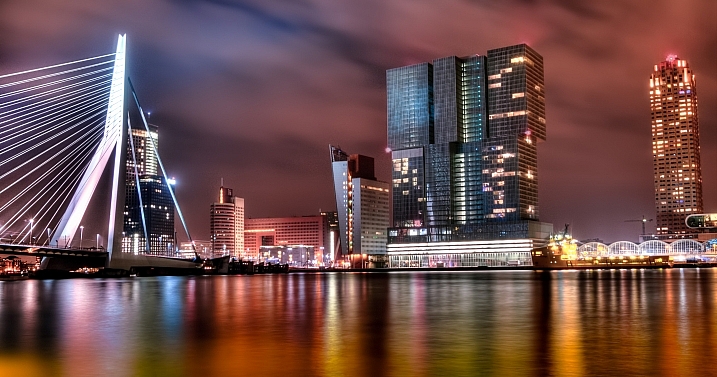
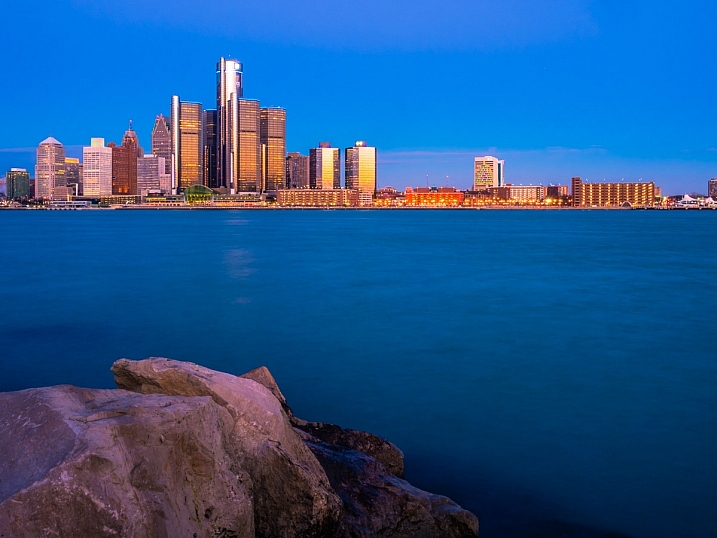
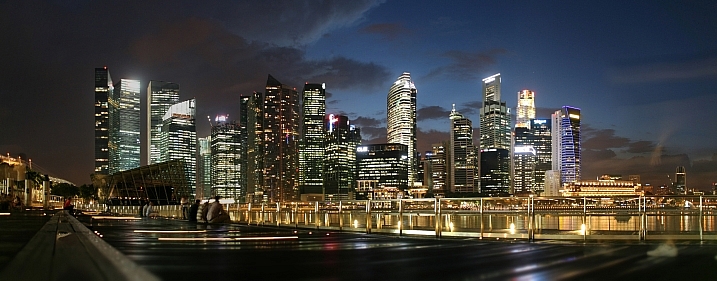
    If you browse online for skyline photos you may notice a common thread among the images – many of them are shot at dusk, or at night. That’s because cities look great just as daylight is fading away and the lights of the city illuminate. It’s the magic of blue hour.

    You get to decide how you want to tackle this week’s challenge and shoot your city’s skyline. Maybe go out a few different times during the day and see how the light changes.

    Trevorklatko

    By trevorklatko

    Fèlix González

    By Fèlix González

    Sdh_zh

    By sdh_zh

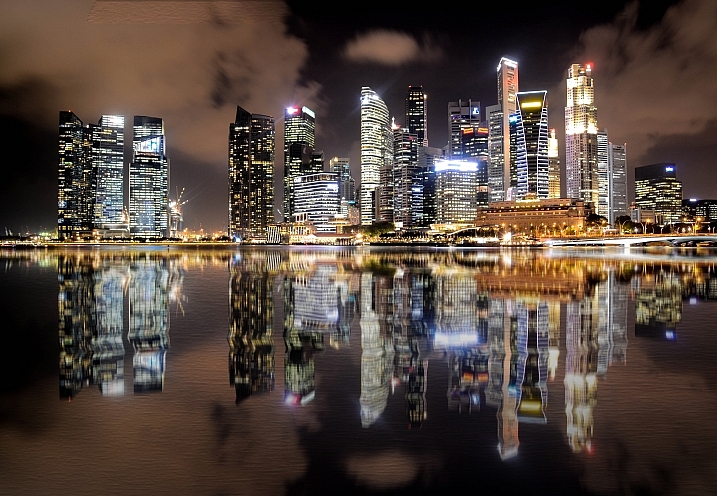
    If it’s a city near a body of water, try and capture a reflection of the lights at night. Or make your own reflection by finding a large rain puddle and a low camera angle.

    If you live in a city that’s been photographed a million times like NYC or San Francisco, try something different like:

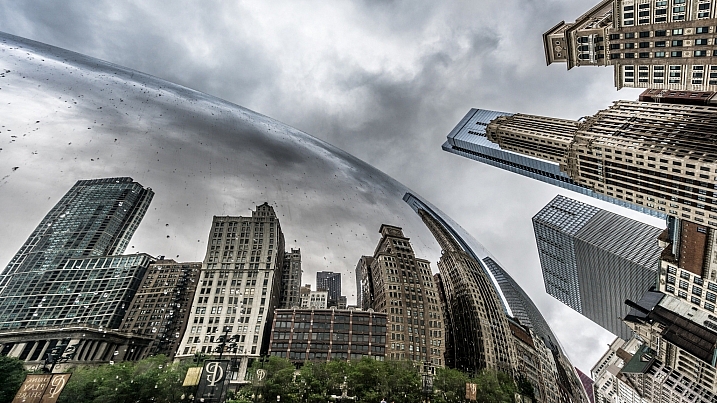
    • Shoot with a fish-eye lens
    • Convert to black and white
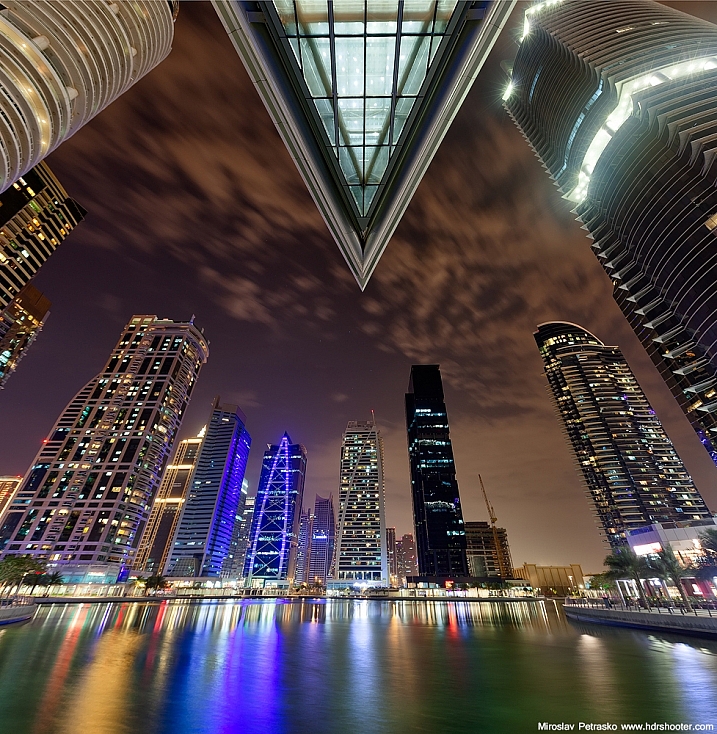
    • Shoot straight up and get just building tops
    • Put something in front to frame the city with
    Louis Raphael

    By Louis Raphael

    David Yu

    By David Yu

    Maciek Lulko

    By Maciek Lulko

    Geoff Llerena

    By Geoff Llerena

    Rytc

    By rytc

    Ehpien

    By ehpien

    Share your images below:

    Simply upload your shot into the comment field (look for the little camera icon in the Disqus comments section) and they’ll get embedded for us all to see or if you’d prefer upload them to your favourite photo sharing site and leave the link to them. Show me your best images in this week’s challenge. Sometimes it takes a while for an image to appear so be patient and try not to post the same image twice.

    Michael Matti

    By Michael Matti

    Harshil Shah

    By Harshil Shah

    googletag.cmd.push(function() {
    tablet_slots.push( googletag.defineSlot( “/1005424/_dPSv4_tab-all-article-bottom_(300×250)”, [300, 250], “pb-ad-78623” ).addService( googletag.pubads() ) ); } );

    googletag.cmd.push(function() {
    mobile_slots.push( googletag.defineSlot( “/1005424/_dPSv4_mob-all-article-bottom_(300×250)”, [300, 250], “pb-ad-78158” ).addService( googletag.pubads() ) ); } );

    The post Weekly Photography Challenge – City Skyline by Darlene Hildebrandt appeared first on Digital Photography School.


    Digital Photography School

  • Time Travel in China: Photos Reveal A Century of Dramatic Growth

    [ By Steph in Culture & History & Travel. ]

    time travel china 1

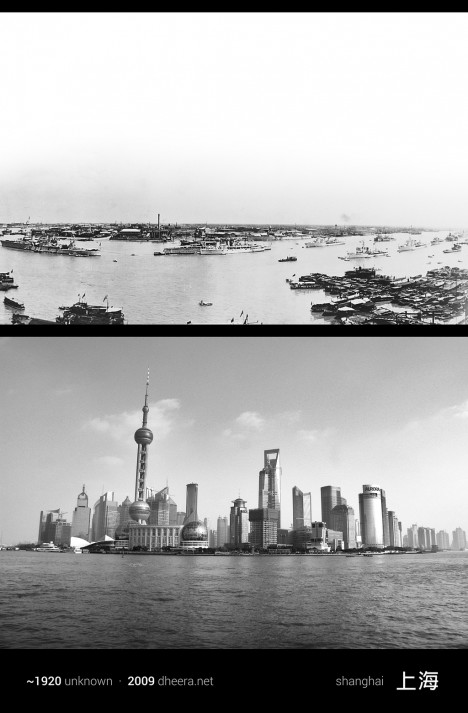
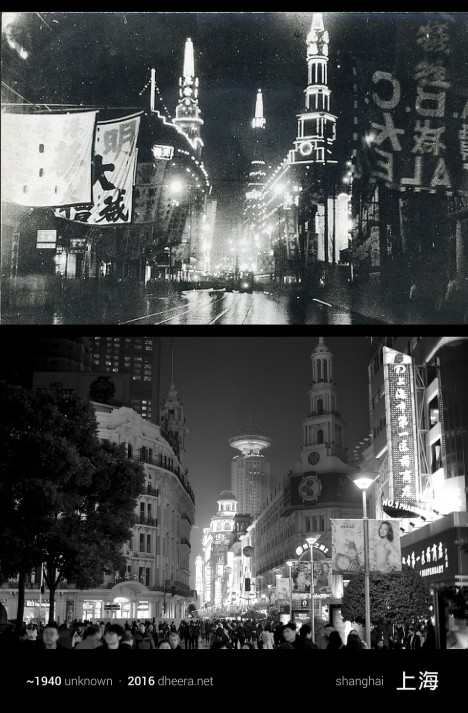
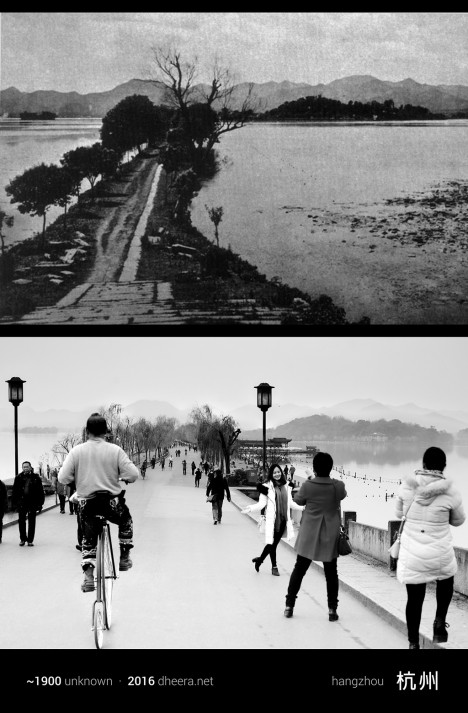
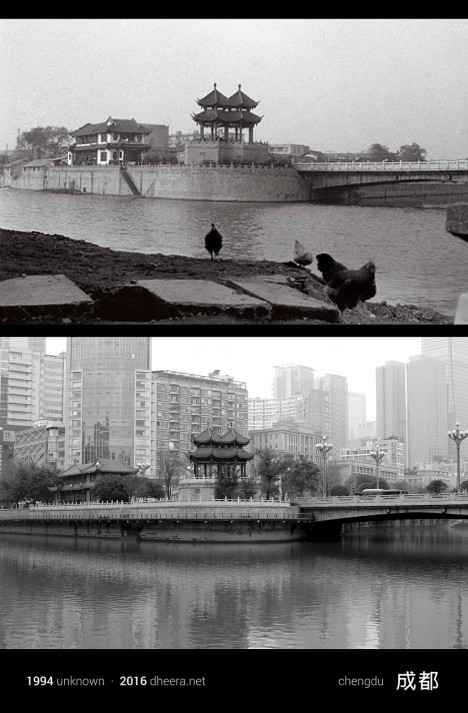
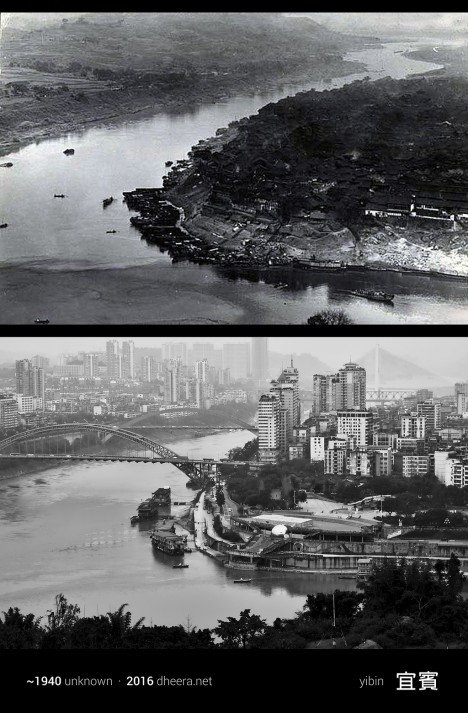
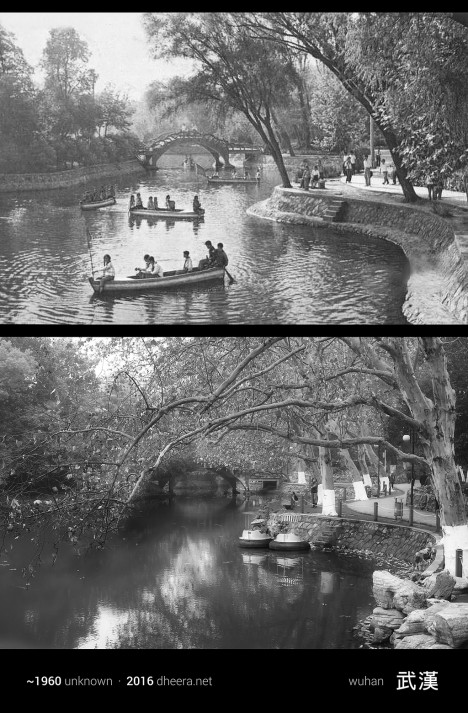
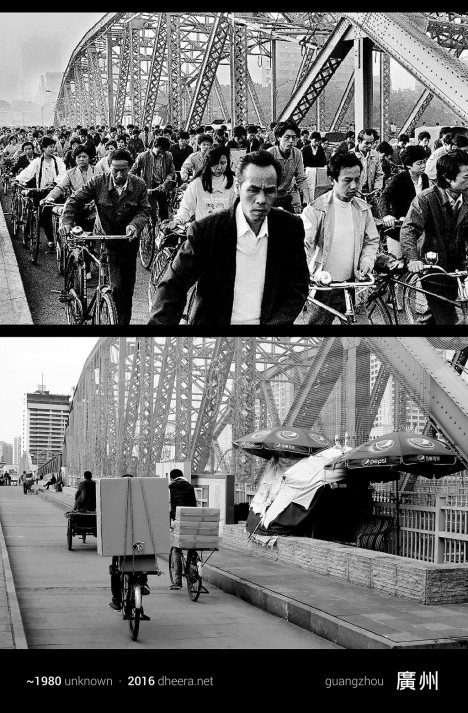
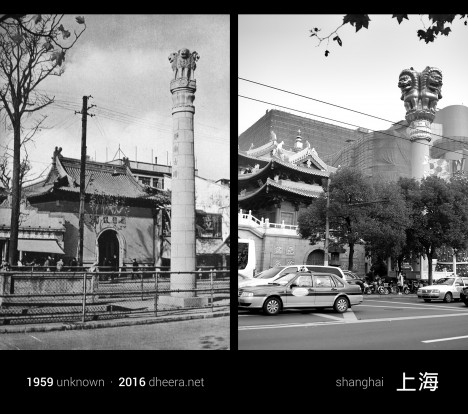
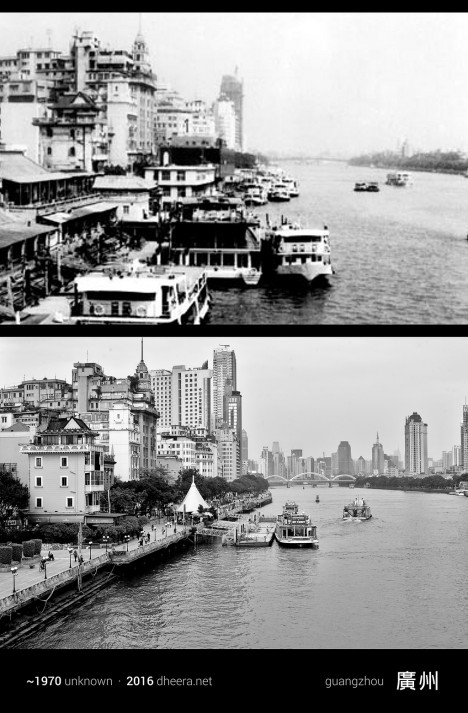
    Few nations have experienced quite the explosive rate of growth over the last century as China, and a new photo series shows us just how dramatic those changes actually look on the ground. Photographer, computer scientist and MIT alum Dheera Venkatraman pored through books and archives to find images taken in the 20th century and then went out and re-took them, shot by shot, attempting to frame them exactly as they were originally photographed. All of the new imagery has been converted to black and white to highlight what’s different and what has managed to survive after decades of frantic industrialization.

    time travel china 11

    time travel china 5

    The result is a series called Time Travel in China, creating pairs of images that Venkatraman likens to a ‘spot-the-difference’ game. Agricultural fields become towns, skyscrapers shoot up into the air, bridges stretch across waterways, dirt roads are paved, infrastructure becomes more complex.

    time travel china 6

    time travel china 7

    time travel china 2

    Yet not only do the contours of the land and the silhouettes of the mountains remain the same, a surprising number of buildings do, too, especially temples and historical structures. In some cases, the only notable shifts in a forty- or even eighty-year period are the vehicles, some lights and a handful of modern towers.

    time travel china 12

    time travel china 14

    time travel china 3

    time travel china 10

    “When most people travel, they think of traveling in space,” she says. “Whether it’s hiking through a national park or learning about a distant culture, it’s usually about the destination. This time, I decided to travel in time.”

    time travel china 8

    time travel china 9

    time travel china 4

    “It wasn’t always easy to get that perfect angle match,” she continues in a post on PetaPixel. “In some places, the vantage point ended up being in a private location, and in some cases there was a large obstruction or building preventing me from getting the same view. But nonetheless, I managed to capture several shocking contrasts over the past century of Chinese history.”

    Share on Facebook


    [ By Steph in Culture & History & Travel. ]

    [ WebUrbanist | Archives | Galleries | Privacy | TOS ]


    WebUrbanist

  • 25 Stunning Photos of City Skylines

    Urban landscape photography, pretty much involves city skyline images. Iconic shots of skylines and many cities of the world are instantly recognizable.

    See if you find these images inspiring, and if you can name the cities:

    Anh Dinh

    By Anh Dinh

    Olsonj

    By olsonj

    Viisoreanu Florin Gabriel

    By Viisoreanu Florin Gabriel

    Chris Toe Pher

    By Chris Toe Pher

    Matt Paish

    By Matt Paish

    Mike Boening Photography

    By Mike Boening Photography

    Michaela Loheit

    By Michaela Loheit

    Yooperann

    By yooperann

    Miroslav Petrasko

    By Miroslav Petrasko

    Maciek Lulko

    By Maciek Lulko

    Miroslav Petrasko

    By Miroslav Petrasko

    Whereisemil

    By whereisemil

    Herr Olsen

    By Herr Olsen

    Giuseppe Milo

    By Giuseppe Milo

    Aurimas

    By Aurimas

    Jamie McCaffrey

    By Jamie McCaffrey

    Ram Balmur

    By Ram Balmur

    RobinTphoto

    By RobinTphoto

    Peter Hubler

    By Peter Hubler

    Gordon

    By Gordon

    Dave Wilson

    By Dave Wilson

    Gord McKenna

    By Gord McKenna

    Hopeless128

    By hopeless128

    Loïc Lagarde

    By Loïc Lagarde

    Siyamalan

    By Siyamalan

    googletag.cmd.push(function() {
    tablet_slots.push( googletag.defineSlot( “/1005424/_dPSv4_tab-all-article-bottom_(300×250)”, [300, 250], “pb-ad-78623” ).addService( googletag.pubads() ) ); } );

    googletag.cmd.push(function() {
    mobile_slots.push( googletag.defineSlot( “/1005424/_dPSv4_mob-all-article-bottom_(300×250)”, [300, 250], “pb-ad-78158” ).addService( googletag.pubads() ) ); } );

    The post 25 Stunning Photos of City Skylines by Darlene Hildebrandt appeared first on Digital Photography School.


    Digital Photography School

  • Pelican lightens up with Air cases

    $ (document).ready(function() { SampleGalleryV2({“containerId”:”embeddedSampleGallery_2062335725″,”galleryId”:”2062335725″,”isEmbeddedWidget”:true,”standalone”:false,”selectedImageIndex”:0,”startInCommentsView”:false,”isMobile”:false}) });

    Pelican cases have a reputation for sturdiness and reliability, making them a go-to for pros who want to guarantee their gear makes it to the shoot and back intact. Today Pelican has introduced the Air series of cases, boasting the same level of protection without all of the weight. The Air series cases are up to 40% lighter than their Protector series counterparts.

    At launch, the Air series will include six sizes including an overhead compartment-friendly wheeled version, and Pelican plans to introduce 20 sizes over the next year and a half. The new cases are made of an HPX2 resin and will be offered in four configurations: no foam, with customizable cubed foam, with padded dividers or with Pelican’s TrekPak rigid dividers.

    The Pelican Air series are available for pre-order now at pelican.com/air and will ship starting May 1, 2016. Prices range from $ 180 for the 1485 Air up to $ 340 for the 1615 Air wheeled check-in model.


    Press release:

    Pelican Products Introduces Pelican™ Air Cases That Are Up To 40% Lighter

    TORRANCE, CA — April, 15, 2016 – Since 1976, the Pelican™ classic Protector™ case has been the go-to protective case solution for millions of people worldwide. It has made an impact in industries ranging from military and aerospace to photography and hunting. Today, Pelican is proud to announce the outcome of a relentless quest to offer Pelican users more versatility than ever before: Introducing Pelican Air cases. These new cases have been engineered to maintain the same standard of durability, but reduce the weight of each case by up to 40 percent and offer new size selections not currently available in the Pelican classic or Pelican Storm lines.

    Available in six long-form, travel-ready sizes, Pelican Air cases are constructed of lightweight HPX2 resin, the next generation of Pelican’s proprietary formula that rebounds to stress without breaking. With the busy traveler in mind, the 1535 Pelican Air case (Wheeled Carry On) complies with overhead bin standards and the 1615 Pelican Air case (Wheeled Check In) complies with current airline check-in size regulations. 

    Additional models are currently in development with more than 20 new sizes making their debut over the next 18 months. Each case passes the same performance tests (impact, drop, submersion, high and low temperature) that Pelican users have come to trust and is backed by the company’s legendary lifetime guarantee of excellence.

     “The Pelican brand is synonymous with protection and has set the gold-standard in the protective case market for more than 40 years,” said Lyndon Faulkner, President and CEO of Pelican Products. “While using the Pelican classic case design as the basis for the new line, our engineers have spent the past two years reimagining the classic case with a focus on taking out weight while maintaining the same high level of performance customers have come to expect from Pelican. This revolutionary Pelican Air case design underscores Pelican’s continuing commitment to innovation and making a legendary product even better.”

    To construct a lighter case, Pelican’s engineering team faced the challenge of building lightness into every facet of the design without compromising Pelican’s renowned durability. By working with a team of materials scientists, Pelican was able to construct cases that are the lightest protective cases on the market today.

    Pelican Air cases are available with several configurations:

    • No Foam (empty)
    • Pick N Pluck™ foam – manually customizable cubed foam
    • Padded Dividers – newly redesigned with a fully-sewn tub, felt exterior and high-visibility yellow interior, making it easier to identify equipment
    • TrekPak™ – a completely new divider system with rigid, customizable panels and locking pins

    Pelican Air cases are available through select dealers, distributors and retailers starting May 1, 2016. For more information on Pelican Air cases and the full Pelican line, visit http://pelican.com/air. 

    Pelican Products, Inc. is a portfolio company of Behrman Capital, a private equity investment firm based in New York and San Francisco. 

    Articles: Digital Photography Review (dpreview.com)

  • Microsoft Lumia 950 camera review

    In addition to strong camera specifications like a 1/2.4″-type 20MP Sony sensor and Zeiss branded F1.9 lens, the Lumia 950 boasts some tantalizing mobile photography features like Raw capture and extensive manual controls. Unfortunately, its imaging feature set is behind the competition in some notable ways. Read more

    Articles: Digital Photography Review (dpreview.com)

  • World’s Tallest Wood-Framed Skyscraper Proposed for London

    [ By WebUrbanist in Architecture & Houses & Residential. ]

    wood tower for london

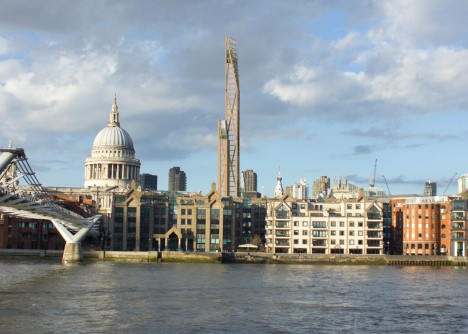
    An angular affair of wood and glass, this proposed skyscraper is designed to reach nearly 1,000 feet in the air and, if it goes forward, will be the first timber-framed tower in London and tallest such structure on Earth.

    wood skyscraper design

    Stick-framed houses are standard in many parts of the world, but using wood for skyscrapers has a lot of potential advantages, including: lower costs, less embedded energy, more renewable resources and a look and feel scaled to human occupancy.
    wood skyscraper skyline

    The obvious worry for most people is, of course, fire. However, timber buildings are famously good at standing up to flames – columns and beams will char in an inferno, and that charred surface can actually stand up longer to heat than exposed steel. While steel heats up and buckles, wood first loses its water weight, then chars and resists the flames.

    wooden architecture tower

    As it turns out, “Wood is one of nature’s most innovative building materials: the production has no waste products and it binds CO2. Wood has low weight, but is a very strong load-bearing structure compared to its lightness.”

    wood human factors

    Rising 80 stories above the city and providing 1,000 housing units, the London stick tower project is a collaboration between PLP Architecture and Cambridge University’s Department of Architecture. Completed, it would be the second-tallest building in the city next to The Shard.

    Share on Facebook


    [ By WebUrbanist in Architecture & Houses & Residential. ]

    [ WebUrbanist | Archives | Galleries | Privacy | TOS ]


    WebUrbanist