Blog

  • How to Create a Delicious Blurry Bokeh Background in 4 Easy Steps

    Blurry backgrounds are nothing new when it comes to photography. The technique of blurring the background to emphasize a subject in the foreground has been used by photographers for decades, and by painters and other visual artists for hundreds of years. Now thanks to the proliferation of digital cameras this phenomenon has exploded in recent times.

    Many people like photos with a tack-sharp subject and a smooth blurry background, and even though some might say it’s more of an over-used trend, the truth is that bokeh is here to stay. The trick to using it effectively, is to learn how to use the physical properties of lenses and light to create the look you are going for. While some people turn to creative editing tricks like adding blurry filters or doing Photoshop gymnastics there really is no substitute for the genuine article. If this is something you have always wondered about or wanted to try for yourself, here are four easy steps to get you started.

    50mm, f/4, 1/350 second, ISO 400

    50mm, f/4, 1/350th of a second, ISO 400

    The term bokeh is a Japanese word that doesn’t have a precise English translation, but refers to the type and quality of the out-of-focus areas of an image. In other words, when the blurry parts of a picture look nice, you might say the image has good bokeh. While a thorough discussion of what bokeh is, what causes it, and what affect your lenses and lens elements have on the type and quality of bokeh could go on for several pages, this article is going to be a bit more basic look at how to create visually pleasing blurry elements in your photos. If you don’t want things to get too complicated, and aren’t quite ready for a thorough breakdown of aspherical elements or the circle of confusion, then get out your camera and follow along with these few simple tips to help you get the look you have always wanted.

    understanding-bokeh-golden-glow

    50mm, f/1.8, 1/6000th, ISO 100

    1 – Shoot with a wide aperture

    Take a look at the front of your lens, you will probably see a few numbers that look like 1:3.5-5.6, or 1:2.8, or f/4 (read: What the Numbers on your Lens Mean for more on how to find this). These numbers refer to the size of the aperture in the lens itself, and how big the opening can get. Ironically smaller numbers are bigger, and a lens that says 1:2.8 will be able to let in much more light than a lens that says 1:4 or f/4. (Some manufacturers use different schemes to show the aperture size but it’s always the number after the colon, or on the second side of the / that you want to look for when determining the maximum size of the lens opening.)

    The smaller the number, the wider your aperture will be, and the less light you will need to take a properly exposed photo. Wide apertures also mean your photos will have a shallower depth of field, and anything out of focus behind your subject will begin to take on a smoother, more visually pleasing blur. In other words, wide apertures help give you more bokeh.

    understanding-bokeh-leaves

    50mm, f/1.8, 1/4000 second, ISO 100

    If you’re itching to get some pictures with the same kind of buttery-smooth background blur you have seen in nature magazines or fashion spreads, put your camera in Aperture Priority mode (on Nikon) or Av (Canon, Pentax, etc.) and turn the control dial until the aperture value number is as close to zero as it can go. It helps if you have a prime lens that doesn’t zoom in and out, since they usually have wider maximum apertures, but even a kit lens can give you decent results if you have enough light. Now go out and find something to photograph, even if it’s just a coffee mug on your office desk.

    To put my money where my mouth is, I took my camera to work and literally snapped a picture of a coffee cup on my desk. No photoshopping or magic tricks here, just a wide f/1.8 aperture. 50mm, 1/100 second, ISO 160

    To put my money where my mouth is, I took my camera to work and literally snapped a picture of a coffee cup on my desk. No photoshopping or magic tricks here, just a wide f/1.8 aperture. 50mm lens, 1/100 second, ISO 160

    2 – Put your subject far away from the background

    If you have been trying to get the kind of silky, blurry bokeh you seem to notice in everyone else’s photos you might try this one simple trick and you won’t believe what happens! Simply putting a great deal of distance between your subject and whatever is behind it, can go a long way towards creating the bokeh you have always dreamed about.
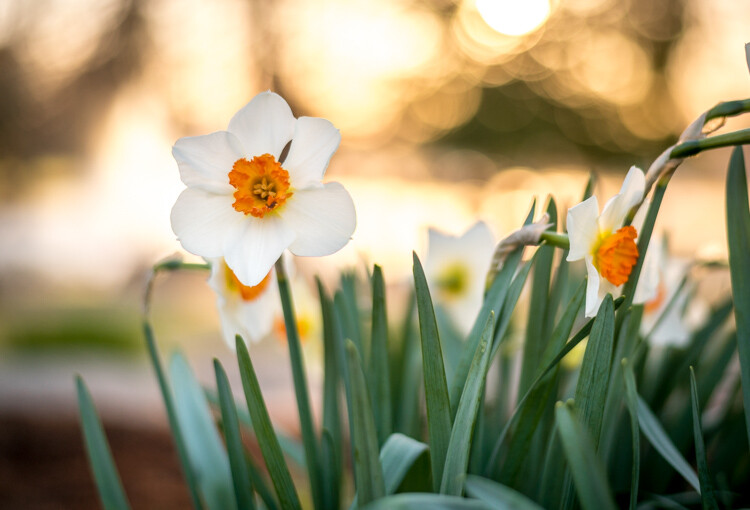
    understanding-bokeh-flowers-sunrise

    50mm, f/1.8, 1/1000 second, ISO 100

    If you are shooting portraits, try moving your subjects to a location where there is a great deal of space behind them, or even just repositioning yourself so you are looking at your subjects from a different angle that puts more distance between them and the background. In the photo below, I specifically shot the scene so that there was about 50 meters between the couple and the fountain, which caused it to have a nice blurry out-of-focus appearance that complements the woman and her fiancée quite well. I could have used a bench that was much closer to the fountain, but it would have had a very different affect on the picture, and it would not have given me nearly the same amount of bokeh as you can see in the final image below.
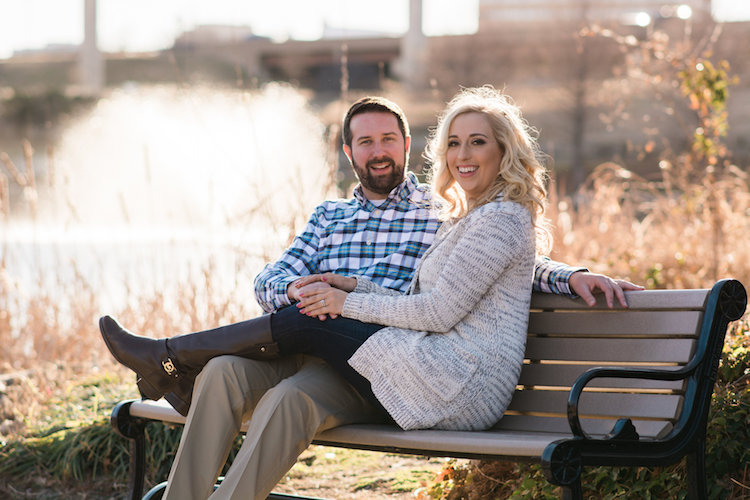
    understanding-bokeh-fountain

    85mm, f/2.4, 1/2000 second, ISO 200

    3 – Get close to your subject

    As I mentioned in the opening paragraph there are many different optical elements that come into play when dealing with bokeh and background blur, and certainly shooting with wide apertures while putting a great deal of distance between your subject and the background are critical elements of the equation. Another thing you can do, is position your camera and lens physically close to the subject you are shooting. Combine this technique with the first two, and you’re virtually guaranteed to get good results.
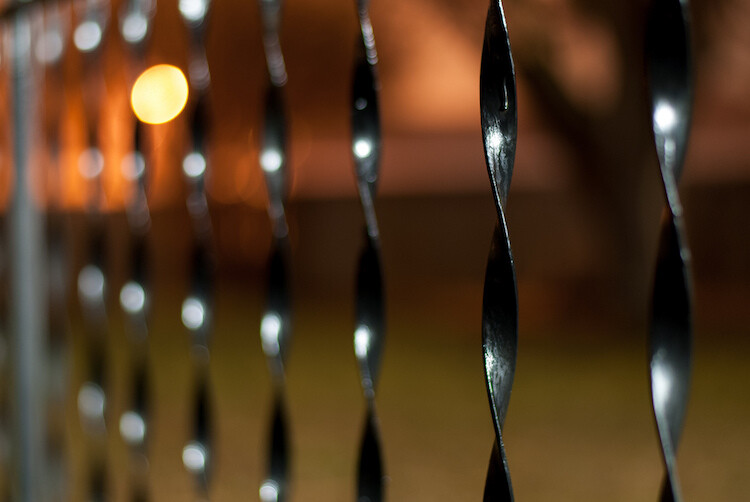
    understanding-bokeh-fence

    This shot has all the techniques rolled into one: a wide f/1.8 aperture, a far-away street light in the top left corner, and a very short distance between my camera and the fence bar on the right side.

    4 – Zoom in, waaay in

    If you are trying to get bokeh-licious shots and not having much luck, there’s another technique that could mean the difference between frustration and celebration. Due to how lenses collect, and focus incoming light rays, it’s easier to get blurry backgrounds with longer focal lengths. This is why these types of shots are difficult to get on mobile phones, which generally have lenses with a much wider angle of view. Grab your nearest camera, whether it’s a DSLR or a humble little point-and-shoot, and zoom the lens as far in as it will go. Now use the other tips I have already mentioned: set the aperture to the widest setting, find a subject that’s relatively close to you, and make sure there is plenty of room between the subject and the background.
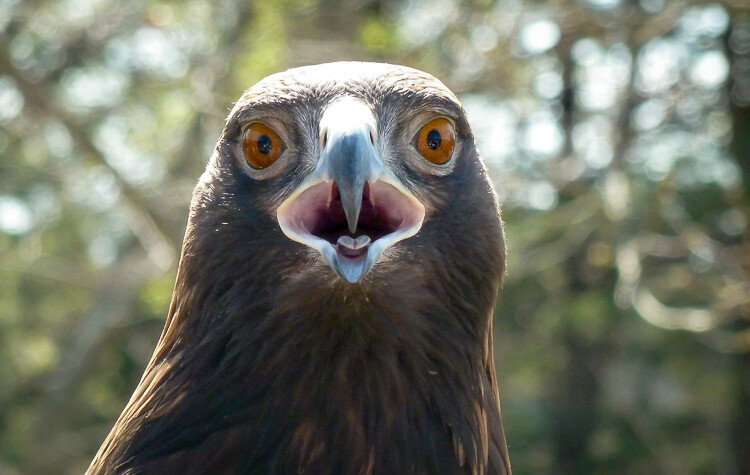
    A golden eagle, taken with my 400mm f/4 lens on a Nikon D7200. A very expensive combination, but it produces outstanding results with silky-smooth bokeh.

    A golden eagle, taken with my 300mm f/4 lens on a Nikon D7200. A very expensive combination, but it produces outstanding results with silky-smooth bokeh.

    You might not get the photo of your dreams, but with a little bit of practice you should start to see some improvements, as you begin to understand how to use your camera to create sharp subjects with pleasing out-of-focus areas.

    Just kidding! I took the first shot with a $  150 Panasonic ZS7 pocket camera. All I did was zoom in as far as it would go. This is the same scene with the same camera a few seconds later, shot at the camera zoomed all the way out.

    Just kidding! I made that first image above with a cheap Panasonic ZS7 pocket camera, and all I did was zoom in as far as it would go. This is the same scene, with the same camera, a few seconds later – but zoomed all the way out.

    Now with all this being said, I have a challenge for all of you dPS readers: What is your favorite picture you have taken that has nice pleasing bokeh? Is it a portrait, a wild animal, or more along the lines of abstract art? Share your picture in the comments section below along with a few tips of your own to help others take similarly beautiful bokeh photos.

    googletag.cmd.push(function() {
    tablet_slots.push( googletag.defineSlot( “/1005424/_dPSv4_tab-all-article-bottom_(300×250)”, [300, 250], “pb-ad-78623” ).addService( googletag.pubads() ) ); } );

    googletag.cmd.push(function() {
    mobile_slots.push( googletag.defineSlot( “/1005424/_dPSv4_mob-all-article-bottom_(300×250)”, [300, 250], “pb-ad-78158” ).addService( googletag.pubads() ) ); } );

    The post How to Create a Delicious Blurry Bokeh Background in 4 Easy Steps by Simon Ringsmuth appeared first on Digital Photography School.


    Digital Photography School

  • VR Journalism: Experience a Solitary Cell in Prison with ‘6×9?

    [ By WebUrbanist in Art & Photography & Video. ]

    6x9 jail cell

    The Guardian has launched a virtual reality app for Android users, compatible with low-tech VR devices like Cardboard (which uses your mobile phone); its first story is about solitary confinement, which you can dive into virtually. The preview makes it sound like a horror film, but for prisoners life in solitary can really be a living nightmare.

    6x9 3650

    As The Guardian explains, “6×9 takes you to a virtual cell, telling a story of the psychological damage of extreme isolation. Right now, more than 80,000 people are in solitary confinement in the US. They spend 22-­24 hours a day in their cells, with little to no human contact for days or even decades. We invite you into this world.”

    6x9 simulation virtual reality

    Throughout the enhanced story, six prisoners share personal experiences of life in solitary. This is to be the first of many new ‘virtual journalism’ efforts undertaken by the Guardian, and makes for a good prototype: the piece is impactful, relatively easy to simulate in VR (a single room) and highly relevant given growing concerns about prisoner isolation, especially in America.

    6x9 how it works

    Users without Cardboard or other virtual reality equipment can alternatively experience the story through 360-degree videos on personal computers or mobile devices. Whether this is a one-off experiment or the beginning of a new kind of audience integration remains to be seen, but so far the reviews of the app are overwhelmingly positive.

    Share on Facebook


    [ By WebUrbanist in Art & Photography & Video. ]

    [ WebUrbanist | Archives | Galleries | Privacy | TOS ]


    WebUrbanist

  • Wedding Photography – Just How Specialized is it?

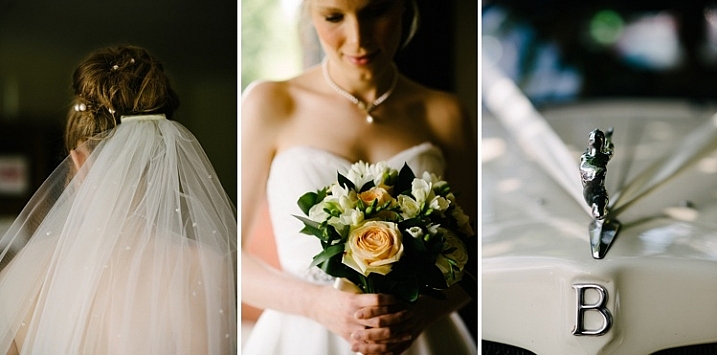
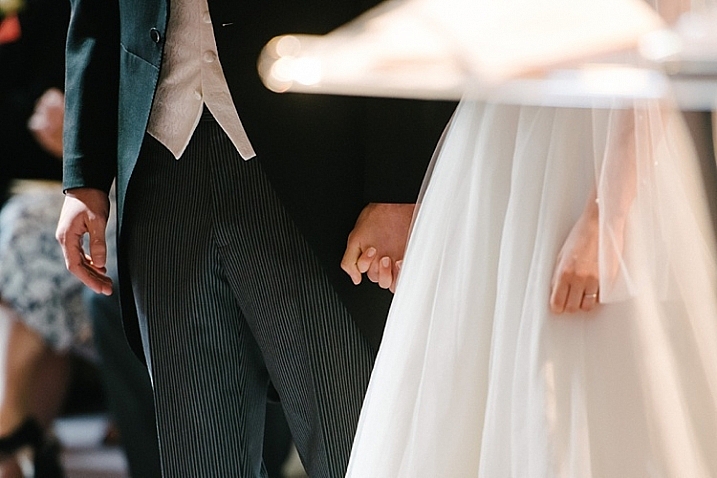
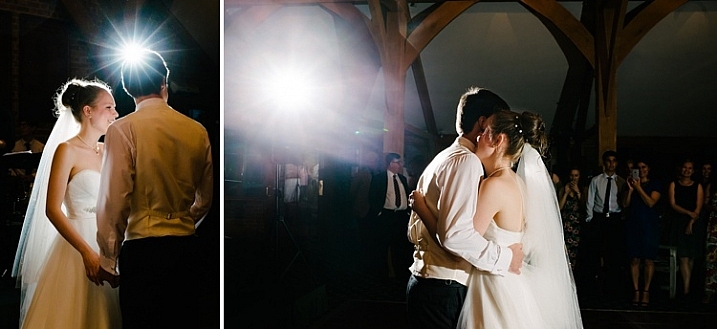
    how-specialized-is-wedding-photography

    Specializing in photography is all the rage right now. Being a specialist is synonymous to being an expert. Being an expert means you are more trustworthy, what you say and what you do carries more weight, and people can have deeper confidence in your knowledge.
    A specialist focuses their ability on one area of photography, and concentrates growing their knowledge to a very detailed degree within that area. The words special and specific come from this word, and further drive home its meaning.

    To specialize or not to specialize

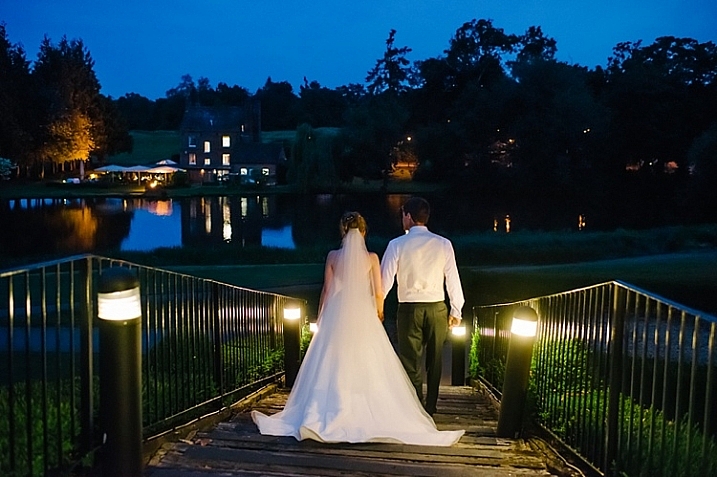
    wedding-photography-how-specialized-is-it

    To specialize or not to specialize – that is the question. For many photographers wanting to stand out and be different, to be known and able to demand higher prices, this is a question they are facing. There are many genres of photography you can choose to specialize in such as: landscape, black and white, cityscape, macro photography, musicians and bands, portraits, people, events, weddings, baby, newborn, children, families, and fine art, just to name but a few. These areas vary in their specificity so that “people photography” can be as specific as it can be general – depending on how specialized you want to be. Nowadays, specialisms are being pushed into more defined niches such as…

    Examples of niches

    • Weddings – outdoors only, city weddings, big weddings, intimate weddings, six hours wedding coverage only, add on a variety of wedding styles such as vintage, modern, contemporary, classic, chic, etc.
    • Family – lifestyle only, portraits only, everyday candid photography, black and white only, active families only, adventures only, sunset and golden hour only, etc.
    • Children – 0-3 years only, 4-11 years only, teens only, newborn, studio, etc.
    • Street photography – black and white only, daytime only, night time only, etc.
    • Portraits – natural light only, studio light only, on location only, etc.

    wedding-photography-how-specialized-is-it

    Just how much of a specialism is wedding photography?

    Let’s deconstruct a wedding day to its main components in terms of the subject to be photographed, the skills that may be required, as well as the suggested lenses to use.

    • Subject: scenery and locations
    • Skills required: landscape
    • Lenses needed: wide angle zoom lenses, and fast primes; 16mm, 24mm, and 35mm

    wedding-photography-how-specialized-is-it

    • Subject: bride and/or groom getting ready
    • Skills needed: candid, reportage, portraits, macro for the accessories, people skills!
    • Lenses: 24-70mm, 35mm, a good macro lens

    wedding-photography-how-specialized-is-it

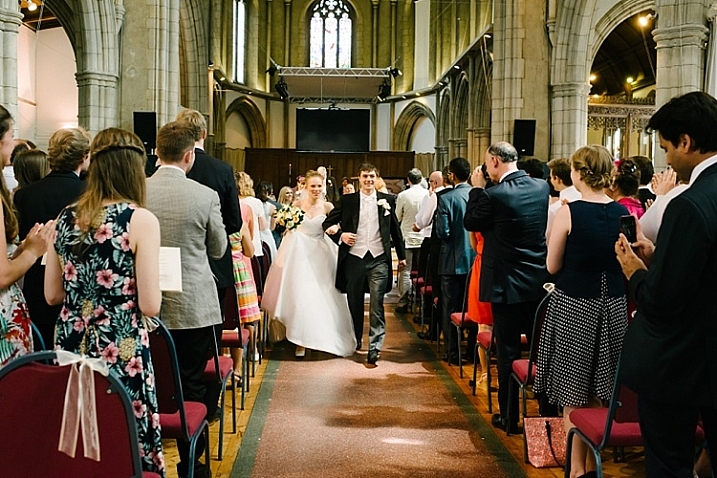
    • Subject: the wedding ceremony
    • Skills needed: documentary photography, creative, capturing emotions, special moments
    • Lenses needed: 70-200mm, 24-70mm, fast primes (working often in low light conditions)

    wedding-photography-how-specialized-is-it

    • Subject: details of the wedding day
    • Skills needed: creativity, an eye for composition and colour, etc
    • Lenses needed: a macro lens, primes with large apertures

    wedding-photography-how-specialized-is-it

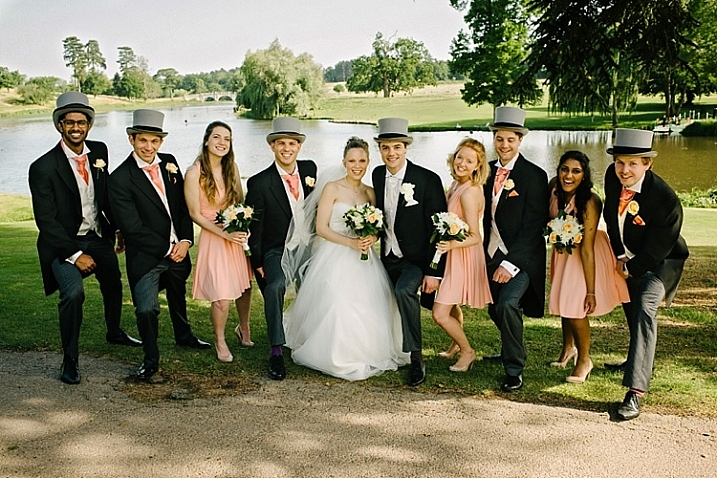
    • Subject: group portraits
    • Skills required: suffice to say you really need to have a solid understanding of the exposure triangle and depth of field
    • Lenses and gear needed: wide and zooms (you may also need speedlights and other lighting gear)

    wedding-photography-how-specialized-is-it

    • Subject: portraits of the bride and groom
    • Skills needed: portrait photography experience, creativity, wide scenes, night scenes, people skills
    • Lenses: 50mm, 85mm, 105mm, 70-200mm, wider primes and zooms

    wedding-photography-how-specialized-is-it

    • Subject: reception and leaving
    • Skills needed: lighting and use of flash, cake and food photography, working in low light conditions
    • Lenses: 24-70mm, 70-200mm, macro, large aperture lenses like a 50mm f/1.8

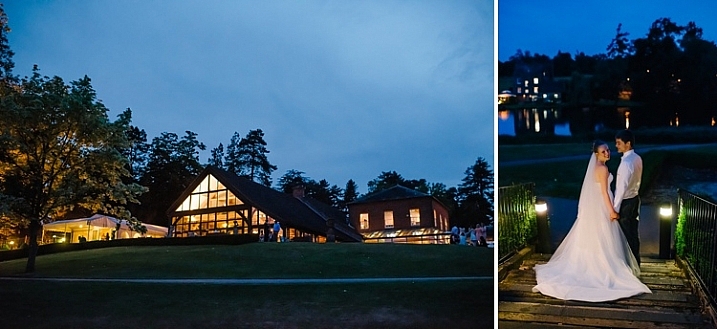
    wedding-specialist_0007

    To be a good wedding photographer, at the very least, you need to know how to shoot each component mentioned above, to a degree better than the average person with a shiny new camera or DSLR can. You are being paid to do the job, and that’s the bare minimum expected of you. To be a great wedding photographer, you need to be confident in your skills to deliver amazing photos in all these areas.

    wedding-photography-how-specialized-is-it

    As a wedding photographer just how much of a specialist are you?

    How many wedding photographers wake up one day, pick up a camera, decide to be a wedding photographer, and shoot an entire wedding knowing only one single thing? I would hazard a guess that many successful wedding photographers have spent hours behind the scenes, learning the ins and outs of various types of photography and the appropriate lens to use for each. Or they have done sessions in many, or all of the other areas of photography listed above, to get to a place where they can photograph a wedding and all the elements that come with it, and reach a very good, if not first-class standard.

    wedding-photography-how-specialized-is-it

    Wedding photography is a world of its own, and cannot be compared to something like purely wildlife photography or macro photography, and other highly specialized types of photography. Within the wedding photography world are various challenges, and you have to be a special kind of photographer to meet all those demands, while keeping cool and being on the ball throughout the entire day. Looking at this industry holistically, yes it is a specialism in itself given the amount of variety and skill required.

    wedding-photography-how-specialized-is-it

    But the deeper question is, do you think wedding photographers are specialists, or do they have to be a bit of everything to be considered good, high standard, or even an exceptional wedding photographer? Can someone be a specialist in all these areas and apply these specialisms into one global category such as wedding photography? Does knowing a bit of everything to fulfill the demands of wedding photography make a wedding photographer a jack of all trades, or a wedding specialist?

    wedding-photography-how-specialized-is-it

    wedding-photography-how-specialized-is-it

    It would be interesting to know what you think. Share your thoughts here and let’s start a discussion!

    googletag.cmd.push(function() {
    tablet_slots.push( googletag.defineSlot( “/1005424/_dPSv4_tab-all-article-bottom_(300×250)”, [300, 250], “pb-ad-78623” ).addService( googletag.pubads() ) ); } );

    googletag.cmd.push(function() {
    mobile_slots.push( googletag.defineSlot( “/1005424/_dPSv4_mob-all-article-bottom_(300×250)”, [300, 250], “pb-ad-78158” ).addService( googletag.pubads() ) ); } );

    The post Wedding Photography – Just How Specialized is it? by Lily Sawyer appeared first on Digital Photography School.


    Digital Photography School

  • Silk & Sadden: 15 Closed & Abandoned Lingerie Shops

    [ By Steve in Abandoned Places & Architecture. ]

    abandoned-lingerie-shops-1a
    The thrill is gone and so are the thongs! These 15 closed & abandoned lingerie shops have nobody else to blame for their sagging level of support.

    abandoned-lingerie-shops-1b

    abandoned-lingerie-shops-1c

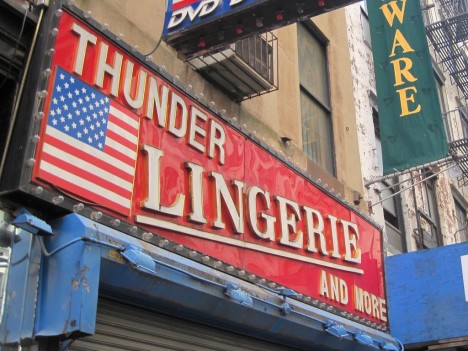
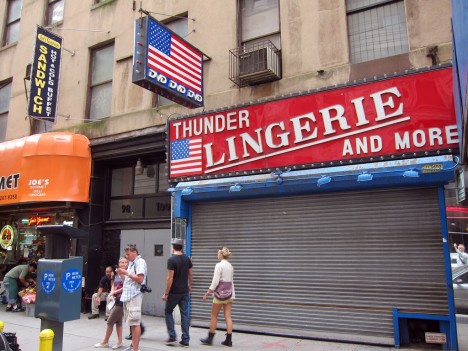
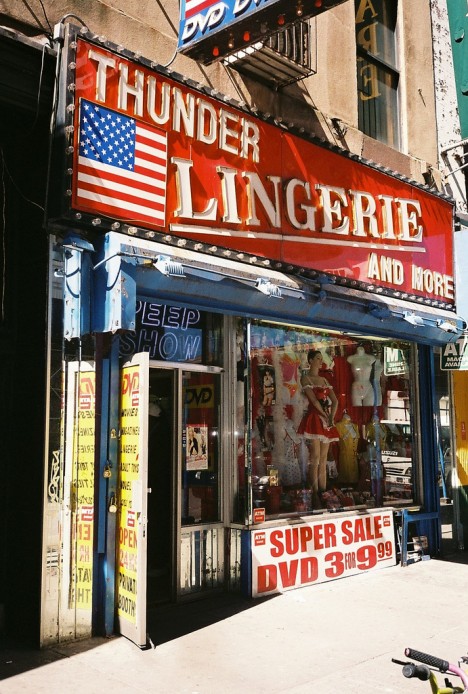
    Cue “Thunderstruck”… but whether you’re AC or DC, Thunder Lingerie and More is, er, no more. Located at 100 Greenwich Street in NYC’s Financial District, this boldly named ex-lingerie store was open as late as early April of 2011 as can be seen by the last of three images above. Kudos to Flickr users H Y (Haruko16), Scott Lynch (Scoboco), and Andy (ho_hokus) for capturing the late and lamented lingerie (and more) retailer in all of its Old Glory.

    Secret Garden of Delights

    abandoned-lingerie-shops-2a

    Lingerie AND flowers? Shoot, a fella’ could have a pretty good weekend in Vegas with all that stuff. But enough about strange love, The Secret Garden in Hamilton Square, NJ closed shop some time before Flickr user Brian McGann came across it on January 1st of 2009. “ASK ABOUT R HOT RESS”… nope, in this case ignorance really is bliss.

    We Had Everything

    abandoned-lingerie-shops-3a

    It would seem that even having everything (including “Bras Of All Sizes”) wasn’t enough to stave off retail oblivion for We Have Everything, a quaint and charming now-abandoned lingerie shop on Chicago’s gritty north side. Flickr user John W. Iwanski (Chicago Man) snapped the sad state of the screened & shuttered store on January 25th of 2011.

    The Writing’s on the Wall

    abandoned-lingerie-shops-4a

    Netherlands-based lingerie retailer Lindessa is still going strong but the outlet above, according to Flickr user oerendhard1, is closed tighter than the clasps of an outgrown brassiere. The photographer snapped the shop’s graffiti-encrusted exterior on a gloomy, overcast day in December of 2008.

    Lead Us Into Temptation

    abandoned-lingerie-shops-5a

    Jesus, what lovely knickers! You knew the Germans always make good stuff but were you aware their shop signs often fill viewers with shock and awe? Take CHRIST, for example, a lingerie shop whose mission it was to make perfect angels look their devilish best. One might’ve called it the best lingerie shop in Berlin, bar nun. Flickr user Squiggly Diggums captured the semi-sacrilegious storefront in Berlin’s central Mitte district on December 8th of 2005.

    Next Page – Click Below to Read More:
    Silk Sadden 15 Closed Abandoned Lingerie Shops

    Share on Facebook


    [ By Steve in Abandoned Places & Architecture. ]

    [ WebUrbanist | Archives | Galleries | Privacy | TOS ]


    WebUrbanist

  • First Look and Field Test of the Canon 80D

    Recently Canon released their latest upgrade in the EOS line, the 80D. It’s a direct update of its predecessor the 70D but it competes well in many areas when compared to the older 5D Mark III, and the 7D Mark II bodies.

    See what Chris and Jordan from The Camera Store think as they put the Canon 80D through various tests.

    It has some great dynamic range, focus pull features while doing video, and a rotating tilting screen. The guys feel that the 80D is the best DSLR in the Canon range right now, and that it’s a step in the right direction for Canon.

    What are your thoughts? Have you tried it out?

    googletag.cmd.push(function() {
    tablet_slots.push( googletag.defineSlot( “/1005424/_dPSv4_tab-all-article-bottom_(300×250)”, [300, 250], “pb-ad-78623” ).addService( googletag.pubads() ) ); } );

    googletag.cmd.push(function() {
    mobile_slots.push( googletag.defineSlot( “/1005424/_dPSv4_mob-all-article-bottom_(300×250)”, [300, 250], “pb-ad-78158” ).addService( googletag.pubads() ) ); } );

    The post First Look and Field Test of the Canon 80D by Darlene Hildebrandt appeared first on Digital Photography School.

    Digital Photography School

  • Accessory Review: Peak Design Slide Camera Sling strap

    Peak Design Slide Camera Sling
    $ 59/£45 | www.peakdesign.com | Buy Now

    I admit, I’m generally not much of a camera strap user. Oh sure, I have a few straps, but they tend to be utilitarian affairs more there for emergencies or #dadlife convenience (‘What do you mean your feet hurt and I have to carry you the rest of the way through the zoo?’). Even when I was in the thick of my years as a working pro, I tended to work out of a bag far more often than I worked off my shoulder.

    That said, shoulder straps have a lot going for them. They protect your camera from accidental drops, allow you to use both hands without putting your camera away, provide a way to keep multiple bodies at hand and the ease of access they offer cuts down on shots missed because you were digging your camera out of a bag or pack. So when I was asked to take a look at the Slide sling strap from Peak Design, I figured it was time to give straps another try.

    Specifications

    • Maximum Length: 145cm/57in
    • Minimum Length: 99cm/39in<
    • Weight: 171g/6oz
    • Width: 45mm/1.8in
    • Strength Rating: 200lb (This is the rating for the Dyneema-corded Anchor Link anchors. The 45mm seat belt webbing could probably lift up your car.)

    It is worth noting that Peak Design also offers a narrower version of the Slide, the SlideLITE, for mirrorless systems and other smaller cameras. Specs are virtually the same save for the width being 32mm/1.25in and the weight being cut to 141g/5oz. The reduction in weight is likely due to the narrower width and the fact that the SlideLITE is unpadded.

    In Use

    $ (document).ready(function() { SampleGalleryV2({“containerId”:”embeddedSampleGallery_8737464020″,”galleryId”:”8737464020″,”isEmbeddedWidget”:true,”standalone”:false,”selectedImageIndex”:0,”startInCommentsView”:false,”isMobile”:false}) });

    Attaching the Slide took less time than any strap I have ever installed. The Anchor Link connector design is clever and quick. So much so, even when I wasn’t using the strap, I left the Anchor Link anchors installed on my camera. Sure, they look a little silly and flap around like little ears, but they don’t get in the way and allow me to install the strap again in seconds. With four anchors included, it would be easy to move the Slide between bodies. The anchors loop around your camera body’s strap eyelets and then click the anchor into the connector at the end of the Slide strap. To remove, you press down on the anchor and slide it back out again. You could easily do it in the dark and yet there is virtually no chance of it happening accidentally. 

    There are two different options to connect the Slide to your camera. The first is the traditional connection to your body’s strap eyelets, suitable for the classic ‘neck strap’ style with the camera hanging down in front of you. The second makes use of the included Arca-Swiss compatible tripod plate.

    The plate has small cutouts in each corner that allow attachment of an anchor. When connected to a strap eyelet and the plate, the camera hangs more naturally at your side when worn across your shoulder/chest as a sling. There are other products on the market that allow you to attach a strap to your camera’s tripod mount, but virtually all of them must be removed if you wish to use a tripod. Integrating an Arca-Swiss compatible plate into its design means that users of the Slide can easily tripod mount their camera without making any changes to the strap setup. 

    The Slide is surprisingly comfortable. The wide soft seatbelt material combined with the internal padding makes carrying even heavy DLSRs manageable. It has been a long while since I’ve had a ‘padded’ camera strap. I have either found them exceedingly bulky or made out neoprene that allowed the camera to ‘bounce’ on my shoulder more than I liked. The Slide’s padding is only 1/4 of an inch thick or so, but it has enough firmness to it that it can support and distribute the weight of the camera. One side of the padded section is smooth and the other has rubberized ‘gripper’ lines added, allowing you to choose between the two options.

    $ (document).ready(function() { SampleGalleryV2({“containerId”:”embeddedSampleGallery_1824827107″,”galleryId”:”1824827107″,”isEmbeddedWidget”:true,”standalone”:false,”selectedImageIndex”:0,”startInCommentsView”:false,”isMobile”:false}) });

    The one drawback to the Slide’s padding is that it is somewhat stiff and doesn’t fold up particularly well. This isn’t noticeable on your shoulder, but can be a little awkward when putting your camera into a bag. I suspect that the padding will soften up with age and be more flexible, but I wonder if that will take away any of the cushioning abilities. Only time will tell I suppose.

    Length adjustment is quick and easy, even one-handed. You just pull up on the quick adjust handle to release the strap and slide up or down to the desired length. It’s really handy to be able to lengthen the strap for when you are actively shooting and to tighten it back up again when you’ve got some hiking to do. This does, however, bring me to the most glaring problem with the Slide.

    While the metal adjustment handles are nice looking and give a sense of quality to the strap, they are also a significant hazard to equipment for those of us who put our cameras in bags. I was constantly afraid that the handle was going to scratch a body or LCD or worse, chip a lens that had somehow been put away without a cap on. As far as I’m concerned, there is no way that the Slide should have used metal in this design. The added weight was unneeded and the danger to camera gear too great. I would love to see this exact design, but with plastic adjustment handles. 

    What’s the Bottom Line?

    The Peak Design Slide Sling Strap is a well-made, innovative camera strap with a premium price tag. Its construction and materials show quality. The namesake ‘slide’ feature works exceedingly well, the minimal padding and wide strap width tames even heavy DSLR/lens combos and the Anchor Link connectors are a clever and quick way to install and remove a strap.

    However, for all the good points about the Slide, the fear that the aluminum quick adjustment handles will scratch or chip expensive equipment is a significant drawback. This is particularly true for those of us who tend to work out of a bag more often than we carry a camera around our shoulder or neck. If you are in that boat and want a strap that still offers many (though not all) of the Slide’s features, it might be worth checking out the Peak Leash strap. 

    What we like:

    • Ease of length adjustment, even one handed
    • Innovative hidden non-bulky padding
    • Wide enough to be comfortable
    • Easily installed/removable, can use on multiple cameras
    • Versatile attachment system
    • Material is soft and flexible
    • Arca-Swiss style tripod plate attachment 

    What we don’t like:

    • Stiffness of padding makes it difficult to put in bag
    • Metal adjustment buckles can bang against camera/gear in bag
    • Most would consider it expensive for a camera strap

    Final Rating:

    Articles: Digital Photography Review (dpreview.com)

  • How to Make Your Photos Shine Using Clarity, Sharpening, and Dehaze in Lightroom

    The goal of any photographer is to make each and every photo stand out from the crowd. Making an image that pops is something that we all strive to achieve, but it’s not always easy to do. Luckily, there are tools at our disposal in Adobe Lightroom that can go a long way to help us achieve an image that we can be proud of, and that catches the attention of the viewer. What are these tools? They are many and varied, but there are three central processing techniques that can make your images transcend the average, and reach the potential you intended. They are Clarity, Sharpness, and Dehaze.

    These three tools are deceptively simple and subtle. When used properly, the enhancements they will make to your photos will be nearly imperceivable. They can take your image from good to great, with just a few simple clicks of the mouse. In this tutorial, I will show you how each one of these processing tools affect your photos, and how they can be put to best use, so that your photographs really stand out from the rest. Let’s get started!

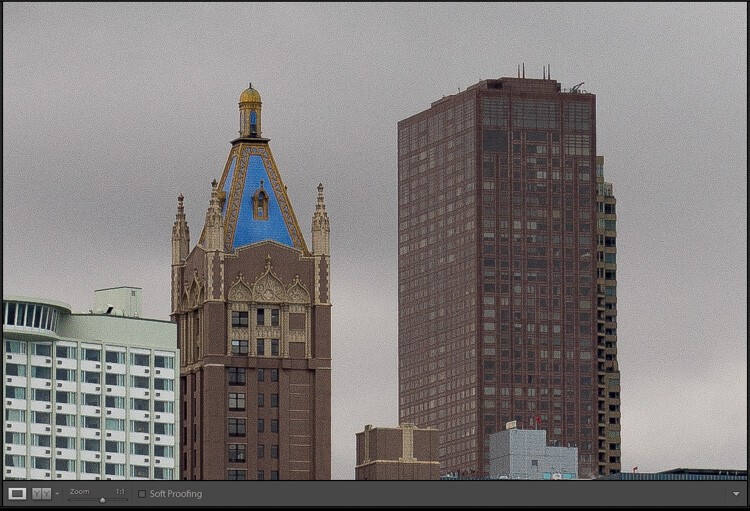
    After CSD

    Clarity

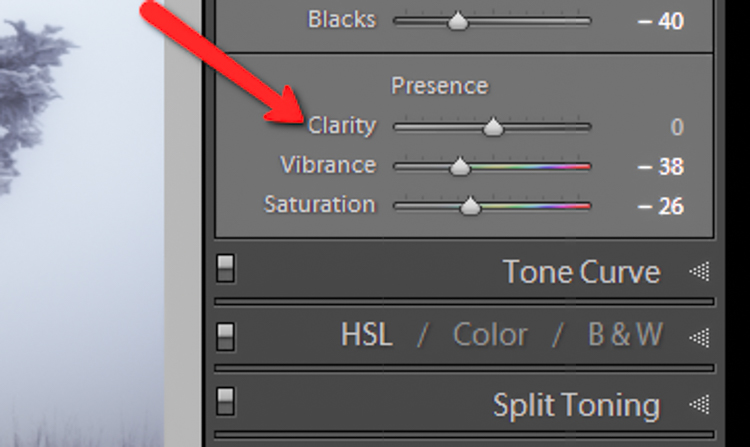
    The clarity slider has been around virtually since the inception of Lightroom. You can find it in the Basic panel of the Develop module. It functions to add definition and well, clarity, to your images. It accomplishes this by darkening the lines surrounding the perimeter of objects within your photo. Think of it as contrast on steroids. The clarity slider can really add a lot of punch to your photos, and add drama.

    Clarity

    Tips for Using the Clarity Slider

    • Don’t add too much. If you push the clarity slider too far to the right, you can begin to see unattractive halos around objects within the frame, resulting in a fake or unnatural looking photograph. If using it globally (applies to the entire image), do so judiciously. Be careful when applying the clarity slider to an entire image, most areas of your photo probably won’t need to be clarified.
    • It’s best to apply clarity after everything else. Since the clarity tool will add a good amount of contrast to your photo, it’s best to apply it towards the end of your workflow. While this is not always true, it is a good guideline to follow in order to avoid the need to backtrack.
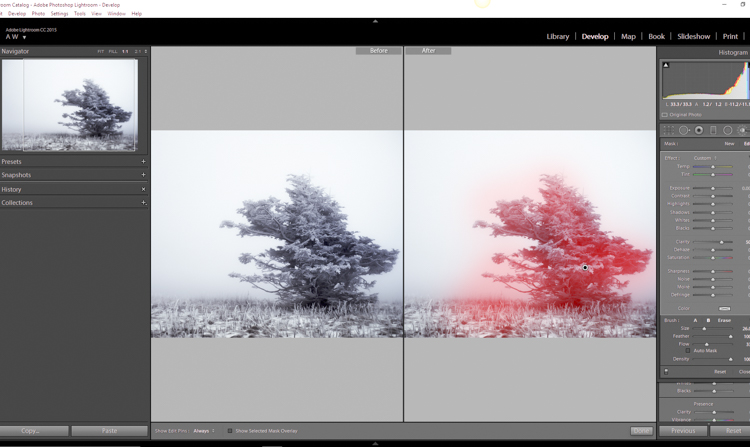
    • Use the Adjustment Brush or Graduated Filter tools to apply it to select areas of your image that need clarity. This will enable you to apply clarity only to foregrounds or backgrounds and to specific points you want to emphasize in the image.

    Clarity Adjustment

    Clarity applied, viewing at 1:1

    Clarity applied at +30, viewing at 1:1

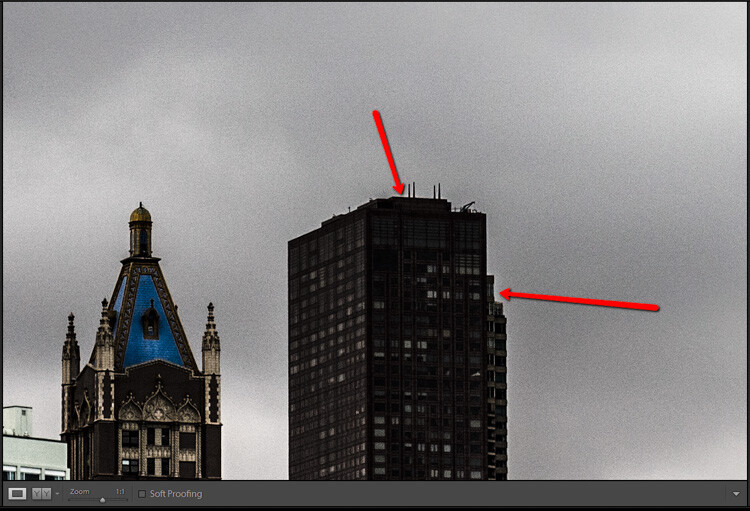
    Clarity slider taken too far, viewed at 1:1 (100%)

    Clarity slider taken too far, viewed at 1:1 (100%)

    Sharpness

    The art of sharpening an image can often make or break the composition. Sharpening is one of those awesome features of Lightroom which has been around from the beginning, and it only seems to be getting better with time.

    Sharpening

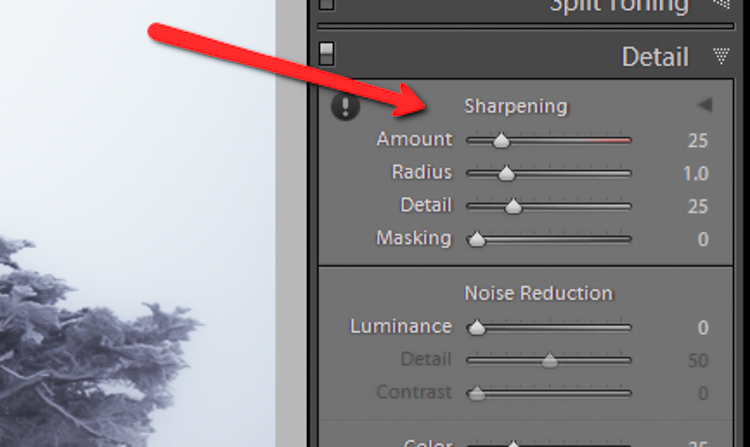
    The sharpening tool is located under the Details panel in the Develop module. Basically, sharpening is accomplished by adding contrast between pixels so that the area being sharpened appears to have more definition, compared to its surroundings. There are a few key tweaks that you can perform in order to get the most from the sharpening panel.

    Make use of the radius slider. The radius controls how many pixels around the perimeter of objects are affected by the sharpening. Think of this as the halo of sharpness. The greater the radius, the more apparent the sharpening will become. Don’t over do the details. You might think the more details you preserve in your sharpening, the better quality your image will be. This is not true. Usually, the farther you move the detail slider to the right, the more grainy and gaudy the image will be. Find a happy medium here and you will be happy in turn.

    Global sharpen at +50

    Global sharpen at +50

    Over sharpened

    Over sharpened – this is what too much sharpening looks like at 1:1

    Apply sharpening only to the areas you need to sharpen. It’s easy to simply sharpen an entire image instead of taking the time to selectively apply the edit. Rest assured though, if you apply your sharpening using the Adjustment Brush tool you will have a much more aesthetically pleasing result. Much like clarity, you usually do not need to sharpen the whole photograph.

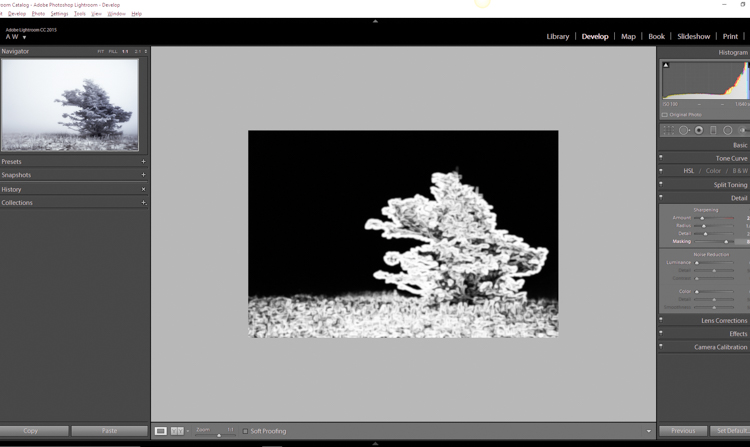
    Use the masking slider with the Alt key (Option key on Mac). The masking slider can be considered the most underrated asset in the sharpening panel. It dictates what areas will be sharpened. However, by itself the masking slider is rather lacklustre. This is where the Alt key comes into play. Hold down the Alt key while you adjust the masking slider.

    Sharpening Mask

    You will see that the image is transformed into a black and white relief image. The areas in white are where the sharpening will be applied; the areas in black will not be sharpened. This is a great way to fine tune your sharpening when adjusting globally. (Note: to keep people’s skin from becoming overly sharp and showing every pore and bump, move the masking slider until the skin areas are black and therefore unaffected by the sharpening adjustment)

    Dehaze

    This is a feature that was introduced very recently in Lightroom CC. It is a magical little function that people seem to either hate or love.

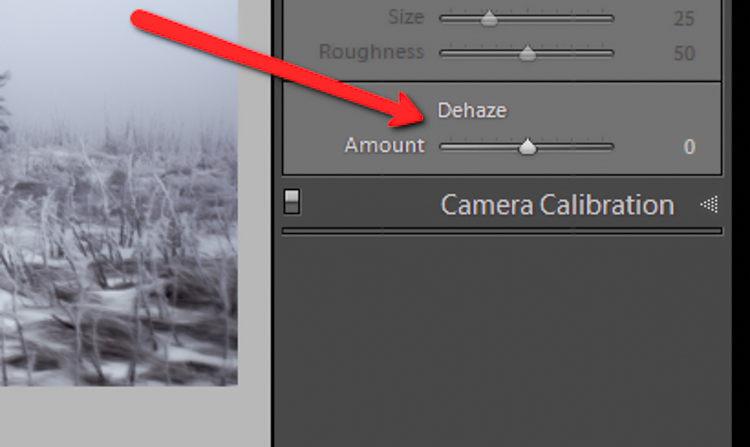
    Dehaze Slider

    I for one love this little guy. It’s located under the Effects panel. The explanation of how exactly it works is somewhat cryptic. Here is an answer pulled directly from Adobe Blog:

    The Dehaze technology is based on a physical model of how light is transmitted, and it tries to estimate light that is lost due to absorption and scattering through the atmosphere.

    Simply put, the dehaze slider can reduce haze within your images. It can also add a mystical fogginess as well if you choose (just slide it the other way).

    Dehaze

    Basically, it will make an otherwise hazy photo more clear. This comes in handy for photographs of the night sky when your want to make the stars more pronounced, or when you have to deal with physically dense atmospheric conditions.

    Tips for Using the Dehaze Slider

    • Keep an eye on your black points within the image. The dehaze slider can cause loss of shadow detail if you push it too far. Use the J key to show highlight and shadow clipping in order to preserve details.
    • Perform your white balance adjustments BEFORE you apply dehaze. The dehaze tool can do some incredible things for your photo, but it can also cause some funky color distortions if you adjust white balance after the fact. As always, strive to obtain optimal white balance before you ever begin to post-process an image.
    • Sometimes an image will benefit from added haze instead of dehazing. Experiment with adding a small amount of haze by moving the dehaze slider to the left. This can add an ethereal glow to some landscapes and even portraits.
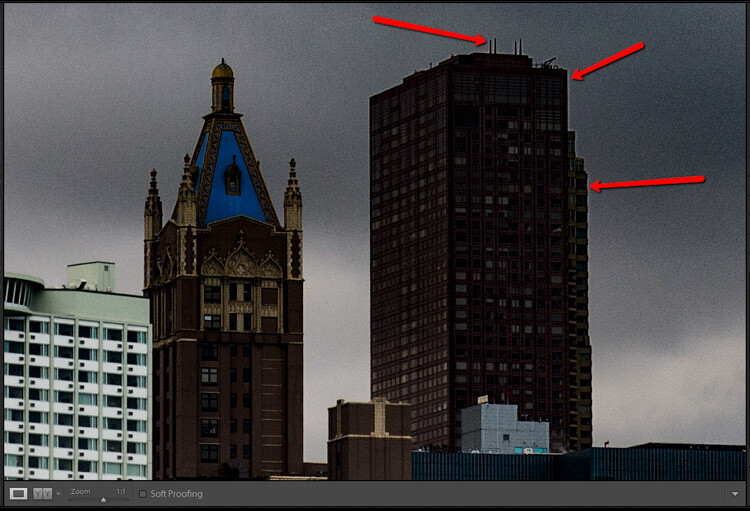
    Dehaze +20 at 1:10 view

    Dehaze +20 at 1:10 view

    Dehaze pulled too far

    Dehaze pulled too far

    As with all post-processing, the less you have to adjust after the image has been made, the better off you will be. The tools in Lightroom are a fantastic way to bring out the true power of your photographs, if you use them deliberately, and with good judgment.

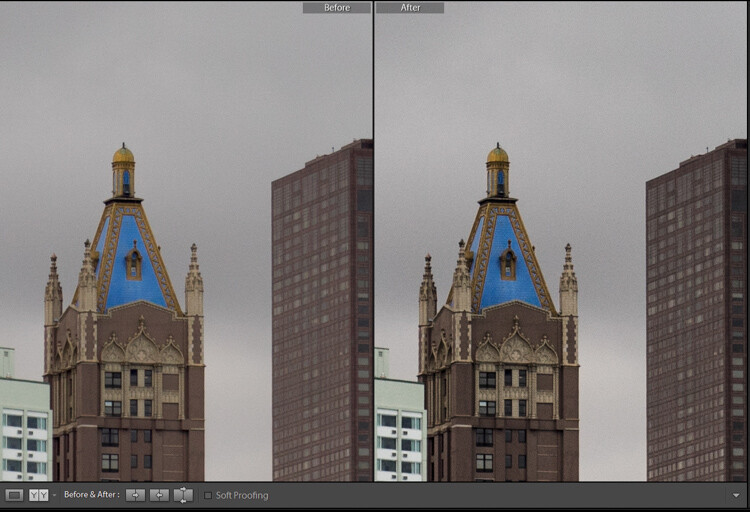
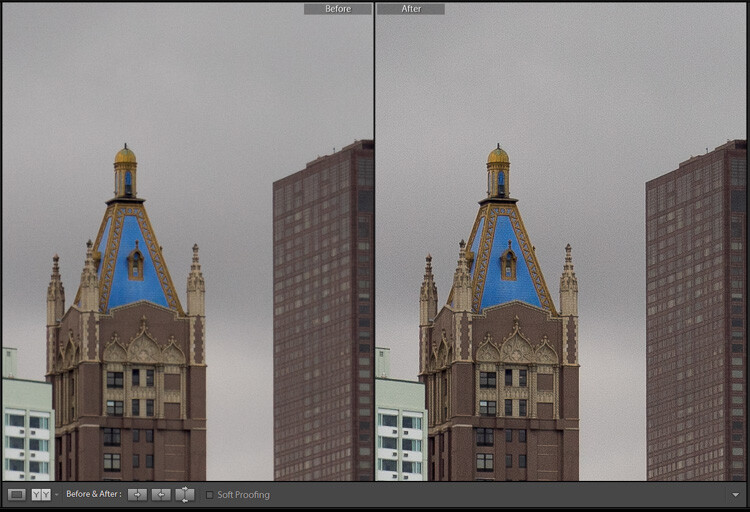
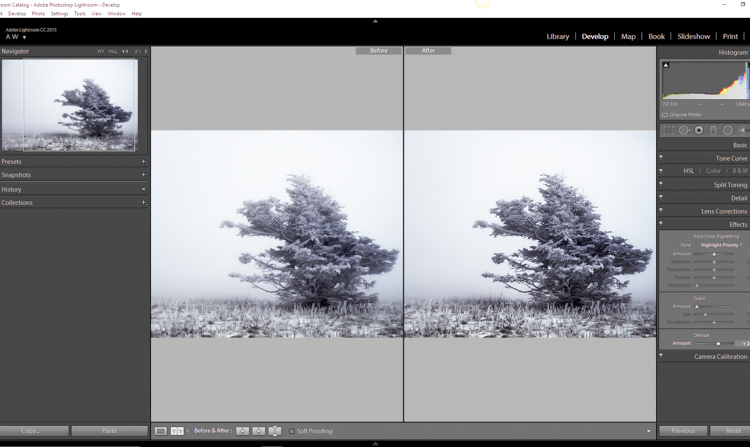
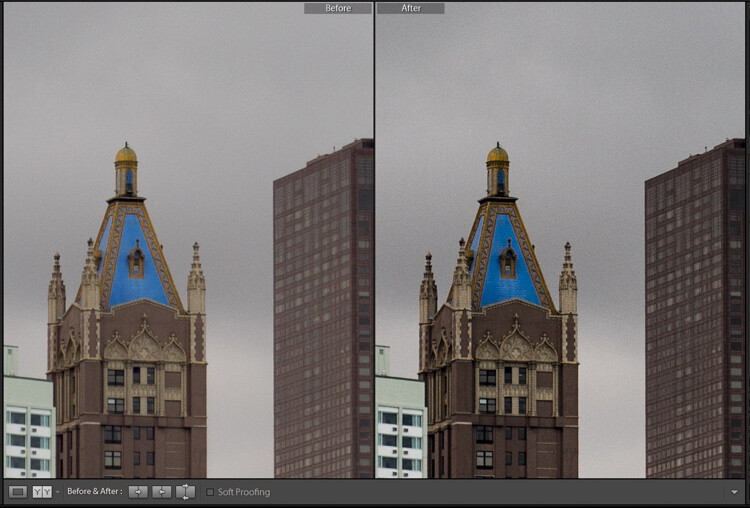
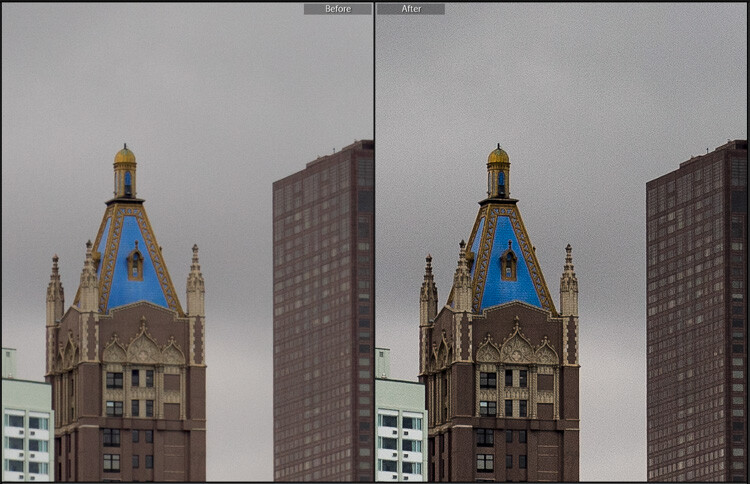
    Before clarity, sharpening and dehaze

    Before clarity, sharpening and dehaze

    After

    After

    After clarity, sharpening and dehaze were applied

    After clarity, sharpening and dehaze were applied

    Any adjustments you make to the clarity and sharpness of your photo should never make them appear unrealistic (with exceptions) or detract from your original vision. Even the dehaze tool should be used sparingly and only when required. Just as the saying goes that one brush stroke can ruin a painting, so too can one more click of the slider. The goal of post-processing is to enhance a photograph to the point of meeting your pre-visualzation. No more and no less. Experiment with the tips you’ve learned here and witness the hidden potential within your own photographs!

    googletag.cmd.push(function() {
    tablet_slots.push( googletag.defineSlot( “/1005424/_dPSv4_tab-all-article-bottom_(300×250)”, [300, 250], “pb-ad-78623” ).addService( googletag.pubads() ) ); } );

    googletag.cmd.push(function() {
    mobile_slots.push( googletag.defineSlot( “/1005424/_dPSv4_mob-all-article-bottom_(300×250)”, [300, 250], “pb-ad-78158” ).addService( googletag.pubads() ) ); } );

    The post How to Make Your Photos Shine Using Clarity, Sharpening, and Dehaze in Lightroom by Adam Welch appeared first on Digital Photography School.


    Digital Photography School

  • 5 Tips for More Professional-Looking Food Photography

    In an age where iPhones are shooting stellar images and high quality DSLRs are coming down in price, it’s becoming increasingly challenging for food photographers to make a living as professionals. As a food photographer in Seattle, I’ve noticed that many of my clients have become opinionated about what makes a good photo, and in many cases are shooting right next to me with their iPhones. I take it as a positive sign that clients, and most people with smartphones, are becoming more informed and educated about photography, but there is of course the notion that this could very soon make professional photography even more undervalued.

    So, what’s a professional food photographer to do? Here are some tips to help make sure you capture quality food photography images that attest to the value of paying you, a professional, to do the job.

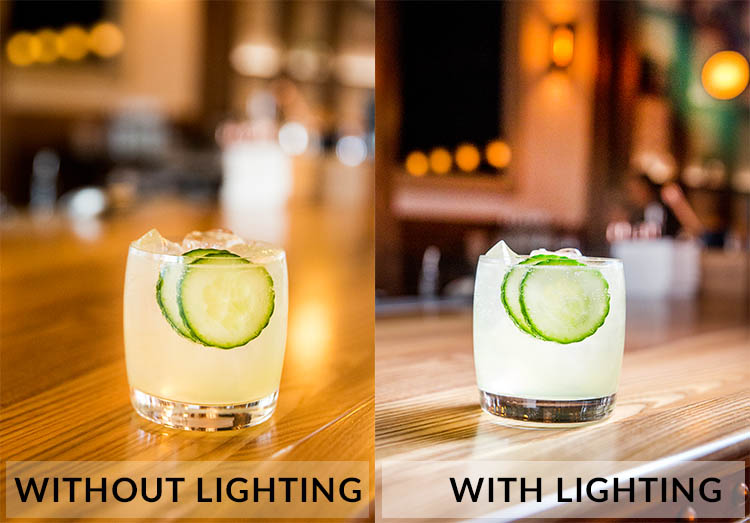
    Tip #1: Don’t use natural lighting

    Food photography tips

    Natural lighting is fantastic, and I still try to use it as often as possible. However, many of my clients have realized the value of using natural lighting and tend to shoot their iPhone photos in naturally lit areas. Taking into account the quality of iPhone photos these days, it’s not unusual that their cell phone photos look pretty darn good, even compared to my DSLR shots. To make sure your photos always look unquestionably better than those taken with a cell phone, use natural lighting less and do some experimenting with strobes and off-camera flash.

    Tip #2: Shoot in dark spaces

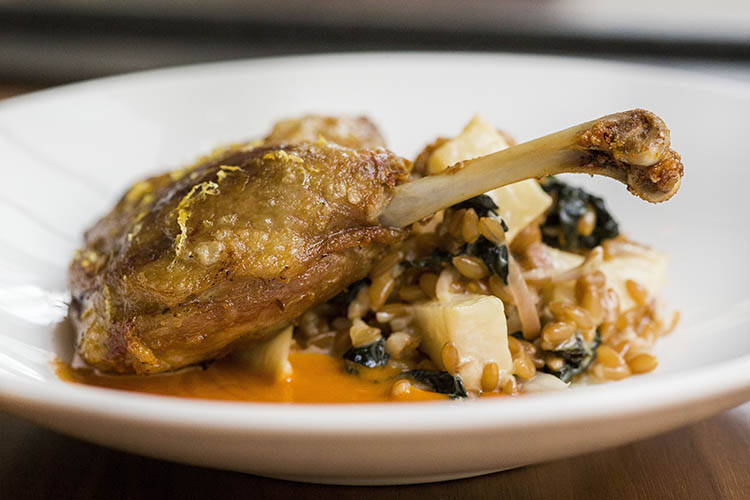
    Taking tip #1 into consideration, take full advantage of your professional-grade camera’s low lighting capabilities, and/or your strobe lighting knowledge, by shooting dishes of food in spaces where iPhones have a slim chance of performing well. This is also a good opportunity to incorporate some of the unique features of the restaurant’s interior spaces, into your main shot.

    Food photography tips

    Photographed in an extremely dark space, this photo wouldn’t have been possible without a DSLR and strobe.

    Tip #3: Use a macro lens

    While cell phone cameras are becoming equipped with better features with every new release, many still can’t shoot quality macro photos the way that DSLRs can. Use this fact to your advantage and make a macro lens your best friend when shooting food photos. Don’t be afraid to get up close and personal, and capture the details of the dishes you’re shooting. These photos may not be exactly what your clients have in mind, but at the very least it’s always a good thing to show them an alternative perspective that reminds them why they hired you.

    Food photography tips

    Tip #4: Be a creative director and/or food stylist

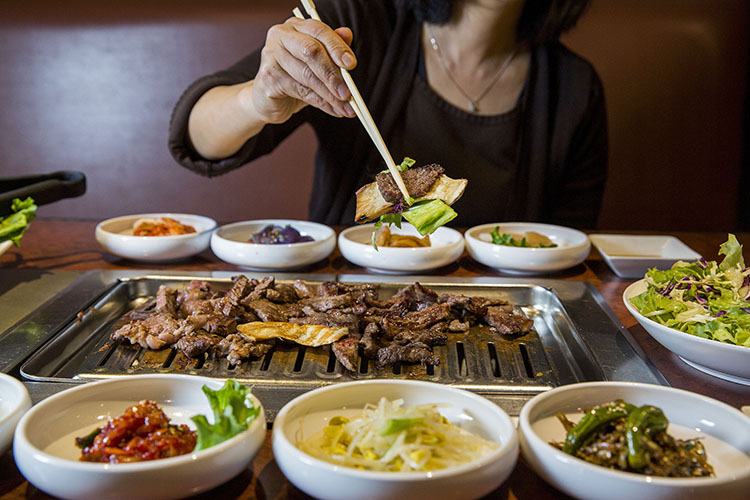
    Most amateurs approach food photos very statically, opting to shoot dishes from a seated position or overhead. Very few will get creative and incorporate people, props, or activity in their shots. This is your opportunity to shine as a food photographer. Move beyond standalone food photos and use your creativity to make a more dynamic shot. Ways to do this might be capturing action shots, adding a beverage or extra silverware in the shot, or even working with chefs to help them plate dishes in ways that will be photographically appealing. These skills are also part of the reason your client is hiring you, so don’t be afraid to exert your creative authority.

    Food photography tips

    Tip #5: Shoot tethered

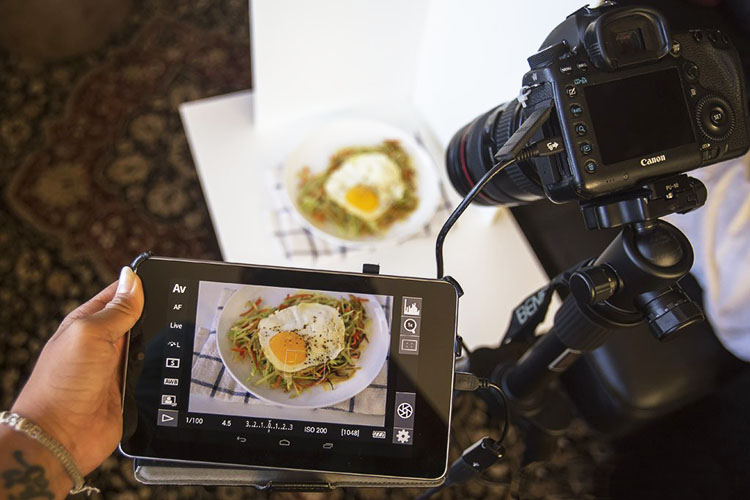
    A very simple, yet highly effective, way to come off as a polished, professional photographer is to shoot tethered. If you’re unfamiliar with tethered shooting, it is basically the act of connecting your camera to a computer or tablet, which allows your clients to see your shots on a screen just seconds after you’ve pressed the shutter. This might sound intimidating, but it’s a very simple way to make sure that you and your client are on the same page throughout the photo shoot. It also invites your client to actively participate in the shoot and give you feedback and their own ideas. Tethered shooting is very easy to do using a USB cord or even Wi-Fi technology if your camera has this capability. If you have the means to shoot tethered, definitely consider offering this service to your clients.

    Food photography tips

    Tip #6: Transmit photos via Wi-Fi

    If you have a client who is shooting alongside you with their iPhone, chances are it’s because they want access to photos for immediate posting on social media. Do yourself and your client a favor and offer to send them images on the spot using in-camera Wi-Fi, or do a few quick edits and transmit some shots directly from your computer if you’re shooting tethered. Depending on your agreement with your client, you could even charge a little extra for these services.

    Over to you

    Do you have other tips for offering more professional-looking food photography that outperforms iPhones and other amateur cameras? Let me know in the comments below!

    googletag.cmd.push(function() {
    tablet_slots.push( googletag.defineSlot( “/1005424/_dPSv4_tab-all-article-bottom_(300×250)”, [300, 250], “pb-ad-78623” ).addService( googletag.pubads() ) ); } );

    googletag.cmd.push(function() {
    mobile_slots.push( googletag.defineSlot( “/1005424/_dPSv4_mob-all-article-bottom_(300×250)”, [300, 250], “pb-ad-78158” ).addService( googletag.pubads() ) ); } );

    The post 5 Tips for More Professional-Looking Food Photography by Suzi Pratt appeared first on Digital Photography School.


    Digital Photography School

  • IKEA VR: Explore Interior Layouts in New Virtual Reality App

    [ By WebUrbanist in Design & Fixtures & Interiors. ]

    ikea virtual reality

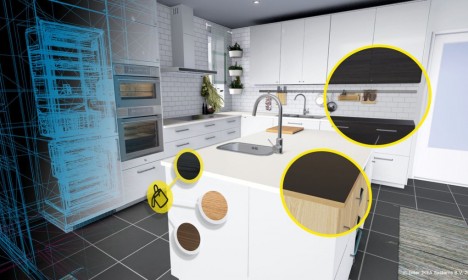
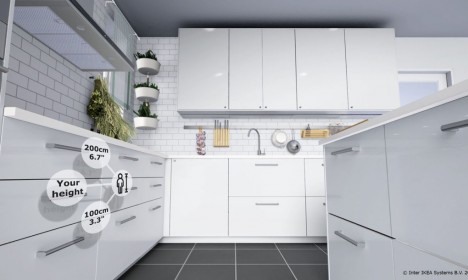
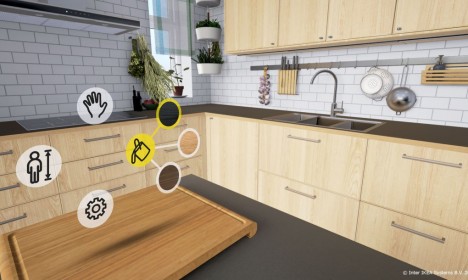
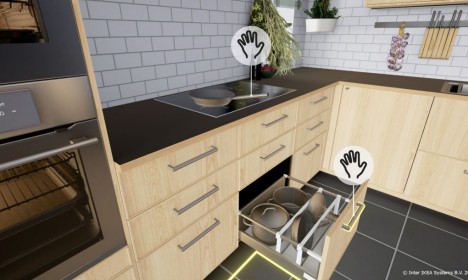
    A new virtual reality application from IKEA lets users try out various kitchen configurations in three dimensions. Using an HTC Vive headset, the app lets people see different setups but also change key details in each, such as the colors and materials of drawers and cabinets.

    ikea interactive vr

    Created in partnership with the French company Allegorithmic and employing the Unreal Engine 4 (from Epic Games), the app lets would-be buyers select from various furnishings and fixtures.

    ikea options

    “Virtual reality is developing quickly and in five to ten years it will be an integrated part of people’s lives,” says optimist and futurist Jesper Brodin, managing director of IKEA of Sweden. “We see that virtual reality will play a major role in the future of our customers. For instance, someday, it could be used to enable customers to try out a variety of home furnishing solutions before buying them.”

    ikea meatspace digital fun

    ikea home interior design

    For now, the system is a test case, available to those with access to a virtual reality headset. Users are encouraged to try it out and let the company know what they think about the current setup and how it can be improved. The company hopes to enable participants not only to shop smarter but also to become a part of the creative process in developing new design ideas and interior options.

    Share on Facebook


    [ By WebUrbanist in Design & Fixtures & Interiors. ]

    [ WebUrbanist | Archives | Galleries | Privacy | TOS ]


    WebUrbanist

  • Let’s take a look: Canon PowerShot G16 iFixit disassembly guide

    Canon PowerShot G16 iFixit disassembly guide

    Before Sony ever put a 1″-type sensor in a compact, there was the Canon PowerShot G series. If you wanted extensive controls without all the weight of a DSLR, the G-series compacts were where you looked. The PowerShot G16 was the last in that line, sporting a 12MP 1/1.7″ sensor before Canon ushered in a series of 1″ compacts with a similar form factor.

    The G16 may be gone from retailer’s shelves, but it is not forgotten. It’s also the subject of a recently published iFixit disassembly guide. The good people at iFixit publish product-specific disassembly guides, written to help common folk make simple repairs to their own electronic devices. They’re also an easy way to peek inside a modern digital camera without voiding your warranty. This week, we look inside the Canon PowerShot G16.

    Canon PowerShot G16 iFixit disassembly guide

    The first disassembly step (after taking the battery out, of course) is an easy one. The G16 offers an accessory attachment point around the lens, which is covered when not in use by a metal ring. Pressing the button on the front panel next to the lens frees the ring.

    Canon PowerShot G16 iFixit disassembly guide

    Next comes the removal of the screws. Many screws. Including this one hiding next to the viewfinder…

    Canon PowerShot G16 iFixit disassembly guide

    …And another tucked next to the ports. 

    Canon PowerShot G16 iFixit disassembly guide

    With the first round of screws removed the back chassis can be removed from the body, revealing just a peek at the motherboard. 

    Canon PowerShot G16 iFixit disassembly guide

    The front panel can also be carefully removed…

    Canon PowerShot G16 iFixit disassembly guide

    …And after removing another screw, the port cover is ready to go.

    Canon PowerShot G16 iFixit disassembly guide

    This ribbon cable on the back panel connects the buttons to the motherboard, and can be carefully removed.

    Canon PowerShot G16 iFixit disassembly guide

    The button circuit board comes free with the removal of a couple of tiny screws, revealing a cable connecting the motherboard to the LCD. Got your spudger handy?

    Canon PowerShot G16 iFixit disassembly guide

    In order to free the cables you’ll need to lift this little tab. A spudger is just the tool for the job.

    Canon PowerShot G16 iFixit disassembly guide

    And with that, the LCD is free.

    Canon PowerShot G16 iFixit disassembly guide

    The copper shield (likely for heat dissipation) can be removed. 

    Canon PowerShot G16 iFixit disassembly guide

    More screws are removed, freeing the viewfinder casing.

    Canon PowerShot G16 iFixit disassembly guide

    With the metal shield removed, the network of cables underneath is revealed. The ribbon highlighted here connects the top panel with the motherboard and will need to be removed from the motherboard with the trusty ol’ spudger.

    Canon PowerShot G16 iFixit disassembly guide

    The top panel is ready to go once it’s free of its connections to the motherboard. 

    Canon PowerShot G16 iFixit disassembly guide

    Lose a few more cable connections and the motherboard is ready for removal.

    Canon PowerShot G16 iFixit disassembly guide

    The front lens covering is next to go after the five screws connecting it to the front plate are removed.

    Canon PowerShot G16 iFixit disassembly guide

    At this point there’t not much camera left, and the lens module can be removed from the rest of the housing with one last screw removed.

    Canon PowerShot G16 iFixit disassembly guide

    But why stop at removing the lens? The viewfinder can be taken right off the top of the lens assembly.

    Canon PowerShot G16 iFixit disassembly guide

    A few more odd screws removed and that’s it – the Canon PowerShot G16 is reduced to its bare bones. 

    Articles: Digital Photography Review (dpreview.com)