Blog

  • Camera Raw 9.5.1, Lightroom updates add Pentax K-1 support

    Adobe has released updates for ACR as well as standalone and CC versions of Lightroom, providing Raw support for the Pentax K-1 and Sony Cyber-shot DSC-RX10 III. Adobe Camera Raw 9.5.1, Lightroom CC 2015.5.1 and Lightroom 6.5.1 are all available for download and offer some minor bug fixes along with the new camera support. Updates are also available for Adobe DNG Converter for Windows and Mac.

    Lightroom Mobile for iOS also gets an update. Version 2.3 brings improvements to editing workflow by making it easier to start editing a single photo from the device’s camera roll. The latest version is available for iPhones and iPads at the App Store.

    Bugs Fixed in Camera Raw 9.5.1

    • EXIF lens name not visible for some camera models.
    • Camera Raw would not launch under Mac OSX 10.7 and 10.8.
    • Errors when using Camera Raw to tone HDR images from Photoshop. This occurred when converting 32-bit files to 16 or 8-bit files.

    Bugs Fixed in Lightroom CC 2015.5.1 / 6.5.1

    • Droplets not working as export actions 
    • Issues with incorrect folder permissions.  Please see instructions to help correct user permissions issues.
    • EXIF lens name not visible for some camera models.  Please see instructions to reparse the Lens metadata after installing the update.
    • Focus lost in the keyword panel when navigating to the next image
    • Error when merging to HDR or Panorama from a collapsed stack 
    • Removed dependencies on QuickTime for some video codecs on Windows. Please see https://helpx.adobe.com/x-productkb/multi/quicktime-uninstallation-impact.html for more information

    Articles: Digital Photography Review (dpreview.com)

  • Leica launches M-D (Typ 262) digital rangefinder with no rear screen

    $ (document).ready(function() { SampleGalleryV2({“containerId”:”embeddedSampleGallery_4857686221″,”galleryId”:”4857686221″,”isEmbeddedWidget”:true,”standalone”:false,”selectedImageIndex”:0,”startInCommentsView”:false,”isMobile”:false}) });

    German camera manufacturer Leica has announced a new M digital rangefinder that has no LCD panel. The Leica M-D (Typ 262) will be almost exactly the same as the existing M (Typ 262) but without a rear screen for reviewing images and working the menu. The company says it has produced a camera with only the ‘essentials of photography’, or ‘Das Wescentliche’, and that it will help photographers concentrate on the important elements of image making rather than getting distracted with the camera functions.

    This isn’t the first time Leica has produced a digital M with no rear screen, as the company launched the limited edition M Edition 60 to mark the sixtieth anniversary of its rangefinder camera system. Leica made only 600 of these models, and they sell for about $ 18,000/£12,000, but the M-D (Typ 262) will be the first full production model without a rear LCD.

    This new model will feature the standard 24MP CMOS sensor, will have an ISO range of 200-6400, and will have brass base and top plates. The viewfinder has a magnification of 0.68x and offers bright-frame markings for 35/135mm, 28/90mm and 50/75mm lenses. The body has no traditional red dot as Leica says it wants the camera to be discrete, and the single frame mode uses a particularly quiet shutter cocking system.

    Users will have control only of aperture, shutter speed and ISO settings, and the camera records in DNG Raw format only.

    The Leica M-D (Typ 262) will go on sale in May with a price of $ 5995/£4650. The M (Typ 262), which does feature a rear screen, actually costs less, at $ 5195/£4050, but it doesn’t have the quiet shutter or brass top and bottom plates.

    For more information visit the Leica website.


    Press release:

    Leica M-D: The return of anticipation

    New digital Leica rangefinder focuses on the absolute essentials of photography, and excludes an LCD screen
     
    Leica Camera has extended its iconic rangefinder camera series with a new model: the Leica M-D (Typ 262). The fifth product in the Leica M range, the Leica M-D joins the Leica M and M-P (Typ 240), the Leica M (Typ 262) and the Leica M Monochrom (Typ 246), offering a greater choice for photographers looking for specific functionality from their rangefinder camera.
     
    The Leica M-D is the first serial production model of the digital M family to be made without an LCD monitor screen. The standard location of the screen on the back of the camera is taken by the ISO sensitivity setting dial – one of the few, but essential, features of the camera. Although the Leica M-D embodies the entire range of technical developments perfected over decades for the Leica rangefinder system, it intentionally omits all but the most vital features. Concentrating entirely on the key parameters required for photography: shutter speed, aperture, distance and ISO sensitivity, the Leica M-D focuses the user on the most essential aspect – the picture they are taking – and brings back the anticipation of discovering the results later in the process, as when shooting with film.
     
    Jason Heward, managing director, Leica UK, said, “With the exclusion of the ubiquitous LCD screen, photographers must return to the principles of photography when shooting with the Leica M-D: accurate framing and composition, selecting the appropriate parameters and settings, and ensuring that they capture the decisive moment with the thought and consideration that has always been necessary in analogue photography. This unique rangefinder camera also brings back the fascination and expectation associated with film – returning photography to its origins during the capturing process, whilst maintaining the obvious convenience and benefits of digital technology.”
     
    Principally, the technical features of the Leica M-D are based on those of the Leica M (Typ 262). As with all other digital Leica M cameras, the Leica M-D (Typ 262) features a high resolution CMOS full-frame sensor, which has been designed exclusively for rangefinder photography, and supports neither video recording nor Live View. Its 24 megapixel resolution delivers exceptional image quality and extreme sensitivity, making it perfect for available light situations. At the same time, the camera’s Maestro processor guarantees fast processing of image data. Exposures are captured exclusively as RAW data in DNG format, enabling photographers to apply the required adjustments in post-processing software.
     
    Leica’s focus on ‘Das Wesentliche’ (the essentials of photography) is immediately recognisable in the design of this camera. The Leica M-D expresses purely functional, formal clarity, and features characteristics such as a brass top plate with a ‘step’ at the end, referencing the design of the Leica M9. The Leica ‘red dot’ logo has been omitted from the front of the camera for ultimate discretion.
     
    Furthermore, the barely audible shutter of the Leica M-D ensures the camera is inconspicuous when shooting: an invaluable advantage in scenarios where the photographer wishes to remain unobtrusive. As an aid to this, the camera features a shutter cocking system that is particularly quiet in single exposure mode, and enables a shutter release frequency of up to two frames per second. In continuous mode, the Leica M-D has the same sequential shooting speed as its sister model and shoots up to three frames per second.
     
    The Leica M-D is available in a black paint finish, and includes a real leather carrying strap in full-grain cowhide.

    Articles: Digital Photography Review (dpreview.com)

  • Germany Puts Stoplights in Sidewalks for Distracted Pedestrians

    [ By WebUrbanist in Gadgets & Geekery & Technology. ]

    safety signals

    Walkers preoccupied with their mobile devices as they traverse Augsburg, Germany, are starting to notice something new in their peripheral vision: sidewalk-embedded traffic lights designed to let them know when to stop and when to go.

    sidewalk embedded traffic signals

    The city, concerned about people looking down and ignoring traffic signals, decided to step in with this new invention. The design addresses both people who are at risk of walking out into active lanes, but also lets those standing and staring into their phones when they can safely walk again.

    Currently, the city is testing these out in two prime trial locations where railroad tracks run roughly at the same level as sidewalks, making it easy for people to miss physical cues (like a change in pavement elevation) and where a vehicle is less likely to be able to stop in time (train versus car).

    sidewalk signals walking train

    A survey conducted in Berlin and several other European countries revealed that nearly 20% of pedestrians (mostly younger people) missed the signal change because they were distracted by their phones. Whether the city should accommodate such behavior is, of course, another question entirely.

    According to Stadtwerke Augsburg (translated), “The stubborn look at the smartphone can lead on the road to dangerous situations,” hence the decision “to enhance security for smartphone users.”

    Share on Facebook


    [ By WebUrbanist in Gadgets & Geekery & Technology. ]

    [ WebUrbanist | Archives | Galleries | Privacy | TOS ]


    WebUrbanist

  • The Canon that can: Canon EOS 80D Review

    The Canon EOS 80D is an enthusiast-level DSLR, and the successor to the 70D. It sports a new 24MP APS-C CMOS sensor which, like the 70D, offers Canon’s Dual Pixel on-sensor phase-detection autofocus system. The 80D also gains a new 45-point hybrid AF system with all of the points being cross-type. This is a step up from the 19-point AF system in the 70D, though not quite at the same level as the 65-point coverage offered by the more professionally-oriented 7D Mark II.

    Featuring a body sealed against dust and moisture, the 80D has a polycarbonate exterior and magnesium alloy chassis. It is nearly identical in design to its predecessor, with the majority of controls accessible via the articulating rear touchscreen, as well as via physical control points. Video is a major part of the 80D’s total package. While it cannot shoot 4K, it does offer 1080/60p capture and continuous autofocus during video. A headphone socket has been added to compliment its microphone port.

    Canon EOS 80D key features:

    • 24MP AP-C CMOS sensor with Dual Pixel AF
    • 45-point AF system with all cross-type points
    • 3″ 1.04M-dot articulating touchscreen
    • 1080/60p video capture
    • 7 fps continuous shooting with AF
    • Weather-sealed body
    • 7560-pixel RGB+IR Metering Sensor
    • Wi-Fi + NFC

    Other improvements come in the form of a new mirror vibration control system (similar to the 5DS and 7D Mark II), which should help reduce the blur-inducing effects of shutter shock. The 80D also gains the same 7560 pixel RGB+IR metering sensor found in the Rebel T6s and T6i, a serious improvement over the 63-zone dual layer sensor found in the 70D. This new sensor gives the camera some degree of human subject awareness for subject tracking through the viewfinder. However, unlike the 7D Mark II, the 80D does not have Canon’s ‘Intelligent Tracking and Recognition’ (iTR) system, which uses the metering sensor along with distance info to subject track.

    The new sensor

    It’s no secret that some Canon shooters have been frustrated as of late, as Sony’s sensor technology marches ahead in terms of dynamic range. Fortunately, the 80D marks a significant step forward in Canon’s sensor development, offering much better DR than the 70D or 7D Mark II. But the new sensor isn’t interesting just because of the pictures it can capture. Dual Pixel AF not only allows for continuous focus during video capture, but during still capture (in live view mode) as well. We first saw this feature in the Rebel T6s and it is exciting to see it now making its way up Canon’s food chain to enthusiast-level cameras.

    Compared to its siblings

      Canon EOS 80D Canon EOS 7D Mark II Canon EOS 70D  Canon EOS 6D
    Sensor 24MP APS-C 20.2MP APS-C 20.2MP APS-C 20.2MP full-frame
    ISO range 100-16000 (expands to 25600)

    100-16000
    (expands to 25600)

    100-12800
    (expands to 25600)
    100-25600
    (expands to 50-102800)
    AF (viewfinder) 45 all cross-type points 65 all cross-type points 19 all cross-type points 11 point, center point is cross-type
     AF (Live view/video)  Dual pixel AF  Dual pixel AF  Dual pixel AF Contrast Detect, Phase Detect (in ‘Quick’ mode)
    Intelligent Tracking and Recognition No Yes No No
    C-AF in live view during still shooting Yes No No No
     AF joystick  No Yes No No
     Video capabilities 1080/60p 1080/60p 1080/30p 1080/30p
    Burst rate 7 fps 10 fps 7 fps 4.5 fps
     LCD spec 3″ 1.04M-dot articulating touch LCD  3″ 1.04M-dot fixed LCD 3″ 1.04M-dot articulating touch LCD 3″ 1.04M-dot fixed LCD
     Weight 730 g (1.61 lb) 910g (2.0 lb) 755g (1.7 lb) 770 g (1.70 lb)

    Aside from the 70D, the closest sibling to the 80D is the more professionally-oriented Canon EOS 7D Mark II. It uses a slightly lower resolution chip and offers less dynamic range than the 80D. While the two share the same basic video specs, the 7D Mark II is better equipped for fast action, thanks to greater AF point coverage, a dedicated AF joystick and the inclusion of Canon iTR, as well as a faster shooting rate. On the other hand, the 80D’s touch focus capabilities make it a more appealing choice for video.

    Of course the full frame Canon 6D now falls into a similar price class to the both the 80D and 7D Mark II, making it worthy of consideration. Although it’s far from new the 6D remains a solid and popular camera despite its comparatively simplistic AF system.

    Accessories

    The 80D shown with PZ-E1 Power Zoom Adapter connected to the EF-S 18-135mm F3.5-5.6 IS USM kit zoom. This adapter allows for smooth zooming at variable speeds. 

    Along with the announcement of the 80D, Canon announced the DM-E1 shotgun microphone (compatible with any camera that has a 1/8″ socket). Canon also announced the PZ-E1 Power Zoom Adapter. It can clip onto the new EF-S 18-135mm f/3.5-5.6 IS USM kit lens and control the zoom, with two speed options. The DM-E1 will sell for $ 250, while the PZ-E1 will run you $ 150. Unfortunately, we weren’t able to get hold of either new accessory in time for this review, but we’ll be updating our impressions as soon as we can. 

    Pricing and availability

    The Canon EOS 80D is available now for a body-only price of $ 1199/£999/€1199. Kitted with Canon’s new EF-S 18-135mm f/3.5-5.6 IS USM lens, the 80D will run you $ 1799. Kitted with the EF-S 18-55mm F3.5-5.6 IS STM lens, the 80D will run $ 1349/£1089.

    Articles: Digital Photography Review (dpreview.com)

  • 5 Steps to Creating a Printed Photo Collection as Wall Art

    In this digital age, where we wander about with thousands of digital images held captive in our smart phones, there is something special about printed photographs. They represent something tangible and reverent – something that was worth transforming into an enduring piece of artwork, to remind us of what is important in our lives.

    One of the most rewarding aspects of my job is seeing the photographs I create for my clients hanging on their walls. To me, it is the icing on the cake, the cherry on top, the grand finale that tells me I have fulfilled my promise to the people who put their trust in me as a professional.

    collection-dps-01

    This image set by Darlene Hildebrandt

    Like many portrait photographers, I began my career selling digital files on a USB stick. I found it disheartening and unfulfilling. Wall art collections were a revelation to me. As a photographer, they gave me a structure and framework to shoot within. My session times became shorter, because I was shooting with purpose. I now had something meaningful and lasting to offer my clients; collections that tell their story in all its detail, and represent something deep that they have revealed to me.

    Photo collections can be about anything. In my case, they are invariably portraits, but if your thing is landscapes, travel, macro, nature etc., you can create collections that add life and personality to you home or office, and serve as visual reminders of what is important to you.

    Step #1: Consider the space you want to fill

    Think about the photographs you are capturing. What is the subject matter? What do these photos mean to you? Do you want to remember a favourite holiday destination, or how confident your son looks when he plays the violin? Do you want to capture the beauty of a rare flower you grew, or your young adult daughter who is about to leave home for college?

    With this in mind, think about where in your home or office you would like to see these photographs every day. Consider how appropriate the subject matter is for where you want to display it, and take into account the style of the decor and other furnishings in the room. Often photographs are displayed above a piece of furniture – above your bed or the sofa, at the end of a breakfast nook, on the wall of a study, or cascading down a flight of stairs.
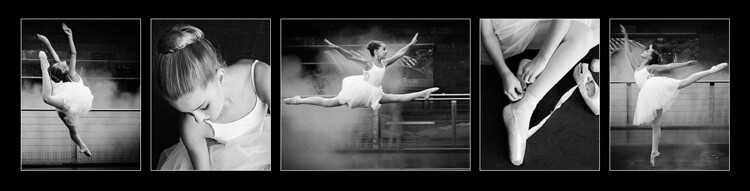
    image showing photo collections

    A collection to fit a long, narrow space.

    Once you have decided where you want to display your photos, you should have a clear idea of what the layout should look like. Big spaces demand big photos, narrow spaces require long and thin, and a stairwell may need a staggered combination of large and small photos.
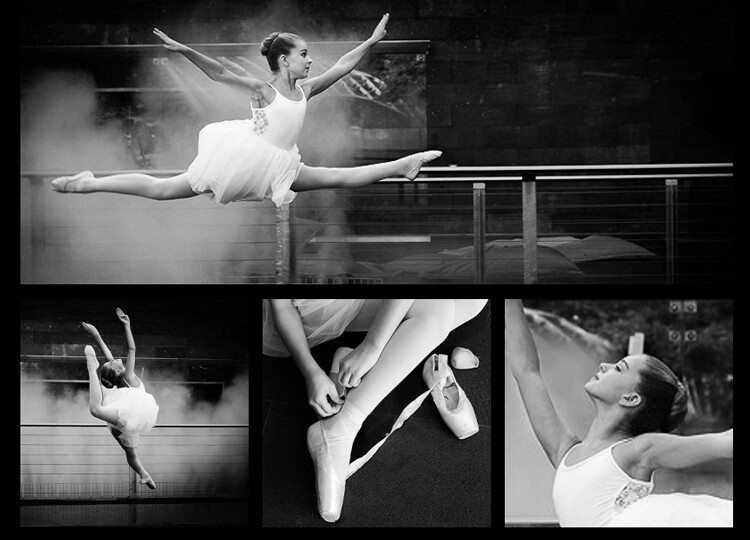
    image showing photo collections

    A different configuration using images from the same session. This would suit a larger space.

    Step #2: Decide the layout before you pick up the camera

    Think carefully about the configuration of your collection before you start photographing. For example, if you have a wide space to fill and you envisage a panoramic with two or three smaller prints underneath, your main photo will need lots of space to crop it into a panoramic shape, without compromising the composition or the quality of the image. You will be hard pressed to get a panoramic crop if you’re shooting in a vertical (portrait) orientation. When I’m shooting for a collection, I allow more space around my subjects than usual. This gives me some versatility when it comes to cropping.

    Likewise with the smaller prints. Think about how you would like each photo to be oriented, and ensure you shoot from an angle that will enable this. I like to orient my detail shots inward, toward the main photo.
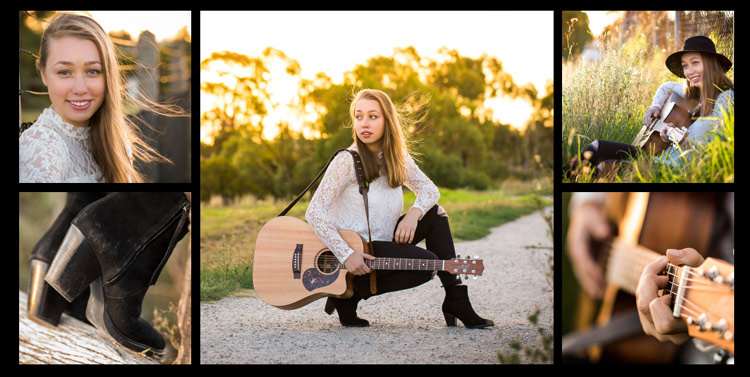
    Image showing photo collections

    It helps if you know how you are going to display each photo before you capture it.
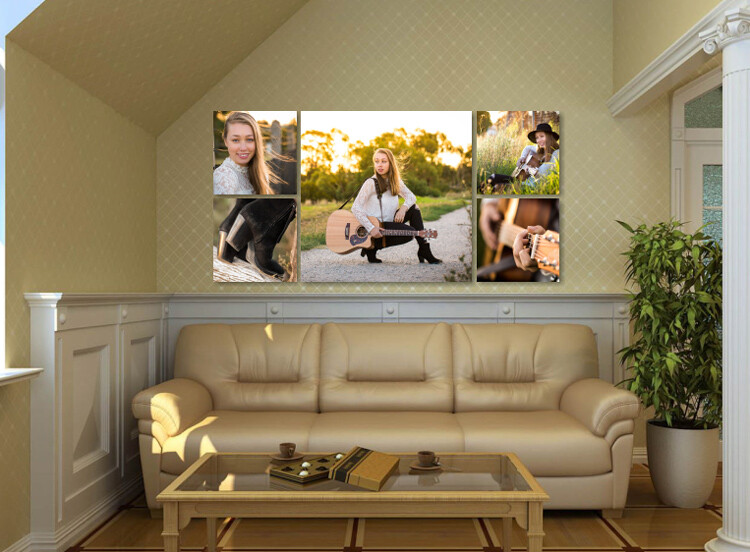
    Image showing photo collections

    This shows how the collection would appear on a wall.

    Step #3: Keep the lighting consistent

    A collection looks most cohesive when the lighting is consistent throughout. If three out of four photos in the collection are high key images with lots of white, a dark photo, or one with lots of colour, will look out of place. So, if you photographed your dog on the beach at sunset, that photo you took of him earlier in the bright midday sun will look mismatched, regardless of how adorable his expression is.

    In the photo collections below, the silhouetted sunset image stands out as a mismatch. In the second version, it is replaced with an image that better matches the lighting.

    Image showing photo collections

    The silhouetted sunset shot in the middle looks out of place.
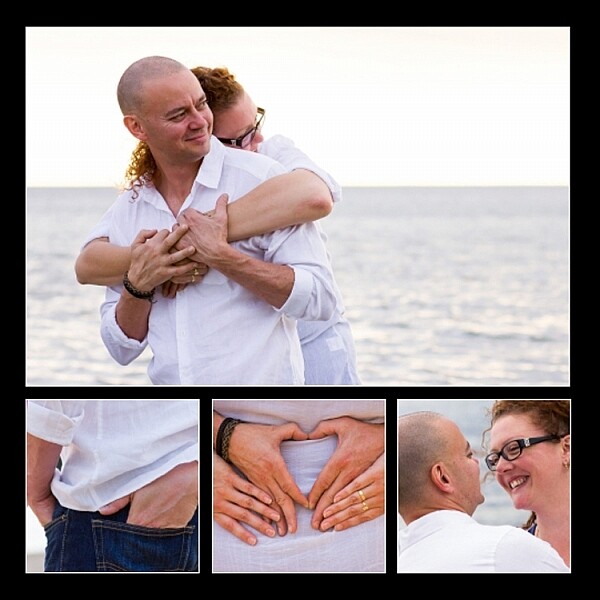
    Image showing photo collections

    In this collection, the images are unified by similar lighting.

    Step #4: Stick to one subject per collection

    Avoid the temptation to create a hodge podge by cramming every member of a family, or every flower in the garden, into one collection. Allow your subject to shine by devoting a whole collection to him, her (or it, in the case of an inanimate object). As a portrait photographer, my collections usually consist of one full body photo, and several detail shots which help tell a story.

    The photo collection below, taken at a water temple in Bali, depicts a sacred ritual. I took so many other photos I loved at the water temple, but to put them all together would detract from the story. I will save the other photos for a different collection.
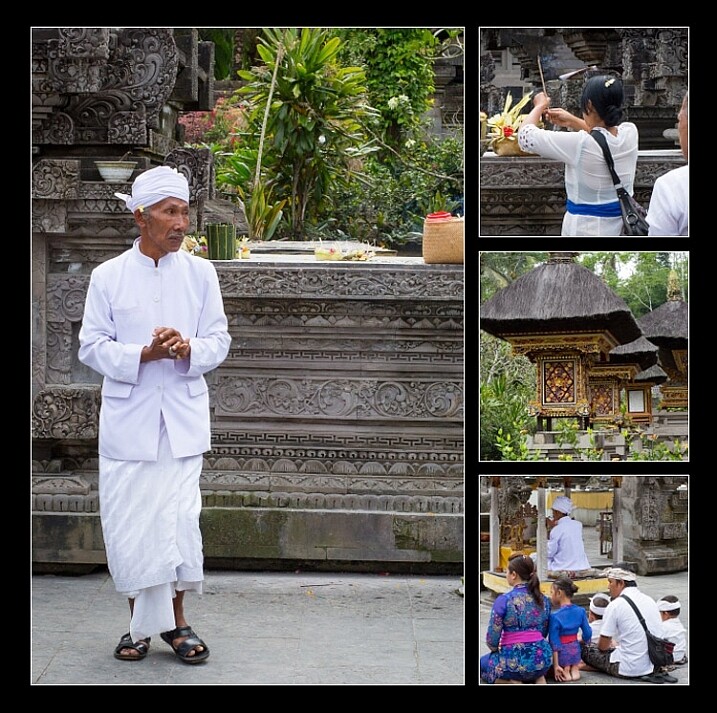
    image showing photo collections

    Although it is tempting to cram every photo you love into a collection, the result is much more pleasing when you stick to one subject.
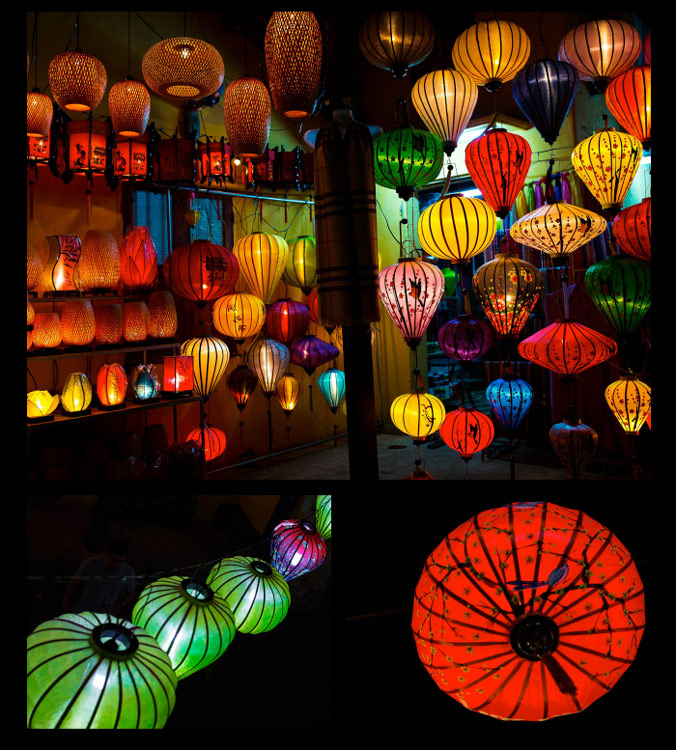
    image showing photo collections

    My main photograph in this collection is full of colour and a variety of shapes. To complete the collection, I have chosen closer-up detail shots of just two of the many lanterns.

    Step #5: Collage or collection?

    A photo collection can be made up of separate pieces displayed together, or you can create a collage to print as a single piece. Your decision will be influenced by the space you want to fill, the material you want to print on, and your budget.

    A collection of separate pieces tends to look more luxurious than a collage. With some configurations such as stairs, it may be your only option. Another benefit of printing each piece separately is that you can change the layout later if you want to. Also, if one piece is not working quite the way you imagined, you can swap it out for a new one.

    The photos below, taken at dawn on a beach in Vietnam, will be printed as separate pieces and hung together as shown.

    image showing photo collections

    Displayed together, the four photos tell a story.

    On the flip side, printing multiple pieces can be expensive, and it can be tricky to hang a multi-piece collection with the accuracy it deserves. Some configurations, such as the black and whites below, can look itsy-bitsy when printed separately, and look better printed as a single piece.

    You can create hi-res collages like this in Photoshop, Lightroom, or the professional version of Proselect. Alternatively, you can buy ready-to-hang frames with cut-out mats designed for collections, or you can ask a framer to create a customized mat for your frame.

    This collage was designed to be hung above a dining table, so the long narrow shape worked well. Background and borders are white to match the colour scheme of my clients’ home, and it is printed on metal to suit their contemporary decor.
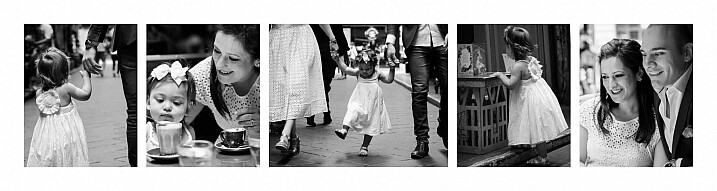
    image showing photo collections

    This was designed to be printed as a single piece.

    Collections and collages are a fun and interesting way to display your favourite images. With a little care and thought, they can make breathtaking displays that will last for a great many years. I hope this article inspires you to go and rescue those beautiful images of yours that are trapped in the digital world, and bring them to life!

    Share in the comments section below your favourite photo collections or collages, or any hints or tips you have learned along the way.

    googletag.cmd.push(function() {
    tablet_slots.push( googletag.defineSlot( “/1005424/_dPSv4_tab-all-article-bottom_(300×250)”, [300, 250], “pb-ad-78623” ).addService( googletag.pubads() ) ); } );

    googletag.cmd.push(function() {
    mobile_slots.push( googletag.defineSlot( “/1005424/_dPSv4_mob-all-article-bottom_(300×250)”, [300, 250], “pb-ad-78158” ).addService( googletag.pubads() ) ); } );

    The post 5 Steps to Creating a Printed Photo Collection as Wall Art by Karen Quist appeared first on Digital Photography School.


    Digital Photography School

  • Video: Meet the Nikon D500

    It’s really here. The wait for the D300’s successor has been a long one, but the Nikon D500 has officially arrived. So what does the D500 bring to the freshly-revived flagship APS-C lineup? We break down just what’s new and notable in our video overview.

    Articles: Digital Photography Review (dpreview.com)

  • Sony enables XAVC S recording to SDHC card with a7R II and a7S II firmware update

    Newly released firmware updates for the Sony a7R II and a7S II enable XAVC S format video recording to SDHC memory cards. Previously, XAVC S format video could only be recorded to an SDXC card. Sony makes a couple of notes on the use of SDHC cards for XAVC S video – any recorded files larger than 4GB will be split into multiple files to comply with a 4GB maximum file size limitation. Cards must also be at least SD Speed Class 10 and UHS Speed Class U1 or faster. Video recorded at 100Mbps or more must use a UHS Speed Class U3 card.

    Articles: Digital Photography Review (dpreview.com)

  • Paper Westeros: Game of Thrones Intro Recreated in Moleskine Notebooks

    [ By Steph in Art & Sculpture & Craft. ]

    game of thrones opening 1

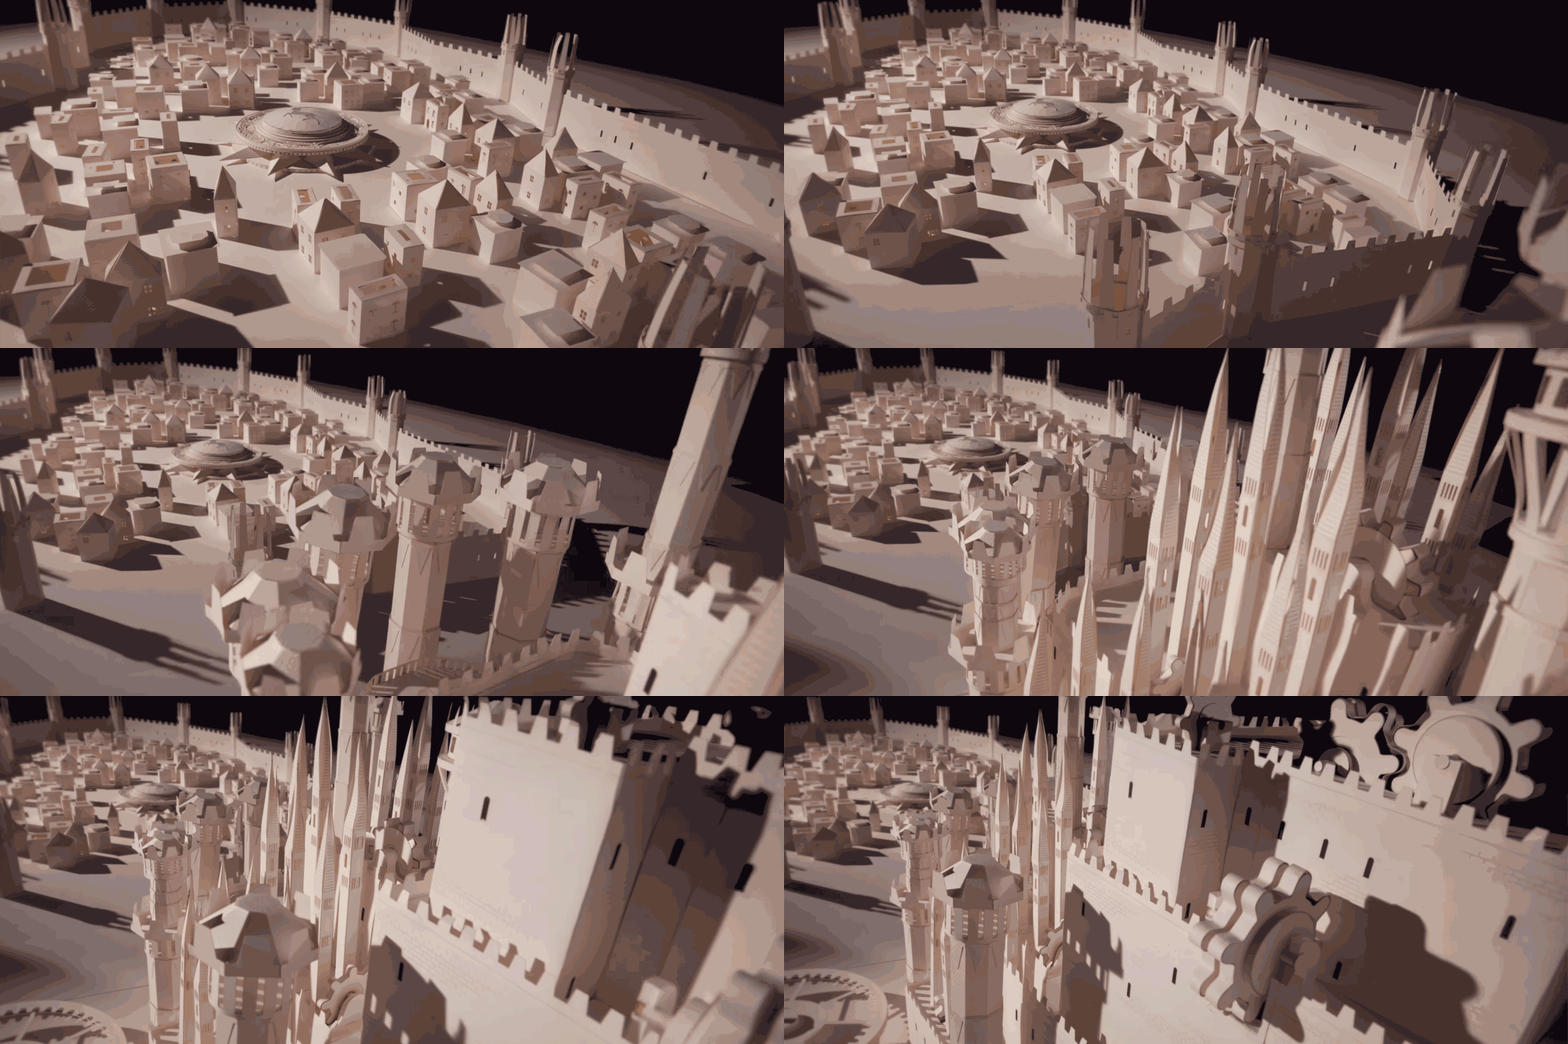
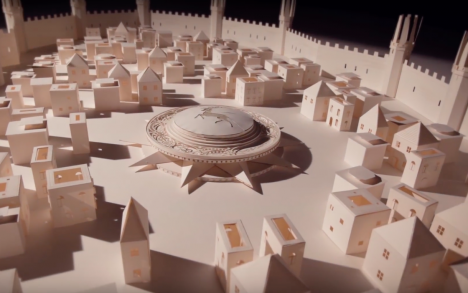
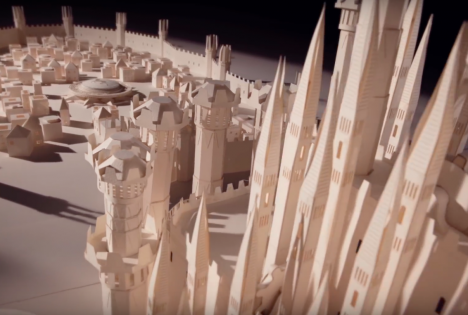
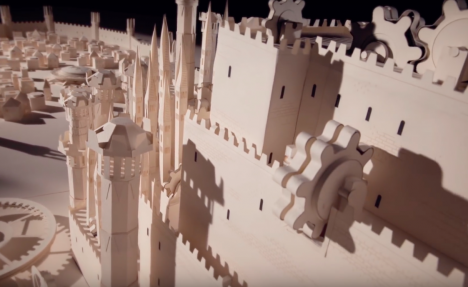
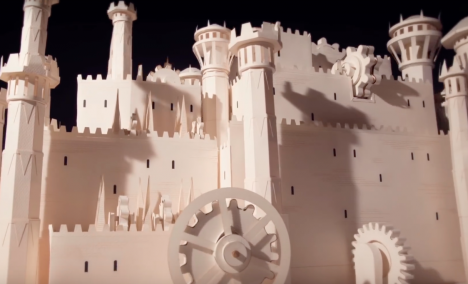
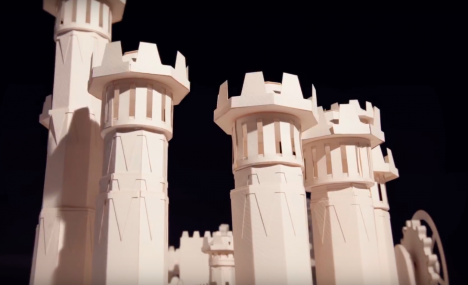
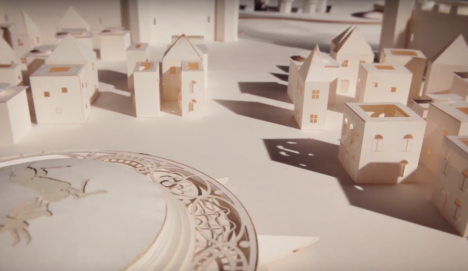
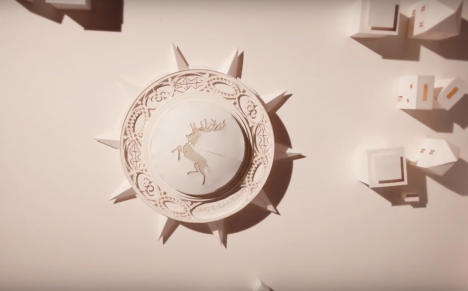
    A snippet of the imaginative and ever-changing opening sequence of HBO’s Game of Thrones series is recreated in stop-motion using over 7,600 paper cutouts made with Moleskine notebooks in this 40-second video. Made by Milan-based animation studio Dadomani to promote the brand’s new Game of Thrones notebooks, the moving models mimic the computer animation seen on the show, wherein three-dimensional structures emerge from the surface of a map and spring to life.

    Screen Shot 2016-04-27 at 5.38.46 PM

    Screen Shot 2016-04-27 at 5.39.05 PM

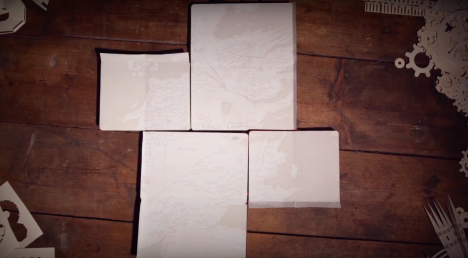
    Opening with a view of the sigil of House Baratheon, the video sweeps through King’s Landing as paper gears turn and spires begin to retract. The tiny paper houses disappear as the stag-topped sigil spins, and the camera pans out to a classic Tolkien-style map of Westeros before the scene splits into four pieces.

    Screen Shot 2016-04-27 at 5.39.19 PM

    Screen Shot 2016-04-27 at 5.39.35 PM

    Screen Shot 2016-04-27 at 5.39.48 PM

    Screen Shot 2016-04-27 at 5.39.58 PM

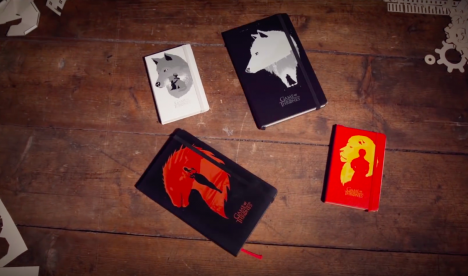
    These four components are revealed to be the individual notebooks in Moleskin’s Game of Thrones series, each covered with the dire wolves of the Starks, the Targaryen dragon and the Lannister lion. A fifth notebook, the collector’s edition only available in Moleskin stores, features an image of the Iron Throne. The silkscreened covers were designed by emerging artist Levente Szabó, and each notebook retails for $ 19.95 – $ 25.95.

    Screen Shot 2016-04-27 at 5.40.17 PM

    Screen Shot 2016-04-27 at 5.40.35 PM

    Screen Shot 2016-04-27 at 5.40.50 PM

    The designers of the original animation took inspiration from Leonardo da Vinci’s machines to achieve an effect appropriate for the fantasy series, which is set in a fictional country in a time period recalling the real-world Middle Ages. The cog-filled engines beneath the surface of the map that power all of the movements above represent the secret machinations of the series’ main families, the Houses of Lannister, Baratheon and Stark, along with all of their allies and enemies. Check out how the paper version was created in the video above.

    Share on Facebook


    [ By Steph in Art & Sculpture & Craft. ]

    [ WebUrbanist | Archives | Galleries | Privacy | TOS ]


    WebUrbanist

  • Announcing the All Things Photo Podcast

    I’m happy to announce that I’ve launched a new podcast titled All Things Photo with Eric Cheng. Between the two of us we have decades of professional photography experience and a unique perspective as industry insiders, Eric with DJI & Lytro and myself with BorrowLenses. Unlike other podcasts this series will also include video vignettes above and beyond our recorded discussions. I welcome you to subscribe on iTunes (listing soon to be available) and subscribe to the All Things Photo YouTube channel. There is a lot still to be done getting the podcast off the ground (including decorating my office), but content begins flowing today.

    All Things Photo #1: Lightroom 6.2 Troubles + Light L16 Camera Impressions
    Hyped concerns and expectations…

    1. Lightroom releases a buggy update that revamps the beloved Import screen and sparks widespread ire amongst photographers.
      Warranted or overblown?
    2. Light announces the L16 camera promising in camera processing, wifi capabilities, depth of field control and a wide range of optical focal lengths (35-150mm). What we saw at the Light L16 camera launch party in San Francisco.

    Additional Content
    Essential Resources to Back Out of a Lightroom Upgrade – JMG-Galleries.com

    Lightroom 6.2 Release Update and Apology – Adobe Lightroom Journal

    Previous import experience to be returned – Adobe Lightroom Journal

    Adobe Lightroom Import Screens Before and After – Petapixel

    Light.co L16 Camera web site – Light.co

    Light L16 Camera promotional video – Vimeo

    The Light Story (video) – Vimeo

    Robert Scoble Interview of Light CEO Dave Grannan (video) – Facebook

    Read more at http://allthingsphoto.libsyn.com/allthingsphoto-1-lightroom-62-troubles-light-l16-camera-impressions#3bUZtXh236Oc2k2E.99
    If you’re interested in joining our podcast mailing list visit All Things Photo, our site will be up shortly (much quicker than displayed)

    The post Announcing the All Things Photo Podcast appeared first on JMG-Galleries – Landscape, Nature & Travel Photography.


    JMG-Galleries – Landscape, Nature & Travel Photography

  • Color Underfoot

    Fallen Aspen leaves with water droplets resting on melting snow

    Fallen Aspen leaves with water droplets resting on melting snow

    Photographing Fall Color took an interesting turn when snow fell in the mountains above Bishop, California a couple of weeks ago. While the colorful leaves in the trees above me were an obvious choice to photograph I first chose to capture the contrast between colorful leafs past their prime against the snow. To me this photo exudes silence & calm, the quiet after a battle against the elements.

    Photo Details
    Canon 5Ds R, Canon EF 70-200mm f/2.8 IS USM at 70mm, ISO 160, 1/160/sec at f/8

    The post Color Underfoot appeared first on JMG-Galleries – Landscape, Nature & Travel Photography.


    JMG-Galleries – Landscape, Nature & Travel Photography