Blog

  • It’s not the camera you have – it’s what you do with it

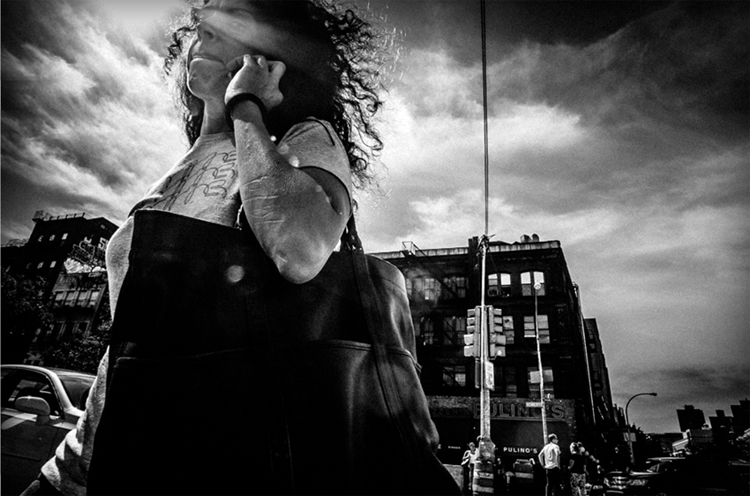
    What you do camera 1

    One day, as I was looking up to the stars, a revelation came upon me. It got imprinted into me that my career should be in photography. That’s the story I’d like to tell myself about how I entered photography. The reality is that I stumbled unto photography quite by accident. I saw a friend of mine who had this very nice professional looking camera. Big, black, sexy, it was a Nikon D80.

    One faithful day I did the math while counting my money, and did a quick Craigslist search. My goodness! Looks like I could buy one! And that I did. But that was just the beginning. After being a Nikon shooter for a while, I started buying lenses, more and more.
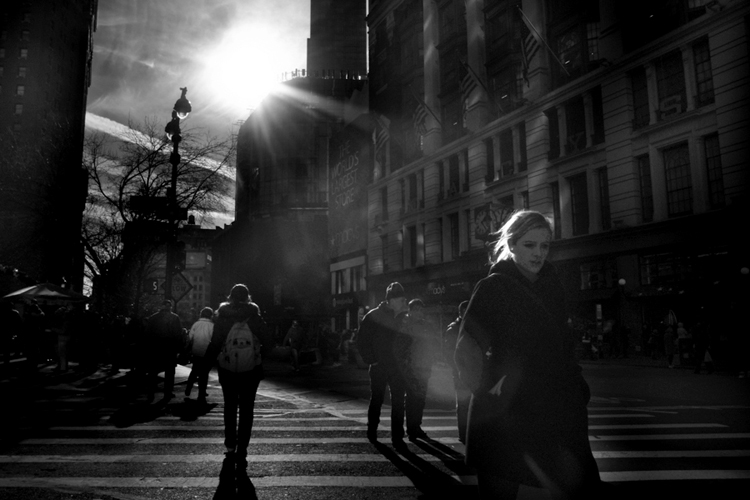
    What you do camera 2

    I brought and sold cameras like crazy, my wife’s family had to ask if I was rich because it seemed like every month or so I would have a new camera. Thing was, I wasn’t rich by any stretch of the imagination, all I had was ebay: I sold some stuff, then bought some stuff, again and again.

    It got so bad that I bought a large format camera, two graflex backs, about a hundred pieces of film, then only shot about three frames before selling it. I even had a medium format camera at some point too, with a box full of medium format film of which I only shot like two rolls, and they are still undeveloped to this day.

    I’m not here to chronicle my old gear addiction, but to hopefully drive a simple point home that I’ve learned the hard way:

    It’s not what camera you have, it’s what you do with it.
    What you do camera 6 What you do camera 9

    Your camera matters

    But before going in, let’s get something out of the way. You’ve probably heard that your camera doesn’t matter, but let me share with you that I believe that yes, it does. I mean, of course your camera matters, how can it not? If you want to make images of birds and your camera doesn’t have a zoom, good luck trying to get close. It’s just a basic fact, all cameras are limited somehow, and because of these limits there are shots that you simply can’t get with certain cameras. Try low light with no flash on a smartphone and see what I mean.

    But who cares?

    But the thing is, it really doesn’t matter that your camera matters. It’s a tongue twister, I know. Not only are modern cameras good enough for pretty much any occasion, but mainly because you can either focus on what you can, or what you can’t, do with your camera. Focus on what you can’t do and you are signing yourself up for gear addiction, as there is ALWAYS something you can’t do with any camera.
    What you do camera 3

    That’s what got me to shell thousands of dollars in gear I never needed in the first place. My camera’s too big, my camera doesn’t look cool enough, or it doesn’t have a viewfinder, etc. I could find all the issues in the world when I needed to rationalize my next purchase. But, after spending thousands buying and selling hear, having used pretty much all of the formats and systems out there, I only have one thing to say – it’s not what camera you use, it’s what you do with it.

    I remember a friend’s wedding. My jaw dropped when I saw the images that their paid photographer produced. The shooter had a serious Canon kit, I think the 70-200mm f/2.8, the whole shabang, a really nice kit if you ask me.
    What you do camera 4

    But goodness gracious I can’t even describe the images. The images looked like a random person with their pre-smartphone phone shot them. They were the blandest of bland – then I realized that they were made on probably $ 3000 worth of gear, but the results were $ 3000 point and shoot images. I had my humble Ricoh GXR back then and got a few shots for myself. The couple thanked me and said, “If it wasn’t for you, we wouldn’t have any nice pictures.”

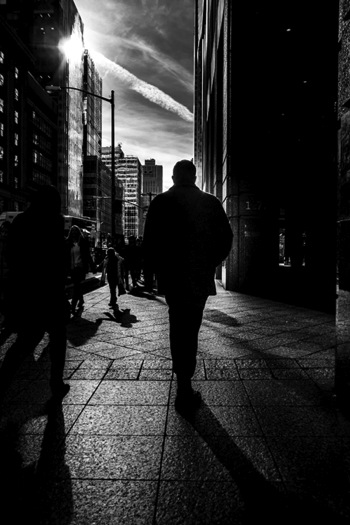
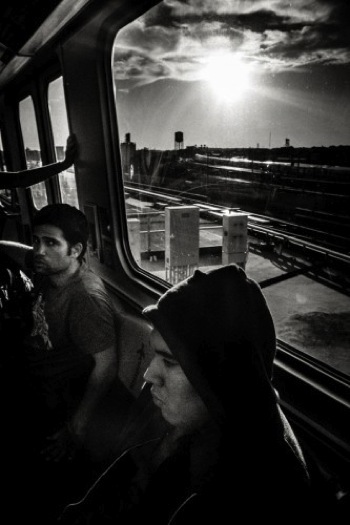
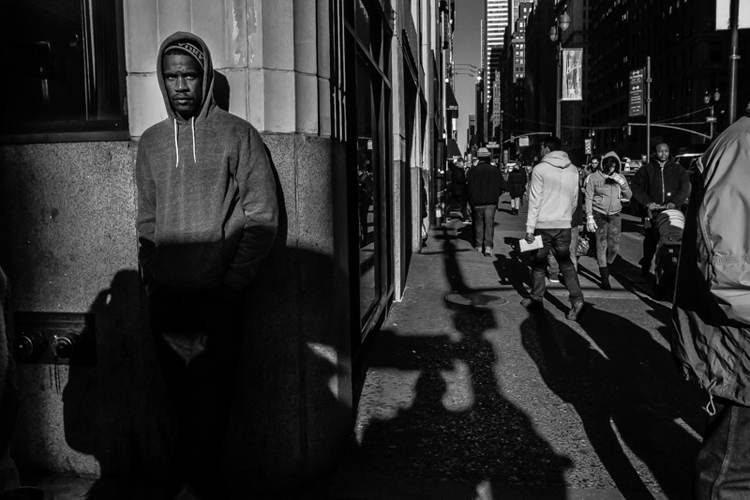
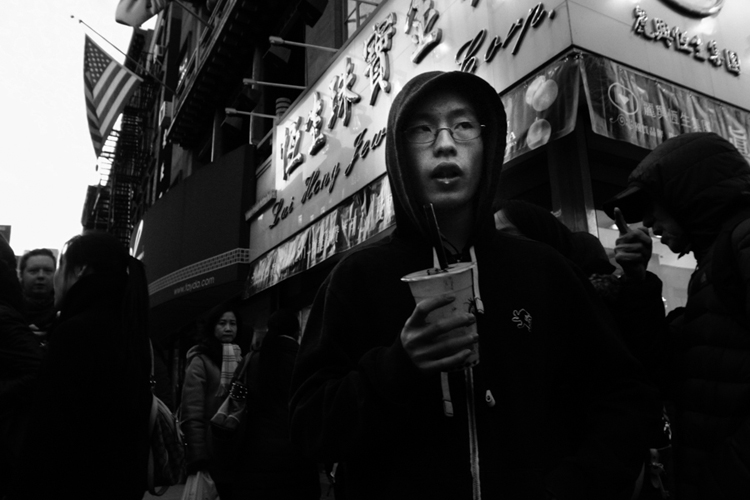
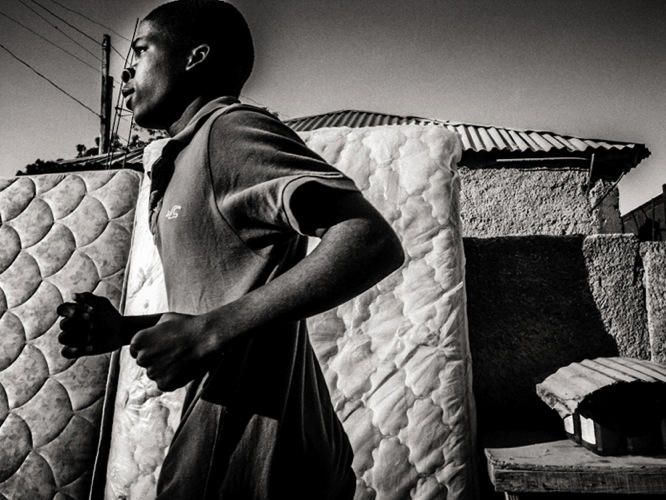
    I’ve seen point and shoot result from cameras worth thousands, and inversely, I’ve seen beautiful results from the humblest of cameras. I think it’s all about using your camera to its maximum potential, whatever that may be. What I realized too late (and it could have saved me lots of money) was that I could have made some nice images with whatever camera I had. From the most expensive one to the cheapest one. Between you and I, all of the images in this article were made with a discontinued, small sensor, pocket camera.
    What you do camera 5

    It’s something I’ve seen over and over again, not only in photography but in life in general. Like the people who only had $ 100 to their names and somehow ended up millionaires. It’s not the cards we have in life, it’s what we do with them. We all could be taller, prettier, whatever. But it’s about making the most of what you’ve got.

    I think the more you understand this principle, the more confidence you will get. I think many of us get confidence from owning a camera, like I did. But I think that confidence is better handled if it’s in your own abilities as a photographer. Something that you can prove to yourself by making the most of your current camera.
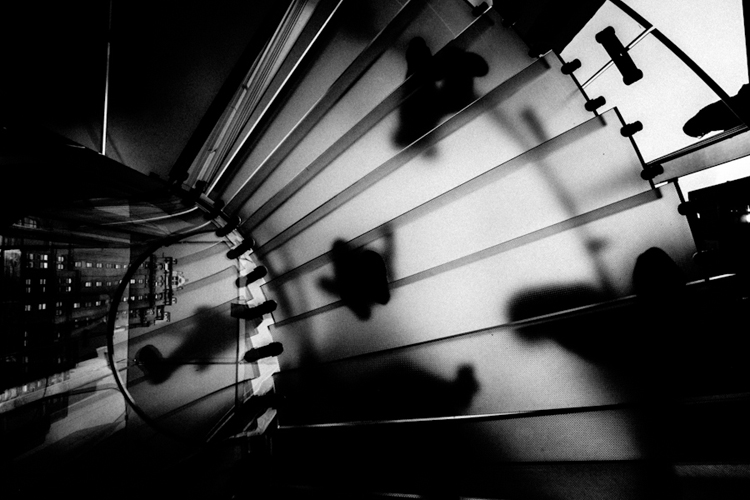
    What you do camera 7

    In short, your camera matters – but who cares? Great images are possible with any camera, because it’s not what camera you have, it’s what you do with it. I’ve proven it to myself, have you? Be yourself, stay focused and keep on shooting.
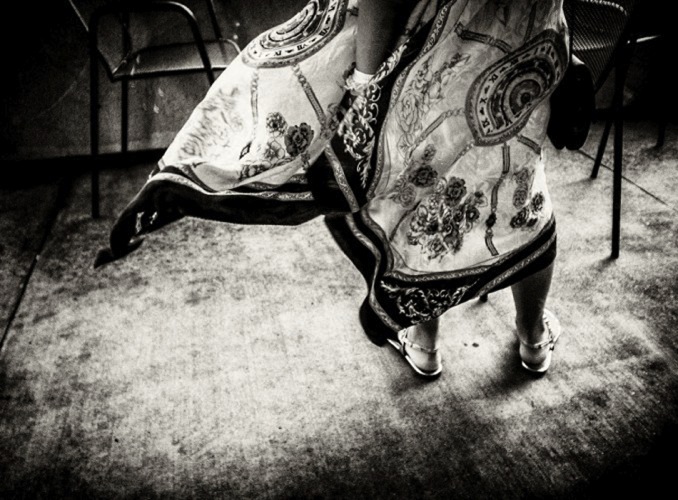
    What you do camera 8

    googletag.cmd.push(function() {
    tablet_slots.push( googletag.defineSlot( “/1005424/_dPSv4_tab-all-article-bottom_(300×250)”, [300, 250], “pb-ad-78623” ).addService( googletag.pubads() ) ); } );

    googletag.cmd.push(function() {
    mobile_slots.push( googletag.defineSlot( “/1005424/_dPSv4_mob-all-article-bottom_(300×250)”, [300, 250], “pb-ad-78158” ).addService( googletag.pubads() ) ); } );

    The post It’s not the camera you have – it’s what you do with it by Olivier Duong appeared first on Digital Photography School.


    Digital Photography School

  • Gritty Cities: Oil Painter Captures Cityscapes at Dusk & Dawn

    [ By WebUrbanist in Art & Drawing & Digital. ]

    construction

    Artist Jeremy Mann works in early in the day or evening, and it shows in the dark, smudged and ultimately riveting way in which he captures streetscapes of major cities from New York to San Francisco.

    urban rooftops

    Wiping, smoothing and layering oil paints with rollers, sponges and brushes, his works, like urban environments, are executions of complex and chaotic addition, evocative yet forever incomplete pictures of a place. He often applies broad marks with an ink brayer and wipes sections away with solvents. Getting increasingly experimental, he has even tried applying and moving paints with doorstops, window wipers and liquor bottles.

    urban street

    “Even that banana which turned out to actually be a good blending tool, painting with lettuce, though, I can tell you might be useless,” said the artist in an interview. “In this process of experimenting with tools, an artist inevitably discovers new techniques as a result of accidents and learning how to recognize those accidents as worthy or not, and then harness them or bury them.”

    urban street shot

    His paintings are as much about capturing the spirit of a place as its details. Rather than appearing as normal paintings, the pieces start to blend and blur, looking more like photographs shot on a rainy day with all the reflections of puddles, drips, and reflections enhanced. If anything, his recent works also seem to be growing more obscured and abstract over time, perhaps in part as his pallete of artistic tools expands.

    oil complex painting

    As art writer Christopher Jobson explains: “Mann applies and wipes away areas of the canvas to recreate these hazy environments, adding layers of paint back on top of the slightly smeared works with more detailed strokes. This layered effects makes the works appear like double exposed images, two scenes gently blurring into one. The resulting paintings are dark and atmospheric, urban streets seemingly drenched in rain and mystery.”

    oil urban landscape

    Mann’s work goes beyond just urban landscapes, and some of his pieces can be seen come June in the John Pence Gallery (you can also see more of his work on Instagram and Facebook).

    Share on Facebook


    [ By WebUrbanist in Art & Drawing & Digital. ]

    [ WebUrbanist | Archives | Galleries | Privacy | TOS ]


    WebUrbanist

  • Friendly Rebel: Canon EOS Rebel T6 / 1300D samples

    Canon’s latest entry-level Rebel DSLR does what all of its entry-level offerings do best: provide only the basic level of controls and features in a beginner-friendly and cost-conscious body. The Canon EOS Rebel T6 (1300D) continues the tradition with an 18MP APS-C sensor, 9-point AF system, built-in Wi-Fi with NFC and 1080p HD video. See how it performs under a variety of conditions in our real-world shooting.

    Articles: Digital Photography Review (dpreview.com)

  • 2016 Roundup: Enthusiast Long Zoom Cameras

    While most of new 1″ sensor enthusiast cameras have been on the shorter end of the focal length spectrum, there are now quite a few long zoom models, as well. Whether you want something pocketable or want to shoot for the moon (pun intended), you’ll find it in this group.

    There are plenty of other long zoom compacts out there, some offering focal ranges reaching 2000mm though they almost always use much smaller 1/2.3″ sensors (the Olympus Stylus 1s is one exception). The cameras in this roundup eclipse those models, especially when it comes to image quality and control over depth-of-field.

    The models we’re looking at in this article include:

    • Canon PowerShot G3 X
    • Panasonic Lumix DMC-FZ1000
    • Panasonic Lumix DMC-ZS100/TZ100
    • Sony Cyber-shot DSC-RX10
    • Sony Cyber-shot DSC-RX10 II
    • Sony Cyber-shot DSC-RX10 III (coming soon)

    The cameras that have the shortest zoom are arguably the most robust, feature-wise: the Sony Cyber-shot RX10 twins. (The RX10 Mark III, which will cover soon, has a significantly longer lens.) The Panasonic Lumix DMC-ZS100/TZ100 is likely the best travel zoom ever, offering a good balance of size and zoom power, while the Canon PowerShot G3 X and Panasonic Lumix DMC-FZ1000 swing for the fences in terms of zoom power.

    To further help you pick the right camera in this class, we’ve created the chart below, which breaks down the equivalent aperture for each camera, as you work your way through the zoom range. Our article here explains the concept of equivalence, but at a high level all you need to know is that the lower the line is on the graph below, the blurrier the backgrounds you’ll be able to get and typically, though not always, the better the overall low-light performance.

    This graph plots equivalent focal length against equivalent aperture – with both axes taking sensor size into account so that they can be compared on a common basis. Equivalent focal lengths offer the same field-of-view and equivalent apertures give the same depth-of-field and similar total light capture. For more information, click here.

    With its constant aperture (F2.8) lens, the Sony Cyber-shot RX10 I/II capture more total light and offers more control over depth-of-field compared to its peers, by 1 or 2 stops. The trade-off is that its focal length caps out at 200mm equiv. The Canon PowerShot G3 X has the longest lens, but it reaches its maximum aperture (F5.6) at around 200mm equiv., putting it 1 stop behind the Panasonic Lumix FZ1000, which tops out at F4.

    And with that out of the way, let’s get right into exploring the enthusiast long zoom cameras!

    Articles: Digital Photography Review (dpreview.com)

  • Making a splash: Nikon D500 real-world sample gallery

    Nikon’s flagship APS-C line got a long-awaited update in the D500. And as far as updates go, it’s an impressive one: its 20.9MP sensor, 10 fps continuous shooting, 153-point AF system and 4K video shooting make it something of a DX-format D5. Our initial studio test results have been very encouraging, so we were eager to follow them up with plenty of real-world shooting.

    Articles: Digital Photography Review (dpreview.com)

  • Sony posts significant imaging division income gains in 2015 financial year-end report

    There’s plenty of bad news going around the camera industry lately. Companies once flush with cash from compact camera sales are now struggling to keep sales even. But despite the downward trend on a lot of camera manufacturers’ books, Sony is coming through with some positive numbers. In its latest year-end financial report, the company boasts a 30.4 billion yen increase in operating income for its imaging products division, despite a 1.7% year-on-year decrease in sales.

    It’s a familiar story – Sony attributes the gain in income to a more favorable mix of high-value products, no doubt including its full-frame mirrorless line and premium RX-series compacts. Cost-reduction measures are also cited as contributing to the income gains. And though the upward trend is no doubt good for Sony, those numbers aren’t quite as impressive as they seem at first glance. The imaging division’s 2014 figures were hit by significant restructuring charges, bringing down the bottom line by 7.3 billion yen by the end of the year.

    Even taking into account last year’s mark-down, Sony has put up some very strong numbers for its imaging products in 2015’s financial year.

    Articles: Digital Photography Review (dpreview.com)

  • Street Origami: Vivid Urban Art Installations in Folded Paper

    [ By Steph in Drawing & Digital. ]

    Screen Shot 2016-05-02 at 5.33.35 PM

    Busting out beyond small proportions, delicate materials and indoor settings, origami has a chance to bloom, bringing bold colors and unexpected patterns to urban surfaces around the world. Paris-based street artist Mademoiselle Maurice installs large-scale origami artworks on public walls, ceilings, crumbling stone castles and even beach rocks, everywhere from Singapore to San Francisco. While some of her creations are made on canvas or installed in galleries, others are made to be destroyed, as ephemeral as real flowers blossoming and then dying on a branch.

    origami street art 1
    origami street art 2
    origami street art 3
    origami street art 4

    Maurice says she was first inspired to work with origami while living in Tokyo for a year. She was there when the devastating earthquake, tsunami and nuclear power plant explosion occurred in 2011, and wanted to make art reflecting how she felt about the tragedy. Her first project came from the legend of 1,000 origami cranes, an ancient tale promising that anyone who manages to fold that many tiny paper cranes will be granted a wish by the gods.

    Screen Shot 2016-05-02 at 5.32.40 PM
    Screen Shot 2016-05-02 at 5.32.54 PM
    Screen Shot 2016-05-02 at 5.34.21 PM

    Screen Shot 2016-05-02 at 5.34.59 PM

    Growing up in the urban confines of Paris, which she found rather grey and monotonous, Maurice wanted to add more color to the world with works that “emanate a carousel of emotion.” In the past five years, the young artist has collaborated with heavyweights like Louis Vuitton, Google, Vice Magazine and Issey Miyaké, and her work has been installed in Italy, the Netherlands, Sweden, China, Vietnam, Australia, Mexico, the U.S. and many more countries.

    origami street art 5
    origami street art 6
    origami street art 7

    “This is my way to stay discrete and not to impose myself too much on the walls,” Maurice said of her choice to use paper outdoors. “But otherwise I love doing something telling me that it will not last, ‘dust thou shalt return to dust.’”

    Share on Facebook


    [ By Steph in Drawing & Digital. ]

    [ WebUrbanist | Archives | Galleries | Privacy | TOS ]


    WebUrbanist

  • 4 Steps to Make Your Images Pop in Lightroom

    In this article, I share with you the start of my post-processing workflow for pretty much all of the photos I take. I’m mostly using Lightroom for 90% of my post-processing and very rarely do I go into Photoshop for some extra stuff.

    Before we begin I must confess that I’m no post-processing master, nor do I know Lightroom inside and out, and I definitely don’t know Photoshop inside and out. But, as I learned, and I hope you will too, it turns out you don’t have to be a master in order to be able to bring your Raw photos to life. It can be done by just about anyone with just a few simple steps as I’m going to show you.

    8 Photobek Before
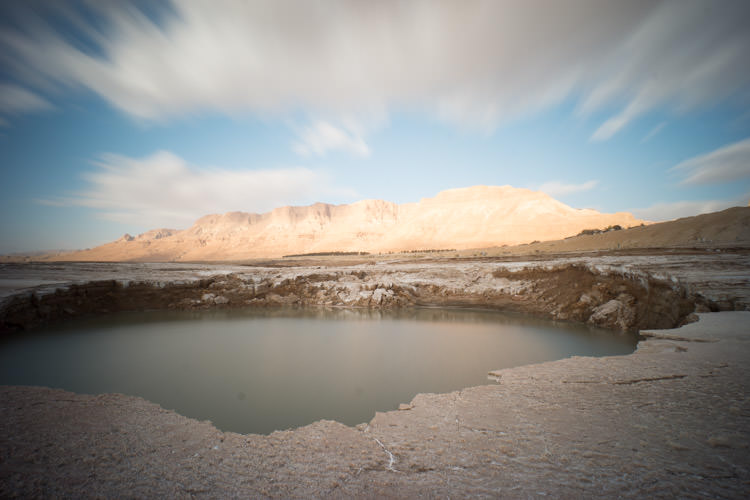
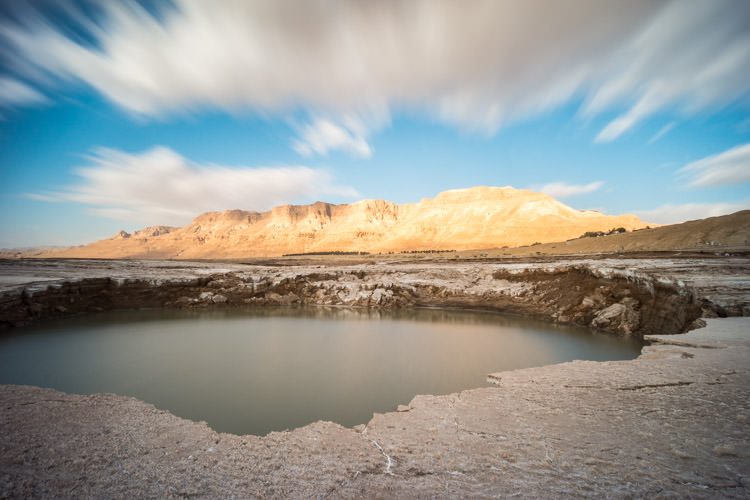
    Before we start, here is the image as taken straight out of camera.

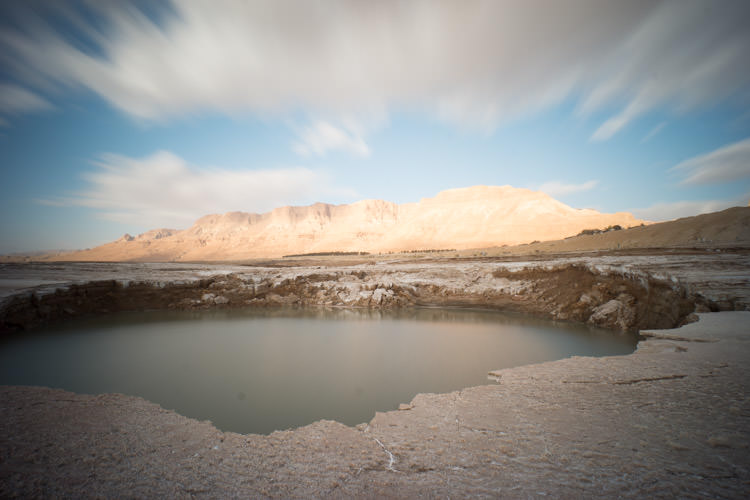
    The photo I’m going to use (above) for this tutorial is one that I took while on a Dead Sea Night and Sunrise Workshop. I didn’t really plan for this photo ahead of time, but it’s probably the best image I took during that workshop. It’s a photo of one of the biggest sinkholes in the Dead Sea area (one out of more than 5,000 and counting) and it’s an 89 second exposure, done with a 10 stop neutral density filter that allowed me to smooth the water inside the sinkhole, and stretch the clouds moving above.

    Now let’s make it POP!

    1. Lens Corrections

    1 Photobek Lens Corrections

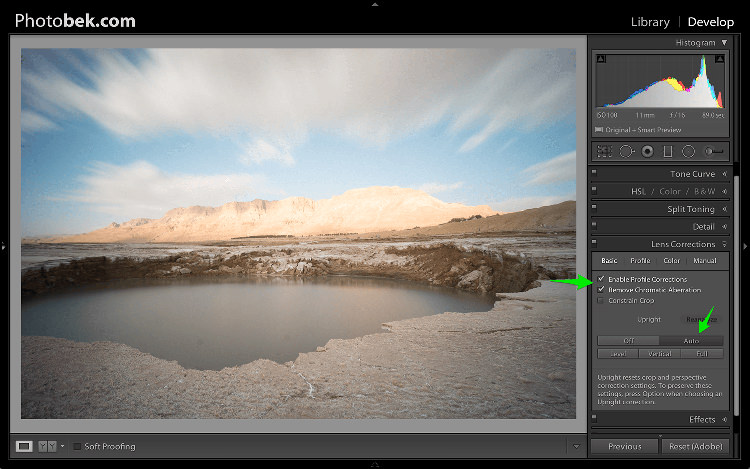
    The first thing I do is apply Lens Corrections. This specific photo was taken with a wide angle lens, and if you’re into landscape photography then a wide angle lens would be your go to lens 80% of the time, so fixing the distortion it creates is important.

    just go to the Lens Corrections Panel and mark the Enable Profile Corrections. Lightroom has profiles for plenty of lenses, and chances are that it will have one for the lens you are using. If not, make sure you update to the latest version of Lightroom as they keep adding support for new lenses as they are being released to the world.

    In some cases I decide to leave the photo as it is without doing the lens correction. It is just a matter of what seems or feels right for each specific photo.

    Under the Lens Corrections panel you can also correct perspective in your photo, so I always click on Auto and see how that affects the image. If it’s good, I keep it. If it’s off I undo it and align in manually, or rotate using the crop tool if necessary.

    2. White Balance

    2 Photobek White Balance

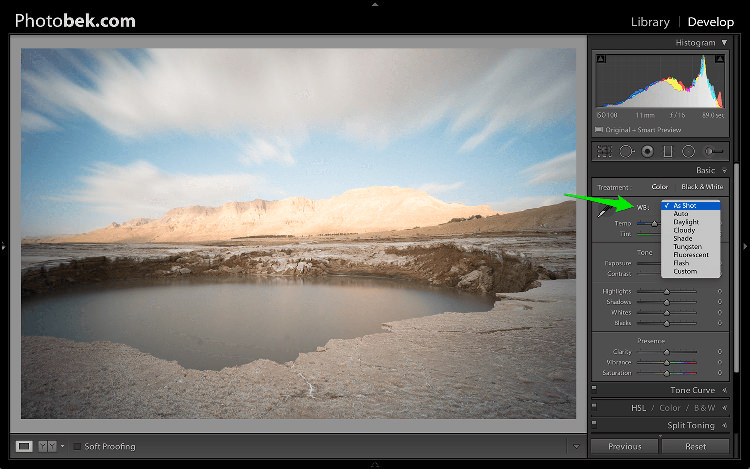
    Adjusting the White Balance comes second. Since I’m always shooting Raw (and if you’re not, then please start) I don’t really mess with White Balance while I’m shooting. Again, this is a matter of playing with the options in Lightroom to see what looks the best, and what makes the image as close to how it looked when I was out shooting.

    80% of the time I’m using either the Auto or As Shot options, and for this photo I kept it at As Shot.

    3. Spot Removal

    3 Photobek Spot Removal 01

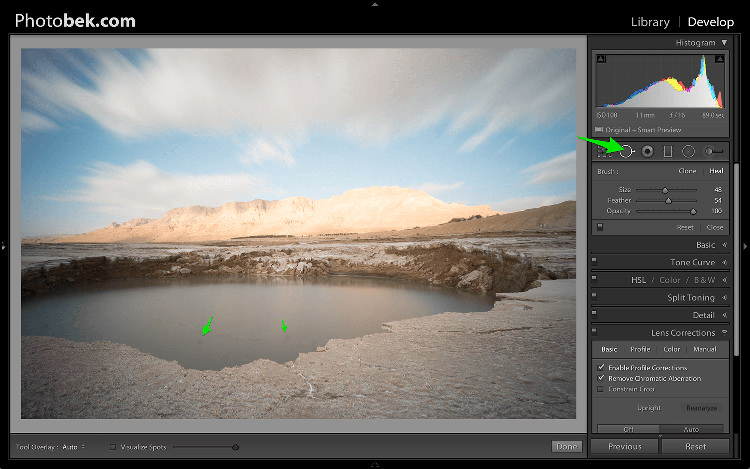
    Spot Removal is a MUST. Not removing the spots from your photos is a really bad habit. It’s hard to avoid having these spots, as the lens or sensor will get some dirt and dust on them, and having them cleaned on a consistent basis is not really something most photographers do. I know I don’t.

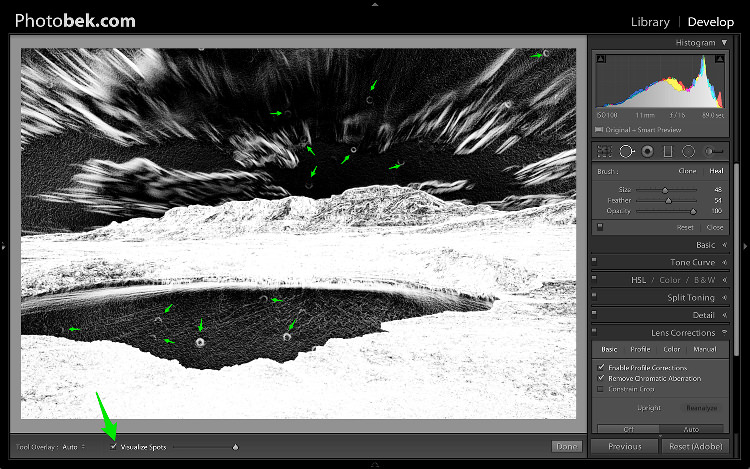
    Spots can ruin a photo in my opinion, I simply hate them, but I love getting rid of them and Lightroom makes it super easy to do. As you can see in the screenshot above I marked two very obvious spots with arrows but after using the Visualize Spots feature look what happens.

    4 Photobek Spot Removal 02

    BOOM!

    I know I shouldn’t be so happy since my lens (or sensor) is pretty filthy, but thanks to this great feature in Lightroom I can see pretty much all the spots and get rid of them.

    You can choose between Clone or Heal in the Spot Removal tool. I usually use Heal as it does a better job of removing the spots and picking the best places to copy over from.

    4. Basic Panel

    5 Photobek Basic 01

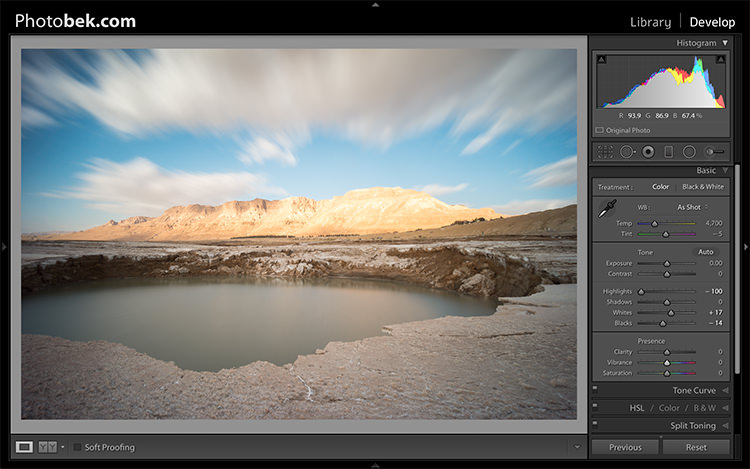
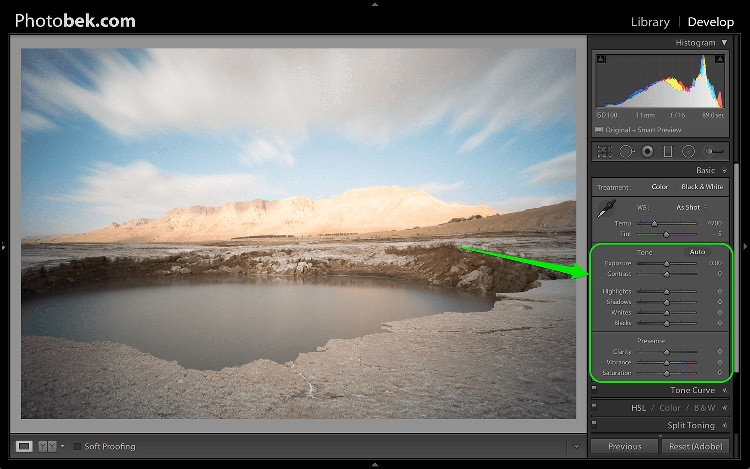
    This is where most of the magic happens, and this part makes the biggest impact on the photo. It has nine sliders (besides the two sliders for White Balance which we already took care of in step 2) and the most important thing for you to know, is that every photo needs its own adjustments as each image is different.

    The adjustments I’m going to make on this specific photo might not work so good on a different shot, so keep in mind that the overall process is similar and I’ll use all these sliders for every photo, but not necessary move them to the same locations.

    Let’s begin:

    4.1 Exposure

    6 Photobek Histogram

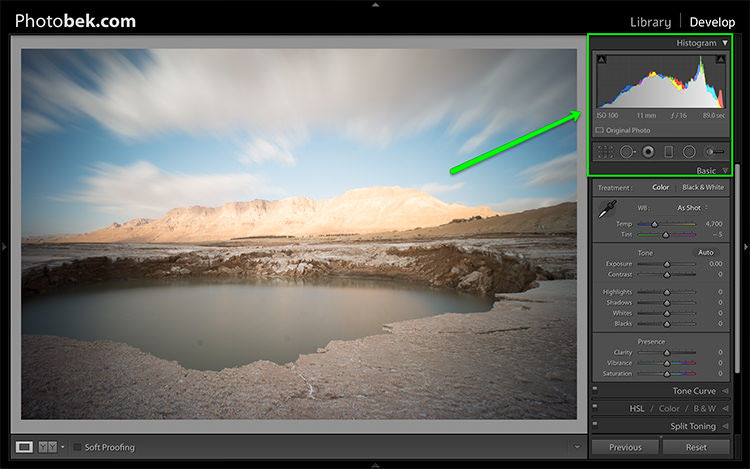
    Since the photo was exposed well, and there is no clipping as you can see in the histogram above, I didn’t need to make any adjustments to the Exposure slider, so I left it at 0.

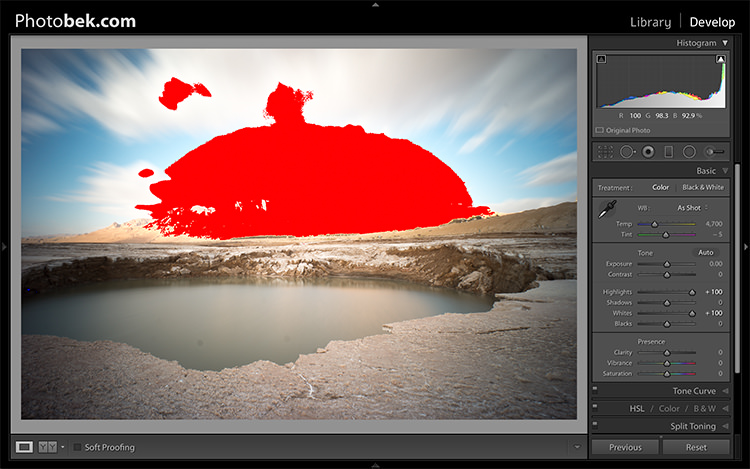
    The histogram is a great tool that you should keep your eyes on at all times during your post-processing work on an image. It will provide you with valuable information about the clipped areas in a photo (in case it has any).

    Here is what it would like if the highlights were clipped (press J or click/hover on the arrows that are shown at the top of the histogram to activate the clipping indicators).

    6 1 Photobek Histogram Clipped Highlights

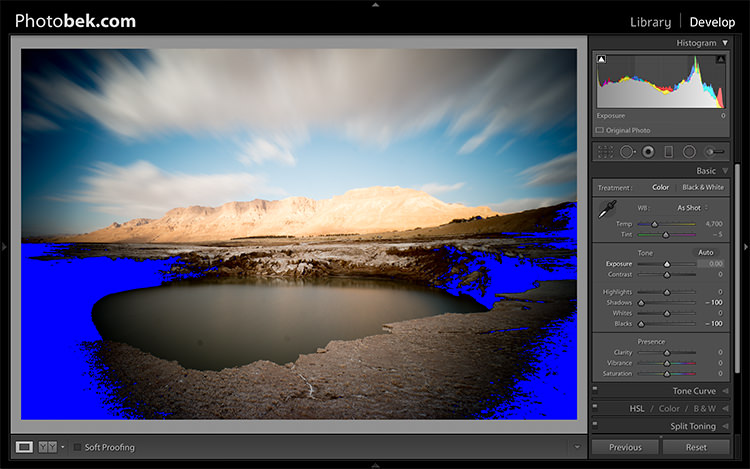
    Here is what it would like if the shadows were clipped.

    6 1 Photobek Histogram Clipped Shadows

    Keep in mind that some clipping is perfectly acceptable, and might even be desired at some occasions. The trick is to find out where the clipping is occurring, and deciding whether a loss of detail in that area is acceptable or not, and that is entirely up to you to decide.

    4.2 Contrast

    I usually don’t mess around with the contrast slider much, as making the adjustments to the following sliders also has a big impact on the contrast of the photo, so I don’t find it necessary. I kept Contrast at 0 for this photo.

    4.3 Highlights

    The highlights slider is designed to bring back detail (moving slider to the left) in the brightest areas of an image, or to brighten (moving slider to the right) highlights while protecting against clipping.

    What you should do is drop the highlights slider all the way down to -100 while watching your histogram, and move it back up if needed. In the case of this photo I dropped it to -100 and kept it there, and you can clearly see that it brings back plenty of detail in the clouds and the mountain in the background.

    7 Photobek Highlights

    4.4 Shadows

    The Shadows slider will affect the midtone shadows, to the lower end of the deeper shadows. To brighten up the shadows, simply pull the slider to the right. To darken the shadows, move the slider to the left. For this photo I actually kept it at 0.

    4.5 Whites

    The Whites slider sets the White Point (brightness) or extreme tonal range of an image, by either lowering or raising this white value. The difference between Highlights and Whites is that the whites slider help you to define the true white in a photo, and the hightlights slider helps you recover lost detail in the highlights of your photo.

    While clicking on the option (MAC) or ALT key (PC) move the Whites slider to the right until you just start to see parts being highlighted in the photo (this indicates which parts are being clipped) then drop it back a little and stop there. For this photo I moved it to +17.

    4.6 Blacks

    The Blacks slider deals with the darkest areas of the image. While clicking on the option (MAC) or ALT key (PC) move the Blacks slider to the left until you see black areas appear (those areas are clipping in the shadows) than move it back a little and stop there. For this photo I moved it to -14.

    7.1 - Photobek - Shadows, Whites & Blacks

    Shadows, Whites and Blacks adjusted

    4.7 Clarity

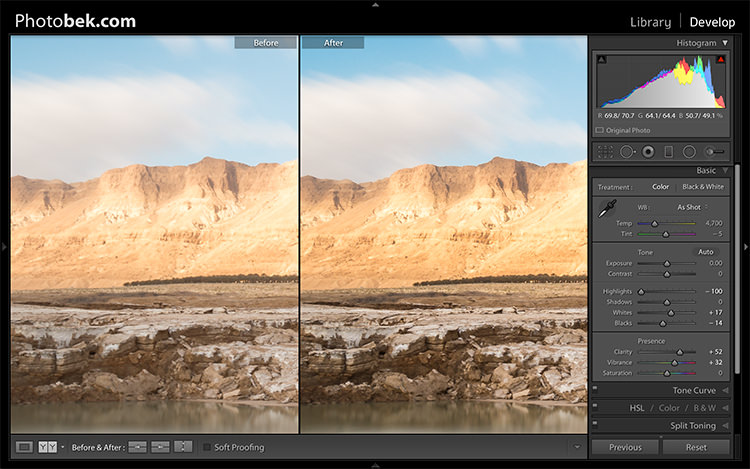
    Clarity is, in effect, a contrast tool. However, rather than boost contrast across the entire range of the image, it affects it only in areas of the image where it finds edge contrast. This makes it a more subtle tool than the contrast slider and it’s excellent for adding punch to your images, without making them look unnatural.

    Raise it up until you think it made the impact you want on the photo, but don’t over do it. For this photo I took it up to +52.

    4.8 Vibrance

    Vibrance is the close cousin of Saturation, and at first they may seem to be almost the same, but Vibrance is different. The Saturation control moves all the colors in the spectrum up or down in saturation, more or less together. Vibrance on the other hand, is a lot more selective about the way it saturates colors as it only saturates colors that need it, which means it doesn’t oversaturate colors that are already very saturated or colors of very low saturation.

    Raise it up until you think it made the impact you want on the photo, and again don’t over do it. For this photo I took it up to +32 to add more blue to the sky and more earth colors to the mountain.

    Clarity and Vibrance adjusted

    Clarity and Vibrance adjusted

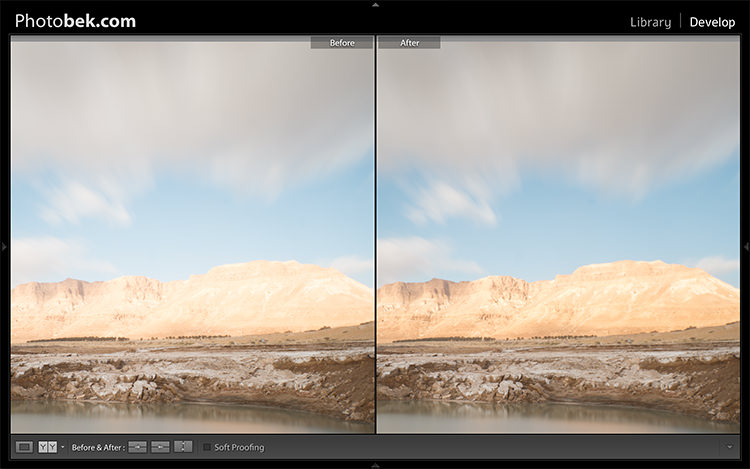
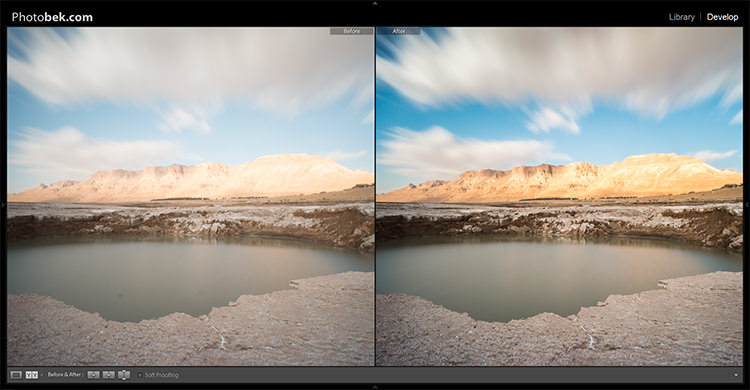
    Before and After

    As you can see, not much was done to the image and this entire process shouldn’t take more than a few minutes (depending on how many spots you have). I think it makes a world of difference to this specific image, and to any image for that matter.

    Here is the image as taken straight out of camera:

    8 Photobek Before

    Here is the image after the adjustments were made:

    9 Photobek After

    Finally, here are the before and after one next to the other:

    10 Photobek Before After

    I hope you enjoyed this tutorial, and more importantly, I hope you’ve learned something that you can actually implement on your own photos to make them POP.

    googletag.cmd.push(function() {
    tablet_slots.push( googletag.defineSlot( “/1005424/_dPSv4_tab-all-article-bottom_(300×250)”, [300, 250], “pb-ad-78623” ).addService( googletag.pubads() ) ); } );

    googletag.cmd.push(function() {
    mobile_slots.push( googletag.defineSlot( “/1005424/_dPSv4_mob-all-article-bottom_(300×250)”, [300, 250], “pb-ad-78158” ).addService( googletag.pubads() ) ); } );

    The post 4 Steps to Make Your Images Pop in Lightroom by Dror Bekerman appeared first on Digital Photography School.


    Digital Photography School

  • Fujifilm facilities resume some production following Kumamoto earthquakes

    Fujifilm is slowly but surely bringing a key subsidiary’s production facilities back online after earthquakes forced a shut down, and expects to be back at full production by the end of May. In a statement issued today, Fujifilm confirmed that trial operations began on April 23 at the facilities and were ultimately successful. Barring any further problems, the company anticipates being back at pre-earthquake production levels by the end of this month.
    Fujifilm Kyusyu Co., Ltd operates the facilities that were impacted by the earthquakes that struck Japan’s Kumamoto prefecture on April 16. These facilities are responsible for manufacturing a key component of LCD panels. A few days after the event, the company announced that operations in the area would be stopped while assessments were performed. None of the facilities were found to be seriously damaged, but at the time the company said it hadn’t yet decided when operations would restart, and that it would hold a trial run on April 23 and 24.

    Inspections of warehouse stock are still underway; as of April 19, Fujifilm says it has been shipping out products that pass inspections. ‘Fujifilm Kyusyu is doing its utmost to resume all operations,’ says the company; the rate at which it does so is determined in part by the number and intensity of aftershocks.

    Articles: Digital Photography Review (dpreview.com)

  • A New View: 65+ Illuminating Larger-Than-Life Macro Images

    [ By Steph in Art & Photography & Video. ]

    Screen Shot 2016-05-01 at 3.04.12 PM

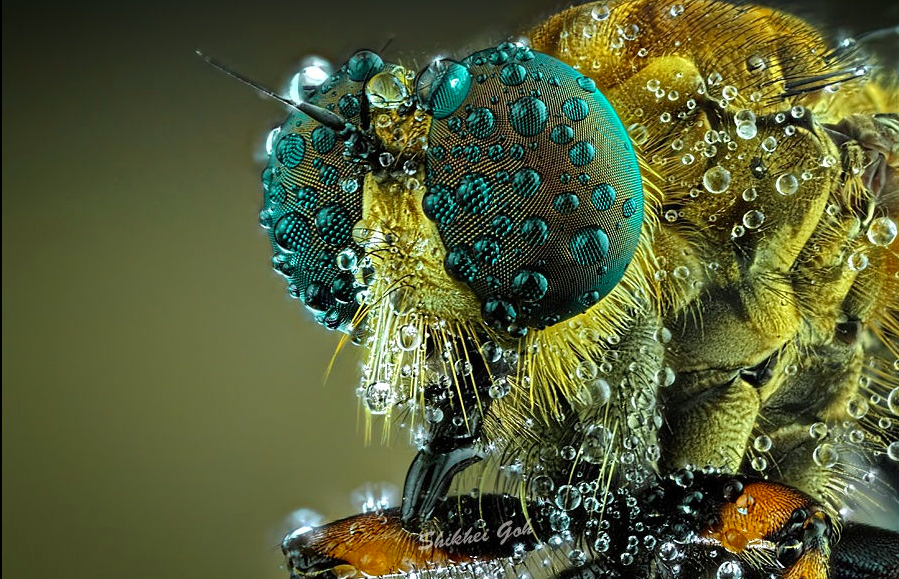
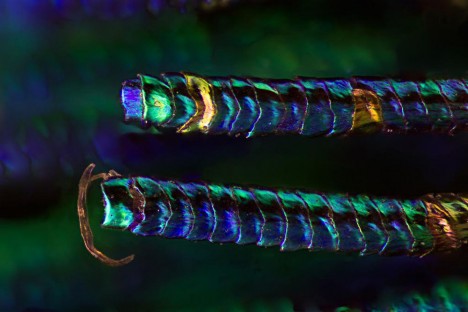
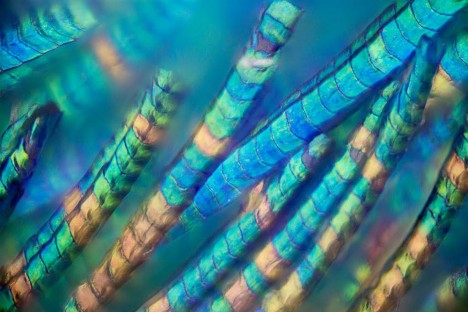
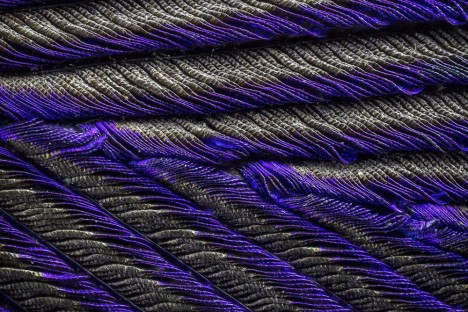
    Few of us would ever get a glimpse of the tiniest rope-like iridescent quills on a peacock’s feather, the scales on a moth’s wing, dew droplets on a spider’s eyes or the planetary patterns on a bubble of soap if not for the macro photographers who carefully document details too small for the naked eye to see. It’s almost as if we’ve shrunk small enough to stare an arachnid in the face, or put ourselves in danger of being trapped by a carnivorous plant.

    Spiders by Jimmy Kong
    macro spider 1

    macro spider 2

    macro spider 3

    macro spider 4

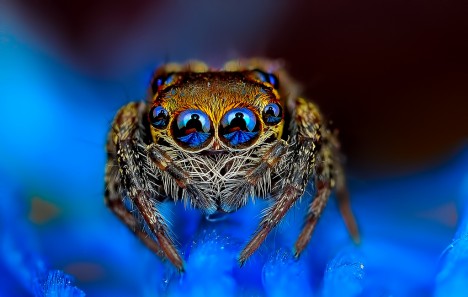
    Six to eight spider eyes stare back at you, reflecting the image of a camera lens, the human holding it, and sometimes a light. Photographer Jimmy Kong captures images of all sorts of creatures, but his spiders seem to have so much personality, watching curiously as he gets close enough to spot the tiny hairs on their legs.

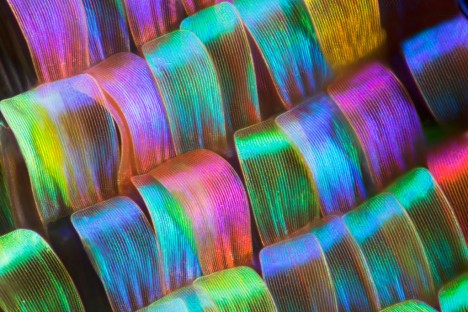
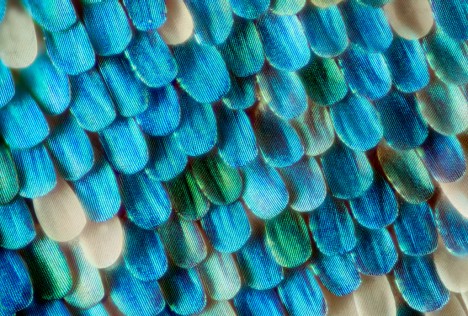
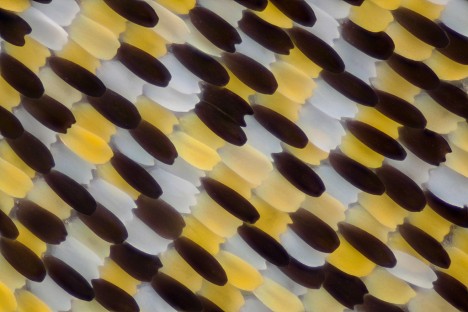
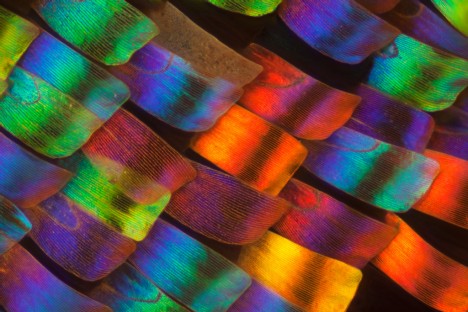
    Butterfly and Moth Wings by Linden Gledhill
    macro butterfly wings 1

    macro butterfly wings 2

    macro butterfly wings 3

    macro butterfly wings 4

    Tiny overlapping scales reminiscent of flower petals reveal the smallest details of their shapes and vivid colors in a series of macro butterfly and moth wings by Linden Gledhill, a biochemist by training.

    Coral & Other Sea Life by Daniel Stoupin
    macro coral 1

    macro coral 2

    macro coral 3

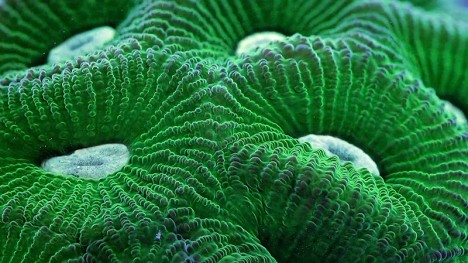
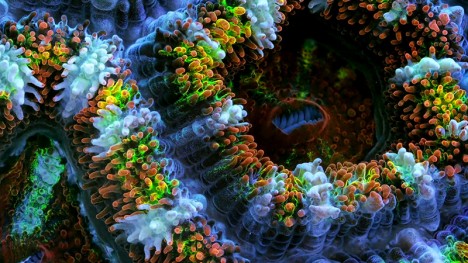
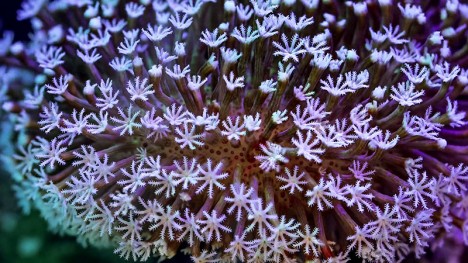
    150,000 shots went into this video documenting the secret lives of ‘slow’ marine animals like coral and sponges, their movements being too small to be seen without a time lapse. Says Bioquest Studios, “Why so many? Because macro photography involves shallow depth of field. To extend it, we used focus tacking and deconvolution algorithms. Each frame of the video is actually a stack that consists of 3-12 shots. just the intro and last scene are regular real-time footage.”

    Peacock Feathers by Waldo Nell
    macro peacock 1

    macro peacock 2

    macro peacock 3

    macro peacock 4

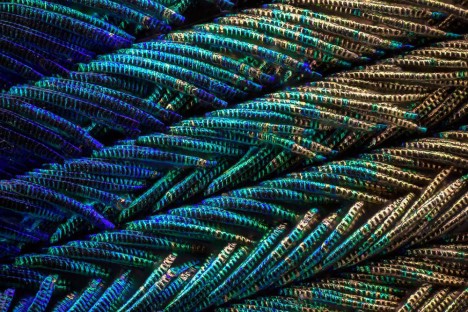
    Go closer and closer and closer to a peacock feather, and the level of detail and color variation only gets more intense, with the smallest parts revealing themselves to be tiny ropes. Photographer Waldo Nell used an Olympus BX 53 microscope to take hundreds of individual shots, combining them to get the images seen here to get the depth of field that is typically lost in this kind of photography.

    Carnivorous Plants by Joni Niemelä
    macro carnivorous 1

    macro carnivorous 2

    macro carnivorous 3

    macro carnivorous 4

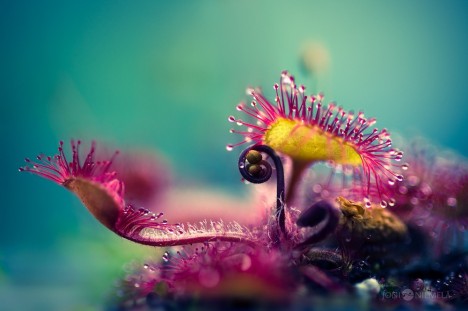
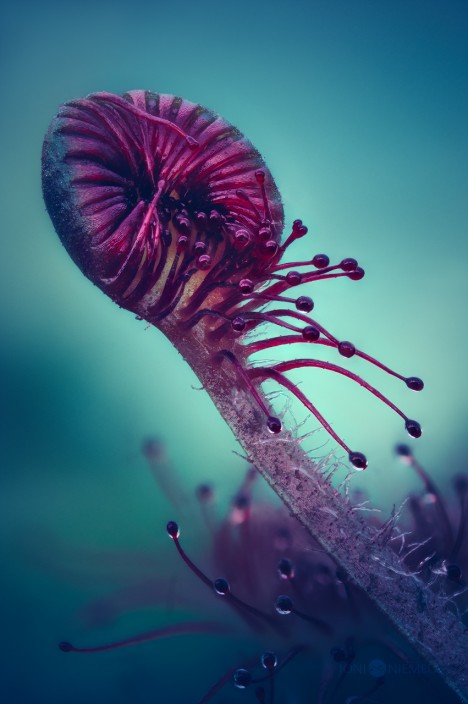
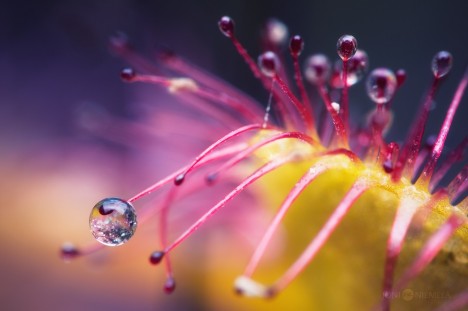
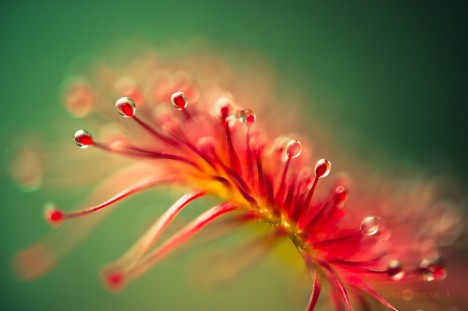
    The sticky insect-baiting appendages of carnivorous plants get a good inspection in all their alien beauty in this series by Joni Niemelä. Each photo offers a different view of the Drosera plant, commonly known as the ‘sundew.’

    Next Page – Click Below to Read More:
    A New View 65 Illuminating Larger Than Life Macro Images

    Share on Facebook


    [ By Steph in Art & Photography & Video. ]

    [ WebUrbanist | Archives | Galleries | Privacy | TOS ]


    WebUrbanist