Blog

  • X-ray: iFixit looks inside the Fujifilm X-M1

    iFixit looks inside the Fujifilm X-M1

    We’re curious people at heart, and we like to know what’s going on inside of our prized electronic possessions. But taking screwdriver to camera isn’t a wise idea if you want to keep you gear functioning with a valid warranty. Thankfully, the folks at iFixit help satisfy our curiosity with their disassembly guides. So let’s enjoy a look under the hood of the Fujifilm X-M1 – from a safe distance, shall we?

    iFixit looks inside the Fujifilm X-M1

    With the lens and battery removed, the project may begin by pulling back the faux-leather covering on the camera body to access some screws.

    Image courtesy of iFixit

    iFixit looks inside the Fujifilm X-M1

    More screws await under the lens mount…

    Image courtesy of iFixit

    iFixit looks inside the Fujifilm X-M1

    …and with the hot shoe cover and a few more screws gone, the back of the camera is free.

    Image courtesy of iFixit

    iFixit looks inside the Fujifilm X-M1

    What’s heard but never seen? The speaker inside your camera! You knew it was there. This is what it looks like.

    Image courtesy of iFixit

    iFixit looks inside the Fujifilm X-M1

    Behind the LCD you’ll get a glimpse of the motherboard, veiled by a plastic covering.

    Image courtesy of iFixit

    iFixit looks inside the Fujifilm X-M1

    Here’s a clear view of the motherboard underneath, with Fujifilm’s image processor in plain sight.

    Image courtesy of iFixit

    iFixit looks inside the Fujifilm X-M1

    And here’s the back of the sensor assembly, just underneath the motherboard.

    Image courtesy of iFixit

    iFixit looks inside the Fujifilm X-M1

    There’s not a whole lot of camera left to disassemble at this stage, and the top plate can be removed cleanly with the appropriate ribbon cable disconnected.

    Image courtesy of iFixit

    iFixit looks inside the Fujifilm X-M1

    Here’s a look at the LCD and its articulated arm away from the camera body.

    Image courtesy of iFixit

    iFixit looks inside the Fujifilm X-M1

    And there you have it, the inner workings of the X-M1 laid out neatly for inspection.

    Image courtesy of iFixit

    Articles: Digital Photography Review (dpreview.com)

  • Choosing the Right Camera Bag – and Why You May Need More than One

    You’ve just bought yourself a new camera, or perhaps a new lens. Now you find yourself wanting to get a new bag for new purchases – after all, a good bag will protect your equipment, and can serve as an ideal place to store your photography gear when not in use.

    camera bags

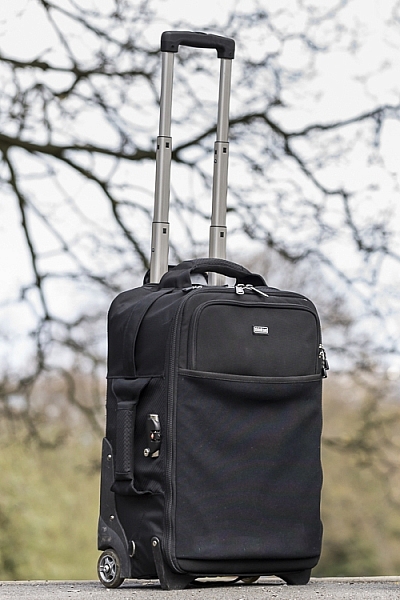
    These are some of my bags. The two end ones are both roller bags. From left to right: ThinkTank Roller Derby; ThinkTank Airport Accelerator; ThinkTank Airport Security.

    However, choosing a camera bag that’s right for you may not be as straight forward as it seems, but it is something that some thought should be given to. Choosing the right bag can make photography more enjoyable for you, as it can help carrying your equipment easier and more comfortable.

    The days of buying the generic shoulder bag are gone! Now we are spoilt for choice with offerings of backpacks, shoulder bags, sling bags, belt packs, roller bags; the list goes on. But which one is right for you? Which one is the best fit for you and your equipment needs?

    1. Camera Bag Size

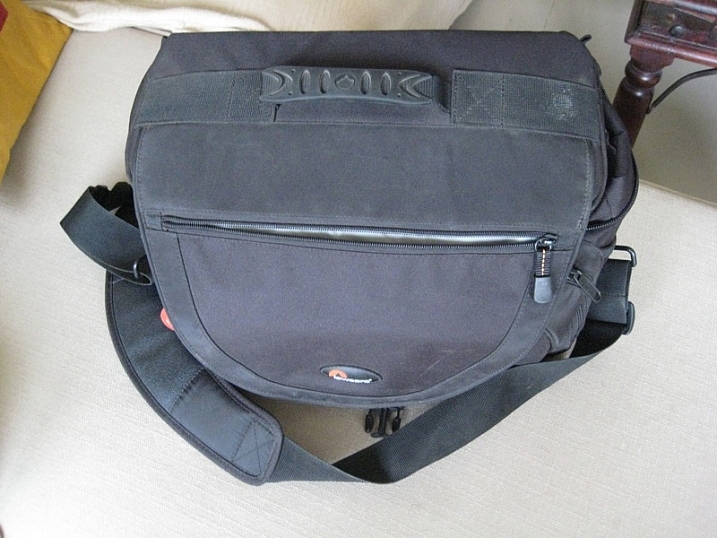
    This is my largest camera bag. I use this bag when I need to carry more equipment than normal.

    This is my largest bag. I use this bag when I need to carry more equipment than normal.

    How much equipment do you have, and will you want to carry all, or only some of it with you? This will help you decide on which size bag you need to look at. Also, think ahead; will you be buying more equipment such as additional lenses or camera bodies? Will you be adding a flash system, etc.?

    All of these will obviously increase the size of your kit, and influence the size of the bag you purchase if you wish to use the bag for all of your stuff. But, do bare in mind that the more kit you carry with you, the heavier the bag will be. Also do be aware that if you use a pro-sized or gripped body, some bags may not fit your camera as the bag is not deep enough to accommodate such sizes. Generally, bag manufacturers will give a list of what can fit into a bag, and list so you can see if pro-sized or gripped DSLRs are suited to that particular bag.

    2. Camea Bag Style – The Personal Part

    camera bag backpack

    Choosing the size of your bag is relatively easy. It’s choosing the style of bag that I think is the most challenging, and this is where most people can get a little stuck. There are just so many choices available, it really does come down to personal choice.

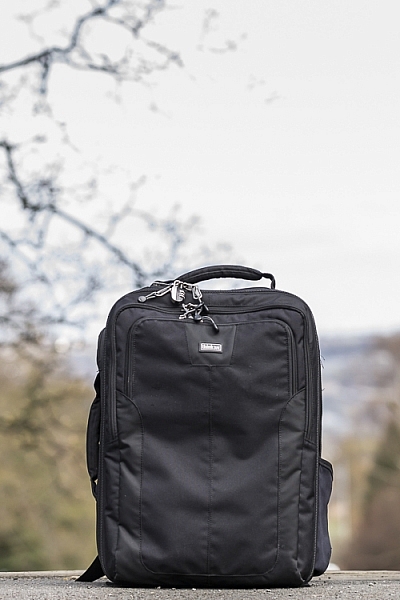
    I take my backpack, the ThinkTank Airport Accelerator (left), to nearly every job I do. I use this bag to carry my laptop, laptop accessories (charger, internet hub, card reader, etc.) and any other bits and pieces I may need such as wet weather gear. If I need it, I also put my modular set (not pictured) inside this bag to use on site.

    You may prefer to use a shoulder bag, where the next person may prefer to have a backpack. It’s important to consider just how much equipment you want to carry around in your bag, as this can influence the style of bag you end up purchasing. Below is a small table with a short list of pros and cons to each style of bag.

    Let’s have a look at some of the pros and cons of the following bag types:

    Backpacks

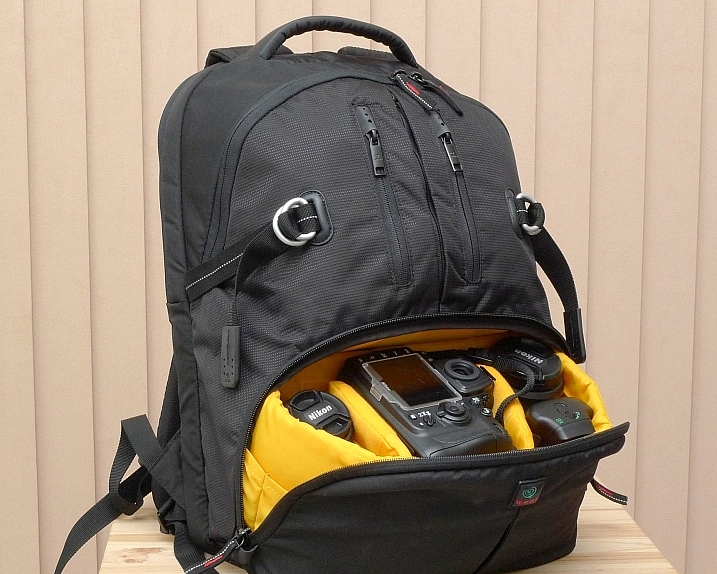
    Backpack style camera bag

    By ????? KhE ?

    Pros:

    • Completely frees your hands, enabling you to use your phone, change lenses, etc.
    • Varying levels of carrying capacity.
    • Weight is moved from one shoulder (on a shoulder bag) to both shoulders, and your lower back.
    • Can be more comfortable that other options.
    • Can be ideal for storing equipment when not in use.

    Cons:

    • Can be slow to access your equipment and/or change lenses etc
    • Bags can have the ability to carry too much equipment and become too heavy
    • Can become uncomfortable with sustained activities; especially in warmer climates

    Roller Bags

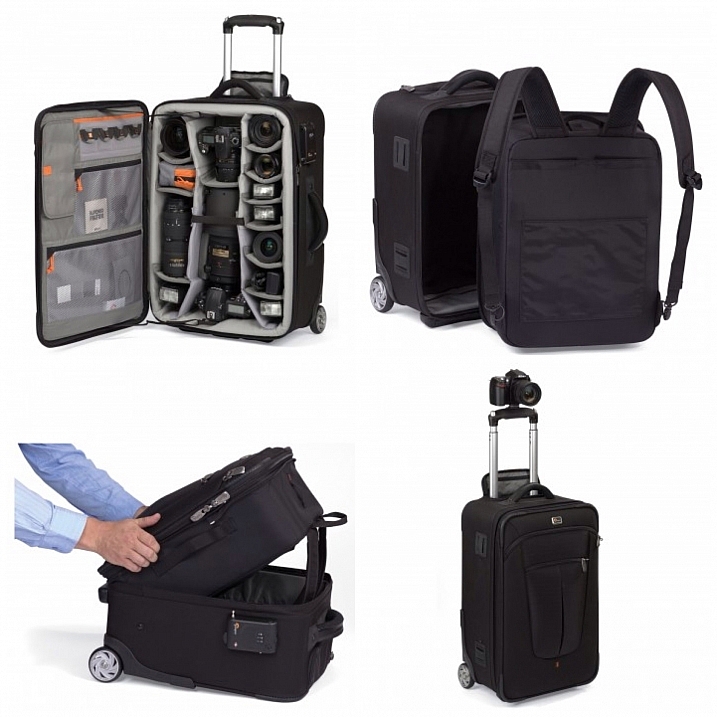
    Roller bag style camera bag

    By See-ming Lee

    Pros:

    • Can carry the largest volume of equipment easily.
    • Easy to transport equipment, as you are not required to carry anything; simply roll the bag along.
    • Perfect for keeping all of your gear in one bag, and storing equipment when not in use.

    Cons:

    • Not well suited if you require more mobility whilst out photographing.
    • Require somewhere secure to be left when no longer needed on a shoot.

    Modular Systems

    modular camera bag system

    Image courtesy Lowepro

    Pros:

    • Ideal for photographers who want maximum mobility.
    • Smal pouches that attach via a belt sit on your waist, thereby removing the weight off your back and shoulders, and transferring it to your hips.
    • Ideal for carrying extra pieces of equipment without the need for a bag on your back.

    Cons:

    • Not ideal for transportation as the pouches to not offer enough protection.
    • Each pouch has a very limited carrying capacity, so not suited to carry all of your equipment.
    • Not suited for storing equipment as each pouch can only hold a very limited number of items.

    Sling Bags

    Pros:

    • A hybrid of backpack and shoulder bag; these bags sit on your back via a single strap.
    • Can be more comfortable for prolonged use than a shoulder bag.
    • Quickly and easily access your equipment without take the bag off.
    • Perfect for storing smaller amounts of equipment.

    Cons:

    • Generally have a lower carrying capacity than other bag styles.

    Shoulder Bags

    Thomas Wanhoff

    By Thomas Wanhoff

    Pros:

    • Easy access to equipment as it’s by your side.
    • Can look more casual, allowing you to blend in easier.
    • Varying levels of carrying capacity to suite your equipment.
    • Can be great to store equipment when not in use.

    Cons:

    • Weight of equipment is on one shoulder and can cause discomfort.
    • Not ideal if you have larger lenses (greater than ~200mm for example).

    3. Active or Passive Bag Concept

    Personally, over the years I have used pretty much every style of bag around from backpacks, sling bags, shoulder bags, to roller bags and modular belt systems; you name it and I’ve most likely used it at some stage!

    What I have learned from this experience is that one style of bag is no better than the next and that what works on one adventure, won’t necessarily work as well on another. I have also learned that generally, one bag will not fit every situation. This brings us to an interesting concept that I have called Active Bag and Passive Bag.

    An Active Bag is a one that allows you to easily carry equipment with you and be more mobile; one that can go with you all the time. The styles of bag that are suited to this are: backpacks, sling bags, modular systems and shoulder bags.

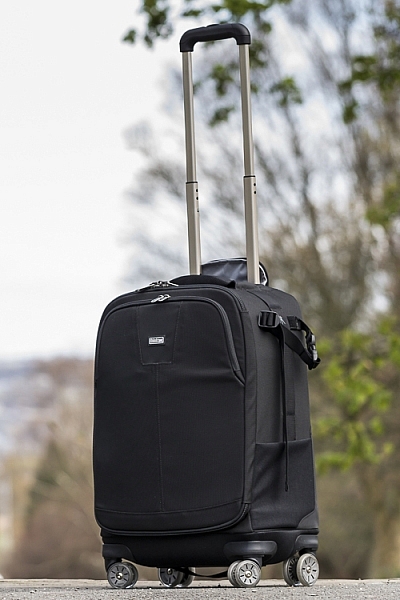
    This roller bag - the ThinkTank Roller Derby - is the bag that I take to pretty much every job I have. It's small enough to easily fit in the car, yet carries everything that I need on a job.

    This roller bag – the ThinkTank Roller Derby – is the bag that I take to pretty much every job I have. It’s small enough to easily fit in the car, yet carries everything that I need on a job.

    Passive Bags are great at transporting all your equipment to and from your shooting location and even providing a great storage solution for storing your kit whilst it’s not being used. But these bags are not ideal for the photographer who is constantly on the move. What I have found to work best is having a combination of both Active and Passive Bags with me. I use my roller bag to transport my kit to my shooting location and it provides great protection during the transport phase – not to mention a great portable desk to sit my laptop on! I then compliment this by using an Active Bag, usually a modular belt system or backpack, to carry the extra lens and flashes that I may need.

    I already have two cameras over my shoulders, each with a lens, so the bags I have are there to carry what I cannot hold in my hands, or do not need right at that moment. It is a little more expensive, yes, but the benefits are great. This is something worth considering if you’re find yourself in a similar situation where you want/need to carry a larger amount of equipment, but do not need that bag once you are at your location.

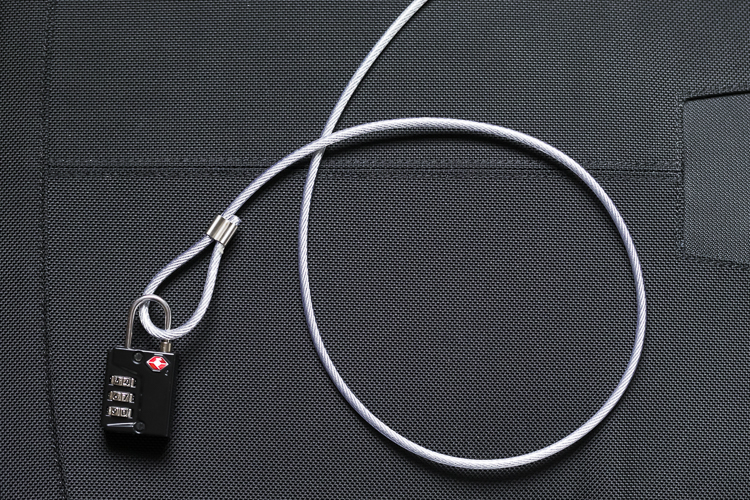
    Cable Lock

    Some manufacturers also include a cable that is made in to the bag. This is ideal to lock the bag to an immovable object; perfect for Passive type bags.

    4. Bag Quality

    So you’ve decided on the size and style of bag you wish to purchase; but please do not overlook quality. You’ve spent a small fortune on your equipment, and the last thing you should do it cut corners on what protects it.

    A good camera bag should have nicely padded, removable inserts inside. The removable inserts will allow you to customize the bag to best suit your equipment, and the padding will provide greater protection and help prevent your equipment from crashing into each other.

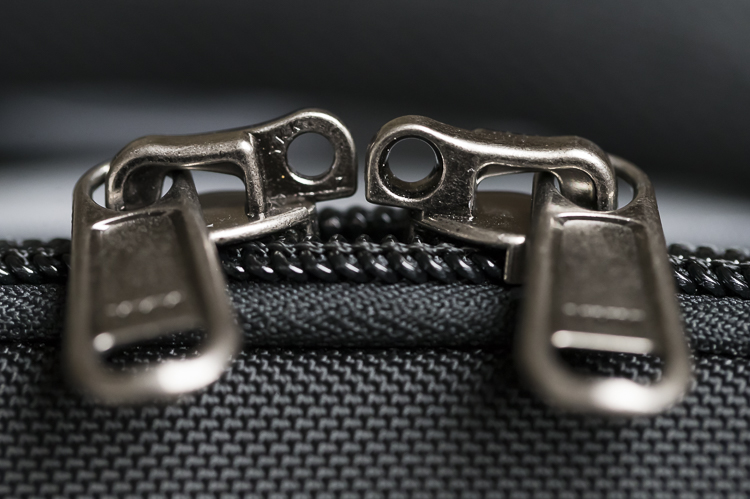
    Generally, the first thing to fail in a camera bag are the zippers, so looking for a good feeling zipper (especially for the main camera compartment) is very important. A poor quality zipper can unexpectedly fail, and potentially cause your equipment to fall out and break.

    You also want your bag to last, so make sure the exterior fabrics used are tough and wear resistant. Personally, I use ThinkTank Photo products and to be honest, I cannot fault them at all. They’re extremely well made and have withstood everything that I have thrown at them.

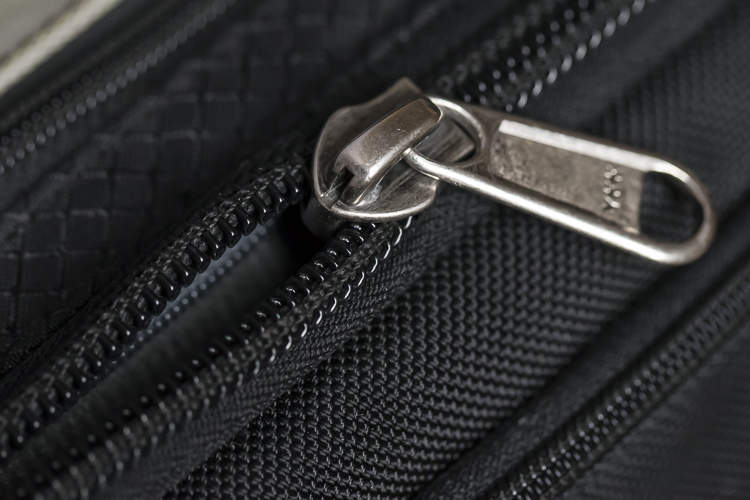
    Zipper

    A close up of the zipper on the main camera compartment on one of my bags. The zippers used on this bag are YKK Fuse zippers.

    Lockable Zipper

    Some bags also offer zippers that are lockable; ideal for that little bit of extra security.

    Conclusion

    Whilst this is an introduction into buying a bag for your camera, by no means is this exhaustive and you will still need to do a little research before you make a purchase. But, this article should offer some guidance on which bag may be right for you. You will find that most of your decisions will be based upon your own requirements. I would highly recommend you go in to a store, and bring your kit with you to try the various bags to help you find the best one.

    I’d love to hear if you have anything else you want to add and offer some advice based on your own experiences. What kind of bags do you have?

    googletag.cmd.push(function() {
    tablet_slots.push( googletag.defineSlot( “/1005424/_dPSv4_tab-all-article-bottom_(300×250)”, [300, 250], “pb-ad-78623” ).addService( googletag.pubads() ) ); } );

    googletag.cmd.push(function() {
    mobile_slots.push( googletag.defineSlot( “/1005424/_dPSv4_mob-all-article-bottom_(300×250)”, [300, 250], “pb-ad-78158” ).addService( googletag.pubads() ) ); } );

    The post Choosing the Right Camera Bag – and Why You May Need More than One by Daniel Smith appeared first on Digital Photography School.


    Digital Photography School

  • Your First 100,000 Photos are Your Worst

    Henri Cartier-Bresson once said that your first 10,000 photos are your worst. The point of that statement was that photography ought to be an art that is perfected with practice, hard work and repetition. It takes time before a photographer feels as one with their camera. Over time though you eventually learn your camera backwards and forwards, the two of you are old friends and you handle it with the skill of an expert. Likewise, after enough experience you begin to develop your own style. You find what works for you compositionally. Light and color take central stage as you do what you do best, naturally, borne out of habit and experience.

    I would change Cartier-Bresson’s quote in the modern digital age to say that your first 100,000 photos are your worst. Maybe it really ought to be your first 1,000,000 photos are your worst.

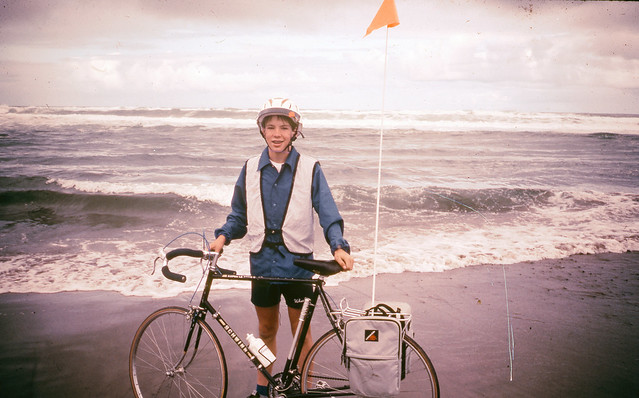
    America Coast to Coast Bicycle Trip, First Photos with an SLR, 1983

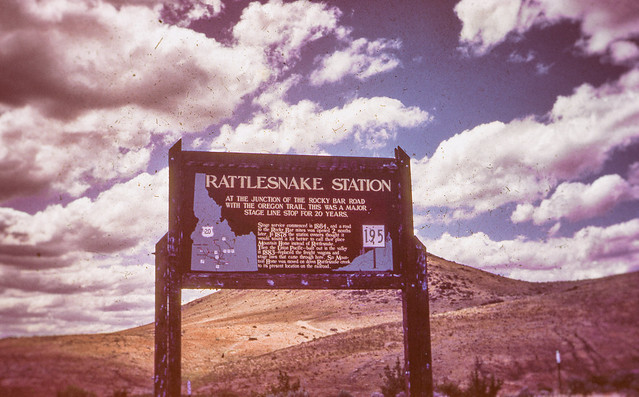
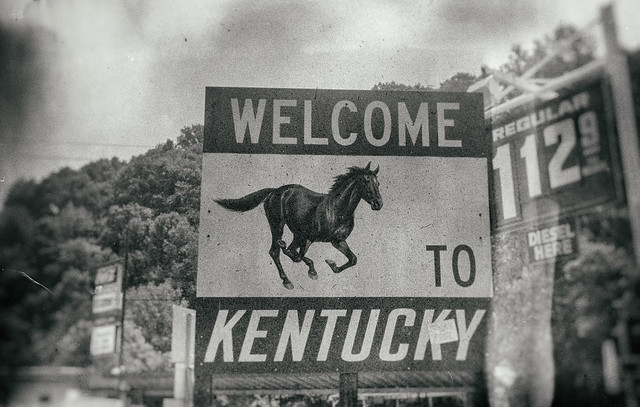
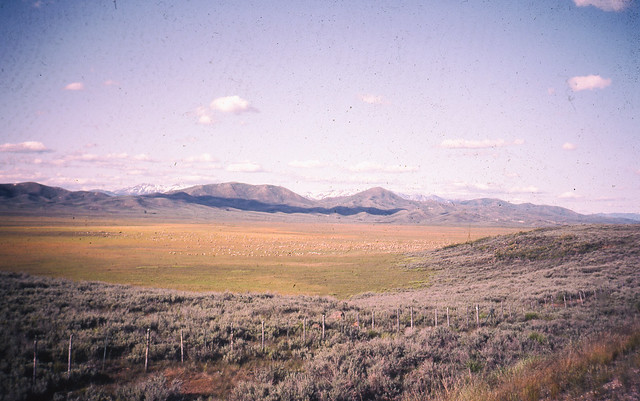
    My love affair with photography began early when I was given my first camera, a Kodak Instamatic at the age of 7 or so. When I really became most interested in photography though was at the age of 15 when my parents bought me my first SLR. It was a Sigma camera with a zoom lens. The very first photos I took with that camera were the Summer between 9th and 10th grade when I rode my bicycle across America. I did the trip with a group called Wandering Wheels out of Taylor University. I rode my bicycle from Lincoln City, Oregon to Rehoboth Beach, Delaware over the course of about six weeks. It was one of the best things I did in my youth and seeing and photographing America in my youth has carried on with me as I continue documenting America now at the ripe old age of 48.

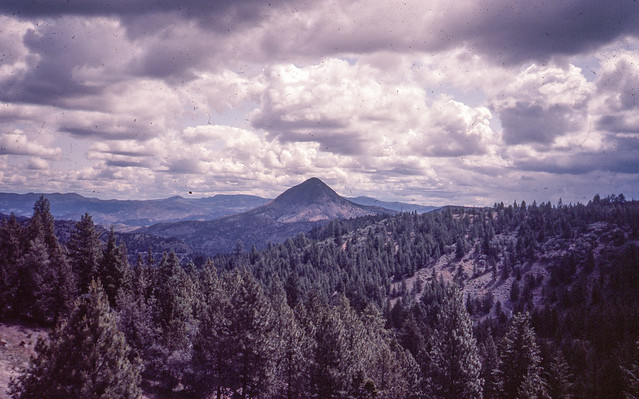
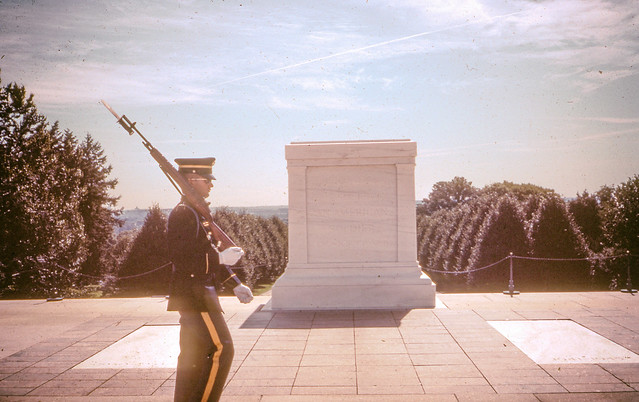
    On my coast to coast trip in 1983 I shot Kodak slide film. I had the slides developed back in 1983 but I’ve never scanned or published any of these images. Today I finally got around to spending some time with Epson V700 and scanned in the 100 or so images I took on that trip. The slides are old, dirty and scratched, but here are some of my first 100,000 images.

    America Coast to Coast Bicycle Trip, First Photos with an SLR, 1983

    America Coast to Coast Bicycle Trip, First Photos with an SLR, 1983

    America Coast to Coast Bicycle Trip, First Photos with an SLR, 1983

    America Coast to Coast Bicycle Trip, First Photos with an SLR, 1983

    America Coast to Coast Bicycle Trip, First Photos with an SLR, 1983


    Thomas Hawk Digital Connection

  • Inverted Umbrella: Drip-Free Design Turns Canopy Inside Out

    [ By WebUrbanist in Design & Products & Packaging. ]

    umbrella double canopy layer

    Like tableware or sliced bread, the umbrella is the subject of many reinvention attempts but few approach the sheer cleverness and ingenious simplicity of this design solution, which tackles drips, winds, crowds and compactness in one product.

    inverted umbrella design

    Created by engineer and inventor Jenan Kazim, the KAZbrella solves the core everyday issue of umbrellas bringing water into your home or vehicle, while also making them easy and safe to open in crowds as well as resistant to high winds (able to pop out then back into shape without breaking). When the umbrella is closed, a strap around the top seals the water inside, keeping it from dripping.

    umbrella dry wrap

    umbrella inversion process

    “The patented design includes a string and pulley mechanism that allows the frame to open the opposite way to a traditional umbrella, though the action of pushing the slider up until the upper latch is engaged remains the same. It still looks and functions like a traditional umbrella when open, but when closed the spokes fold in so they point away from the handle and the outer surface is hidden inside.”

    umbrella everyday use

    inside out umbrella

    umbrella in crowd

    The KAZbrella also employs materials for lightweight durability, from its fiberglass spokes and aluminum frame to its double layer of woven polyester. It can be opened and closed through smaller gaps than its ungainly cousins, making it easier to keep dry while entering or exiting spaces. It can then be set down against a wall, in a stand or on your car seat without getting things wet.

    Share on Facebook


    [ By WebUrbanist in Design & Products & Packaging. ]

    [ WebUrbanist | Archives | Galleries | Privacy | TOS ]


    WebUrbanist

  • Striking: Photos from a lightning hotspot in Venezuela

    $ (document).ready(function() { SampleGalleryV2({“containerId”:”embeddedSampleGallery_2035541136″,”galleryId”:”2035541136″,”isEmbeddedWidget”:true,”standalone”:false,”selectedImageIndex”:0,”startInCommentsView”:false,”isMobile”:false}) });

    For landscape photographer and storm chaser Jonas Piontek, Lake Maracaibo in Venezuela is practically paradise. The lake’s proximity to the Andes and the Caribbean Sea set the conditions for a so-called ‘never ending storm,’ with lightning storms occurring almost 300 days of the year. You’d even notice it from space apparently, as NASA has named it the ‘Lightning Capital of the World.’

    You can see a few of his photos here, and over at Resource Travel Piontek describes what it’s like photographing Maracaibo’s daily light show.

    Articles: Digital Photography Review (dpreview.com)

  • The 5 Best Google Nik Color Efex Pro 4 Filters and How They Can Amplify Your Images

    The Google Nik collection has been considered one of the top photographic effect plugin suites for a few years now, and it just got better in a big way – as of March 24th, 2016, it’s available free of charge.

    This move has been applauded by many, yet accompanied by caution with by some, since a few analysts see this as the beginning of the end for the software suite. This is all speculation of course, and regardless of what the future holds for the Nik collection, it is a highly useful set of tools that can benefit any photographer, of any skill level.

    Nik color efex pro

    Color Efex Pro

    The highlight of this set has always been the all-around workhorse, Color Efex Pro. The current version, Color Efex Pro 4, is a complete package in itself, featuring a variety of effects of the highest quality. Although you can sort the list of effects by photo type (landscape, portrait, etc.), there is a lot to explore.

    Let’s go through five of the most useful and effective tools available in this package, and see how they can boost the appearance and effectiveness of your images.

    Foreword

    As with all of the tools within this suite, the filters described below include a Control Points feature within the panel of individual filter controls. This feature is invaluable, and allows you to add positive or negative points anywhere in the image, adding or reducing the effect of the filter in targeted areas. Each point can be individually controlled to modify range of effect and opacity. Combining these points with the filters gives you almost unlimited control of how the filters will effect your final photograph. I encourage you to play around with the control points, and you’ll quickly see how they can help you turn your image into the picture you initially envisioned.

    1 – Bi-Color Filters

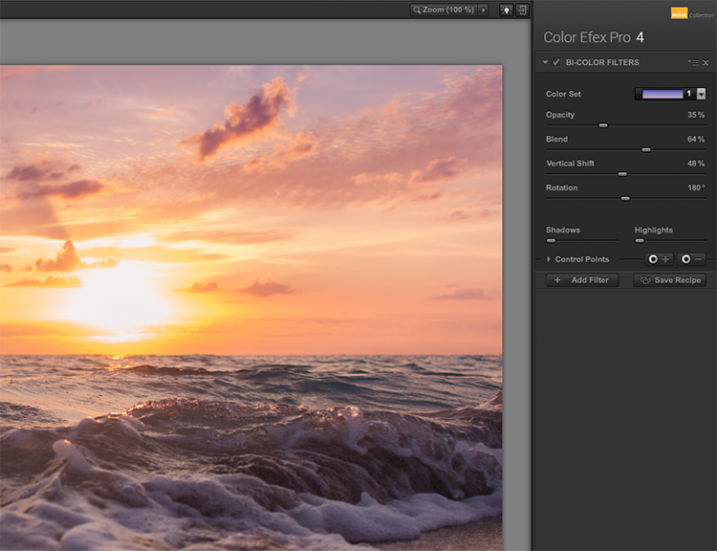
    This filter is meant to simulate standard bi-color filters that would normally be affixed to your camera lens. Two preselected colors are blended together along a plane and mixed with your original image, creating a very customizable look that can completely change the tone of the photograph.

    Although another bi-color filter is available that allows you to choose the two colors to be blended, the original filter has already selected many color combinations divided into five shade groups, such as browns, cool/warm, violet/pinks, and so on.
    Nik color efex pro

    Once you have selected a color set, you can further modify the appearance of the filter by adjusting several sliders, including Opacity which allows you to increase or decrease the intensity of the overall effect, and Blend slider, which softens or sharpens the line between the two colors. The entire effect can be rotated around the image using the Rotation slider.
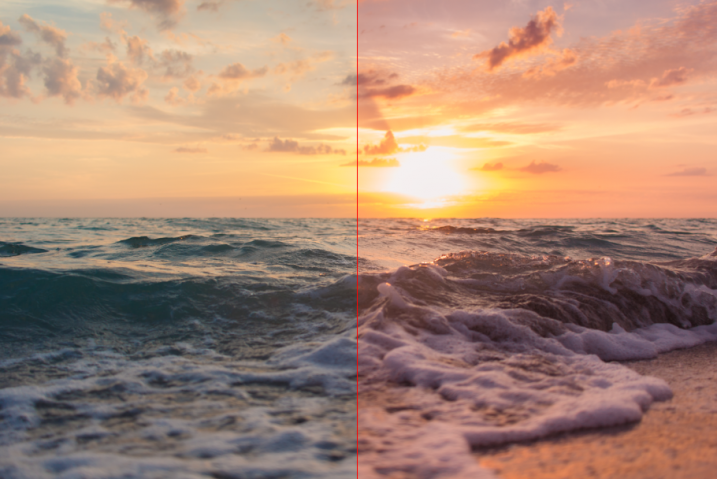
    article_cep4_screen6

    Once you have mastered the controls for adjusting the bi-color filter effect, you can then move on to the User Defined Bi-Color Filter, which has similar controls, and allows you pick any two colors to blend with your image.

    2 – Contrast Color Range

    The Contrast Color Range filter allows you to selectively modify contrast within certain colors of a photo. Selecting a color will cause that color range to become lighter or less saturated, and colors opposite of it to become darker or more saturated. For example, selecting a blue or purple color range in an image featuring a sunset (with a lot of orange within the photo) will intensify the red and orange colors, making the sunset much more dramatic.
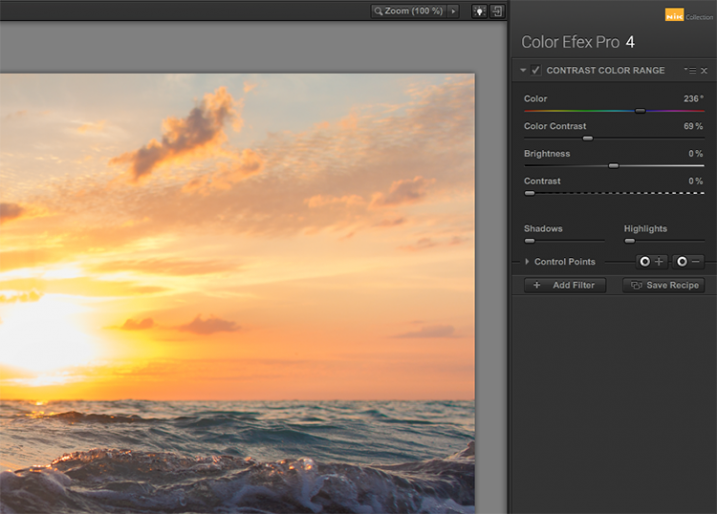
    Nik color efex pro

    The two main tools to understand here are the Color, and Color Contrast sliders. The Color slider will select the color range, while the Color Contrast slider will adjust the intensity of the effect by increasing or decreasing the contrast between the color selected and its reciprocal.
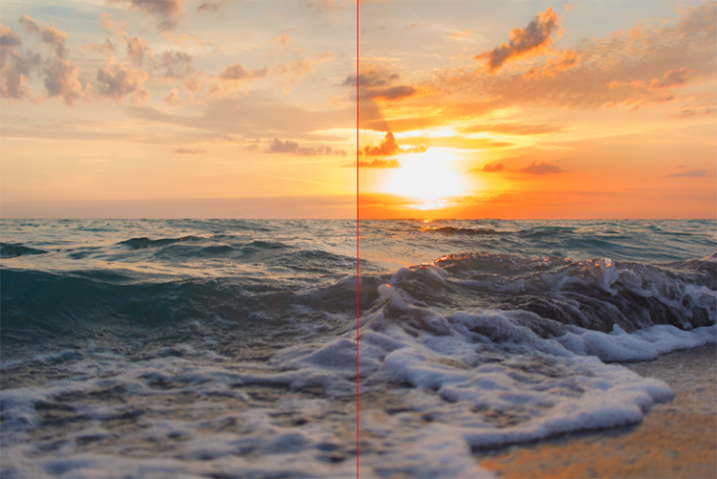
    Nik color efex pro

    Below these are controls for Brightness and Contrast, which behave similarly to their counterparts in Photoshop or Lightroom.

    3 – Detail Extractor

    While most users might argue in favor of using the excellent Pro Contrast filter (discussed below) over the Detail Extractor, I’d argue that it depends on what look you’re going for. For a smoother, less enhanced result, Pro Contrast would definitely be the way to go, but to add insane levels of drama to your image, the Detail Extractor is just what the doctor ordered.
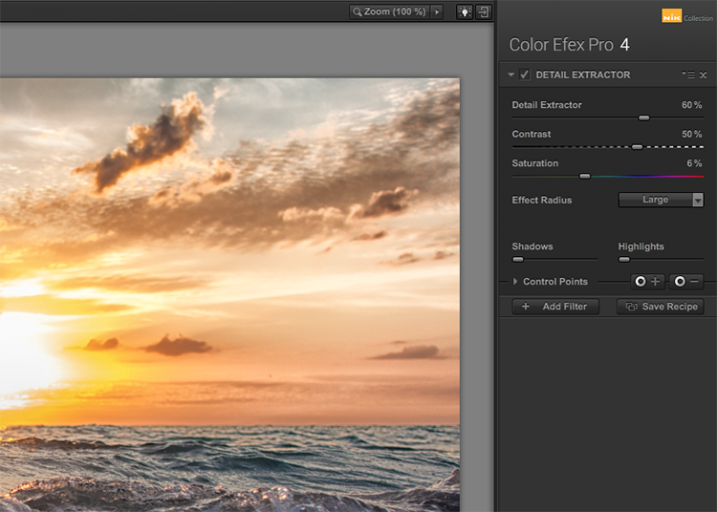
    Nik color efex pro

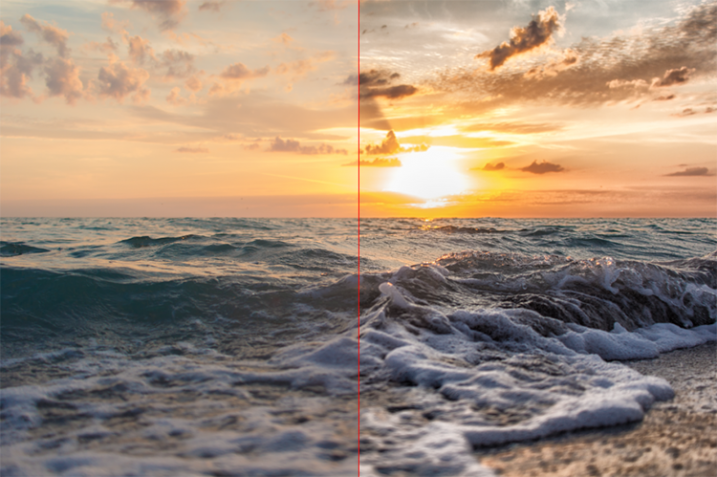
    This tool adds that drama by disrupting the balance of shadow and light within the photo, to pull much more detail, giving you a dark and gritty stylized result that can really grab the viewer’s eye.
    Nik color efex pro

    The main control used to create the effect here, is the Detail Extractor slider. Moving it to the right increases the amount of details highlighted. In addition to Contrast and Saturation adjustments, there is also an Effect Radius adjustment available, which allows you to target whether fine or large elements within the image are modified.

    4 – Pro Contrast

    Without a doubt, the Pro Contrast module in Color Efex 4 is my favorite filter by far. Admittedly, half of my interactions with the Nik Filters involve me making all of my adjustments in Lightroom, and using Color Efex 4’s phenomenal Pro Contrast to add the bit of drama and flair I’m looking for, without going over the top and getting an overcooked result.

    The tool analyzes the image to determine how the contrast adjustment will affect the loss in detail inevitable in this type of correction, and minimizes it. The filter can turn a flat, lifeless, image into a colorful and vibrant photo with almost perfect levels of contrast.
    Nik color efex pro

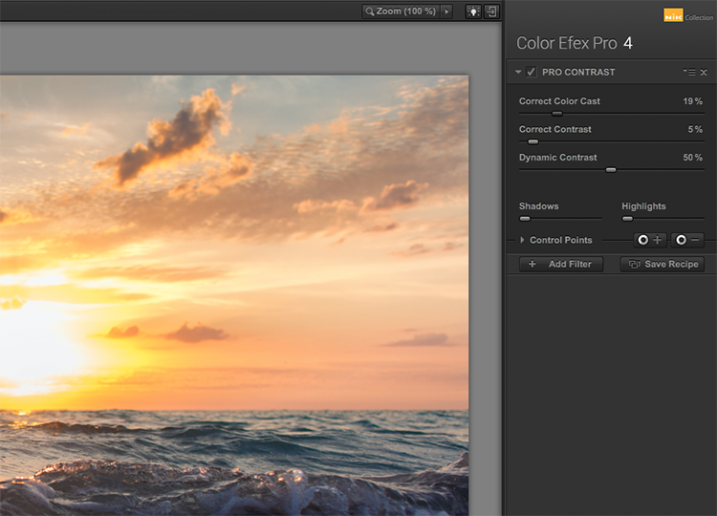
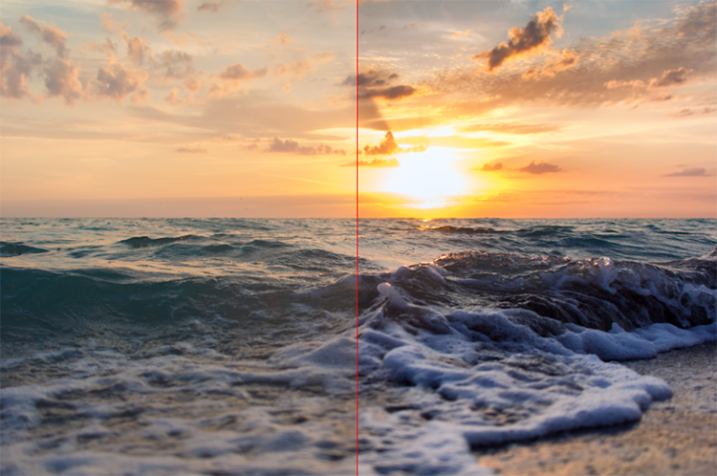
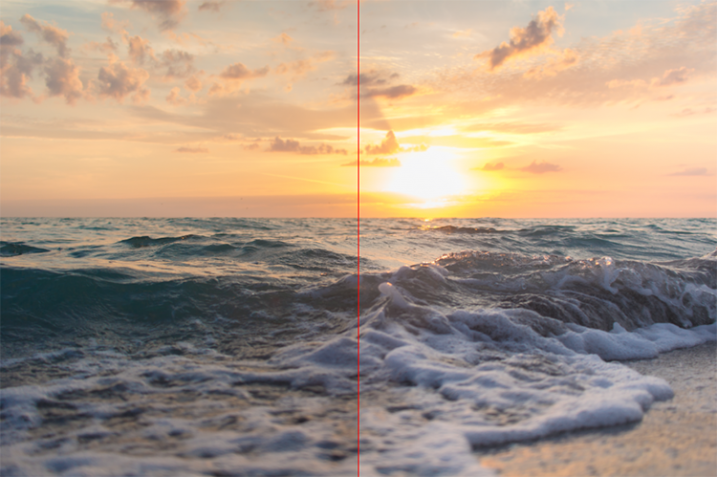
    Pro Contrast features three sliders, each one of them important to the final result. Correct Color Cast analyzes the photo, and produces an algorithm to remove any inherent color cast it finds. Moving the slider to the right will reduce this cast and smooth out the tonal scheme of the image. In the ocean sunset image shown here, applying Correct Color Cast removes the orange hue cast upon the waves in the foreground, and returns them to their proper blue.
    Nik color efex pro

    Correct Contrast applies a general contrast adjustment based on the tonality of the image, as analyzed by the software. Finally, Dynamic Contrast introduces the real magic; areas of the photo that are flat are boosted in contrast, while areas already featuring high contrast are not. This allows for a rich, beautiful enhancement, without muddy tonal structures and details that might normally be lost.

    5 – Reflector Efex

    We all understand the need for a reflector when creating portraits; whether it be a natural-light or studio situation, certain areas of our subject (usually a person’s face) are befallen with shadows due to the interaction of the subject with the light being used. Reflectors allow us to bounce light onto our subject, and target it to fill in these areas of shadow, producing an even layer of light.
    Nik color efex pro

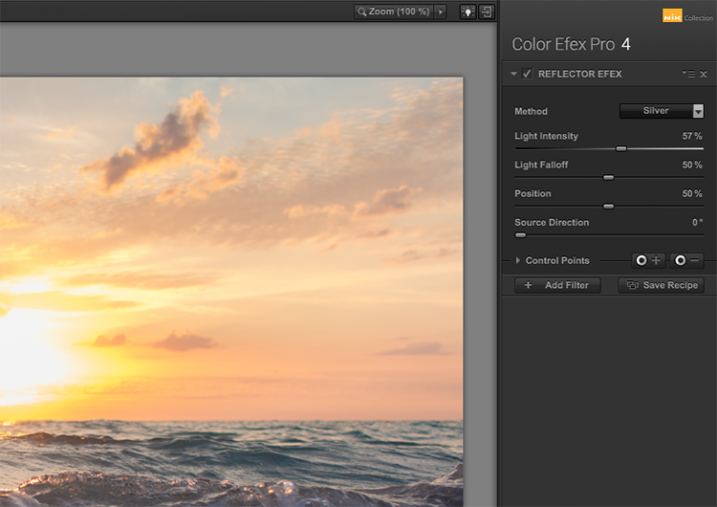
    The Reflector Efex filter takes that concept and turns it up to 11, by simulating a silver or gold reflector’s use within your image, and allowing you to modify it in a number of ways to illuminate the photo exactly as you envision it.

    First, you select a Method, which is effectively picking which color of reflector to use; gold, soft gold, or silver. You’ll then use the Intensity slider to select how much light will be bounced onto the image. This is equivalent to adjusting power output of a studio light, or the harshness of sunlight in an outdoor situation.
    Nik color efex pro

    The Light Falloff and Position sliders allow you to adjust how softly or sharply the effect of the bounced light trails off, as well as the position of this falloff. Finally, the Source Direction adjustment lets you change the position of the reflector; if you need light directed to your subject’s left side, you would position the Source Direction between 270° and 360°, which is the bottom, to bottom right corner of the frame.

    Conclusion

    We don’t know what the future holds for the Nik collection, as a price reduction to zero doesn’t bode well for continued enhancements or updates of any kind. But, for users of the software this may not matter, as it is already an integral part of many photographer’s toolkits, amateurs and professionals alike. The entire collection is of incredible value. But, Color Efect Pro 4 in particular, features these, and many more tools that can be incorporated into your everyday photographic workflow from Lightroom or Photoshop, and give your images a competitive edge!

    What about you? Do you already use Google’s Nik Collection? If not, will you try it now after it has been changed to a free product? Are there other filters within the collection you find just as useful for your own workflow? Sound off below please, ladies and gents!

    googletag.cmd.push(function() {
    tablet_slots.push( googletag.defineSlot( “/1005424/_dPSv4_tab-all-article-bottom_(300×250)”, [300, 250], “pb-ad-78623” ).addService( googletag.pubads() ) ); } );

    googletag.cmd.push(function() {
    mobile_slots.push( googletag.defineSlot( “/1005424/_dPSv4_mob-all-article-bottom_(300×250)”, [300, 250], “pb-ad-78158” ).addService( googletag.pubads() ) ); } );

    The post The 5 Best Google Nik Color Efex Pro 4 Filters and How They Can Amplify Your Images by Tim Gilbreath appeared first on Digital Photography School.


    Digital Photography School

  • Weekly Photography Challenge – Signs

    You only have to walk down the street to be bombarded with signs, advertising, street markers, building and business names and more. See some here: Sign of the Times – 27 Significant Images of Signage

    Natasha Wheatland

    By Natasha Wheatland

    Natasha Wheatland

    By Natasha Wheatland

    Weekly Photography Challenge – Signs

    So it’s time to take a walk and see what signs you can find. Maybe do some street photography!

    Remember all the principals of good photography still apply: good lighting, good composition, a center of interest, sharpness, etc.

    Elisa Greco

    By elisa greco

    Meena Kadri

    By Meena Kadri

    ACME

    By ACME

    Share your images below:

    Simply upload your shot into the comment field (look for the little camera icon in the Disqus comments section) and they’ll get embedded for us all to see or if you’d prefer upload them to your favourite photo sharing site and leave the link to them. Show me your best images in this week’s challenge. Sometimes it takes a while for an image to appear so be patient and try not to post the same image twice.

    googletag.cmd.push(function() {
    tablet_slots.push( googletag.defineSlot( “/1005424/_dPSv4_tab-all-article-bottom_(300×250)”, [300, 250], “pb-ad-78623” ).addService( googletag.pubads() ) ); } );

    googletag.cmd.push(function() {
    mobile_slots.push( googletag.defineSlot( “/1005424/_dPSv4_mob-all-article-bottom_(300×250)”, [300, 250], “pb-ad-78158” ).addService( googletag.pubads() ) ); } );

    The post Weekly Photography Challenge – Signs by Darlene Hildebrandt appeared first on Digital Photography School.


    Digital Photography School

  • Google teams with IMAX to create next-gen VR rigs for the film industry

    At its I/O developer conference this week, Google announced a new partnership with IMAX to develop next-gen VR camera rigs for use in the film industry. These camera rigs will be different than Google’s previously unveiled GoPro VR rig, but will likewise utilize the company’s Jump virtual reality platform for post-processing. The cameras are being created in part with tech from Chinese company Yi Technology. Likewise, IMAX has announced plans to open VR experience spaces in six locations across the US.

    The companies haven’t revealed any details about the planned cameras at this time, except that they will feature Jump integration. The announcement comes at a time when competing high-end VR cameras have made public debuts, including the 4K-capable $ 2500 Sphericam 2 and Nokia’s $ 60,000 OZO camera.

    Via: Yahoo

    Articles: Digital Photography Review (dpreview.com)

  • LandscapePro software promises simple steps to dramatic changes

    Anthropics Technology, the makers of the PortraitPro software application, has announced a program that it claims ‘radically simplifies and speeds up’ dramatic reworking of landscape images. LandscapePro offers tools for replacing skies, enhancing water and altering the direction of the light using automatic selection techniques and ‘one-click’ pre-sets. The company says that users will need ‘no prior knowledge or technical skills’ to use the program.

    LandscapePro invites users to drag labels, such as ‘grass’, ‘sky’ and ‘water’ on to the relevant areas of an image and the software automatically makes an adjustable selection of that area. A collection of sliders and filters then makes it possible to adjust or replace each type of element. A depth of field simulator can create blur at certain distances while further controls allow photographers to emphasize distance through coloration.

    Color temperatures can be adjusted using pre-sets with atmospheric labels to simulate sunset or stormy conditions, and ‘common objects’ such as grass and sand have their own pre-sets as well. There is also a tool that helps to select areas of sky through the branches of a tree.

    There are two versions of LandscapePro: Standard and Studio. The Studio version works with Raw files and has options to operate as a plug-in for Photoshop, Lightroom and Elements among other differences.

    The Standard version costs $ 79.90/£59.90 while the Studio version costs $ 119.90/£99.90, though both are offered at 50% off at the moment.

    For more information, and a free trial, visit the LandscapePro website.


    Press release:

    LandscapePro Launched

    New, easy way to enhance landscape photos

    Anthropics Technology today announced the launch of LandscapePro, the industry’s first intelligent landscape photo editing software, available in standalone and Adobe Photoshop, Lightroom and Elements plug-in editions. The new software radically simplifies and speeds up outdoor and nature photo retouching. It includes landscape relighting, sky replacement, 3D depth estimation, a depth of field simulator, distance controls, intelligent selection tools, and photo-adaptive controls among other powerful features. With one-click presets and targeted editing available, users can create beautiful landscapes in seconds.

    LandscapePro is a new way to enhance pictures that rises to the challenges and nuances of landscape photography. It assumes no prior knowledge or technical skills, and photographers can create unique, dramatic effects quickly. The new product comes from the makers of the award-winning retouching software PortraitPro and PortraitPro Studio with a plug-in mode for Adobe Photoshop, Lightroom, and Apple Aperture.

    “Inspired by the success of Anthropics’s PortraitPro software, we are delighted to introduce a new product to help photographers expand their creativity and take landscape retouching to the next level,” said Andrew Berend, CEO, Anthropics. “LandscapePro offers an innovative and easy way to create stunning landscape photography, and can be used by novices or experienced photographers alike. As its intelligent controls uniquely adapt to the features of each photo, it enables photographers to do incredible things with their outdoor photos simply by using sliders.”

    Key Features

    Easily enhance landscape photos. LandscapePro contains a host of unique tools to enable anyone to create beautiful scenic photographs.

    • Intelligent selection tools.
    • Unique editing controls that adapt to the photo.
    • Easy-to-use slider interface.
    • No technical skills required.
    • LandscapePro Studio handles RAW files and can be run as a Photoshop, Lightroom and Elements plug-in.

    Expand your creativity. Create unique, breathtaking scenes. LandscapePro effects are specifically tailored to landscape photography.

    • Landscape relighting. Lighting adjustment to fit any creative goals: change light source, temperature, time of day, or go from dawn to sunset. Note how the side lighting brings out the texture on the ground.
    • Instant sky replacement with presets. The unique sky controls enable photographers to replace sky, change clouds, or cast cloud shadows. Note how the change in sky has automatically relit the ground.
    • Cloud and atmosphere adjustment. Tools to manipulate skies by separately adjusting the clouds and the atmosphere behind them.
    • 3D depth estimation. A unique, easy-to-use depth of field simulator respects 3D objects in the scene. As easy as using a single slider.
    • Distance controls. Change colors in the image depending on the distance to the camera – make distant objects bluer, highlight the middle distance, or add fog.
    • Landscape-specific tools for dealing with common issues such as selecting small patches of sky behind trees.
    • Color adjustment tools targeted at common objects in landscapes, e.g. tools to make grass look lush, change the color of the sea, or to make sand golden.
    • One-click presets such as wet sand, stormy water, red sunset, lush trees.
    • Automatic area selection. Tag areas as sky, trees, buildings, grass, sand, rock, water and the selection will be applied instantly.
    • Targeted editing. Specially designed controls for different areas, e.g. change clouds to stormy or add thunder clouds, adjust waves, or add sunrise reflection to the sea.
    • Whole picture and individual object enhancements. Transform the whole photo instantly or use a new workflow where you select several objects in your scene first, before editing.

    Editions

    LandscapePro Standard – dedicated landscape photo editing.
    LandscapePro Studio – handles RAW files, 48 bit per color TIFFs, supports different color spaces, and can be run as a plug-in for Photoshop, Lightroom and Elements.

    Compare the different editions: www.landscapepro.pics/editions.
    Availability, Free Trial and Pricing

    LandscapePro is available to purchase or for a free trial from http://www.landscapepro.pics/.

    Articles: Digital Photography Review (dpreview.com)

  • Hasselblad offers no-loss trade-up on H6D to those waiting for 100MP back

    With the Hasselblad 100c 100MP back delayed by the after effects of the Japanese earthquake the company has introduced a trade-up deal for photographers who want to get their hands on the new H6D medium format body sooner rather than later. The deal allows photographers to buy the camera with the 50c 50MP back now and then trade-up without financial penalty later when the higher resolution back becomes available.

    Those trading up will only have to pay the difference in recommended sales price between the two backs, so Hasselblad will effectively take the 50c back for the same amount that was paid for it. This means those who are waiting for the 100c to become available before buying the H6D can start using the new, improved camera now.

    The sensor used in the 100c back is made by Sony at its plant in the Kumamoto region of Japan. The factory was badly damaged in the recent earthquakes and is only just getting production underway now, so there will be quite a delay before Hasselblad can get its 100c into the stores. The sensor in the 50c back is also made by Sony, but as it has been in production for longer the company had a stock-pile before the earthquakes struck.

    For more information visit the Hasselblad website.


    Press release:

    H6D-50c to H6D-100c Trade-Up Promotion

    Purchase the H6D-50c now and trade-up to the H6D-100c for the difference in price!

    The H6D has become an instant success with orders received worldwide and has far exceeded our expectations. The engaging media coverage and encouraging comments from our current and new users has been phenomenal!

    Unfortunately due to the recent devastating earthquakes in Kumamoto, Japan, the suppliers of some components, including the 100MP sensor, have been affected.
    To get the H6D into the hands of eager customers Hasselblad are offering a fantastic H6D-50c Trade-Up promotion.

    Purchase the all new H6D-50c at the standard price and you will have the option to trade-up that camera to the H6D-100c for the difference in the recommended sales price (MRSP).

    The H6D has a brand new electronic platform boasting super-fast image processing and faster shooting rates that can be sustained for longer than ever before. The 100MP option, delivers unmatched image quality and the ability to resolve the finest detail with all our HC & HCD lenses.

    This unique offer of getting started with our all new H6D-50c applies to both new and previous H6D-50c customers, and will be valid until 31st October 2016.

    Articles: Digital Photography Review (dpreview.com)