Blog

  • Use Photoshop to Correct Perspective Distortion of Buildings in Your Images

    Shooting buildings can be tricky. The main reason is that they are tall, and you need to get far away from them if you want to fit them into the frame. If you are shooting in the city, you don’t have the luxury of getting really far away, the best you may be able to do is get farther down the street. What you have to do then, is tilt your camera upwards to get the whole building in, and that’s when it happens – perspective distortion.
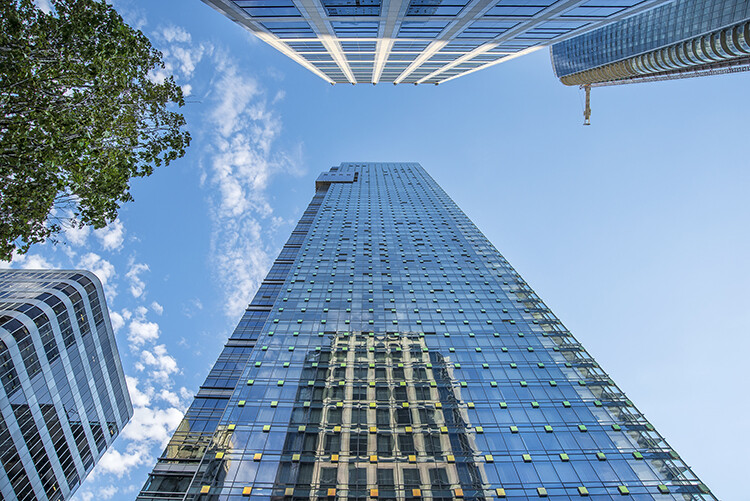
    City Scenes can be difficult to photograph

    City scenes can be difficult to photograph because of the risk of distortion

    When you are using a wide angle lens (which you probably will be when shooting architecture) and you tilt your lens up or down, your image will distort. Architectural photographers would use a tilt-shift lens to counteract this distortion, which can make a really big difference in your image. The only problem is that it is a specialist lens, and it is expensive.

    Until a few years ago, that was the only solution for fixing perspective distortion, but in the latest versions of Photoshop, there are a few truly amazing tools that can fix it painlessly. Sometimes the distortion may work well in the image, but if you need to fix it, these techniques can help. To learn more about getting better architectural photos read: Tips for Different Approaches to Architecture Photography

    1. Working with distortion

    The definition of distortion is: when the straight lines of a subject are either curved in a particular direction, or they converge or diverge. This happens when the focal plane of your camera is pointed upward or downward. This is called perspective distortion. The second most common type of warping is barrel distortion, this type is dependent on the type of lens you are using. Barrel distortion make the image look like it has been inflated in the middle of the scene so it looks like a barrel – wider in the middle, and narrower at the top and bottom. Wide angle lenses tend to distort a fair amount when pointing up or down, and in some cases, you may get barrel distortion in the image too. So, how do we fix this?
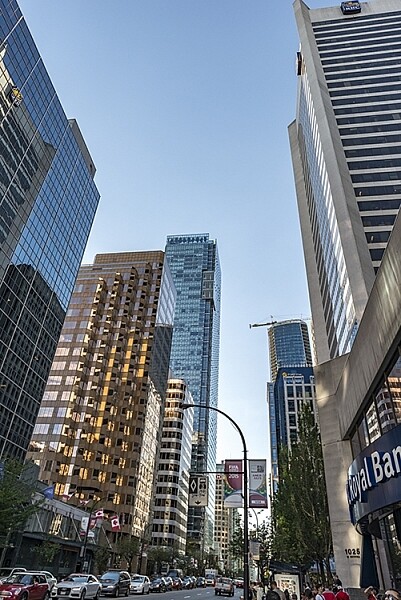
    Tall buildings distort easily with a wide angle lens

    Tall buildings distort easily with a wide angle lens.

    2. Fixing distortion in camera

    If you want to avoid perspective distortion, then you will need to keep your focal plane at 90 degrees to your subject. In other words, don’t tilt your camera up or down when you are shooting. This may work well for landscape photography, but when you are shooting tall buildings, it may be very difficult to get that right. Sometimes there is no way to avoid perspective distortion in camera.

    Thankfully Photoshop can help you out here. Barrel distortion is a function of the lens you are using, wide angle lenses can make the middle of the image seem bloated or inflated. You can try and fix this by zooming in a little, as wide angles tend to suffer from barrel distortion when they are at their widest focal length. Zooming in is not always possible, so we will fix the bulk of the issues in Photoshop.

    3. Fixing distortion in Photoshop

    Photoshop has a few functions that can help you fix both perspective and barrel distortion. One of the best tools that has been included with recent versions is the Adaptive Wide Angle Tool. This tool is intuitive and easy to use, but takes a little practice initially. In the past, I would use the transform tools (i.e., Distort, Skew, Perspective and Warp). While these worked really well, it took a fair amount of time to get the corrections to look realistic.

    In the examples below, you can see that the building looks shorter and more squat. Some further adjustments would need to be made to correct this, but overall, the buildings are vertical and look correct architecturally.  With the Adaptive Wide Angle tool, this process is easily done, in some cases with only three or four mouse clicks.
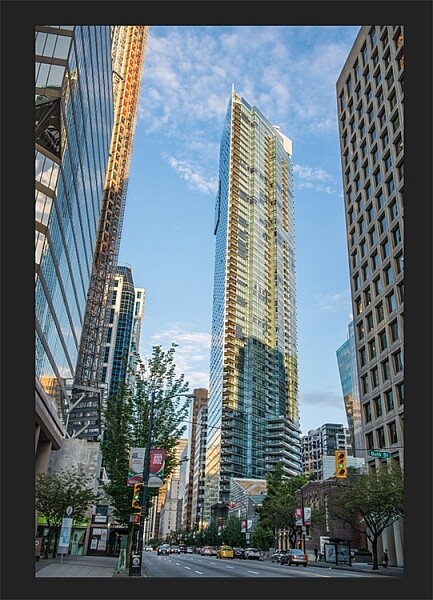
    Image of a building before the distortion tool was applied in Photoshop
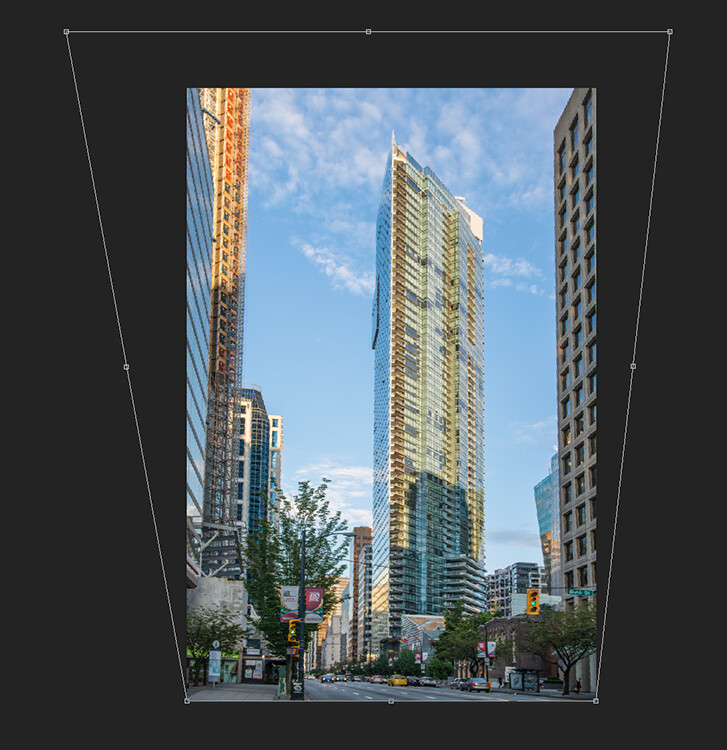
    Image of a building before the distortion tool was applied in Photoshop

    Same image after the distortion tool was applied

    Same image after the distortion tool was applied

    4. Adaptive Wide Angle tool

    The Adaptive Wide Angle tool sits under the filter menu. Open the image you want to correct (with skew buildings or walls) click on FILTER>ADAPTIVE WIDE ANGLE, and a new box will open up with your image inside it.
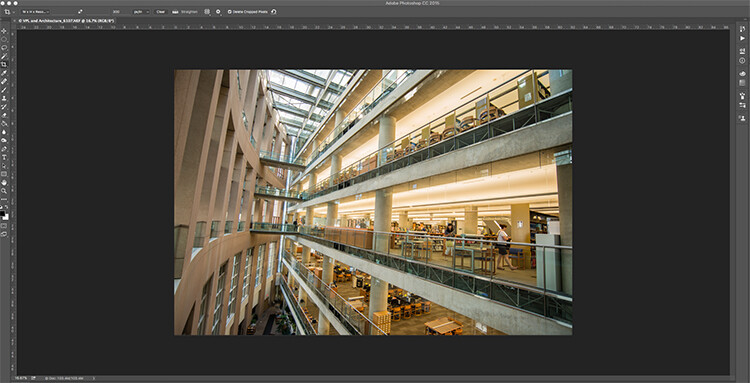
    Adaptive Wide Angle tool screen

    Image to be corrected, you can see the vertical lines are pretty skew

    Depending on how your image is displayed in the box, you may need to scale it to see the whole thing. On the right hand side you will see a box that says Correction. Underneath that you will see a scale slider, adjust it until you can see your whole image in the box. There is a dropdown box in there with other options such as perspective, fisheye, etc., – I find leaving it on Auto seems to work best. The other functions within that box may work in some cases, but by leaving it on Auto and making specific adjustments to the verticals and horizontals in your image, you will get the best results.
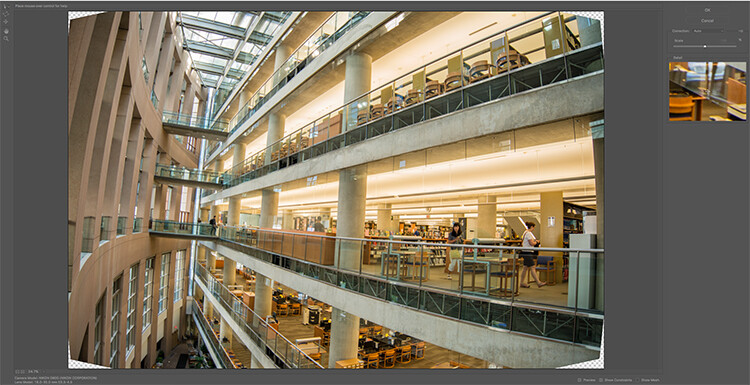
    Adaptive Wide angle tool screen

    Adaptive Wide angle tool screen

    You will then need to identify the walls of the building that are converging or diverging. On the left hand side of the dialogue box, you will see some constraint tools. The tool that is first in the row is simply called the Constraint Tool, this is the one I use most often.

    Click on that and move your mouse over to one of the vertical lines of the building, and draw a line down the wall. Start at the top of the building and drag the line down to the bottom, along a vertical wall that should be straight. Click at the bottom of the line when you are done and Photoshop will drop a line down exactly where you dragged. As you click, Photoshop will correct any barrel distortion, but the line will still be skew.

    At the bottom of the line you will see a square, right click on the square and three options will pop up: Horizontal, Vertical, and Arbitrary. These are the three ways you have to correct that line. If it is a vertical wall, then click on Vertical. Immediately, Photoshop will bring that wall into a perfect upright position. What you will notice is that it may distort other lines now. That’s okay, find a second vertical that is not correct and repeat this process, once you have done three or four verticals, your building should be perfectly straight, as should the rest of the building. Sometimes what may happen is that the horizontal alignment may shift with all these vertical changes. You can then select a horizontal line in the image and repeat the same process you did for the verticals, just use a line that you know should be horizontal. Also, when you right click, select the Horizontal option in the popup box.

    To make sure you are making a precise selection when you draw your line, there is a 100% zoom window on the right hand side. This is really useful, as it can be difficult to be zoomed in to the image, and drag the line down at the same time. This box really helps make sure that you start and finish at the right places on the building.
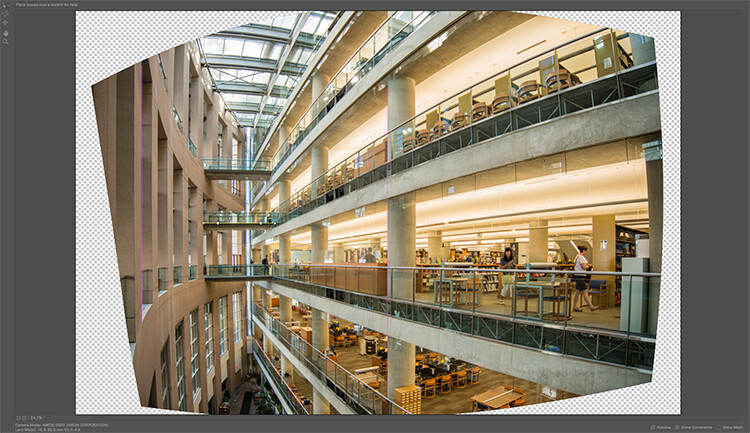
    Adaptive Wide Angle tool and image after 3 adjustments have been made

    Adaptive Wide Angle tool and image after 3 adjustments have been made

    Once you have straightened some of the more skewed verticals, and one or two horizontals, your image should be looking pretty close to perfect. Once you are done, click ok and your image will open up in Photoshop. From there you can edit the rest of the image with all the lines being straight and aligned.

    A new tool has recently been launched by Adobe Photoshop for CC users called Guided Upright and you can find it in Camera RAW of the latest version.
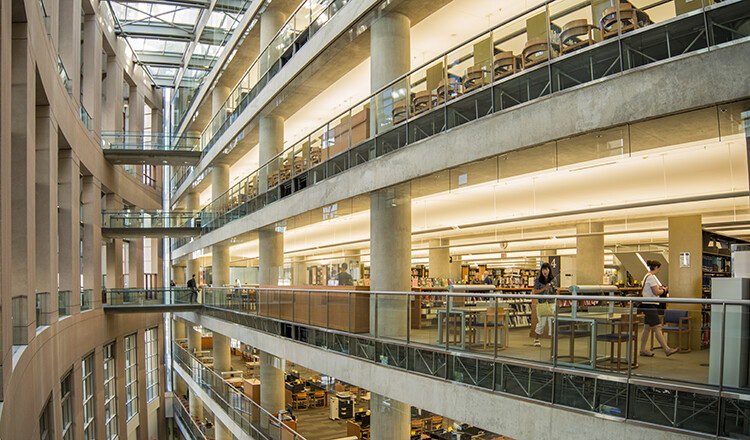
    Final image after being edited in the Adaptive Wide Angle tool

    Final image after being edited in the Adaptive Wide Angle tool and cropped.

    Here is a great short minute video that Adobe has released, take a look, this could also be a useful tool to use.

    What’s your go-to method of correcting perspective distortion? Please share in the comments below.

    googletag.cmd.push(function() {
    tablet_slots.push( googletag.defineSlot( “/1005424/_dPSv4_tab-all-article-bottom_(300×250)”, [300, 250], “pb-ad-78623” ).addService( googletag.pubads() ) ); } );

    googletag.cmd.push(function() {
    mobile_slots.push( googletag.defineSlot( “/1005424/_dPSv4_mob-all-article-bottom_(300×250)”, [300, 250], “pb-ad-78158” ).addService( googletag.pubads() ) ); } );

    The post Use Photoshop to Correct Perspective Distortion of Buildings in Your Images by Barry J Brady appeared first on Digital Photography School.

    Digital Photography School

  • ‘I instinctively felt I had an extraordinary image’: Ansel Adams on capturing Moonrise over Hernandez

    In newly released footage, legendary landscape photographer Ansel Adams recounts capturing one of his most popular images: Moonrise, Hernandez, New Mexico

    Adams’ son Michael recently explained in an interview with Marc Silber of Advancing Your Photography how the events unfolded the day the photo was taken. Riding along with his father, he remembers how Ansel caught sight of the moon rising over the landscape and pulled the car over to take the photo. In the clip above, you’ll hear Michael and Ansel Adams himself explain how the image was created, thanks to some quick thinking when a light meter couldn’t be found. The resulting image is, of course, a classic.

    Articles: Digital Photography Review (dpreview.com)

  • 20×24 Studio will stop producing Polaroid 20 x 24 film next year

    20 x 24 camera designed and built by Tracy Storer, Operator of Polaroid 20×24 Studio West

    The Polaroid 20 x 24 is facing extinction as the last company producing the large-format instant film, 20×24 Studio, has announced plans to stop production at the end of 2017. 

    The studio and its owner John Reuter originally purchased an original Polaroid 20 x 24 camera from Polaroid after it declared bankruptcy in 2008, as well as hundreds of cases of existing film for it. The company sought to keep the format alive by producing its own iteration of the cameras and film, but a lack of demand and other issues have forced it to abandon that dream.

    In a statement posted on 20×24 Studio’s website, Mr. Reuter said:

    “Our hope now is that we can work on some great projects with many of our legacy clients as well as new artists who have yet to experience the ultimate in instant analog image making. Our original business plan was for five years with the inventory purchased and for a variety of reasons we have not worked through the material. Instant film will not last forever and despite storing the film stock in cold storage and mixing the chemical reagent only as needed the studio projects that they can maintain the quality for two more years.”

    Elaborating on this to the New York Times, Mr. Reuter said it would take a massive ‘multimillions’ investment to continue producing the film, something that isn’t feasible for the company given the relative lack of demand. As it stands, the camera itself costs $ 1750 to rent per day and each film exposure costs $ 125. Mr. Reuter anticipates the existing stock being used up by the time 20×24 Studio closes its doors next year.

    Take a look below at the 20×24 camera in action as Douglas Doubler photographs ballet dancer Rachelle di Stasio. 

    Via: New York Times

    Articles: Digital Photography Review (dpreview.com)

  • MIT Museum exhibition ‘Images of Discovery’ highlights science photography

    $ (document).ready(function() { SampleGalleryV2({“containerId”:”embeddedSampleGallery_3889188396″,”galleryId”:”3889188396″,”isEmbeddedWidget”:true,”standalone”:false,”selectedImageIndex”:0,”startInCommentsView”:false,”isMobile”:false}) });

    MIT Museum has opened a photography exhibition called ‘Images of Discovery: Communicating Science through Photography,’ running through January 2017. The exhibition showcases photographs from Berenice Abbott, Felice Frankel and Harold ‘Doc’ Edgerton, all three of whom ‘explored a range of scientific questions’ through their photography while working at the university.

    All three aforementioned photographers spent time working at MIT; Frankel is a research scientist and science photographer in the MIT Center for Materials Science and Engineering; Edgerton was an MIT Professor of Electrical Engineering and is known, among other things, for his Milk Drop photograph; and Abbot worked for MIT in the late 1950s, contributing images for a physics curriculum.

    Speaking about the exhibition, MIT Museum Director John Durant said:

    “Wherever you look in science, you see the historical importance of finding new ways of visualizing things, leading to greater understanding of the world. From Galileo’s use of his own hand-built telescope to explain the movements of the earth and other planets, to the latest imaging technologies in everything from nanotechnology to neuroscience, the making of images remains central to our ability to make new discoveries.”

    The exhibition includes half a dozen ‘Image Making Stations’ that give visitors the opportunity to better understand and make their own similar science photographs. Image Making Stations including ‘Water Drop,’ ‘Capture Movement,’ ‘A Bouncing Ball,’ ‘Water Waves in a Ripple Tank,’ ‘Photographing Ferrofluid,’ and ‘Zoom Scanner.’

    The MIT Museum is located at 265 Massachusetts Ave, Building N51, Cambridge, MA 02139.

    Via: wbur

    Articles: Digital Photography Review (dpreview.com)

  • Shadow Graffiti: Typographic Sundial Transforms Building Facade

    [ By SA Rogers in Art & Street Art & Graffiti. ]

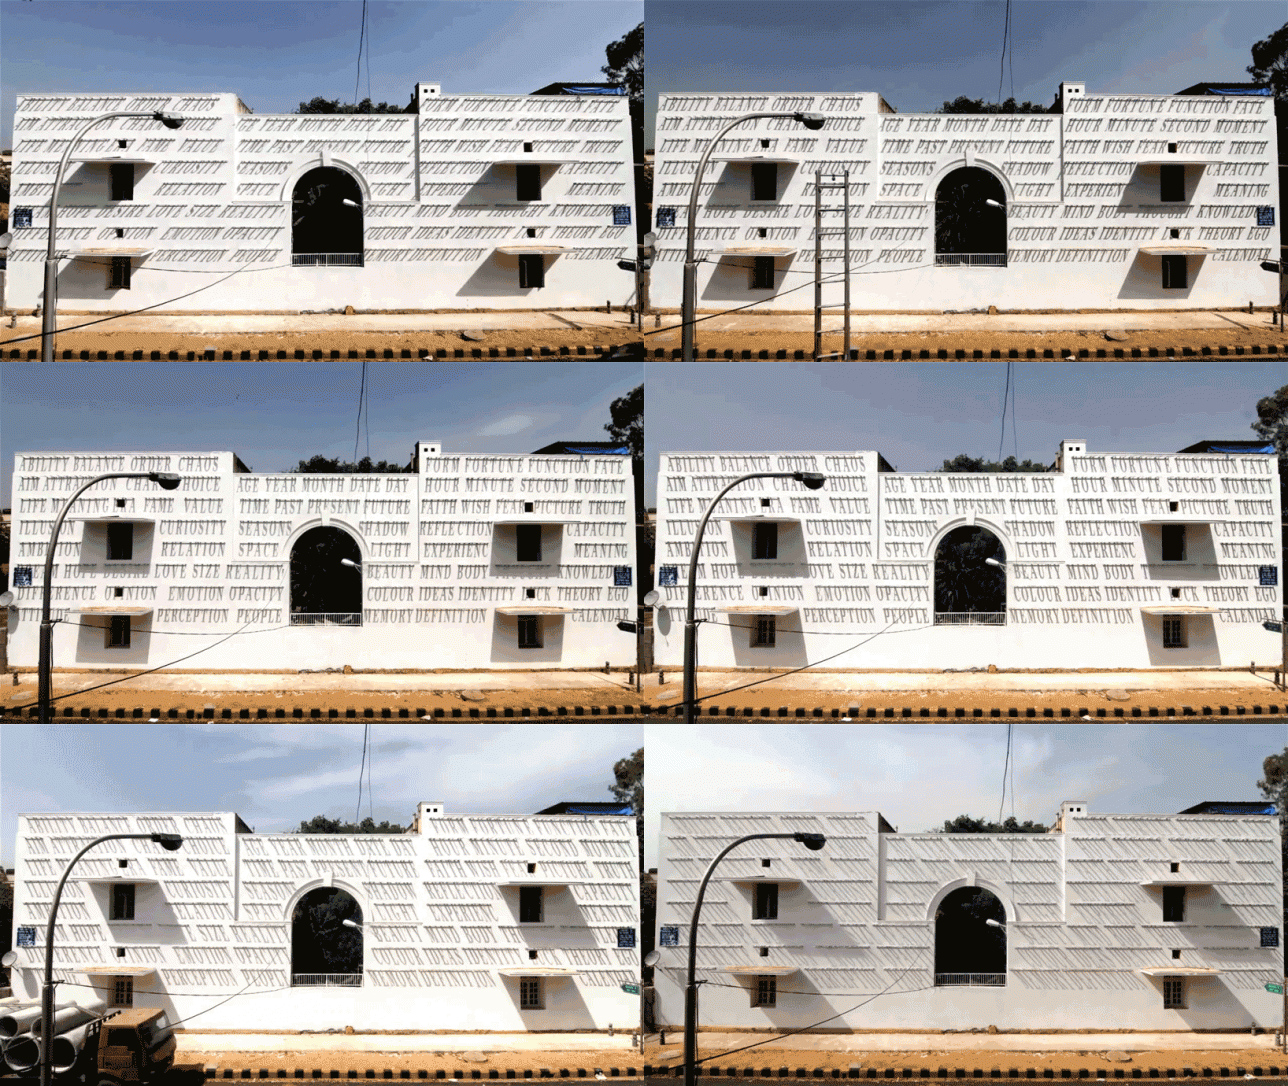
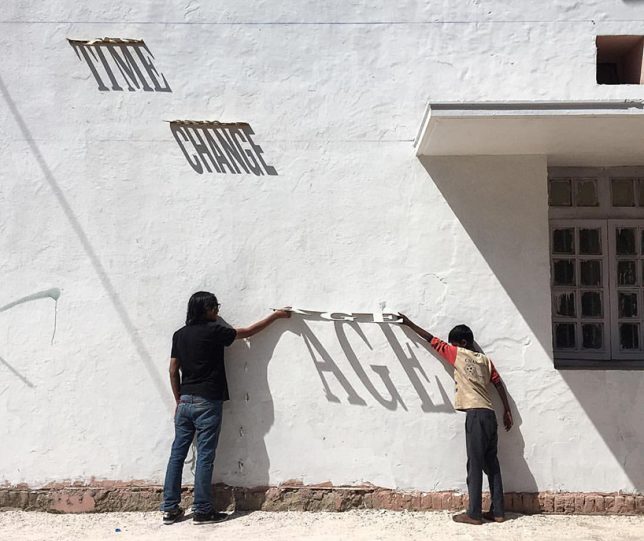
    typographic sundial 1

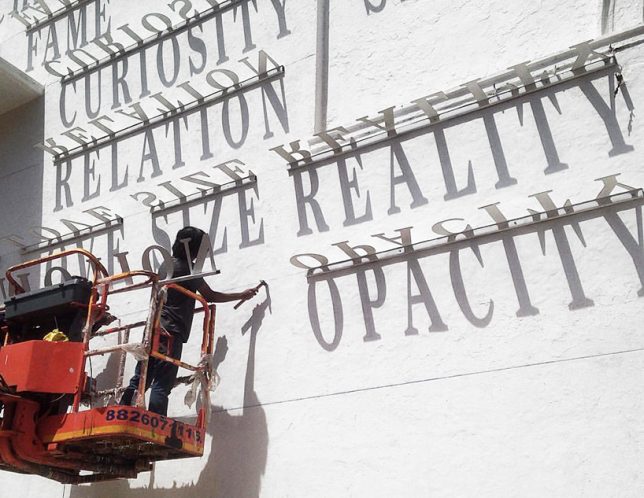
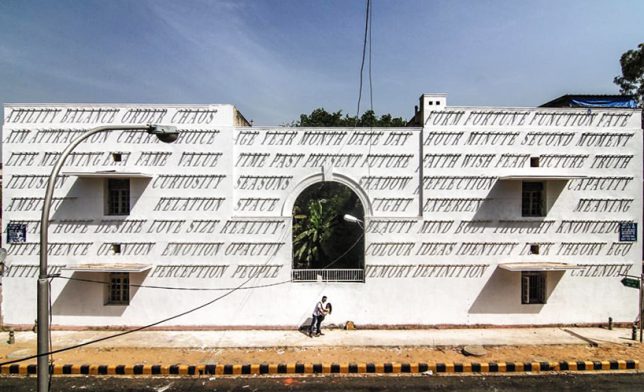
    Integrating the shadows cast by everything from stop signs to public benches into street art often requires the luck of seeing the piece in action at just the right time of day, when the shadow is in just the right spot for everything to line up as intended. Catching it in action feels like serendipity and adds a little bit of magic to ordinary urban settings. But in the case of this particular work of shadow art, you could literally stand in front of it all day and just watch it transform before your eyes. The lettering attached to the facade of a building in India’s Lodhi District changes its angle as the sun moves across the sky, acting like a sundial.

    typographic sundial 3

    typographic sundial 2

    ‘Time Changes Everything’ by Indian street artist Daku requires the sun’s harsh light in this location and the stark white facade of the building to even be visible to passersby, virtually disappearing on a cloudy day or at night. Get close to the wall and look up, however, and you’ll get a new perspective on the piece, viewing the words upside-down. The theme relates to the passage of time, with words including ‘age,’ ‘illusion,’ ‘season,’ aim’ and ‘memory.’ They start out in italics and then shift into prime legibility at noon before leaning in the other direction.

    typographic sundial 4

    The installation is part of the first dedicated public art district in India, turning the neighborhood into a gallery that’s available to everyone. ST+ART India invited 25 local and international street artists to contribute to the project, which aims to make art accessible for wider audiences “while having a positive impact on society.” Check out more of Daku’s work on Instagram.

    Share on Facebook


    [ By SA Rogers in Art & Street Art & Graffiti. ]

    [ WebUrbanist | Archives | Galleries | Privacy | TOS ]


    WebUrbanist

  • Weekly Photography Challenge – Bridges

    Bridge the gap – see how these photographers photographed some pretty unique bridges.

    Peter McConnochie

    By Peter McConnochie

    Weekly Photography Challenge – Bridges

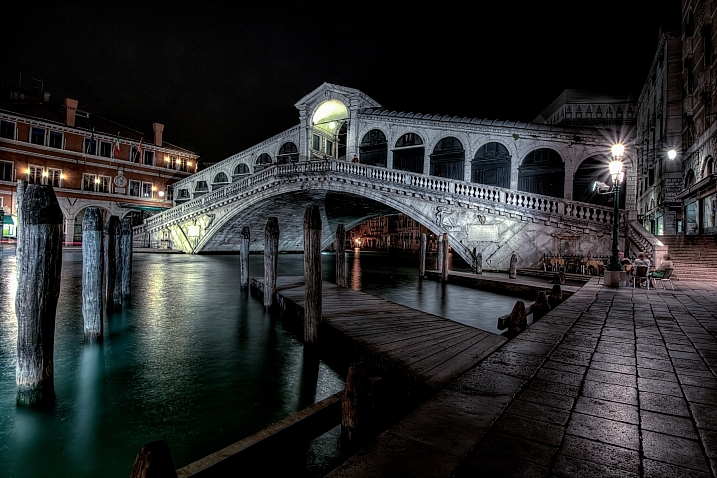
    There are two most obvious ways to photograph a bridge – from the side, or on it – as you can see by the two different angles of the Tower Bridge in London below. That’s a couple ideas for you. They both also use some long exposure photography, and have photographed the bridge at night or blue hour.

    Cat Burton

    By Cat Burton

    Neil Howard

    By Neil Howard

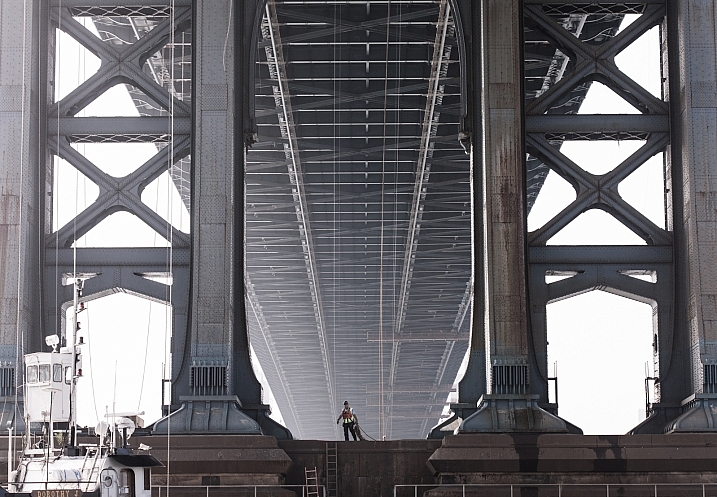
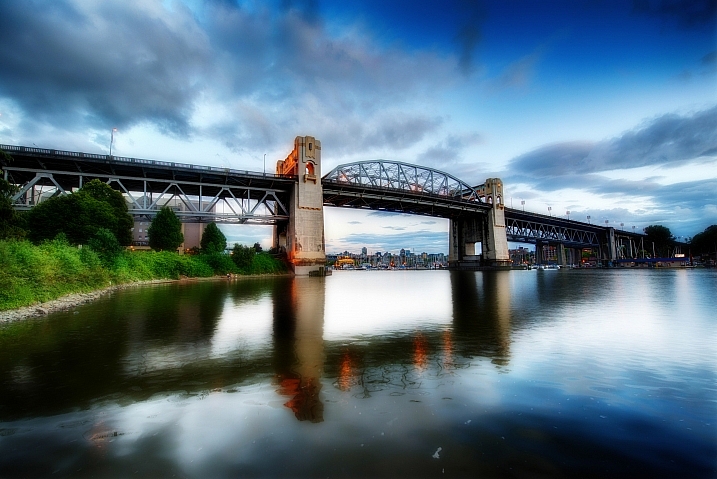
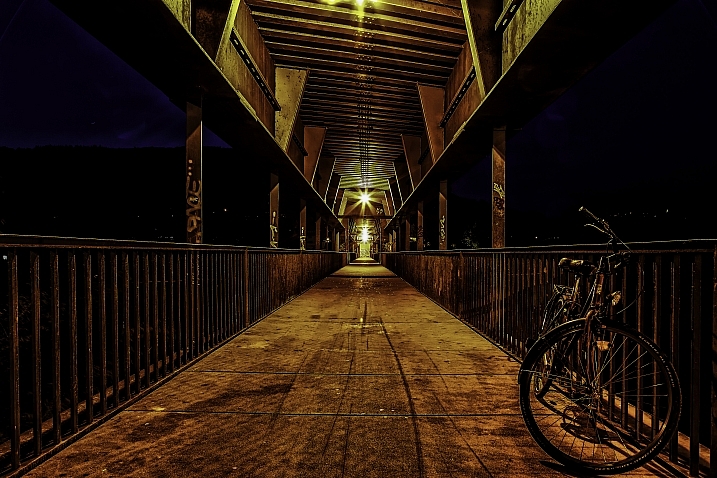
    How about getting under the bridge like this examples – never know what you’ll find under there, maybe a troll?!

    Barnyz

    By barnyz

    Thomas Hawk

    By Thomas Hawk

    Baiazid

    By Baiazid

    Michael Matti

    By Michael Matti

    Share your images below:

    Simply upload your shot into the comment field (look for the little camera icon in the Disqus comments section) and they’ll get embedded for us all to see or if you’d prefer upload them to your favourite photo sharing site and leave the link to them. Show me your best images in this week’s challenge. Sometimes it takes a while for an image to appear so be patient and try not to post the same image twice.

    Photograph a local bridge, or an iconic one if you have one in your area. Just go find a bridge and shoot something in your style.

    Martin Stitchener

    By Martin Stitchener

    Bastian Hoppe

    By Bastian Hoppe

    googletag.cmd.push(function() {
    tablet_slots.push( googletag.defineSlot( “/1005424/_dPSv4_tab-all-article-bottom_(300×250)”, [300, 250], “pb-ad-78623” ).addService( googletag.pubads() ) ); } );

    googletag.cmd.push(function() {
    mobile_slots.push( googletag.defineSlot( “/1005424/_dPSv4_mob-all-article-bottom_(300×250)”, [300, 250], “pb-ad-78158” ).addService( googletag.pubads() ) ); } );

    The post Weekly Photography Challenge – Bridges by Darlene Hildebrandt appeared first on Digital Photography School.

    Digital Photography School

  • Leica expands ‘a la carte’ program to allow customers to customize the M Monochrom

    The Leica M Monochrom (Typ 246) shown in cement leather and silver chrome

    Leica has announced that its M Monochrom (Typ 246) will now become part of the company’s ‘a la carte’ program, where photographers can choose a range of custom options to personalize their camera. The M Monochrom has only been available in a discrete black chrome finish until now, with black leather and no traditional Leica red dot in case it attracted unwanted attention. Now that the camera is in the a la carte program a polished silver chrome version will be available as well as black laquer, and the leather finish can be chosen from 10 different colours including shades of red, blue, green and brown.

    The service also allows users to decide if they want the image field selector lever that previews the effects of different focal lengths (it costs more to have it removed), to choose between Gorilla and sapphire glass on the LCD, and a choice of color for the strap to match or complement the color of the body. Users can also request no engraving on the camera’s top plate, or indeed request their own lettering or signature for the top plate and/or the camera’s rear.

    The customization can add over £1000 to the cost of the body on top of a charge of £840 for the service. Leica has created a simulator so that users can choose their options online, and Leica stores will also offer the service. For more information visit the Leica Camera website.

    Press release:

    Made to measure: Leica M Monochrom à la carte

    Leica à la carte programme extended with the addition of the Leica M Monochrom, with silver chrome finish available for the first time

    Leica Camera has today announced that its successful Leica M à la carte camera personalisation programme has been expanded with the addition of the Leica M Monochrom, bringing the entire portfolio of bespoke options to this special digital rangefinder model.

    The Leica M Monochrom, which incorporates a unique black and white sensor, can now be ordered with a multitude of tailored features, including a choice of classic black chrome or black paint body. Furthermore, for the first time and exclusively via the à la carte programme, customers can also select the camera body in a stunning silver chrome finish.

    Among the custom options are a top plate with – or without – the iconic Leica ‘red dot’ logo on the front, and an extensive collection of leather trims, from classic black to subtle shades to rich, eye-catching colours such as khaki, red or deep blue.

    For the ultimate personal touch, the Leica M Monochrom à la carte can be delivered with fine engraving on the top surface and rear of the top plate. Meticulously hand-crafted in Germany, each camera can be transformed into a personal ‘object of desire’ – a unique and unmistakeable example of precision and quality – with the application of its owner’s signature, custom text or special markings.

    An array of high quality camera carrying straps completes the Leica M à la carte portfolio, in colours and materials to match those chosen for the camera’s leather trim.

    Allowing the simulation of all possible variations, and selection of the final combination chosen by the customer, an online configurator is available now on the Leica website at uk.leica-camera.com. Orders for the personalised Leica M Monochrom à la carte camera can be placed via official Leica Stores and Boutiques, where customers are able to view a variety of samples, illustrating the full range of options offered by the programme.

    Articles: Digital Photography Review (dpreview.com)

  • Lights on! White theme extended to forums, now default for new visitors

    You may have already noticed that following a few weeks of tweaking and bug squashing we’ve extended the new ‘light’ theme to the forums and deployed a new unified header that is shared between both dark and light versions of the site. The beta pop-up has been banished from the site and a new permanent ‘Reading Mode’ switch placed at the top right corner of the site.

    Use the ‘Reading mode’ switch (top right of every page) to switch between black and white themes. Your choice is remembered.

    White is the new black

    As of the today the ‘light’ reading mode will be the default. If you want to switch to black and forget this ever happened, go ahead – your choice will be remembered.

    DPR has had the same basic ‘look’ since it launched in 1998, and there’s no doubt that the white-on-black design has always been an instantly recognizable part of our identity – our brand. And we know – because you’ve told us through polls and comments – that many of our regular visitors and forum pros are very happy with the current design and have no appetite for change, hence the decision to offer this as an option, forever.

    If you want to switch to black and forget this ever happened, go ahead – your choice will be remembered.

    But we also know that a large number of our visitors found the old design visually off-putting and hard to read, and a switch to a more conventional ‘black on white’ design has been the single most requested change seen via our feedback system for at least ten years. So we decided to see if we could, in relatively short order, knock together a quick alternative with the emphasis on readability for those that struggle with white text on a black background. What you see today is the outcome of that experiment. Not a lot has changed – we flipped the colors and made the body font a little larger, but this is a new coat of paint, not a foundation-up rebuild.

    White theme forum index White theme post view

    We asked, you answered…

    For those of you that managed to get this far down the page before scrolling straight to the comment section, I’d like to take this opportunity to thank the thousands of visitors who took the time to give us feedback on the new theme during the beta. I personally read every single feedback email, all the comments on the original news story announcing the beta, and as many forum posts as I could find. 

    The feedback (after filtering out all the complaints about the pop-up asking for feedback and those that took the time to tell us they had no opinion) pretty much all fell into one of four buckets: those that loved the new design (most common words: ‘thanks!!’ and ‘finally!!’), those that prefer the old design (most common phrase ‘don’t fix what ain’t broke’), those that didn’t like either and had their own suggestions for background colors, and a few who hadn’t read the story or the pop up and were under the impression that we were going to replace the old design with the new one, which made them angry. Like, really angry.

    I’m not complaining – we were really appreciative of ALL the feedback, and it informed many of the decisions we made and will make in future design changes. 

    ..and the results are in

    Overall the feedback was split 63:37 in favor of the lighter theme, though in the last two weeks the gap widened to about 70:30 as we finessed the design and annoyed more people into giving us feedback (thanks Mr Pop-up!).

    The most common themes we saw in favor of the darker theme were

    • The original color scheme sets DPR apart from most sites on the internet and is a fundamental part of our identity.
    • The new theme is too bright and is hard to read (quite a few people claimed it ‘burns my eyes’)
    • Photos look better on black and photo apps such as Lightroom have a similar theme.

    We agree that generally color images look better on a dark background, so we didn’t re-skin galleries, challenges, slideshows or the expanded image view in forums.

    Just to reiterate…we may be defaulting to the white theme… but the dark theme is not going away. Ever.

    It’s probably worth mentioning too, that in the month or so that we ran the beta we saw a significant difference between those using the white and black versions of the site, with those opting for the lighter theme spending almost twice as long and reading almost twice as many pages as those who stayed with the black theme. This is not conclusive proof (for reasons too longwinded to go into here), but it did confirm our long-held belief that the old theme was actually putting people off reading our content.

    I hope you give the new ‘Reading mode’ a try – especially the forums, which we just launched. Please share your opinion of how we might make it better below.

    Desktop users wondering where the switch for the ‘classic’ (yellow on gray) forum skin went – it’s at the bottom of every forum page (below the index of threads). Again, this setting is remembered between sessions (as long as you retain our cookies).

    Just to reiterate, we may – for now – be defaulting to the white theme (because based on the feedback and the data it’s the right choice), but the dark theme is not going away. Ever*.

    That’s all, folks.

    *OK, it’s been pointed out to me that saying the black theme won’t ‘ever’ go away is quite a commitment, and maybe I should say ‘until no one is using it, or until the dying Sun consumes our planet, whichever comes sooner’.

    Articles: Digital Photography Review (dpreview.com)

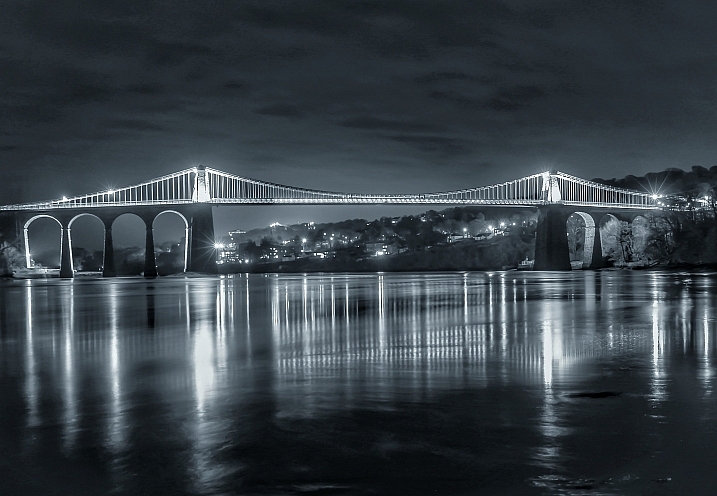
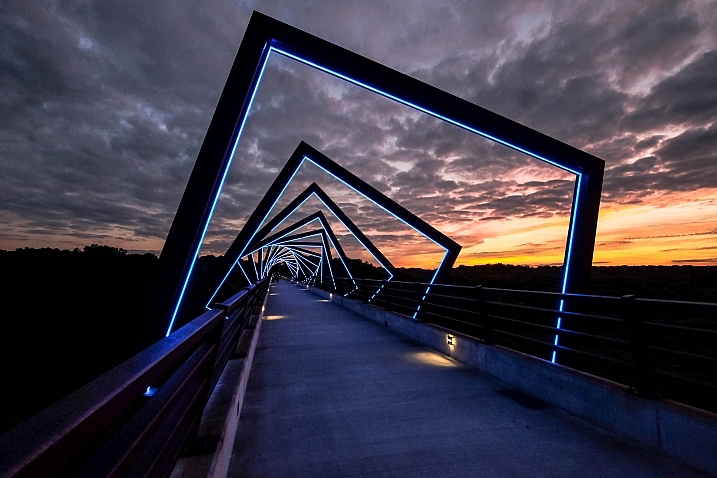
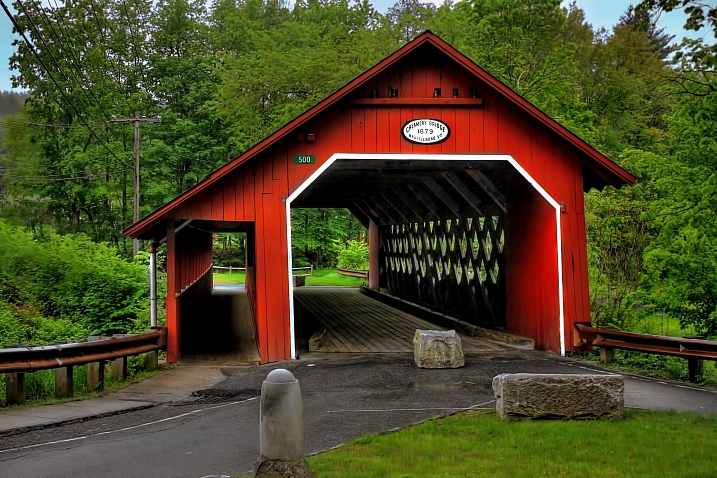
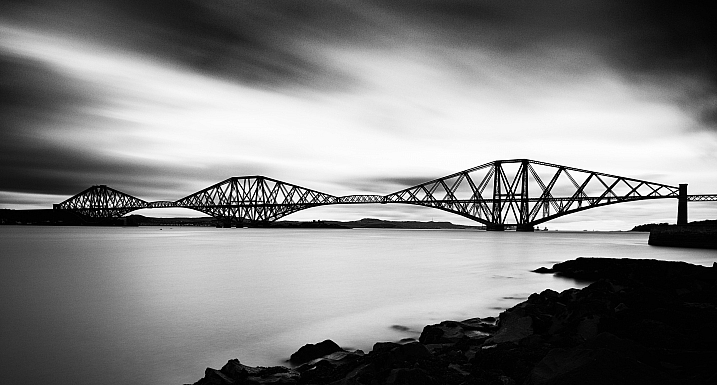
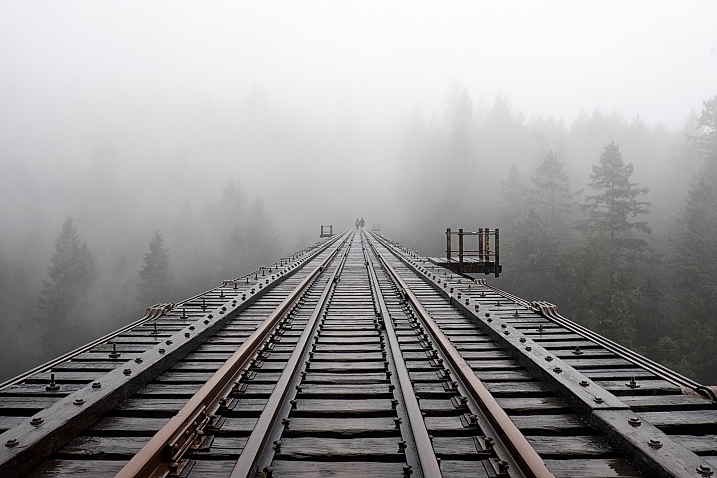
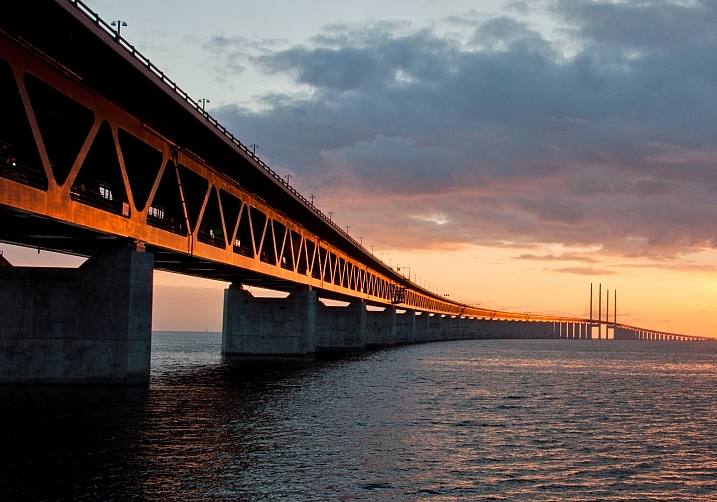
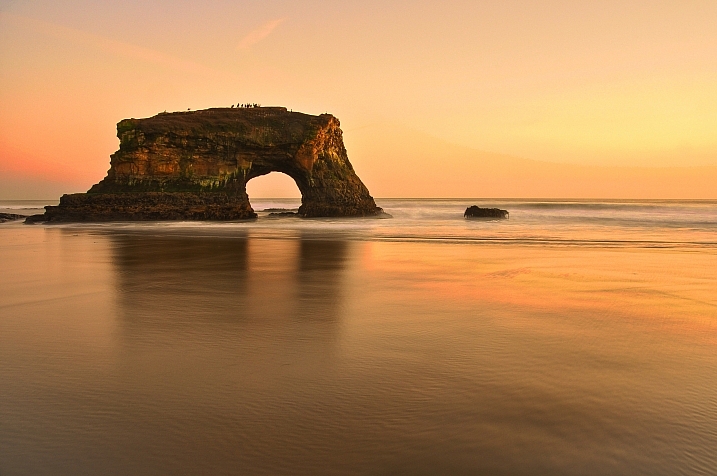
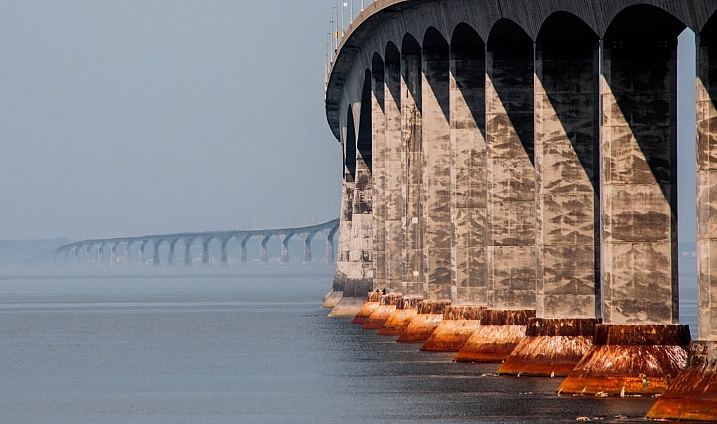
  • 26 Sublime Images of Bridges and Connection

    The term bridge has several meanings. The literal one which is a structure that spans across something, usually over a waterway. The other is of a connection between two things, or a transition from one to the other. Of course there is also the bridge of a ship where the captain takes the helm, bridge of your nose, and a bridge or passage in a musical composition.

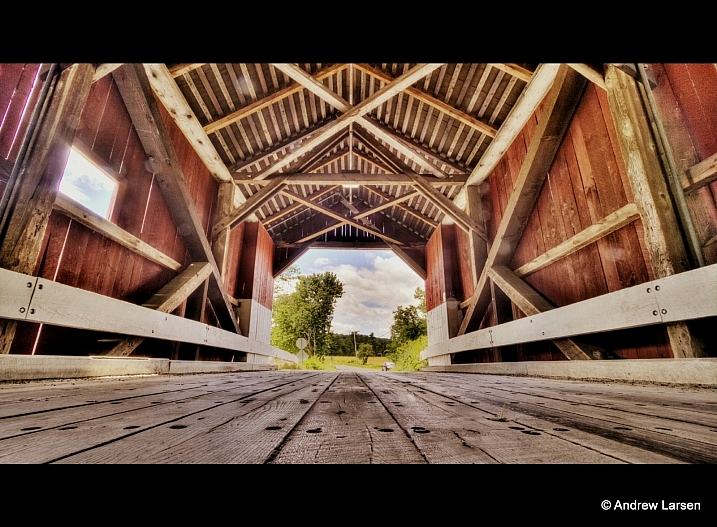
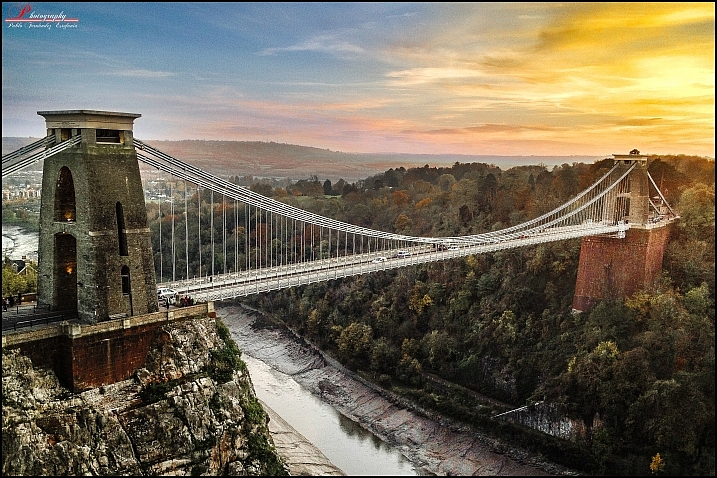
    Here are several images that interpret that term – bridge:

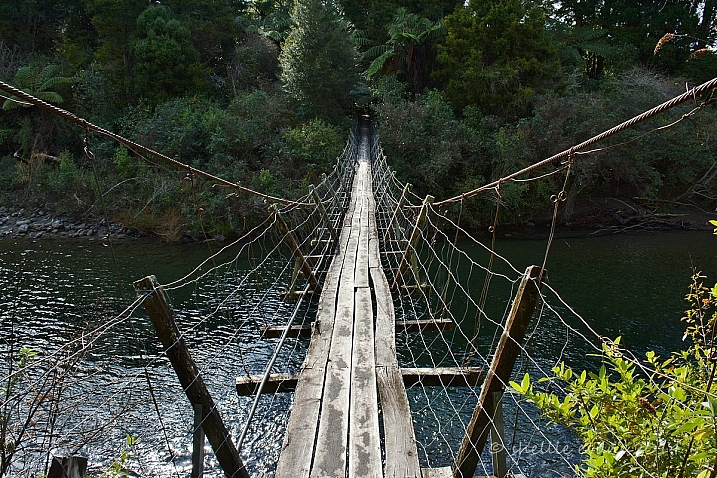
    Shellie

    By Shellie

    Several Seconds

    By Several seconds

    Styrovor

    By styrovor

    Julie Anne Johnson

    By Julie anne Johnson

    Yusuke Umezawa

    By Yusuke Umezawa

    Jon Matthies

    By Jon Matthies

    Jacob Surland

    By Jacob Surland

    Thomas Hawk

    By Thomas Hawk

    Omar Bariffi

    By Omar Bariffi

    Rick Schwartz

    By Rick Schwartz

    Raul Lieberwirth

    By Raul Lieberwirth

    Andrew E. Larsen

    By Andrew E. Larsen

    Pablo Fernández

    By Pablo Fernández

    Sian Monument

    By sian monument

    Jason Mrachina

    By Jason Mrachina

    Daniel Mennerich

    By Daniel Mennerich

    Andi Campbell-Jones

    By Andi Campbell-Jones

    David Merrett

    By David Merrett

    JP Freethinker

    By JP Freethinker

    Bernhard Latzko

    By Bernhard Latzko

    Francisco Manuel Esteban

    By Francisco Manuel Esteban

    Timothy Neesam

    By Timothy Neesam

    L.E Daniel Larsson

    By L.E Daniel Larsson

    Sudheer G

    By Sudheer G

    MaxGag

    By MaxGag

    Andrea Moroni

    By Andrea Moroni

    googletag.cmd.push(function() {
    tablet_slots.push( googletag.defineSlot( “/1005424/_dPSv4_tab-all-article-bottom_(300×250)”, [300, 250], “pb-ad-78623” ).addService( googletag.pubads() ) ); } );

    googletag.cmd.push(function() {
    mobile_slots.push( googletag.defineSlot( “/1005424/_dPSv4_mob-all-article-bottom_(300×250)”, [300, 250], “pb-ad-78158” ).addService( googletag.pubads() ) ); } );

    The post 26 Sublime Images of Bridges and Connection by Darlene Hildebrandt appeared first on Digital Photography School.

    Digital Photography School

  • Sigma announces pricing and availability for sd Quattro and EF-630 flash

    $ (document).ready(function() { SampleGalleryV2({“containerId”:”embeddedSampleGallery_4930243882″,”galleryId”:”4930243882″,”isEmbeddedWidget”:true,”standalone”:false,”selectedImageIndex”:0,”startInCommentsView”:false,”isMobile”:false}) });

    Sigma Corp. has announced pricing and availability for its sd Quattro mirrorless camera, a bundle including the camera and a 30mm F1.4 Art lens, as well as the EF-630 external flash.
    The sd Quattro is a mirrorless camera with an APS-C-size Foveon sensor (which Sigma claims is ‘equivalent’ to 39MP), hybrid autofocus system, 2.36M-dot electronic viewfinder and ‘Super-Fine Detail’ mode that combines seven exposures into one for high dynamic range. The sd Quattro will priced at $ 799 body-only when it ships in July.

    The sd Quattro will also come bundled with Sigma’s 30mm F1.4 DC HSM Art lens for $ 999.

    The company also released pricing for its EF-630 external flash. It will initially be available for Sigma cameras, with Nikon and Canon versions to follow. The flash covers a range of 24-200mm (and can go down to 17mm via its built-in wide panel), supports high speed sync and offers an easy-to-use interface via its dot matrix display. The EF-630 will set you back $ 379 when in ships in July.

    Press release:

    Sigma Announces Pricing and Availability for sd Quattro, new sd Quattro bundle and Sigma EF-630 Flash

    Pricing and availability announced for the Sigma sd Quattro camera, a new sd Quattro camera and 30mm 1.4 Art lens bundle, as well as new EF-630 Flash

    Ronkonkoma, New York — June 24, 2016 – Sigma Corporation of America, a leading camera, DSLR lens, flash and accessories manufacturer, today announced the pricing and availability of the sd Quattro camera along with a new bundle including the sd Quattro and 30mm 1.4 DC HSM Art lens, as well as pricing for the new Sigma EF-630 external flash. The Sigma sd Quattro features an APS-C sized sensor and a redesigned mirrorless system among other advancements, and will be available in July for the street price of $ 799 USD. The sd Quattro and Sigma 30mm 1.4 DC HSM Art bundle is expected to be available in July for the street price of $ 999 USD. The Sigma EF-630 flash is the latest external flash from Sigma and boasts an overhaul from previous models, including a new docking station that allows users to update the flash via personal computer. The ideal match with the new sd Quattro, the new Sigma EF-630 flash will be available in July for Sigma mount for the street price of $ 379 USD, along with its dedicated USB Docking station for $ 79 USD. Additional mount availability for systems including Nikon and Canon are to be announced at a later date.

    “Our goal with the sd Quattro and 30mm 1.4 Art bundle is to make our new camera available to more photographers interested in the unique aspects of our Foveon Quattro sensor,” stated Mark Amir-Hamzeh, President of Sigma Corporation of America. “The cameras are truly exciting and showcase some great advancements including a new mirrorless design, updated auto-focusing system, a rugged build, and paired with our renowned 30mm 1.4 Art lens make for an extraordinary pair. Additionally, our new EF-630 flash system shows Sigma’s dedication to photography with updated performance from previous models, and makes for an ideal pairing with our new sd Quattro cameras.”

    About the sd Quattro and 30mm 1.4 DC HSM Art
    The sd Quattro utilizes our proprietary Foveon Quattro sensor renowned for its high-resolution capabilities. A magnesium alloy body makes the sd Quattro durable and rugged, while a dust and splash proof design make it ideal for photographers facing harsh conditions. On top of the new design, these cameras boast a list of useful advancements. These include a two-mode Autofocus detection that combines Phase detection for focus speed and Contrast detection for focus accuracy. The focus settings have also been enhanced with such modes as Movement Prediction, Face Detection, Free Movement, Focus Peaking and a variety of others. The new 2.3 megapixel viewfinder displays close to 100% of the field of view, and when placed in “Auto” will toggle between the viewfinder when the user has the camera to their eye and then to the LCD when the user lowers the camera. A new “Super-Fine Detail” mode brings out the full potential of the Quattro sensor by capturing seven different exposures with one shot and merging them for exceptional dynamic range (images can be extracted individually as well). The Sigma 30mm 1.4 DC HSM Art is a staple prime lens in Sigma’s lineup. This compact prime lens is designed for APS-C sensors and touts a bright 1.4 aperture. Part of the Sigma Global Vision lineup, every Sigma 30mm 1.4 Art is individually tested before leaving our single factory in Aizu, Japan and can be updated and fine-tuned with the Sigma USB dock and Sigma Photo Pro software. 

    About the Sigma EF-630 Flash
    Compatible with most well-known digital SLR cameras, the EF-630 flash will be available in Sigma mount in July with additional mounts, including Canon and Nikon, in the future. The FP Flash function of the EF-630 makes flash photography possible at shutter speeds greater than the normal sync speed, which is typically limited at shutter speeds up to 1/250 second for most cameras. The FP Flash function for high shutter speeds is necessary when setting a larger aperture to limit depth of field when shooting in daylight, as high shutter speeds are used to balance the daylight and the flashlight at any shutter speed.  

    EF-630 features:

    • Intuitive user interface: dot matrix LCD screen for improved menu visibility, D-Pad and dial settings controls, and easy one-click disengage function improve ease of use
    • Slave flash function: for use with multiple flash systems
    • Modeling flash function: check for intense reflections and shadows before capturing the shot
    • AF assist light: accurate auto-focus in low light conditions
    • Auto Power-off: flashgun automatically powers off after a period of non-operation to conserve battery life
    • Manual flash power level control: manually set the flash power level from 1/1 to 1/128

    The new EF-630 Flash can be updated with the latest software from a workstation or laptop using the Sigma Optimization Pro software and Flash USB Dock FD-11 (sold separately).

    Articles: Digital Photography Review (dpreview.com)