Blog

  • Concept To Creation: Editorial Versus Campaign

    Editorial vs. Campaign


    Hey FashionPhotographyBlog.com readers.


    Thanks for joining us on our “Concept to Creation” series where we walk you through the process of taking an idea into an image. If you were here with us last time, we investigated examples of how working fashion photographers in the industry turn their inspirations into a concepts.


    Concept – crucial to binding your images together. You’ll find that any high end magazine only published editorials that has a concept holding the story together so today we are going discuss the difference between editorial and campaign images and how these can affect the concept for your shoots.


    There’s a bit of a formula to it all. A set of rules that can, and are, broken.. But for the most part hold true to all editorials and campaigns you see.


    Campaigns


    Typical, successful campaigns do a few things. Obviously, they showcase the clothing. If you can’t see the clothing, you’re not getting paid. In fashion, clothing is king. It comes before all else.


    You’ll notice that campaigns shot on location tend to stick to one area. If you’re on a sofa in a house- you’re on that sofa, in that house, for all of the images. A lot of campaign images tend to look the same. That’s a job well done! It’s this repetition that makes you remember “Oh, the girl on the blue couch with a million men is that Brian Atwood campaign.” So every time you see a girl on a blue couch with a million men, what do you think? That’s right! Subconsciously you recall Brian Atwood’s name!


    Brian Atwood’s Fall 2012 Campaign by Mert & Marcus:


    Notice all the images have the same general perspective, are in the same place, and are essentially the same image (with variations).

    brian-atwood-fall-2012-campaign-by-mert-and-marcusbrian-atwood-fall-2012-campaign-by-mert-and-marcusbrian-atwood-fall-2012-campaign-by-mert-and-marcus


    Louis Vuitton Spring 2012 by Steven Meisel

    Notice a pattern?
    louis-vuitton-2012-by-steven-meisellouis-vuitton-2012-by-steven-meisel

    EDITORIALS


    With an editorial, you have more freedom! You’re not glued to one location, you can play with lighting (it should be relatively consistent but doesn’t necessarily have to be exactly the same in every shot), you can play with angles, etc.


    As long as all the images are tied together via concept, have some fun with it. Editorials do showcase clothing however you can be a bit more liberal and artistic with how it’s shown. And one day, if you have enough power in the fashion world like Steven Meisel or Steven Klein, you can sometimes get away with having the dress you’re supposed to feature laying on the floor or hardly showing. (This only applies to the big players in the fashion photography industry.. don’t get any ideas!)


    Steven Klein for Interview Magazine


    Observe that there is a definite concept. However, unlike a campaign, there is more variation between the shots.

    steven-klein-for-interview-magazinesteven-klein-for-interview-magazinesteven-klein-for-interview-magazinesteven-klein-for-interview-magazine 

    Tim Walker (& Tim Burton!) for Harper’s Bazaar


    tim-walker-and-tim-burton-for-harpers-bazaartim-walker-and-tim-burton-for-harpers-bazaartim-walker-and-tim-burton-for-harpers-bazaartim-walker-and-tim-burton-for-harpers-bazaar

    I hope you all enjoyed discovering the difference between editorial and campaign images. It’s definitely something you want to keep in mind when you’re translating your inspirations into concepts. With a better understanding of the concept to creation process, you’ll be able to turn your shoot ideas into reality.

    As always, if you have any questions, feel free to shoot over an email!


    Alana


    IMAGE SOURCE:

    Feature image & images 1-3: Mert & Marcus for Brian Atwood’s Fall 2012 Campaign

    Images 4 & 5: Steven Meisel for Louis Vuitton Spring 2012 by Steven Meisel

    Images 6-9: Steven Klein for Interview Magazine

    Images 10-13: Tim Walker (& Tim Burton!) for Harper’s Bazaar


    Fashion Photography Blog

  • Concept To Creation: How Professional Photographers Do It

    Examples of Concept to Creation from Working Fashion Photographers


    Hey FashionPhotographyBlog.com readers.


    Thanks for joining us on our “Concept to Creation” series where we walk you through the process of taking an idea into an image. If you were with us last time, we discussed how to turn your inspiration into a concept. Today, we’re going to dive a little further. I’ll help you out with some examples of how working fashion editorial photographers pull their inspiration and translating them into concepts.


    Miles Aldridge for Vogue Italia:

    Sure, there is a concept in the styling: spring time flowy dresses. There’s continuity between the images because of the bold use of color. But anyone that knows Miles Aldridge’s work knows that’s his style. What ties all these images together? Cats! Without the cats, none of the images would appear to be from the same editorial.

    miles-aldridge-vogue-italia-cat-story

    miles-aldridge-vogue-italia-cat-story

    miles-aldridge-vogue-italia-cat-story

    Mert & Marcus for W Magazine:

    All the images are shot in the same room. A room that has been flooded. Bingo! There’s your concept.

    Mert-&-Marcus-for-W-Magazine

    Mert-&-Marcus-for-W-Magazine

    Knowing that these guys often pull inspiration from artwork, I wouldn’t be surprised if they were inspired by Pre-Raphaeliate “Ophelia” paintings. I especially wouldn’t be surprised if a big piece of their inspiration came from photographer Gregory Crewdson’s interpretation of these Ophelia images.

    ophelia-by-john-everett-millais

    Ophelia by John Everett Millais

    Ophelia-by-Gregory-Crewdson

    Ophelia by Gregory Crewdson


    Granted, these examples are more on the extreme end of the spectrum. However, I think it drives the idea across. These images aren’t united because of what the model is wearing. They’re not united because of a dominant color (although, it helps). They’re united because of an idea which brings them together. It takes them out of the real world and brings them into a fantasy land.


    This is extremely hard to do on a limited budget. That’s okay! No one is expecting someone with no budget to pull off a shoot like the ones pictured above. Just because you don’t have funds doesn’t mean you cant create a concept on a low/no budget that ties everything together.


    Melissa Rodwell for Kurv Magazine:


    Not something that would require an extravagant budget like the images pictured above. However, they’re all united in their lighting, clothing, hair, makeup, location and way in which they’re shot. Melissa brings you into this whimsical, etherial world with a simple concept. White.


    I know, I know, I’ve said it shouldn’t just be a color that holds your images together. But In these images, it works! Melissa brings you beyond the color white and creates a fantasy world out of it.


    melissa-rodwell-kurv-magazinemelissa-rodwell-kurv-magazine

    Concept – crucial to binding your images together. You’ll find that any high end magazine only published editorials that has a concept holding the story together.


    Hope you all enjoyed the examples of working fashion photographers and their thought processes behind turning inspiration into concepts. Stay tuned because next time, we’ll be discussing the difference between editorial and campaign shoots and how these relate to your shoot concepts.

    Until then –


    Alana


    IMAGE SOURCE:


    Feature image: Mert & Marcus for W Magazine

    Images 1-3: Miles Aldridge for Vogue Italia

    Images 4 & 5: Mert & Marcus for W Magazine

    Image 6: John Everett Millais

    Image 7: Gregory Crewdson

    Images 8-10: Melissa Rodwell for Kurv Magazine


    Fashion Photography Blog

  • Concept To Creation: Finding Inspiration

    Hey FashionPhotographyBlog.com readers.


    This time around, we’re going to look at something a bit more conceptual. I can give advice and guide you, but ultimately it’s your job to really dig in and put it all together. That being said.. This post we’re going to briefly explore “Concept to Creation.” How to take an idea and turn it into an editorial or, if you’re lucky enough, an advertising campaign. Granted this post (hell- this whole blog) is geared more toward fashion photography, but the same principles apply for all walks of photography.


    One of the biggest things I didn’t understand when first starting out was what an editorial really is. Sure, it’s a “story.” It’s a group of images that go together. Easy enough. So what was I doing wrong that I couldn’t get any of my “stories” published? They were good pictures but I lacked concept and intrigue.


    When planning a shoot, there is no precise way to tell you how to get from initial inspiration to final image. However, we can look at developing an idea and the unwritten rules behind the images we see.


    Inspiration


    Let’s start at the beginning. First off, find some inspiration.


    Many people ask where to find inspiration. There’s no right or wrong answer. For some people it’s reading a book, watching a movie or going to a museum. For others it’s found walking around town or listening to new music. Everyone gets inspired differently. The hardest part is finding out how you’re inspired and taking it from there. Are you stimulated visually? Auditorily?


    The best piece of advice I could give you is to NOT look at fashion photographers work when trying to get inspired. Sounds silly, I know. Look at fashion photographers work all the time! Knock yourself out. But when it comes to initially conceiving an idea and you’re looking at the work of other fashion photographers, you’ll run into a few problems.


    1) You’re most likely going to steal a bit of their idea/image subconsciously

    2) If you’re looking at the work of masters such as Guy Bourdin or Steven Meisel, you’ll drive yourself mad! There is no way your work can stack up against these guys.


    Let your ideas come organically. Bounce ideas off friends. Watch a movie. Go to the Met. (Can’t get to NYC? No sweat! The Met has their collections catalogued online, so does the MoMA


    Browsing online and see something you like? Create an inspiration folder on your desktop to keep images for later reference.


    francis-bacon-pope

    Francis Bacon’s work often focuses on how the face distorts as one screams. I used this as inspiration for some personal images I shot.


    alana-tyler-slutsky-personal-work-lighting

    Image I shot studying how the face can be manipulated through distortion and lighting. As you can see, Bacon’s work was a big inspiration for this set of images.


    We’ll dive a little further into turning inspiration into concept next time.

    Until then –


    Alana


    IMAGE SOURCE:


    Image 1: Francis Bacon

    Image 2: Alana Tyler Slutsky


    Fashion Photography Blog

  • Concept To Creation: Turn Inspiration Into Concept


    Turning Inspiration Into A Concept

    miles-aldridge-vogue-italia-cat-story

    Hey FashionPhotographyBlog.com readers.


    Thanks for joining us on our Concept to Creation series where we walk you through the process of taking an idea into an image. If you were with us last time, we talked about talked about how to find inspiration for your shoots. On today’s we’re going to jump into discussing how to turn your inspiration into a concept.


    Now, this right here is the most important step. You have an idea, great. How do you turn that idea into a set of images? Can it be turned into a picture narrative/story? Now that you have your base idea, it’s time to do some research! Doing an editorial based on the color red? What does the color red evoke? How have people pulled off red editorials in the past? While researching, plan your shoot. Is it in studio? Is it on location? One model or two? Blonde, brunette or redhead? Take this laundry list of ideas and findings and start turning it into a picture in your head.


    For some people, it helps to sketch things out. For others, it helps to collage. I tend to collect images while I sit on an idea and then go straight into creating a moodboard.


    Look at an editorial or a campaign, you’ll see that there is one main thing that binds all the images together – a concept. When flipping through the pages of a magazine, you can determine when one story ends and another beings purely based on the concept behind the images. You won’t find an editorial that consists of different girls wearing different types of clothing in locations that aren’t relevant to each other. That’s just not how it works.


    A concept is what will bind your story together. And the way in which you handle it shows a bit of your voice. A concept goes further than “my model is wearing red in all the images”. That’s purely a way of styling the model. Put some imagination into it.


    Hope you all enjoyed this dive into the thought process behind translating an inspiration into a concept. To help explain the points raised in this post further, the next article I’m posting, we’ll dive a little further by showing you some examples of how working fashion editorial photographers pull their inspiration and translating them into concepts.


    Until then –

    Alana


    IMAGE SOURCE:

    Feature image & image 1: Miles Aldridge for Vogue Italia


    Fashion Photography Blog

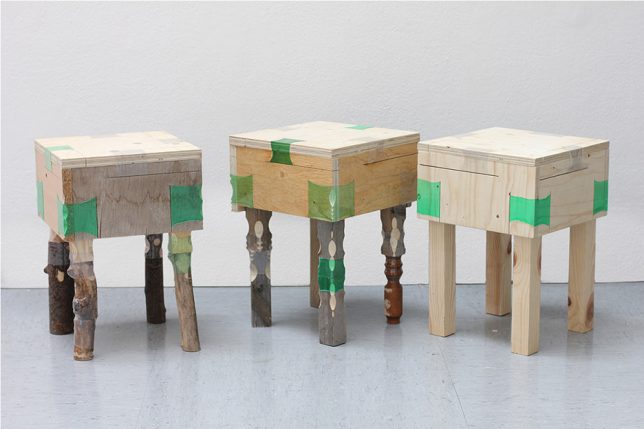
  • Junk Joinery: Heated Plastic Scraps Connect Notched Wooden Furniture

    [ By WebUrbanist in Design & Furniture & Decor. ]

    wood plastic furniture

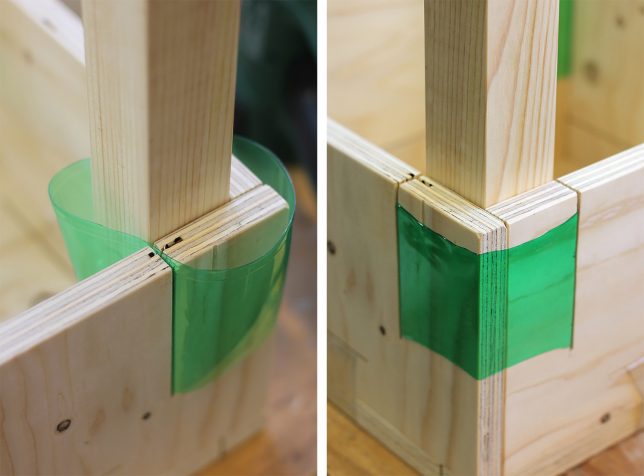
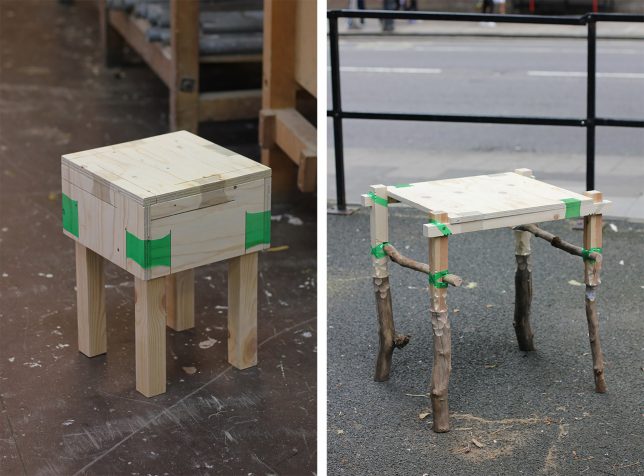
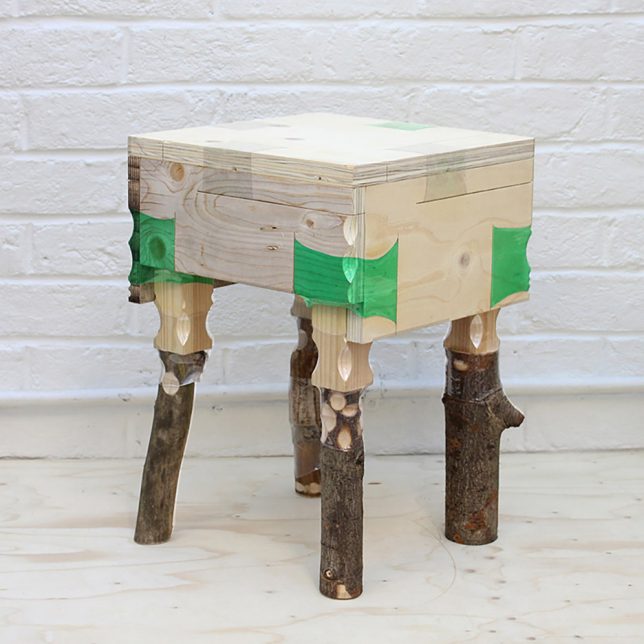
    Using scraps from start to finish, this shrink-wrap approach to furniture is not only greener but faster and leaner, requiring less by way of specialized skills or tools and allowing people to build easier do-it-yourself objects. A project of Micaella Pedros for the Royal College of Art, the Joining Bottles project uses heat to shrink plastic around wood joints, collected from around London, locking them together.

    wood plastic wrap

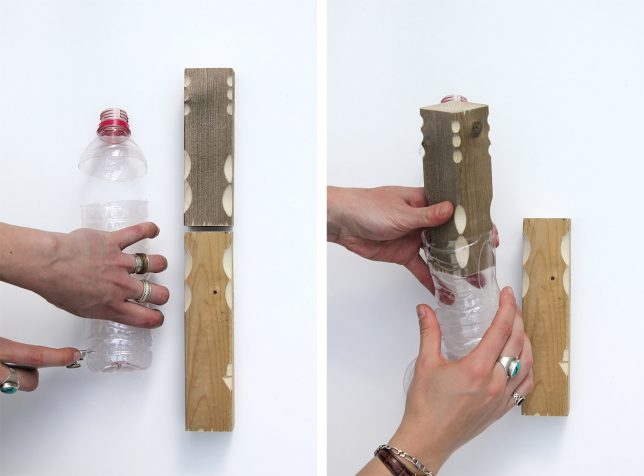
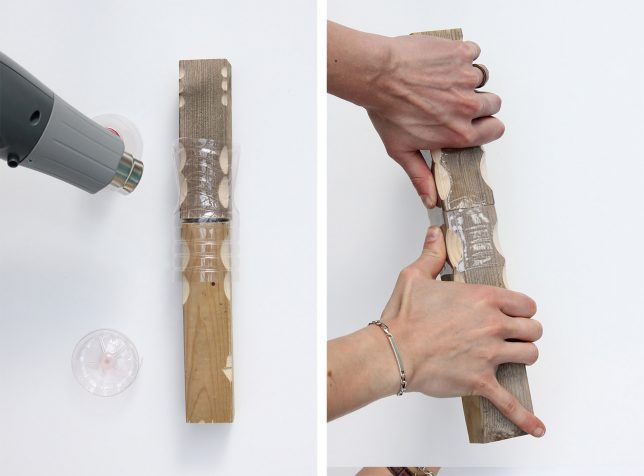
    “The idea is about taking a plastic bottle, cutting it, and then putting it around two pieces of wood., Pedros explains. “Then I heat it so it shrinks and creates a joint.” The key part of the process is the notching of the wood, which gives the plastic a way to grip the disparate pieces and lock them firmly into place.

    wood joinery plastic

    Traditionally, joinery is the most complex, time-consuming and often high-tech part of the furniture-making process, making this innovative approach a welcome alternative for those without the time and resources to spend months building custom pieces.

    wood hair heat dryer

    On the flip side, cutting and notching tools are commonplace and able to be improvised, meaning: a would-be Joining Bottles-type builder would not need access to a sophisticated wood shop. Scissors, a hair dryer or other heating element and simple carving tools will suffice. They key is in making the connections follow common sense: flat-to-flat helps, and complex angles may fail.

    shrink wrap scrap furniture copy

    This is not about marketing a new line of garbage chic furniture, but about sharing knowledge about easier ways for ordinary people to upcycle everyday trash. “The core idea of the project is not to sell the products I’m building but more about sharing the principle and sharing the technique.” She is running workshops to show people how to follow her lead, enabling them to walk in with junk and walk out with furniture.

    wood joined furniture table

    The idea hinges on the global similarity of plastic bottles amid a sea of different types of wood. Basically, anyone in any place can find the same plastics and use them to connect whatever woods are locally available. The aesthetic results are up to the end user (or maker): there are many ways one could refine the look and feel of this general design approach.

    Share on Facebook


    [ By WebUrbanist in Design & Furniture & Decor. ]

    [ WebUrbanist | Archives | Galleries | Privacy | TOS ]


    WebUrbanist

  • Globell launches Kickstarter campaign for new screen calibration device

    Globell, a software distributor and the company behind Meyer-Optik Gorlitz lenses, has announced it plans to introduce a new screen calibration device if it gets enough support from the Kickstarter campaign it has just begun. The company claims its proposed globellColorMeter can calibrate almost any computer monitor in three steps that take less than five minutes, and that the device will remain accurate for years.

    The meter uses a lens developed with Meyer-Optik and a glass cover that won’t dis-color, according to Globell. Designed and built in Germany, the company says its device offers an alternative to calibration systems that are ‘technically ambitious but complicated and expensive to use‘ or ‘easy to use and affordable, but unable to function at a sufficiently high standard‘. Globell describes the globellColor, which comes with software for PC and Mac, as ‘affordable‘ and ‘the most precise, easy-to-use product in its price range‘.

    The company expects the product to retail at $ 250, but is offering early-bird deals from $ 99. For more information see the Kickstarter page.

    Press release:

    globellColor: Color management on Kickstarter

    Color management made in Germany: leading color management company Globell is launching a Kickstarter project for its new globellColor product range at www.globell.com/kickstarter.

    Tegelen, July 2016 – Natural colors on all monitors and in printed photos: the globellColor product range makes color management simpler, better and faster. In order to get the word out to an international audience, Globell has started a worldwide Kickstarter campaign at www.globell.com/kickstarter.

    This Globell solution is 100% made in Germany and delivers accurate calibration for all major monitor types and other display devices for both Mac and Windows. This benefits private users, photographers, design agencies and gamers.

    True colors on all display devices
    globellColor is affordable for everyone, easy to use and delivers professional quality calibration. To ensure this, the company developed its own colorimeter based on the latest technology and drew on expert knowledge and the optical expertise of lens specialists Meyer-Optik-Görlitz. The durable glass filter of the globellColorMeter will always provide accurate and consistently correct calibration and profiling – even after several years of use. The solution also includes powerful and user-friendly software for both Windows and Mac.

    “We combine modern sensor technology and durability with sophisticated software to create an ideal tool for any professional or amateur photographer,” explains Thomas Kuligowski, globellColor Product Manager. “As a long-standing innovation partner for digital image processing, we are pleased to launch globellColor, a complete color management solution that is made in Germany. On completion of the successful Kickstarter project, we will expand the globellColor product range further to include more products.”

    The Kickstarter campaign launches today (July 13, 2016) and ends on August 14, 2016. Supporters have the unique opportunity to acquire the innovative globellColor technology at an exceptionally low price starting at $ 99, with the RRP expected to be $ 249. After the products are delivered to campaign supporters this fall, they will be launched on the market.

    globellColor features
    – Fast and accurate calibration and profiling
    – Easy to use: no experience required
    – Can be used immediately: predefined calibration settings
    – Also for professionals: customizable calibration settings
    – Ability to examine results: before/after comparison
    – Can be used with almost all monitor technologies
    – Measure multiple monitors in a workplace
    – High-quality glass lenses powered by Meyer-Optik-Görlitz
    – Non-ageing glass filter
    – View of the representable color space as a 3D model
    – Many hardware-calibratable monitors supported
    – Software also supports some third-party sensors
    – Compatible with Windows and Mac

    Technical requirements
    Minimum RAM: 512MB, min. 150MB of free hard disk space, Windows (32-bit and 64-bit): XP, Vista, Win 7, Win 8.X, Win 10, Pentium or AMD K7; Mac OS: Mac 10.6, 10.7, 10.8, 10.9, 10.10, 10.11, Intel Hardware, Mac processors: Intel only. PowerPC not supported, USB connection

    Articles: Digital Photography Review (dpreview.com)

  • Zenmuse Z3 is DJI’s first aerial zoom camera

    Drone maker DJI has today announced its first aerial zoom camera, the Zenmuse Z3. The new model is optimized for still photography and combines a 3.5x optical zoom with 2x digital magnification, resulting in a 7x overall zoom factor, covering equivalent focal ranges from 22-77mm. Aperture ranges from F2.8 at wide angle to F5.2 at the long end of the zoom. Inside the 262-gram camera body images are captured on a 12MP 1/2.3-inch Sony sensor that can also record 4K video at 30fps and save DNG Raw files. 

     Drone shot at 22mm equivalent focal length
     Done shot at 77mm equivalent focal length (7x zoom)

    The camera can be used on the DJI’s Inspire 1, Matrice 100 or Matrice 600 drones and the company’s dedicated HD video downlink allows for transmission from a distance of up to 3.1 miles (5km) away. The zoom is operated via the DJI GO app or the Drone remote control. DJI says it has refined and improved image stabilization, as any camera movement is magnified at the longer end of the zoom lens.  The Z3 also comes with an upgraded gimbal. The camera will be available from July 28th and retail for $ 899.

    SHENZHEN, July 14, 2016 – DJI, the world’s leading aerial-imaging company, on Thursday announced the Zenmuse Z3, DJI’s first integrated aerial zoom camera optimized for still photography.

    The Zenmuse Z3 will offer up to a 7x zoom. The camera incorporates DJI’s leading gimbal technology, which has been upgraded to work optimally with its zoom capabilities.

    “The Zenmuse Z3 pushes the possibilities of use for industrial applications,” said Senior Product Manager Paul Pan. “Before this camera, the only way to zoom in on a subject or object was to fly closer to it. Now, pilots in a search-and-rescue situation, or conducting surveys or inspections, can maintain distance and still zoom in for sharp, detailed images.”

    The zoom camera is aimed at providing new capabilities for industrial applications, such as inspection and surveying.

    The Zenmuse Z3 is compatible with the Inspire 1, Matrice 100 and Matrice 600 drones and uses the company’s dedicated HD video downlink, Lightbridge and Lightbridge 2, providing up to 3.1 miles (5.0 kilometers) of HD transmission range.

    The Zenmuse Z3 is fully integrated into the DJI GO app and provides a seamless user experience, including a live feed from the camera and the ability to change camera settings, swipe to zoom in and out, capture photos or video and to activate intelligent flight modes. Users may also choose to employ camera controls, such as capturing photos and video and zoom, through their drone’s remote controller.

    The Zenmuse Z3 weighs 262-gram and achives up to a 7x zoom via a 3.5x optical zoom, combined with a 2x digital zoom. This gives the Zenmuse Z3 an effective zoom range of 22 millimeters to 77 millimeters. It has a maximum aperture of F2.8 and F5.2 at 22 millimeters and 77 millimeters, respectively.

    When the camera zooms in, the smallest movements are magnified. Adding an additional layer of fine-tuning to the yaw control of the Z3 is a custom-designed reaction wheel. This works in tandem with the normal yaw motor to allow for more refined and controlled movement and greater stability.

    The Zenmuse Z3 features the same highly refined Sony 1/2.3-inch sensor that is found on the Inspire 1 and the Phantom 4, leading the class in image quality. It can shoot still images at 12 megapixels with additional Adobe DNG Raw Support for maximum editing options in post-production. The camera also shoots video at up to 30 FPS in 4k resolution.

    Flight time with the Zenmuse Z3 is up to 19 minutes on the Inspire 1. Pilots can extend flight time up to 30 minutes with the dual-battery-equipped M100 and up to 39 minutes with the M600.

    The Zenmuse Z3 is priced at USD899 and will start shipping after July 28, 2016.

    For more details please visit:
    www.dji.com/product/zenmuse-z3

    Articles: Digital Photography Review (dpreview.com)

  • 5 Tips for Better Nature Photography

    One of the most challenging things about photography is finding good subject matter. People want to see images of places and things that they normally may not get to witness in person. It’s not always easy to find fresh and appealing material that will draw in your viewer and capture their attention.

    Luckily, with a little looking, you have the most abundant resource you will ever need to produce wonderful photographs, that have appeal and carry timeless beauty: nature. That’s right, our incredible natural world offers virtually limitless opportunities for you to bring out the very best in yourself so you can show others the awesomeness that surrounds us all.

    Nature

    Whether you’re shooting in rugged mountains, the ocean, or in your own backyard, there are ways to get the most out of your photography to be sure you produce some of the best images you possibly can, each and every time. Here are five easy to follow tips, which will help you take better nature photography, as you venture out to explore the natural world!

    #1 – Go Small

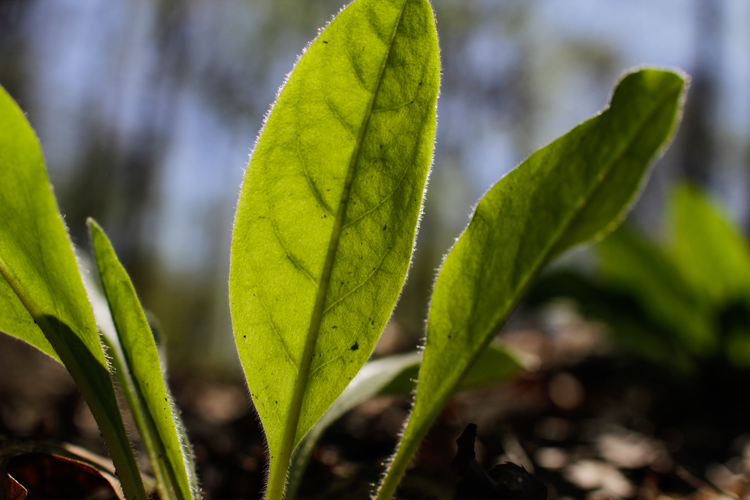
    The vast majority of the comings and goings occurring in nature, take place completely unknown to us. Wonderful little occurrences move constantly along in harmony, and can offer great chances for getting an equally wonderful photograph.

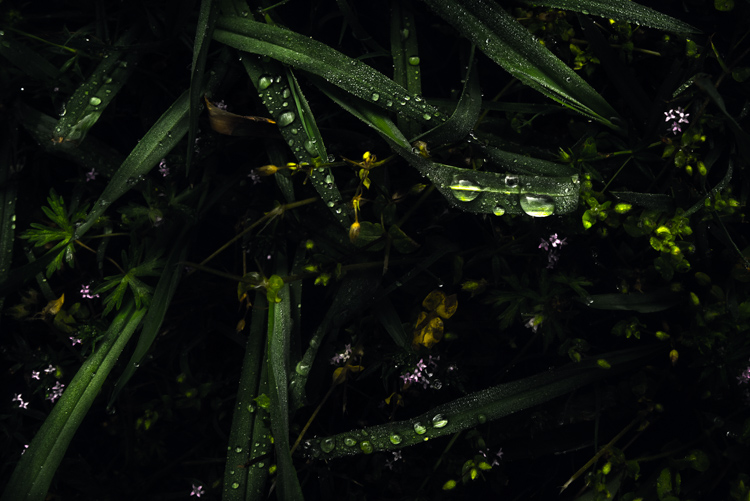
    Dew

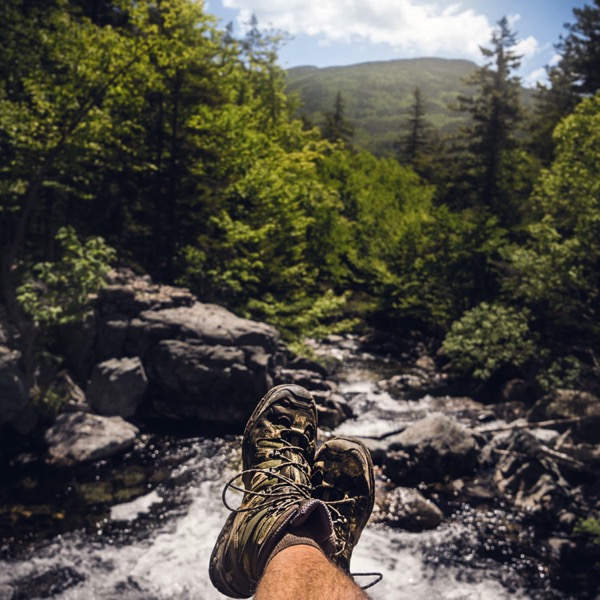
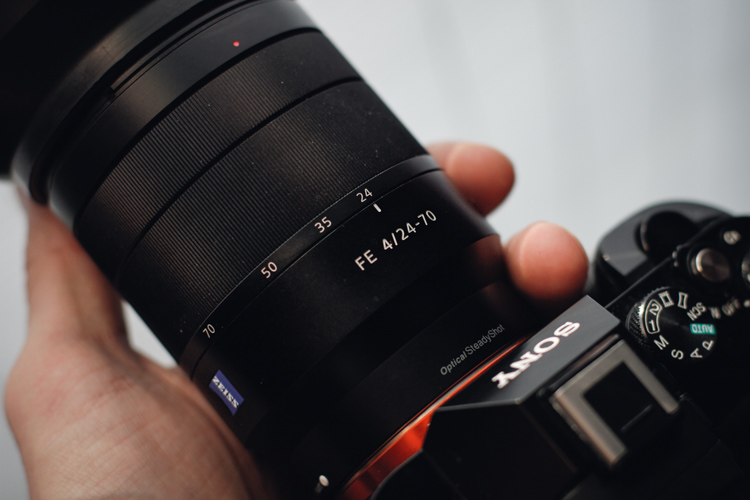
    When you’re out shooting in nature, don’t forget to pay attention to the smallest of details. Bring a lens that has a decent zoom (over 50mm) and is capable of focusing close-up. Certainly you don’t need a macro lens in order to get great photos of small things, but do keep in mind that the closer you can get the better off you will be.

    Lens

    Look for insects going about their daily lives, and pay special attention to the patterns in nature that can be found in leaves, flowers, and the Earth itself.

    Plant

    Getting close to small natural wonders means that you are also likely to be get a little dirty, so remember not to go out shooting wearing your best clothes.

    #2 – Look Up, Look Down, Look All Around

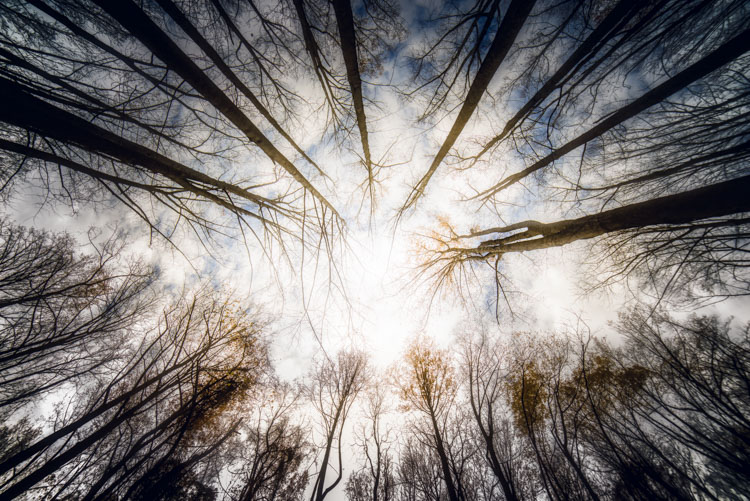
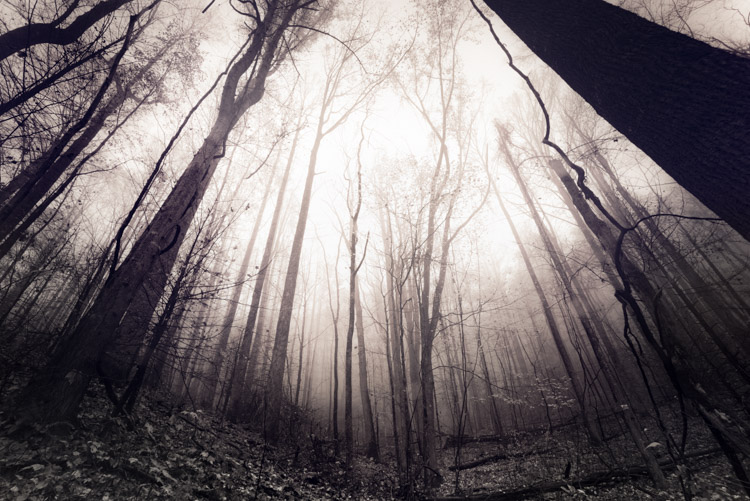
    Far too often we unintentionally view the world that is directly in front of us, and neglect to see the literal big picture. There is so much more to see if we would only look tilt our heads up. There are many wonderful things to photograph above our heads, and even greater opportunities for creative photography.

    Trees 1

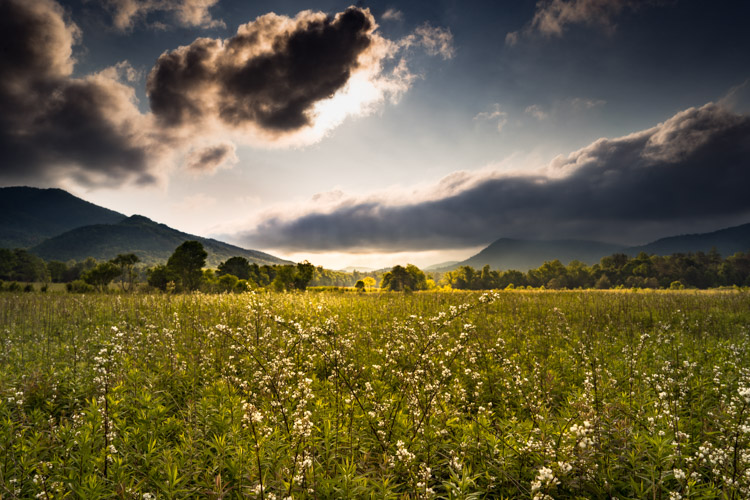
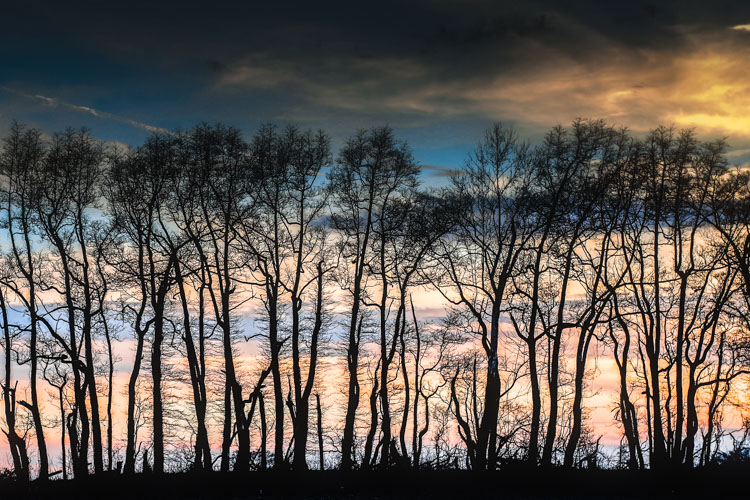
    Look for interesting and dramatic cloud formations, and incorporate clouds in your shots of other natural scenes. Remember that hardly anyone likes looking at an uninteresting sky, so try and compose your shots with that in mind.

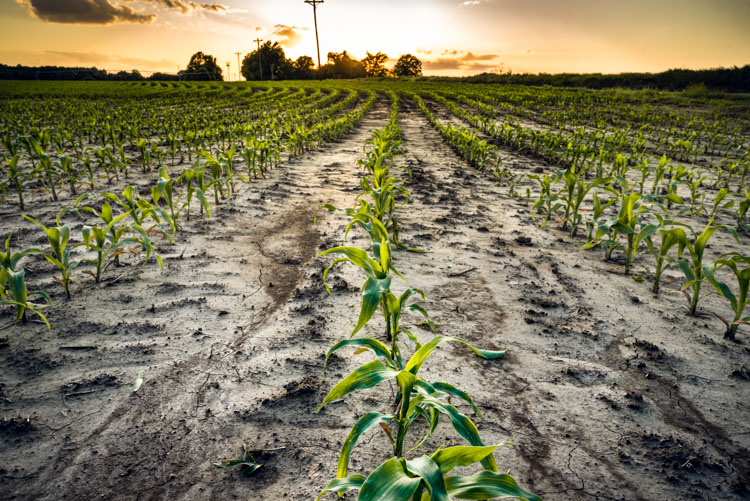
    Field

    It doesn’t stop at merely looking for cool cloud formations either. Get instant creativity in your shots by using leading lines, and vertical perspectives to give your images a uniqueness, that is sure to catch the attention of your viewers.

    Crops

    Trees 2

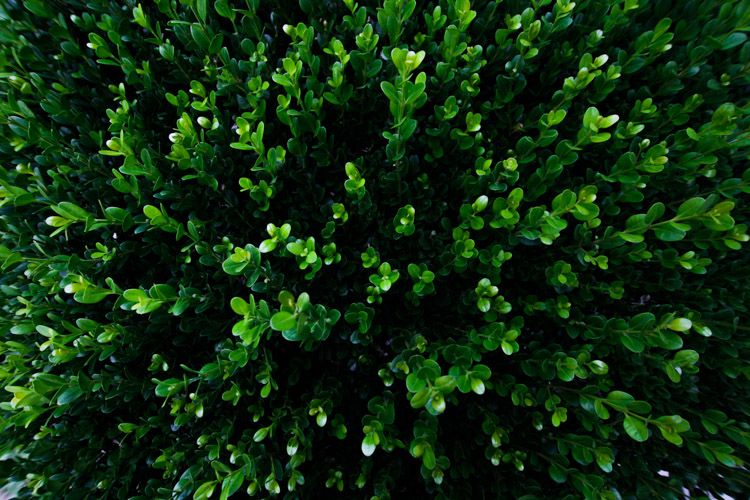
    The same goes for looking down onto your subject. There are many interesting perspectives to be had by shooting straight down on your subject from above.

    Hedge

    The key thing to remember here, is that your goal is to show things in nature in ways that most people don’t get to see, or have not even considered looking for in the first place. Make use of the power of perspective, and pay attention to everything around you, whether it’s above your head or below your chin.

    #3 – See the Light

    Light is the basic force behind all photography. It illuminates your subjects, and brings shadows and contrast to your photos. Learning to understand the nature of light is a lifelong journey for any photographer. Using the light found in nature is one of the best ways to add impact to your images and gain powerful compositions. Seeing light is something that takes practice, but that doesn’t mean that you aren’t capable of using it to your advantage right now.

    Sunlight

    When you’re out shooting, be sure to pay close attention to the way shadows are cast, and by whatever you happen to be photographing. Seeing the contrasts within the scene helps you to avoid dry and drab photos that are generally unappealing.

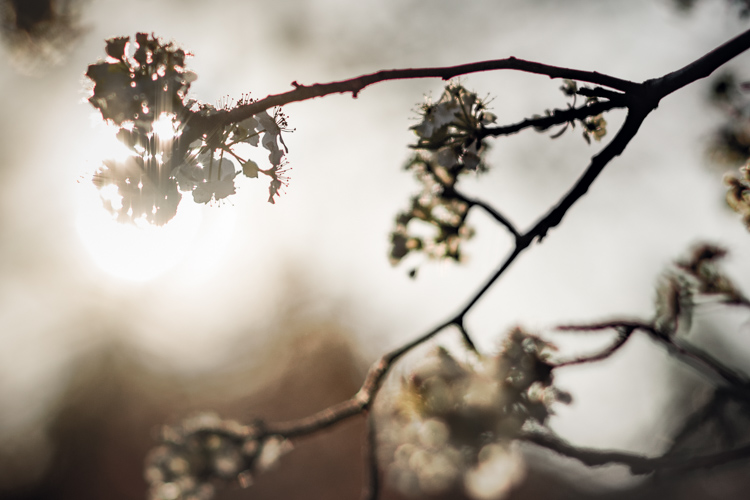
    Direction of light is also very important, and can make a place or object look completely different depending on the angle of the sun. Be sure to visit a location more than once, at varying times of day (or even at night), so that you can find your creative spark.

    #4 – Get out Early . . . Stay out Late

    If you are searching for good natural light for your photographs, it means that you have to be there when it happens. That good light almost always comes about in the morning hours as the sun rises, or in those late evening hours when the sun begins to disappear. You must be prepared to get out and be ready for this great light if you want to increase your chances of getting great shots.

    While you are definitely able to find good light throughout the day, it’s a good idea to get out and about early, or late in the day, so that you can see the gorgeous effects of morning and afternoon light.

    trees 3

    Furthermore, most animals and insects operate at their peak during the very early and late hours of the day. Even if it means losing a little sleep, it will almost always be worth the trouble to make sure you’re there when the magic happens.

    #5 – Bring Backup

    One of the most depressing feelings you will ever experience as a photographer is that of a dead battery, or a full memory card, as a beautiful scene disappears before your eyes. It’s always worth your while to bring an extra battery and memory card (extra film) so that you’re prepared when Murphy’s Law makes an appearance. Stack the odds in your favor when shooting the natural world be being prepared.

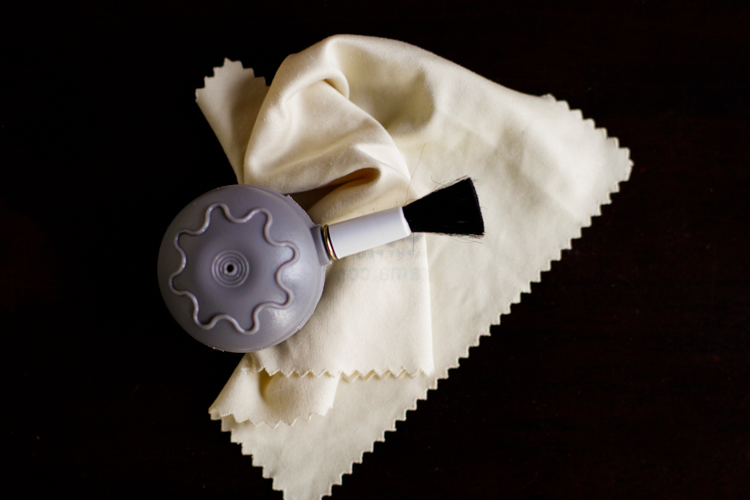
    Lens Cloth

    This doesn’t end with simply bringing an extra battery either. A lens cloth and blower brush can save the day when you get a little rain or dirt onto your lens. Being prepared for the small things isn’t difficult, and it ensures that you’ll be ready when the time to click that awesome photo comes along.

    Follow these five simple tips and make the most of your time shooting out in our amazing natural world. Have some tips of your own? Be sure to share them in the comments below as well as your nature photography images.

    This week we are doing a series of articles to help you do nature photography. This is the second, also read: 3 Habits Every Outdoor Photographer Should Develop to Avoid Missing Shots  – and watch for more coming soon! 

    googletag.cmd.push(function() {
    tablet_slots.push( googletag.defineSlot( “/1005424/_dPSv4_tab-all-article-bottom_(300×250)”, [300, 250], “pb-ad-78623” ).addService( googletag.pubads() ) ); } );

    googletag.cmd.push(function() {
    mobile_slots.push( googletag.defineSlot( “/1005424/_dPSv4_mob-all-article-bottom_(300×250)”, [300, 250], “pb-ad-78158” ).addService( googletag.pubads() ) ); } );

    The post 5 Tips for Better Nature Photography by Adam Welch appeared first on Digital Photography School.


    Digital Photography School

  • 11 Amazing Photos Pokémon Go Characters Fit Perfectly In

    While Pokémon Go is quickly becoming a new fitness, it’s no wonder that Pokémon characters are now among the most popular photography subjects. Well, most of such photos are just screenshots meant to show the Pokémon rather than carry any photographic appeal. However, the game is just a few days old (right, days!), so it’s probably won’t be too long Continue Reading

    The post 11 Amazing Photos Pokémon Go Characters Fit Perfectly In appeared first on Photodoto.


    Photodoto

  • Photographer captures the ruin of Fukushima’s exclusion zone

    Inside the Fukushima exclusion zone

    An abandoned supermarket in Fukushima. Photo by Keow Wee Loong

    Much of the area around Japan’s Fukushima Daiichi Nuclear Power Station has been closed to the public following the disaster that struck the region over five years ago. The earthquake and subsequent tsunami of March 11, 2011 caused a meltdown at the plant, and some 170,000 people were evacuated immediately from the Prefecture. The area closest to the plant has remained closed since then as the lingering radiation contamination continues to pose a health risk, but one curious photographer would not be deterred.

    Keow Wee Loong, a Malaysian photographer currently based in Thailand, snuck into the zone with his fianceé to document the current state of Fukushima’s abandoned towns – and what was left behind. From a supermarket picked over by wild animals, forgotten laundry at a laundromat and a wall calendar forever frozen on March 2011, his photos show the eerie remains of daily life brought to an abrupt halt.

    You can see more of his Fukushima photos and his photography on his Facebook page.

    Inside the Fukushima exclusion zone

    Structure collapse resulting from the magnitude 9.0 earthquake. Photo by Keow Wee Loong

    Inside the Fukushima exclusion zone

    Abandoned video rental store. Photo by Keow Wee Loong

    Inside the Fukushima exclusion zone

    CDs and videos still on the shelves. Photo by Keow Wee Loong

    Inside the Fukushima exclusion zone

    Merchandise litters the floor of an abandoned bookstore. Photo by Keow Wee Loong

    Inside the Fukushima exclusion zone

    Overgrown parking lot of an abandoned convenience store. Photo by Keow Wee Loong

    Inside the Fukushima exclusion zone

    Residents left laundry and 100 yen coins behind in this Fukushima laundromat. Photo by Keow Wee Loong

    Inside the Fukushima exclusion zone

    A calendar page showing the month of the disaster. Photo by Keow Wee Loong

    Inside the Fukushima exclusion zone

    A mall in the town of Tomioka. Photo by Keow Wee Loong

    Inside the Fukushima exclusion zone

    An abandoned supermarket that has likely been visited by wild animals in the area. Photo by Keow Wee Loong

    Articles: Digital Photography Review (dpreview.com)