Blog

  • Pentax K1 firmware update adds electronic shutter in live view mode

    Pentax has released new firmware for its flagship K1 full frame camera that includes the ability for users to select electronic shutter shooting for the first time. Firmware version 1.3 adds a live view Electronic Shutter option to the menu system that the company says avoids the vibrations caused by mechanical shutter actions immediately prior to the exposure of the sensor. There are some limitations however, as the shake reduction system can’t operate during electronic shutter exposures, HDR mode won’t work, external flash units won’t be triggered and the drive is limited to single shot or multiple exposure modes.

    Other functions added by this update include the ability to shoot square images and to record only two frames (Off and Type 2) when using the anti-aliasing filter simulation bracketing feature. Previously, three frames had to be recorded in a sequence that included Type 1 as well. A general ‘bracketing cancel’ Off option has also been added to the camera menu under the BKT function.

    Pentax says that other more general stability issues are fixed too with this update. To read more and to download the firmware see the Pentax website.

    Release information:

    Release of the function expand Firmware version 1.30 for PENTAX K-1

    RICOH IMAGING COMPANY, LTD. is pleased to announce the release of the function expanding Firmware version 1.30 for PENTAX K-1 digital SLR camera (launched on April, 2016) on September 29, 2016.

    The function expand firmware is to add new function or increase number of setting for currently used PENTAX K-1 camera, so that improve the function, easy handling and update to the latest function.

    New Enhanced Functions

    *The Electronic Shutter at Live View mode
    The Electronic Shutter can be selected at the Menu to reduce camera shake from the mechanical shutter when shooting with Live View mode.

    *Add the [1:1] format at the Crop mode
    Added and selectable [Square format (1:1)] size at the Crop mode.

    *Add [2 frames bracketing] for the [AA Filter Simulator bracketing]
    Addition to the current [3 frames bracketing (OFF, TYPE1, TYPE2)], the [2 frames bracketing (OFF, TYPE2)] is added and selectable for the [AA Filter Simulator bracketing]

    *Smart Function
    At the [BKT] setting, the bracketing range [±0 (=single frame)] can be selected.

    [Others]
    *Improved stability for general performance.

    Articles: Digital Photography Review (dpreview.com)

  • PowerVision’s PowerEye pro-grade cinematography drone goes up for pre-order

    PowerVision has announced the launch of global pre-orders for its PowerEye professional-grade cinematography drone. This drone features Dual Viewing for both subject matter view (SMV) and first person view (FPV) streaming at the same time, something made possible via a gimbal-mounted camera and another camera housed on the drone’s nose. PowerEye also features PowerVision’s Object Detection technology.

    Two different PowerEye drone models are being offered: the ‘PowerEye Professional’ and the ‘PowerEye Thermal.’ The Professional model features a 4K-capable 16MP Micro Four Thirds sensor that offers Raw DNG capture and Panasonic Lumix G 14mm F2.5 ASPH lens while the Thermal model has a switchable thermal/natural light camera with two different lenses and sensors. Operators toggle between the natural and thermal cameras using the PowerEye App.

    Overall, PowerEye weighs 3.9kg / 8.7lbs including its propellers and battery; the design includes 4-point landing and liftoff and collapsible rotors and legs for a folded transport size of 340 x 285 x 296mm / 13 x 11 x 11.6 inches. The battery claims a flight time of up to 29.5 minutes on a charge, about 10 minutes longer than the DJI Inspire 1, and operators can control the drone from distances up to 5km / 3.1 miles. The drone’s max payload is up to 3kg / 6.6lbs. The full spec sheet is available here.

    The PowerEye Professional is available for pre-order now for $ 3,988, which includes the Panasonic camera, base station, the battery and charger, propellers + an extra set, a rolling case, and a remote control + an extra remote control for pre-orders specifically. The thermal camera variant is not currently listed on PowerVision’s website, however, and pricing is unclear.

    Via: PowerVision

    Articles: Digital Photography Review (dpreview.com)

  • Seeing Space in New Ways: 13 Creative Maps & Navigational Guides

    [ By SA Rogers in Art & Drawing & Digital. ]

    map-art-topographic-3

    With the advancement of technology, the ways in which we perceive information have become increasingly visual, interactive and all around multi-dimensional – so why shouldn’t maps evolve to reflect it? These map concepts, installations and renderings in a variety of materials and forms let navigational data pop off the page into 3D creations, or blend the information with functional objects to tell a story.

    3D Tube Map of London Made of Pipes

    map-art-london-tube-1

    map-art-london-tube-2

    British designer Nick Fraser used a network of copper pipes on a black wall to create a map of London’s tube system, making the nickname literal. To differentiate the different lines, Fraser uses a series of colored washers.

    Neon Subway Lights by Petr Koll

    map-art-neon-1

    map-art-neon-2

    london_gif

    Subway maps for various unnamed cities are rendered in vivid neon lights by designer Petr Koll for this fun series. What you can’t see in the still images is that the lines light up one at a time and then blink together.

    ‘Philadelphia Explained’ Installation Art by Paula Scher

    map-art-philadeliphia

    map-art-philadelphia-2

    map-art-philadelphia-3

    A hand-drawn map of Philadelphia is fitted to the interior surfaces of a gallery using dimensional modeling, immersing visitors in a navigational experience as “a personal reaction to information overload.” Famed designer Paula Scher worked with students at her alma mater, the Tyler School of Art, to create the installation.

    Rijksmuseum Paper Pathfinder

    map-art-paper-pathfinder-1

    map-art-paper-pathfinder-3

    How do you explain to visitors in clear visuals how they can navigate 8,000 objects spanning 800 years of art spread through 80 individual galleries in the same building? Graphic designer Marjin van Oosten came up with a refreshingly simple analog solution: a pop-up paper model of the building with color-coded and labeled ‘floors.’ It lets you see the whole building at once and physically hold a model of it in your hands to get a better idea of where things are.

    3D Map of Tokyo’s Subway System

    map-art-tokyo-subway-1

    map-art-tokyo-subway-2

    The surprising number of dips and turns in Tokyo’s subway system, hidden from sight, are revealed in this rollercoaster-like model by Takatsugu Kuriyama. Different colored liquids pulse through the various tubes to show movement in each line.

    Next Page – Click Below to Read More:
    Seeing Space In New Ways 13 Creative Maps Navigational Guides

    Share on Facebook


    [ By SA Rogers in Art & Drawing & Digital. ]

    [ WebUrbanist | Archives | Galleries | Privacy | TOS ]


    WebUrbanist

  • Serious resolution: Phase One XF with IQ3 100MP back tested

    Phase One XF with IQ3 100MP back tested

    Phase One has enjoyed two significant updates since we last tested the company’s medium format offering: the 645DF+ body has been replaced by the more modern XF, and the IQ2 series of backs has been replaced by the updated IQ3 series. Added to that, Phase One has introduced a 100MP sensor to the IQ3 range. The new 100MP sensor is of the 54 x 40mm format, so somewhat larger than the previous 50MP 44 x33mm sensor. What is also significant is that it is a CMOS sensor and comes with all the flexibility that technology brings to these big and bulky cameras.

    Phase One says that it has developed the sensor alongside Sony, and that a new design has introduced a range of benefits, including helping to increase the ISO range that can be offered, improving color accuracy and boosting dynamic range.

    When I spoke to Lau Nørgaard, the head of R&D at Phase One, and asked him whether anyone needs 100MP he replied that the obvious customer base was anyone who needs to make big prints that will be inspected close-up.

    Less obvious perhaps are the workflow advantages such resolution brings. He cited an example of someone photographing a car and then having to shoot all the details individually. With a 100MP back you shoot the whole car once and cut out all the detail shots from that image. Online clothing retailers like to provide roll-over enlargements of garments that show the texture of the fabric, and this back is ideal for that  – the weave of the finest fabric can be shown even from a full length shot that includes three or four models. The resolution also presents less of a risk of aliasing. Museums, galleries and aerial surveyors are obvious customers, as they need the detail, but Lau also explained that images of anything from this back will benefit from the pixel count even when downscaled – noise is reduced, and the superior color and tonal information is retained.

    The new XF body

    The Phase One XF is a 645-style medium format SLR body that’s designed to accept digital backs, with the company encouraging photographers to use its IQ1 and IQ3 series backs with resolutions of 40, 50, 60, 80 and 100 million pixels. Phase One has given its body a complete make-over and while it remains much the same basic form factor as the previous model, it is now much less mechanical and clunky, and features a number of dramatic improvements.

    Key new features Phase One XF:

    • Shutter and mirror dampening
    • Electronic first curtain
    • Touch screen top plate display
    • Improved integration with the IQ3 backs
    • New handling layout
    • Metering in camera rather than in prism
    • Accepts waistlevel finder
    • Seismograph built-in
    • Separate battery from back – but can power share
    • Built-in wireless flash sync via Profoto Air Sync

    There are so many really key improvements to this body that it is hard to know where to start. The experience of using the XF is dramatically different to using the 645DF+, which is why I think Phase One has given it a completely different name instead of making it a ‘Mark II’ or ‘X’.

    Let’s start with the new shutter and mirror mechanism. The mirror action is still more violent than you’d encounter with a 35mm-style DSLR but the impact created when it flips up and down is a good deal reduced compared to the previous model. The shutter action is also much smoother, so when the shutter is tripped the whole operation is quieter. In the previous camera the mirror and the shutter were connected in the same mechanical set-up, but now the two operate as individual units – so in mirror-up mode the shutter can re-cock itself without the mirror having to flip back and forth.

    Phase One has introduced a seismograph to the body that measures the amount the camera is vibrating, and displays the results as a moving graph on the top plate display. This helps to ensure the user trips the shutter when the camera is at its steadiest, and the incorporation of ‘vibration delay’ allows the camera to trip itself automatically when internal vibrations have died down. 

    Further help towards reducing vibration comes in the form of an electronic first curtain mode that works when the mirror is already up – similar to that used in DSLRs like the Nikon D810. Phase One’s Lau Nørgaard told me that the company’s engineers studied the acceleration and rate of travel of the second curtain and mirrored that with the read-out progress of the electronic first curtain to ensure that the whole frame would be evenly exposed.

    The new handling arrangements also make this a significantly easier camera to use, with a touch screen on the top plate that provides direct access to the shooting and exposure modes. Three dials controls shutter speed, aperture and ISO, while a mini-menu is controlled via a pair of Leica-style long silver buttons. In short, pretty much anything that you’ll need to access quickly and regularly has a short and direct path from the right-hand grip.

    In the 645DF+ metering was handled through the prism of the camera, but in the XF it has moved to the body to allow exposure reading when using the new waist-level finder. There is an additional flash sync socket on the IQ3 backs for when the waist-level finder is in use, as the main one is on the prism head.

    The XF body is light years ahead of the 645DF+, and a good deal more advanced than the Hasselblad H5D series cameras. It feels very modern for a medium format DSLR, and is so much easier to use and navigate as a consequence of the mass of new features.

    Articles: Digital Photography Review (dpreview.com)

  • Urban Food Park: Scandinavia is Growing a “Silicon Valley for Agriculture”

    [ By WebUrbanist in Architecture & Public & Institutional. ]

    danish-food-park

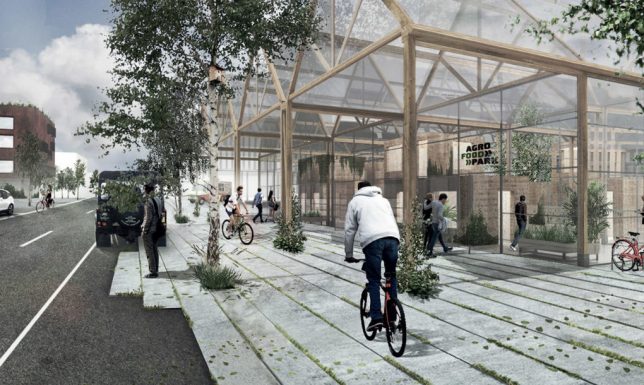
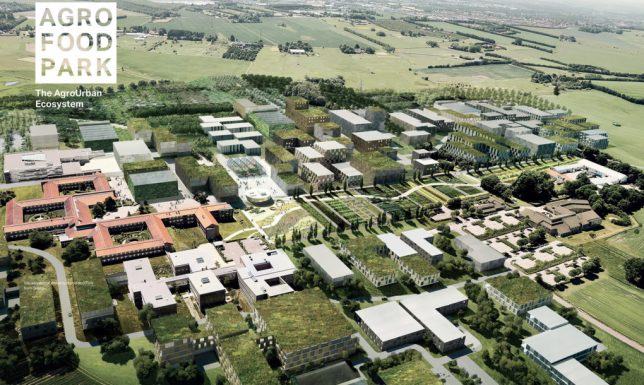
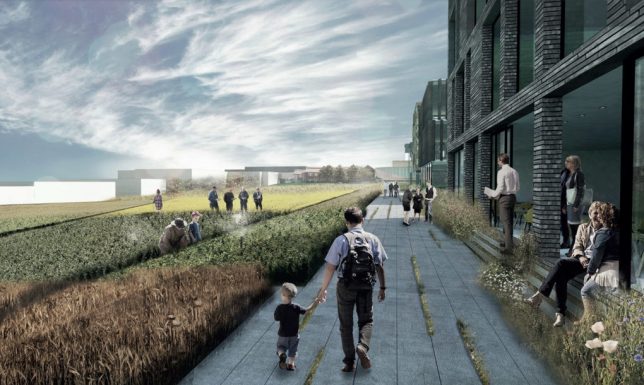
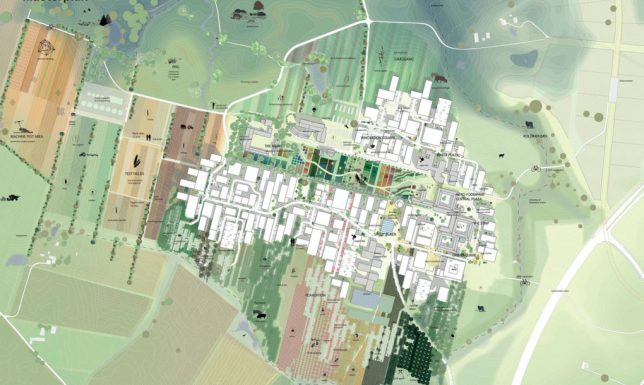
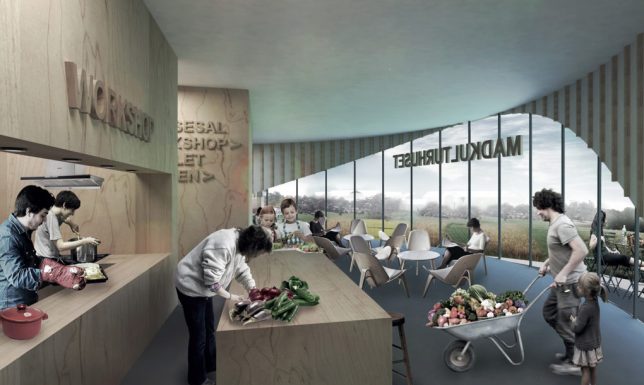
    An expansive master-planned complex to facilitate urban agriculture and private/public collaboration, The Agro Food Park is Denmark’s version of “Silicon Valley” for food research and development. From experimental greenhouses to vertical farm prototypes, the park is bringing together academics and businesses to work on creating a sustainable future via global food security.

    scandanavian-food-park

    Co-designed by an array of architecture, engineering, technology and agriculture firms, the food park was first opened in 2009 and already hosts nearly 100 companies in 44,000 square meters of space. The newly-expanded plan, however, will grow the park by 280,000 square meters over the coming decades, requiring careful strategic planning reflecting environmental considerations.

    food-park-master-plan

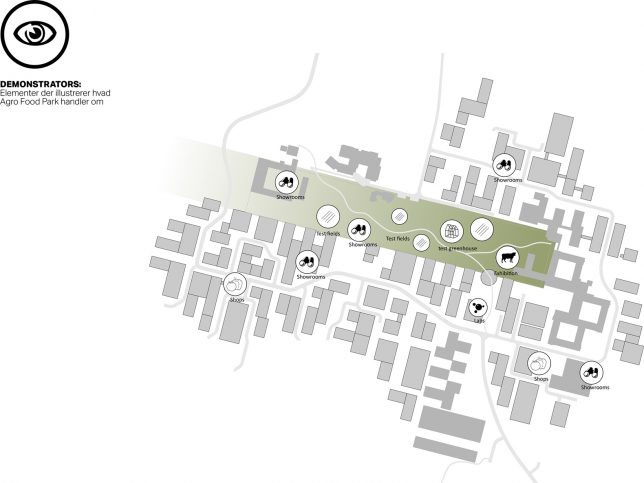
    The long-term master plan features a communal Lawn showcasing experimental developments, a main-street Strip hosting various gathers and activities, and a series of Plazas to facilitate interactions between companies and researchers. The huge complex is also designed to recycle its own waste efficiently and minimize its footprint, a “practice what you preach” approach to ecological urban agriculture.

    food-park-plan

    “Innovation occurs best when knowledge is concentrated in clusters and cross-pollinate. By linking food production to urban life, we have tried to create an environment where people, knowledge and ideas meet. The dream is to create the framework for agriculture’s answer to Silicon Valley.”

    food-park-systems

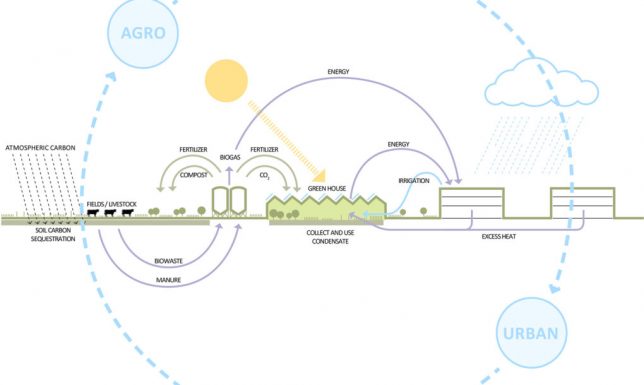
    Though the plan is complex, the mission of the place is simple: to feed the world in a healthy way. The expressions of that mission, however, vary greatly, from initiatives to use clean energy and create biodiversity to facilitating healthy air and clean water. In short: it is not just about good food, but how best to produce edible goods in a sustainable way.

    food-park-arrangement

    “Embracing Agro-Urban Ecosystem Design, the AFP treats urban and agricultural development together as a unified, productive and restorative ecosystem,” said the project architects.

    futuristic-silicon-valley-food

    “By integrating the carbon cycle and other ecological processes into large scale urban systems and their surroundings – buildings and energy flows, water cycles and wastewater treatment, land use and food production – the AFP creates economic value within the urban and agricultural infrastructure.”

    Share on Facebook


    [ By WebUrbanist in Architecture & Public & Institutional. ]

    [ WebUrbanist | Archives | Galleries | Privacy | TOS ]


    WebUrbanist

  • 5 Tips for Using a Kit Lens for Travel Photography

    There are many good reasons not to use a kit lens for travel photography. If a kit lens is the only lens you own and you have a photography trip planned, you may be thinking about buying a better quality mid-range zoom or even a prime lens to replace or accompany it.

    Kit lens in travel photography

    But before you do so, I want to tell you a story.

    Why a kit lens isn’t so bad after all

    10 years ago I bought my first digital SLR, a Canon EOS Digital Rebel XT. I had switched systems from Pentax so I didn’t have any lenses to use with it. The camera came with an 18-55mm kit lens, and undecided about what other lenses I needed, I took it with me on an extended trip to South America.

    I soon realized that the quality of the lens was not as good as it could be (I nearly used the word horrible). It wasn’t sharp and there was lots of chromatic aberration and purple fringing in my photos. Canon have since discontinued that early kit lens and replaced it with another, better one.

    But that lens and camera combination gave me a tremendous amount of freedom. It was light enough enough to carry with me everywhere. I never had to change lenses, which helped keep the sensor reasonably free of dust. I had a wide-angle lens at 18mm, a short telephoto at 55mm, and all the focal lengths in-between.

    It was during this trip that I had time to think about my future and what I wanted to do with it. I decided that I wanted to write about photography for a living.

    Five months later I sold my first feature to Practical Photography magazine, illustrated with photos taken in South America with the Digital Rebel XT and that same kit lens. Yes, the lens may have been horrible, and I’d never want to go back to that camera and lens combination, but the photos I took with it were good enough to be published in a major photography magazine.

    Kit lens in travel photography

    What lessons can we learn from this? Here are some of the key lessons.

    1. Your equipment matters, but not in the way you think

    The key thing is that the equipment you chose to take with you is light enough for you to take just about everywhere, so that you don’t miss any photo opportunities that present themselves. That’s one of the reasons that mirrorless cameras and high end compacts have become popular with travellers.

    Relating this back to lenses, one of the benefits of prime lenses is that they tend to be smaller and lighter than better quality mid-range zooms.

    Kit lens in travel photography

    2. Location and timing are more important than gear

    Travel photography is about getting yourself to interesting places, when the light is beautiful, so that you can take photos that evoke the mood and atmosphere. If you don’t do this, it doesn’t really matter what camera and lens you have. Your photos won’t be as interesting as those from people who do take the trouble to do these things.

    Kit lens in travel photography

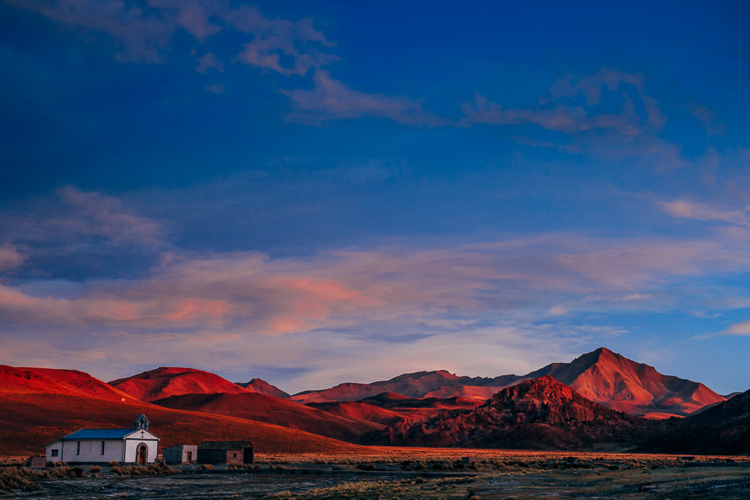
    The photo above was taken during a 4-day jeep trip in south-west Bolivia. It’s a remote location at 4200 meters above sea level in the Andes that I never would have seen without going on that trip. It doesn’t matter what camera and lens you have, you’ll never take photos like this if you don’t make the effort to get to places like this one.

    3. You need to interact with the locals

    You get more out of the journey on a personal level when you talk to local people. The ability to confidently communicate gives you the chance to learn about their lives and the way of life of people from a different place or country.

    It also opens up the number of photographic opportunities that come your way. Perhaps the people you talk to would like to have their photos taken, if you ask. Or you can ask people what local sights they can recommend for you to visit with your camera. You will learn about local temples, markets, festivals and other interesting cultural events or places that make good subjects.

    Kit lens in travel photography

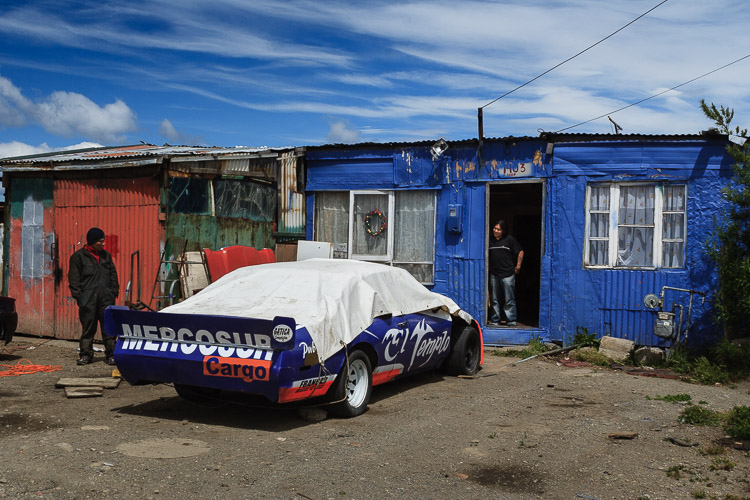
    I came across this scene in Punta Arenas, Chile (above) and was struck by the contrast between the expensive looking racing car and the houses. These two guys were happy for me to take a photo. The confidence to talk to people in this type of situation, and ask for permission to take a photo, is just as important as your gear.

    4. Money is always a factor

    Travel can be expensive, and it may be wiser spending money on experiences than gear. You don’t want to be in the situation of having spent so much on lenses that you don’t have enough money left to do all the things you would like on your journey.

    Kit lens in travel photography

    5. Kit lenses are not perfect

    I think it’s wise to acknowledge at this point that there are many reasons why you might want to buy a better lens than your kit lens. You might need a prime lens with a wide aperture for shooting in low light or experimenting with shallow depth-of-field. Or you may need a shorter focal length or a longer one. A weatherproof lens so you can shoot with confidence in the rain might also be handy.

    These are all valid reasons for buying a better lens. Most photographers who start out with a kit lens end up buying better ones eventually. My photos were published in spite of me using a kit lens, not because of it.

    But if a kit lens is all you have, there is no need to worry. You will have plenty of opportunities to buy better lenses in the future. For now, just get out there and seize the moment. Enjoy your trip, have a wonderful experience and make as many beautiful images as you can.

    Kit lens in travel photography


    Mastering Lenses

    If you want to know more about buying and using lenses then please check out my ebook Mastering Lenses: A Photographer’s Guide to Creating Beautiful Photos With Any Lens.

    googletag.cmd.push(function() {
    tablet_slots.push( googletag.defineSlot( “/1005424/_dPSv4_tab-all-article-bottom_(300×250)”, [300, 250], “pb-ad-78623” ).addService( googletag.pubads() ) ); } );

    googletag.cmd.push(function() {
    mobile_slots.push( googletag.defineSlot( “/1005424/_dPSv4_mob-all-article-bottom_(300×250)”, [300, 250], “pb-ad-78158” ).addService( googletag.pubads() ) ); } );

    The post 5 Tips for Using a Kit Lens for Travel Photography by Andrew S. Gibson appeared first on Digital Photography School.


    Digital Photography School

  • Park Places: 10 Paved Painted & Personalized Driveways

    [ By Steve in Art & Street Art & Graffiti. ]

    painted-driveways-3a

    Do you drive on a parkway and park on a driveway? These unusual painted driveways prove that when it comes to painted pavement, nobody’s really asphalt.

    painted-driveways-3c

    painted-driveways-3b

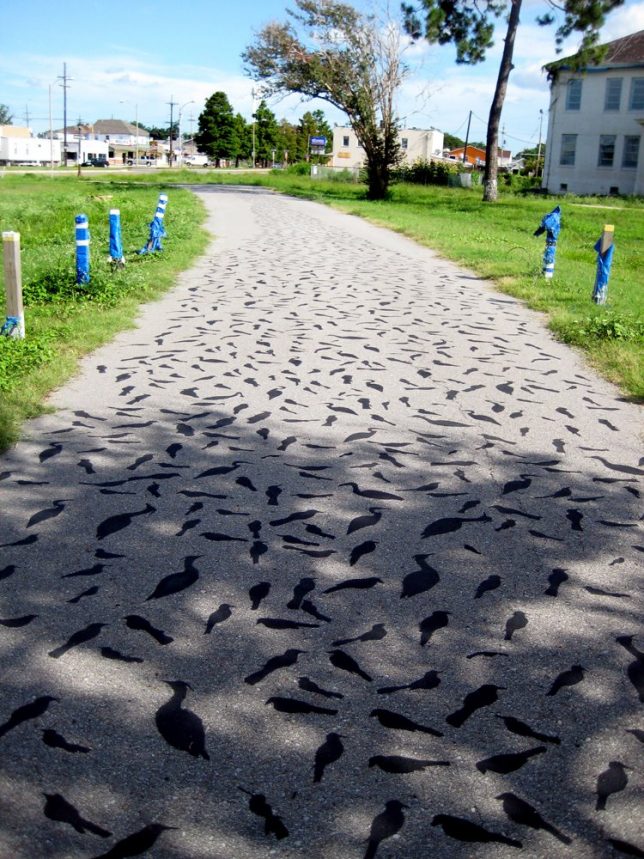
    The Milne Boys Home in Gentilly, a neighborhood in New Orleans, LA was built in 1933 to house “orphans and troubled children” – an all too common social phenomenon in the Great Depression. Featuring a cluster of seven antebellum-style buildings, the facility closed in 1986 and was used only sporadically thereafter. Fast-forward to 2005 when Hurricane Katrina caused enough damage to make the campus completely unusable unless one was a squatter or drag-addict – or both.

    In 2008, however, things began to change at the old Mllne Boys Home thanks to a multimillion-dollar injection of funding from the state, the city and FEMA. One of the site improvements concerned the campus’s winding driveway, contracted out to AORTA Projects.

    painted-driveways-3d

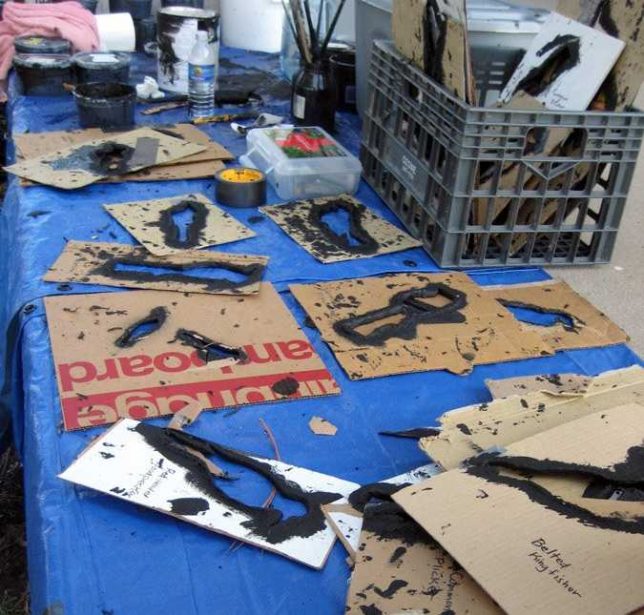
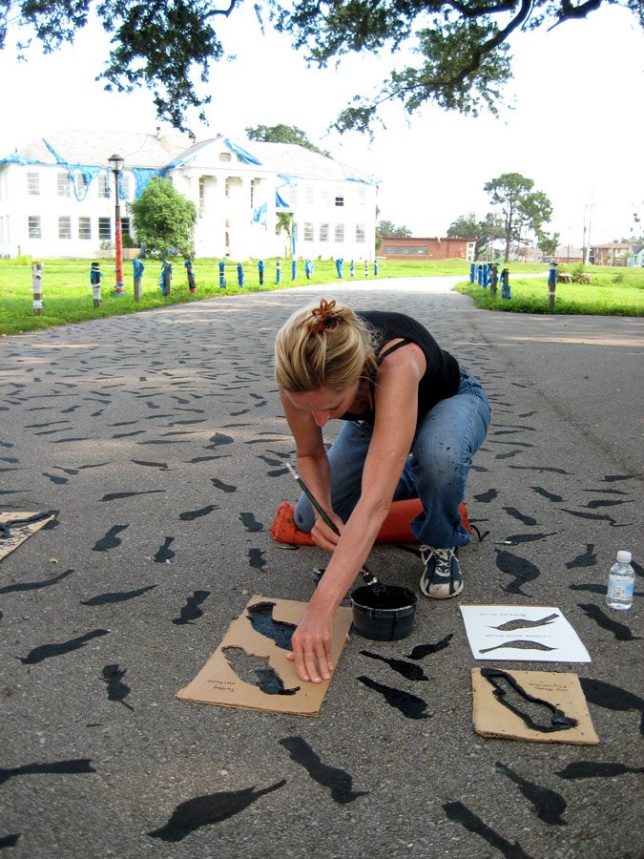
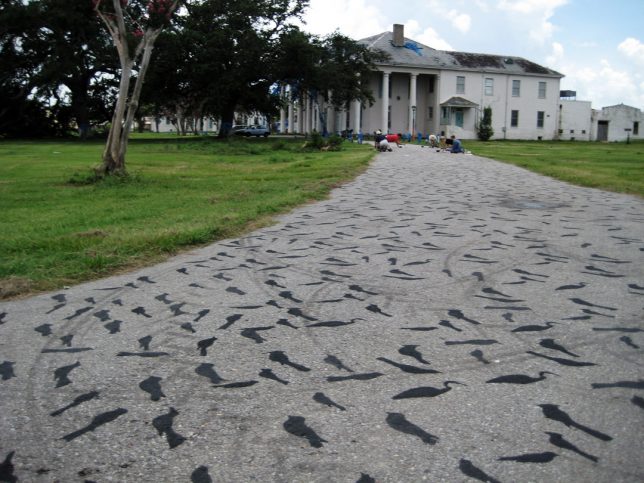
    “With the help of a crew of approximately 20 volunteers,” explains lead artist Jacqueline Bishop, “I painted the asphalt driveway of the Milne Boys Home with approximately 5,000 simple black bird silhouettes that were individually cut from original drawings and applied with Industrial Zone and Marking paint. Considering there are approximately 460 bird species in Louisiana, we stenciled a variety of these species in an effort to celebrate and raise consciousness about our unique and fragile environment.”

    Bishop titled the finished work “Field Guide”. “After experiencing the power of Katrina while sitting in my house, the most immediate, haunting memory after the storm was the deafening silence. There were no birds for ages. It seems appropriate that this project can bring attention to birds who in turn bring life to abandoned areas in post-K New Orleans.”

    Tile Of The Century

    painted-driveways-4a

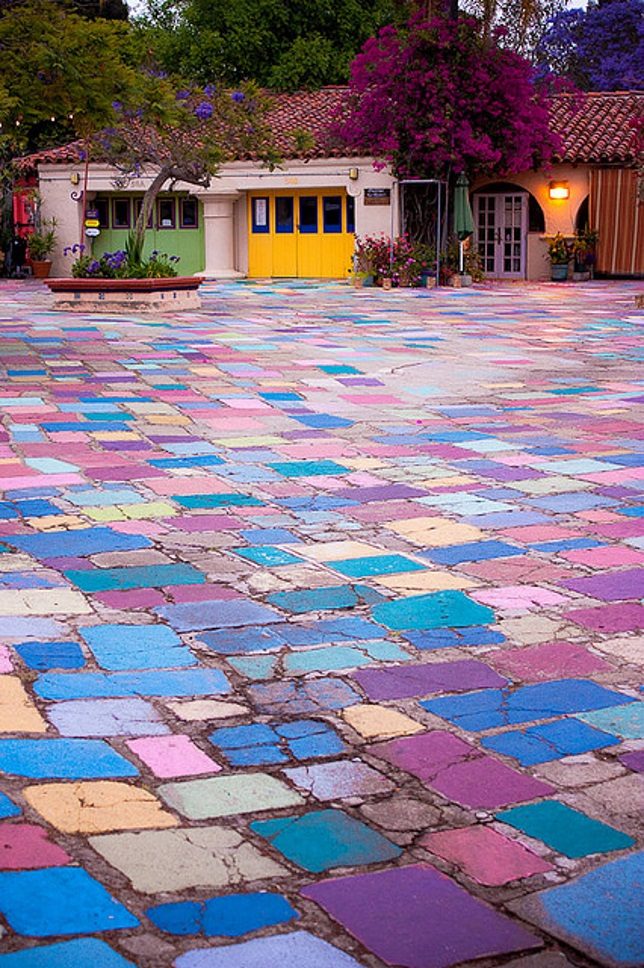
    There’s not much we can tell you about the dazzling, impressionistic tiled driveway above, other than the fact it was photographed on April 1st of 2011… no foolin’! Kudos to Betty Broccoli of Betty’s Fashion Corner page at Tumblr for bringing some much-needed color into the gray monotony that is the pervue of far too many driveways.

    Shock & Oz

    painted-driveways-1a

    painted-driveways-1b

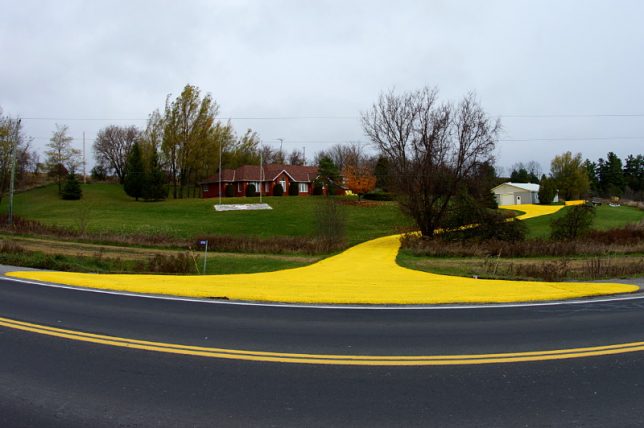
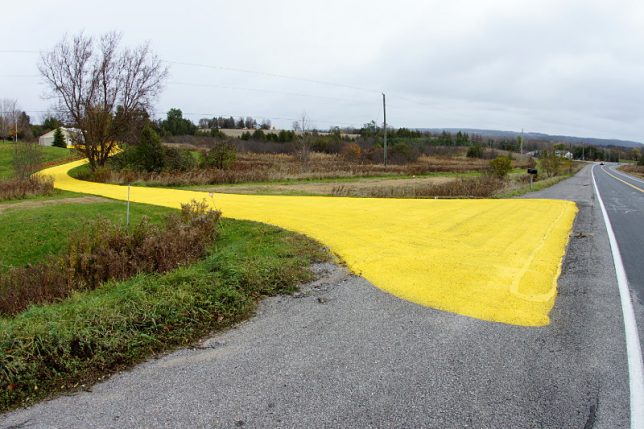
    Alas, there’s no Emerald City at the end of this yellow brick, er, asphalt road though the homeowner must be a wizard of sorts. Located just off Hwy 28 in Bailieboro, north of Port Hope, Ontario, this “brilliant” idea makes a weird sort of sense being there aren’t any visible road signs in the vicinity, so this is one way to attract notice (and alert the pizza delivery guy). On the other hand, the lemon-yellow laneway leads not just TO the highway but oozes over a significant portion of the soft shoulder… Mr Wizard can expect a visit from the Wicked Witch, er, the local county mountie sometime soon.

    Treads On Me

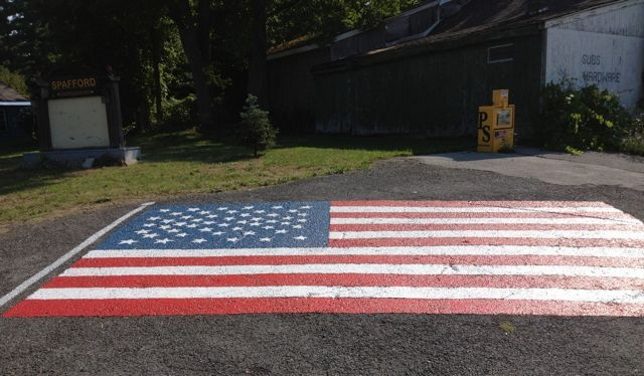
    painted-driveways-9a

    You’ll find this patriotic piece of roadwork in Spafford, NY, fronting a home at the intersection of routes 41 and 174. Something tells us the jacked pickup that probably gets parked here sports a Confederate flag on its rear window, because freedom.

    Next Page – Click Below to Read More:
    Park Places 10 Paved Painted Personalized Driveways

    Share on Facebook


    [ By Steve in Art & Street Art & Graffiti. ]

    [ WebUrbanist | Archives | Galleries | Privacy | TOS ]


    WebUrbanist

  • 9 Tips for Creating Great Street Portraits

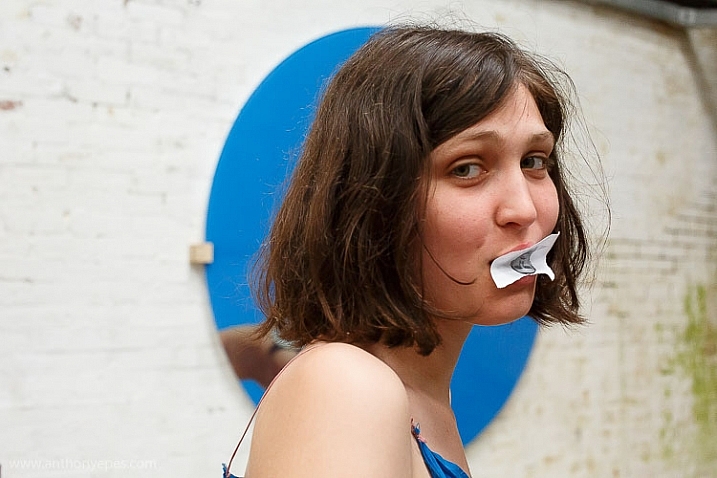
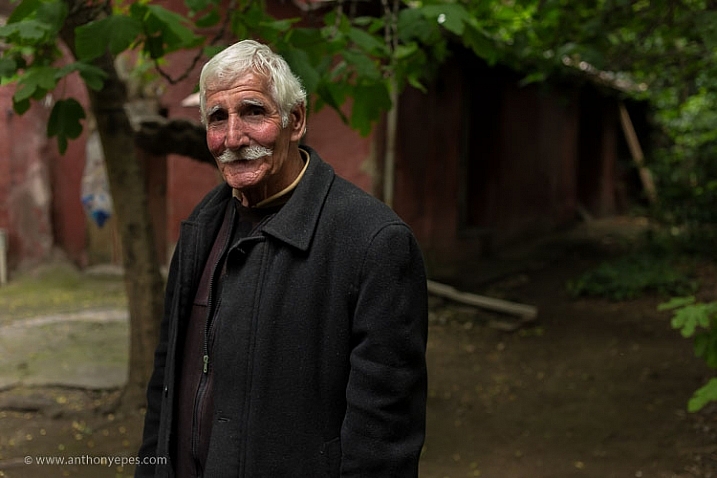
    I love taking street portraits. Whether the people you are photographing are posing or just going about their day-to-day life, humans are the most captivating, strange and interesting of subjects.
    9-tips-for-creating-great-street-portraits-01

    Most of my portraits taken out on the street are shot with the permission of the subject. That’s my style. I love looking for people who intrigue me. I often signal them with a smile and gesture of my camera, then watch for their reaction. But I also shoot unposed portraits and life on the street, whatever catches my eye.

    I know from my workshops that a lot of people find photographing strangers difficult and even, sometimes, terrifying. What is important to remember though, is that most people like to be noticed. It’s a compliment to be seen and thought of as interesting. But if they don’t like it, then the worst that can happen is that you have to delete the photo. Simple. Plus the more you do this, the easier it gets.
    9-tips-for-creating-great-street-portraits-02

    Here are some tips for creating interesting and evocative street portraits:

    #1 – Simplicity

    “The one guiding idea was to strip away the visual noise of the street so that the people emerge in a different and hopefully more surprising way.” Eamonn Doyle

    I am a lover of simplicity in my composition and when it comes to street portraits, simplicity really is your friend. One thing that ruins so many portraits is a busy, complicated background. A background that’s too busy will make your image look flat because your camera can’t capture the depth that your eye can. You have to create depth yourself with your composition. A busy background will swallow up your subject and distract your eye.

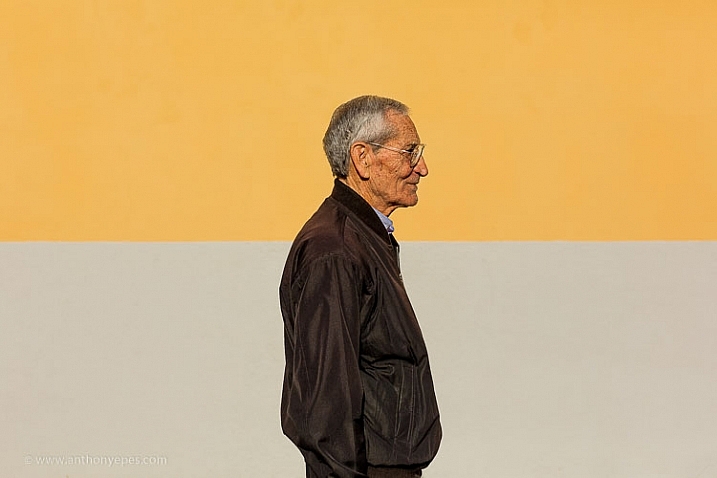
    One of my favourite types of backgrounds for street portraits is something clean, colourful, and strong, like the image below. The line in the middle creates a really strong balancing element for the subject. The strength of the colours and line contrast nicely with this older man, who with that slight smile looks like he knows a thing or two about life.
    7-tips-for-creating-great-street-portraits-03

    #2 – Break the world down into elements

    You can simplify the purpose of composition into the idea that you are simply breaking down the world into elements and organizing them in an interesting way.

    I find it really helpful to look at composition with this in mind – that all you are doing is organizing the world’s elements. It helps because our eyes make things very complicated for us photographically as we see everything in 3D. Not only do we see and sense hundreds of thousands of pieces of visual information every minute from all around us, but our senses can pick up on things happening behind us as well.
    street-portrait-tips-6

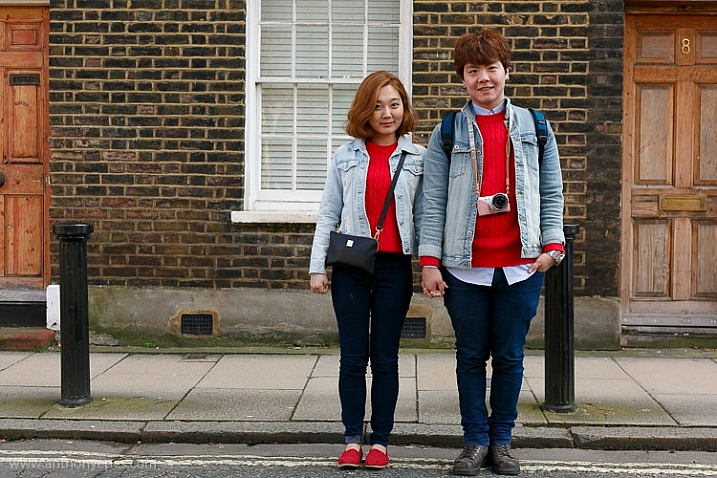
    To break this visual overload created by your eyes when you are bringing the world into your frame, start by breaking down what you see around you into elements – an interesting mural, strong lines on the road, beautiful shadows, etc. Then build your composition up from there. You only need one or two interesting elements to make a photo. Ones that work together and say something through their balance, shape, or placement.

    An example

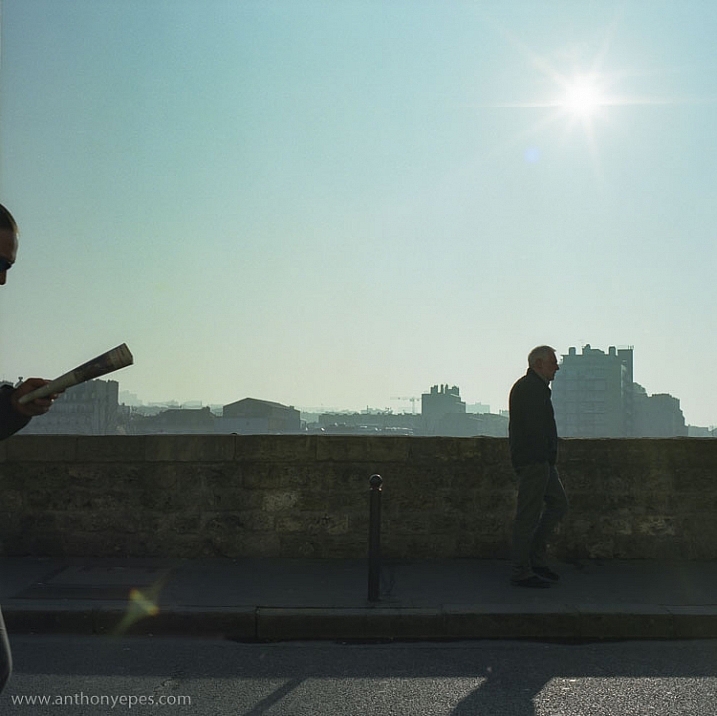
    This photo below is super simple. Very little going on, but I like it. What do you think makes it work? There are a couple of strong elements here that make it an interesting photo. Firstly it’s the hand holding the newspaper with a glimpse of the face reading. Then the man farther ahead walking.

    Now these two men, combined with that strong line of the wall, makes it look to me like a conveyor belt. You know that it’s morning, partly because of the sun, and then the newspaper, that’s the kind of thing you do on the way to work right? So now you have a little story, perhaps about the repetitiveness and the monotony of the human experience?
    street-portrait-tips-2

    I don’t always see a story in an image when I am shooting; often that comes after when I’m looking at my photos and sharing them. But what I do concentrate on is looking for interesting elements and figuring out how to place them together to make an interesting composition.

    #3 – It’s all in the eyes

    “The face is a picture of the mind as the eyes are its interpreter.” Marcus Tullius Cicero

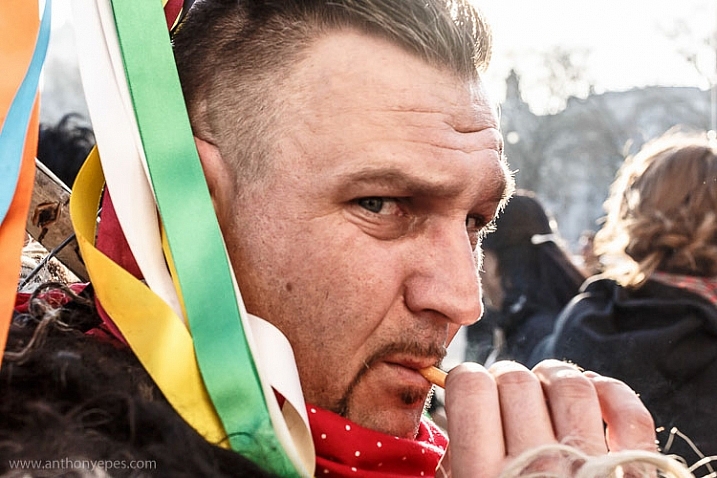
    When you are starting out taking photos of people it can be a scary experience. So much so that you often rush too much – perhaps in an effort to get it done as quickly as possible and to not offend or upset anyone. But the more you shoot street portraits, and the more effort you make to relax into the experience, the more you can work on revealing the deeper emotions of your subject.

    When you take a more relaxed and patient approach you give people the space to unfold and reveal their thoughts and feelings through their bodies, faces and, most powerfully, their eyes. Eyes tell you how the subject is feeling, and often thinking.
    7-tips-for-creating-great-street-portraits-07

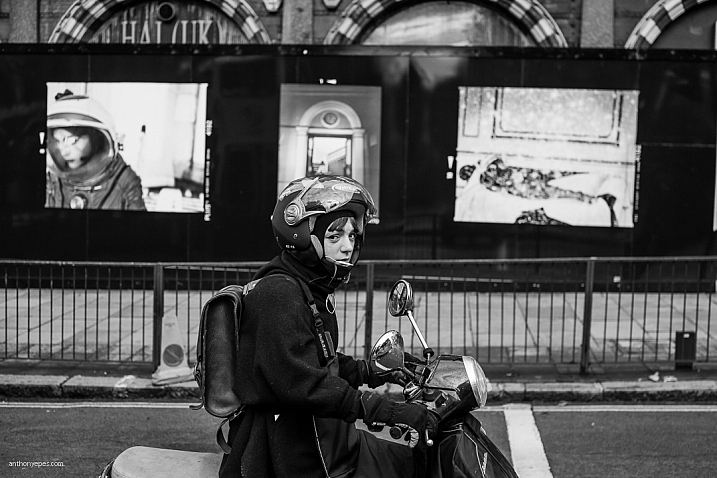
    This is where having a camera is an advantage. As humans we don’t usually look into someone’s eyes for long periods of time. It’s too powerful! It takes the interaction with that human to another level. If you have a camera between you and your subject though, it acts as a sort of safe barrier. So you can then spend time observing them, seeing what their face is doing, looking into their eyes, and seeing how they really feel.
    7-tips-for-creating-great-street-portraits-13

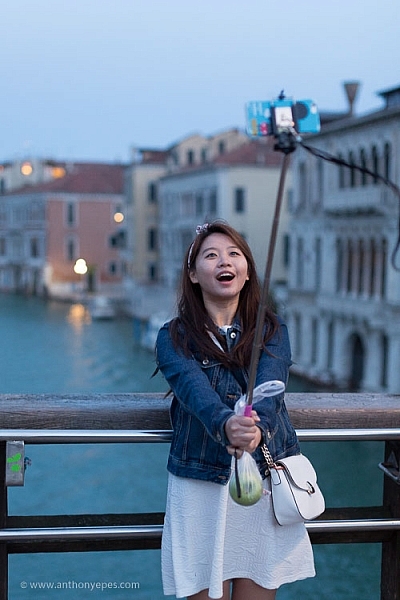
    #4 – Be patient humans do funny things

    “You don’t have to enhance reality. There is nothing stranger than truth.” Annie Leibovitz
    9-tips-for-creating-great-street-portraits-09

    street-portrait-tips-23

    For me taking photos of people on the street is all about opening yourself up to, and noticing the comedy of being human, as Elliot Erwitt calls it.

    “You can find pictures anywhere. It’s simply a matter of noticing things and organizing them. You just have to care about what’s around you and have a concern with humanity and the human comedy.” Elliott Erwitt

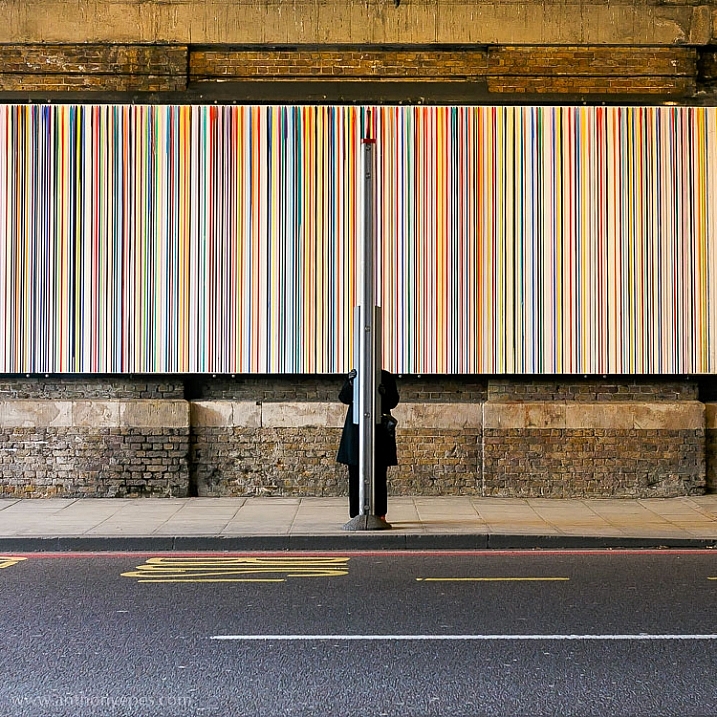
    #5 – Find a great background and wait

    There is a tradition in street photography that you find an interesting location; a background, a road, or sign, and then you wait for someone or something to happen in front of it. It requires patience, which is a very good thing to develop. I’ve noticed that patience is something that beginners often lack. Possibly because we live in a world that is so used to immediate gratification that we expect good shots to come in abundance.

    It rarely works like that. I therefore like this idea of finding something interesting out on the street – some elements, or a place that fascinates you, then waiting for something to happen. It’s a great way to train your eye, and perfect your timing. Plus, when you continually gaze at one place you become very familiar, very intimate with it. You’ll notice things that initially you didn’t see.
    street-portrait-tips-8

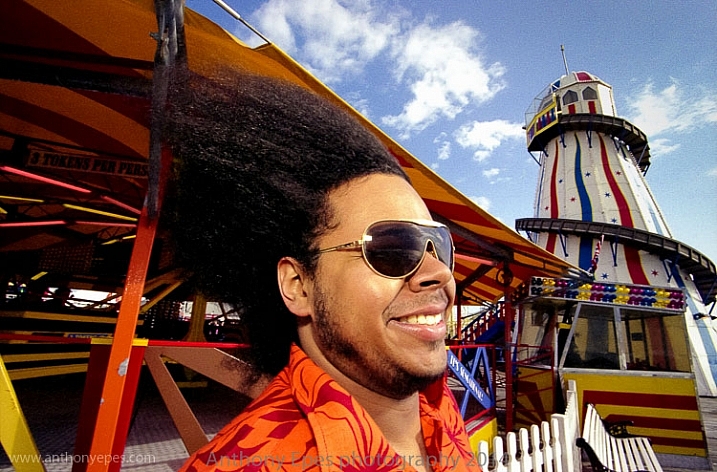
    #6 – Use colour

    “I paint because colour is a significant language to me.” Georgia O’Keeffe.

    Colour is also a significant language for me and I have always preferred shooting colour over black and white. I love the feeling you can communicate with colour and I think it moves me as much as light. So for me it’s an integral part of my style.

    Street photography is often dominated by black and white photography. Although what I am doing is often not strict street photography (however, Bruce Gilden, controversial street photographer extraordinaire, did say “If you can smell the street by looking at the photo, it’s a street photograph.”).
    street-portrait-tips-26

    Whether you use colour or black and white, do what excites you the most. The more excited you are by your subject and what you are creating, the more you’ll imbue your photos will feeling and depth.

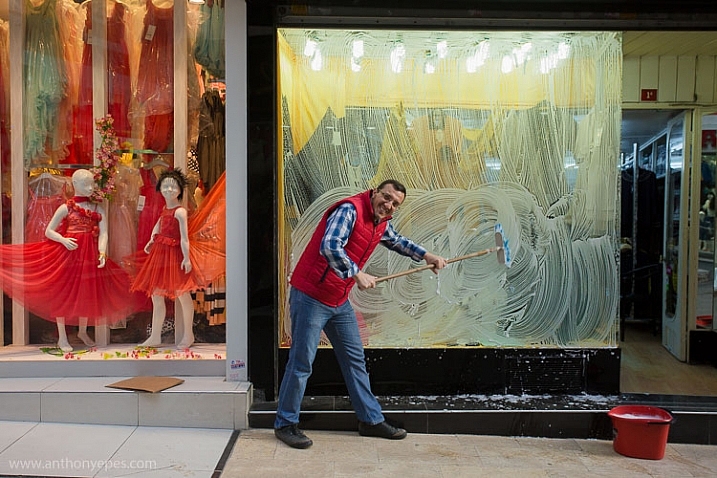
    Colours communicate different feelings and ideas (e.g., yellow is warm and happy, green is peaceful, red signals confidence and aliveness). I love to use them to contribute to the story that I am telling with my images.
    street-portrait-tips-14

    #7 – Your camera is your licence to be curious

    “I love that having a camera basically gives you a license to go up to anyone and ask them what they’re doing and why.” Andrew Hinderaker

    Most people are perfectly happy to be photographed. That’s the key when you’re going out and about. My mantra when taking photos of strangers is – be confident (this comes with practice), friendly, curious, and ethical. In other words, I prefer to photograph people who are okay with the experience. I don’t generally photograph kids and the obviously vulnerable, etc. That’s my ethical line. For me photography is an exchange and I respect everyone whom I photograph.
    7-tips-for-creating-great-street-portraits-10

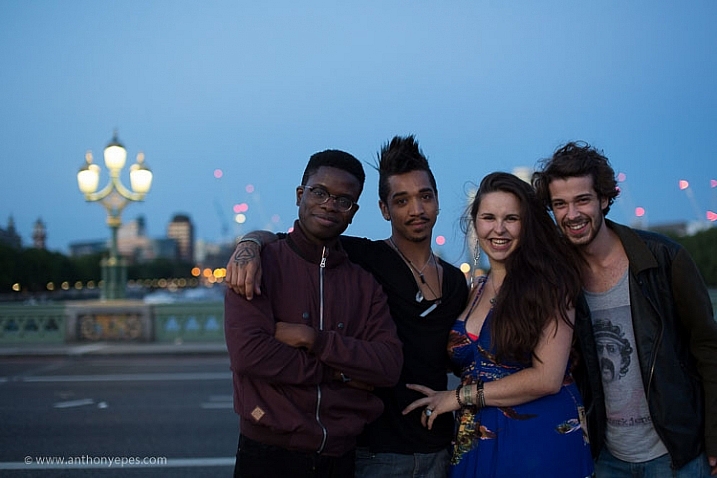
    Humans are built to want to connect with other humans, and photography is a powerful form of connection when you use it as such. When you are taking someone’s photo you are basically saying – I see you, you interest me. And for most people that’s a wonderful compliment.

    For me the portrait above is about two things, the light and the couple smiling. The warmth of their smiles match the warmth of the light, as well as the lush, summery background of grass and trees. I took this photo by just smiling at the couple and gesturing with my camera. Of course the fact that it was a beautiful summer’s evening and we were in the park helped. People who are relaxing and enjoying themselves are, of course, easier subjects to approach.

    #8 – The power of the gesture

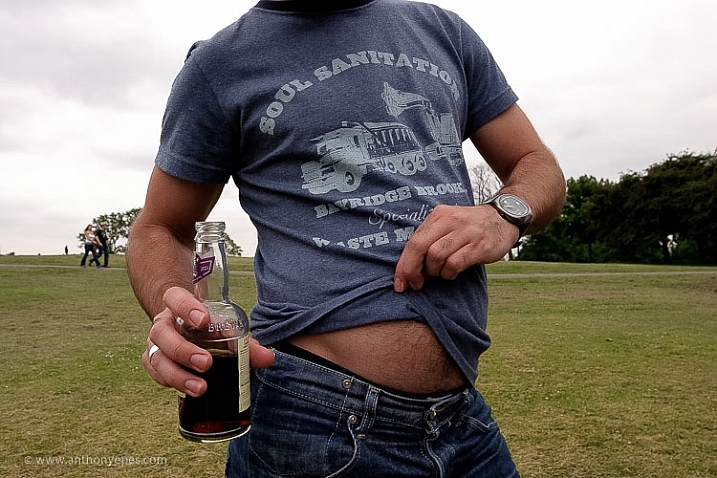
    The more closely you watch humans the more you see how they reveal themselves in so many ways. This was a photo I took for a project I was doing on people’s bellies. Each photo was totally different because the way that people presented their bellies and the gestures they made, showed so much about their personalities, what they felt about themselves, and their bodies.
    street-portrait-tips-18

    Keep watch of people’s gestures. Along with the eyes, hands are very revealing of people’s feelings and thoughts (and apparently hands are easier to read than eyes if you want to tell if someone is lying).

    #9 – The key to original, interesting photos is to be yourself

    “I’m photographing myself out there. Not myself physically, but mentally. It’s my take on the world.” Bruce Gilden

    A lot of people in workshops worry about how over-photographed the world seems now and will they ever have anything interesting or original to contribute? Hasn’t it all been done before? Well, this is the wrong way to think about it. Of course the world is very photographed now. Especially places that I visit, London, Paris, Venice, Istanbul, etc.

    But the world isn’t a staid thing – it’s an ever-changing, ever moving, organism. Nothing stays the same. Having humans moving around the world makes the possibilities for original and interesting photos infinite.
    street-portrait-tips-4

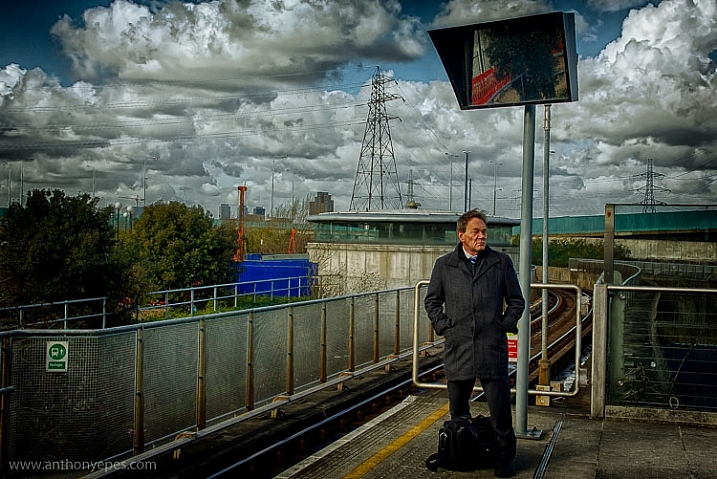
    More importantly though, photography is an expression of who you are. When you start out perhaps you’ll take photos like everyone else. But the more you do it, the more you’ll create something unique and original that’s a total expression of who you are – your passions, experience, style, and way of seeing the world. This creates the unique and interesting photographs that you are aiming for. It’s just like famous jazz musician Miles Davis says:

    “Sometimes you have to play a long time to be able to play like yourself.”

    Conclusion

    I’d love to know what you think. What do you do to create interesting street portraits? Comment below, I’d love to hear your ideas!


    Taking street portraits and exploring the street life of cities with your camera is an exhilarating experience. Learn how to conquer your fears of street photography and to create compelling compositions with Anthony’s popular street photography workshops in some of the most vibrant cities Europe.

    googletag.cmd.push(function() {
    tablet_slots.push( googletag.defineSlot( “/1005424/_dPSv4_tab-all-article-bottom_(300×250)”, [300, 250], “pb-ad-78623” ).addService( googletag.pubads() ) ); } );

    googletag.cmd.push(function() {
    mobile_slots.push( googletag.defineSlot( “/1005424/_dPSv4_mob-all-article-bottom_(300×250)”, [300, 250], “pb-ad-78158” ).addService( googletag.pubads() ) ); } );

    The post 9 Tips for Creating Great Street Portraits by Anthony Epes appeared first on Digital Photography School.


    Digital Photography School

  • Going wide: Irix 15mm F2.4 sample gallery

    Swiss company Irix recently released two versions of their 15mm F2.4 prime to the consumer market. The Irix 15mm is offered in two varieties: ‘Blackstone’ and the ‘Firefly.’ The Irix Blackstone features a magnesium and aluminum body able to withstand ‘extreme conditions,’ while the Irix Firefly model is, according to the company, the lightest lens in its class. Both versions of the lens are available in Canon EF-, Nikon F- and Pentax K-mount. 
    The lens is composed of 15 elements in 11 groups and produces a really nice sunstar and some, well, very interesting lens flare. Interestingly enough although the lens states its widest aperture is F2.4, the best we could do on the Canon 5DS R was F2.5. In any case we put the lens to the test over a few weeks of shooting and here are the results. 

    Irix 15mm F2.4 real-world sample gallery

    Articles: Digital Photography Review (dpreview.com)

  • Abandoned America: Photographing a forgotten history

    $ (document).ready(function() { SampleGalleryV2({“containerId”:”embeddedSampleGallery_0949592309″,”galleryId”:”0949592309″,”isEmbeddedWidget”:true,”standalone”:false,”selectedImageIndex”:0,”startInCommentsView”:false,”isMobile”:false}) });

    Photographing abandoned spaces has gained a reputation to some as a voyeuristic act, with little respect paid to the subject or its history. But for Matthew Christopher, it’s much more than ‘ruin porn.’ He runs Abandoned America, and his interest in photographing abandoned structures started a decade ago with an asylum in Philadelphia. Working at mental health facilities, he calls exploring Philadelphia State Hospital a life-changing experience. He picked up photography and started keeping a record of the places he visited at Abandoned America.

    He tells Resource Travel ‘If there was one thing I’d hope to achieve, I suppose it would be encouraging people to see abandoned spaces not as eyesores but as the treasures they sometimes are.’ He’s also aware of the often sad stories behind the buildings he enters, and encourages those looking to follow in his footsteps to do two things: ‘be careful and be respectful… just because these places are abandoned, doesn’t mean that nobody cares about them or that it’s OK to loot or vandalize them. Leave them as you found them.’ 

    You can read the full interview with Christopher over at Resource Travel and see more of his images.

    Articles: Digital Photography Review (dpreview.com)