Blog

  • This 4K video tour of the International Space Station is probably as close as you’ll get to being an astronaut

    Halloween’s not over yet – NASA has released a 4K treat. The 18 minute UHD video features a fly-through of the International Space Station. Get out your headphones, flip into full-screen mode and pretend your dreams of becoming an astronaut have finally come true.

    Related: NASA astronaut Jeff Williams showcases ISS photography equipment

    Articles: Digital Photography Review (dpreview.com)

  • Yongnuo shows off familiar-looking 100mm F2 lens for Canon EOS

    The Yongnuo Y100mm F2 on the left, and Canon’s EF 100mm F2 USM on the right

    Chinese photo equipment manufacturer Yongnuo is set to launch a new 100mm F2 lens that not only uses a Canon EF mount but which also looks just like Canon’s own 100m F2. According to websites Photo Rumours and Photo Gear News the full-frame lens will be priced at around $ 170/€160.

    The lens has been made to resemble the Canon version inside and out it seems, as both feature eight elements, have a maximum magnification of 0.14x and an aperture range of F2 to F22. The Yongnuo lens arranges its elements in five groups though while Canon’s own model used eight in six. Canon’s EF 100mm F2 USM also has eight blades in its iris, against the nine in the Yongnuo version.

    Price is also a significant differentiator as the Canon lens costs $ 500. Nikon Rumours expects the lens to also become available in a Nikon mount.

    Yongnuo already sells 35mm F2 and 50mm F1.8 lenses in Canon and Nikon mounts with each mount having a corresponding barrel design to match of the camera brand’s own.

    Articles: Digital Photography Review (dpreview.com)

  • Magnum’s ‘Conditions of the Heart’ square print sale underway

    Magnum ‘Conditions of the Heart’ square print sale 

    Kochi, India, 2014 © Alex Webb / Magnum Photos

    Magnum Photos recently tasked its photographers with capturing photographs related to the theme ‘Conditions of the Heart,’ doing so for the organization’s Square Print Project. This project was inspired by David ‘Chim’ Seymour’s work, and is itself part of a larger series that examines the work of Magnum’s four co-founders. A new square print sale is now offering these photos as museum-quality 6×6 prints for a short duration.

    The square print sale started yesterday, October 31, and is running through November 4 at 6PM EST. During this time, the public can purchase high-quality 6×6 prints that are signed and estate stamped for $ 100 each. These square prints are printed onto archival paper and will not be available for purchase beyond this sale. Photographers featured in the square print sale include Steve McCurry, Alex Webb, David Alan Harvey, Matt Black, and others.

    Purchases can be made through Magnum Photos’ online shop.

    Magnum ‘Conditions of the Heart’ square print sale

    Kochi, India, 2014 © Alex Webb / Magnum Photos

    “Connection in photography can take many forms. While one typically thinks of the connection in photographing people one knows, there can also be a kind of intimacy with a place or a culture itself. As a street photographer, it is this latter connection that intrigues me. Over the years, I’ve learned that each culture demands its own unique and complicated approach—often with many nuanced variations—in order to photograph the life of its streets. For instance in Mumbai, people sometimes seem so interested in strangers, one may later discover smiling faces peering into the edges of one’s photographs. However, in a city such as Kochi in southern India where I took this photograph, one may also encounter unexpected quieter moments. Ultimately, no matter how gently and respectfully one tries to photograph in a culture other than one’s own, how long a street photographer can linger is largely thanks to the grace of others.”

    – Alex Webb

    Magnum ‘Conditions of the Heart’ square print sale

    Chiang Mai, Thailand © Steve McCurry / Magnum Photos

    “I photographed these elephants and their mahouts at a rescue sanctuary in Chiang Mai, Thailand. The mahouts dedicate their lives to caring for a specific elephant, spending their days and nights tending to all of the elephant’s needs.”

    – McCurry, Steve

    Magnum ‘Conditions of the Heart’ square print sale

    Savoy Ballroom. Harlem, New York City. 1939 . © Cornell Capa / International Center of Photography / Magnum Photos

    “The Concerned Photographer produces images in which genuine human feeling predominates over commercial cynicism or disinterested formalism.”

    – Cornell Capa

    Magnum ‘Conditions of the Heart’ square print sale

    Sheepherder with Mount Mikeno. North Kivu, Democratic Republic of the Congo. 2016 © Michael Christopher Brown/ Magnum Photos

    “Though much of my work in the Democratic Republic of the Congo depicts dire circumstances, I remain optimistic for the country; it is not only one of the most beautiful places, but also filled with incredible people.”

    – Michael Christopher Brown

    Magnum ‘Conditions of the Heart’ square print sale

    Fisherman and family. Bahía Honda, Cuba. 1954.© Eve Arnold/ Magnum Photos

    “Magnum dispatched [Eve Arnold] to Cuba and Haiti to take pictures for magazine projects that [Robert] Capa had arranged. In both countries, she was confronted with destitution on a level she had never seen, beyond even the migrant farm workers. A Cuban family she was photographing begged her to adopt their nine-year-old daughter, Juana, to save her from a life of poverty and prostitution, and she was so moved by them that she cried when she left.”

    – Janine di Giovanni, Magnum Legacy: Lives Behind Photographs – Eve Arnold, Prestel, 2015

    Articles: Digital Photography Review (dpreview.com)

  • Split Level: Segmented Russian Rock Dwelling Bridges Lake & Cliff

    [ By WebUrbanist in Architecture & Houses & Residential. ]

    lake front

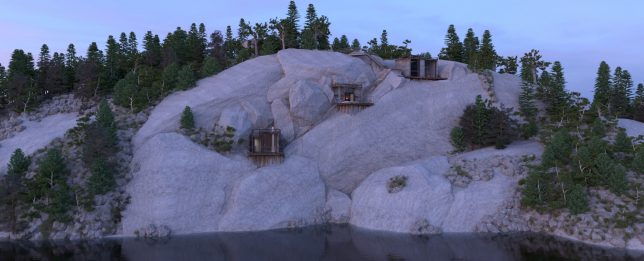
    Steep sites with limited buildable areas have always proved challenging for architects, but this home aims to navigate rocky terrain by breaking up a single dwelling into stair-connected segments.

    lake rock residence

    russian home above

    Designed by Igor Sirotov, the PS1 House is a private residence to be built onto a series of stone lips that span from the lake’s surface below to access points above.

    lake stone buildings

    rrussian house detail

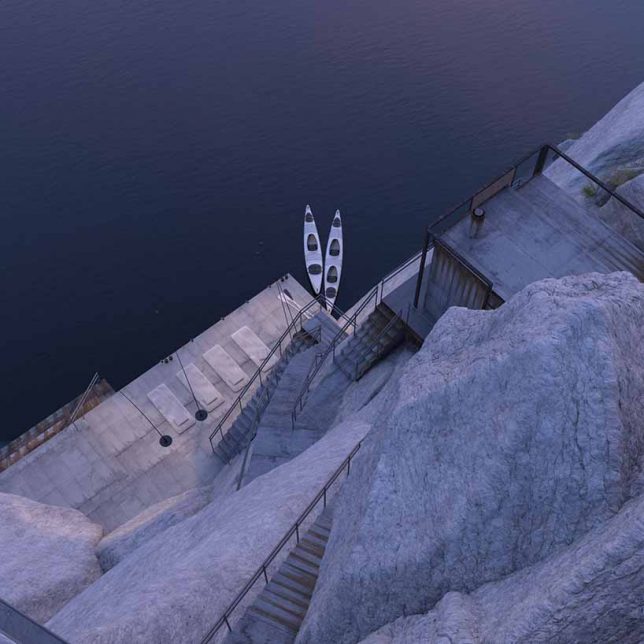
    Weathered steel and concrete blend the buildings into the landscape while physically linking them via steps and railings as well.

    russian interior spaces

    The idea was driven in part by a desire to minimize the building’s footprint and need to alter the natural landscape, taking advantage of existing natural formations.

    russian fireplace modernist brutalist

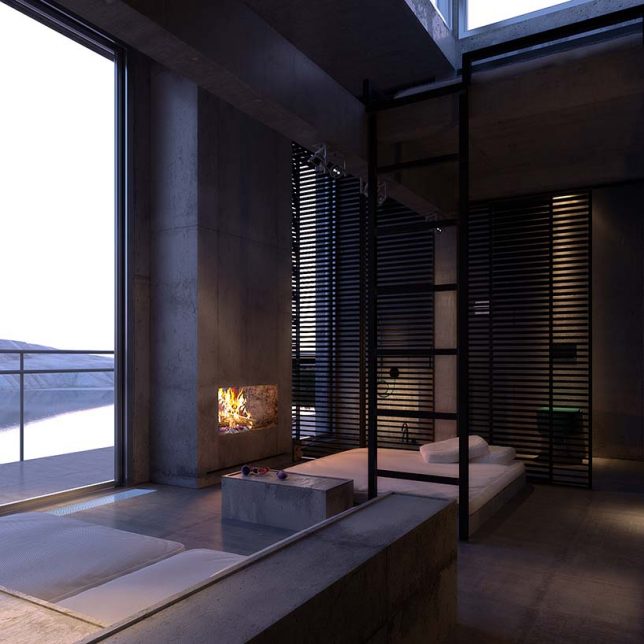
    The design borrows from Modernist and Brutalist camps, austere but materially rich with aging in mind.

    stone building segments

    Steel frames and stone floors match the color and pattern palettes of surrounding site elements, providing semi-permeable shelters for bedrooms, kitchens and dining spaces at intervals between the top and bottom.

    Share on Facebook


    [ By WebUrbanist in Architecture & Houses & Residential. ]

    [ WebUrbanist | Archives | Galleries | Privacy | TOS ]


    WebUrbanist

  • Announcing the winners of USA Landscape Photographer of the Year 2016

    USA Landscape Photographer of the Year 2016 Winners

    Sunrise light illuminates Mount Rainier as it rises above low clouds, seen from high above Tipsoo Lake, Washington. Adult Overall Winner 2016. Photo by Alex Noriega

    Nikon D600, 35mm, ISO 100, F11, shutter speed unknown

    We’re pleased to announce the winners of the 2016 USA Landscape Photographer of the Year Awards! From thousands of entries, Oregon-based Alex Noriega’s photo of a misty Mount Rainier at sunrise was selected as the overall winner. Youth winners were also selected for the comptetitions categories, with Hawaii’s Raiatea Arcuri taking the overall Youth award for a stunning image of water flowing over coastal lava tubes.

    We’re also excited to co-present a Special Award category, Life in Landscape. You can see the winner of that category and all of the other winning images by flipping through the slides above. For more information about the contest, visit their website. 

    Press release:

    The winners are announced
    1st November 2016

    A visually stunning and dramatic view of Mount Rainier has won the top prize in this year’s search for USA Landscape Photographer of the Year’s winning entry. Portland based photographer, Alex Noriega becomes the third person to win the overall title and the $ 15,000 prize. His picture of Mount Rainier as it rises above low clouds, seen from high above Tipsoo Lake was chosen, by the judges, from the thousands of entries received from over 40 countries across the globe, all celebrating the beauty and free spirit of the American landscape.

    Charlie Waite, one of Britain’s leading landscape photographers and founder of the Awards spoke about this year’s competition:

    “Apart from the pleasure I enjoy from my own landscape photography, there can be few experiences that come near the huge enjoyment and admiration that I have had from looking at photographs submitted to the USA Landscape Photographer of the Year.

    I have been truly overwhelmed by the high quality, considered and finely crafted images that we have seen from so many talented photographers who have contributed for the third USA Landscape Photographer of the Year 2016.

    From the start of the contest, the standard of landscape photography has been as high as it ever has been. The wonderful images that I have seen are testament to not only every photographer’s passion but for the obvious joy they receive from their creativity and indeed from fully engaging with some of the greatest landscapes on the planet.”

    The Young Landscape Photographer of the Year title has been awarded to Raiatea Arcuri, who captured coastal lava tubes along the Kona coast on the Island of Hawaii. Raiatea said of his image “What makes the Big Island special is the presence of lava tubes around the island. Some of these lava tubes at the coast will make amazing water motion as the waves push water in and out. It can be quite an epic experience capturing it. The water can easily surge up to your waist level and quickly recede back into the tube, creating a nice waterfall.”

    For the first time this year, the Awards are being held in association with DPReview and Amazon. Life in the Landscape, The Digital Photography Review Special Award was offered for the photograph judged to best convey how people interact with the American landscape. Michael Shainblum’s Endless which saw Michael endure extreme heat as it was about 105 degrees fahrenheit, certainly met the requirements for this Award and captures a truly magical moment.

    Congratulations also goes to the winner of this year’s other Special Award. Wild Landscape, The Future Publishing Award was won by Terrence Bond for his photograph The Real Duck Dynasty which was taken on the Clarence Canon Wildlife Refuge, Annada, Mo on the migratory highway, on the west side of the Mississippi River.

    2016 Results:

    Adult Winner – Alex Noriega – Sunrise light illuminates Mount Rainier
    Winner – Classic View – James Menzies – Main Strike, Grand Canyon National Park
    Runner Up – Classic View – Long Nguyen – Lost, Boardman Farm, Oregon
    Winner – Black and White – Terry Koyama – Waimea Bay Beast, Hawaii
    Runner Up – Black and White – Michael Ryan – Waimea Bay Beast, California
    Winner – My USA – Az Jackson – A lone figure of a man on Brooklyn Bridge, New York Runner Up – My USA – Michael Shainblum – Thunder Mountain, Eastern Sierra Mountains Winner – Urban – Souvik Dutta – Caged, Orlando, Florida
    Runner Up – Urban – Jennifer Vahlbruch – 75 Stages of Life, Miami, Florida
    Winner – Environmental Value – Terry Koyama – Mammatus Makers, Kansas
    Runner Up – Environmental Value – Yoshiki Nakamura – Sunset flight in Fir Island, Mt Vernon
    Winner – DPReview Special Award – Michael Shainblum – Endless, Fonts Point, Anza Borrego Desert
    Runner Up – DPReview Special Award – Sapna Reddy – Escape the Ordinary, Mt Tamalpais, Marin County
    Winner – Future Publishing Special Award – Terrence Bond – The real Duck Dynasty, Missouri
    Runner Up – Future Publishing Special Award – Ashish Varma – Autumn fog over Grand Tetons, Wyoming

    Youth Winner – Raiatea Arcuri – Coastal lava tubes in Kona, Hawaii
    Winner – Classic View – Mark Rivera – Lamar Valley, Autumn Foliage, Yellowstone National Park, Wyoming
    Winner – Black and White – John Morris – Sunset Light Show, California
    Winner – My USA – Raiatea Arcuri – Plume Cloud from the active Halemaumau Crater, Hawaii
    Winner – Urban – Kyle Wolfe – The Golden Gate Bridge as seen from Fort Point, San Francisco, California
    Winner – Environmental Value – Mark Basarab – Fiery Sunset Yosemite National Park, California
    Winner – DPReview Special Award – Mark Basarab – Point Reyes Slanted Tree, California Winner – Future Publishing Special Award – Kyle Wolfe – Navajo Sandstone of Antelope Canyon, Arizona

    Contact: info@usalpoty.com for images to accompany this release or to organize interviews with Awards founder, Charlie Waite, and/or Award winners.

    Please note that all images and/or logos supplied by or on behalf of USA Landscape Photographer of the Year remain the copyright of their respective photographers. They may only be used for press/promotional purposes in direct connection with the USA Landscape Photographer of the Year Awards and must be credited.

    More information: www.usalpoty.com

    USA Landscape Photographer of the Year 2016 Winners

    Coastal lava tubes in Kona, HI cause the water to flow in and out creating beautiful water motion. Youth Winner 2016. Photo by Raiatea Arcuri 

    Sony A6000, ISO 100, 0.4 sec, F11, 12mm (Rokinon 12mm)

    USA Landscape Photographer of the Year 2016 Winners

    Waimea Bay Beast, Oahu, Hawaii. B&W Winner. Photo by Terry Koyama

    Canon 5D Mark III with Canon EF200-400mm F4L lens 1/640 sec, F5.6, ISO 800

    USA Landscape Photographer of the Year 2016 Winners

    Sunset Light Show. B&W Winner Youth. Photo by John Morris

    Nikon D800, 1/250th, F9, ISO 160

    USA Landscape Photographer of the Year 2016 Winners

    Main Strike. Grand Canyon National Park. Classic Winner. Photo by James Menzies

    Canon EOS 5D Mark III. ISO 320, F10, focal length 26mm on a 17-40mm Wide lens. Bolt occurred during 19.9 second exposure

    USA Landscape Photographer of the Year 2016 Winners

    Lamar Valley, Autumn Foliage, Yellowstone National Park, Wyoming. Classic Winner Youth. Photo by Mark Rivera

    Nikon D750, Nikkor 300mm lens, F6.7 for 1/640 second, ISO 250

    USA Landscape Photographer of the Year 2016 Winners

    “Endless” This image is a self portrait taken at Fonts Point in the Anza Borrego Desert. DPReview Special Award. Photo by Michael Shainblum

    Canon EOS 6D, Rokinon 14mm F2.8 25sec F2.8 ISO 3200

    USA Landscape Photographer of the Year 2016 Winners

    Point Reyes Slanted Tree, California. DPReview Special Award Youth. Photo by Mark Basarab

    Canon Rebel T3i 1/1000sec F3.5 ISO 800

    USA Landscape Photographer of the Year 2016 Winners

    Mammatus Makers, Kansas. Environmental Value. Photo by Terry Koyama

    Sony a7R II with Sony Vario-Tessar T* FE 16-35mm F4 ZA OSS 1/4sec, F8.0, ISO 100

    USA Landscape Photographer of the Year 2016 Winners

    Fiery Sunset Yosemite National Park, California. Environmental Value Youth Winner. Photo by Mark Basarab

    Panasonic Lumix G5 1/400sec F3.5 ISO 160

    USA Landscape Photographer of the Year 2016 Winners

    The real Duck Dynasty. Future Publishing Special Award Winner. Photo by Terrence Bond

    Canon EOS 1D Mark IV, Canon EF 600mm F4L IS, 7.5 MB, JPEG, ISO 125 840mm, F7.1 1/400 sec

    USA Landscape Photographer of the Year 2016 Winners

    A mysterious lone figure with an umbrella walking from the arches of the Brooklyn Bridge in New York City. My USA Winner. Photo by Az Jackson

    Canon 5D Mark II – ISO: 800, F5.6, 1/40 sec. – Focal Length: 24mm

    USA Landscape Photographer of the Year 2016 Winners

    An interesting plume cloud from the active Halemaumau Crater with steam pluming from the vents below in Kilauea Iki Crater in Volcanoes National Park. My USA Youth Winner. Photo by Raiatea Arcuri

    Sony A7S, ISO 500, 20 sec, F2.8, 24mm (Rokinon 24mm)

    USA Landscape Photographer of the Year 2016 Winners

    Caged (Orlando). Urban Winner. Photo by Souvik Dutta

    Canon EOS 70D 1/1328 sec, F8, ISO 200, Focal Length 10mm (16 mm – 35 mm equivalent)

    USA Landscape Photographer of the Year 2016 Winners

    The Golden Gate Bridge as seen from Fort Point in San Francisco. The eye is led into this circular composition by the careful placement of a rustic metal chain. Urban Winner Youth. Photo by Kyle Wolfe 

    Sony A7, Sony 28mm F2, B+W 10 stop ND filter Manual exposure, F22, 30 seconds, ISO 64, 28mm

    Articles: Digital Photography Review (dpreview.com)

  • The future is bright: technology trends in mobile photography

    The future is bright: technology trends in mobile photography

    Smartphones have long overtaken the trusted digital compact camera as the most popular imaging device among consumers. So it’s no surprise that for some time now the mobile industry has been a major driving force of innovation in imaging. 2016 is slowly yet surely coming to an end, and has been a fruitful year in terms of innovation in mobile imaging. What better time to look back at the most important technology trends that have emerged over the past few months?

    Multi-lens-cameras

    Dual-cameras have been around for some time now, but this year we’ve seen the introduction of two new types of this camera category with real potential to have a lasting impact on mobile imaging. The dual-camera modules in the Huawei P9 and Honor 8 capture images on a color and a monochrome sensor at the same time. Thanks to the lack of a color array filter, the latter can record better detail, higher contrast and a wider dynamic range than its color counterpart. After capture, the image information from both sensors is combined, resulting in better overall image quality than on a conventional camera.

     The dual-cam in the Huawei P9 combines images from color and monochrome sensors.

    Both the LG G5 and Apple’s new iPhone 7 Plus use dual-cameras for optical zooming. However, there is an important difference. On the LG the standard wide-angle lens is accompanied by a super-wide-angle. The Apple’s secondary lens offers an equivalent of 56mm, double that of the 28mm standard lens.

     Apple’s iPhone 7 Plus uses a dual-camera setup for digital zooming.

    Lack of optical zoom is one of the key limitations of conventional smartphone cameras. The digital zoom functions implemented in most smartphones lead to a deterioration of image quality and can’t really be considered an alternative. This is why the solutions from LG and Apple represent a real step forward that can help expand the creative potential of smartphone photography. The concept of dual-cameras is still in its infancy and it’s probably only a question of time before we’ll see smartphones with more than two camera/lens combinations – the very approach that the the Light L16 camera development team is taking.

    Raw-capture on smartphone cameras

    Raw-capture on smartphones is not a totally new topic either. It was first introduced to the high-end models in Nokia’s Lumia line and came to Android devices with version 5.0 of the Google OS, which was introduced in 2014. Since then many high-end devices from Samsung, Huawei, LG and other manufacturers have supported the feature. However, with the introduction of the seventh iPhone generation and iOS 10, Raw capture is now finally available on the other major mobile platform, iOS, massively expanding its potential user base. 

     The Huawei P9’s DNG files can be edited in Adobe Camera Raw or other Raw converters.

    The advantages of the Raw file format are the same on a smartphone camera as they are on a DSLR or mirrorless system camera. Instead of leaving the conversion of the captured image data to the algorithms of the camera’s JPEG-engine, the photographer can adjust many image parameters after capture, without any loss of image quality, by processing manually in a Raw-converter such as Adobe Camera Raw, Lightroom or Capture One.

    With the small image sensors in smartphone cameras digital exposure compensation can only be applied within narrow limits, but white balance, sharpness, contrast, noise reduction and many other parameters can all be modified. Especially in difficult lighting situations shooting Raw can be a lifesaver. However, it can also help achieve more natural image results when the camera’s default settings produce too vibrant images, as is often the case with smartphone cameras, or to create different versions of the same image – for example one for large-scale printing and one for viewing on the web.

    There is no doubt that the conversion of Raw image files can improve the quality of an image, or at least adjust it for specific requirements. However, the crucial question is if this all makes sense on a smartphone. Here, opinions are mixed. On one hand it can be argued that photographers who are willing to put time and effort into Raw conversion would typically shoot with their DSLR or system camera to start with. On the other hand, you never know when you encounter a great photo opportunity. If the only camera you’ve got is the smartphone in your pocket, Raw conversion can make the difference between a good and a great image.

    Modular solutions

    For many users an elegant and thin smartphone body is an important buying criterion. Unfortunately those characteristics stand in direct contrast to camera performance. Larger sensors offer lower noise levels and better dynamic range. Bigger lenses provide for brighter apertures or offer zoom capability. A powerful xenon flash also requires space. One of the solutions to this dilemma is a modular approach: for general everyday day use you carry the slim smartphone in the pocket. When better image quality and camera features are required, for example while visiting an event or when traveling, an external camera module is attached to the smartphone.

    Previous approaches, for example Sony’s QX-models or the Kodak Pixpro SL modules, which are compatible with most smartphones and connect to the device via Wi-Fi, were unfortunately cumbersome to operate. Connection to the smartphone was often slow and occasionally unstable, leading to laggy image transmission and operation.

    However, this year Lenovo has revived the camera module concept by introducing the Hasselblad True Zoom. The TrueZoom is so far only compatible with the smartphones of Lenovo’s Moto Z series but, on the upside, attaching and operating the device work much more seamlessly than anything else we’ve seen before. The TrueZoom attaches to the smartphone magnetically and, with a 10x zoom lens and xenon flash, instantly transforms it into a connected travel zoom camera, without any rebooting or other configuration steps.

    The Hasselblad True Zoom camera module attaches magnetically to smartphones of the Lenovo Moto Z series.

    The fact that the True Zoom is only compatible with a handful of phones won’t contribute to a wide distribution of the device. However, it is showing what is currently technologically feasible in terms of smartphones and external modules working together. Things could get even more interesting if market leaders Apple or Samsung show an interest in camera modules and make them popular with the masses.

    Algorithms trump hardware

    As mentioned above, your standard smartphone doesn’t provide enough space for large image sensors, zoom lenses or powerful flash units. However, mobile devices have one definite advantage over conventional cameras: computing power.

    Thanks to powerful chipsets modern smartphone cameras can record and digitally merge several image frames in a split-second. This process, called image stacking, captures more image information than a single frame. The resulting JPEG files show better detail, lower noise levels and a wider dynamic range than standard exposures. In very dark scenes this method can also achieve a brighter exposure than conventional capture. In addition, camera shake and blur in low light are less of an issue, as the individual frames of the image stack can use faster shutter speeds than a single standard exposure.

     The HDR+ mode in the Google Camera app uses frame stacking for improved image results.

    Apple offers such high dynamic range and night modes in its iPhone cameras and Google has implemented them into the HDR+ function of its Google Camera app, which is also used as the stock camera app on the new Pixel and Pixel XL phones. Again, development of such technologies is still in relatively early stages. Over the coming years more powerful processor hardware and better algorithms will likely further improve smartphone image quality, without a need for larger sensors or faster lenses.

    Outlook

    It’s probably fair to say that in the conventional digital camera sector the rate of innovation has noticeably slowed down over the last few years. In contrast, many of the new concepts that are currently being applied in mobile imaging are still in their infancy. It remains to be seen which ones will be here to stay and which ones will be forgotten in the nearer future. However, there’s no doubt that mobile photographers have a lot to look forward to. 

    Articles: Digital Photography Review (dpreview.com)

  • How to Get Stunning Macro Photos with Your Mobile Phone

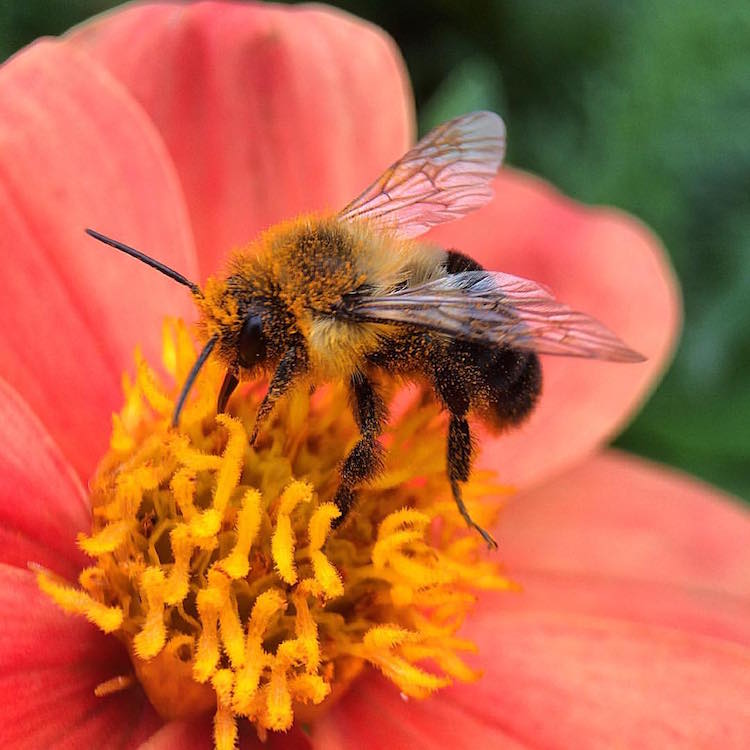
    If you’ve ever scrolled through Instagram or Flickr and seen an incredible close-up photograph of a flower, insect, or even jewelry, you may have wondered how you can get similar photos, especially if you don’t have a camera. Thankfully, you don’t have to buy a DSLR or expensive macro lens to get these kinds of shots. All you need is a mobile phone, a simple accessory, and a bit of curiosity. In this article, I’ll go through some tips to help you get stunning macro photos using your mobile phone.

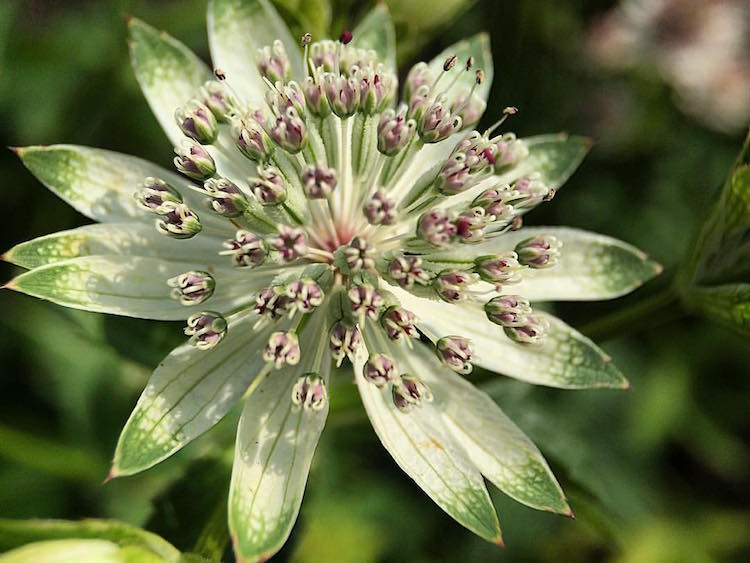
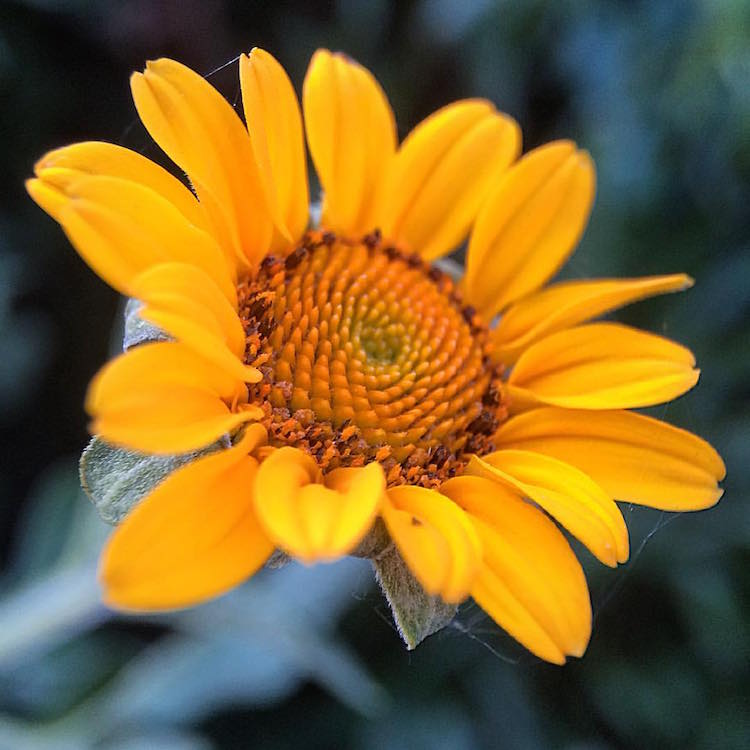
    how-to-get-stunning-macro-photos-with-your-mobile-phone

    Busy

    Lenses

    While some phones have a macro mode, the best way to get amazing macro photos with your phone is to invest in an inexpensive lens (or set of lenses) that work specifically with your device. I have an iPhone 5s and initially purchased the Olloclip 4-in-1 set that includes lenses for wide-angle, fisheye, macro 10x, and macro 15x.

    I quickly discovered the 10x was my personal favorite since it best suited most of my subjects. So I also got the Olloclip Macro 3-in-1 that has lenses for 7x, 14x, and 21x, as well as a couple special hoods that diffuse the lighting and make getting a good shot a bit easier. Over time, I’ve discovered that the 7x lens is my go-to for nearly all of my macro photos since it can capture a large enough area while still getting lots of detail. You can experiment and use any of these magnifications to get the types of shots you are not able to take with your phone camera alone.

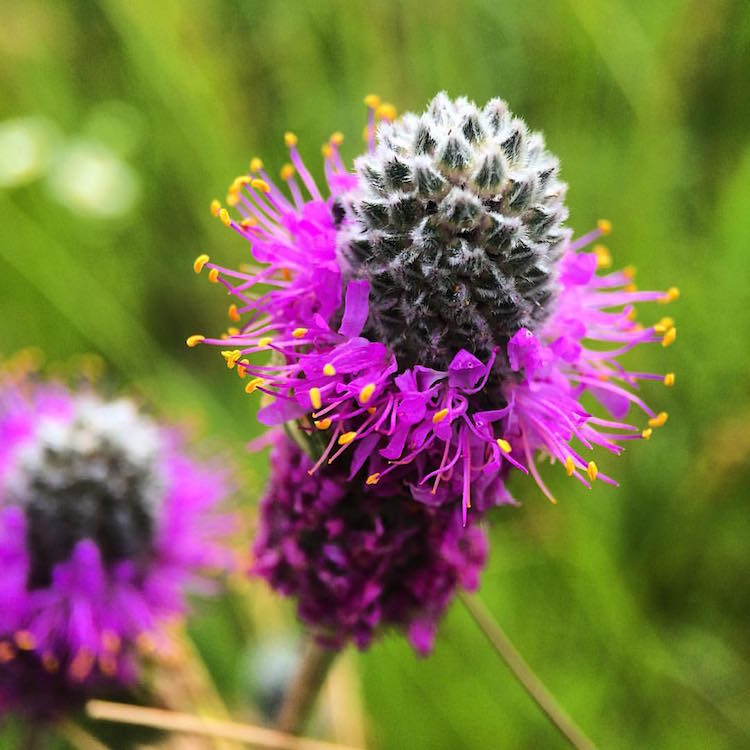
    Prairie

    Options

    There are definitely other brands and magnifications available, but make sure that the lens you buy fits with your phone and won’t get in the way of taking photos. Note that most lenses slip over your phone so you cannot typically use them with a phone case. Olloclip has special cases with openings at the camera area for easy access, or you can go without a case.

    You never know when you might come across something that will make for a good macro photo. Initially, I suggest taking your lenses with you (they fit in a pocket), especially when you go outside so that you can experiment with different subjects. A garden or another area with flowers or insects is a great place to try out your new lens. Or if it’s winter, use your lens as an excuse to buy a bouquet of flowers.

    Garden

    Lighting

    As with all photography, lighting is critically important for taking good macro pictures. Daylight is probably the best and easiest to work with, but bright sunlight can make for tricky shadows. With macro photography, sometimes you can simply move your subject to decrease shadows by gently bending a flower stem or turning a leaf toward you.

    Fullsun

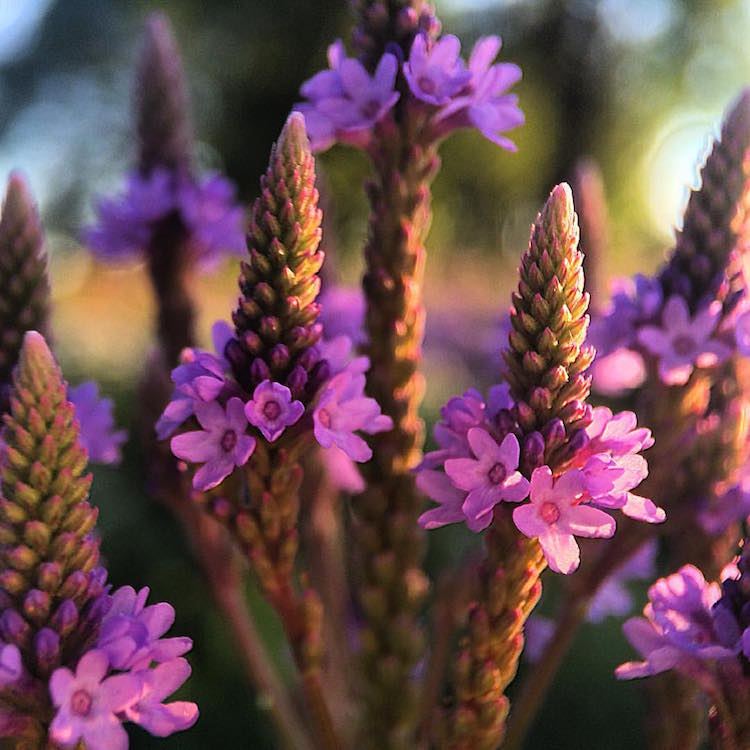
    You can also use your body to block bright sunlight or put a hand over your subject to reduce glare. You can play around with sunrise and sunset, and catch lighting in the background of your images. With macro lenses, the light will often turn into a lovely addition to your photos in the form of bokeh, or out-of-focus areas that make your pictures appear to glow.

    Bokeh

    Note: you can also add light. Read: How to Create Gorgeous Flower Images using a Flashlight and a Reflector

    Focus and framing

    With macro photos, there are endless ways to frame your subject, but you will be limited in the depth of field or the area of the photo that will remain in focus. You want the subject to remain (mostly) in focus, depending on your magnification. The larger the magnification, the smaller the area of exact focus in your pictures. This can lead to surprisingly beautiful photos which you might not expect to get from just your mobile phone.

    Sunset

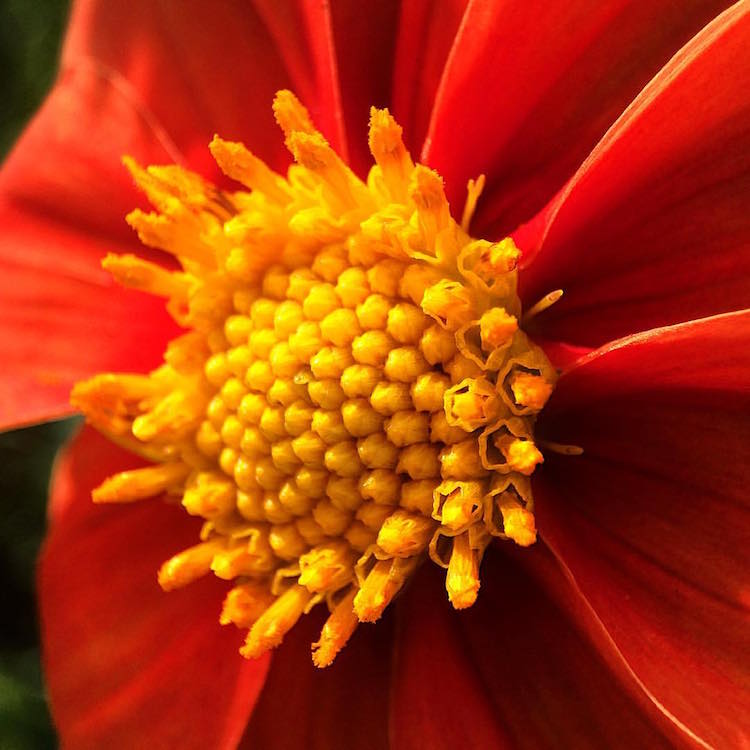
    Sometimes your intended subject will be too large to fully capture, even with the smaller magnification (like the 7x lens), so you may have to focus on only a part of the subject like the center of the flower, or a few petals. This is the fun part of macro photography! You can shoot the subject from directly above, from the side, or even from below. Experiment with different angles for the same subject.

    Center

    Other notes

    When taking macro photos, any movement is your enemy. Even slight movement while shooting will result in blurriness. You will need to remain very still, and do everything you can to keep your subject from moving. A tripod for your phone can help but isn’t necessary. Just find a position that’s comfortable, stay as still as possible, and steady your phone with two hands.

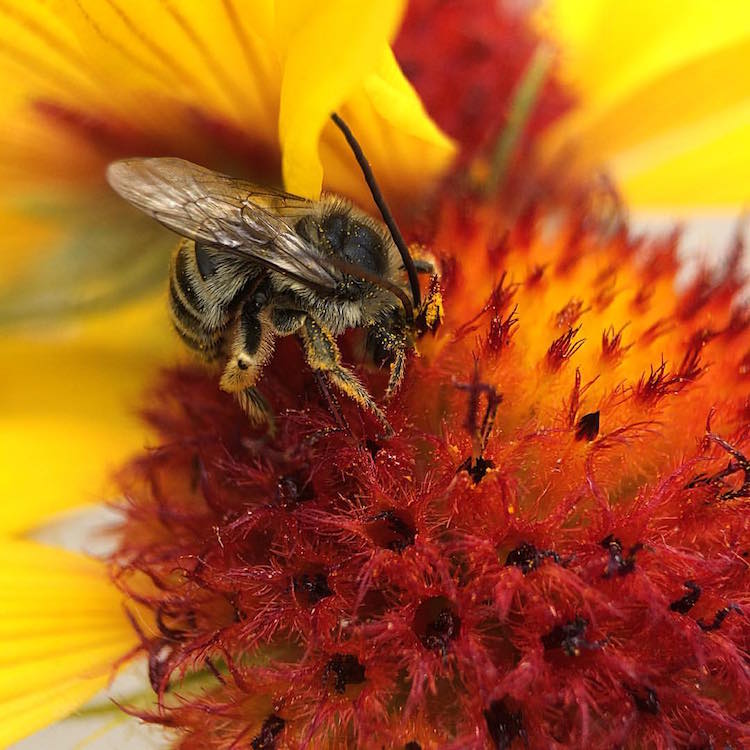
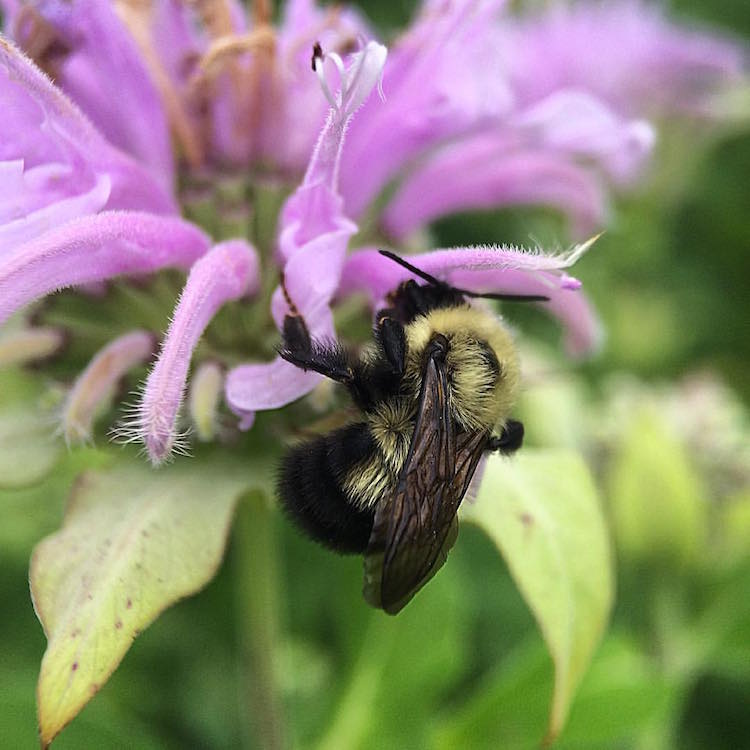
    Sometimes, like on a breezy day, it’s impossible to keep your subject in one place. You can sometimes hold your subject still (as with a flower), but other times you can’t, as with shooting insect photos. One helpful tip for these situations is to use the burst mode on your phone’s camera which takes many shots in rapid succession. On an iPhone, you can hold down the camera button on the side of the phone or on-screen to shoot multiple photos very quickly. Android phones usually have a way to do this, too. If you don’t have built-in burst most, just take many photos while staying as still as possible. This is how I get most of my insect photos, patience and taking many shots. It’s easy to weed out the blurry photos later.

    Beebalm

    Editing – especially for Instagram users

    Since many people who use their mobile phones for photography also use Instagram to share them, here are a couple extra tips for Instagram users.

    1. You don’t need to use Instagram’s filters to make great photos.

    Adjusting color or warmth slightly can make your photos look more like real life. In the image below, the only adjustment has been to crop the image.

    Original

    2. Turn up the Lux

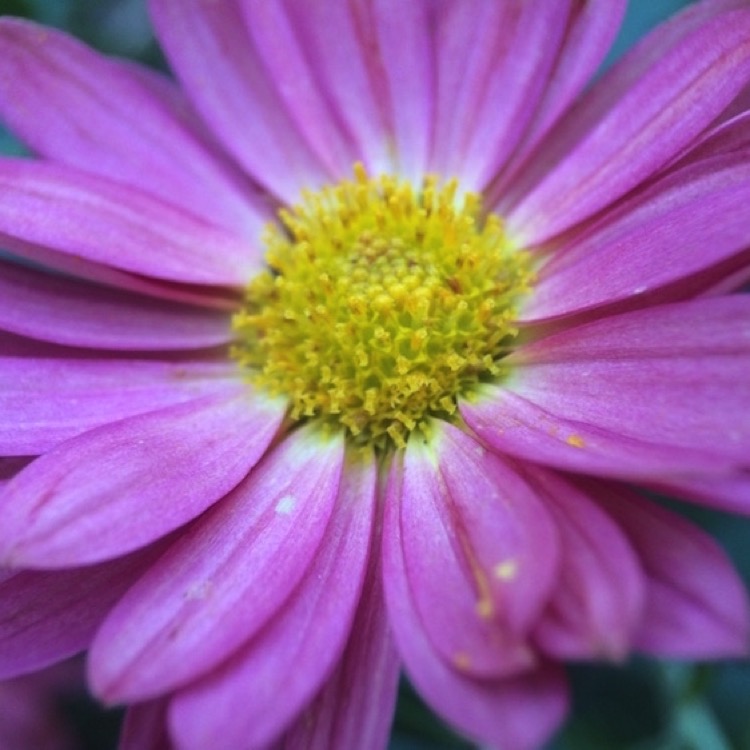
    This is the little light/dark option at the top of the screen when you are on the Filter or Edit pages in the Instagram app. Using this editing trick (try moving it to the right to 50 or even 100), you increase the intensity of your images. This makes the photo a little less washed out, which can help if you’re taking photos on a very bright day. In the image below, this is turned up slightly and adds more depth to the petals.

    Lux

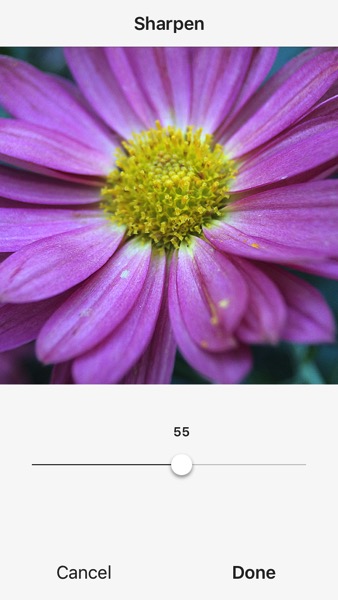
    3. Sharpen your macro photos

    Using Instagram’s own built-in sharpen edit, you can bring a bit more detail out of your macro photos. In the image below, this has been adjusted and brings out the detail in the center of the photo.

    Sharpen

    Conclusion – your turn

    Do you have any tips for getting good macro shots with a mobile phone, or with other gear that doesn’t cost a lot of money? Leave your thoughts in the comments below, and feel free to share your own macro shots, too. I’d love to see your photos.

    Ladybug

    googletag.cmd.push(function() {
    tablet_slots.push( googletag.defineSlot( “/1005424/_dPSv4_tab-all-article-bottom_(300×250)”, [300, 250], “pb-ad-78623” ).addService( googletag.pubads() ) ); } );

    googletag.cmd.push(function() {
    mobile_slots.push( googletag.defineSlot( “/1005424/_dPSv4_mob-all-article-bottom_(300×250)”, [300, 250], “pb-ad-78158” ).addService( googletag.pubads() ) ); } );

    The post How to Get Stunning Macro Photos with Your Mobile Phone by Beth Ringsmuth Stolpman appeared first on Digital Photography School.


    Digital Photography School

  • REVIEW: Everyday Messenger Bag for Photographers… And Everyone Else!

    Peak Design is familiar to any pro photographer and their latest Kickstarter project for their Everyday Bags that gathered over $ 6,000,000 of funding has made them famous far beyond the photography world. While their new backpack, tote, and sling from the Everyday series are conquering the world, I’ve got a chance to put my hands on Peak Design’s Every Messenger Continue Reading

    The post REVIEW: Everyday Messenger Bag for Photographers… And Everyone Else! appeared first on Photodoto.


    Photodoto

  • Earth from a New Perspective: ‘Overview’ Aerial Shots Reveal Hidden Beauty

    [ By SA Rogers in Art & Photography & Video. ]

    Planned community of Sun Lakes, Arizona

    Other than a few brief glimpses near airports, few of us ever get to see the Earth from high up in the sky, taking in all of the complex textures and patterns created by nature and human activity. If we could, we might feel more inclined to do all that we could to protect it. This phenomenon, as experienced by astronauts when viewing our small, fragile planet from space, is called the ‘overview effect,’ and it serves as the inspiration behind a series of stunning aerial photographs by Benjamin Grant.

    Tulip fields, Lisse, Netherlands
    Tulip fields, Lisse, Netherlands
    A highway interchange in Jacksonville, FL
    A highway interchange in Jacksonville, FL
    World's largest aircraft storage facility, Tucson, Arizona
    World’s largest aircraft storage facility, Tucson, Arizona
    Residential communities in Boca Raton, FL
    Residential communities in Boca Raton, FL

    ‘Overview: A New Perspective of Earth’ is a new hardcover book full of over 200 aerial images taken of sites all over the world, from industrial areas of South Korea and fields in Ethiopia to planned communities in South Florida. Grant initially started the project as an Instagram series in December 2013, selecting high-resolution satellite photographs that reveal the extent to which we have altered the surface of the planet upon which we live and curating them into a thoughtful, emotional collection.

    Port of Singapore
    Port of Singapore
    Industrial district, Ansan, South Korea
    Industrial district, Ansan, South Korea
    Agricultural development, Addis Ababa, Ethiopia
    Agricultural development, Addis Ababa, Ethiopia
    Residential neighborhood in Delray Beach, FL
    Residential neighborhood in Delray Beach, FL

    “What I’m really trying to get across here is that we’ve entered an important time in human history where our home has been significantly altered,” Grant told Wired in a 2015 interview.

    The Gemasolar Thermosolar Plant, Seville, Spain
    The Gemasolar Thermosolar Plant, Seville, Spain
    Olive tree groves in Cordoba, Spain
    Olive tree groves in Cordoba, Spain
    Mexico City
    Mexico City
    Burning Man, Black Rock, Nevada
    Burning Man, Black Rock, Nevada

    Grant searches aerial shots relating to a specific current event or environmental issue to find the ones that have the biggest impact, striking us as visually beautiful even when the imagery depicts tragedy. Some examples include shots of a refugee camp in Kenya, shrinking ice sheets and the choked streets of the world’s most populated cities. Take a look through the feed on DailyOverview.com, or order the book on Amazon.

    Share on Facebook


    [ By SA Rogers in Art & Photography & Video. ]

    [ WebUrbanist | Archives | Galleries | Privacy | TOS ]


    WebUrbanist

  • 4 Secrets for How to Get Tack Sharp Photos

    We’ve all been here before. You get home from an afternoon with your kids in the park, at the ball game, or even a formal photo session only to load your pictures on the computer and realize that many of them are fuzzy, blurry, or just plain out of focus. It’s a problem that has plagued photographers for years. While new cameras offer all sorts of features like 3D focus tracking and real-time face detection to help make sure to get the ultimate tack sharp photos, the fact remains that out-of-focus images are still an issue for just about everyone with a camera.

    It’s an unfortunate reality of the way cameras work with incoming light, and until we are all shooting with Lytro-style light field cameras we are all going to have the occasional out-of-focus picture or two. Fortunately, there are a few relatively simple things you can do to make sure your pictures are indeed as sharp as possible.

    tips for getting tack sharp photos

    Use a fast shutter speed

    The world around you is constantly in motion, and having a camera means you are equipped to freeze that motion into a single frame. Depending on what you are shooting the result can sometimes be a blurry mess, which is often the result of a shutter speed that is simply too slow. There’s an old bit of conventional wisdom that says the minimum shutter speed needed to get a sharp image of a still subject is 1/focal length. So if you are shooting with a 50mm lens you need a shutter speed of 1/50th of a second.

    Note: Due to the cropped sensor on cameras like the Canon Rebel series or lower-end Nikons the formula becomes 1/(1.5x focal length), so you would need a minimum shutter speed of 1/75 second.

    This might sound fast but it’s actually not, especially if you are shooting in low light conditions or with a small aperture on your lens. It gets even worse when your subject is moving, in which case you need a much faster shutter speed! This is why many mobile phone pictures end up looking blurry, in order to let in enough light to get a photo they often use slower shutter speeds.

    This jittery squirrel was moving all over the place, so I shot with a speed of 1/180 second to get a sharp picture. tips for getting tack sharp photos

    This jittery squirrel was moving all over the place, so I shot with a speed of 1/180 second to get a sharp picture.

    Proper settings

    The solution is to use a faster shutter speed, which might sound fairly obvious but it doesn’t always work unless you have your camera configured properly. If you shoot in Auto your camera might not know you want to use a fast shutter speed. So shooting in Program or Shutter Priority is a good way to control the shutter speed to make it as fast as you want.

    You can also utilize higher ISO settings like 1600 or 3200, which look just fine from most modern cameras if you need a fast shutter and there isn’t much light. Most photographers would take a slightly grainy (noisy) photo that can often be fixed with software like Lightroom or Photoshop over a blurry photo that can usually not be fixed. If you find that you consistently get blurry pictures of your subjects, try increasing your shutter speed and you just may just be surprised with the outcome.

    Use a smaller aperture

    The lens on your camera is designed to gather incoming light and focus it so you can take a picture. The amount of light it lets in is largely dependent on the size of the physical lens opening. A bigger opening, or aperture, lets more light pass through than a smaller opening, much in the same way a bigger hole in the bottom of a bucket lets more water leak out than a smaller hole. Wider apertures let you use faster shutter speeds and also help you achieve the type of beautiful out-of-focus backgrounds, called bokeh, that are common in portrait, wildlife, or even sports photography.

    tips for getting tack sharp photos - family photo

    Even though my 85mm lens has a maximum aperture of f/1.8, I shot this at f/2.8 because I wanted a wider depth of field in order to make sure all three subjects were in focus.

    Depth of field

    One tradeoff that comes into play when using wide apertures, is that your depth of field is much shallower. That means you have a very narrow section of the image that will actually be in focus or tack sharp.  Under very carefully controlled conditions this can be fine and even quite desirable. But in many situations, a thin depth of field can result in more headaches and frustrations than it’s worth.

    Shooting with a wide aperture can result in a depth of field that is so narrow a person’s nose could be in focus but her eye might not. One of the best solutions is to just use a smaller aperture. The tradeoff when using smaller apertures like f/2.8, f/4, etc., is that your background won’t be quite as blurry and you will need a longer shutter speed, but if your lighting is good the latter won’t matter. And as for the former, I like to err on the side of caution and go with a technique that will give me a higher chance of having my subject sharp and focused, even if it means a slightly less blurry background.

    tips for getting tack sharp photos

    Use cross-type focus points

    Almost every interchangeable-lens camera has one or more cross-type focusing points. That means they look along the horizontal and vertical axes to make sure things are tack sharp before taking a picture. These points are the little dots or squares you see when you look through the viewfinder of your camera. The ones that are cross-type are usually a bit faster and give you better results than their single-axis counterparts. Of course, you will need to know which of the points on your particular camera are cross-type but a quick online search of your camera model and “cross type focus points” will usually get you the information you need.

    tips for getting tack sharp photos cross-type focus points

    The center focusing points on my D750 are all cross-type, so I like to use them whenever possible in order to make sure to get maximum sharpness.

    Cross-type focusing points are usually limited to a certain portion of the viewfinder. This can present a bit of a problem since normal-type focusing points are what is commonly used to lock focus on objects along the outer edges. A solution I like to use for these situations is the focus-and-recompose technique. I use a cross-type focusing point, often the one right in the center, to lock focus and then recompose my shot to frame it how I want. This does not always work when shooting wide open since even the smallest amount of movement can affect your shot when the depth of field is razor thin. But as I mentioned earlier, if you want tack sharp pictures you should probably stop your aperture down a little bit anyway.

    Sharpness is critical when shooting macro pictures, so I used a wide aperture (f/8) and cross-type focusing points to make sure the foreground tulip was tack sharp.

    Sharpness is critical when shooting macro pictures, so I used a small aperture (f/8) and cross-type focusing points to make sure the tips of the petals on the foreground tulip were tack sharp.

    Use a tripod and Live View and zoom in to 100%

    If you’re like me, you spend 99% of your time looking through the viewfinder of your camera as opposed to using the Live View function (where you use the LCD screen on the back of your camera to compose your shot). DSLRs have traditionally been designed for photographers to use the optical viewfinder which is why this method is generally faster and easier to use. But Live View has some very good features as well depending on the type of photos you want to take. If you are doing a lot of action shots like sporting events the Live View function is quite frustrating. But if you shoot landscapes, products, or other types of pictures where your subject remains relatively still, Live View can be a major advantage in terms of getting the sharpest image possible.

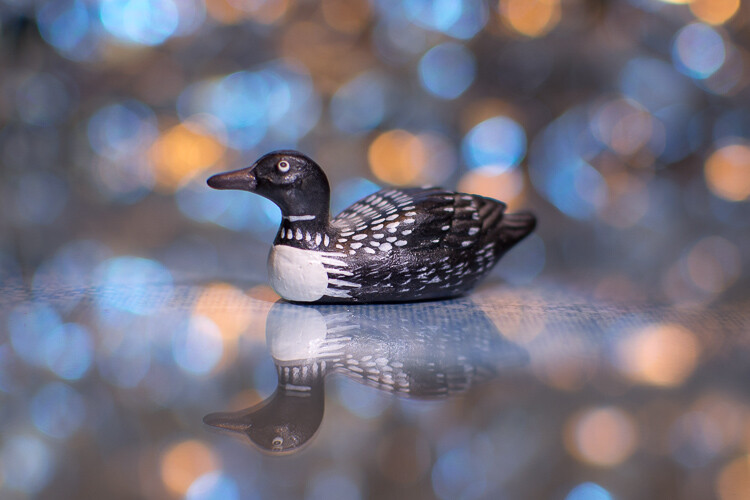
    Using Live View helped me get this small wooden duck very sharp and focused.

    Using Live View helped me get this small wooden duck tack sharp and focused.

    Using Live View

    The trick to using Live View for getting sharp images is to frame your shot with your camera on a steady surface such a tripod, then zoom in to 100%, using the controls on your camera. This gives you an ultra-close-up look at your image, and you can then use autofocus or manual focus to make sure everything is perfectly tack sharp.

    While the autofocus points in the viewfinder do a good job, this type of 100% magnification shows you precisely how in-focus your image will be and helps you get pixel-perfect images. Landscape (and macro) photographers often use this technique, combined with small apertures for a wide depth of field, to get pictures that are much sharper than they could otherwise. It’s a tip that I highly recommend you try, especially if you don’t often shoot in Live View.

    tips for getting tack sharp photos long exposure image

    I wanted to get this 30-second exposure as sharp as possible. So I first used Live View and zoomed in to 100% to check that the foliage was focused.

    Bonus tip: Use Focus-Peaking on mirrorless cameras

    Most of the items in this article are geared towards traditional DSLR shooters, but if you use a mirrorless camera there is one handy tool you probably have that gives you a leg up on your traditional-style camera counterparts.

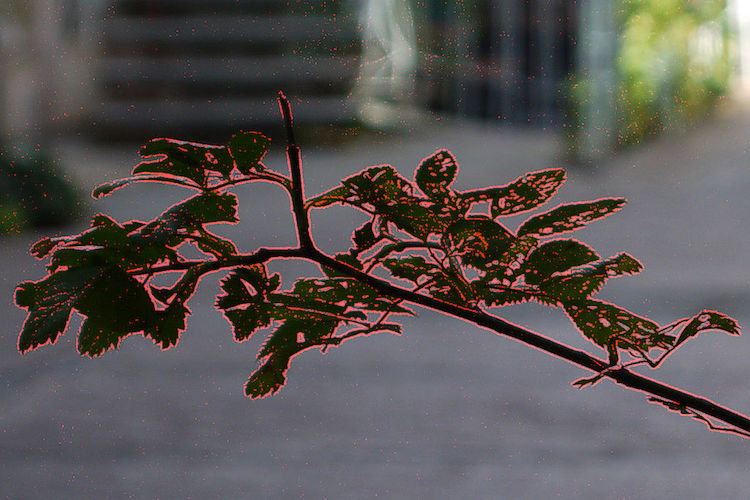
    Focus-Peaking is a way for your camera to show you precisely what is tack sharp as you focus your lens. Many, but not all, mirrorless cameras have this capability and it is a fantastic way of making sure you get everything that should be tack sharp focused properly. With Focus-Peaking enabled, as you turn the focusing ring on your lens you will see a swath of dots (usually red or green) travel across the viewfinder. These dots indicate the spots that are perfectly focused, and when you see an outline of dots around the part of your image that you want focused, you can snap a picture and rest assured that it will show up exactly how you envisioned.

    You can even use Focus-Peaking in conjunction with autofocus, so it’s another tool in your repertoire to help make sure you are taking the best possible pictures.

    tips for getting tack sharp photos - focus-peaking

    The edges of the leaves are all outlined in red by Focus-Peaking, which indicates that they will be in focus. Image by Bautsch (Own work) [CC0], via Wikimedia Commons

    Over to you

    Do you have any favorite tips or tricks for getting sharp photos? Are there things I left off this list that you’d like to share with others? Leave your thoughts in the comments below!

    googletag.cmd.push(function() {
    tablet_slots.push( googletag.defineSlot( “/1005424/_dPSv4_tab-all-article-bottom_(300×250)”, [300, 250], “pb-ad-78623” ).addService( googletag.pubads() ) ); } );

    googletag.cmd.push(function() {
    mobile_slots.push( googletag.defineSlot( “/1005424/_dPSv4_mob-all-article-bottom_(300×250)”, [300, 250], “pb-ad-78158” ).addService( googletag.pubads() ) ); } );

    The post 4 Secrets for How to Get Tack Sharp Photos by Simon Ringsmuth appeared first on Digital Photography School.


    Digital Photography School