Blog

  • How to Experiment with Different Editing Styles to Find Your Own

    Photography is an art form and like every art form, it goes through its fair share of evolution. Hence, it is only fair that as photographers (artists of this trade), we too go through an evolution process of defining and redefining our artistic flair. This redefinition can take place in many different ways. It can be technical (going from digital to film or vice-versa) or it can be business (changing genres of what you photograph). Another way you can evolve as a photographer is with your editing style. And it is perfectly okay and acceptable to make one or all of these changes in your personal photographic journey.

    memorable-jaunts-experimenting-with-editing-styles-article-for-digital-photography-school-1

    For a photographer, his or her images are the art form. Experimenting with the images is creatively satisfying.

    There comes a point in one’s career when you really take a hard look at what your journey has been. What you have been through to get here and where you are headed. While you may call this a mid-life crisis of some sort, I call it reassessing your strengths, talents, and goals.

    A few years ago, while I was searching for what style of photography appealed to me, I was instantly drawn to bright and airy images with lots of light and emotion. This kind of images really inspire me and make me happy. But of late, I have been drawn to more moody contrasty images that are still full of emotion. I don’t consider this a flaw or a failure of my part but instead, choose to look at it as a natural evolution in my journey as an artist.

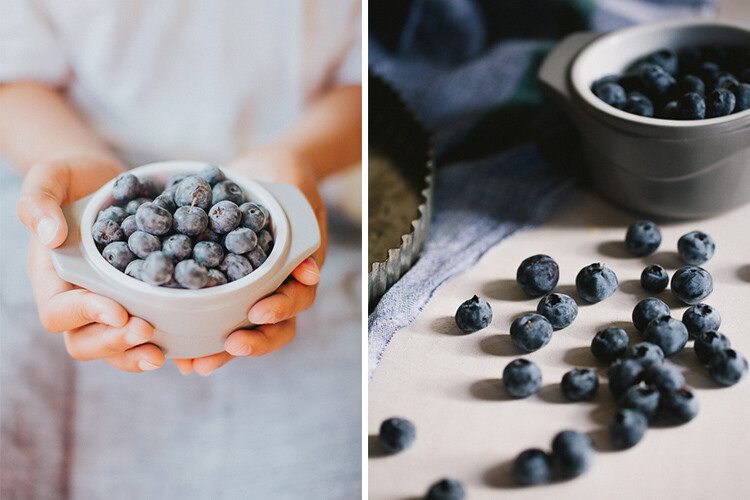
    memorable-jaunts-experimenting-with-editing-styles-article-for-digital-photography-school-1-4

    The same subject shot two different ways. I love them both equally and feel like both represent the message/story I wanted to convey about summer’s favorite produce – blueberries!

    If you are at such crossroads, I encourage you to fully explore each of these paths and find a way to integrate it with your existing work. I have found that, if done correctly, your clients (or fans) will also value this evolution process as a sign of internal growth of your talent.

    There are a few ways to go about this discovery.

    1 – Identify your personal editing style

    What style of images are you most drawn to? In other words, when you seek inspiration what sort of images do you gravitate towards? For me, images that are full of emotion and personality really call out my name! That is my first requirement; what story is the photographer trying to communicate.

    Then I look for processing – is it dark and moody, or full of light and crisp? I like airy, light images just slightly more than dark and moody ones but they both appeal to me. My personal opinion – I am not inspired by sepia or warmer toned black and white, it’s just my personal preference. If that is what moves and motivates you, you own it and rock that style!

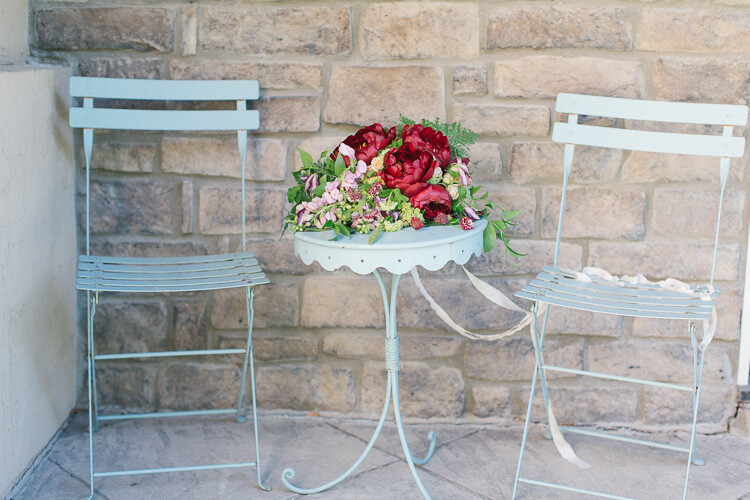
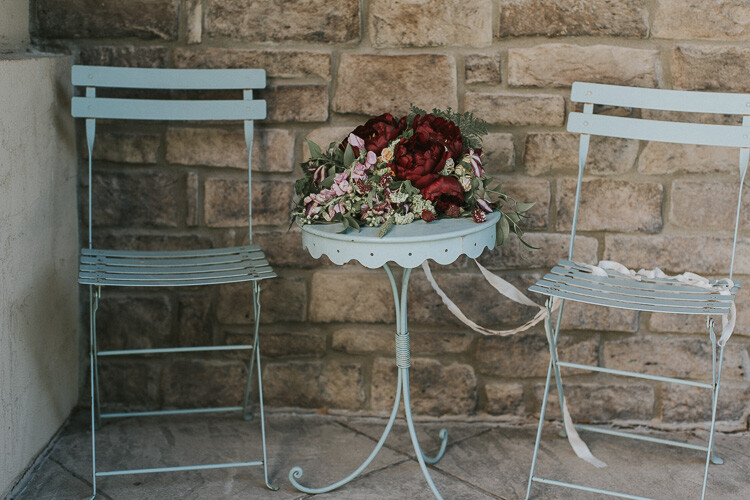
    memorable-jaunts-experimenting-with-editing-styles-article-for-digital-photography-school-1-5

    A clean, crisp, bright edit brings out the freshness of the florals against the blue backdrop of the chairs.

    2 – Research all other styles that inspire you

    There are a few common editing styles that seems to surface over time. This is by no means a comprehensive list, just some that I noticed as I browsed through the internet and Pinterest for inspiration.

    Matte Finish

    Those images that appear as if a slight hazy filter has been placed consistently over the image.

    Matt style typically has black which is not sure 100% as it it were printed on matt paper.

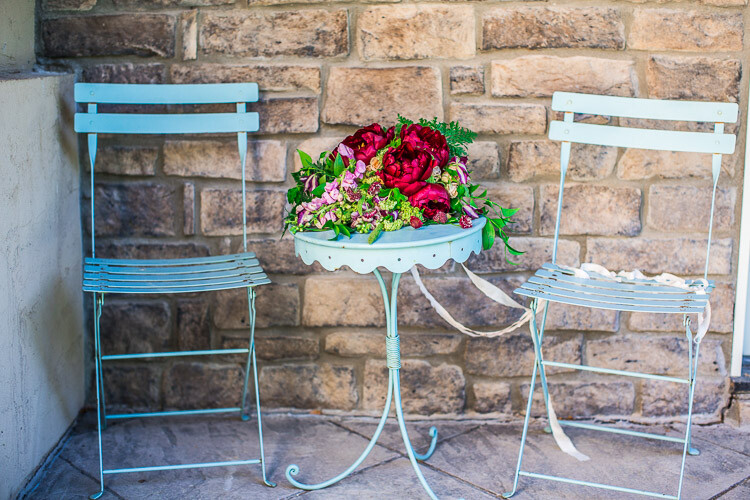
    Matte style typically has blacks which are not sure 100% as if the image was printed on matte paper. (see original image below)

    Original image

    Original image

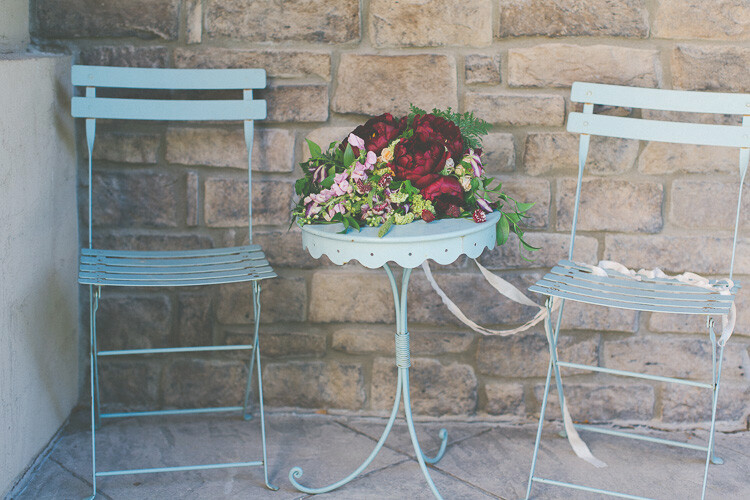
    matte-style2

    A slight haze like finish that is predominately seen over the florals (especially comparing to the earlier image).

    Desaturated Look

    Images where all the colors are very muted. This style seems to be quite popular lately, especially images where the greenery (i.e. trees and brushes) are toned down in the saturation of green tones.

    memorable-jaunts-experimenting-with-editing-styles-article-for-digital-photography-school-6

    A desaturated look where all the colors are muted from the original vibrancy seen in the first image of this series. The reds are toned down, the greens and blues are also muted (reduced in intensity).

    HDR

    As Per Wikipedia, HDR or High Dynamic Range is the effect to reproduce a greater dynamic range of luminosity than what is typical of standard digital imagery. I have seen this typically with urban night shots but in theory, this effect can be applied to any image.

    memorable-jaunts-experimenting-with-editing-styles-article-for-digital-photography-school-7

    HDR here almost has the opposite effect of desaturated colors…the greens, reds, and pinks seem to pop in this image.

    Monochrome

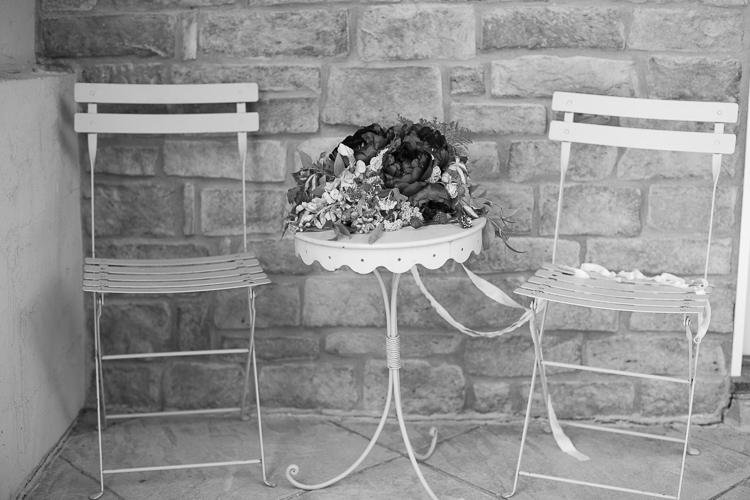
    This quite simply means single color and is most commonly used in black and white images.

    memorable-jaunts-experimenting-with-editing-styles-article-for-digital-photography-school-8

    3 – Identify artists that do these things well and follow them

    There are many artists that excel at one or more of these types of editing styles. Once you have identified the ones you want to experiment with, find those artists and follow their work. You will begin to see a pattern in their shooting and editing style that may provide you with the right amount of motivation to try and achieve a certain look for your own portfolio and images.

    4 – Shoot for a particular style and close to your vision

    This ties in with the above two points. Once you have identified the type of look you want to achieve, take the time and effort to set up all the parameters needed to achieve it. For example, if I am aiming for a dark and moody look to my image I will look for lighting, textures, and tones that will support that type of imagery. I will not set up the shoot in the brightest part of my house where sunlight fills the room.

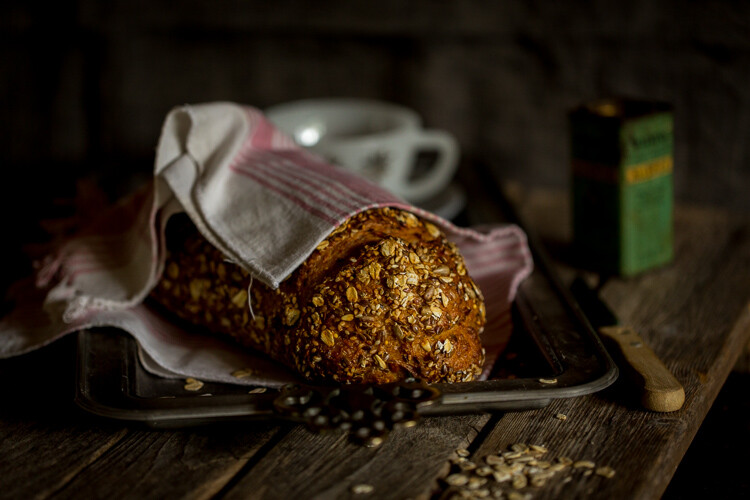
    memorable-jaunts-experimenting-with-editing-styles-article-for-digital-photography-school-1-2

    This food editorial shot was set up in my basement studio on a dark cloudy day to minimize the amount of light hitting the overall scene. Additionally the dark tones of the bread and the wood board compliment the look, feel, and tone of this image.

    5 – Invest in LR presets or PS actions or experiment

    There are numerous editing aids out there for almost every style of photography. Just google the kind of look you want to achieve and chances are someone has created a template/preset/action for that effect. Some editing aids are free while others cost money. Depending on your personal preference, you can choose to use these aids or not. My primary editing software is Lightroom and sometimes I will use a free preset just to see if I like that style of editing before I go down the path of additional research and experimentation with my own shooting style.

    Conclusion

    At the end of the day, there are many different ways to look at your creativity and your photography style. There will always be those of us who go through life with the mindset of – Don’t fix what isn’t broken – while others follow the logic of – Change it up, mix it up, rock that boat…fall in the water and you will learn to swim! No matter what camp you belong to, the message I want to leave with you is that do that what makes photography fun, interesting and creatively challenging for you!

    googletag.cmd.push(function() {
    tablet_slots.push( googletag.defineSlot( “/1005424/_dPSv4_tab-all-article-bottom_(300×250)”, [300, 250], “pb-ad-78623” ).addService( googletag.pubads() ) ); } );

    googletag.cmd.push(function() {
    mobile_slots.push( googletag.defineSlot( “/1005424/_dPSv4_mob-all-article-bottom_(300×250)”, [300, 250], “pb-ad-78158” ).addService( googletag.pubads() ) ); } );

    The post How to Experiment with Different Editing Styles to Find Your Own by Karthika Gupta appeared first on Digital Photography School.


    Digital Photography School

  • Five Photography Rules You May Want to Ignore

    A few years ago when I purchased my first Canon dSLR I took a free 2-hour class on digital photography from a local school. They offered free seminars as a way to market their series of intensive 6-week photography courses. I was new to digital photography at the time, having learned on 35mm film. During the class I scribbled away in the notebook the instructor handed out. I was given several photography rules to follow, but is that the best advice?

    My camera-loving orange tabby Carter, shot in low light, requiring a relatively high ISO of 1600 to get a fast enough shutter speed to hand hold.  ISO 1600, 1/125th, F4 @ 105mm.

    My camera-loving orange tabby Carter, shot in low light, requiring a relatively high ISO of 1600 to get a fast enough shutter speed to hand-hold. ISO 1600, 1/125th, f/4 @ 105mm.

    The thing about photography is that it’s a series of decisions starting with the brand of gear you choose and it funnels down to your favorite subject, your preferred shooting mode, your shutter speed, aperture and ISO. By applying popular advice to all situations, you eliminate too many of the key creative decision about how your images look. Go ahead and disagree with or ignore rule-of-thumb photography advice. The choices you make allow you to create images that feel right to you – and that’s the real sweet spot.

    So let’s look at five supposed photography rules and see if you agree or disagree with them.

    1. Set the ISO at 400

    One of my instructor’s key points was to set the ISO at 400 and forget it.”

    Since I didn’t know anything about digital photography, it like pretty good advice, so I tried it. I also made a lot of blurry images. Set at ISO 400, and limited by a wide open aperture of f/3.5 on my kit lens, I often couldn’t gather enough light for a shutter speed fast enough to prevent motion blur. I flipped back to Auto Shooting Mode (Full Auto or Program) and suddenly my images were sharp again.

    I dissected the settings on the Auto Mode shots and – you’ve probably guessed this already – the main difference while in Auto Mode was that the ISO was higher, enabling a faster shutter speed and reducing motion blur.

    five-photography-tips-to-ignore-n

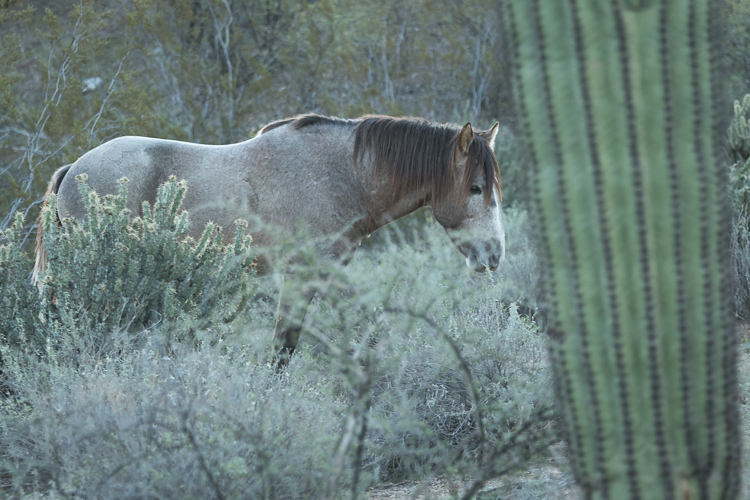
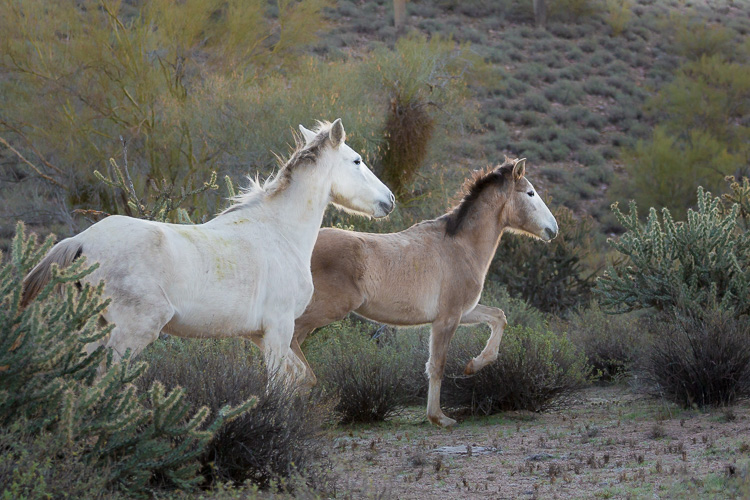
    While this image wouldn’t have made the cut because of the awkward composition, the horse is also a bit blurry because my ISO was too low, allowing my shutter speed to lag. It wasn’t fast enough to freeze the motion of the moving horse. ISO 800, 1/160th, f/5.6, 176mm.

    Increasing your digital ISO makes your camera’s sensor more sensitive to light, meaning you can shoot at smaller apertures and/or faster shutter speeds in low light conditions. Like film, increasing your ISO can create a grainier, noisier image. But unlike film, digital cameras have extraordinary ISO capacity. High-end cameras like the Canon 1Dx Mark II have an ISO capability of 51,200 expandable to 409,600! Sticking to ISO 400 is like pretending you’re still shooting film and disregarding all the recent digital technology advances.

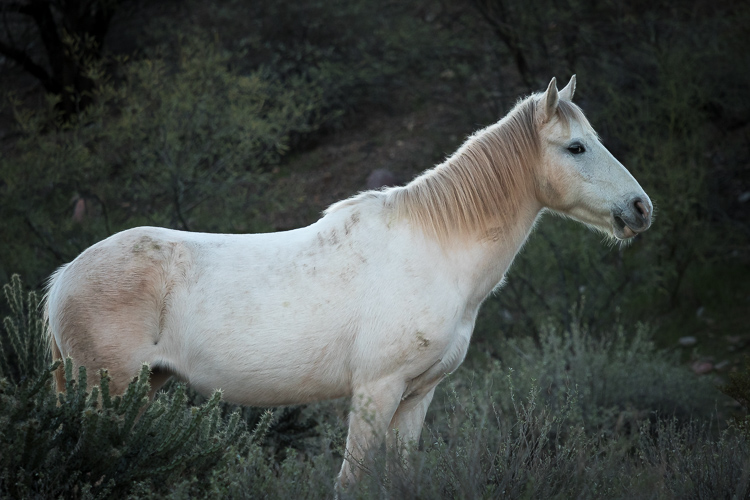
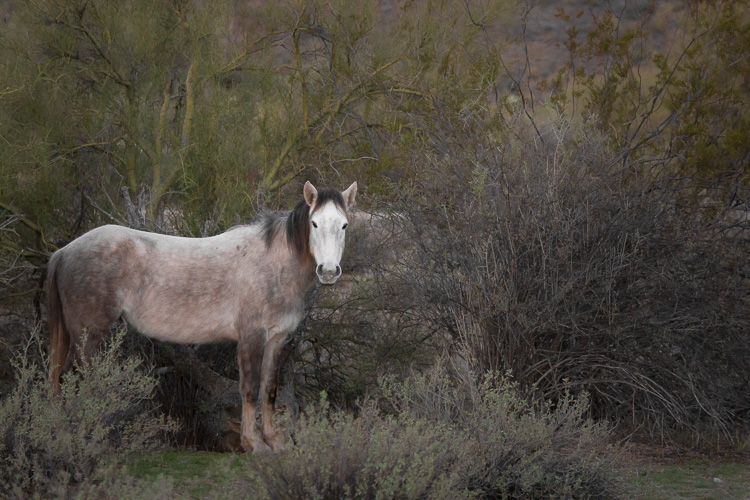
    Earlier this year I was in Mesa, AZ photographing the Salt River Wild horses at dawn. During blue hour, I started with my ISO too low, my shutter speed lagged, and I shot a whole series of blurry images (see image above). Purely by luck, at ISO 800, only this one didn’t have motion blur.

    Five Photography Tips to Ignore A

    ISO 800

    The next day, I started at ISO 12,800 to keep my shutter high enough to prevent motion blur, gradually decreasing my ISO was the sun grew brighter.

    Five Photography Tips to Ignore B

    ISO 12,800

    Five Photography Tips to Ignore C

    ISO 1250

    While these images might be noisier than those shot at ISO 400, noise is almost always preferred to motion blur. Digital noise can be managed, while an unintentionally blurry picture can rarely be saved.

    Setting your ISO to an unrealistically low value and leaving it there is the sort of advice or rule I’d encourage you to ignore.

    2. You never need to shoot faster than 1/500th of a second

    There’s a famous teaching photographer (I mentioned him here too) who says that you never need to shoot faster than 1/500th of a second. I ignore his advice too. Here’s why.

    Five Photography Tips to Ignore D

    Shutter speed 1/500th

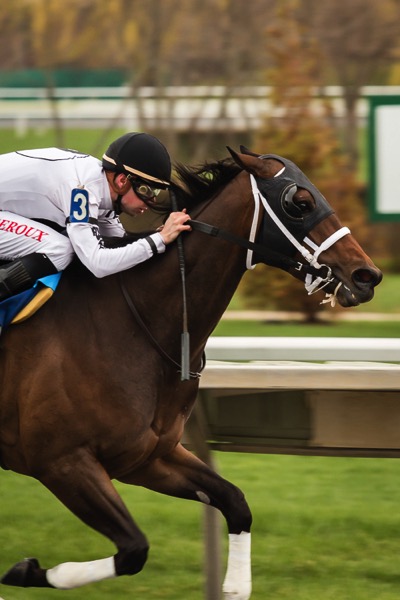
    This image, shot at 1/500th of a second, shows motion blur in the horse’s legs. Sometimes you may want to intentionally include motion blur in your images because it shows speed in a dynamic way, and in this case, that’s what I wanted. If I wanted no motion blur, I would need to have chosen a faster shutter speed.

    Five Photography Tips to Ignore E

    Shutter speed 1/640th

    This image, shot at 1/640th of a second, is sharper. It has very minimal motion blur in the legs but again, it still shows motion blur.

    Five Photography Tips to Ignore F

    Shutter speed 1/1000th

    If you shoot at 1/1000th and above, you can get crisp, blur-free images of fast-moving objects or animals in motion. In this image, even the water droplets are frozen in time.

    Depending on your creative goals, you may want to experiment and shoot from 1/100th, all the way up to 1/8000th of a second. That’s the reason to ignore this rule. Adhering to 1/500th of a second as your maximum shutter speed takes too many of your creative choices away from you.

    3. Serious photographers always use tripods

    Has your instructor or mentor told you that to be serious about making images, you must always use a tripod? That’s another piece of advice you might want to ignore, unless the type of work you make truly requires a tripod. Night photography, for example, typically requires a tripod because of the longer shutter speeds.

    Five Photography Tips to Ignore G

    Night photography – with a tripod

    Long exposure photography, astrophotography and shooting landscapes at dusk or dawn are all good examples of when to use a tripod in order to make excellent images.

    Macro photography often requires a tripod but sometimes doesn’t. This image was made hand-held.

    Five Photography Tips to Ignore H

    Macro photography – handheld

    Street photography never requires a tripod. The most serious street photographers I know use small camera bodies with prime lenses. What makes them serious is that they carry their cameras all the time and are always ready to shoot. For a street photographer, lugging around a tripod actually seems a little ridiculous, doesn’t it?

    Five Photography Tips to Ignore I

    Street photography – handheld

    I’m a very serious photographer and I almost never use a tripod. I have two: a Travel Flat Benro tripod and a Gitzo with a Really Right Stuff BH 40 Ball Head. I always have one in the car or in my suitcase, but I rarely use either one anymore.

    Does that mean I’m no longer a serious photographer? No, of course not. I travel all over the world to photograph horses and wildlife. I’m very serious about the images I make. The thing is, my images don’t usually require a tripod. Using one is sometimes even counterproductive when photographing fast bursts of action.

    When two wild stallions start to fight out in the desert, I begin to shoot while adjusting my body position to look for the best angles for the scene to improve my composition. Sometimes a wild stallion spat can last for mere seconds. If you had to pause to adjust your tripod, you’d likely miss the action.

    Five Photography Tips to Ignore J

    Wild stallions – hand-held. ISO 250, 1/800th, f/8 @ 98mm

    Being a serious photographer isn’t about the gear you choose to use or not use. Being serious is about making images with intention. Your intention might be totally different than the photographer using the tripod. If it is, ignore his advice to use one.

    4. Only shoot in Manual Mode

    Most of the professional, money-making photographers I know actually shoot in Aperture Priority so I think this rule is more the advice of old-fashioned, learned-on-film photographers. These photographers grew up using Manual Mode since that’s the only option that was available. They didn’t have the choice of Auto, Aperture or Shutter Priority Modes.

    So that’s the rub. You do have a choice. You also have stellar gear that is going to make the right exposure choice 90% of the time. Why not learn to use all the modes on your camera?

    At a cocktail party for your bestie’s 40th? Use Auto Mode to make sure you get the shot. Shooting fast action? Use Shutter Priority. Shooting in quickly shifting light? Use Manual Mode and set your ISO to Auto. Shooting a portrait? Experiment with Aperture Priority and then give your camera’s Portrait Mode a try.

    Five Photography Tips to Ignore K

    Self-portrait shot in Portrait Program Mode. 100, 1/100th, f/3.5 @ 50mm

    Cameras today have amazing functionality. Anyone telling you to exclusively use Manual Mode may have different photography goals than you do. If your goal is to make sure you make the best images possible, ignore their advice and learn all of your camera’s capabilities backwards and forwards.

    5. Only shoot in your lens’s sweet spot

    If you’re keeping track, by heeding all of this well-intentioned advice, your camera is in Manual Mode and attached to a tripod. Your ISO is set at 400 and you’re using a maximum shutter speed of 1/500th. There has to be a rule about aperture and focal length too, right? There is.

    The sweet spot is a combination of the aperture and focal length where your lens functions at its absolute best. If you’ve read reviews about zoom lenses you may have read something along the lines of; “Wide open at f/5.6 at the maximum focal length of 400mm, the corners get soft and there’s a noticeable loss of sharpness throughout.” Photographers write reviews like that so that you can avoid shooting in the so-called soft end of your lens and gravitate towards its sweet spot.

    You can evaluate the sweet spot of your lens by making a series of images of the same subject, in the same lighting conditions, using each aperture at every focal length and comparing the results. (Read: How To Find Your Lens’ Sweet Spot: A Beginner’s Guide to Sharper Images for a full description of how to do this.) That sort of evaluation sounds soul-crushing and unnecessary to me. If you buy a zoom lens, you’re buying it because you need that focal length in your bag. Why run a test on your lens that might make you hesitate to use it at its maximum focal length?

    Five Photography Tips to Ignore L

    The real sweet spot is making images that feel right to you. ISO 2500, 1/80th, f/4.5 @73mm

    Instead how about learning the capabilities of your lens by truly using it? Over time, you may gradually learn that the sweet spot is 100mm at f/8, because every image you shoot at that aperture and focal length is amazing. Rather than avoiding the rest of your lens’ focal length range and aperture combinations, you can shoot a second image using the sweet spot. If there isn’t time to shoot a second image, that’s okay. Just be grateful you had a lens capable of capturing the image at all.

    Bottom line

    The bottom line is that as you progress in your photography journey, you get to make the decisions. What advice and rules will you follow, and which will you toss out?

    Be disagreeable with me! What photography rules have you been taught that you ignore now? Please share your experience in the comments below.

    googletag.cmd.push(function() {
    tablet_slots.push( googletag.defineSlot( “/1005424/_dPSv4_tab-all-article-bottom_(300×250)”, [300, 250], “pb-ad-78623” ).addService( googletag.pubads() ) ); } );

    googletag.cmd.push(function() {
    mobile_slots.push( googletag.defineSlot( “/1005424/_dPSv4_mob-all-article-bottom_(300×250)”, [300, 250], “pb-ad-78158” ).addService( googletag.pubads() ) ); } );

    The post Five Photography Rules You May Want to Ignore by Lara Joy Brynildssen appeared first on Digital Photography School.


    Digital Photography School

  • Adobe announces Reuters partnership, Creative Cloud app updates

     Adobe Stock brings Reuters images like this one straight into Creative Cloud.

    Adobe is teaming up with Reuters in an effort to strengthen its Stock app offerings. The move will bring Reuters entire video and still editorial collection into Adobe Stock, where users can license content directly within Creative Cloud. The company also announces a name for its machine learning and AI-based technologies: Adobe Sensei. Driving features like ‘content-aware face liquify,’ Sensei is also behind a new visual search tool that allows Stock users to search for images with similar content or a look and feel that matches a particular image.

    Photoshop CC users will get a new universal search tool, and updates to Premiere Pro CC aim to make creating VR and 3D content easier. A new social publishing panel in Premiere Pro will facilitate video sharing and data analysis within the application. Design professionals will be most interested in the rest of Adobe’s CC updates introduced leading up to the company’s MAX conference, as Adobe Experience Design brings Photoshop tools like layers to an app for UX designers, and Dreamweaver CC gets an interface update. Photoshop Fix, Photoshop Sketch and Adobe Comp CC apps also see an Android release.

    Articles: Digital Photography Review (dpreview.com)

  • Olympus OM-D E-M1 II will ship in December for $2000 body-only

    Olympus has taken wraps off availability and pricing details for its flagship OM-D E-M1 II. Announced at Photokina, the E-M1 II will cost $ 2000 body-only and is set to ship at the end of December. The E-M1 II’s predecessor was introduced just over three years ago and started at $ 1400 body-only.

    That $ 600 premium buys some notable advancements including a faster processor, 20.4MP sensor with 121 phase-detection AF points and a stabilization system claiming an unearthly 6.5 stops of shake correction. Like the Mark I, the E-M1 II is built to withstand hostile conditions with a dust, splash and freeze-proof design. 

    Read our Olympus OM-D E-M1 II
    Shooting Experience

    Press release:

    REVOLUTIONARY CAMERA PERFORMANCE: THE OLYMPUS OM-D E-M1 MARK II ARRIVES

    The new flagship Micro Four Thirds® camera boasts world’s fastest sequential shooting1, superior autofocus accuracy, and world’s most effective image stabilization performance2

    CENTER VALLEY, Pa., — November 2, 2016 — Olympus announces that its new flagship camera, the Olympus® OM-D E-M1 Mark II, is set to go on sale at the end of December 2016 for the manufacturer’s suggested retail price of $ 1999.99 USD and $ 2499.99 CAD. The OM-D® E-M1 Mark II is the latest addition to the award-winning OM-D series and features incredible speed, outstanding image resolution and a host of new shooting features to meet the needs of the professional photographer.

    The OM-D E-M1 Mark II is equipped with the newly-developed high-speed TruePic VIII Image Processor, which is 3.5 times faster than the previous TruePic processor used in the OM-D E-M1, and a new 20.4 megapixel Live MOS sensor equipped with 121 points of cross-type on-chip phase detection and contrast detection AF. These technologies work together with the camera’s silent electronic shutter to provide full-resolution RAW images at up to an unprecedented 60 frames per second in AF and AE lock, and up to 18 frames per second with continuous AF and AE tracking.

    The OM-D E-M1 Mark II boasts a wide array of shooting features including the new Pro Capture Mode for lag-free shooting that enables the capture of split-second moments, a 50 Megapixel High-Res Shot Mode for images with incredible detail rivaling that of full-frame DSLRs, in-body 5-Axis Image Stabilization that provides up to 5.5 shutter speed steps of compensation performance3, and 5-Axis Sync IS that provides the world’s most effective 6.5 shutter speed steps of compensation2 when combined with the new M.ZUIKO® Digital ED 12-100mm f4.0 IS PRO.

    The OM-D E-M1 Mark II is weather sealed to be dustproof, splashproof and freezeproof (down to 14°F/-10°C) in a compact lightweight design, ideal for shooting in all types of outdoor conditions.

    Main Features

    1. High-Speed Sequential Shooting and Superior AF Performance

    Live MOS sensor and TruePic VIII Image Processor
    The newly developed high-speed TruePic VIII Image Processor and a new 20.4 megapixel Live MOS Sensor works in concert with the camera’s electronic shutter to provide full-resolution images at a maximum 60 frames per second in AF and AE lock, and up to 18 frames per second with continuous AF and AE tracking.

    The TruePic VIII Image Processor boasts a dual quad core system with four CPU cores and four image processing cores to achieve image processing speeds approximately 3.5 times faster than the TruePic VII Processor. Because camera operation and image processing functions are carried out in unison, transfer speeds and menu operations are vastly improved over previous models. 

    Pro Capture Mode
    The new Pro Capture Mode provides lag-free shooting so users can capture high-quality full-resolution images at precise moments with no compromises. Using the silent electronic shutter, Pro Capture buffers a running series of JPEG / RAW images when users press the shutter release halfway. Then, by fully pressing the shutter button, users can capture that moment’s image plus up to 14 previous frames all at once.

    Advanced Dual FAST Autofocus
    The advanced Dual FAST AF automatically chooses between on-chip phase detection AF and contrast detection AF, or utilizes both phase and contrast detection simultaneously. This system boasts 121 cross-type on-chip phase detection focus points in order to dramatically improve accuracy. The simultaneous use of contrast detection and on-chip phase detection AF enables accurate focus in difficult lighting conditions, while a new moving subject tracking algorithm rapidly and continuously measures the subject-to-camera distance to precisely maintain focus. Finally, the in-camera AF Limiter function is included to achieve faster focusing by limiting the focus range of the lens, thus preventing time-consuming focus hunting.

    Autofocus functions such as AF Target Mode4, AF target position and face/eye priority AF are easily set with a single button press. AF operations are enhanced with a new subject-tracking Cluster Display, which illuminates active sensors to assure the user of focus-subject accuracy. The AF Targeting Pad feature allows users to select the AF point by sliding their finger on the rear touch LCD monitor while looking through the viewfinder.

    High-magnification, high-speed electronic viewfinder
    The performance of the 1.48x (35mm equivalent) high-magnification, high-resolution electronic viewfinder rivals those of professional full-frame interchangeable lens cameras. With high-speed operation that includes a maximum refresh rate of 120 fps and a minimum response time of five milliseconds, users never lose track of fast-moving subjects.

    High-speed response
    The significantly improved shutter release lag time, now reduced by approximately 30% from that of the previous model, facilitates response time so users never miss a photo opportunity. In addition, frame-advance speed during playback is approximately three times quicker for faster scrolling and review of images.

    2. Outstanding Portability and Reliability

    A compact, lightweight system with excellent portability
    The OM-D E-M1 Mark II features weatherproof construction in a compact and lightweight design. Coupled with an Olympus M.ZUIKO lens, the OM-D system is extremely compact, providing the ultimate in portability for shooting and transportation. Handheld super-telephoto shooting is possible with the M.ZUIKO Digital ED 300mm f4.0 IS PRO lens (600mm focal length in 35mm equivalent), and this camera and lens combination is compact enough to store in carry-on luggage when flying.

    Weatherproof construction and Super-Sonic Wave Filter dust reduction system
    The OM-D E-M1 Mark II features high-performance weather sealing for excellent dustproof, splashproof and freezeproof (down to 14°F/-10°C) performance so that users can shoot in the harshest of conditions. This weatherproofing is not limited to the camera body alone: it is extended across the entire OM-D system, including the dustproof, splashproof and freezeproof M.ZUIKO PRO lens lineup5. In addition, a Supersonic Wave Filter (SSWF) dust reduction system vibrates the image sensor more than 30,000 times a second to virtually eliminate any dust that may land on the sensor while changing lenses.

    High-performance shutter
    A newly developed shutter is rated for 200,000 actuations6 to withstand consistent daily use in professional environments. Floating shutter construction is employed so that shutter shock is not easily transmitted to the camera body.

    Dual memory card slots
    The OM-D E-M1 Mark II features dual memory card slots to allow simultaneous use of two SD cards for more versatile shooting. The slots are positioned in a staggered layout, making cards easier to insert and remove. Users can select from four settings: Standard Mode records to the specified card; Automatic Switching Mode automatically switches to the second card when the first card becomes full; Dual Independent Mode records to both cards according to the specified image quality setting assigned to each; and Dual Same Mode records identical files to both cards simultaneously. Slot 1 supports UHS-II and UHS-I cards, while Slot 2 supports UHS-I cards.

    High-capacity battery and rapid charger
    The new BLH-1 lithium-ion rechargeable battery has a capacity that’s approximately 37% higher than that of the BLN-1 used in the previous model, providing approximately 440 shots on a single charge (CIPA standards-compliant). The OM-D E-M1 Mark II displays the remaining battery life percentage on the rear monitor so users are not surprised by a depleted battery. Also, the new BCH-1 charger is 50% faster than the previous version.

    3. Exceptional Image Quality

    Higher resolution and improved dynamic range
    The new 20.4 megapixel Live MOS sensor offers 25% higher resolution than the previous model, and the absence of a low-pass filter further enhances image quality. A higher dynamic range7 improves the reproduction of highlight and shadow detail, and an anti-reflective coating on both sides of the sensor’s sealing glass further enhances contrast performance.

    Improved image quality at high ISO settings

    The newly-developed TruePic VIII Image Processor dramatically improves image quality when shooting at high ISO settings, making it possible to capture images with minimal noise. The normal sensitivity ISO (ISO AUTO) range has been expanded to ISO 6400 for greater flexibility in a variety of shooting scenarios, and Fine Detail Processing II ensures that no detail is lost due to oversharpening.

    ISO 64 equivalent ISO LOW setting
    The ISO LOW setting is equivalent to ISO 64, providing greater flexibility to shoot at wider apertures even in brightly lit situations, making it possible to achieve beautiful, shallow depths of field.

    50 Megapixel High-Res Shot Mode
    A High-Res Shot Mode utilizes the Voice Coil Motor (VCM) system of the 5-Axis Image Stabilization System to precisely shift the sensor in half-pixel increments while capturing a total of eight shots. The camera automatically composites the shots into a single 50-megapixel equivalent ultra-high resolution image8. This unique Olympus technology is a benefit for any still life photographer or anyone who requires ultrafine detail reproduction. The TruePic VIII Image Processor effectively suppresses blur due to subject movement, making it possible to utilize High-Res Shot Mode in a wide variety of shooting conditions, such as gently blowing grass, tree leaves or ocean waves. In addition to 80 megapixel RAW and 50 megapixel equivalent JPEG images, it is possible to select a smaller 25 megapixel equivalent file size.

    In-body 5-Axis Image Stabilization
    The Olympus OM-D E-M1 Mark II is equipped with the latest in-body 5-Axis Image Stabilization to compensate for all types of camera shake. An optimized correction algorithm boasts outstanding compensation performance with approximately 5.5 shutter-speed steps of compensation3. Also, when combined with Olympus lenses equipped with in-lens image stabilization, 5-Axis Sync IS provides the world’s most effective 6.5 shutter-speed steps of compensation2 for blur-free handheld shooting of stills and video.

    4. Stunning UHD Video Capture

    Digital Cinema Standard 4K videos
    The OM-D E-M1 Mark II supports Digital Cinema Standard 4K (4096×2060 pixels) video capture9 at a 24P frame rate and a bit rate of up to 237 Mbps for authentic movie production. The 20.4 megapixel Live MOS sensor provides a read speed three times faster than that of the previous model for effective suppression of movement distortion, resulting in sharp, clear image quality. The video-specific picture mode “Flat” is ideal for color grading and finishing the footage exactly as envisioned by the videographer.

    5-Axis Image Stabilization combined with electronic stabilization for video
    With four times the resolution of Full HD, 4K videos are easily affected by camera movement and typically require a tripod, mini jib, crane and other specialized accessories for movie recording. The OM-D E-M1 Mark II pairs its advanced 5-Axis Image Stabilization with electronic stabilization specialized for video (M-IS)10 to effectively reduce camera shake, making handheld 4K video capture possible. This outstanding image stabilization system allows videographers to easily shoot movies with virtually no visible camera shake. The camera’s rear vari-angle LCD monitor can be adjustable to the user’s preferred angle for shooting convenience.

    HDMI monitor connection and recording synchronization
    The HDMI monitor connection provides the ability to view live video output on a larger display while shooting. Users are able to select from Monitor Mode for an external monitor and Recording Mode to capture uncompressed video directly from the HDMI port. The OM-D E-M1 Mark II is equipped with a synchronization signal so that video recording to an external device can start or stop from the camera. A 4:2:2 external output is provided to meet a wider color correction range. An audio synchronization function makes it easy to synchronize audio recording when using Olympus’ Linear PCM Recorder LS-100 while recording video, and a Slate Tone function facilitates the syncing of recorded audio and video.

    5. Advanced Shooting Functions

    Silent Mode
    Silent Mode utilizes the silent electronic shutter to eliminate all mechanical noises while shooting. Silent Mode is especially useful for shooting in situations where noise of any kind is not appropriate, including stage performances, concerts and even sleeping children. Also, it is possible to deactivate the AF Illuminator, AF confirmation beep and flash for virtually silent operation.

    Focus Stacking/Focus Bracketing Modes
    Depth of field is especially shallow when taking macro photos, making it difficult to capture an image that is completely in focus from the foreground to background, even at smaller apertures. Focus Stacking Mode captures eight shots at different focal positions and composites them to form a single shot that is entirely in focus. The depth of field provided by Focus Stacking is far deeper than even the smallest aperture at close distances. Focus Stacking Mode is compatible with seven Olympus M.ZUIKO lenses for a variety of shooting scenes11.

    Focus Bracketing Mode automatically captures up to 999 shots with different focal points, allowing users to choose shots with the optimal focus point or use commercially-available software to composite all images into one picture with stunning depth of field.

    Live Composite/Live Bulb Modes
    Live Composite Mode is available for shooting fireworks and cityscapes against starry backgrounds. While using Live Composite, the exposure of dark areas remains constant, while areas of light that change during the exposure are updated, creating trails of light from stars or fireworks. Live Bulb and Live Composite Modes allow users to easily check the image on the LCD monitor in real time, instead of relying on intuition.

    Keystone Compensation
    The camera is equipped with Keystone Compensation for photographing architecture. Keystone Compensation digitally provides tilt and shift functions with all M.ZUIKO lenses, and because trapezoidal compensation may be applied simultaneously to both vertical and horizontal directions, it is possible to shoot various subjects in a wide range of situations.

    Tethered shooting with Olympus Capture
    Olympus Capture™ is now available in Version 1.2 and supports tethered shooting with the Olympus OM-D E-M1 Mark II. High-speed data processing and transfer via the USB 3.0 Type C port is four times faster than with Olympus Capture Version 1.1. A cable clip is bundled for securing and stabilizing the cable to a strap when the camera and computer are connected.

    Additional features

    • Customizable C-AF tracking sensitivity allows users to choose the best setting for their subject to optimize C-AF tracking performance.
    • AF Scan allows users to adjust the lens scan operation settings in low-contrast environments to prevent unnecessary hunting.
    • Preset MF lets users quickly set a preferred focus distance when using manual focus.
    • AF Home Settings is assignable to a customizable function button. Users are able to program their most frequently used AF target position, AF Target Mode and AF Mode as an AF Home setting.
    • Lowest Shutter Speed Setting on the camera allows users to predefine a minimum shutter speed so that the ISO sensitivity increases in low-light situations rather than slowing down the shutter speed. This is convenient for handheld shooting in low-light environments.
    • Users are able to back up customized camera settings on a computer so that they can be reapplied to the camera whenever necessary, which is especially useful for using the same settings on multiple cameras or maintaining settings after a firmware update.
    • Specify Folder function lets users select a folder as a recording destination and create new folders to make image editing and management easier.
    • Grid settings allow users to set a highly visible grid color for display as a guide when shooting in dark locations such as theaters.
    • The Date/Time/Second display lets users organize images by a second unit. This is an effective feature for high-speed sequential shooting.

    Optional Accessories

    HLD-9 Power Battery Holder
    This dustproof, splashproof and freezeproof power battery holder is specifically designed for the OM-D E-M1 Mark II. With the HLD-9, users have the power of one BLH-1 lithium-ion rechargeable battery in the camera body and a second one in the HLD-9. The rear of the HLD-9 power battery holder is equipped with the same directional pad, two control dials, two function buttons and shutter release, as on the camera body, for identical controls whether the camera is held in a vertical or horizontal position. An optional AC-5 AC adapter can be used for studio photography or other situations when using the camera for long periods of time.

    FL-900R Weatherproof High-Intensity Flash
    This is a high-intensity flash boasting a maximum guide number of 58m. This accessory on-camera flash has the highest sequential shooting tracking performance in its class at 10 fps12. It features a lightweight weatherproof design with a wireless RC mode for simultaneous control of multiple flash units, and supports Multi Flash, High Res Shot, Focus Stacking and Focus Bracketing Modes. The FL-900R is also equipped with a built-in LED light for recording videos. For additional details, please see the FL-900R press release.

    STF-8 Weatherproof Macro Flash
    The STF-8 is the world’s first macro flash built with dustproof, splashproof and freezeproof construction13. The flash heads and controller features a lightweight compact design. When combined with the Olympus OM-D E-M1 Mark II, Focus Stacking and Focus Bracketing modes are supported for flash photography, useful for capturing flowers, insects and commercial photos in the studio. The bundled adapter ring is compatible with the M.ZUIKO Digital ED 30mm f3.5 Macro, M.ZUIKO Digital ED 60mm f2.8 Macro and M.ZUIKO Digital ED 12–40mm f2.8 PRO. When using both flash heads the GN is 8.5m. In addition to a TTL Auto Sync Mode for precision control, users can set the flash in 1/3-step increments on the camera when in Manual Mode and in one-step increments with the flash dial. The main flash can also be used as a commander to control multiple flash units. The flash head angle is adjustable within a range of -60 to 40 degrees.

    RM-CB2 Release Cable
    This release cable with a pin jack terminal (2.5mm diameter) features a bulb lock function convenient for long exposures. The connector terminal features an L-shaped design ensuring a compact form when connected to the camera.

    PT-EP14 Underwater Case
    This compact underwater housing provides water depth resistance up to 60 meters. It provides a clear field of view to each corner of the screen, designed to be easy to hold to frame and zoom your shot easily. In addition, the PPO-EP03 Macro Lens Port provides compatibility with the M.ZUIKO Digital ED 60mm f2.8 Macro and M.ZUIKO Digital ED 30mm f3.5 Macro14.

    1. Sequential shooting speed as of September 2016, when using Silent Sequential Shooting H Mode S-AF.
    2. OM-D E-M1 Mark II with M.ZUIKO Digital ED 12-100mm f4.0 IS PRO, focal length: 100mm (35mm equivalent focal length: approx. 200mm); halfway release image stabilization: OFF; CIPA standard compliant, when correction is carried out on two axes (Yaw/Pitch); as of September 2016.
    3. OM-D E-M1 Mark II with M.ZUIKO Digital ED 12-40mm f2.8 PRO; focal length: 40mm (35mm equivalent focal length: approx. 80mm); CIPA standard compliant, when correction is carried out on two axes (Yaw/Pitch); as of September 2016.
    4. Four modes of AF targeting include the new 5-Point Cross, All Point, Single Point, and 9-Point Group.
    5. Dustproof, splashproof and freezeproof (-10°C) performance applies to the following non-M.ZUIKO PRO lenses as well: M.ZUIKO Digital ED 60mm f2.8 Macro, M.ZUIKO Digital ED 12-50mm f3.5-6.3 EZ and M.ZUIKO Digital ED 14-150mm f4.0-5.6 II.
    6. According to Olympus internal testing.
    7. As of September 2016, according to Olympus internal testing.
    8. In RAW+JPEG Mode, three types of images are saved including 50M JPEG, 80M RAW (ORF) and 20M RAW (ORI). 80M RAW images can be processed to 50M JPEG images on the camera. 80M JPEG images can be processed using Olympus Viewer 3 (64-bit OS). Please use a tripod.
    9. 4K video capture (3842×2160 pixels) also possible.
    10. The angle of view is narrowed when using electronic stabilization for movies (M-IS1).
    11. Lenses compatible with Focus Stacking Mode: M.ZUIKO Digital ED 7–14mm f2.8 PRO, M.ZUIKO Digital ED 8mm f1.8 Fisheye PRO, M.ZUIKO Digital ED 12–40mm f2.8 PRO, M.ZUIKO Digital ED 40–150mm f2.8 PRO, M.ZUIKO Digital ED 300mm f4.0 IS PRO, M.ZUIKO Digital ED 30mm f3.5 Macro and M.ZUIKO Digital ED 60mm f2.8 Macro.
    12. When paired with the OM-D E-M1 Mark II, at a flash ratio of 1/32.
    13. Among ring flashes and twin flashes currently on sale as of September 2016, according to Olympus research.
    14. Any lens with the appropriate diameter may be used with a commercially available step-up ring.
    Articles: Digital Photography Review (dpreview.com)

  • How to Go Beyond the Hero Image and Get Real Storytelling Photos

    Good photography is really about telling stories, and that’s where all the lessons of composition, juxtaposition, lines, and focus fall short. Compelling images tell compelling stories, but the hard part is recognizing that story. I’ll tell you a story of how I missed the opportunity to do that, and look at some ways you can add more storytelling into your photography.

    A bear story with a moral

    I was camped on a low tundra bench above a swift blue river in Alaska’s western Arctic. Our green canoes lay upside down next to the kitchen tent, and the willows along the river were flecked with the first autumn yellow. It was early when I crawled from my tent, stood and stretched. While still reaching skyward I saw another form rise from the tundra a stone’s throw away, a young grizzly giving me a curious look. I dropped my arms and turned just in time to see its sibling offering me a similar stare from a bit farther back. These bears were three-year-olds, spending their first summer away from their mother, ursine-teenagers, and just as troublesome. Unlike the many adult bears we’d encountered on our journey down the river, these two didn’t yet know to give humans a wide berth.

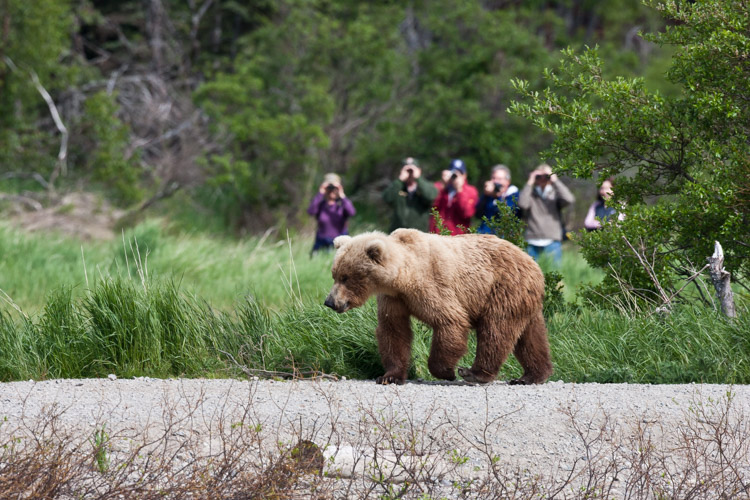
    In Katmai National Park at the famous Brooks Falls tourists are inescapable. In this image, I embraced that part of the story of being there.

    In Katmai National Park at the famous Brooks Falls tourists are inescapable. In this image, I embraced that part of the story.

    Safety first

    They backed off, after I shooed them with a wave of the arms, though not far enough. I woke my co-guide, and together we herded them away from camp and down onto the gravel bar below. One of the two young bears, rather than wandering off, decided to push my buttons and walked straight over. When off hiking or away from camp, you always give bears the right of way, but in camp, you can’t do that. Bears cannot learn that camps are places to explore.

    Standing on the low bench, I knew that I could not let this mischievous youngster enter our camp. I stepped forward as he approached, right to the edge of the cut bank, and started speaking to the bear in a low steady voice. “I can’t let you up here, you have to back off. Back off. Now.” The bear paused in its approach, then stepped forward again. I raised a can of strong pepper spray, and held it up, ready to fire. The bear took another step forward, and then another until he was just eight feet away.

    Hard lesson learned

    And that’s when I felt a sudden moment of regret. Not for my behavior around this young, dumb bear, (in that, I knew I was doing the right thing) but for the fact that my camera lay in my tent. This beautiful (if troublesome) beast was so close I could count his whiskers. What a photo-op I was missing! But I pushed that aside, and spoke again, “One more step and you are getting it in the face. Don’t do it”, I said. “I’ll give you a count of three, then you are getting sprayed. One. Two…” before I could say three the young bear thought better of his situation, turned and ambled back to the river, swam across with his sibling, and disappeared.

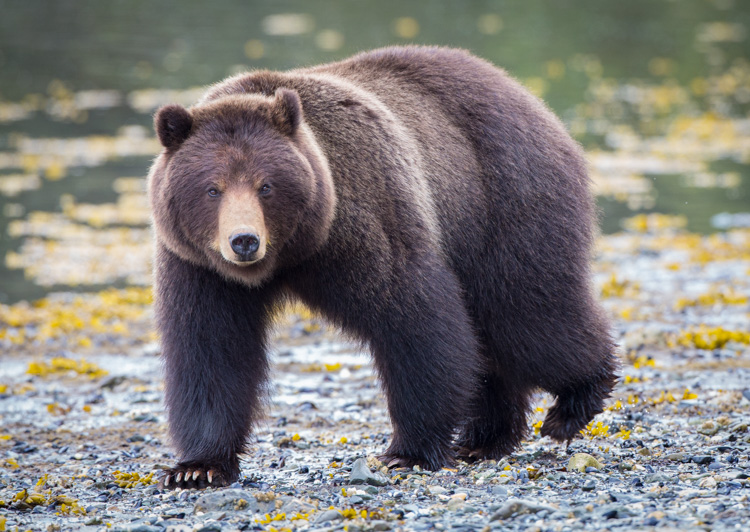
    Similar to the story I related above, this bear approached a group of photographers I was a part of on Admiralty Island, Alaska. He came very close, and I regret not taking a moment to show a wider shot with the group of us in the frame.

    Similar to the story I related above, this bear approached a group of photographers I was a part of on Admiralty Island, Alaska. He came very close, and I regret not taking a moment to show a wider shot with the group of us in the frame.

    Think outside the frame – the moral

    In retrospect, as I thought about the images I missed, I realized that it wasn’t the frame-filling portraits of the bear that would have been so spectacular about that moment. It was the story that went with it. Facing the bear down with a can of pepper spray, the bear testing us, and his eventual retreat. That’s where the compelling images were, not in the missed photos of the bear, but in the missed story that went with it.

    If I had a camera in that moment with the bear, even if I’d been on the sidelines, I know I would have blown it and gone for the wildlife portraits, missing the much more interesting interaction that was taking place.

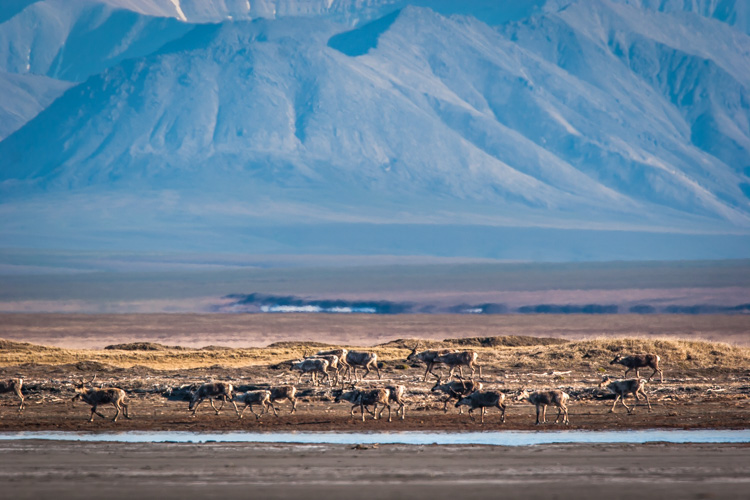
    Here a herd of caribou is seen migrating across the coastal plain of the Arctic National Wildlife Refuge in Alaska. This image tells a more important story of movement, landscape, and perspective than a more typical portrait of an animal would.

    Here a herd of caribou is seen migrating across the coastal plain of the Arctic National Wildlife Refuge in Alaska. This image tells a more important story of movement, landscape, and perspective than a more typical portrait of just an animal would.

    Learn from the best

    Take a look at any issue of National Geographic. Many, even most, of images that are selected are storytelling images, not illustrations. The compositions are atypical, often showing the interaction of people or animals within the scene. Those photographers stepped back from a typical composition and explored their surroundings in a way that most of us, myself included, usually forget to do.

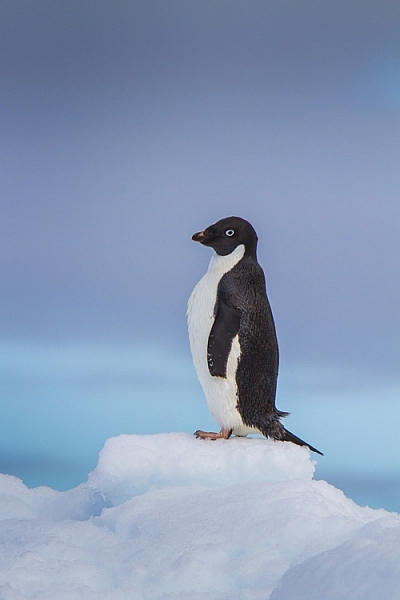
    This image of an Adelie Penguin on an iceberg, I made in Antarctica. Getting close to wildlife is easy there, and the following image provides information to see just how easy.

    This image of an Adelie Penguin on an iceberg, I made in Antarctica. Getting close to wildlife is easy there, and the following image provides information to see just how easy.

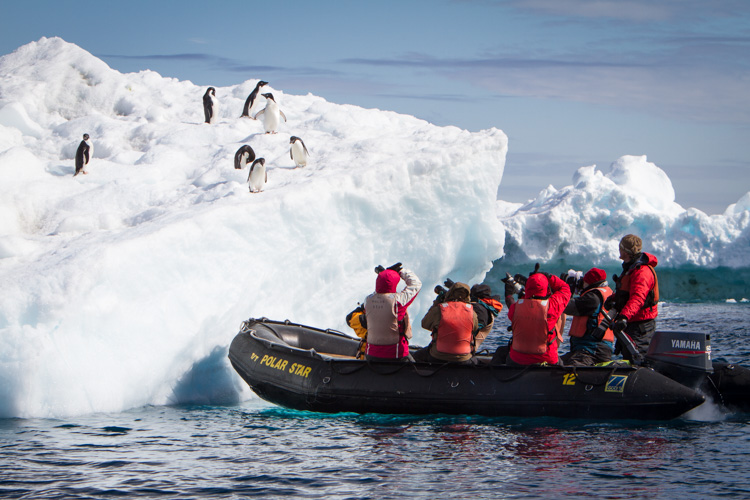
    A zodiac pull right up to an iceberg with Adelie Penguins.

    A zodiac pulled right up to an iceberg with Adelie Penguins.

    Look around

    This is an easy lesson to say, a much harder one to perform in the field because the real story is often easy to miss.

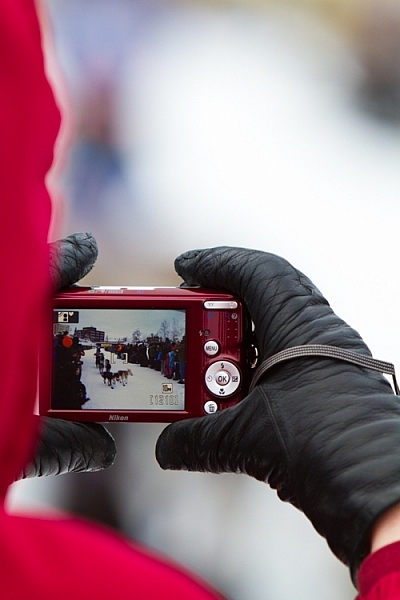
    Another example: I was photographing the start of the Yukon Quest sled dog Race in Fairbanks, Alaska, where I live, a few years ago. I’d been concentrating on the passing dogs, the smiling mushers, and been studiously avoiding the crowds of people that surrounded me. At one point a spectator raised a point and shoot in front of my shot, I was irritated, but in that moment I was forced to pause. It clicked, and I realized that the real story was the crowd of mushing fans, out on a cold morning to watch the race. I changed my composition and made an image of the spectator’s camera. That shot is much more telling of the experience than any of my previous photos.

    Here, the scene of the dog teams seen through a spectator's camera is more telling of the experience of the start of the Yukon Quest.

    Here, the scene of the dog teams seen through a spectator’s camera is more telling of the experience of the start of the Yukon Quest.

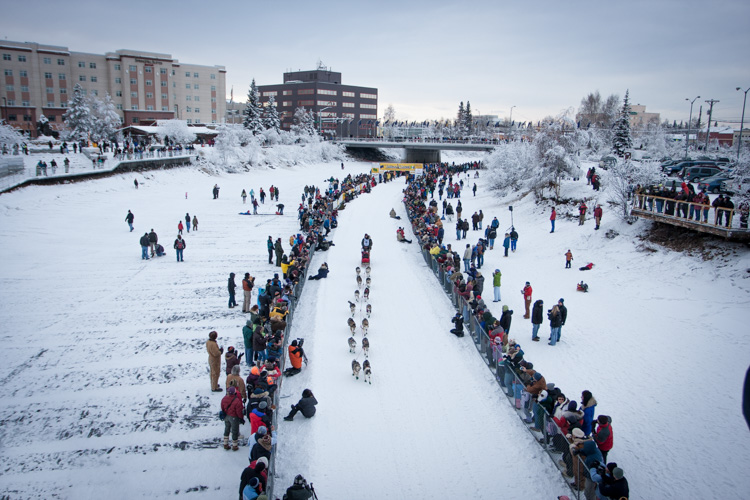
    This broad perspective is also an effective way to tell the story, showing the rows of spectators and the buildings of Fairbanks in the background.

    This broad perspective is also an effective way to tell the story, showing the rows of spectators and the buildings of Fairbanks in the background.

    Sometimes it’s a sudden realization like mine at the mushing race, but often, you have to put some effort into the real story. You need to break away from the scene you think you should be photographing, pause, and look around. Consider not just the scene, but the experience. What are you, or those around you, feeling, seeing, and doing?

    Stay open to your surroundings

    While being focused on your subject is vital to creating good images, it’s important not to close yourself off too much. Take the time to look around. Literally step away from your tripod, and turn 360 degrees while paying attention. What else is out there? Have you been missing anything as you’ve been staring through your viewfinder? What happens if you back up and show the surroundings?

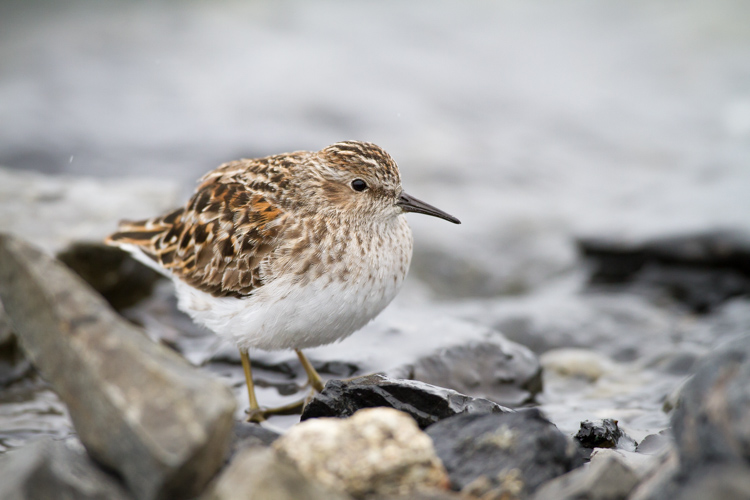
    While an image of single bird, in this case a Least Sandpiper is nice portrait, it is more of an illustration than a story.

    While an image of a single bird, in this case, a Least Sandpiper is a nice portrait, it is more of an illustration than a story.

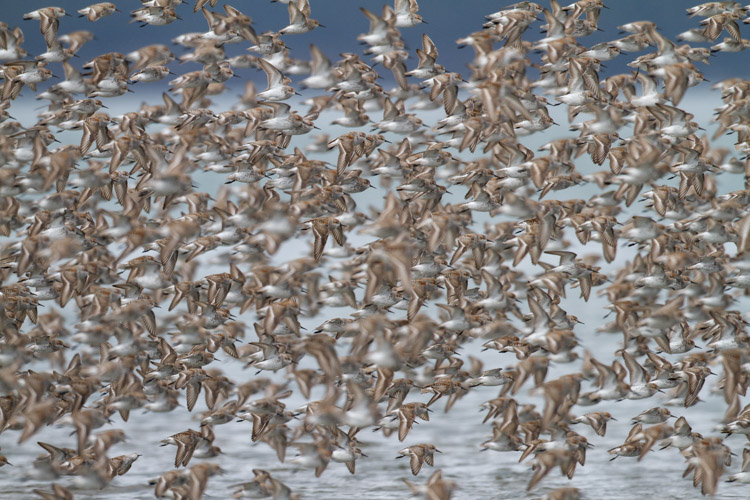
    A large flock of shorebirds, when compared to the single-bird portrait, is more telling of the lives of the birds, and their epic migrations.

    A large flock of shorebirds, when compared to the single-bird portrait, is more telling of the lives of the birds, and their epic migrations.

    Think in terms of stories

    That real story can be told within a single image, but there are also other strategies. Though an entire article is required to discuss the photo essay (5 Tips for Creating a Photo Essay with a Purpose), I do want to note that you can always think through your story using a series of images. This is also a good way to make the classic images you strive for while simultaneously capturing the storytelling ones as well.

    Telling the real story is important not just for the quality of our images, but also for the quality of our experience. These storytelling images may not have the flash and glamor of a bear portrait or a sprinting sled dog, but it will help your viewers know the story, and that really is where the real excitement lies.

    googletag.cmd.push(function() {
    tablet_slots.push( googletag.defineSlot( “/1005424/_dPSv4_tab-all-article-bottom_(300×250)”, [300, 250], “pb-ad-78623” ).addService( googletag.pubads() ) ); } );

    googletag.cmd.push(function() {
    mobile_slots.push( googletag.defineSlot( “/1005424/_dPSv4_mob-all-article-bottom_(300×250)”, [300, 250], “pb-ad-78158” ).addService( googletag.pubads() ) ); } );

    The post How to Go Beyond the Hero Image and Get Real Storytelling Photos by David Shaw appeared first on Digital Photography School.


    Digital Photography School

  • Olympus E-M1 Mark II Iceland sample gallery

    From waterfalls to the Northern Lights, Iceland is full of natural beauty. And, in October, lots and lots of rain. We’ve put together a sample gallery of photos taken over four days with Olympus’ new OM-D E-M1 Mark II on a company-sponsored trip.

    Articles: Digital Photography Review (dpreview.com)

  • A Simple Way to Conquer Your Fear of Street Photography

    Frustrating, isn’t it? You are ready to go out, your camera is in your hands, it’s a nice day outside and once you actually go where people are….panic starts settling in. It’s that old fear of street photography.

    It’s almost like, as soon as you start putting the camera to your eye, your heart starts beating faster and you start sweating. You can’t think about the picture anymore, it’s gone. You are pretty sure you can get a nice shot if only you could get close enough. But you chose to play it safe and settle for some wide angles where everyone is pretty far away.

    fear-street-photography-2

    That, my friends, is called the fear of street photography. And if you are reading this, I am pretty sure you want to get rid of it, right? The good news is, you not only can, it’s actually probably not the way you think. Oh, and take it from a guy that couldn’t even look his own older brother in the eye.

    But before diving into the logistics of fear, let’s get two things straight and out of the way first.

    1 – Getting closer means nothing

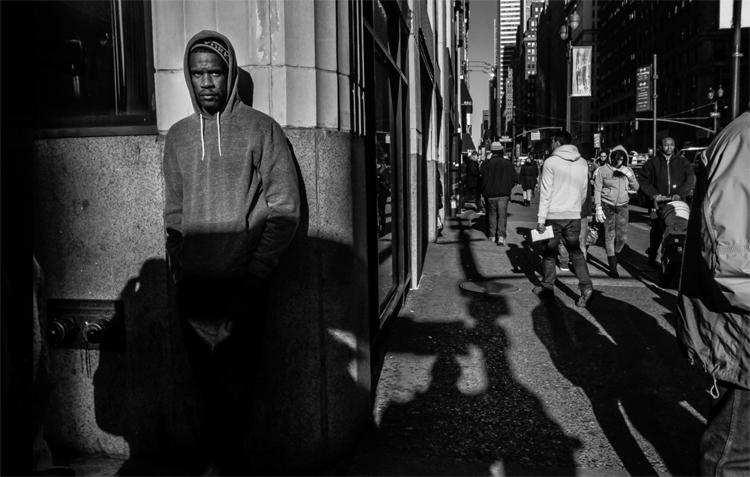
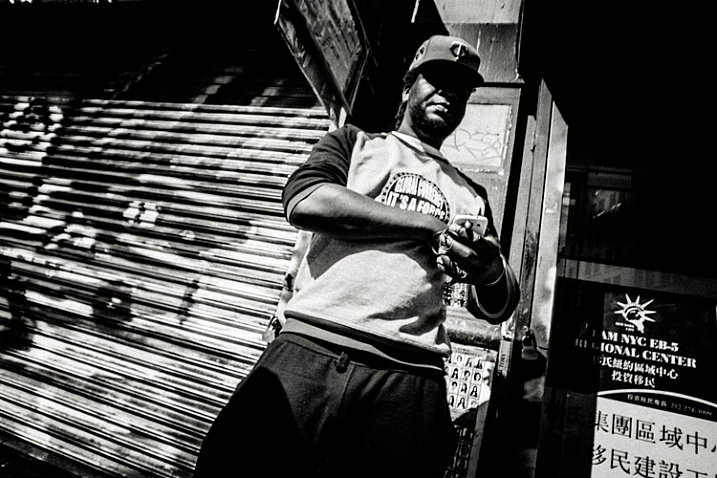
    There’s an unspoken creed amongst street photographers, it’s the notion that that you always need to be close for it to be a good image. While it is probably better to be closer than not, that’s just one thing. A bad image is a bad image, whether it’s close or far away. Just getting close won’t magically make an image good. Look at the image below, I’m not particularly close to the guy in the middle and he’s not even facing me!

    fear-street-photography-3It’s not just about getting close. There are far away images that are great and very close images that are the epitome of boring. If anything, you might NOT want to get too close to people, so that you can include them and their surroundings. All of this to say what? Street photography is an art form, it’s about images, and getting closer sometimes has no bearing on the final results!

    2 – A smaller camera is better

    Some cameras bring more attention to them than others. No one would really notice a pocket camera, but pull out a double battery DSLR with a large lens and you will be noticed. So, use a small camera, it’s de facto less attention on you, at least for the time being.
    With that being said, let’s get to the nitty gritty of fear!

    fear-photography-1

    People don’t really care about what you do

    Sorry to break it to you. You are not so important that all the people in the street want to do is to notice you. Except if you are Brad Pitt, or Beyonce. If you are, call me! If you are just a regular Joe like the rest of us, the bottom line is this; people just don’t care about you. They care about themselves, and it’s easy to prove. Just go out in the streets without a camera and ask yourself how many of these people actually notice you.

    Hint: Very few, most likely none will notice you.

    Psychology tells us we all have something called the spotlight effect, where we believe a spotlight on us, that everyone notices us, but that is not the case, it’s just how we feel. But it’s not the same when you have a camera with you and near, right? Yes and no. Again, most people won’t notice you with a camera, but even if they do, what’s the problem?

    fear-street-photography-4

    Why you fear street photography

    What’s the problem if people notice you taking a picture of them? Well, let me ask you a question. Don’t worry, it relates to the matter at hand. Do you feel guilty when your boss pays you? The answer (except if you are doing something fishy) is probably NO. Because you exchanged value for it. Your time and skills in exchange for his/her money, nothing wrong there.

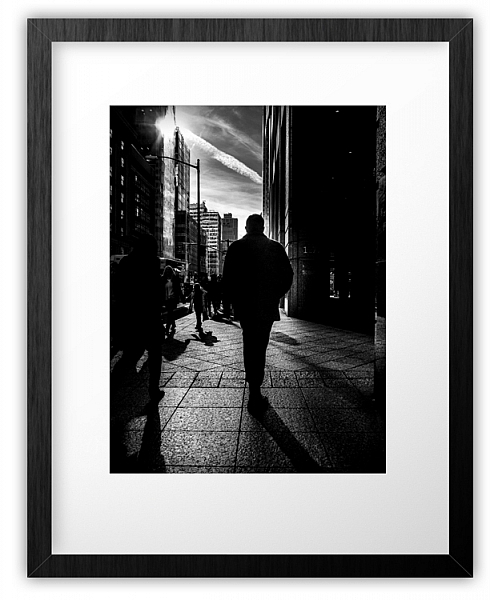
    But it’s not the same on the streets. There you feel like you are TAKING something from the person you are photographing. Something that is theirs, and you took it. That’s called stealing, right? So doesn’t it logically follow that you feel fear because you fear being caught at thievery? It’s easily proven. As soon as you ask for permission the fear dissipates because there is no more tension.
    street-photography-fear

    You fear because you think you are doing something inherently wrong. Let’s look at it in another way, do you feel any fear when just walking down the street? No, because you don’t feel you are doing anything wrong. Fear in street photography comes from fearing the reaction of others to your perceived wrong-doing. And between me and you, if I was stealing, I would feel fearful!

    The cure for fear

    The answer then is understanding the value exchange that happens on the street. You are not taking anything, you are making a photograph. You are creating something. Of all the people and things to photograph, you have chosen one person to make an image of them. You have acknowledged that person’s existence and importance.

    street-photography-fear-03

    Sounds cheesy? The photograph is the ultimate ego tool. Check your Facebook, everyone is clamoring for attention through their selfies. Why can’t you be the one that bestows that attention on them with your lens?
    Images are so powerful, that a Japanese photographer got carte blanche to photograph Yakuzas, Japanese mafia. Quite powerful, no?

    By making a photograph of someone, you are acknowledging their existence, something that every one of us needs and desires at a deep level of our psyche.

    fear-street-photography-5

    The exchange between you and the subject

    Go down the street, give a nod to someone. Smile, and say hello. You have just altered someone’s day with your acknowledgment. Images are like that, they are visual acknowledgment. Once you stop seeing what you’re doing (photographing them) as something that’s wrong and actually see it as something good by exchanging value (they get to participate in the making of an art piece in exchange for their photo) your outlook will start to change. And by doing so you change your way of approaching street photography and the fear will dissipate.

    The street photographer’s posture

    This is truly where the magic happens because here’s a truth – the street reacts to you. The way you are in the street will dictate how people react to you. That’s the whole secret. But wait. If that was the whole secret, why then did I write all of the stuff above? Couldn’t I just cut to the chase, get right to this part? The streets react to you, so it’s all about appearing confident, right?

    fear-street-photography-6

    Well, not really because I don’t believe you can fake it. I could tell you to go up and down the streets and act confident, to fake it till you make it so to speak. But I think people smell these things like a dog smells fear. If you think you are doing something wrong, it’s probably going to show in your posture and people will react accordingly.

    Street Karma

    Think about this with me – you look out your window and this guy is just strolling by your house, all happy go lucky. Then you look out your window once again and see this shady looking guy, looking right and left, as if he is doing something wrong. How are you going to react towards each one? Towards the first one you might even smile, but to the other, you may be ready to call the police.

    The same rule applies on the street, it’s called street karma. You will get out of it the energy that you put into it. And it’s no woo-woo stuff either. It’s because of mirror neurons, those things in your brain that make you tend to mimic others. The street reacts to you. That’s what makes the difference between getting a dirty look and a smile of amusement.

    street-photography-fear-04

    Conclusion

    As you have seen, people care less about you than you may think, and the streets react according to how you hold yourself. Act like a thief, be treated like one. But act like you are enriching the world, and people will react differently.

    Such things can be faked. It all comes from knowing that what we are doing in the street isn’t anything wrong. Indeed we are not thieves because as photographers we seek to simply interpret the reality that is in front of us with our lens. Now go out there and shine forth. Be yourself, stay focused, and keep on shooting.

    googletag.cmd.push(function() {
    tablet_slots.push( googletag.defineSlot( “/1005424/_dPSv4_tab-all-article-bottom_(300×250)”, [300, 250], “pb-ad-78623” ).addService( googletag.pubads() ) ); } );

    googletag.cmd.push(function() {
    mobile_slots.push( googletag.defineSlot( “/1005424/_dPSv4_mob-all-article-bottom_(300×250)”, [300, 250], “pb-ad-78158” ).addService( googletag.pubads() ) ); } );

    The post A Simple Way to Conquer Your Fear of Street Photography by Olivier Duong appeared first on Digital Photography School.


    Digital Photography School

  • How to Sharpen Your Photos using Lightroom and Nik Efex

    Do you want to take razor sharp photos? One of the best methods for creating tack sharp images is what I call The 20/20 Technique. It’s a process that combines the editing power of Adobe Lightroom and Nik Efex to sharpen your images.

    sharpen, photos, tips, photography, Lightroom, Nik Efex

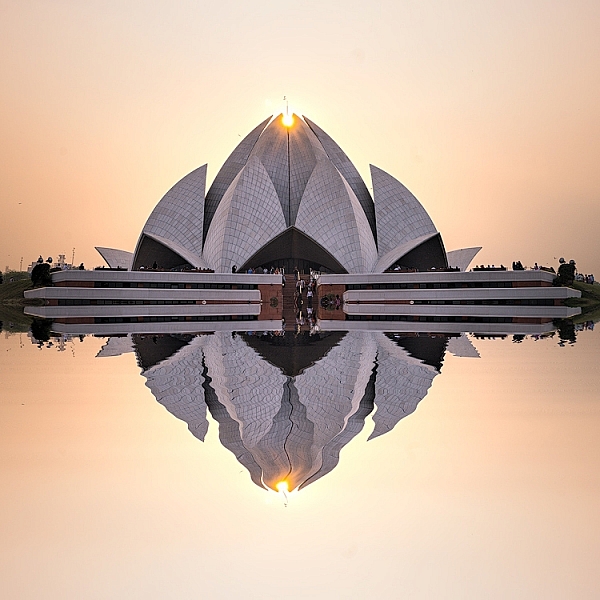
    Lotus Temple, Delhi: Bringing out sharpness in architectural photos can really make them pop. © Pete DeMarco

    Is sharpness overrated?

    The godfather of street photography, Henri Cartier-Bresson, once quipped, “Sharpness is a bourgeois concept.” It’s true that sharpness does not turn a bad photo into a good one. In fact, some of the greatest photographs of our time aren’t that sharp. A picture that evokes emotion will always win over an image that is technically great but lacks feeling.

    In the digital age, however, sharpness is another tool in the photographer’s kit that can transform an image from good to great. Have you ever seen a photo so clear that it makes you feel as if you could reach through the screen? It’s almost as if it’s not even a photograph at all but a window into another world.

    sharpen, sharper photos, tips, photography, Lightroom, Nik Efex

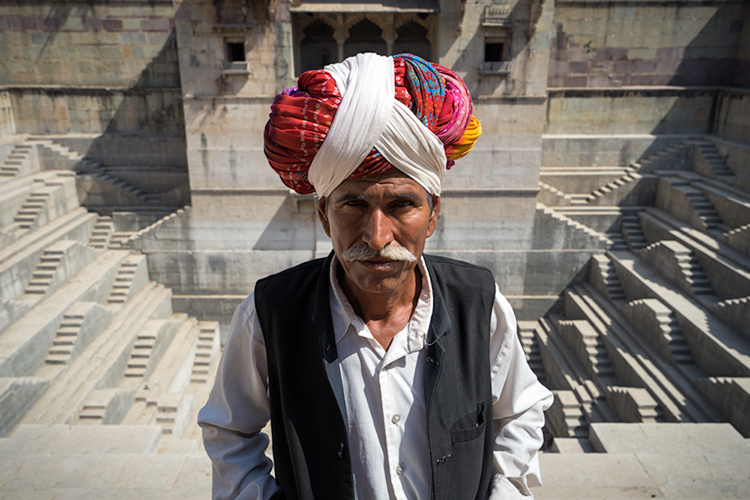
    Bundi, India: Be careful not to sharpen people too much. © Pete DeMarco

    Popular advice about getting sharp images usually centers around buying expensive lenses or having the proper settings in camera, as is explained in this article; How to Take Sharp Images. Although those two factors have a major impact on the overall sharpness of the image, today’s top photographers take an additional step. They enhance the sharpness in post-processing.

    Sharpen Using The 20/20 Technique

    In the modern digital darkroom, there are a number of ways you can add a superior amount of sharpness to your images. I’m going to explain one of the most simple and effective methods you can use to get incredible results. Here is my 20/20 Technique workflow:

    sharpen, photos, tips, photography, Lightroom, Nik Efex

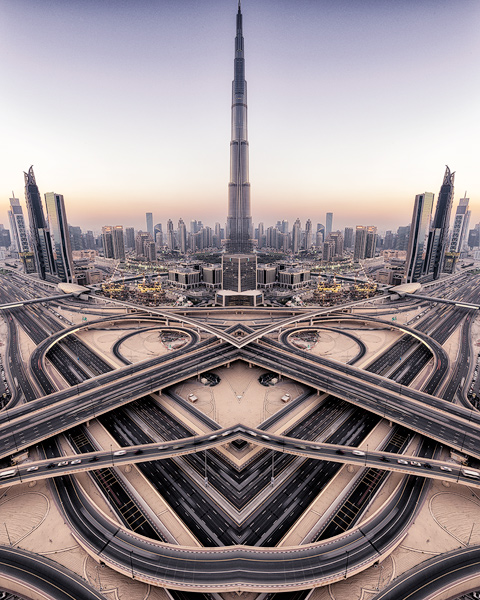
    Burj Khalifa Reflection, Dubai: Nik Efex is a powerful photo editing suite you can download for free. © Pete DeMarco

    Step 1. Open your image in LR

    Import your image into Adobe Lightroom (or the editing software of your choice). Open the Develop Module and go to the Detail Panel, then to Sharpening. Increase the sliders up to somewhere between 40 – 50. This is just a general number to start. You’ll have to decide what works best for your image (make sure to view it full size or 1:1). Then finish editing your photo (correcting the white balance, exposure, etc.).

    Step 2. Open the image in Nik Efex

    For the next step, you will need a piece of software called NIK Efex. You can download NIK Efex for free here. Look for the blue download button in the top-right corner.

    NIK Software is a company that develops image editing tools for others like Adobe and Google. In fact, Google bought the company in 2012. Then they copied the best editing algorithms from NIK Efex and created the photo editing app Snapseed. Sadly, NIK Efex has not been updated since then. Most assume it will die a slow death, especially after Google announced the software is now free.

    sharpen, photos, tips, photography, Lightroom, Nik Efex

    Busan, South Korea: Adding a slight tilt-shift blur effect to the edges of your photo can accentuate the sharpened areas. © Pete DeMarco

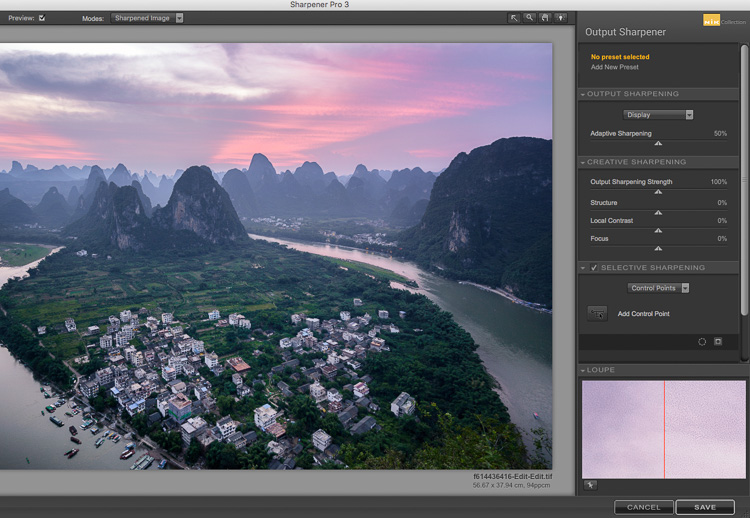
    Anyways, once you install Nik Efex, right click on your photo in the Lightroom Develop Module > Edit in Nik Output Sharpener, and choose; Edit a copy with Lightroom Adjustments. Your photo will then open in a new Nik Output Sharpener window.

    Step 3. Adjust using the Nik filters

    From the Nik Output Sharpener window, move the sliders until you get the look and sharpness you are after. For me, I usually leave the “Adaptive Sharpening” at 50%. Then I increase the “Local Contrast” and “Focus” sliders up to around 15-20%.

    Google, Nik Efex, sharpen, photograph, output

    The Nik Efex Output Sharpener interface.

    Step 4. Save and head back to Lightroom

    Click on “Save” and the final version of your image will import as a new file back in Lightroom. That’s it!

    Here is a video from Nik showing how to use this filter:

    Words of warning

    Don’t sharpen too much. Know when to pump it up or turn it down. For instance, clouds are soft so you usually don’t want to apply a lot of sharpening to them. Nature scenes usually call for less sharpening. With architecture, some extra sharpening really makes it pop (try adding a little “Structure” sharpening to those). Sharpening people can be hit or miss. It all depends on what you’re trying to achieve.

    sharp, photos, tips, photography, Lightroom, Nik Efex

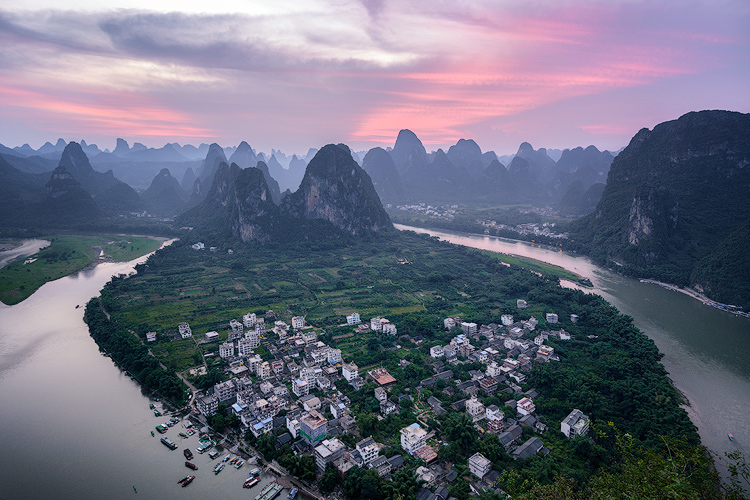
    Xingping, China: Selectively sharpening parts of your image, like the houses in the foreground of this photo, helps to lead the viewer’s eye. © Pete DeMarco

    Watch out for noise. The more digital sharpening you apply, the greater the noise in your photo. Just zoom in on your photo to see it more clearly. You can apply some Noise Reduction in Lightroom if need be. I don’t like to use it much though because it softens the image. Some noise really doesn’t matter anyways, especially if you are sharing your photo as a smaller size online.

    Make sure you’re using a good monitor. If you are viewing or editing your photos on an old monitor, it’s possible that you will not see much difference in sharpness. You can get the best results on a retina display or by printing your photos.

    sharpen, photos, tips, photography, Lightroom, Nik Efex

    Sipisopiso Waterfall, Indonesia: Transform your images by combining the 20/20 Technique with split toning. © Pete DeMarco

    Share your work

    Try the 20/20 Technique and share your photo in the comments below. I’d love to see what you do with it. And if you enjoyed this article, you might also like my previous article: How To Use Split Toning to Make Your Photos Stand Out.

    googletag.cmd.push(function() {
    tablet_slots.push( googletag.defineSlot( “/1005424/_dPSv4_tab-all-article-bottom_(300×250)”, [300, 250], “pb-ad-78623” ).addService( googletag.pubads() ) ); } );

    googletag.cmd.push(function() {
    mobile_slots.push( googletag.defineSlot( “/1005424/_dPSv4_mob-all-article-bottom_(300×250)”, [300, 250], “pb-ad-78158” ).addService( googletag.pubads() ) ); } );

    The post How to Sharpen Your Photos using Lightroom and Nik Efex by Pete DeMarco appeared first on Digital Photography School.


    Digital Photography School

  • 66 Degrees North: Olympus E-M1 Mark II Shooting Experience

    If there’s one thing I learned about the Olympus OM-D E-M1 Mark II, it’s that it can handle mother nature with the best of them. At an Olympus-sponsored press event in Iceland, the camera got pelted with rain, sleet, snow and hail, all of which occurred over a 20 minute period on more than one occasion. Despite both the camera and the photographer getting soaked, the Mark II kept on going.

    Black Beach near Vik. ISO 200, 1/160 sec, F5.6, Olympus 12-100mm F4 lens @ 100mm equiv. Photo by Jeff Keller.

    In most respects the E-M1 II feels very ‘Olympus.’ The controls aren’t radically different than other recent OM-D models, and the Super Control Panel (which is on by default) and a slightly restyled menu system are both there. The E-M1 II feels great in the hand and is well balanced. The build quality is superb, which I learned firsthand when the camera knocked the front plate off of the electronic lock on my hotel room door (oops).

    Icelandic horses. ISO 200, 1/160 sec, F4.5, Olympus 12-100mm F4 lens @ 132mm equiv. Photo by Jeff Keller.

    The E-M1 Mark II has an impressive 440 shots-per-charge CIPA battery life rating, though the battery drained a lot quicker than that in the roughly 4°C/40°F temperatures. Quite a few of my colleagues used the optional grip full-time, while I saved it for aurora shooting, where I really didn’t want the camera to run out of juice, since (ironically) I found it easier to hold the camera without it.

    Given its spot as Olympus’ flagship mirrorless camera, it should be no surprise that the E-M1 Mark II has two memory card slots, located on its right side. The top one supports UHS-II media, while the bottom one is UHS-I only. The UHS-II slot is noticeably ‘thicker’ than the UHS-I one, which is another way to tell them apart. For this trip, I set up the camera to put all videos onto the UHS-II card – a necessity when shooting at very high bit rates – and all stills to the UHS-I card.

    A break in the hail at Black Beach. ISO 200, 1/400 sec, F10, Olympus 12-100mm F4 lens @ 50mm equiv. Photo by Jeff Keller.

    Something that affected my shooting quite a bit was the Mark II’s overly sensitive shutter release button. This resulted in many unwanted photos and, in one case, my memory card became filled with 2000+ shots while using in the Pro Capture mode, because I was unknowingly shooting the entire time I was waiting for a geyser to erupt. Other members of the press echoed my concerns about the touchy shutter release.

    Skógafoss. ISO 200, 1/400 sec, F7.1, Olympus 7-14mm F2.8 lens @ 16mm equiv. Photo by Jeff Keller.

    While the E-M1 II’s big claim to fame is its advanced autofocus system, the Olympus event in Iceland was essentially all landscape photography. Our journey included a lot of waterfalls and geysers, plus some shooting around Reykjavik, but fast-moving subjects were scarce, so I can’t comment on how well that part of the AF system works. What I can say is that in single AF mode the Mark II was both responsive and accurate, though it did miss focus (in both front and back directions) on a few occasions with the 12-100 and 300mm lenses.

    Two features I got to test out were the Pro Capture and Live Time modes. The former works by buffering shots as you half-press the shutter release, saving up to 14 of them when you fully press it. My plan was to capture the moment a geyser erupted, but as mentioned earlier, I was actually recording images the entire time due to that oversensitive shutter release button. The fact that I chose the wrong geyser didn’t help matters, either. Another member of our group had better luck and got some great shots using Pro Capture, so maybe it was just me.

    Northern Lights over Reyjavik. In-camera Raw conversion (I’ll update when ACR is available). ISO 800, 21 sec, F2.8, Olympus 8mm F1.8 fisheye. Photo by Jeff Keller.

    I used the Live Time feature when shooting the Northern Lights, which unfortunately weren’t as strong as expected. Live Time is a long exposure mode that displays the current image at an interval of your choosing, so you can close the shutter when you’re happy with the result. For aurora shooting I turned on Live Time, set the 12-100mm lens wide-open at F4 and used an ISO value between 800 and 1600, depending on the current auroral activity. Just to be safe, I turned on anti-shock to prevent any shake caused by pressing the shutter release button. While the ‘show’ wasn’t great, Live Time was a valuable feature that made it easy to decide when to press ‘stop’ when the exposure looked right.

    I came back pretty satisfied with the photos I took on the trip, though I had to dump a lot of photos due to water on the lens (did I mention it rained a lot? Every time I wiped it off, more would appear.) I have no complaints about color, though at default settings JPEG noise reduction is higher than I’d like. Normally I’d pop the images into Photoshop and use ACR to tweak that to my liking (and bump up the shadows in a few of my photos,) but the only option at time of publication was converting the Raws in-camera. If you’ve used Olympus’ in-camera Raw conversion, you’ll know that it’s quite confusing, though I appreciate the addition of shadow/midtone/highlight correction.

    While I didn’t take a ton of video, I was impressed with the results. I shot exclusively at Cinema 4K (24p), which maxes out at 237Mbps. The bit rate never got that high, since it varies depending on your subject, but the quality was never in question. Despite Olympus’ claims of 5.5 stops of shake reduction, a few videos seemed a bit shakier than I was expecting. In continuous AF mode there was a bit of ‘hunting,’ but not enough to concern me.

    Gullfoss in Dramatic Tone. ISO 200, 1/100 sec, F5, Olympus 12-100mm lens @ 36mm equiv. Photo by Jeff Keller.

    The one thing that about the E-M1 II that remained a mystery until the very end of the trip was its price. Some of the group were guessing around $ 1500, while I was thinking $ 1800. As it turned out, the E-M1 II is a penny under $ 2000 — a full $ 600 over the MSRP of the original E-M1 and on par with the Nikon D500. That’s a lot of dough for a Micro Four Thirds camera and while my initial impressions of the camera were positive, I want to see how it performs in our tests – especially in terms of autofocus – to see if its worth the price.

    Sample gallery

    $ (document).ready(function() { SampleGalleryV2({“containerId”:”embeddedSampleGallery_2955274204″,”galleryId”:”2955274204″,”isEmbeddedWidget”:true,”standalone”:false,”selectedImageIndex”:0,”startInCommentsView”:false,”isMobile”:false}) });
    Articles: Digital Photography Review (dpreview.com)

  • Overview and Field Test of HoldFast Gear’s Money Maker Leather Camera Strap

    The camera strap is one accessory that has definitely evolved along with the photography industry. While the default strap that comes with every camera might suit your basic shooting needs, there are plenty of options available with enhanced features (and style). Some help you shoot more ergonomically by better balancing heavy gear across your body, and some just give you the appearance of looking like a more polished professional. This product review is a camera strap that meets both ergonomic and stylistic needs of today’s photographers: the Money Maker leather camera strap by HoldFast Gear.

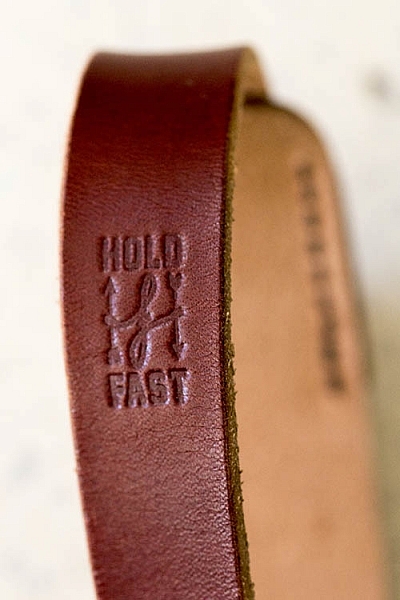
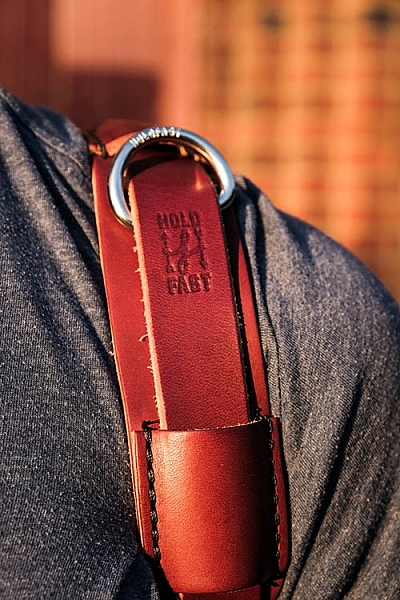
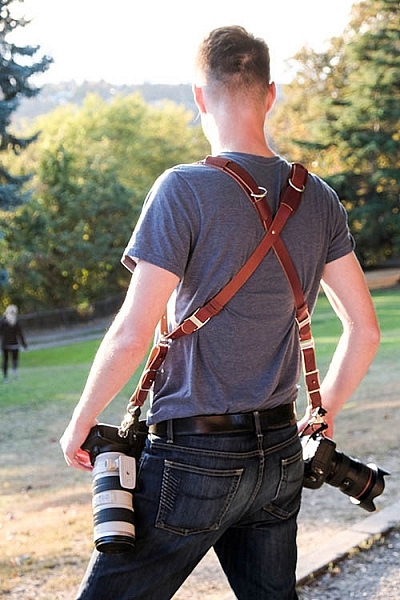
    best leather camera strap Holdfast Moneymaker Review

    About the MoneyMaker strap

    The MoneyMaker is one of several camera strap products created by HoldFast Gear founder Matthew Swaggart. As a photographer himself, Swaggart created his line of camera straps to efficiently carry his own camera gear and pocket items, while also maintaining a nice aesthetic. Beginning with his very first product, the RuckStrap, Swaggart’s brand is perhaps best known for the MoneyMaker leather dual camera strap. Based in Tulsa, Oklahoma, every single HoldFast product is made in the USA, and Swaggart has been known to openly collaborate with customers to design custom straps.

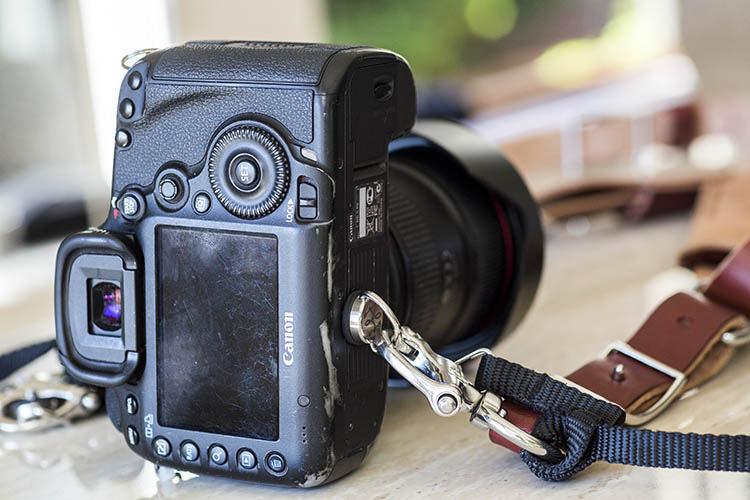
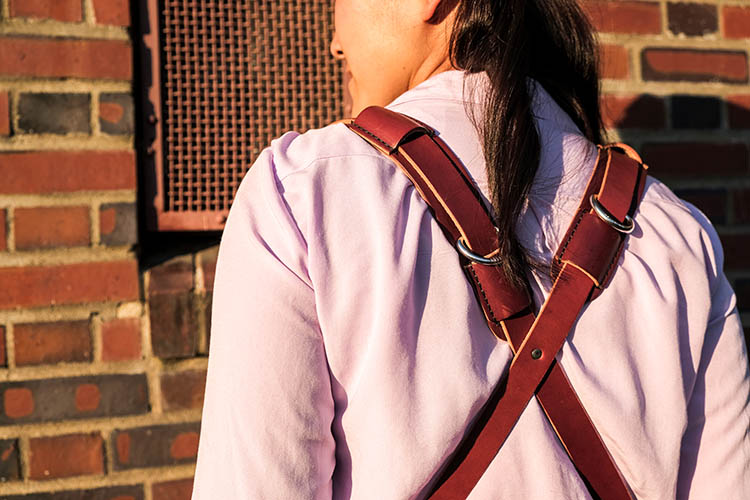
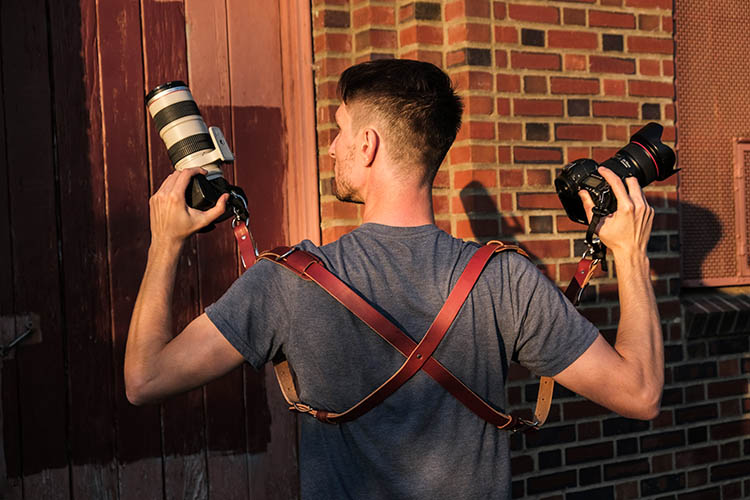
    best leather camera strap Holdfast Moneymaker Review

    Benefits of Dual (or Double) Camera Straps

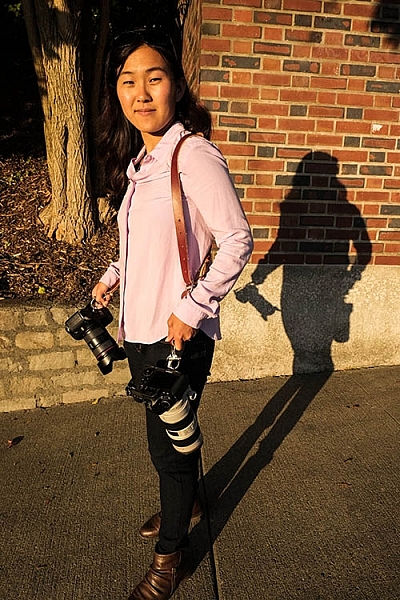
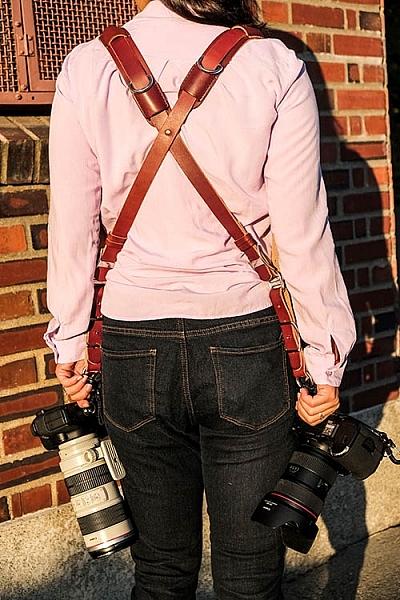
    While dual (or double) camera straps are already very popular among photographers who carry multiple camera bodies, many of them such as the popular Black Rapid Double have designs that resemble tactical SWAT team gear. As a petite female photographer using these dual camera straps, I’m frequently met with raised eyebrows and asked if I’m getting ready for battle.

    This is where the HoldFast MoneyMaker comes into play. Once I switched from Black Rapid to the MoneyMaker, I noticed even more raised eyebrows, but this time with the question, “Where did you get that beautiful camera strap?”

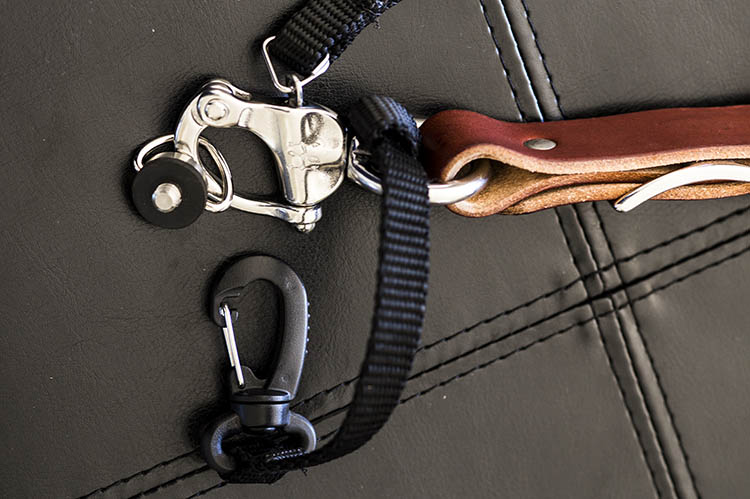
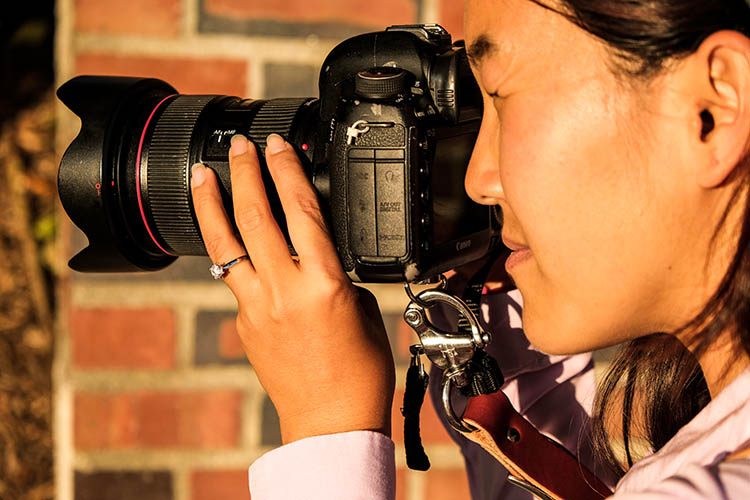
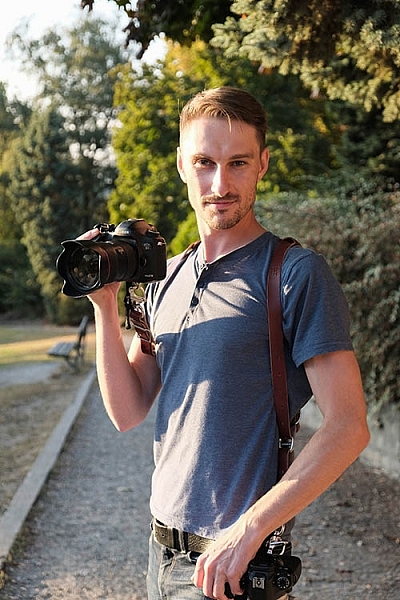
    best leather camera strap Holdfast Moneymaker Review

    MoneyMaker Basics

    Crafted from high-grade leather and metal fasteners and buckles, the MoneyMaker is worn like suspenders, with a camera suspended from each end. The design balances the weight of the cameras so they both hang down by your hips, and you can even attach a third camera to the front by using an optional attachment leash. One of the best features, that is lacking from competitors such as BlackRapid, is the MoneyMaker’s inclusion of a Safety Catch clip that adds an extra layer of security to your camera.

    best leather camera strap Holdfast Moneymaker Review

    If you’ve ever used a Black Rapid camera strap, the mechanics of the MoneyMaker will be very similar.

    1. Start by first putting on the MoneyMaker Straps, then fasten the HoldFast screws to the tripod mount of your camera.
    2. Next, attach the circular split ring from the Safety Catch to your camera. This can be a bit tricky for Canon DSLRs.

    best leather camera strap Holdfast Moneymaker Review

    MoneyMaker Options and Variations

    Textures

    There are several standard variations you can choose from with the MoneyMaker to make it more comfortable and stylish. First, the MoneyMaker comes in several different materials including English Bridle, Water Buffalo, Great American Bison, and even Genuine Python. Prices and color options vary according to the material you choose, with Bridle Leather being the lowest priced, and Genuine Python costing the most.

    best leather camera strap Holdfast Moneymaker Review

    For those preferring camera straps not made of leather, HoldFast offers the Camera Swagg collection featuring the same MoneyMaker design crafted from high-grade nylon. Slightly lighter in weight and more affordable in price compared to leather options, this ultra-light option also comes in a wider array of colors including copper, navy, red, and black.

    pratt_holdfast-gear-camera-strap_16

    If you want a truly unique, one-of-a-kind camera strap, you can even opt for the hand tooled, hand painted leather MoneyMaker. Each is custom made to order and results in a beautiful, functional piece of art that embodies the art of leather craftsmanship.

    Sizes

    All of the leather straps can be ordered in the Original (1 1/2″ wide) or Skinny (1″ wide with 1 1/2 inch removable shoulder pads) version. They also come in Small, Medium, or Large, depending mainly on your height and build, with optional D-ring metal loops that can add extra attachment options. As a 5’2″ petite female, I opted for the Bridle Leather MoneyMaker in Chestnut color, size Small, and the Skinny version with no D-rings (they are’t recommended if you have long hair). It was a perfect fit!

    best leather camera strap Holdfast Moneymaker Review

    My Experience Shooting with the MoneyMaker

    While the MoneyMaker is very popular among wedding photographers, I found it to be perfect for shooting concerts and corporate events as well. At concerts and music festivals, in particular, where leather camera straps aren’t yet prevalent, the MoneyMaker proved to be an excellent conversation starter among other photographers and concert-goers.

    best leather camera strap Holdfast Moneymaker Review

    When I shoot big concerts and events, I typically have the following camera setup:

    • (1) Canon 5D Mark III (B&H or Amazon pricing) with a 70-200mm f/2.8 attached  (B&H or Amazon pricing)
    • (1) Canon 6D (B&H or Amazon pricing) with a 24-70mm f/2.8 attached (B&H or Amazon pricing)
    • (1) 580 EXII Flash (B&H or Amazon pricing)
    • (1) Wallet with extra memory cards, batteries, and business cards

    Using the MoneyMaker to carry my two camera bodies, I also used a lightweight ThinkTank belt pack to carry my flash and wallet. This combination helps balance the weight in my upper body and allows me to emerge with zero back and shoulder pain after shooting a multi-day music festival and two corporate conferences.

    best leather camera strap Holdfast Moneymaker Review

    best leather camera strap Holdfast Moneymaker Review

    Things to Note

    While my experience with the MoneyMaker was highly positive, there are a couple things about this camera strap system to note.

    First, the use of all authentic leather makes the MoneyMaker heavy compared to the all-nylon systems of Black Rapid and other competitors. This isn’t a problem when you’re wearing and using the camera straps, but it can feel and appear somewhat intimidating right out of the box.

    best leather camera strap Holdfast Moneymaker Review

    Second, leather takes some time to break in, so the straps aren’t the softest and most supple at first. That doesn’t mean the straps aren’t comfortable, but you’ll need to use them frequently over time to get them to loosen up. Also, you’ll want to take extra care of the material if you go with a genuine leather camera strap option so it retains high quality.

    Over to you

    Do you have a certain camera strap that you prefer to use other than the default strap you automatically receive when you buy a camera? Is style as important as function when it comes to your ideal camera strap? What do you look for in a strap?

    Please share in the comments below.

    best leather camera strap Holdfast Moneymaker Review

    googletag.cmd.push(function() {
    tablet_slots.push( googletag.defineSlot( “/1005424/_dPSv4_tab-all-article-bottom_(300×250)”, [300, 250], “pb-ad-78623” ).addService( googletag.pubads() ) ); } );

    googletag.cmd.push(function() {
    mobile_slots.push( googletag.defineSlot( “/1005424/_dPSv4_mob-all-article-bottom_(300×250)”, [300, 250], “pb-ad-78158” ).addService( googletag.pubads() ) ); } );

    The post Overview and Field Test of HoldFast Gear’s Money Maker Leather Camera Strap by Suzi Pratt appeared first on Digital Photography School.


    Digital Photography School