Blog

  • Scrubbed: 10 Unclean Abandoned Soap Factories

    [ By Steve in Abandoned Places & Architecture. ]

    soap-factories-1a

    These abandoned soap factories sure look filthy… if only there was something that could scrub away the dirt & grime, making them look shiny and new again.

    soap-factories-1b

    soap-factories-1c

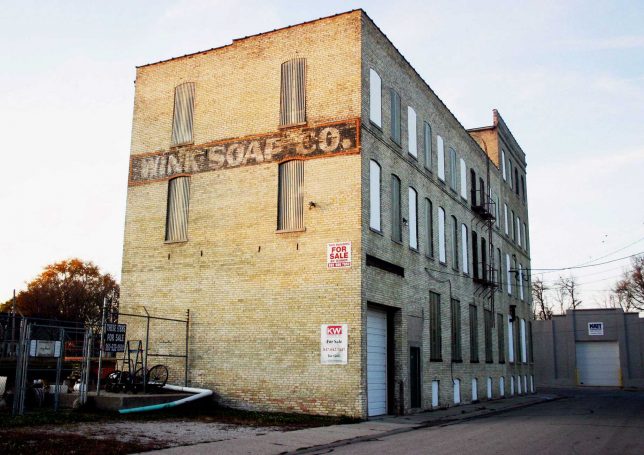
    The old abandoned Wink Soap Company building in Racine, Wisconsin was built in 1900 though Wink didn’t move in until 1938. The company then proceeded to make soap like it was going out of style – it wasn’t but Wink was, shutting down their soap-making operations in 1980. The building, still sporting its handsome though faded painted sign, looks like it closed fairly recently instead of 35-odd years ago.

    Hosed Down

    soap-factories-2a

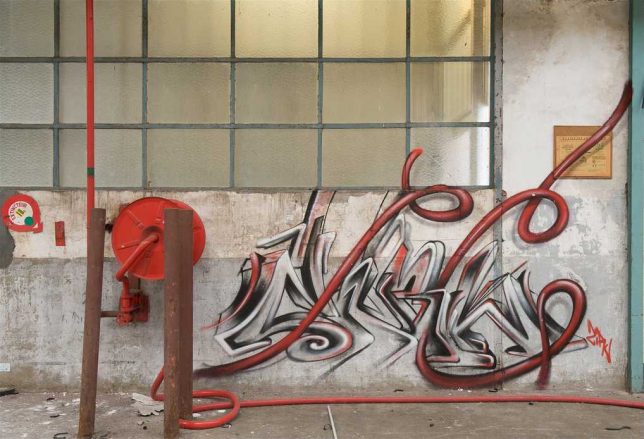
    This abandoned soap factory somewhere in France isn’t much to look at but within its bland decaying shell, a graffiti masterwork by the artist Ziru complements the factory’s detritus of hoses and rust. Kudos to Flickr user Romany WG who captured this ephemeral artwork for posterity in mid-October of 2011.

    Finnished

    soap-factories-3a

    soap-factories-3b

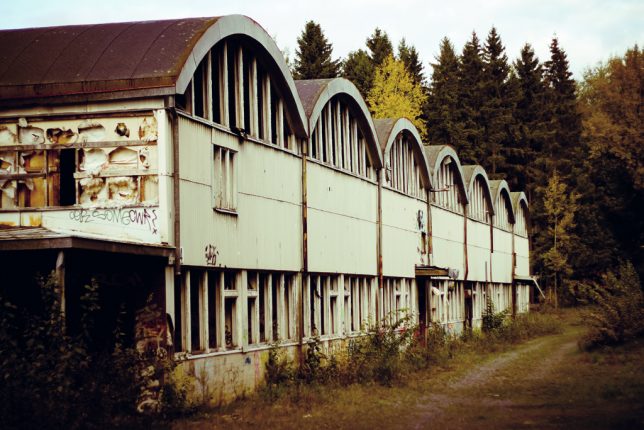
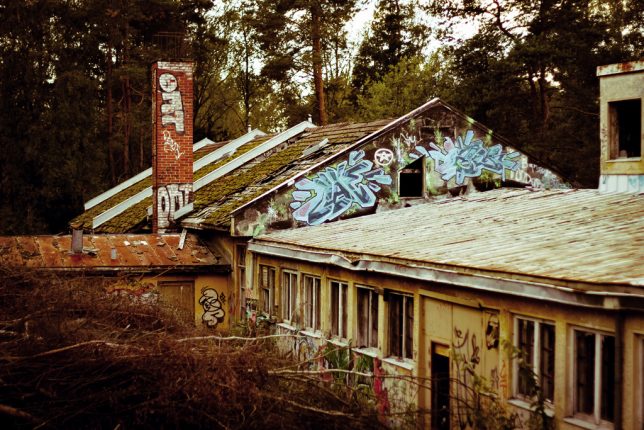
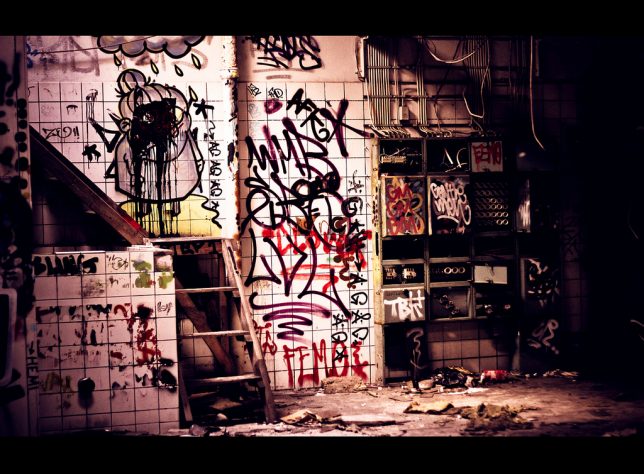
    This abandoned soap factory in Kaarina, southwestern Finland, is close enough to a major city (Turku, in this case) to attract graffiti artists yet isolated enough to let them do their deeds in relative privacy.

    soap-factories-3c

    soap-factories-3d

    It’s not known why the factory closed – supplying all those saunas must have been good for business. Kudos to Flickr user WIGILOCO for snapping these images and more on a visit to the factory in late 2010.

    Next Page – Click Below to Read More:
    Scrubbed 10 Unclean Abandoned Soap Factories

    Share on Facebook


    [ By Steve in Abandoned Places & Architecture. ]

    [ WebUrbanist | Archives | Galleries | Privacy | TOS ]


    WebUrbanist

  • Carry-everywhere convenience: Sony RX100 V samples gallery update

    Photo by Carey Rose

    The Sony RX100-series has always been about offering photographers better image quality than a phone without weighing them down or putting a kink in their necks – and the Mark V is no exception. Ours has been a constant companion, allowing us to take advantage of the last remaining flashes of autumnal Seattle sunshine. So in the course of putting the finishing touches on our full review, we’ve brought one more big update to our existing samples gallery – enjoy!

    Check out our RX100 V
    real-world sample gallery

    Articles: Digital Photography Review (dpreview.com)

  • Furniture Chopping: Converted Grocery Cart Chair & Couch Pair

    [ By WebUrbanist in Design & Furniture & Decor. ]

    converted shopping cart couch

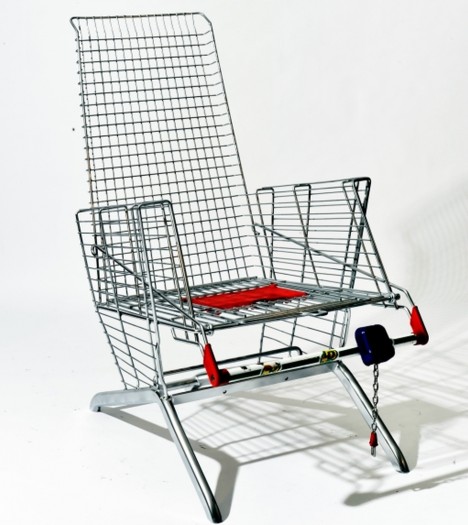
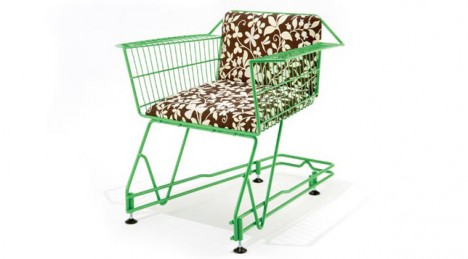
    Shopping carts are anything but sleek and modern, often dysfunctional and generally associated with a boring chore, at least until this (re)creator came along.

    shopping chair two

    Etiënne Reijnders is a Dutch designer who decided to test the stylistic limits of grocery carts, cutting, sawing, folding, forging and welding them into stunning new shapes.

    cart couch round two

    The resulting seats utilize almost all of the material from the original carts, carefully planned to minimize waste while also creating beautiful and functional seating.

    shopping chairss

    Reijnders is not the first designer to think of recycling everyday materials into furniture (the example above comes from another designer), but the results in his case somehow manage to bridge the gap between looking both like the recycled object but also something dynamic and new.

    Share on Facebook


    [ By WebUrbanist in Design & Furniture & Decor. ]

    [ WebUrbanist | Archives | Galleries | Privacy | TOS ]


    WebUrbanist

  • Watch thousands of books being re-shelved in a two minute time-lapse

    After a two-year closure for repairs, the Rose Main Reading Room at the New York Public Library re-opened earlier this month. That meant a whole lot of books had to go back on the shelves. Thankfully, the whole process has been documented in a totally engrossing time-lapse video that makes it look way easier than it actually was. Take a look at the video above, and head to the NYPL’s blog for more on the grand re-opening of their Rose Main Reading Room.

    Related: Photos of Cincinnati’s impressive ‘Old Main’ public library

    Articles: Digital Photography Review (dpreview.com)

  • Kipon launches EF to Sony E adapters with built-in variable ND filter

    Chinese lens and accessory maker Kipon has introduced an adapter that includes a variable neutral density filter, primarily for video shooters. The filter is placed between a Canon EF-S mount and a Sony E-mount body. The Kipon EF-S/E AF ND retains the autofocus and image stabilisation features of the lens, according to the company, and EXIF data is communicated so it can be recorded in the image files. The adapter also allows manual focusing of the lens to trigger MF assistance features of the camera – such as peaking or magnification.

    Kipon has produced adapters that contain graduated neutral density filters before but this is the first that has a variable ND filter. The filter is turned via a wheel that sticks out of the barrel and is marked with values between 1.5 and 7 f-stops. The idea of the adapter is that wide apertures can be used with shutter speeds appropriate for shooting video – as well as for stills shooters who want a shallow depth of field outdoors on bright days.

    The adapter features an EF-S mount, so that it can use both EF and EF-S lenses but covers the full frame image circle for use on a7 series cameras.

    The company suggests that the selling price should be 45,000 yen before tax, which is approximately $ 430.

    You can read more about the adapter, including camera compatibility, on this translated version of Japanese agent Focus Workshop’s website.

    Articles: Digital Photography Review (dpreview.com)

  • Nikon KeyMission action cameras now shipping in US

    The Nikon KeyMission action cameras are now shipping from retailers in the US. As previously stated, the Nikon KeyMission 80 is priced at $ 270, the KeyMission 170 at $ 399, and the KeyMission 360 at $ 499. However, all three models are being offered on Amazon, B&H Photo, and Adorama at slight discounts.

    The Nikon KeyMission 360 was first introduced at CES 2016, and followed later by the KeyMission 80 and KeyMission 170, with the numbers referring to each model’s field-of-view. The KeyMission 80 features a 12.5 megapixel front camera and 4.9 megapixel rear camera with support for 1080p recording, while the KeyMission 170 and 360 both support 4K recording. All three cameras are rugged to various degrees, including being waterproof and shockproof.

    Via: NikonRumors

    Articles: Digital Photography Review (dpreview.com)

  • World’s First All-Electric Mobile Office Built Into a Nissan Van

    [ By SA Rogers in Technology & Vehicles & Mods. ]

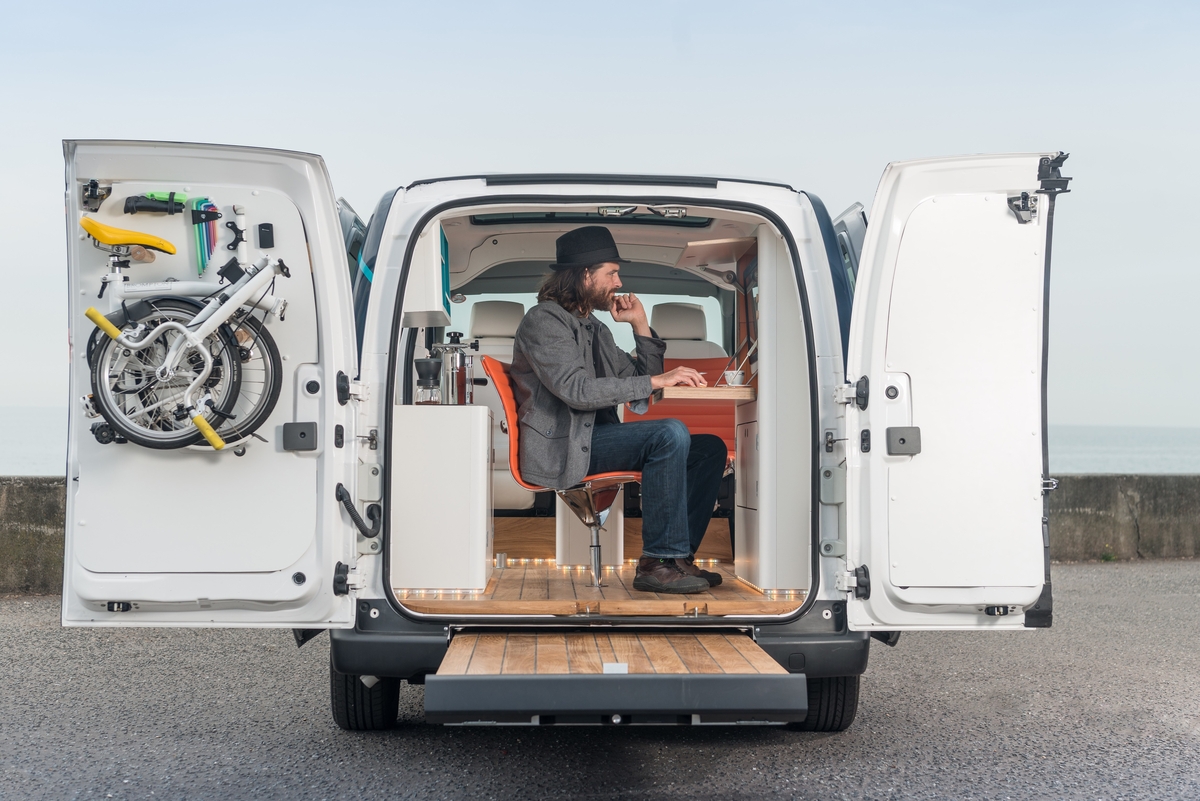
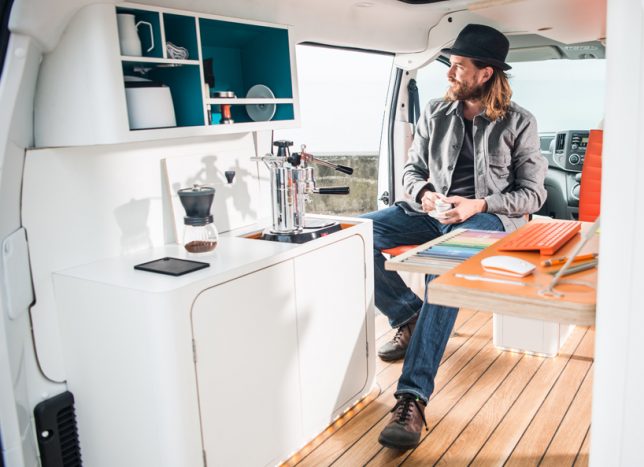
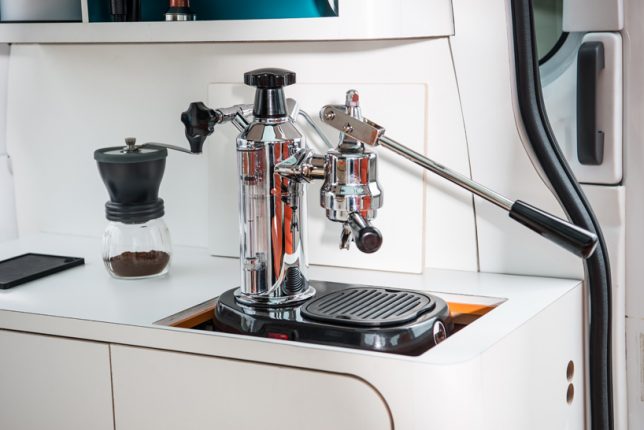
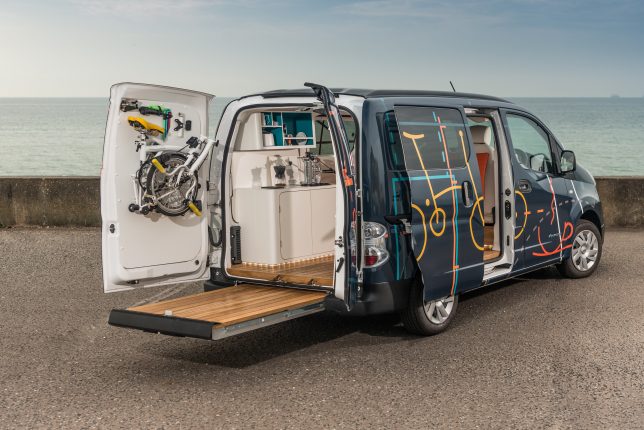
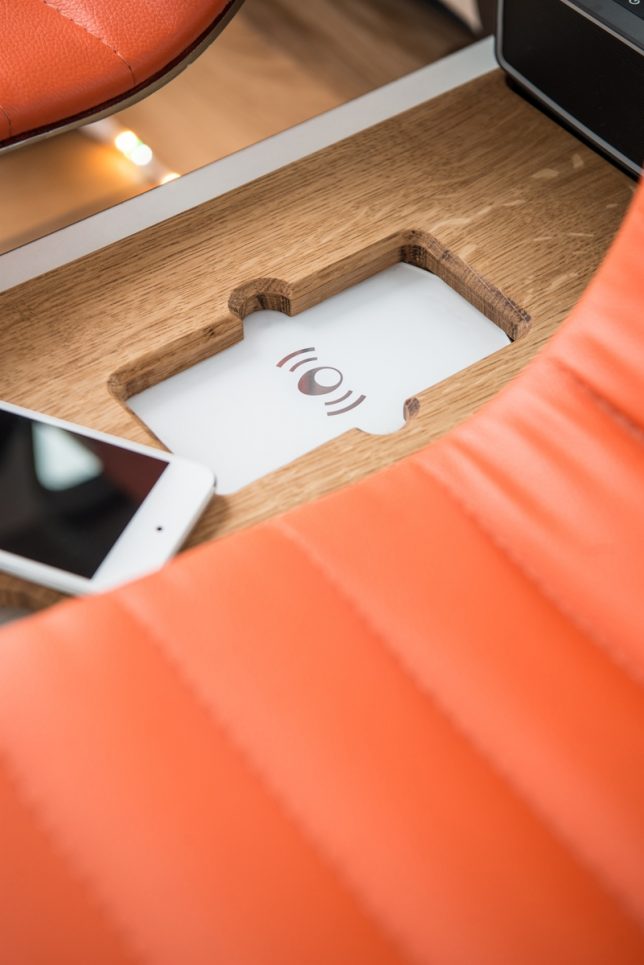
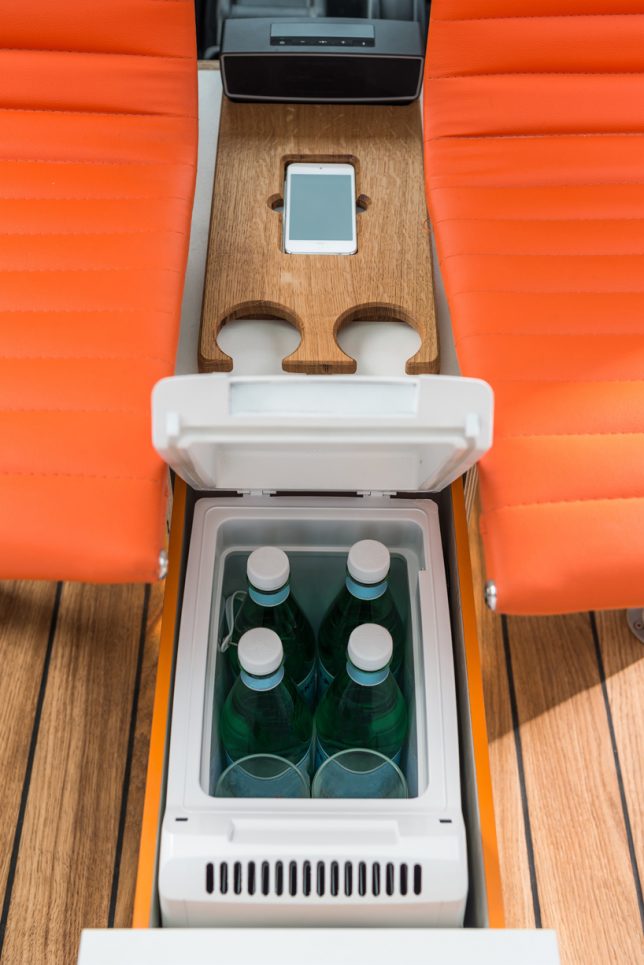
    Who wants to sit in a stale, noisy central office when they could take their job – not to mention the coffee maker – on the go instead? This Nissan vehicle houses the world’s first all-electric mobile office, and it’s more than just a fold-down desk in the back of a van. The whole enviable setup includes a panoramic glass roof, wood flooring with built-in LED lights, an intelligent system that adjusts the lighting and color, wireless mobile charging and an espresso machine that pops up out of the counter.

    Devised to show off what the e-nv200 van can do, the mobile office concept spotlights changing workspace trends, especially as flexible and remote working becomes more widespread. Lots of workers are no longer chained to permanent desks anymore, with the freedom to do their jobs from any number of places.

    nissan-mobile-office-2

    nissan-mobile-office-3

    nissan-mobile-office-1

    Both of the side sliding doors on the e-nv200 can be opened, along with the split rear doors, to open up the office to the worker’s chosen surroundings. Drive the van to the park, a beach or any other spot that inspires you and helps you focus, pull out the floating deck at the rear and enjoy working conditions most of us can only dream about.

    nissan-mobile-office-4

    The fold-down desk console features a built-in touch screen computer, wireless mouse and keyboard along with storage space and stationery supplies, and there’s even a mount inside one of the rear doors for a folding Brompton bike if you want to take a break and get some exercise. Watch the video to take in all of the details.

    Share on Facebook


    [ By SA Rogers in Technology & Vehicles & Mods. ]

    [ WebUrbanist | Archives | Galleries | Privacy | TOS ]


    WebUrbanist

  • How to Add a Sun Flare to Your Images Using Photoshop

    If you read my previous article where I give you some tips for doing more spectacular sunset photography, you’ll understand that I love taking photos during the magic hour. For my portraits, I also book my sessions during that time because the light is very soft and flattering. There is one thing I particularly like to do when I process my images and that’s adding a sun flare to my portraits and landscapes. I love to use Photoshop to recreating a scene that would have ideally been there in real life.
    How to Create a Sun Flare in Photoshop

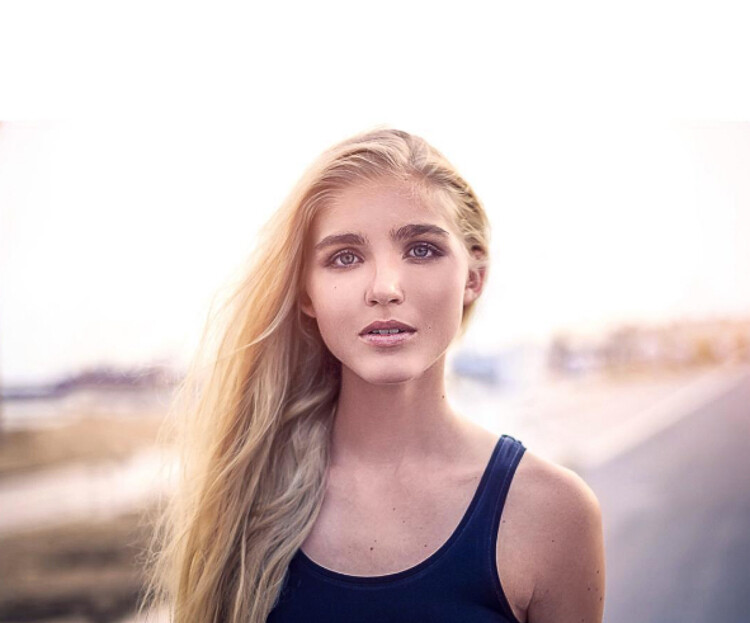
    I added sun flares to this portrait to add depth.

    It’s difficult to not underestimate the effect of a sun flare but it really does make a big difference, especially if you like cinematic results to your images. They’re a great way to add color and depth to your images.

    Analyze your image first

    The process of adding sun flares is actually quite easy, it only takes two steps and a few minutes. The most difficult thing however is to get a realistic result. You need to analyze your image before doing anything. Start by looking at the position of the sun, how the shadows and highlights are wrapping around your subject.

    In the image below, I added a sun flare on the left, but before doing that I noticed that the highlights were hitting the Taj Mahal from the left and the shadows were in the right side of the monument. If I were to position the sun flare on the right side of the image, the results wouldn’t be realistic because the highlights and the shadows wouldn’t correspond to the direction of the light of my sun flare. Try to consider the position, direction and intensity of the light.
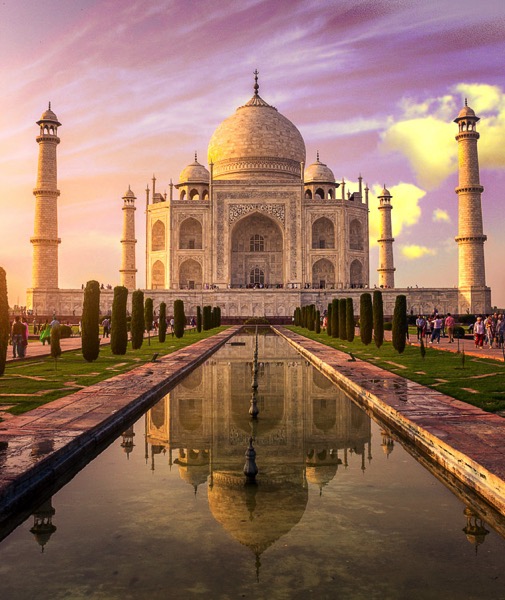
    How to Create a Sun Flare in Photoshop - Taj Mahal

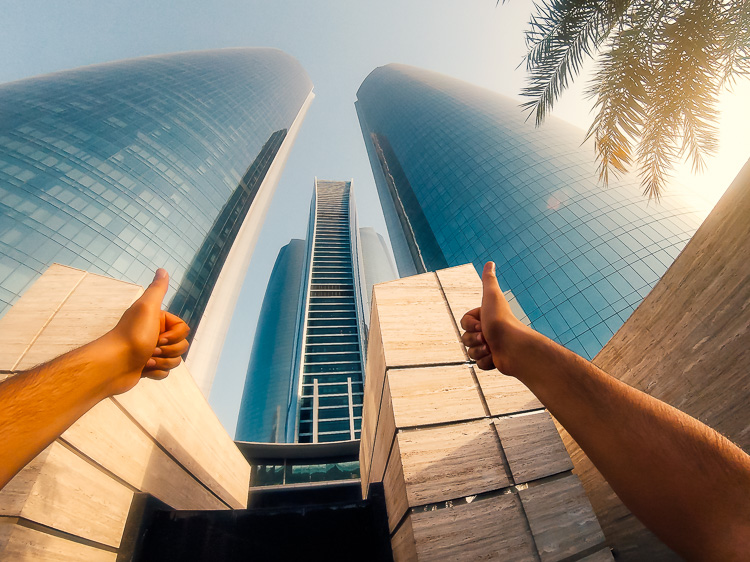
    This is another example of a GoPro image I took. I added a sun flare on the right side of the image because the sun was positioned there in real life. We’re not trying to create another sun, we’re just enhancing it with more colors and more intensity.
    How to Create a Sun Flare in Photoshop

    In this portrait, I added a sun flare to the left of the model. The result looks realistic because you can see the orange flair spreading and lightning the hair of the model but her face isn’t affected.

    How to Create a Sun Flare in Photoshop

    How to create and add a sun flare in Photoshop

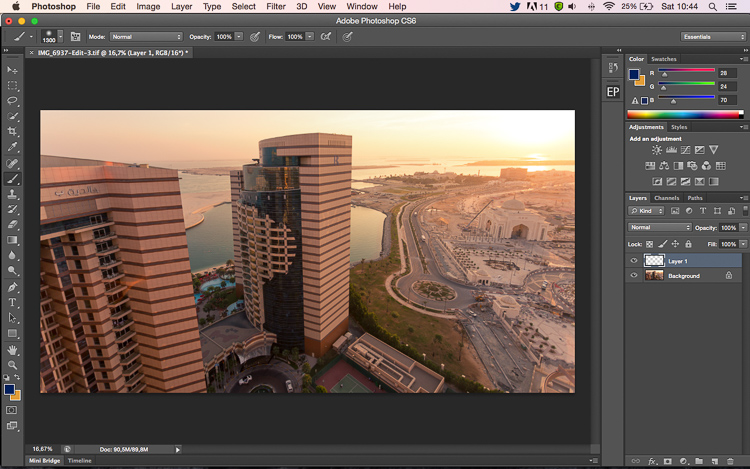
    It’s actually quite easy to add a sun flare in Photoshop. Start by opening your file in Photoshop and creating a new empty layer. The next step is to analyze where you want to place your sun flare and how strong do you want the effect to be. In this case, I want to place my sun flare in the top right of the image and make it pretty big. The sun was actually setting in that position but I am not completely satisfied with how it looks. I want to make the flare more vivid and more intense.
    How to Create a Sun Flare in Photoshop

    Select the Brush Tool and pick a color

    The next step is to select the Brush Tool with an opacity and flow of 100%. Make sure to select a soft brush with a hardness of 0%. I usually like to pick my own color of the sun flare, the color code I use is #fd9424, but there are different ways to pick a color for the sun flare.

    You can use the Eye Dropper Tool and select a color from the image by pressing I on your keyboard or by selecting it in the tool box on the left (the chosen color will automatically be set in your palette). Or after you have created the flare, you can create a hue/saturation adjustment layer only affecting that layer and just playing around until you find a color you like.
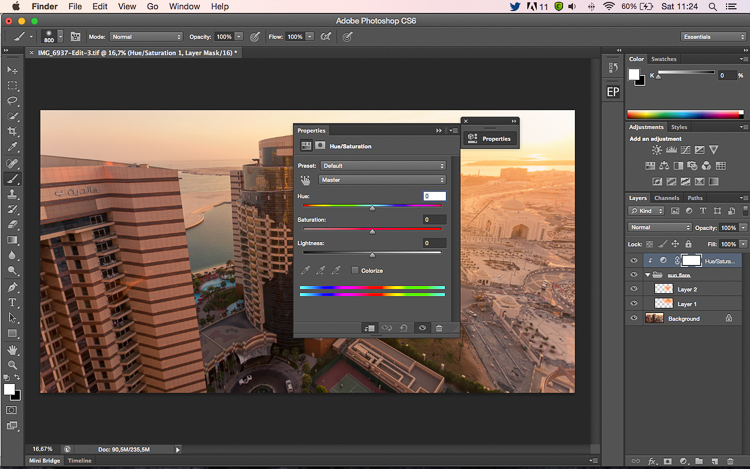
    How to Create a Sun Flare in Photoshop

    Adding your flare

    To create the sun flare, the first step is to simply create one brush stroke (you just have to press once). Make sure your brush is quite big. So far your image should look something like this:
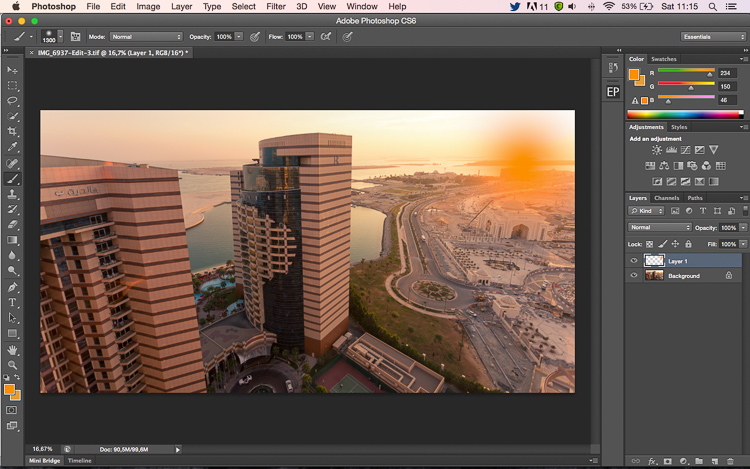
    How to Create a Sun Flare in Photoshop

    The next step is to go to blending modes for your current layer (the layer with the brush stroke). The default blending mode is normal, you need to change it to Screen. The screen blending mode by definition will invert both layers, multiply them, and invert the result. Your sun flare is going to get brighter and blend in with the sky after you do that.
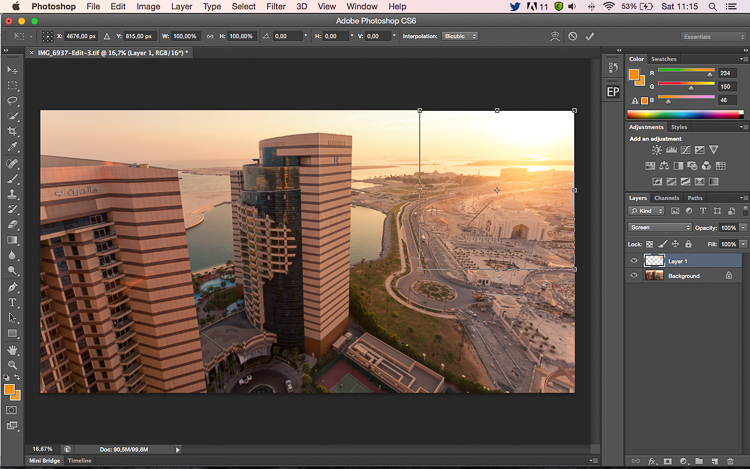
    How to Create a Sun Flare in Photoshop

    Transform

    The next step is to select your layer with the sun flare and press CTRL/CMD+T to transform (resize) it. A little box will appear, you want to drag the corners to make it bigger. How big you want to make it depends on your image and your desired effect. The sun flare will affect the whole image if you make it too big and will brighten up the shadows.

    Using a brush tool on a new layer is really helpful because you have full control. You can change the position, color, brightness, or saturation of your flare whenever you want by creating new adjustment layers that only affect that layer.

    If you think that your effect if too strong, you can reduce the opacity of the layer, if it is not strong enough, you can duplicate the layer. Always remember that the effect should be subtle otherwise if will look quite unrealistic. We are just trying to create a scene taking in consideration how light works.
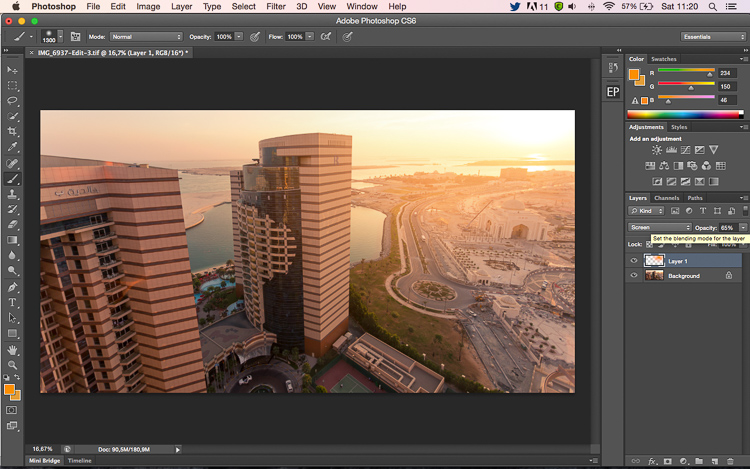

    How to Create a Sun Flare in Photoshop

     whenever you want

    Your turn

    Now you try you hand at adding a sun flare to one of your images using Photoshop. Please share your images and any questions in the comments below.

    googletag.cmd.push(function() {
    tablet_slots.push( googletag.defineSlot( “/1005424/_dPSv4_tab-all-article-bottom_(300×250)”, [300, 250], “pb-ad-78623” ).addService( googletag.pubads() ) ); } );

    googletag.cmd.push(function() {
    mobile_slots.push( googletag.defineSlot( “/1005424/_dPSv4_mob-all-article-bottom_(300×250)”, [300, 250], “pb-ad-78158” ).addService( googletag.pubads() ) ); } );

    The post How to Add a Sun Flare to Your Images Using Photoshop by Yacine Bessekhouad appeared first on Digital Photography School.


    Digital Photography School
  • Facebook takes aim at Snapchat and Prisma with new camera features

    If cute animal selfie masks are the wave of the future, then Facebook isn’t going to sit idly by. The company will be updating its in-app camera function with some Snapchat and Prisma style functions soon. It is currently testing a new version that includes animated selfie masks, overlaid graphics, and geofilters, similar to those available on Snapchat, and a range of filter effects that convert your images and videos into fine-art paintings, like on the popular Prisma app.

    In addition there is a series of new ‘reactive’ filters that respond to movements of your body. They cover the screen with ‘bubbles’ that can be move around by waving your arms, or line patterns than be disrupted by motion. 

    Once you have accessed the new camera, filter options can be made visible by swiping down. In addition, you can tap on the new creative tools button for even more effects. The latter include pieces of virtual clothing and fashion accessories and art-filters. And it’s not just the filters that will remind you of Snapchat. Like on Snapchat, photos disappear after a 24 hour period, unless unless someone leaves a comment to start a conversation. The new Facebook camera features are currently being tested in Ireland, but should be expected to roll out globally soon.

    Articles: Digital Photography Review (dpreview.com)

  • Video: Game Boy Camera revisited

    Some of us were thrilled to be reunited with the Game Boy Camera of our childhood. Others? Less thrilled. Watch as DPR staff revisit the Game Boy Camera – or in some cases, pick it up for the very first time. 

    Read more about the Game Boy Camera

    Articles: Digital Photography Review (dpreview.com)