Blog

  • How to Create Glass Ball Landscapes – 6 Techniques

    In photography, creative inspiration can often come from trying something new and photographing a scene with that technique. Creating glass ball landscapes is one example of this, as it allows you to capture a fish-eye like scene, using a telephoto lens. The glass ball creates a mystique, as many people associate looking into a crystal ball with seeing into the future. However, visions inside a glass ball are easy to achieve with a few simple steps!

    How to take landscape photos with a glass ball

    img_8070-copy

    In order to get good landscape photos with the glass ball, you’ll need to apply some basic rules, an understanding of the science at work also helps. If you read my previous article on crystal ball photography you will already be familiar with the 7 steps you can follow to take this type of image. Here’s a quick recap:

    1. Choose a scene that you’d normally shoot with a wide angle lens.
    2. Photograph this scene with the sun behind you, lighting up the scene you wish to shoot.
    3. Place the ball somewhere it won’t fall.
    4. Compose your scene with the glass ball in it.
    5. Ensure the horizon lines inside the ball and in the background match.
    6. Focus the camera on the scene inside the ball, which is best achieved using live-view and manual focus.
    7. Use an aperture of around f/4 as this will keep the ball sharp and the background blurred.
    8. Take the photograph, and repeat if you’re not happy with the sharpness inside the ball.
    9. Rotate your image in post-processing so the scene in the ball isn’t upside down. In some cases, you can skip this step.

    Alternative glass ball landscapes, and how to compose them

    It’s easy to get it in your mind that every scene or situation needs a crystal ball photo. This is not the case and careful consideration needs to be taken when selecting the photograph you’ll take. The most important thing to do is find a compelling subject that shows prominently inside the glass ball. Once you have this basic parameter established below are some differing ways you can compose your glass ball landscape photograph.

    1 – The classic composition
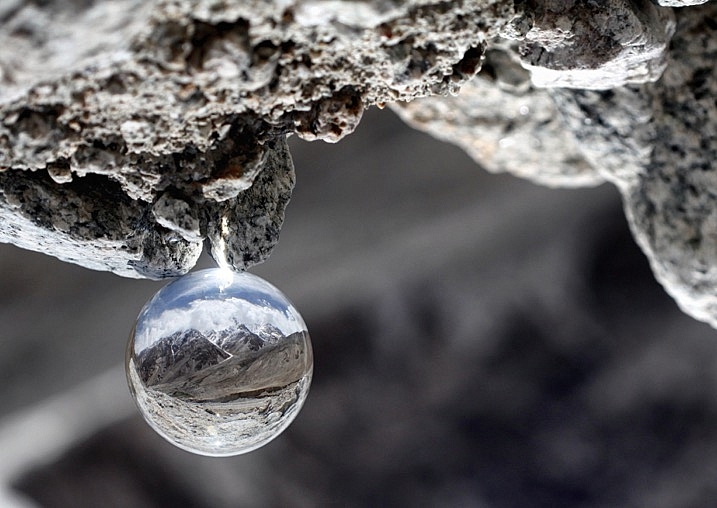
    Glass ball landscapes use the rule of thirds. This classic composition shows the entire ball and was shot at 100mm.

    Glass ball landscape using the rule of thirds. This classic composition shows the entire ball and was shot at 100mm.

    In this type of composition the ball fills the majority of the frame, with the entire edge of the ball visible. This will lead to glass ball landscapes that have an immediate impact and areas to the side of the ball that are blurred out and minimalist in nature. This type of image is most easily taken with a macro or telephoto lens with an aperture of f/4 to create the nice bokeh around the ball.

    2- Get in close

    Getting closer to the glass ball will emphasize the scene within the ball, this also entails framing that cuts some of the edges of the ball away. A centered composition with both the top and bottom part of the ball can work here, this has the advantage that top and bottom parts of the scene cannot be easily deduced. The other composition follows the rule of thirds, with the edge of the ball showing in the left or right third of the image.
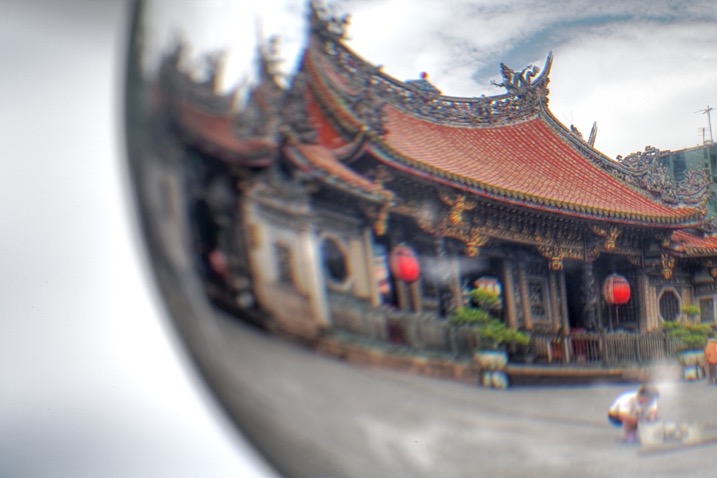
    glass ball landscape photography

    A closer crop focuses the eye more on the image in the ball.

    3 – Give the ball a bit of space

    There are many ways to photograph the glass ball, and using a wide-angle lens with this technique can be very effective. In this case, you want the background scene to be minimalist, with the ball becoming an accent in the scene. The scene will not likely be rotated during post-processing, so compose to the scene in the background. In this type of the photo, the ball and the landscape scene should form a balanced composition.
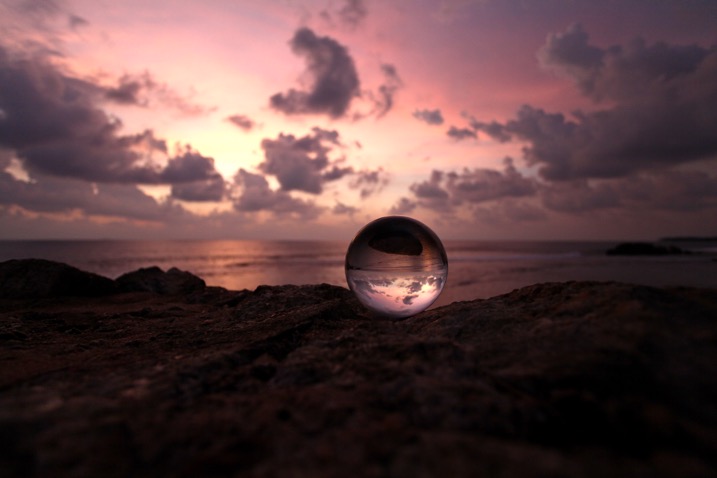
    A wider angle of 20mm is used here. The ball is an accent within this frame.

    A wider angle of 20mm is used here. The ball is an accent within this frame.

    4 – Take it to the high life
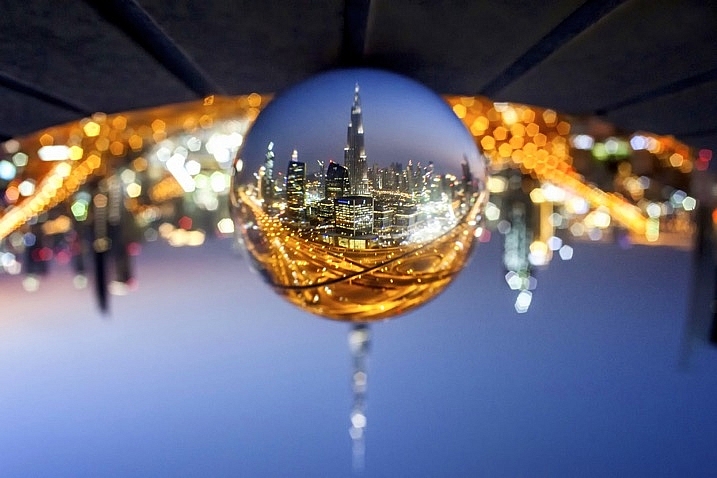
    Glass ball landscape photographs

    Gaining access to the rooftop provided a great vantage point.

    As with all landscape photos, a high vantage point for glass ball images works well. Gaining access to a high building overlooking a city, or climbing a hill are both good options. Once at your high vantage point find a good position to place the ball, so you can see the landscape inside it. You need to ensure the ball will not fall, be very careful with its positioning.

    5 – Don’t forget the view from the floor
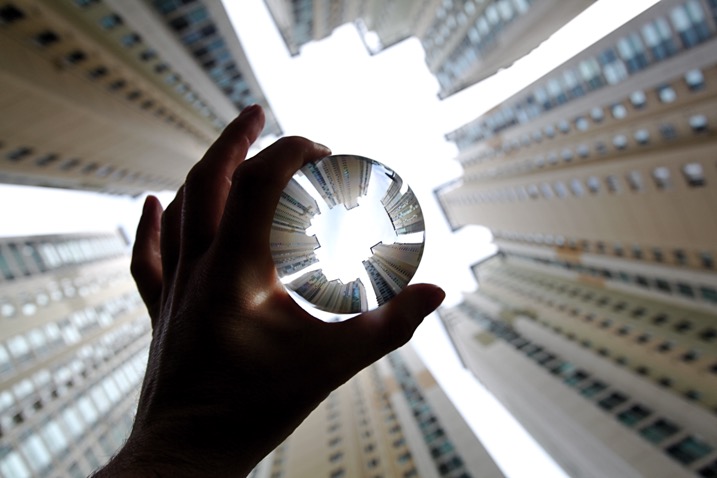
    Apartment buildings in Busan, South Korea. This photo shows a glass ball being held by hand.

    The view looking up can be just as good as the view looking down.
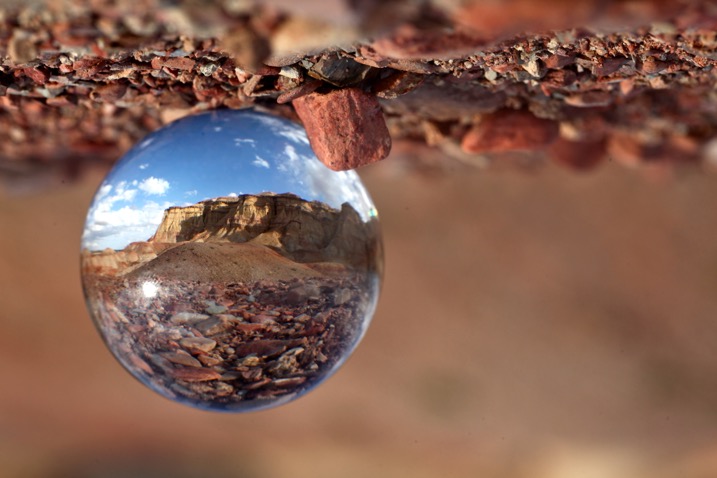
    Deserts and canyons make for great locations to photograph with the ball. In this photo the ball is place on the ground, the stones in the foreground add a nice element to this photo.

    In this photo the ball was placed on the ground, the stones in the foreground add a nice element to this photo.

    Placing the ball at street level doesn’t always work, as half the scene will be taken up by the ground. That said there are several situations that really work well with the ball on the ground.

    • The ball is ever so slightly higher than the rest of the scene, so it might be at the top of an undulation.
    • There is a reflection in the scene from a marble surface or a puddle.
    • The ground is an appealing element of the photo because it’s a leaf bed for example.

    6 – The human element
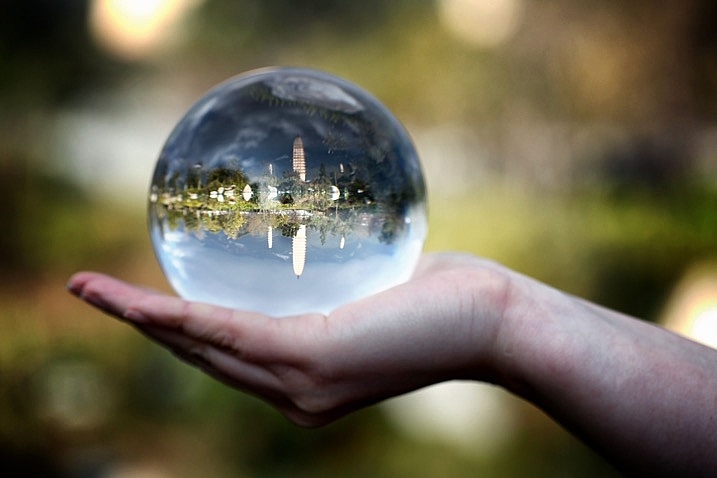
    A friend holding the ball in position is an alternative to putting the ball on the ground.

    A friend holding the ball in position is an alternative to putting the ball on the ground.

    The glass ball landscapes are not always best suited to having people in them. The blurred background may look less appealing with a human shape included in it. There are a couple of ways to humanize your image, though, while still maintaining a minimal feel.

    • You eclipse the people inside the ball. Use a long telephoto lens, compression will cause people to appear inside the ball. The background will be clean without the shapes of people in it (as below).
    • You take the photo, and someone else is holding the ball. The hand is the human element of this photo, with the landscape still inside the ball (as above).
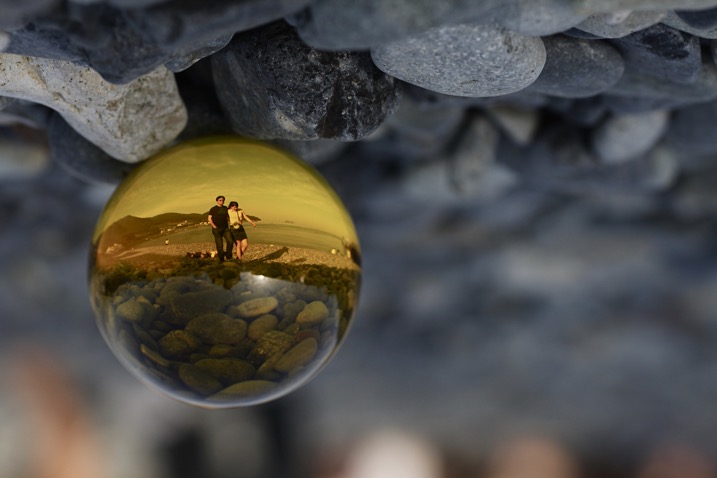
    glass ball landscape photography

    Photographing people inside the ball is tricky, but not impossible.

    Where to try this technique

    The places you’d visit for regular landscapes will also work for glass ball landscapes. The rooftops of tall buildings in cities work very well or a worm’s eye view from street level can be just as good. The beach or the desert are excellent options due to the minimalist nature of those locations.

    Sunset photos at the beach with the glass ball are one of the classics in this genre of photography. Mountains and forests make for good locations as well. A lone tree can be a nice subject, as can lines of tree trunks inside the glass ball. Up in the mountains, you can easily fill the scene inside the ball with a large peak jutting up into the landscape.
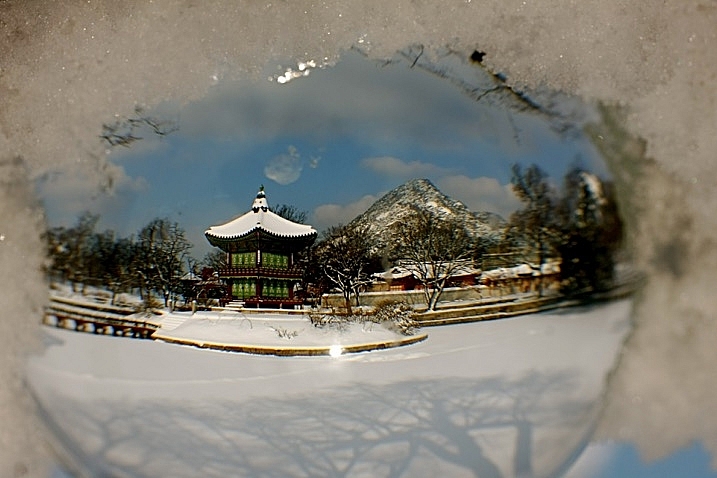
    The snow globe is a well known souvenir gift, which the glass ball can replicate.

    The snow globe is a well-known souvenir gift, which the glass ball can replicate.

    Getting out with the glass ball

    In my last article on refraction I linked to a site selling an 80mm glass ball, this is a great option though it can be heavy to carry. You can also use a smaller ball for many situations, and when you are carrying a heavy bag of camera gear this is a good idea.

    Once you have a glass ball it’s best to dive in and see what works best for you. I’d love to see more examples of your work, it was great to see so many pictures last time. One final tip, be careful in the sunlight with the ball. The glass ball acts as a magnifying glass with the sun’s rays and can burn you, or your property.

    googletag.cmd.push(function() {
    tablet_slots.push( googletag.defineSlot( “/1005424/_dPSv4_tab-all-article-bottom_(300×250)”, [300, 250], “pb-ad-78623” ).addService( googletag.pubads() ) ); } );

    googletag.cmd.push(function() {
    mobile_slots.push( googletag.defineSlot( “/1005424/_dPSv4_mob-all-article-bottom_(300×250)”, [300, 250], “pb-ad-78158” ).addService( googletag.pubads() ) ); } );

    The post How to Create Glass Ball Landscapes – 6 Techniques by Simon Bond appeared first on Digital Photography School.

    Digital Photography School

  • Deal 11: Black & White Photo Artistry Course – 60% OFF!

    NewImageOn the eleventh day of Christmas dPS gave to me …

    Sebastian Michaels smashed every dPS record recently with his Fine Art Grunge Composition course. Now he’s back, with his bigger, better and brand freshly updated Black & White Photo Artistry course!

    … and you can save 60% on the regular price right now.

    This course brings together all the best photo artistry approaches and techniques from the original course and expands on them within the realm of creative black and white.

    You’ll discover the pro secrets for producing stunning works of photo art. Awesome, intricate black and white compositions fit for print and canvas. All while honing your own photography skills!

    Ready to create the most artistic photo works of your life? Grab this deal with a 60% saving today only!

    Here’s the link to order – you won’t be disappointed.

    This huge offer to this brilliant course not only comes with lifetime access, but also a heap of extra bonuses. You’ll get FREE software, bonus Lightroom presets and more.

    We think it’s a stunning deal in the 12 dPS days of Christmas and well know you’ll cherish everything it will teach you about black and white photography artistry.

    googletag.cmd.push(function() {
    tablet_slots.push( googletag.defineSlot( “/1005424/_dPSv4_tab-all-article-bottom_(300×250)”, [300, 250], “pb-ad-78623” ).addService( googletag.pubads() ) ); } );

    googletag.cmd.push(function() {
    mobile_slots.push( googletag.defineSlot( “/1005424/_dPSv4_mob-all-article-bottom_(300×250)”, [300, 250], “pb-ad-78158” ).addService( googletag.pubads() ) ); } );

    The post Deal 11: Black & White Photo Artistry Course – 60% OFF! by Darren Rowse appeared first on Digital Photography School.


    Digital Photography School

  • Made for Introverts: 13 Furniture Designs & Wearables That Prioritize Privacy

    [ By SA Rogers in Design & Furniture & Decor. ]

    Nothing says ‘don’t talk to me’ like a soundproof helmet, a cocoon-shaped desk or a chair that basically swallows you when you want to disappear. Designed for introverts and people who just want some dang peace and quiet in a noisy open-plan office, these furniture designs and wearables offer hiding places for the busiest and least private of environments, like airplanes, coffee shops, hostels and even city sidewalks.

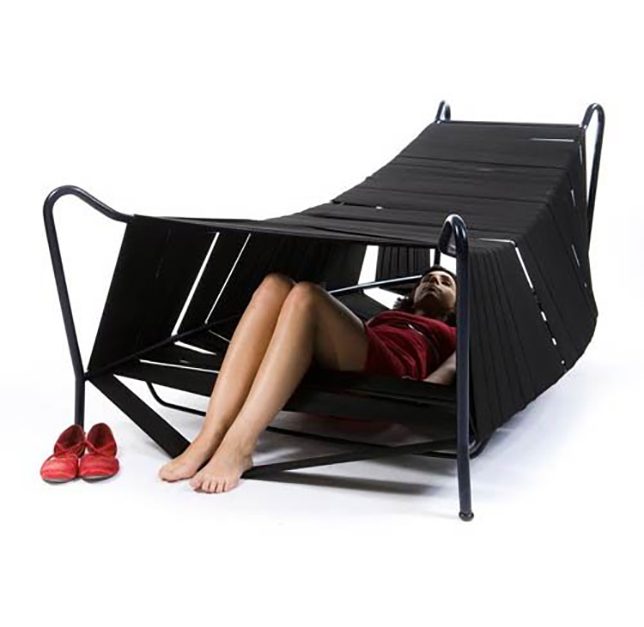
    Tunnel Chair & Bed by Noga Berman

    privacy-designs-tunnel-1

    privacy-designs-tunnel-2

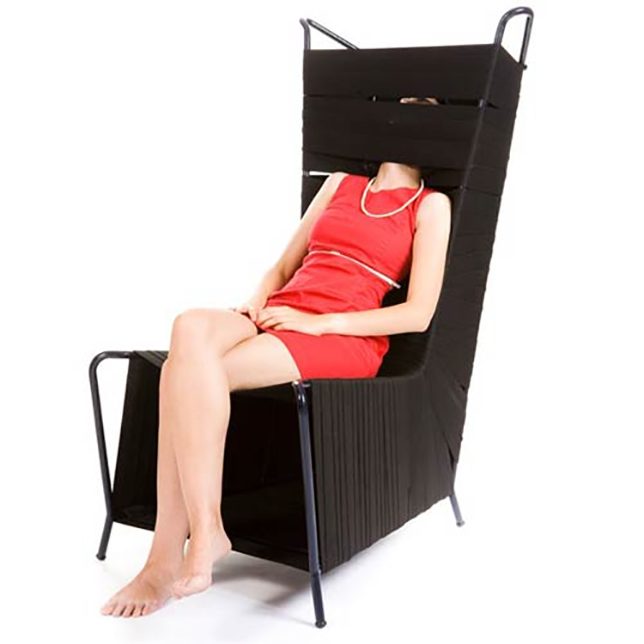
    Can you find privacy within existing furniture? Designer Noga Berman has come up with a way to incorporate ‘hiding places’ into relatively ordinary-looking functional furniture pieces, including a chair and a sofa. Wrapping elastic bands around the frames creates ‘tunnels’ within the furniture that you can hide part or all of your body inside.

    Brody Desk by Steelcase

    privacy-designs-brody-1

    privacy-designs-brody-2

    null

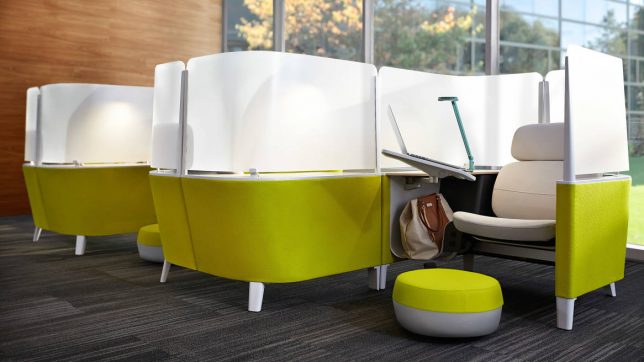
    This desk by workplace furniture manufacturer Steelcase feels enclosed yet open at the same time, with a design that offers some privacy and minimizes distractions without cutting you off from the entire office. It might look like tight quarters in there – and it is – but the design is intended as a sort of break from your regular desk, for periods of time when intense focus is required.

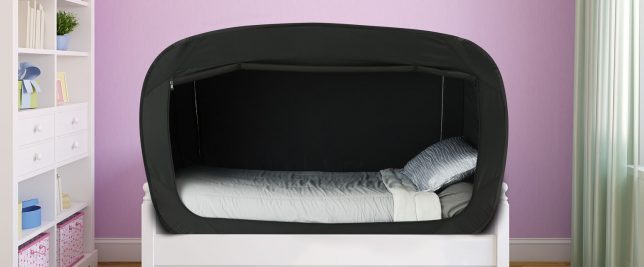
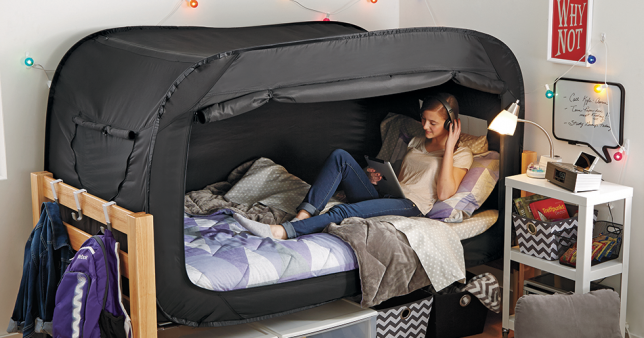
    Privacy Pop Bed Tent

    privacy-designs-bed-tent

    privacy-pop-bed-tent-1

    Worried about privacy while traveling, or stuck in a dorm room with several roommates? The ‘Privacy Pop’ bed tent may not offer much in the looks department, but it’s highly practical, offering a room-with-a-room that sets up in minutes and blocks out light.

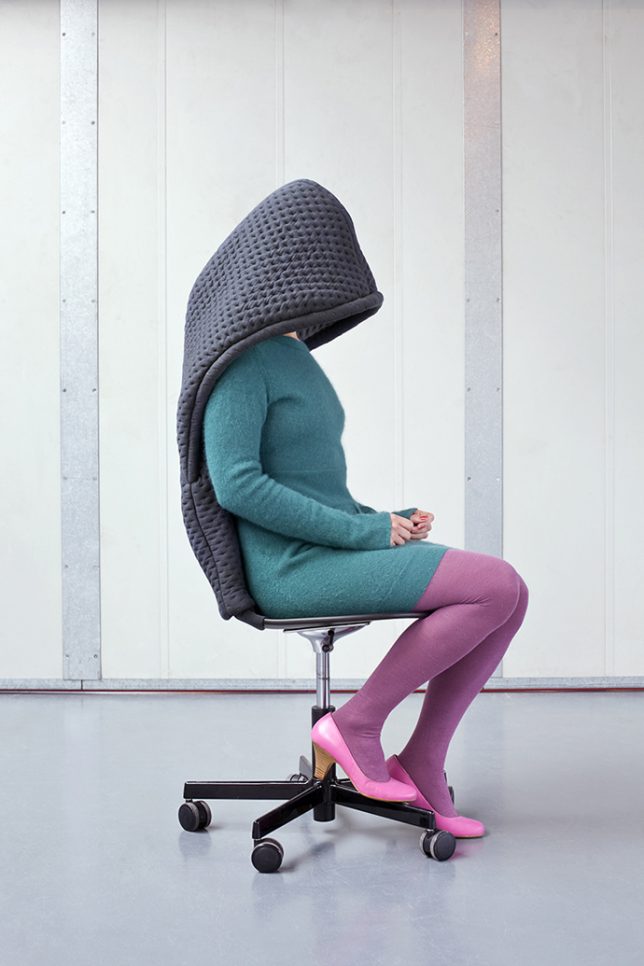
    Desk Chair Hoodies by Bernotat & Co

    privacy-designs-desk-chair-hoodie

    privacy-designs-desk-chair-hoodie-2

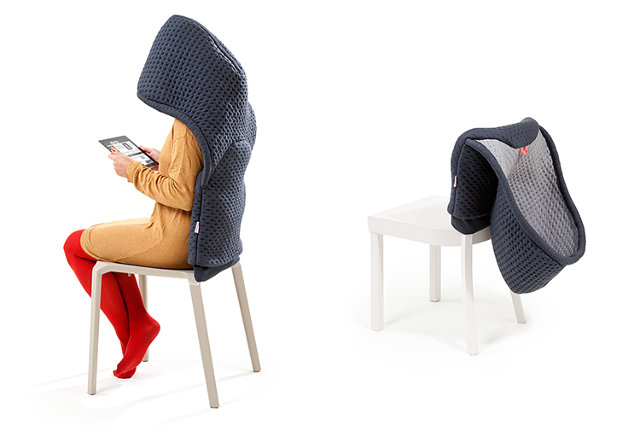
    ‘Chair Wear’ is a series of textile chair add-ons by Bernotat & Co that bring a little extra functionality, like pockets, without requiring an additional piece of furniture. The ‘Hoodini’ has an oversized hood that you can put over your head while reading or talking on the phone.

    Next Page – Click Below to Read More:
    Made For Introverts 13 Furniture Designs Wearables That Prioritize Privacy

    Share on Facebook


    [ By SA Rogers in Design & Furniture & Decor. ]

    [ WebUrbanist | Archives | Galleries | Privacy | TOS ]


    WebUrbanist

  • 24 Festive Holiday Images to Get You Into the Spirit

    Christmas, Hanukkah, Fiesta of the Lady of Guadalupe, Day of the Virgin, and many other world holidays happen this month. Every religion and culture celebrate in their own unique way. Here in Nicaragua where I will be spending Christmas, they parade a statue of the Virgin Mary down a new street each night, complete with marching band and bombas (fireworks).

    holidays-nicaragua-01

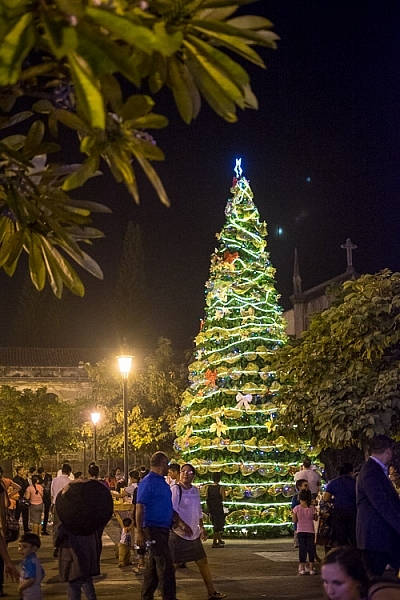
    A festively decorated tree in Leon, Nicaragua.

    holidays-nicaragua-02

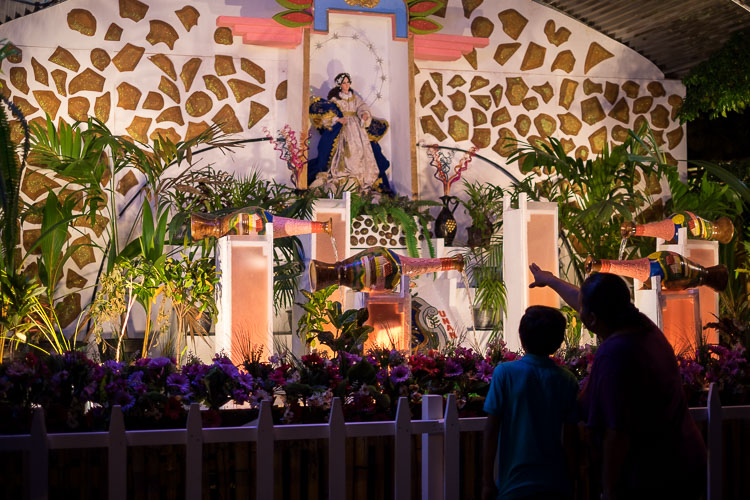
    The Virgin on display in Leon, Nicaragua.

    Here are some more images of different holiday sights. Enjoy the season however you celebrate.

    Michela

    By Michela

    Alan Cleaver

    By Alan Cleaver

    Mike Beales

    By Mike Beales

    David Bannister

    By David Bannister

    David Morris

    By David Morris

    Charlotte90T

    By Charlotte90T

    Nikos Koutoulas

    By Nikos Koutoulas

    J J

    By J J

    Stéphanie Kilgast

    By Stéphanie Kilgast

    Johnny Silvercloud

    By Johnny Silvercloud

    Denise Mattox

    By Denise Mattox

    Thomas Hawk

    By Thomas Hawk

    Theophilos Papadopoulos

    By Theophilos Papadopoulos

    Britt-knee

    By Britt-knee

    Cta Web

    By cta web

    Brett Kiger

    By Brett Kiger

    Scott Robinson

    By Scott Robinson

    Bunches And Bits {Karina}

    By Bunches and Bits {Karina}

    Robert Couse-Baker

    By Robert Couse-Baker

    Steve Snodgrass

    By Steve Snodgrass

    Messycupcakes

    By messycupcakes

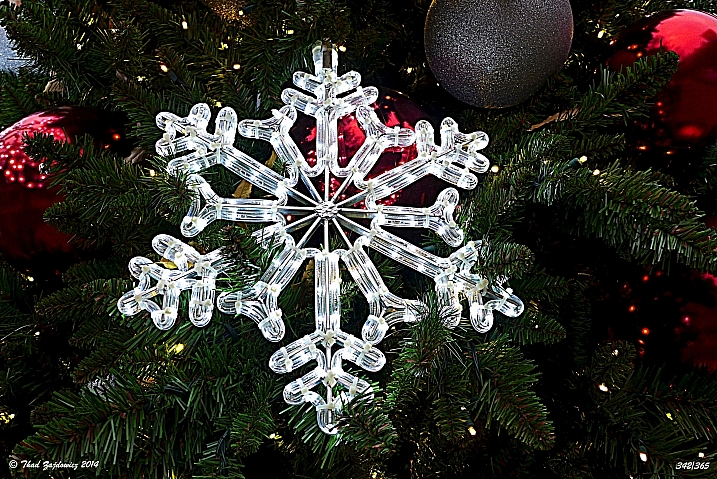
    Thad Zajdowicz

    By Thad Zajdowicz

    googletag.cmd.push(function() {
    tablet_slots.push( googletag.defineSlot( “/1005424/_dPSv4_tab-all-article-bottom_(300×250)”, [300, 250], “pb-ad-78623” ).addService( googletag.pubads() ) ); } );

    googletag.cmd.push(function() {
    mobile_slots.push( googletag.defineSlot( “/1005424/_dPSv4_mob-all-article-bottom_(300×250)”, [300, 250], “pb-ad-78158” ).addService( googletag.pubads() ) ); } );

    The post 24 Festive Holiday Images to Get You Into the Spirit by Darlene Hildebrandt appeared first on Digital Photography School.


    Digital Photography School

  • Rendered images show upcoming LG G6 with dual-cam

    Image: @OnLeaks

    It seems dual-camera technology is quickly establishing itself as standard on high-end smartphones. LG is expected to launch the G6 at or around the Mobile World Congress at the the end of February 2017 and today a series of rendered images confirms that, like its predecessor G5 and the V20, the new model will feature a dual-camera. However, the G6 will not come with the G5’s modular construction, which means users of the device will probably have to make do without the camera grip extension that was available for the G5.

    Given the visual differences between the two camera lenses, it is fair to assume the G6 dual-cam will offer two different focal lengths, like the G5, rather than adopt an image merging approach to improve image quality like some Huawei devices. Display size remains at 5.3″ and there is also a fingerprint reader, headphone-jack and USB Type-C connector. 

    The images also show a more modern and elegant unibody design, which hopefully will make the G6 more of a commercial success than its predecessor. We quite liked the performance of the LG G5 dual-camera in our full review, but overall the device only received lukewarm reviews and could not meet expectations in the marketplace. As usual, this kind of leaked information should be taken with a pinch of salt, but the source tends to be very reliable. We should find out more in about three months time.

    Articles: Digital Photography Review (dpreview.com)

  • Brides Magazine suggests professional photographers use ‘Cannon or Nikon’ cameras

    An article recently published in Brides magazine offered soon-to-be newlyweds some questionable advice on how to find a professional wedding photographer. Though it has since been edited, the original version of ‘Essential Questions You Need to Ask Your Wedding Photographer’ included a paragraph suggesting consumers should only hire a photographer who uses a ‘Cannon [sic] or Nikon’ camera.

    The article aims to provide advice on choosing a professional wedding photographer, however, it previously contained the following paragraph regarding questions the client should ask a prospective photographer:

    What kind of equipment do you use?

    “They should say either Cannon [sic] or Nikon, which are the most readily available professional cameras available,” says Tiffani. “However, there are professional and amateur cameras in both brands. A professional camera should be a ‘full format’ camera. This will ensure that you can print large-scale prints easily.”

    Brides has since updated the article without an editor’s note to simply read, “Ideally, your photographer would use a readily available professional camera, Matsuura advises.” 

    Via: PetaPixel

    Articles: Digital Photography Review (dpreview.com)

  • Weekly Photography Challenge – Festive

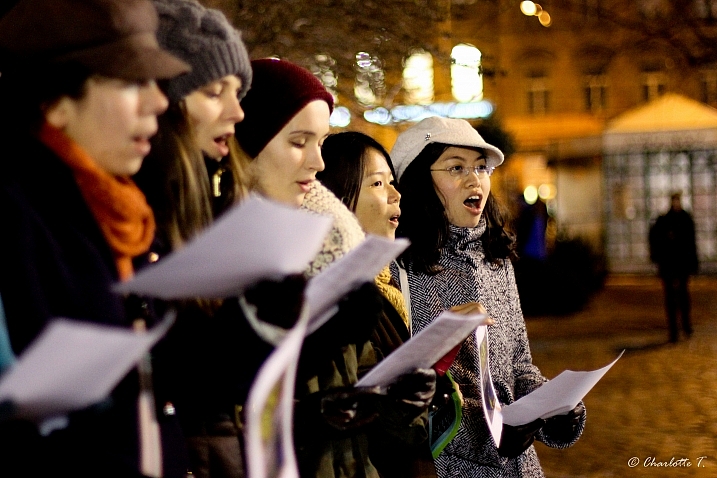
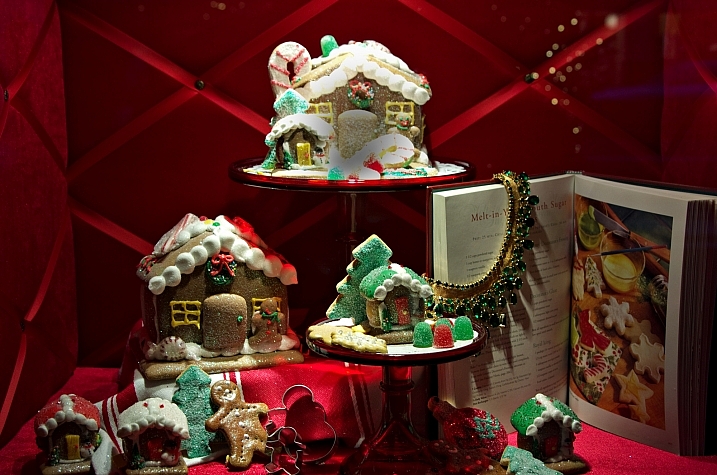
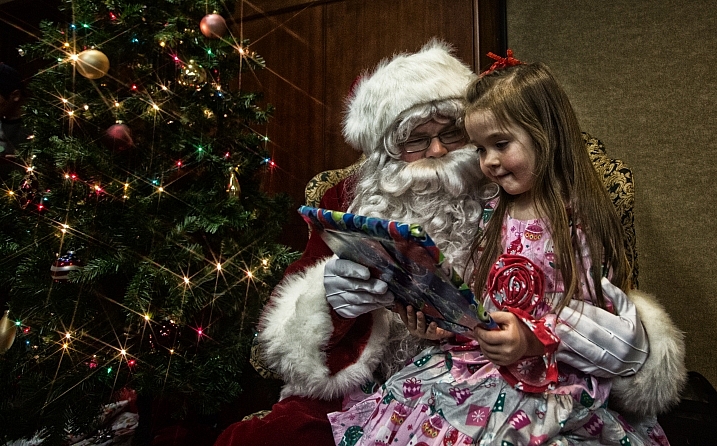
    Holiday time in many parts of the world is a time for festivities. I shared a few festive images earlier, have a look.

    Kenny Miller

    By Kenny Miller

    Weekly Photography Challenge – Festive

    What does festive look like for you? In your city? In your culture? Photograph that and share it with us this week for this challenge. Think about:

    • Decorations and lights
    • Food or special meals
    • Parties or events
    • Parades or fireworks
    • Family and friends
    MattysFlicks

    By MattysFlicks

    Jamie McCaffrey

    By Jamie McCaffrey

    The Explorographer™

    By The Explorographer™

    Share your images below:

    Simply upload your shot into the comment field (look for the little camera icon in the Disqus comments section) and they’ll get embedded for us all to see or if you’d prefer, upload them to your favorite photo-sharing site and leave the link to them. Show me your best images in this week’s challenge. Sometimes it takes a while for an image to appear so be patient and try not to post the same image twice.

    Share in the dPS Facebook Group

    You can also share your images on the dPS Facebook group as the challenge is posted there each week as well.

    googletag.cmd.push(function() {
    tablet_slots.push( googletag.defineSlot( “/1005424/_dPSv4_tab-all-article-bottom_(300×250)”, [300, 250], “pb-ad-78623” ).addService( googletag.pubads() ) ); } );

    googletag.cmd.push(function() {
    mobile_slots.push( googletag.defineSlot( “/1005424/_dPSv4_mob-all-article-bottom_(300×250)”, [300, 250], “pb-ad-78158” ).addService( googletag.pubads() ) ); } );

    The post Weekly Photography Challenge – Festive by Darlene Hildebrandt appeared first on Digital Photography School.


    Digital Photography School

  • Throw a Photo-Fun New Years Eve Party!

    We’ve all been there – a New Year’s Eve “party” with stale chips and nothing to do.

    While we can’t help with the snacks, we can help with the fun – yes, there are photos involved, of course.

    Use a few (or all) of these tricks and gadgets to make your New Year’s party one to remember, even as we’re all trying to forget 2016.

    p.s. Don’t forget: You can save 15% on your entire order in the Photojojo Shop with the coupon “ByeSanta”, now through 1/1.

    (…)
    Read the rest of Throw a Photo-Fun New Years Eve Party! (258 words)


    © Meg for Photojojo, 2016. |
    Permalink |
    No comment |
    Add to
    del.icio.us

    Post tags:


    Photojojo

  • Throwback Thursday: Apple QuickTake cameras, pioneers of consumer digital photography

    Apple QuickTake 100. Photo by Carl Berkeley

    While Apple Inc. is known for being a pioneer in the world of computers and smartphones, it also produced some of the first consumer digital cameras. The QuickTake 100, built by Kodak and priced at $ 750, had a unique binocular-like design and captured images at a whopping 640 x 480. It wasn’t designed for a day of shooting. In fact, the internal memory filled up after just eight shots. An RS-232C port was used to transfer photos (in QuickTake or PICT format) to your Mac.

    Apple QuickTake 100. Photo by Carl Berkeley

    The QuickTake 100 had a fixed 50mm equivalent F2 lens, an optical viewfinder and an LCD info display on which to adjust settings. As you can see, there was no way to review photos on the camera – you needed a computer for that.

    The successor to the 100 – the QuickTake 150 – came about 15 months later. This model, priced at about $ 700, looked identical to its predecessor, but offered twice the storage and support for more image formats (even PCX, for those who remember it). It included a macro conversion lens and also supported Windows PCs. Not wanting to leave original QT 100 owners out in the cold, Apple released a firmware update that essentially converted it into a QT 150.

    QuickTake 200. Photo by Jared C. Benedict.

    Apple and Kodak parted ways after the QuickTake 150, with 1997’s follow-up, the QuickTake 200, being built by Fujifilm. In fact, Fujifilm sold a nearly identical camera itself – the DS-7. The QuickTake 200 had a more traditional design and had a 48mm equivalent F2.2 lens. 

    QuickTake 200. Photo by Jared C. Benedict.

    By far the most important addition to the QT200 was a 1.8″ LCD display. Finally, there was a way to preview and review your photos without having to get out a serial cable. For those seeking an optical viewfinder, Apple included one which you could clip onto the camera. Other new features on the QuickTake 200 were a mode dial, limited aperture and focus adjustment, and a SmartMedia card slot.

    While they were some of the first consumer digital cameras, the QuickTake cameras didn’t take off as the ‘big names’ got into the business. When Steve Jobs returned to Apple in 1997, the QuickTakes, along with the LaserWriter and ahead-of-its-time Newton PDA were unceremoniously killed off.

    Articles: Digital Photography Review (dpreview.com)

  • All dPS eBooks – $9 Today Only

    On the twelfth day of Christmas dPS gave to me …
    It’s the last day of our 12 days of Christmas sale and for today only, you can get any of our photography ebooks for just $ 9.

    Rather than pick a few to share, we thought we’d put EVERY single book on dPS for sale for just $ 9.

    9 ebooks

    There are 23 titles to choose from

    Topics include photographing portraits, landscapes, travel, kids and much more.

    There’s also eBooks on special effects, black and white, flash photography and even natural light photography.

    Check them all out here.

    Even our $ 50 Going Pro eBook is just $ 9.

    It’s a $ 9 eBook spectacular! There’s also no limits, grab as many as you like. But only in the next 24 hours.

    Check them all out before time runs out.

    googletag.cmd.push(function() {
    tablet_slots.push( googletag.defineSlot( “/1005424/_dPSv4_tab-all-article-bottom_(300×250)”, [300, 250], “pb-ad-78623” ).addService( googletag.pubads() ) ); } );

    googletag.cmd.push(function() {
    mobile_slots.push( googletag.defineSlot( “/1005424/_dPSv4_mob-all-article-bottom_(300×250)”, [300, 250], “pb-ad-78158” ).addService( googletag.pubads() ) ); } );

    The post All dPS eBooks – $ 9 Today Only by Darren Rowse appeared first on Digital Photography School.


    Digital Photography School