Blog

  • 7 Vital Tips to Improve Your Candid Street Photography

    If people watching is in your nature, you owe it to yourself to try some street photography. It can be addicting, and the fleeting moments you can capture will be one of a kind. It is a genre of photography similar to fishing. The more you enjoy the process, and the more you cast your reel out there (is this correct fishing terminology?), the more you will catch.

    Time and experience trump everything due to the difficulty, and while perseverance is the only way to do street photography well, there are some important tips and strategies that can set you off in the right direction. Here are some of my favorites.
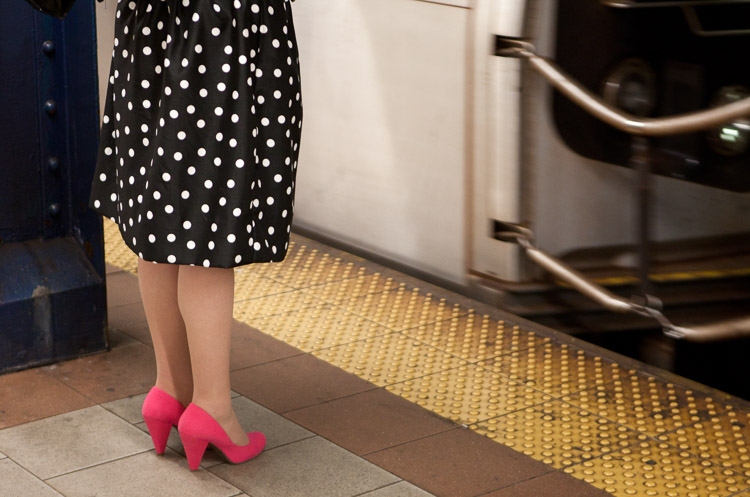
    7 Vital Tips to Improve Your Candid Street Photography Polka Dots and Pink Shoes, Subway, 2012.

    1. Travel light and with minimal gear

    Many of you will have a DSLR and a mid-range zoom lens. While it is fine to shoot street photography with this equipment and many do (and even more start out this way), lightening your load will make a huge difference. You will have more energy, your coordination will be better, and you will be faster and more willing to explore. You will also be able to photograph in situations where you would not want to bring a large camera.

    Not only are micro-4/3rds and mirrorless camera systems lighter, but they look less intimidating to the people you are photographing. If you have a DSLR, consider using a 35 or 50mm prime, or a pancake lens for these reasons. Fortunately, you do not need the fastest versions of these lenses, so it will not be quite as expensive. A 35mm f/2 is usually about half the size of a 35mm f/1.4, and Canon’s 50mm f/1.8 is both small and only $ 125.
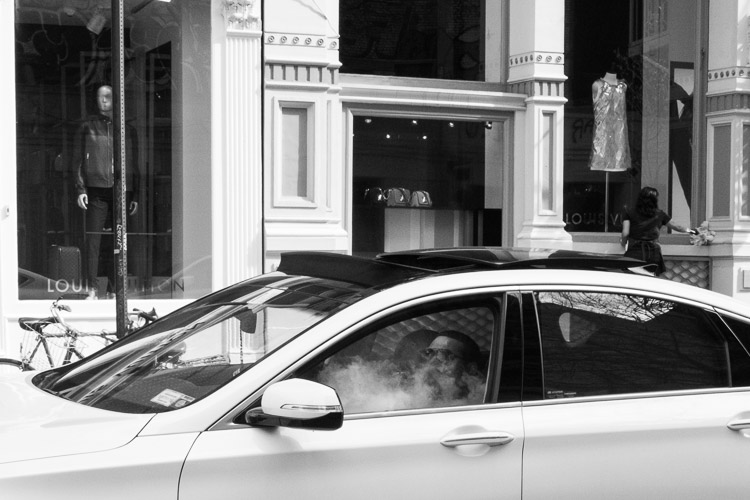
    7 Vital Tips to Improve Your Candid Street Photography Greene Street, New York Street Photography

    Prime lenses

    Prime lenses will restrict you to a specific focal length, but this limitation can actually be quite freeing. By sticking to a focal length such as 35mm or 50mm (the two favorite lenses for most street photographers), you will learn to see how the lens sees.

    You may miss out on certain moments by not having a zoom, but at the same time, you will be able to capture more quality images within the ideal distance for the lens that you are using. You will be quicker and more spontaneous with your camera. You will even start to think more about your perspective and framing without having the luxury of the zoom, and as the old saying goes, you will begin to zoom with your feet.

    2. Raise your ISO
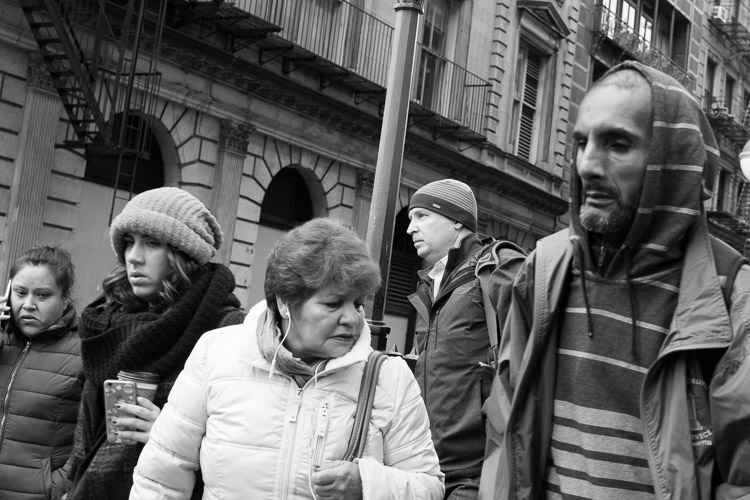
    7 Vital Tips to Improve Your Candid Street Photography SoHo, New York Street Photography

    It used to be taught that you always needed to use as low an ISO as possible. This is because the early digital cameras were terrible at high ISOs, particularly over 400. Luckily, new digital cameras blow the old ones out of the water in terms of high ISO ability. You can now shoot at ISOs of 1600 and 3200 with beautiful looking grain/noise, but the stigma of using high ISOs still exists.

    For street photography, I will typically shoot at ISO 400 in sunlight, 800 in light shade, 1600 in dark shade, 3200 at dusk, and 6400 at night. With an entry level or less advanced camera, I would go down one stop in ISO, i.e. ISO 200 in sunlight and up to 3200 at night.

    Benefits of high ISO

    This gives us a huge advantage. Being able to raise our ISOs this high not only allows us to shoot handheld in dark situations, but it also allows us to simultaneously shoot with a faster shutter speed to freeze motion and a small aperture to maximize the depth of field.

    Some photographers prefer a shallow depth of field, but in the fast moving world of candid photography, I prefer a large depth of field for a few reasons. First, if you miss the focus on your subject, they can still turn out sharp. If you are photographing at f/2.8 on the other hand, your image will be ruined if you miss the focus. Next, since context is very important in street photography, if you have multiple subjects at different depths or important background elements, it will allow everything in the frame to be relatively sharp.

    I prefer to shoot at 1/250th of a second to guarantee that there is no motion blur in my subjects, although I will go to 1/160th or 1/125th in the darkest of situations. In bright light, I will shoot at 1/320th or 1/400th of a second. A high ISO is what allows me to shoot with these speeds, no matter what the lighting is like.

    3. Pick a spot and wait

    7 Vital Tips to Improve Your Candid Street Photography Broadway, New York Street Photography

    Street photography and going for a walk go hand in hand. Sometimes you just want to take your camera and explore on a nice day. However, by constantly walking, you might be doing yourself a disservice. Instead, try to find some promising locations on the way and linger there for a while as you wait for something to happen.

    Picking one spot does a few things. First, it allows you to combine a good location with an interesting moment. If you find a quality location and just take a quick photo and move on, you’re killing so much of the potential. By waiting, you give yourself more time for that magical moment to happen. It’s when the right location merges with the interesting moment, that a great photograph appears.

    It’s when the right location merges with the interesting moment, that a great photograph appears.

    You will also be faster at noticing your surroundings and quicker with your camera because you will be focused on looking around instead of walking. In addition, people will be coming into your scene and entering your space instead of you entering their space, so it makes the whole practice of street photography easier and less confrontational.

    Camera snap

    A small but important tip that goes hand in hand with this idea has to do with the camera snap. The camera snap is the quick, instinctive removal of the camera from their eye that photographers do immediately after clicking the shutter. It is the motion that tips your subjects off to the fact that you just took a photo.

    By picking a spot and waiting for a subject, you can be as candid as possible. Just put the camera to your eye, take the image, and keep it there as the subject leaves your scene. This will make it seems like you were just photographing the background and waiting for them to get out of the way.

    4. Know what to say if someone stops you
    7 Vital Tips to Improve Your Candid Street Photography

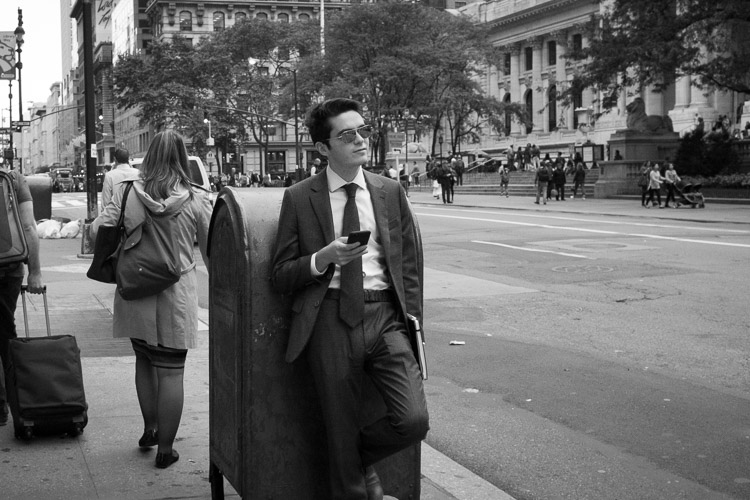
    No matter how you approach it, there is an inherent creep factor to street photography. Some of your subjects will understand and be flattered, while others will think you are the weirdest person on the planet. If you like to photograph your surroundings and culture, people are a big part of that. Including them in what you capture can be a big part of telling the story of your surroundings, and there is nothing wrong with it.

    While tough situations are rare, particularly if you handle yourself in the right way, knowing what to say ahead of time is very important. If someone asks if you took their photo, own up to it and tell them what you were doing. Talk to them and explain why you found them interesting. This will flatter some people, but others will still not understand. I always keep a business card with me and offer to send the photograph if someone emails me for one.

    Keep your cool

    Always keep a smile on your face. If someone seems angry for any reason, there is no need to get defensive or angry back. You don’t have to explain that it’s in your legal right (depending on where you are photographing of course) unless it comes to that. That’s not the best thing to bring up right away because it can make people even angrier.

    Instead, figure out how to diffuse the situation and tell them that you did not mean to make them uncomfortable. I’ve offered to delete a couple of photos over the years when I felt it was necessary. The ability to diffuse a situation is very important, even though I have only had one or two uncomfortable situations over a 15 year period of frequent shooting.

    5. It’s not just about people

    7 Vital Tips to Improve Your Candid Street Photography

    It is a common thought that street photography is only about capturing people walking down the street, on a beach, or in public. That’s just not the case. Street photography is about candid photography of life and culture. While that can and should include people sometimes, other times it can be about nearly anything else. Capture daily scenes and backgrounds that you find to be interesting.

    They can be weird images. Capture something unique. You do not always have to take the prettiest or most epically beautiful photograph. Capture something that makes someone think or that throws them off balance. Capture images for yourself, and ones that you know some people will not understand or like right away. It is not your job to please everyone. It’s your job to take a good photograph.

    Be spontaneous and go for it

    Be spontaneous. With other forms of photography, you can be a perfectionist about every detail. While it is also important to think this way for street photography, so many of these decisions are made in a split second. Let yourself go and be spontaneous with what you capture. Whenever you feel there is potential for a strong image, even if you aren’t sure, go for it. Many will fail, but some of those moments will end up being the best photos you have ever taken.

    Go somewhere that you think will make it tough to capture an interesting photograph. Sometimes you will find that you will be able to capture unique content in areas that others would think of as quiet or boring. There are good photographs everywhere and the best photographers have a way of finding them anywhere.

    6. Group your photos while editing
    7 Vital Tips to Improve Your Candid Street Photography - Three Men, Gucci, New York Street Photography

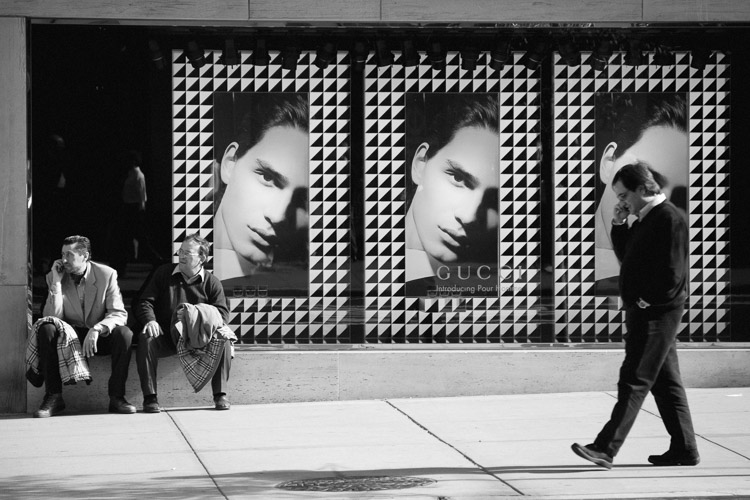
    This is not a tip that all street photographers adhere to. Some like each of their photographs to live on their own. However, many prefer to group their work by feeling, ideas, or themes. For some, the book is the ultimate form of display for street photography.

    Group your photos based on feel and sequence them into a loosely based narrative of some sort. Come back often and add to and take away from it. Over time, you will notice that ideas will grow organically. It will help inform you about what to capture when you are out there. These ideas will develop as you grow as a photographer.

    Before you think about putting together a book, purchase a simple cork board for your office wall and fill it with 4×6 and 5×7 images. Constantly print and replace them to create a cohesive wall of images. It is a lot of fun and a great way to view your work and your progress.

    7. Explore the work of other photographers

    7 Vital Tips to Improve Your Candid Street Photography

    This is such a simple tip but it is immensely important. In your free time, look up the work of all types of street photographers and study their portfolios. Explore the content, the technique, and the styles that you like. Watch videos of these photographers in action to see how they approach the street. Go to gallery shows and look at real life prints to train your eye. This will give you a range of ideas for what to capture the next time you are out shooting.

    The fascinating thing about street photography is that while the content is the same for all of us, what we each come back with is completely different. Studying the styles of different photographers will help inform what is possible for you to create.

    It is inspiring and fun to do. Start a photography book collection or even purchase a couple prints for your walls. The more you surround yourself with it, the better you will become, the more ideas you will have, and the more inspired you will be.

    Some photographers to start out with are Henri Cartier-Bresson, Garry Winogrand, Robert Frank, Helen Levitt, Lee Friedlander, William Eggleston, Walker Evans, Daido Moriyama, Martin Parr, Elliot Erwitt, Joel Meyerowitz, Mary Ellen Mark, Bruce Davidson, Saul Leiter, Trent Parke, Alex Webb, Vivian Maier, and Bruce Gilden.

    Conclusion

    Now go out there and have some fun. The biggest tip is that the more time you spend shooting, the better images you will come back with. So shoot with some regularity and do it in the way that you find the most fun so you will continue to practice.


    If you’d like to learn more about Street Photography, then please check out my ebook The Essentials of Street Photography.

    googletag.cmd.push(function() {
    tablet_slots.push( googletag.defineSlot( “/1005424/_dPSv4_tab-all-article-bottom_(300×250)”, [300, 250], “pb-ad-78623” ).addService( googletag.pubads() ) ); } );

    googletag.cmd.push(function() {
    mobile_slots.push( googletag.defineSlot( “/1005424/_dPSv4_mob-all-article-bottom_(300×250)”, [300, 250], “pb-ad-78158” ).addService( googletag.pubads() ) ); } );

    The post 7 Vital Tips to Improve Your Candid Street Photography by James Maher appeared first on Digital Photography School.


    Digital Photography School

  • TwoEyes VR stereoscopic camera simulates human vision

    Another VR camera has launched on Kickstarter, but this one does things a little differently: TwoEyes VR features two horizontally-oriented cameras spaced 65mm apart that record footage in a stereoscopic arrangement. The resulting 3D video simulates the way someone would see the subject with their own eyes.

    TwoEyes VR features two F2.0 180-degree lenses spaced 65mm apart, which is said to be the average distance between human eyes. The two cameras (CMOS 1/2.3” sensors), when used together, can record 3D videos in both 180 and 360 degrees, while recording with just one camera results in 360-degree non-3D footage. The camera also supports generating red-cyan 3D footage.

    Content is stored to an internal 128GB drive, while other camera features including a 4K image processor, 2,000mAh battery, Bluetooth 4.1, dual-band WiFi, WiFi Direct, and a gyro sensor. The related Android and iOS mobile apps offer users live video previews from the camera, two-button shooting controls, and a post-processing tool for generating either 3D, VR, or 360 videos. 

    The team behind TwoEyes is seeking funding on Kickstarter, where they have raised more than double their $ 40,000 goal with 36 days remaining in the campaign. A ‘Kickstarter Pack’ is offered to backers who pledge at least $ 239 — it includes the camera and global shipping. Shipments to backers are expected to start this upcoming August.

    Via: Kickstarter

    Articles: Digital Photography Review (dpreview.com)

  • Samsung virtual assistant rumored to use camera for object identification

    In its upcoming flagship smartphone Galaxy S8 Samsung is expected to implement a Siri or Google Assistant style virtual assistant named Bixby. According to sources of SamMobile, Bixby will include visual search capabilities and be able to analyze a photograph and identify objects within the frame. The system will also perform optical character recognition on visible text. Users will be able to launch the service via the camera app or a dedicated button on the side of the device. 

    We have seen apps with similar functionalities before, for example Google Goggles, but Bixby is reportedly aiming to take things to the next level by offering a higher degree of interchange with other applications installed on the phone. For example, users will be able to use detected objects or text to order on shopping apps or perform searches.  

    The Bixby technology is likely to have come from Viv Labs, a startup created by former Apple employees and Siri co-founders Dag Kittlaus, Adam Cheyer, and Chris Bringham. Viv Labs was acquired by Samsung last October. It’s not quite clear at this point when the Galaxy S8 will be revealed to the public. It could be at the Mobile World Congress at the end of February or on a dedicated event as late as April. In any case, we’re looking forward to the camera being used in innovative ways on the new Samsung. 

    Articles: Digital Photography Review (dpreview.com)

  • Guerrilla Guidance: DIY Street Signs Make Urban Life More Interesting

    [ By SA Rogers in Art & Street Art & Graffiti. ]

    guerrilla-street-signs-5

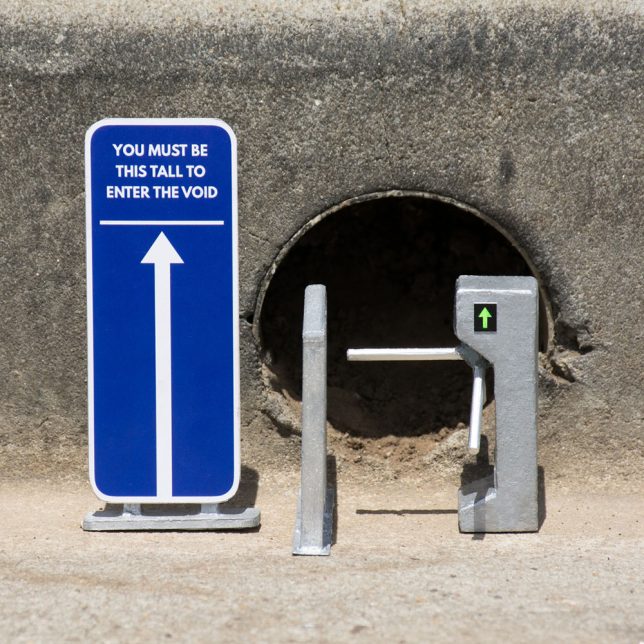
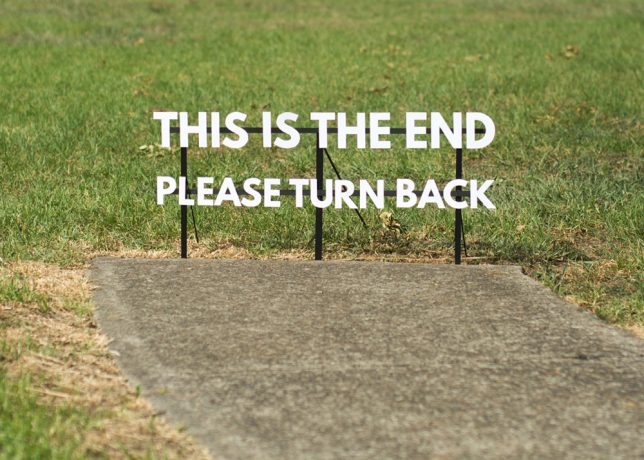
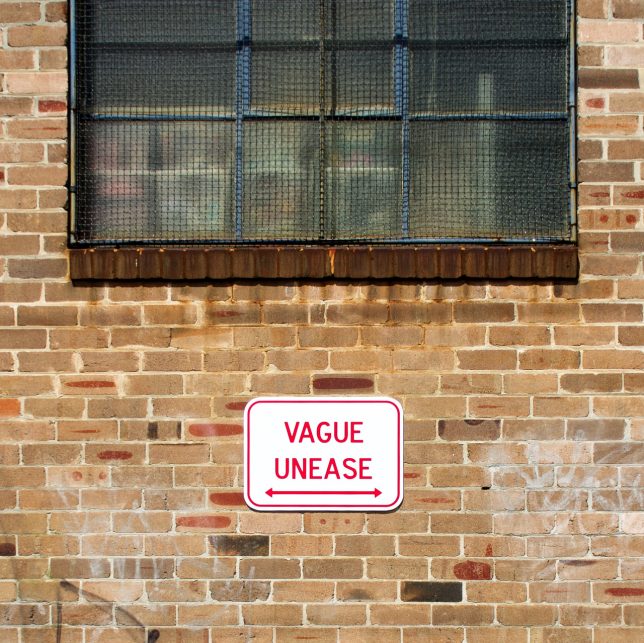
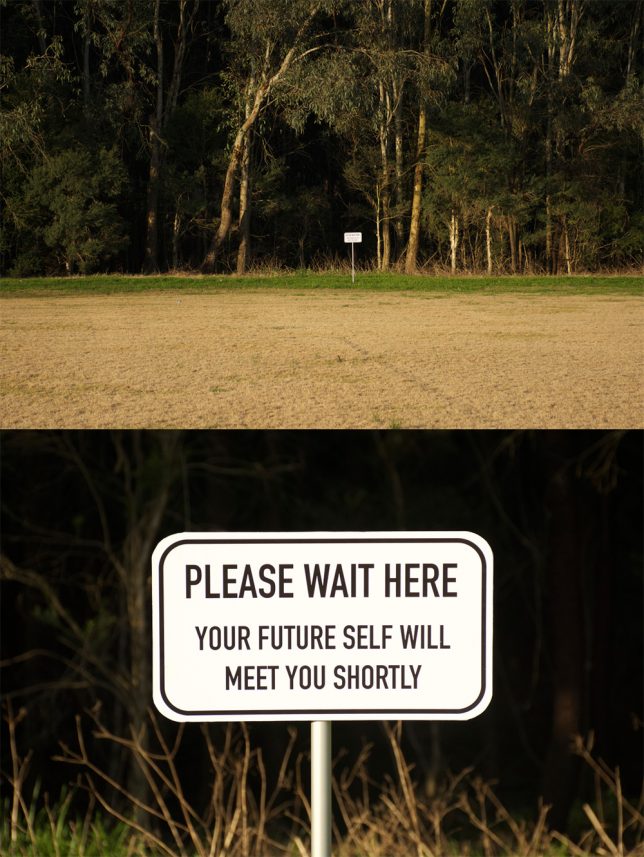
    You’re hurrying along the sidewalk on the way to work, running late and not in the greatest mood, when you see a sign in the adjacent field that simply reads “PLEASE WAIT HERE, YOUR FUTURE SELF WILL MEET YOU SHORTLY.” How does that affect your day? Little moments like these can bring some much-needed levity to the world around us, especially in dark times.

    marquez-signs-3

    guerrilla-street-signs

    guerrilla-street-signs-2

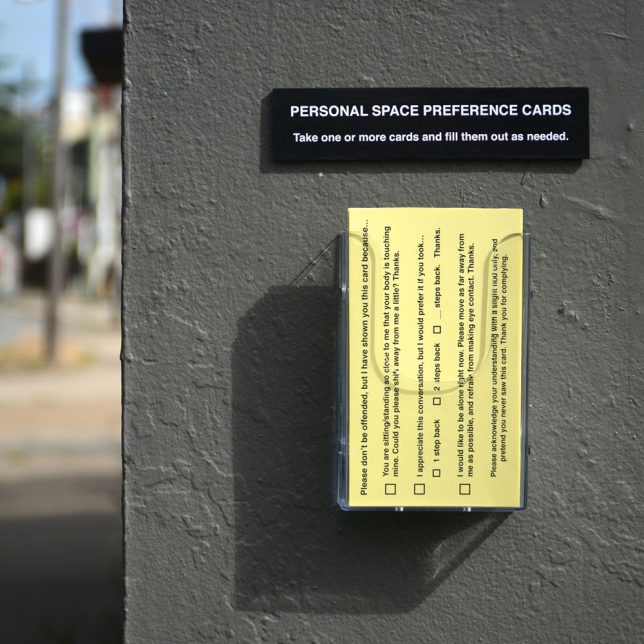
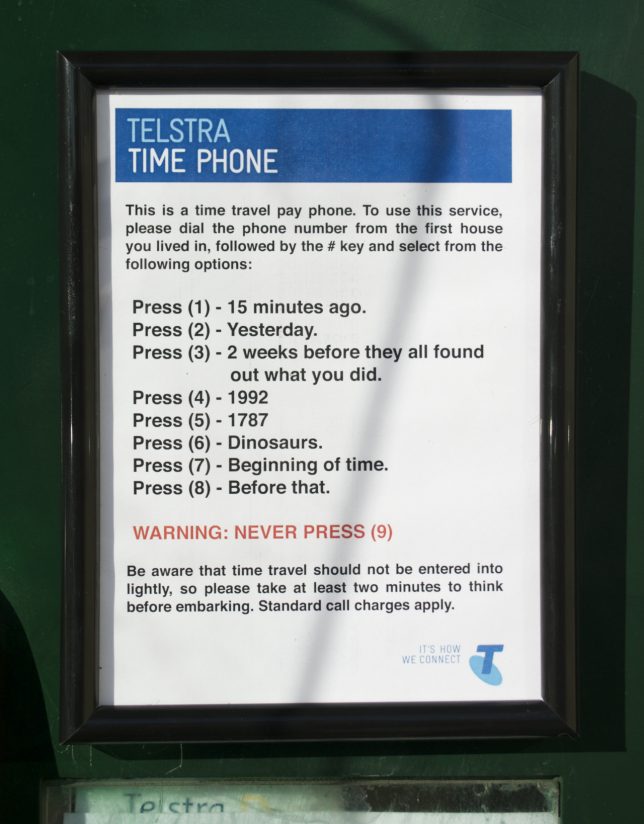
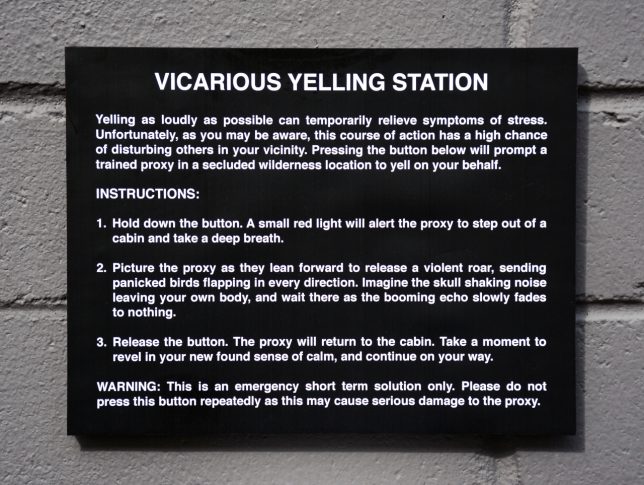
    Impeccably produced, often enticing you to push a button or take a card, these guerrilla installations look pretty legit until you stop to read what they say. They’re easy to miss, if you’re hustling too quickly and tuning out your surroundings – but if you take a moment to notice them, they might just make you smile.

    marquez-signs-1

    marquez-signs-2

    guerrilla-street-signs-6

    guerrilla-street-signs-7

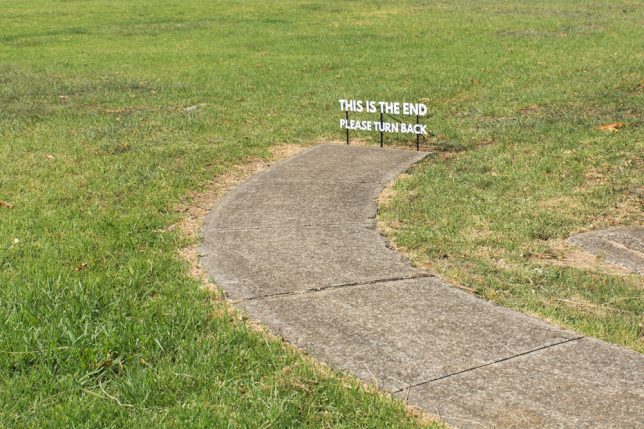
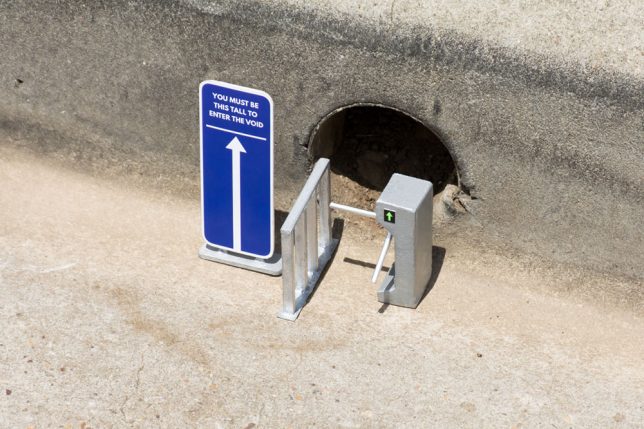
    Artist Michael Pederson (aka Miguel Marquez Outside) creates these little interventions and puts them up all over his home city. Sometimes they’re site-specific, referring to things that can be found in the local environment, like a hole in the curb or a sidewalk that ends abruptly.

    guerrilla-street-signs-3

    guerrilla-street-signs-4

    guerrilla-street-signs-8

    The personal space cards would actually be pretty handy, and who wouldn’t be tempted by a time travel pay phone? Check out more of Pederson’s work at his tumblr and Instagram.

    Share on Facebook


    [ By SA Rogers in Art & Street Art & Graffiti. ]

    [ WebUrbanist | Archives | Galleries | Privacy | TOS ]


    WebUrbanist

  • 5 Tips for Capturing Everyday Moments in Your Family’s Life

    Lifestyle photography and the art of everyday photography is about documenting your daily life. This could include capturing your baby’s toothless smile, his/her first steps, the way they hold their hair or twirl their dress, first time they start to read or write, or anything that you would normally run to grab your cell phone to capture.

    While smartphone cameras have gotten to be more powerful and expensive over the years; nothing beats the quality and the depth of field you can achieve with wide apertures using your DSLR. The ability to capture raw files and process them, lens interchangeability, and being able to obtain superior images under even low light conditions, are just a few of the benefits. To add, over the decade the price for an entry level DSLR has also come down significantly. So if you own a DSLR (or a mirrorless or high-end compact camera) already, why not use it to capture everyday moments in your daily life?

    how to capture everyday moments

    Here are some tips for you to capture your everyday moments with your camera.

    #1 – Capture the details

    how to capture everyday moments

    how to capture everyday moments

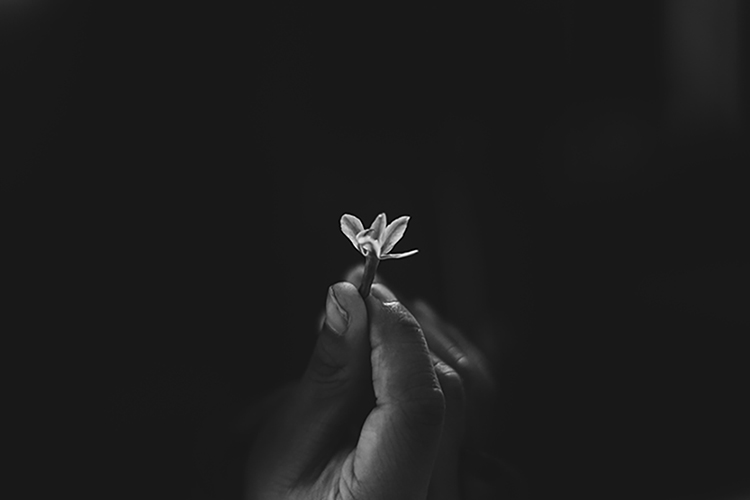
    Capturing the details is about focusing on what the subject is actually doing versus photographing the entire subject which can take away from the story the image is trying to tell or convey. It could be something as simple as a kid holding a flower, or the way she touches her hair or smiles, or anything for that matter.

    how to capture everyday moments details

    Another key to creating extraordinary images out of the ordinary is to think about composition while considering the detail you are trying to capture. You may be focused on documenting and creating that memory that you can reflect upon. So compose your image such that the subject, in this case, the boy writing, creates stronger and meaningful image while helping you remember the story that occurred.

    Another example is the image below.

    how to capture everyday moments

    This was a very simple image where he wanted to show a tiny flower he got from the garden. Again, having my camera right next to me, I quickly adjusted the settings to get the shot. I also tweaked the image a bit during post-processing to accentuate the details.

    how to capture everyday moments

    Children grow up fast and the memories in images and videos of them doing little fun things, their innocence is sometimes all we have to remember and treasure of their childhood.

    #2 – Think perspective

    how to capture everyday moments perspective

    This was an ordinary everyday moment for us. Having breakfast at the table, eating his favorite snack and just enjoying his moment. I happened to think about a different angle and took this image while he stared up at me. Straight on would have been a perfectly fine image as well, but him looking up gives the viewers something different from the usual.

    Here is another image where perspective was a little different.

    how to capture everyday moments

    In this image, I found my little one sitting on the stairs and coloring away. He found that to be his comfortable spot. Using the stair rods as framing I placed my camera in between the pillars and clicked for a unique perspective. This was a very ordinary moment of a 4-year-old coloring. But having my camera on hand and using a different perspective makes this image more unique and extra special.

    Perspective can be anything. Utilizing your stairs for shooting through, or having your kid looking up at you while you click to emphasize scale are some commonly used techniques that can give an added boost to your images.

    how to capture everyday moments

    3 – Open your windows and blinds and use natural light

    When that fails, use alternate light sources.

    The biggest challenge with indoor photography is the availability of light and being able to use your camera under different lighting conditions. The quantity and quality of light change dramatically with different sky conditions. Regardless of the sky, however, try to shoot in the available natural light while keeping your subject close to the window.

    how to capture everyday moments

    how to capture everyday moments

    Also, consider the time of day while photographing your subjects. In the first image above, I had to increase my ISO to 400 while also trying to keep only certain parts of the image in focus. Something to remember is while a high ISO can help you with many scenarios, it can also produce a certain amount of grain in the images which may or may not be desirable, depending on the look you want.

    The bigger challenge with natural light is what do you do at night when there is only artificial light available? One solution is to use a flash and bounce it off the ceiling or wall depending on how much you wish to have in your image. Another way is to actually decrease the available light in your image, use interesting available light sources as a backdrop and accentuate your subject under low lighting conditions for some extra creativity.

    how to capture everyday moments

    In the image above, all the artificial lights in the room were turned off. While he was browsing his iPad, it was the only light source illuminating his face.

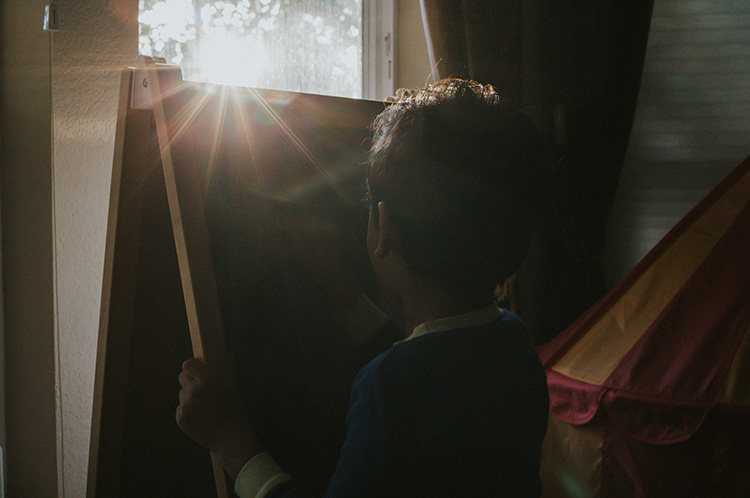
    In examples below, I used the lighting from the Christmas tree as my light source. I turned all the room lights off and adjusted the exposure a bit during post-processing. Another creative way to use the artificial light is to use backlighting which causes a silhouette.

    how to capture everyday moments

    how to capture everyday moments

    In other words, use natural light as much as possible. However, when artificial lighting is all you have, use it in the best possible creative way.

    #4 – Make your moments happen, don’t wait for them

    how to capture everyday moments

    how to capture everyday moments

    how to capture everyday moments

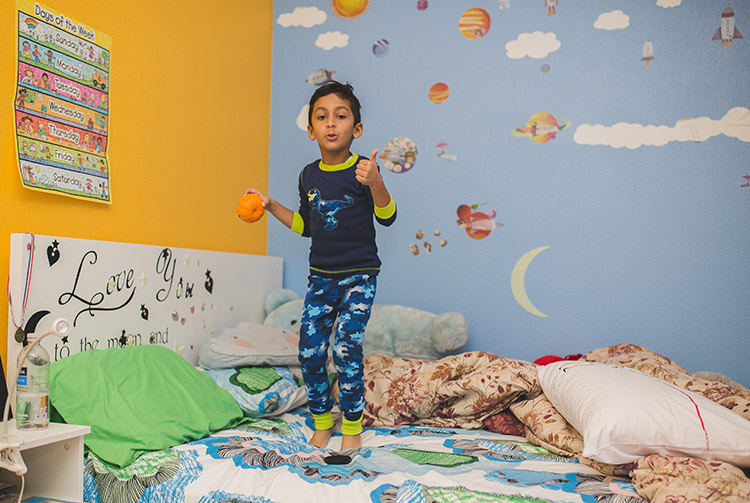
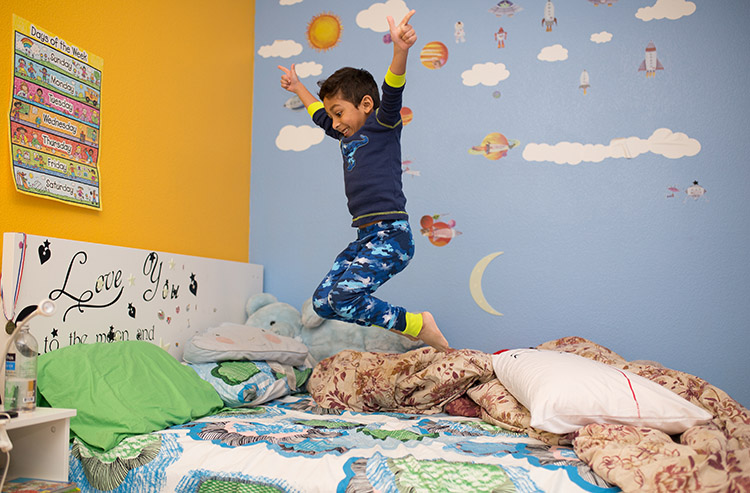
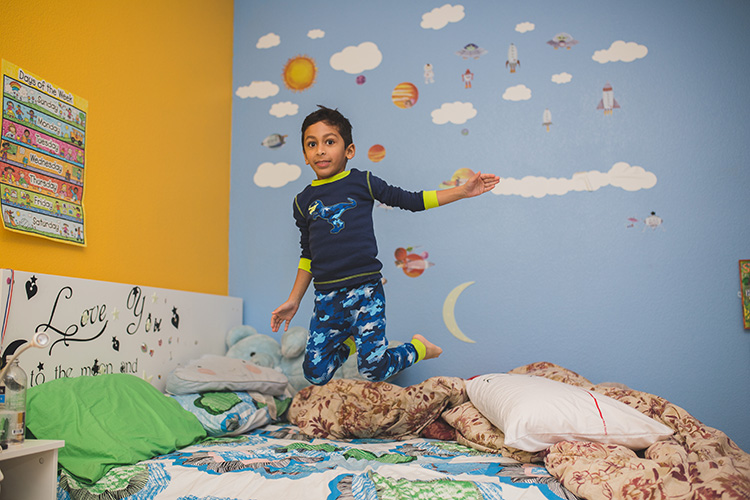
    Somedays, you just have to wait for a cute moment to happen. While other days, you have to create a scenario to make those adorable moments with your kids occur. In the images above, he just wanted to hang out in his room. I used that as an opportunity to let him jump on the bed, which he loved a lot, and I clicked away to capture the action and movement shots with a high shutter speed.

    In the image below, I really wanted a laughing happy image of my kid without him knowing I was shooting. Hence acting natural, while he really didn’t care to do either while being engrossed with his iPad. I kept repeating certain jokes he likes until I got that laughter out of him.

    how to capture everyday moments

    In other words, it is nice to have your camera nearby when a certain moment happens for you to be able to capture it right away. However, you sometimes have to create that moment or place your subject in a place or a scene in order to achieve something you want.

    #5 – Last, but not the least, carry your camera everywhere

    how to capture everyday moments

    how to capture everyday moments

    Carrying your camera everywhere you go will ensure that you do not miss out on documenting key moments in your kids’ lives. Can you imagine carrying only your cell phone to your son’s soccer game and ending up with a blurry image?

    Documenting and creating a memory book or printing out a family album with images you created that are clean, crisp and not blurry is a special feeling of its own. Having your DSLR with you while learning the basics will help you to document key events in your own life and ensure they remain for generations to come.

    Conclusion

    In conclusion, just a few simple techniques in understanding composition, lighting, while also applying the above tips will help you create stronger images. Lifestyle photography and the art of capturing the everyday moments using your DSLR instead of your cell phone gives you an extra layer of that creative edge while still documenting moments that you usually would either way.

    googletag.cmd.push(function() {
    tablet_slots.push( googletag.defineSlot( “/1005424/_dPSv4_tab-all-article-bottom_(300×250)”, [300, 250], “pb-ad-78623” ).addService( googletag.pubads() ) ); } );

    googletag.cmd.push(function() {
    mobile_slots.push( googletag.defineSlot( “/1005424/_dPSv4_mob-all-article-bottom_(300×250)”, [300, 250], “pb-ad-78158” ).addService( googletag.pubads() ) ); } );

    The post 5 Tips for Capturing Everyday Moments in Your Family’s Life by Jyotsna Bhamidipati appeared first on Digital Photography School.


    Digital Photography School

  • Here’s the first known photo of a US Presidential Inauguration

    When James Buchanan was sworn into office on March 4, 1857, John Wood made history by making the first known photograph of a US Presidential inauguration. 

    Wood was hired by Montgomery C. Meigs, an engineer managing the expansion of the US Capitol which added wings for the Senate and House. According to Robert O’Harrow’s The Quartermaster, Meigs was an early days photography enthusiast. As prints became easier and more affordable to produce, he saw the value in using photography to make copies of architectural plans and hired Wood.

    For the inaugural photo, Meigs constructed a small stage so that Wood could capture the scene. The crowd of more than 20,000 mostly stood on a platform Meigs had built to hide construction debris. His journal mentions that Wood was able to make the inauguration exposure in 4 seconds, as he had been experimenting with a ‘photography process of great speed,’ referring to the wet collodion process that was being widely adopted at the time. The image that resulted is an albumen print, resulting from a method of making prints that used a substance found in egg whites and table salt to bind photographic chemicals to paper. 

    Articles: Digital Photography Review (dpreview.com)

  • Dear Nikon: Please let us keep the 20mm F1.8G, Love, Dan

    An open letter to Nikon 

    Dear Nikon, 

    Dan Bracaglia here from DPReview.com. It’s been brought to my attention (mostly due to the nagging of coworkers) that the Nikkor 20mm F1.8G lens you’ve loaned us needs to be returned to Nikon ASAP. I guess this makes sense, seeing as we’ve had it for about 20 months now. But perhaps I can convince you, beyond a reason of a doubt to allow us just a little more time with it. I ask because I truly love this lens. And here’s why:

    There’s no such thing as a perfect lens, but a lens can certainly be the right tool for a specific job, and to that extent, it’s perfect. Your 20mm F1.8G is just that for me.

    I first moved to Seattle about five months before you shipped DPReview the lens. I’d previously been living in New York City and photographing live music. Back then I largely shot with a 17-35mm F2.8 (the lens motor has since died) and an on-camera flash. It was the perfect setup for the rowdy punk rock shows I frequented.

    ISO 12,800, 1/160 sec at F2. Edited to taste in Lightroom.

    But, after moving I realized I was going to have to switch up my music rig. I became aware that shows in small and mid-size venues in Seattle were well-documented, but shows happening in less traditional spaces, like friends’ basements, living rooms or art/community centers were often not photographed (despite being well-attended). So I launched a photoblog with the goal of documenting my local music community.

    Out of respect for these intimate environments, I vowed to leave my flash at home and shoot available light only. And what could be better for documenting in the dark than fast primes? 

    When shooting shows with available light, three things matter most to me in a lens: its size/weight (too large = too intrusive), it’s brightest aperture and its focus speed. Your 20mm, Nikon, is a perfect balance of all these things. A look at the Sigma 20mm F1.4 to gives an idea of how big and cumbersome a brighter 20mm lens could be.

    And when paired with my D750, the combination is fast-to-focus (using the center area) even in conditions that are often too dark for me to physically see. This is incredibly impressive and useful. Even if I can’t tell whether or not my subject is in focus, I need to be able trust that my camera and lens can. Simply put, when used together the D750 and 20mm F1.8G sing.

    ISO 12,800, 1/160 sec at F1.8. Edited to taste in Lightroom.

    I’ve been mostly shooting it alongside your marvelously cheap 50mm F1.8D, which was actually my favorite Nikon lens (shocking!) before I got my paws on the 20mm 1.8G. I use the 50mm for detail shots and the 20mm to capture the tone of the room. Both are coat-pocketable and don’t add much bulk to the D750. Moreover both are sharp enough for me by F2.2 and fast-to-focus. The only thing I don’t like about the 20mm against the 50mm is the price, which is much more than the quintessential fast 50. 

    That’s where the loan comes in. I know, I know, I’m lucky to be able to have access to loaner gear (we do ALSO use the lens for camera testing and sample image shooting), it’s just hard to justify spending $ 800 on a lens that will likely be soaked in beer within two weeks of my purchase (not that it’s ever happened to your 20mm…). I suppose I should be grateful for having had the chance to use a piece of gear and fall in love with it before buying it. After all, the inherent danger of using loaner gear from any brand, is getting attached.

    At the the end of the day, maybe I should look at the $ 800 price tag as less about the cost of the lens and more about the price of being able to continue to document something I love, without drawing much attention. And to that regard, I owe it to myself, my community and you, to pony up and buy one. 

    I’ll do that, but maybe after just one more loan extension?

    Sincerely,

    Dan Bracaglia

    P.S. Anyone at Nikon want to purchase a slightly busted 17-35mm F2.8 for $ 800?

    Articles: Digital Photography Review (dpreview.com)

  • Review of the New Flagship DX Camera – The Nikon D500

    Everyone thinks they need a full frame camera but are they really that much better? Most people feel the only reason they have cropped sensor cameras is because they can’t afford a full frame one. Then you have to wonder why Nikon have produced one that is not full frame and comes with an expensive price tag. So who would be interested in the new Nikon D500? There are a lot of people who would love this camera and what it has a lot to offer.

    Earlier this year Nikon released the new flagship D500 camera as part of their DX range or cropped sensor line-up. It is fast and designed with a specific user in mind. It is also one of the first cameras Nikon has produced that is using Snapbridge, the new phone app that allows you to take photos and upload them to your phone for sharing on social media straight away.

    Nikon D500 review

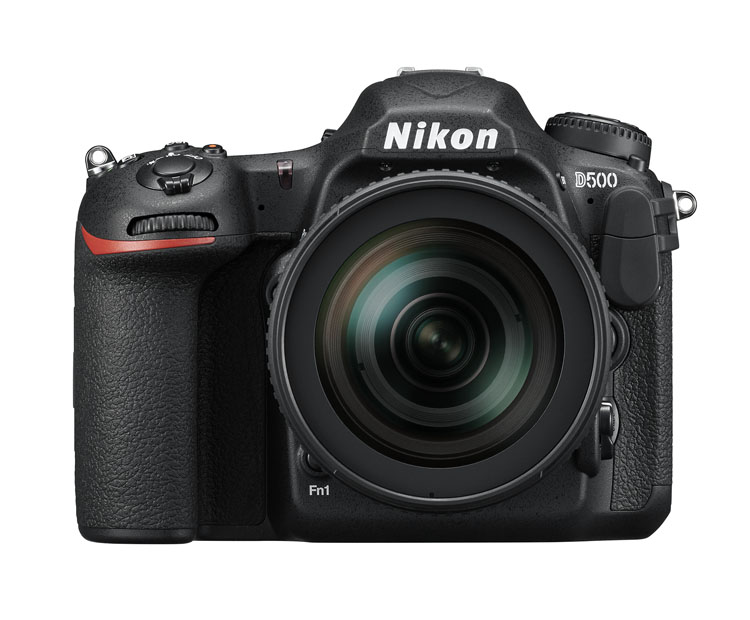
    The Nikon D500 – image courtesy of Nikon.

    Price out the Nikon D500 on Amazon or B&H Photo’s site.

    First impressions

    Unlike many of the other DX cameras, it is quite large. People tend to think that cameras with cropped sensors are smaller, but the D500 is in the Pro range and you can see that just by looking at it. It looks like a camera that a professional photographer would use, and many indeed do.

    One of the first things I noticed was how similar many of the controls and the layout is to the D800. In many ways, it seems like a cropped sensor version of that camera. This also means that most of the buttons are around the camera body, so you don’t have to keep going back to the menu to change settings. There are everywhere, but it doesn’t make it confusing. You can make changes without really having to stop and look at what you are doing.

    Nikon D500 review

    Sunset image shot with the Nikon D500.

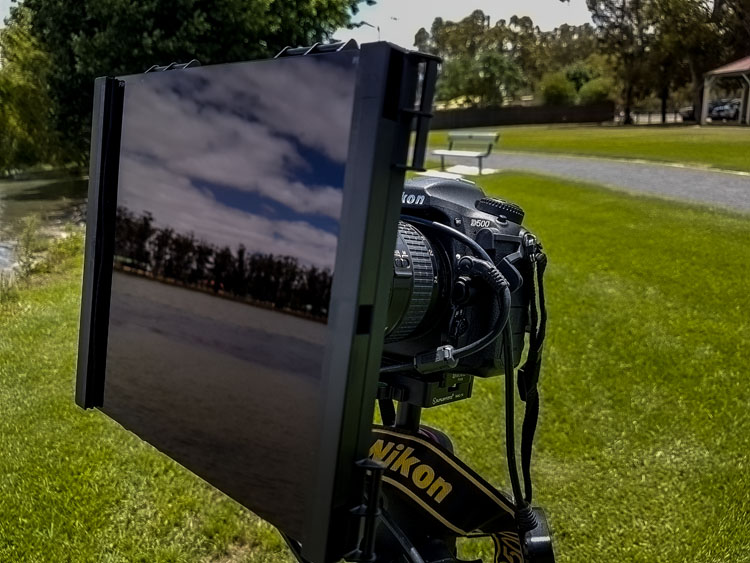
    If want to do long exposure photography there is a small blind in the viewfinder that will close to stop light leaking into your image. It means you never have to worry about whether or not you have the cover for it. You just need to remember to use it when doing long exposures. Very handy.

    ISO and noise

    The D500 is Nikon’s replacement for the popular D300 range that they stopping making a few years ago. The D300 was fast and great for many types of photography, however, the ISO range was not good. As soon as you increased the ISO the images became very noisy.

    It also didn’t go very high, with ISO 3200 being the maximum. The D500 ISO goes up to 512,000, so it will get you images no matter the shooting conditions. The level of noise in the images is also significantly better and not as noticeable.

    Review of the New Flagship DX Camera - The Nikon D500

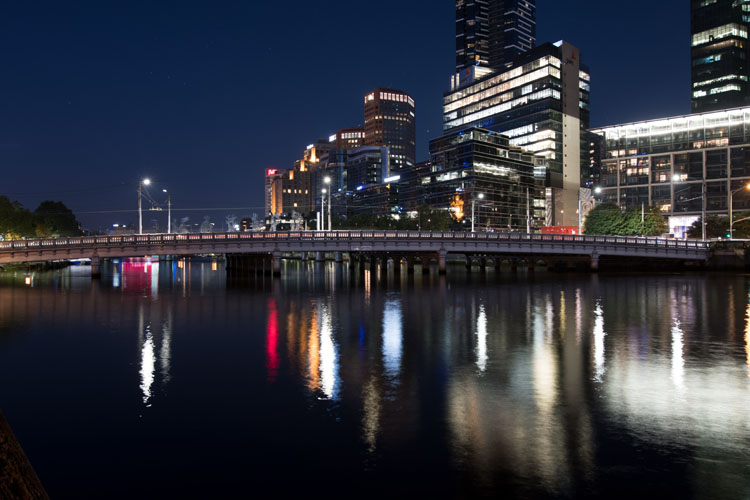
    Image shot using a tripod with the Nikon D500 at ISO 200.

    Review of the New Flagship DX Camera - The Nikon D500

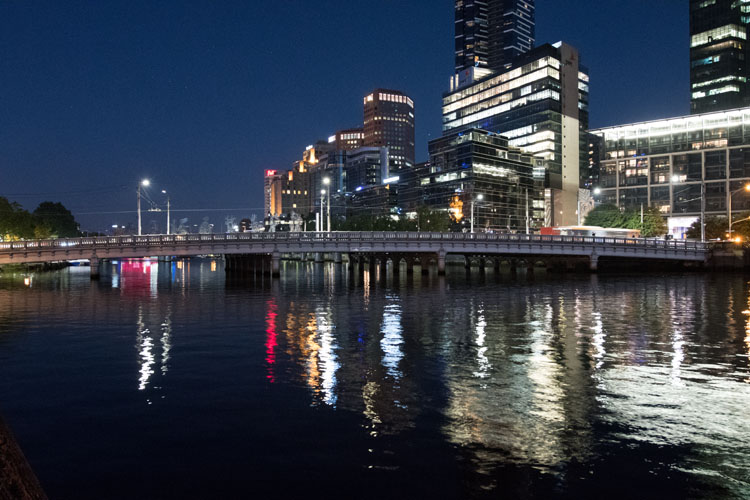
    Image shot with the Nikon D500 hand held at ISO 6400.

    Megapixels and image size

    The camera is 20 megapixels, which is enough for most people. A RAW image is around 25 MB. Not as large as some cameras, but still large enough that you have to consider how you will store them. Jpegs are a lot smaller, but you don’t get as much information to work with as shooting RAW.

    Battery

    The battery is very similar to the battery for the D800 but it is a new version, so should only be used in the D500. If you have similar batteries for other cameras it is a good idea to mark them in some ways so they don’t get mixed up. You don’t want to be putting the wrong battery in the camera. While the battery is different the charger is the same.

    The battery lasts a long time and you can safely go out for a day of shooting and not use much. Like most Nikon cameras you can go out and shoot for a few days without having to recharge it. Though that is dependent on how many photos you take. Of course, if you do a lot of chimping (image review on the camera) or use LiveView frequently the battery will run out faster. Likewise, if you’re shooting in the cold.

    The batteries do typically last a long time as well. You can use a battery for quite a few years before you start noticing that it doesn’t last as long.

    Remote shutter release

    Review Nikon D500 DX camera

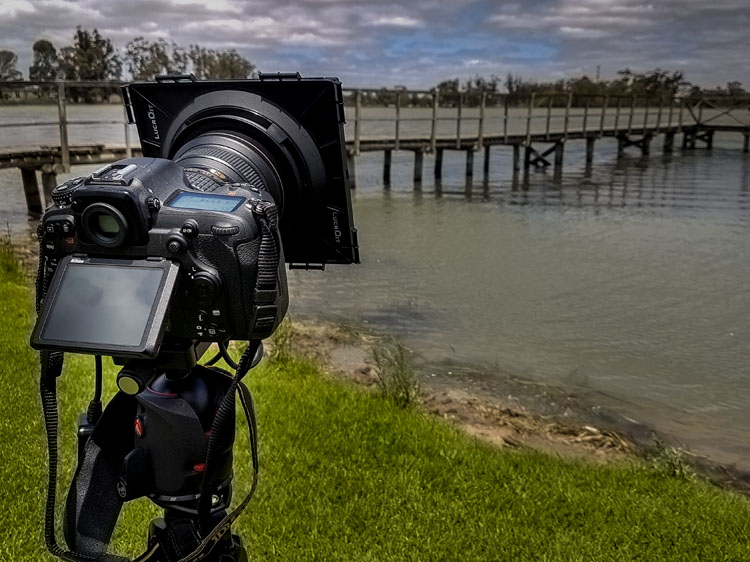
    Using some ND filters and the MC-36 remote shutter release on the Nikon D500 for some long exposures.

    When you are looking at a new camera you need to be aware of all the accessories and whether or not you will have to buy a lot of new ones. The remote shutter release that I purchased for the D300s, the MC-36, was fine for the D800, and it is also good to use on the D500. That makes it a good match for the gear I already have. It is something you need to consider anytime you are buying a camera, it isn’t just the expense of the camera, but what other equipment you may need as well.

    Review Nikon D500 DX camera

    A long exposure of some recently painted silos using the D500.

    Focusing area

    The focusing area takes up larger space in the Nikon D500 than it does in other bodies. It has the same focusing center as the Nikon D5, their top pro model, but on the cropped sensor of the D500. In practice, that means you can focus on subjects almost up to the very edges of the viewfinder. You can focus on a much larger area than other DX cameras.

    If you want to use spot focusing, but have found it hard in the past because you couldn’t focus on subjects at the side, it is now possible to do that. Any camera that makes focusing easier for you has to be good.

    Memory card


    The D500 has two slots for memory cards. You can put an SD card in one, and the other is for XQD cards, which are reasonably new but only needed for a few Nikon cameras. It is mainly used in the higher end bodies that are fast and shoot a lot of frames per second, which is why the card is used. Normal cards would find it hard keeping up with the speed and writing the images. If you are taking photos at 10 frames a second it is important.

    Apparently, you can buy the cards at all good camera stores. Though, you would also need a memory card reader for it as well.

    Touchscreen

    The screen at the back is a touchscreen which makes it easy to scroll through your images. It works a lot like your smartphone. You can make the images bigger or smaller and flip through them with your fingers.

    leannecole-nikon-d500-review-15

    The back screen of the D500 can be moved for better viewing and is also a touchscreen.

    Crop factor

    The Nikon D500 has the 1.5x crop factor. Basically, that means that if you have a full frame lens, like the 70-200mm, when you use it on the D500 the lens becomes essentially like a 105-300mm. It is the advantage of using a DX camera body with high-quality lenses.

    Nikon D500 review

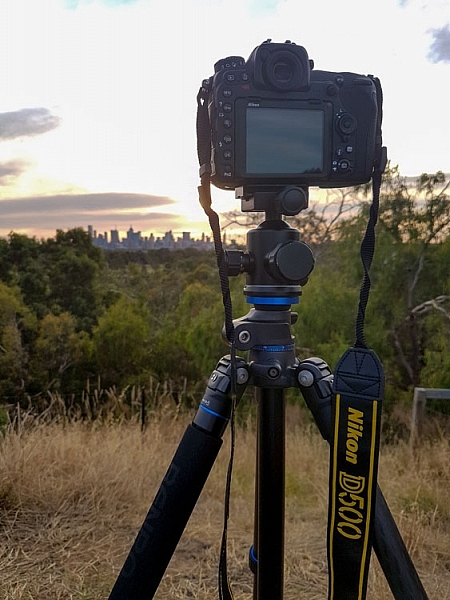
    It is all set up to take some sunset photos of the city of Melbourne.

    Who is the Nikon D500 for?

    The most likely person to buy this camera is someone who is interested in the 1.5x crop factor. Photographers who can’t afford those great big long lenses, but want to be able to get as close as they can to the action. Having the ability to make a 300mm lens go to 450mm is fantastic. The longer the telephoto lens, the more expensive it is, so the cropped sensor is great for that reason.

    leannecole-nikon-d500-review-20

    The sunset shot with the Nikon D500. The DX camera allowed me to get a lot closer with the 80-200mm, this was at 277mm.

    Sports photographers would also be interested where speed and getting closer to the action is very important. Full frame is great, but to get a camera that is fast enough to shoot lots of frames per second you would need to spend around $ 6500 on a Nikon D5 or similar. If you don’t have that kind of money, $ 2000 USD will get you the Nikon D500 which will do many of the things that the others can, but you also get the cropped sensor.

    There are many other kinds of photographers who would benefit from the D500 as well. Bird and wildlife photographers would love being able to get more length with their lenses. The 10 frames per second capability of this camera would also be an advantage for capturing birds and animals on the move.

    Macro photographers will get a lot closer to their subjects with their lenses, and when you put on extension tubes, a whole new world will be seen.

    leannecole-nikon-d500-review-23

    Taken using the D500 and the Nikon 105mm macro lens, with the cropped sensor you can get in a lot closer than you can with a full frame.

    Snapbridge app

    This is a new app that Nikon has developed that makes it possible to connect your smartphone with the camera. It is unlike others that use Wi-Fi to do it, Snapbridge stays connected to your phone all the time. You can upload photos, use it to take your photos, and it also keeps your camera’s firmware up to date.

    It is available for Apple iPhones and Android, though it is a little harder to use with an Android.

    Using the camera

    I found the camera easy to handle and work my way around. Then again, I’ve been using Nikon cameras for many years, and as previously stated I found a lot of similarities with the D800. I found the weight fine, but others who picked it up thought it was heavy. Then again, you would expect a camera of this quality to be that heavy. Good quality cameras of this caliber are always a bit hefty.

    The fast frame rate blew me away and as someone who always likes to bracket photos to get more options, I really enjoyed it. With the D800 I would never do more than three shot hand holding, but with the D500 I felt there was enough speed to let me do five. I also really enjoyed just listening to how fast it was.

    leannecole-nikon-d500-review-14

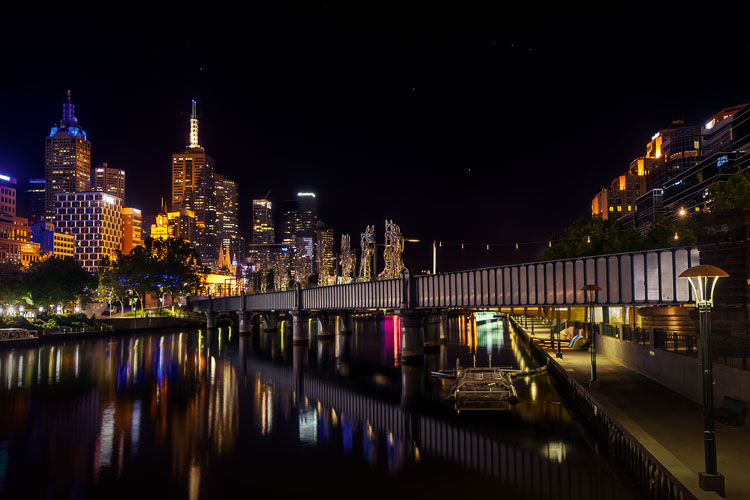
    Using the D500 for night photography in Melbourne.

    If I had one criticism, it would be that there is an overall blue cast and how, in some cases, it made the blues far bluer than they really were. I’m not a fan of blue in images, so I didn’t like it, but I know a lot of other photographers would.

    Overall

    The Nikon D500 is a great camera and anyone who purchases it will really enjoy using it. Full frame is great, but if you are a photographer who likes to zoom in, then the DX may suit you more. If you shoot sports, birds, wildlife or macro, look at this camera, it could be just what you need.

    Price out the Nikon D500 on Amazon or B&H Photo’s site.

    leannecole-nikon-d500-review-19

    The sun as it sets and the camera taking photos.

    googletag.cmd.push(function() {
    tablet_slots.push( googletag.defineSlot( “/1005424/_dPSv4_tab-all-article-bottom_(300×250)”, [300, 250], “pb-ad-78623” ).addService( googletag.pubads() ) ); } );

    googletag.cmd.push(function() {
    mobile_slots.push( googletag.defineSlot( “/1005424/_dPSv4_mob-all-article-bottom_(300×250)”, [300, 250], “pb-ad-78158” ).addService( googletag.pubads() ) ); } );

    The post Review of the New Flagship DX Camera – The Nikon D500 by Leanne Cole appeared first on Digital Photography School.

    Digital Photography School

  • Feisty upstart: Hands-on with the Fujifilm X-T20

    A great looking camera

    Our first impression of the X-T20: ‘that’s going to generate a lot of comments.’ And there’s one simple reason for that: the X-T20 is an awful lot of X-T2 for a lot less money.

    This probably shouldn’t be a surprise: the X-T20 has the same relationship to the X-T2 as the X-T10 did to the X-T1. The only difference is how quickly the smaller camera has followed on its big brother’s heels.

    The sixteen month gap between the launch of the X-T1 and X-T10 softened the blow of Fujifilm offering much of the T1’s spec at a lower price. But X-T2 owners are likely to flinch slightly at the sight of a camera with such similar spec announced only four months after the T2 hit the shelves, and the knowledge that it’ll be another month before anyone can get hold of one is unlikely to ameliorate the sting.

    What don’t you get?

    There certainly are differences between the T2 and T20. Just like their respective predecessors, the more expensive model features a larger viewfinder. The X-T2 uses a larger OLED panel with better magnification (0.77x vs 0.62x, which is more than 50% larger) and a more distant eye-point, meaning you can see the whole panel from further away. The smaller camera doesn’t have any weather sealing, either.

    There’s no battery grip option for the X-T20, so you can’t get the reassurance of the 1000 shot-per-charge CIPA rating that the X-T2 has with access to three batteries. Similarly this means there’s no way to extend the T20’s video longevity, nor to add a headphone socket. Video makers will also note the lack of Log output from the new camera.

    Other differences

    The X-T20 doesn’t offer dual card slots or support for UHS-II cards, which is likely to mean it can only capture sugnificantly shorter bursts of images, making it a considerably less attractive camera to anyone whose interests extend to sports shooting.

    The X-T20’s 4K video is taken from the full width of the sensor, unlike the X-T2, meaning more lenses will be able to offer a wide-angle view while video shooting. However, this is achieved by line skipping, rather than capturing, demosaicing and then downsampling, so the resolution capture won’t match the X-T2.

    The X-T20 also lacks the clever dual tilting screen that we liked so much about the T2. The X-T20’s rear LCD tilts up and down, meaning you can still shoot stills or video from waist level, but it doesn’t adapt itself as well to portrait-orientation shooting.

    So what’s the fuss?

    That’s settled, then, they’re totally different cameras, right?

    Well, no, not really. The most significant similarity is the move to a 24MP sensor (an X-Trans CMOS III, to use Fujifilm’s terminology). This was always likely to be part of the X-T20’s spec but that doesn’t mean we should overlook just how much of an improvement this will offer, compared with the existing 16MP chip.

    It’s not clear whether it’s purely the higher resolution or more sophisticated processing, but the 24MP chip is much less prone to the paintbrush-esque artefacts or ‘waxy’ skin texture that could occur with the earlier X-Trans cameras. Either way, just the inclusion of the 24MP sensor should have existing X-mount owners studying their bank balances.

    Performance/processor

    The X-T20 also gains the same processor as the X-T2 so just about every aspect of the T20’s performance should be similarly snappy.

    The autofocus speeds, shutter lag time, shot-to-shot time and startup delay are all comparably rapid, meaning the X-T20 should be a pleasantly responsive camera. The only detail that’s unclear is whether the X-T20 will share the X-T2’s ‘Boost’ mode that increases EVF refresh rates from 60 to 100Hz.

    The use of the same NP-W126S battery as the X-T2 means the X-T20 can offer a CIPA rating of 350 shots per charge; a 10% improvement on the camera’s predecessor. As with all CIPA numbers, real-world usage is likely to last much longer than this, but the figure should be comparable between cameras. The X-T20 will charge over its USB 2.0 socket.

    AF system (inc customization)

    The X-T20 gains its autofocus system wholesale from the X-T2, not only providing direct access to up to 325 selectable AF points (up from the X-T10’s 49), but also gaining the sophisticated continuous AF fine-tuning. The development of this system for the X-T2 helped that camera offer hugely improved C-AF and tracking results when paired with fast-focusing lenses.

    The X-T20 doesn’t offer a customizable C-AF preset (option 6 in X-T2’s menu, shown above), to allow fine-tuning of the system’s behavior, so you need to choose between the 5 available presets.

    Touchscreen

    The X-T20 doesn’t have the X-T2’s AF point joystick but it does, instead, have a touch-sensitive rear LCD. We’ve not had a chance to try the production-ready X-T20 touchscreen experience, so can’t be sure exactly how well it will work (and we’ll be updating this story very soon, once we have).

    The camera lets you set the focus point, set focus point and initiate focus, or set focus point, initiate focus and fire the shutter. The ability to move the focus point during movie shooting is also promised, which is a huge bonus. The touchscreen isn’t active when you’re shooting with your eye to the viewfinder.

    The touchscreen also has a role to play in playback mode, allowing swiping between images, pinching to zoom in and out, and double-tapping to jump to a magnified view of the focus point used. Our initial experiences with a pre-production model suggest it isn’t the most responsive touchscreen system, but we’ll have to wait for the final samples to be sure.

    Ergonomics

    Comparing side-by-side, the X-T20’s ergonomics are very similar to those of the T2. Like the X-T2, the T20 has a dedicated movie-shooting mode, freeing up a button on the top plate for customization and meaning you can preview the video angle-of-view prior to shooting. However, the camera loses the Fn button that the X-T10 had it its rear panel, so you don’t end up any better off, overall.

    The handling isn’t quite the same, of course: the smaller camera doesn’t have a front-plate Fn button, its shutter button is rather smaller and the top-plate Fn button isn’t quite as conveniently located. The X-T20 also misses out on an ISO dial, but the ability to cycle between three Auto ISO presets probably makes up for that (and is more effective than the pretty-but-unusable combined shutter speed/ISO dial used on the X-Pro2 and X100F).
    On the camera’s right shoulder is an exposure comp dial that extends from +3 to -3EV and also features a ‘C’ position that hands-off control to the camera’s command dial, extending the available range of compensation out to +/-5EV. There’s also a lever to engage full auto mode if you need to hand the camera to your grandma.

    The X-T20 also gains the improved menus offered on the X-T2, including a custom ‘My Menu’ tab.

    Kit and caboodle

    Best of all, Fujifilm offers the X-T20 in a series of kits. For existing X-mount users there’s a body-only option ($ 899). For budget buyers who need a lens, there’s a kit with the XC (no aperture ring) 16-50mm F3.5-5.6 OIS ($ 999): a perfectly standard kit zoom. But the combination that stands out to us the the kit with the 18-55mm F2.8-4 OIS ($ 1199): one of the best kit lenses on the market and a great way to minimize the need to upgrade.

    This much camera and lens for the list price of an X-T2? Even if it does upset some people, the X-T20 looks likely to make a lot of photographers very happy.

    Articles: Digital Photography Review (dpreview.com)

  • F is for ‘4th’: Hands-on with Fujifilm X100F

    Hands-on with Fujifilm X100F

    Fujifilm has announced the fourth in its series of X100 rangefinder-style cameras: the X100F. The X100F features an updated sensor, revamped autofocus system, larger battery and tweaked ergonomics. We met with Fujifilm recently and got our hands on a pre-production sample. Click through for a quick product tour.

    Hands-on with Fujifilm X100F

    Superficially very similar to its predecessor, the X100F is a clear evolution of the X100-series lineup in terms of design. The most obvious difference between the two cameras from the front is the X100F’s new front control dial, which brings the total dial-count to three.

    Hands-on with Fujifilm X100F

    Here’s a closer look at that dial, and next to it the viewfinder mode selector lever, which toggles the hybrid finder between optical and electronic viewing modes. The 23mm (35mm equivalent) F2 prime lens is the same design as the X100T (and X100S and X100) and can accept the same telephoto and wide-angle adapters.

    However, new ‘Mark II’ versions of these adapters have been released alongside the X100F. We understand that the Mark II versions are optically identical but feature electronic contacts which match contacts on the X100F camera body, meaning that the camera can recognize when an adapter has been fitted and respond accordingly.

    Hands-on with Fujifilm X100F

    The X100F’s rear control layout has been simplified compared to the X100T, and the controls have been slightly rearranged. The LCD screen is the same, but controls are now arranged on the right of the display, with an AF selection joystick added at upper-right. Essentially the same control that we’ve seen added in the X-Pro2 and X-T2, this should make changing AF points much easier than it was been in previous X-series models. 

    The AF system has been revamped, too. The X100F now features 91 user-positionable AF points (which can be more finely divided into 325, if you prefer), with 40% of the imaging area covered by a hybrid phase-detection autofocus array, and focus should be responsive down to -3EV.

    Hands-on with Fujifilm X100F

    Another change, but arguably a less impactful one is the addition of an integrated ISO dial to the shutter speed dial on the X100F’s top-plate. This matches the same dial on the X-Pro2. It looks nice, but we suspect that for many users it will stay locked on the ‘A’ position most of the time.

    This view also shows off the expanded exposure compensation range of +/-3EV on the dedicated exposure compensation dial (upper right). The ‘C’ position allows exposure compensation of up to +/-5EV, using the camera’s control dials.

    Hands-on with Fujifilm X100F

    The X100F gains a new battery – the same NP-W126S that’s used in the X-Pro2, X-T2 and X-T20. Battery life is rated at between 270 and 390 shots (CIPA) depending on whether you mostly use the electronic or optical finder. As always, these figures only give a value that can be compared between cameras; in real-world usage you’ll probably get more than this.

    The bigger battery means a slightly deeper camera, and this increased size makes the X100F feel a little more solid and businesslike compared to the previous models.

    Hands-on with Fujifilm X100F

    The X100F will be available in silver or black, shipping next month for $ 1299.

    Articles: Digital Photography Review (dpreview.com)