Blog

  • Sony a9 offers powerful pro-level customization

    Sony has certainly rippled some tides with the announcement of its a9, which we got a first look at hands-on in NYC. We’ve been thoroughly analyzing its capability, which you can follow in our updated First Impression Review, and if you’re an a7R II owner, check out our ‘what’s better?’ slideshow here.

    But perhaps as, or more, important as all its technical capability is that the a9 comes with some serious ergonomic improvements that change everything for fast-paced shooters. Features we’ve been asking for a long time now. And Sony listens. Not just to us but to the requests of many of its direct users. And we can all agree direct access to certain camera features is a huge plus, as opposed to menu-diving.

    We can all agree direct access to certain camera features is a huge plus, vs. menu-diving. That’s exactly what Sony has given us.

    So that’s exactly what Sony has given us. Instant camera overrides at the press of a button. With one simple button press you can switch the camera from Aperture Priority with 1/125s minimum shutter speed in Auto ISO to Shutter Priority with 1/2000s shutter speed to freeze the action. This can allow you to instantly switch from panning shots to ‘freezing the motion’ shots – with one button press.

    Sports/action shooters should take note, but we’re particularly excited because the ability to assign different autofocus area modes plus autofocus activation (among other options) to different custom buttons, just like you can on a Nikon D5 (and to a limited degree on a Canon 1D X II), has changed the way I personally shoot. I can instantly adapt to changing scenarios, much like with the Nikon D5 here, with a simple button press – potentially rescuing shots I’d have otherwise missed diving into settings to change AF modes. Watch our video below to see the implementation on the a9:

    On the a9, what allows one to quickly activate any AF mode is not just Sony’s dedicated function to do so (called ‘Registered AF func.’ – which only recalls one AF area mode) but, instead, ‘Recall Custom hold’. This function instantly overrides a number of camera settings, including: Shoot Mode, Aperture, Shutter Speed, Drive Mode, Exposure Comp., ISO, Metering Mode, Focus Mode, Focus Area, and AF On (whether or not to engage AF). This is very similar to Canon’s ‘Register/recall shooting func’, but with the added benefit that there are 3 such banks, while Canon only offers 1. That means that on Canon DSLRs, you can only ever recall one set of overrides (even if you assign this function to multiple buttons, they all do the same thing). Nikon only allows certain settings to be overridden – like AF area and metering mode – but at least allows any number of buttons to be assigned arbitrarily to any AF/metering mode.

    So what Sony allows via ‘Recall Custom hold’ is a sort of best-of-both-worlds: marrying Canon’s flexibility to override multiple settings with Nikon’s ability to assign any button to a number of AF/metering options, not just one particular bank. Canon’s custom controls are so complex and inflexible that you can only assign a button to change and activate an AF mode via ‘Metering and AF start’ or ‘Recall shooting func’, which are themselves only available to two buttons: AF-ON and AEL. That’s it. Read more about it in our 5D IV review covering all this in detail.

    Sony: you’ve one-upped Canon and Nikon – in an ergonomic regard no less.

    The Sony a9, on the other hand, simply affords you 3 banks to allow to quickly switch between 3 different commonly accessed operating modes with utmost ease. Kudos, Sony: you’ve one-upped Canon and Nikon – in an ergonomic regard no less.

    Settings you do with override to change you check with a checkmark in the checkbox; if you don’t want that particular mode to change (like Shoot mode or exposure settings if you’re simply trying to change AF mode): just uncheck it.

    This is a powerful feature that allows me, for example, to instantaneously switch between subject tracking AF, complete auto AF when the former fails, Eye AF for portraits, or good old center-focus-and-recompose when everything intelligent fails. All with one button press. That can be the difference between nailing the shot, and missing it.

    Memory Recall

    But that’s not all that’s different about the a9. Memory Recall functions have been extended to be far more like the Custom modes Canon, Panasonic and Olympus allow – instantly changing most/all camera settings with one switch of the mode dial.

    Memory Recall modes on Sony cameras are like ‘Custom’ Modes on Canon, Panasonic, and Olympus cameras – they recall many cameras functions simply by switching to that mode. Sadly, in the past, Sony’s M modes have not been very comprehensive (they don’t remember custom button assignments, e.g.), but the a9 remembers more settings. And while it doesn’t remember button assignments – a shame since the features I wish to access in video are different than the features I wish to access in stills – it’s a step in the right direction. Still, Sony really needs to introduce proper C modes that remember all camera settings – including button assignments.

    Memory Recall now remembers far more features than in previous Sony cameras. Ideally, it’d remember all of them – including button customizations – so as to recall the state of a camera precisely, immediately. Sadly, this not yet the case, but the extended set of settings Memory Recall now remembers is welcome and significant. We’ll outline the additional features remembered vs. the a7R II below, shortly, so stay tuned.

    That means keep hitting that ‘Refresh’ button. 🙂*


    * It’s late, and I promise to update this article with a full set of Memory Recall functions/differentiators in the morning, after I get (I hope) at least 4 hours of sleep. Thank you for your patience!

    Articles: Digital Photography Review (dpreview.com)

  • How to Plan a Successful Sunset Portrait Session

    In this article you will get some solid tips for planning and executing a sunset portrait session. Learn how to take the images that you and your subjects will love.

    Planning sunset portrait session 01

    Plan ahead for a successful sunset portrait

    Many photographers feel overwhelmed when they start photographing portraits, professionally or for fun.

    Where should I shoot? How should I pose people? What lens should I use? What settings should I be using? When should I move them to/from a great spot? What should I say to get great emotion?

    A plan will give you confidence and help alleviate some of the immediate pressure of decision making. It’s not restrictive because often the best shots are unplanned, but rather something to give you confidence and a direction to fall back on when you aren’t feeling inspired.

    Here is our rough plan for all of our sunset shoots, whether it be an engagement, part of a wedding, family portrait, maternity, or outdoor newborn session. Our sunset portrait sessions are always planned approximately one hour before sunset.

    This plan’s purpose is twofold – it not only helps you have more confidence and direction, but will also help you make the most of your location and sunset lighting.

    Planning sunset portrait session 04

    STEP ONE: ARRIVE EARLY TO SCOUT

    Plan to arrive at least 20-30 minutes early to scout a new location. You never know what amazing little lane or spot may be just around the corner, so it’s worth taking some extra time to explore. It’s also nice to arrive before your client so that you can make them feel welcome upon their arrival.

    STEP TWO: ASSESS THE LOCATION

    Start to assess the location by asking the following questions:

    Where are some nice shady spots to begin? Shady spots are perfect to start off with while the sun is still bright and harsh.

    What is the highest point at the location? If you are at a hilly location, this is where you will be able to capture the final moments of sunset and make the most of the golden light.

    Where is the most impressive spot for sunset? This is where you want to end up – so it should be last on your route.

    With these questions answered, you can very roughly map out a planned route. This means you’ll always have a direction to head and will be able to lead the clients confidently around the location.

    Planning sunset portrait session 07

    STEP THREE: SHOOT FOR THE BEST LIGHT

    To make the absolute best of the sunset lighting, you can follow the same sort of pattern every shoot (in this order):

    1. Shade shots
    2. Filtered Light shots
    3. Silhouette shots
    4. Sunset shots
    5. Dusk shots

    Let’s put your plan into practice, assuming sunset is 6 pm:

    4:40 pm – Arrive, scout the area and assess the location.

    5:00 pm – Your client arrives and is briefed about the fun time they are going to have!

    5:10 pm – SHADE SHOOTING

    Get straight into shooting in the nice shady spot you already found. We love to knock out some more formal shots like these here, as usually these are photos clients love, but don’t want big on the walls. Save the more impressive lighting for landscape shots.

    Planning sunset portrait session 02

    Planning sunset portrait session 03

    5:25 pm – FILTERED LIGHT SHOOTING

    You can then move on to any shots where you want the sun in the photo, but you can filter the light through the trees. (Read our past article on four different ways to filter sun flare in this article: How to Control Sun Flare in Your Photos). Photos such as these:

    Planning sunset portrait session 05

    Planning sunset portrait session 06

    5:40 pm – SILHOUETTE SHOOTING

    Roughly 10-20 minutes before sunset is usually the best time to try a silhouette. As silhouettes require you to shoot at a very low angle, you won’t be able to match up the height of the sun with the clients’ feet if you wait any longer. You can read our article on capturing silhouettes here.

    Planning sunset portrait session 08

    Planning sunset portrait session 09

    Planning sunset portrait session 10

    5:50 pm – SUNSET SHOOTING

    At this point, the light will be golden – so you want to be at your final spot. Do all you can to make this most of the beautiful soft light – you can even position your clients out in the open if you know how to control sunflare. We try to take a variety of photos at this time – a landscape, waist-up, and close-ups. That way, we can create wall art sets that all have the same sunset colouring.

    Planning sunset portrait session 11

    Planning sunset portrait session 12

    Planning sunset portrait session 13

    6:00 pm – DUSK SHOOTING

    The sun has set, but you still have a glorious window of 15 minutes where you can capture the gorgeous colours of dusk. Because the sun is no longer emitting harsh light, you can now use the whole other side of the location! Areas that were previously too lit by the sun can now be shot in the soft light of dusk.

    Planning sunset portrait session 14

    Planning sunset portrait session 15

    Planning sunset portrait session 16

    6:10 pm – DONE!

    This plan is designed to give you some structure if you are lacking confidence and direction for your sunset portrait photo sessions. It will help you get the most from the sunlight, and effectively manage your time during the shoot. Of course, being photographers, we’re all for creativity, so breaking the rules is great once you have more confidence.

    Please share your sunset portrait images in the comments below.

    Planning sunset portrait session 17

    The post How to Plan a Successful Sunset Portrait Session by Alana Orth appeared first on Digital Photography School.


    Digital Photography School

  • Fro is fired up about the ShutterFest competition debacle and we’re with him on this one

    You probably know the story by now: Sal Cincotta, owner of the site Behind the Shutter and its associated ShutterFest conference, entered and won his own photography competition. Not surprisingly, many people are upset about this, and have said so on the internet. Cincotta wrote a lengthy post on Facebook defending his actions, stressing that the judging was fair. Still: he entered and won his own photo competition. It just doesn’t look great any way you spin it, does it?

    Much has been said about the whole debacle, but nobody rants like our friend Jared Polin aka Fro, so we think it’s worth 8 minutes of your time. And for the record, we think it’s a bad idea to enter your own photography competition. 

    Articles: Digital Photography Review (dpreview.com)

  • How to Start and Finish a Photography Project

    A comment I get a lot on my workshops is how hard it is staying motivated to take photos on a regular basis, especially when your time and attention is being dragged away by all of the other things in life – work, family, living! I find one of the best ways to remain motivated and to have a regular feeling of achievement, is to do a photography project.

    photography project

    Benefits of doing a photography project

    What I love about a photography project is that I have a focus to my shooting. If I manage to grab a few hours on a Saturday afternoon to go out, I know what I’m looking for, I have an instant place to start. I am not faffing around thinking – where should I go today, what should I shoot?

    I also find that a project encourages me to do more photography because I am thinking more about my images and the project itself. Even when I am not thinking consciously about it I know that it’s percolating in the back of my mind. I sometimes daydream about my photography project, ideas for it will suddenly pop into my head – all as I am going about my daily life.

    How to Start and Finish a Photography Project

    Motivation and a sense of accomplishment

    Having the focus of a project is an easy way to get myself more involved with my creativity, and that to me is super exciting. The more creative I am, the more involved I am with creating and not just doing (doing is all the other stuff, mending the broken washing machine, writing emails, talking to my accountant), the happier I am. It’s simple.

    I also love to have a sense of accomplishment that comes not from a bunch of nice images, but from a collection, a story, something that I can refine and develop. Photography projects also show me where the weak spots are in my work – because I am not just reacting to what’s around me, I am pulling my skills together to create something compelling. That drives me to work on the skills I need to develop.
    How to Start and Finish a Photography Project

    Now starting – and finishing – a photography project is not always a straightforward process. So here are my tips about how getting a project off the ground, and the ever important issue of getting it finished!

    Let’s start with your subject

    Picking a subject is, of course, the most important first step. There are endless choices, endless ways to shoot, and endless ideas. For me this is the toughest stage, nailing down the subject and the concept of the project.

    I want my subject to be something that is new and exciting to me. I want to put my own stamp on the subject, to say something new and fresh.

    How to Start and Finish a Photography Project

    Here is what I consider when picking a subject:

    1) Passion

    Creativity is piercing the mundane to find the marvelous. Bill Moyers

    This is the most important criteria for me in picking a project. I need to be super passionate about what I am shooting, not only because that will help me get great shots but also it will keep me motivated to create a good body of work, and finish it.

    The world is littered with unfinished projects, don’t let yours be one! So ask yourself this – are you really passionate about your proposed subject? Does it really excite you?

    How to Start and Finish a Photography Project

    Sometimes it seems like a project idea is amazing, but once you get started you realize it is too difficult to execute or it’s not what you thought it was going to be. No problem, just move on and start again.

    2) What do you love outside of photography?

    My favorite projects are usually things connected to what I love to do outside of photography. When you combine two passions then there’s brilliant potential.

    I love exploring cities – most specifically at dawn when the light is beautiful and the streets are usually quiet and empty. I love the urban landscape – but I don’t really like crowds! So this is why I can go out day after day, year after year, to the same places in my city, or in other cities around the world, and take photos. It’s combining two things I love.

    How to Start and Finish a Photography Project

    Being in nature and lying on beaches also inspires me – but not as much as the urban landscape. For me nature is all about relaxing – so your subject has to be something you love and you find compelling to photograph.

    How will I shoot this project?

    Once you have some ideas for a subject, start thinking about how you want to shoot it.

    What is your vision? For example – will it be color or b&w, reportage or posed portraits, epic landscapes etc.? Will the photos have a similar look and feel? What do you want the photos to look like?

    How to Start and Finish a Photography Project

    Gear

    Also thinking about your kit – what lenses will you be using? Do you need any special equipment? This kit and equipment issue can be a tricky thing because you can stall on a project forever if you get too focused on gear that you don’t have. I have delayed projects for months because I became fixated on getting certain special equipment together, or having too many challenging arrangements to make, so in the end they never came together.

    If you are new to doing projects I advise you to only shoot something you can do with the equipment that you have already. Make it as simple as possible to just get started.

    Choose a subject that is accessible

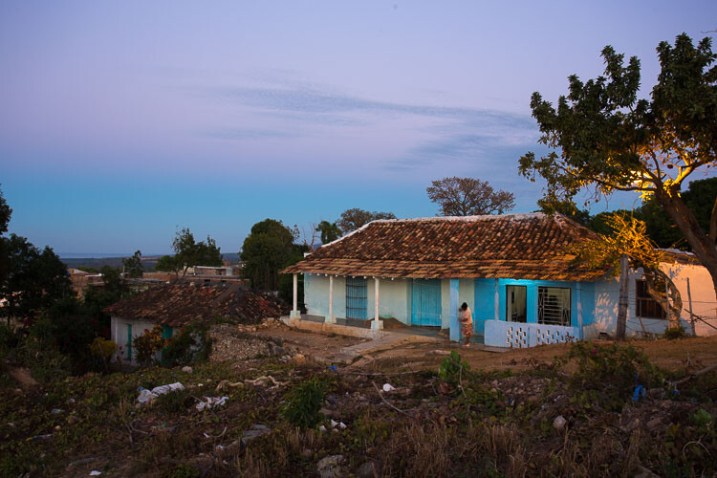
    The photos in this article are from a new project I recently started in Cuba. This is not an accessible place for me as I live in London – and I’ll only be shooting there a couple of times a year until I’ve finished my book about Havana. So I also have a project that is closer to home. That way when I am not traveling I have something close by to keep me focused and inspired.

    How to Start and Finish a Photography Project

    I think a lot of people rely on taking photos when they are outside of their normal day to day life, when they feel more inspired because they are somewhere new and different. Ultimately, though, getting inspired by the world that is immediately around you is much better training for your photography. If you can make something interesting of a scene you see every day, then you can definitely take an interesting photo of anything.

    Don’t have too many projects going at once, though. If you are new to doing projects I’d recommend you start with just one.

    Consistency is crucial

    The more regularly you take photos, the quicker seeing and thinking like a photographer will become part of you. It’s just like going to the gym – regular consistent work results in the biggest overall impact.

    How to Start and Finish a Photography Project

    Creativity is a habit, and the best creativity is a result of good work habits. That’s it in a nutshell. – Twyla Tharp

    Will I realistically have time to shoot this?

    All of the points so far have been about refining the possibilities so it makes it easier for you to pick a subject for your project.

    Working out the time to do it is a very simple point, but it’s super relevant. Are you going to actually have time to shoot this on a regular basis? You need to keep that creative juice flowing and if you aren’t shooting regularly you will lose your ability to stay inspired and be in the flow with your project.

    How to Start and Finish a Photography Project

    Keep it realistic – if you only have three or four hours a month, then that’s it. Plan to fit it in easily with your life.

    Move out of your comfort zone

    Step out of your comfort zone. Comfort zones, where your unrealized dreams are buried, are the enemies of achievement. – Roy T. Bennett

    It’s super easy to get in a rut with your photography – shooting similar subjects in similar ways. Telling yourself – this is what I’m good at shooting, or this is what I love doing. While I encourage you to really dive deep into a subject and develop your own style, make sure you are not using it to limit yourself.

    How to Start and Finish a Photography Project

    Staying where you are comfortable in your photography is not where you are going to find yourself taking stunning, amazing photos. What you’ll be taking are photos that are just like the ones you took yesterday, last week, last year. Photographers need to keep developing and that often means pushing yourself out of your comfort zone.

    Don’t park… Arrival is the death of inspiration. Ernst Haas

    If you want to do something new, something fresh, something unique – you have to move away from the safety of what you’ve always done, and move toward things you’ve never done before.

    For me that’s been things like asking strangers if I can photograph their bellies (scary!), to travelling to new places or accepting commissions for big projects (weirdly it can often be more stressful getting paid to do a very creative job than doing it for yourself. After all, if you come back with a terrible personal project it just sucks for yourself.)

    How to Start and Finish a Photography Project

    Are you in your zone?

    Photography doesn’t always have to be done outside of your comfort zone. Just keep an eye on the things you are choosing to photograph and making sure that you aren’t always playing it safe.

    When you ask yourself what you really want to photograph and you come up with something that is both exciting and a little terrifying, that’s great! Then you definitely have something that is going to be interesting for you to explore. The line between being comfortable shooting and being on the edge of your comfort zone is a fine one.

    Plan your project – but leave room for spontaneity

    I couldn’t find the quote but I’m pretty sure that Napoleon said that you always want to go into battle with a plan, but that you’ll never follow the plan once you’re in battle. It’s the same with photography!

    How to Start and Finish a Photography Project

    You want and need a plan for how you are going to get this project going. Just don’t be afraid to adapt as the creative forces start working when you are out there shooting. I’ve sometimes had projects totally change shape, even the subject, while I am shooting.

    Be open to change and adapt

    For example, when I shot my first book, London at Dawn, I thought the book would be all about the workers who are up at 4 am and what they were doing. You know, the market traders, the cleaners, the bus drivers. It seemed like a really cool angle.

    When I started shooting, though, not only are people really hard to find at dawn, and are usually inside buildings, and what I discovered was that the light of sunrise and the empty streets were way more interesting to me than tracking down people inside buildings working. I wanted to capture all this quiet and beauty.

    How to Start and Finish a Photography Project

    Make a project description

    I like to have a basic description of my project before I get started which acts as my vision, the essence of my plan. To give you some ideas about how to do this, here are some descriptions of projects that I’ve done:

    • The Homeless World Cup: Create beautiful, colorful portraits of homeless football players that echo the powerful persona of the subjects in sports advertising. Pose subjects in strong and proud postures which, combined with the colorful backgrounds, promote a positive message about the homeless football players and the tournament.
    • Arboreal Dreams: An abstract exploration of trees inspired by my childhood memories of lying on the grass and staring up at trees for hours on end. The look of the photos will be dream-like and surreal, just as my childhood memories are, with the trees morphing into different shapes.
    • The Belly Project: The belly is an under-photographed part of the body (in my opinion) and rarely displayed (unless it’s in perfect condition). It’s often a source of personal dislike. I say free the belly! This project will be shot out on the street in a fun, spontaneous, and candid style. I will approach people with all kinds of bellies – and explore what lies hidden under people’s shirts.

    How to Start and Finish a Photography Project

    Can you see how in these short descriptions I covered what was interesting to me about the subject, how I wanted to shoot it and the style I would use? This is the kind of thing you want to end up with.

    Is it a short term or long term project?

    When starting out, I find many people aim to tackle these really big subjects that will take a year or two. That’s totally cool, but it’s really hard to sustain momentum for a two-year project. Even professionals find it difficult – well, I know I do! Life always gets in the way and distracts you from your project.

    I think a short term project is the best place to start. Then as you build the skills for completing projects, you can extend yourself.

    How to Start and Finish a Photography Project

    What are you hoping to achieve with this project? What is the end result you hope to see? To give it to a friend, put it on social media, hang it on your wall, make a book? How many final images will you have?

    These all sound quite specific but I find that when I ask these questions they help me to refine why I am doing a photography project, and the more refined I am the easier I find the project is to shoot.

    Ultimately, I want to end up with such a good vision for my project that I can almost see the photos before I even step out the door. Of course, things will develop and change but working out these details really helps me when I am out there in the world faced with the actual – so where do I begin?

    How to Start and Finish a Photography Project

    The power of the deadline

    Deadlines are the single best motivation for me to finish a project. To be honest, I rarely feel that I am totally finished. I could go on forever with most projects – there is always more to shoot, there are always more ways to make it better (even if that’s just in my mind). I do, though, like to get to the end and feel a sense of accomplishment, having something to tell the story of the subject I’ve been shooting.

    The world is littered with unfinished creative projects of all types. Don’t let yours be one of them! A deadline is an amazing way to help you get it finished. You can pick a time frame – a year, a month, or 6 months. You can also create other deadlines by agreeing to do a project at the same time as a friend. Or by committing to creating a project before Christmas or for an exhibition.

    Now – get started!

    An idea that is developed and put into action is more important than an idea that exists only as an idea. – Edward de Bono

    How to Start and Finish a Photography Project

    This is where I get stuck all the time. I often have an amazing concept for a project, and I can see it in my mind. Then I try to get started, and… I procrastinate. This is often because I am waiting for perfect timing – be it the perfect light, perfect models, or a perfect day. All that thinking about perfect ends up feeling totally intimidating. So I have to say to myself – don’t wait for perfect conditions, they don’t exist! Don’t wait for more time, it won´t come.

    It won’t be perfect straight out (or maybe even ever!) Perfectionism is the true enemy of creativity. Now think ahead to a few months from now with a finished photo project in your hands that you are showing people. It will feel awesome to know you created something from nothing, a photo project that is all about your passions and creativity. All you have to do now is get started.

    Do whatever brings you to life, then. Follow your own fascinations, obsessions, and compulsions. Trust them. Create whatever causes a revolution in your heart. – Elizabeth Gilbert

    I’d love to know what you think and if you plan to do a photography project this year, or may you are doing one now. Let me know in the comments below.

    The post How to Start and Finish a Photography Project by Anthony Epes appeared first on Digital Photography School.


    Digital Photography School

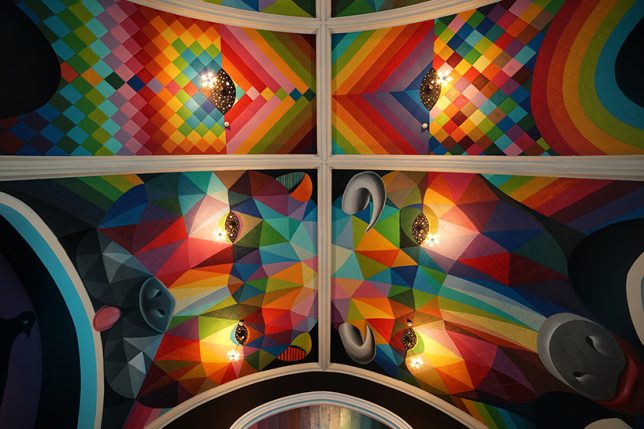
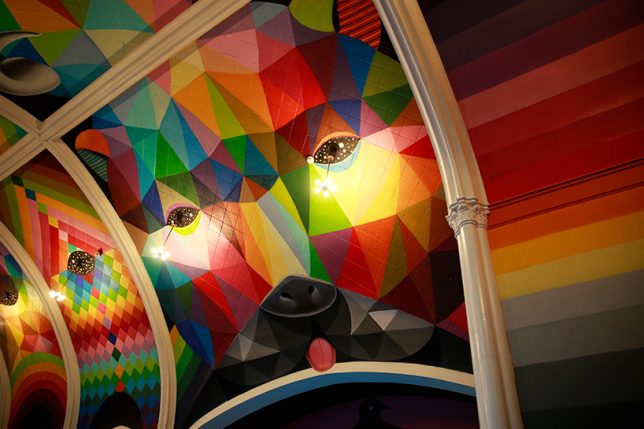
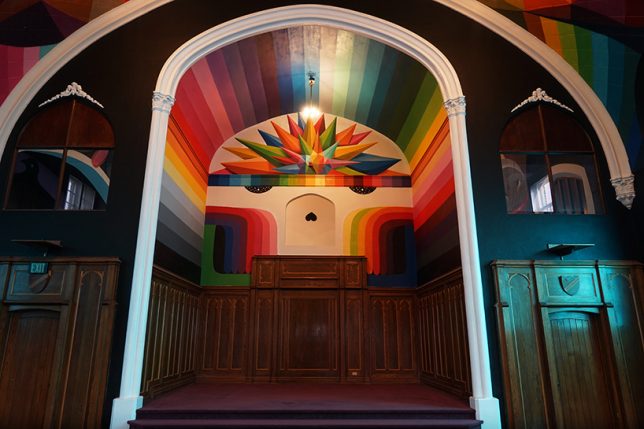
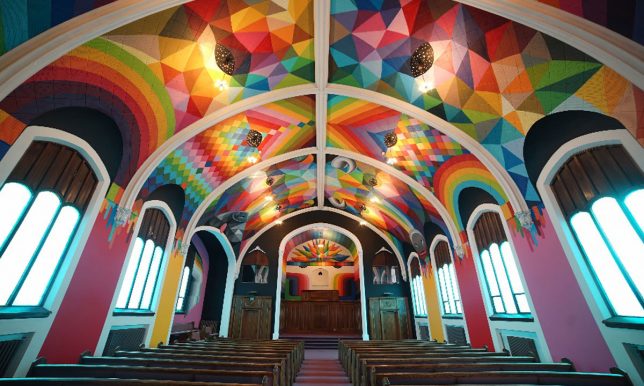
  • Church of Cannabis: Sanctuary Painted in Hypercolor by Okuda San Miguel

    [ By SA Rogers in Art & Street Art & Graffiti. ]

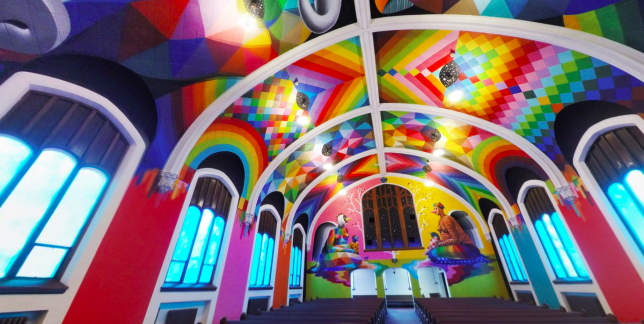
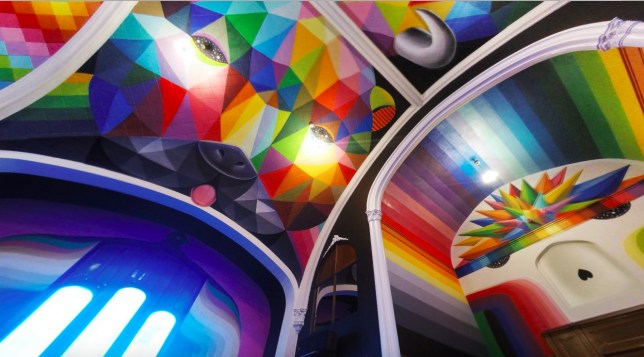
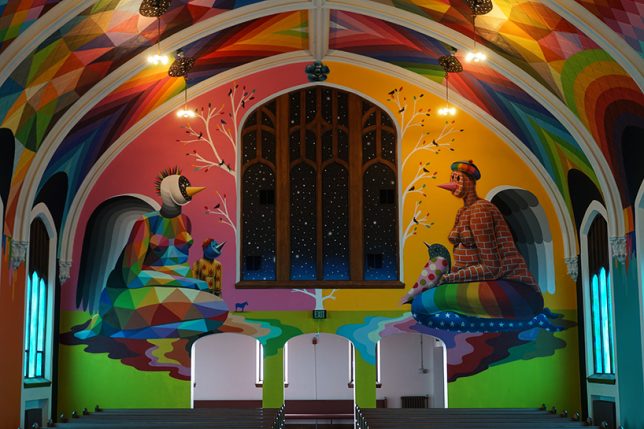
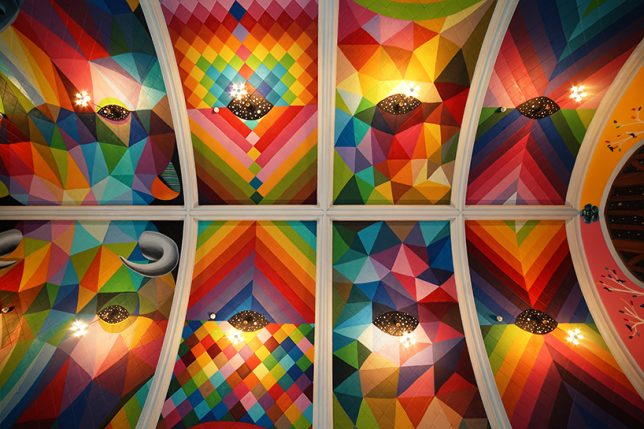
    On 4/20/17, the International Church of Cannabis opened in Denver, offering a new community center and sanctuary for marijuana enthusiasts with nearly every surface hand-painted in vivid colors and geometric shapes by street artist Okuda San Miguel. The church “is the first gathering place in the world where those who consume cannabis in order to help achieve their spiritual goals may do so legally, without fear,” and from the looks of their renovation of a 113-year-old building, it’s pretty awesome. You might just say the creators of this space have found their higher calling.

    The church is the headquarters of Elevation Ministries, a new nonprofit religious organization in Colorado that officially claims cannabis as its primary sacrament. To become a member, you have to fill out an application on the church’s website, where they explain a few things and offer a 360-degree tour.

    Church members are called Elevationists, and maintain that “an individual’s spiritual journey, and search for meaning, is one of self-discovery that can be accelerated with ritual cannabis use. Elevationists claim no divine authority, nor authoritarian structure, therefore, those of all religious and cultural background are welcome to visit our chapel and take part in our celebrations.”

    In addition to a dazzling interior painted by Okuda San Miguel (who’s no stranger to painting churches), Elevation flew legendary LA street artist Kenny Scharf to Denver to paint a mural on the facade. The church is seeking funds on IndieGoGo for a few major repairs to the building, replacing the boilers and adding disabled access. Backing it will get you perks like online membership, t-shirts, bricks with your name on them in the garden and more.

    Share on Facebook


    [ By SA Rogers in Art & Street Art & Graffiti. ]

    [ WebUrbanist | Archives | Galleries | Privacy | TOS ]


    WebUrbanist

  • Art of Typography: 13 Text-Based Designs Spell It All Out

    [ By SA Rogers in Art & Sculpture & Craft. ]

    The language of letters themselves is revealed when we look at their shapes as artistic forms and experiment with the materials we use to create them, whether using them as the basis of furniture design, climbing walls or intricately cut works of paper art. These typography-based experiments encourage us to look at the written word in a whole new way.

    Typographic Climbing Wall by Gordon Young

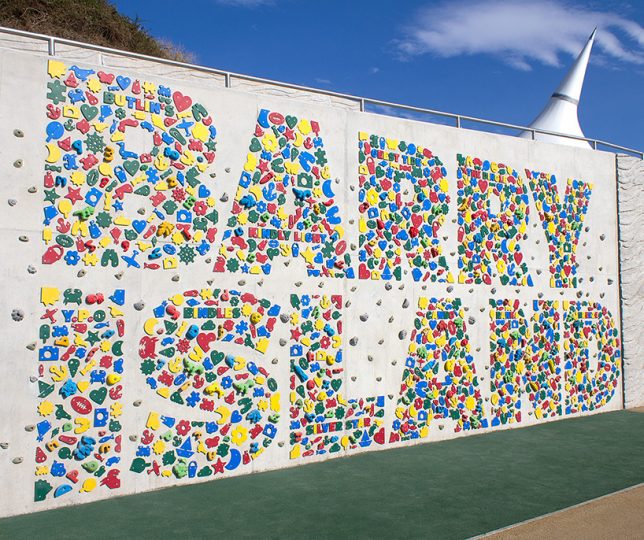
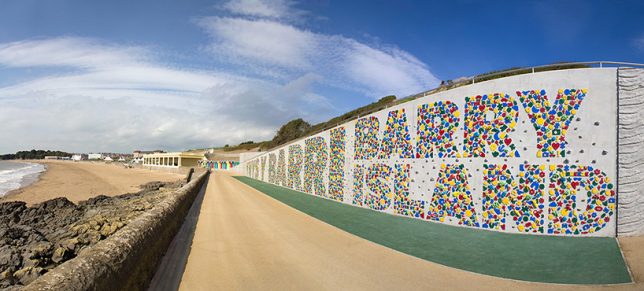
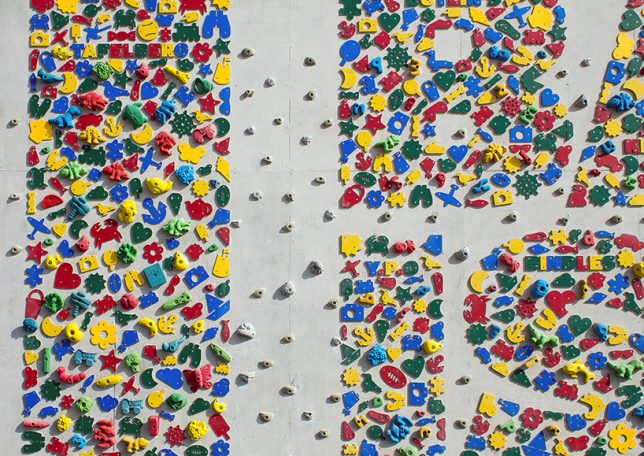
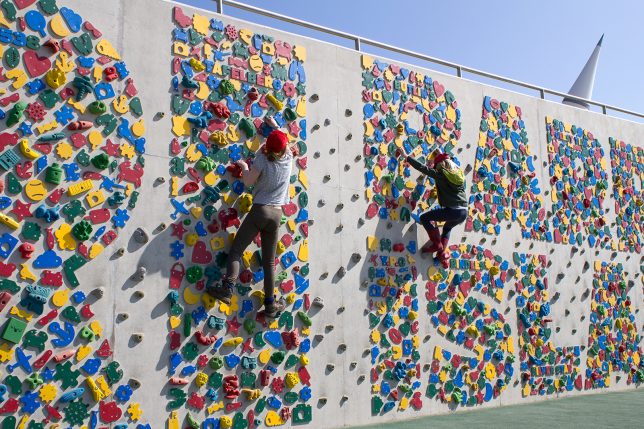
    4,000 recycled plastic climbing holds join up with 1,000 sea-themed novelty climbing holds to form a typographic wall spelling the name Barry Island in the UK. Gordon Young transformed a sea wall into an interactive landmark for a previously neglected corner of the shore.

    Typographic Paper Cuts by Annie Vought

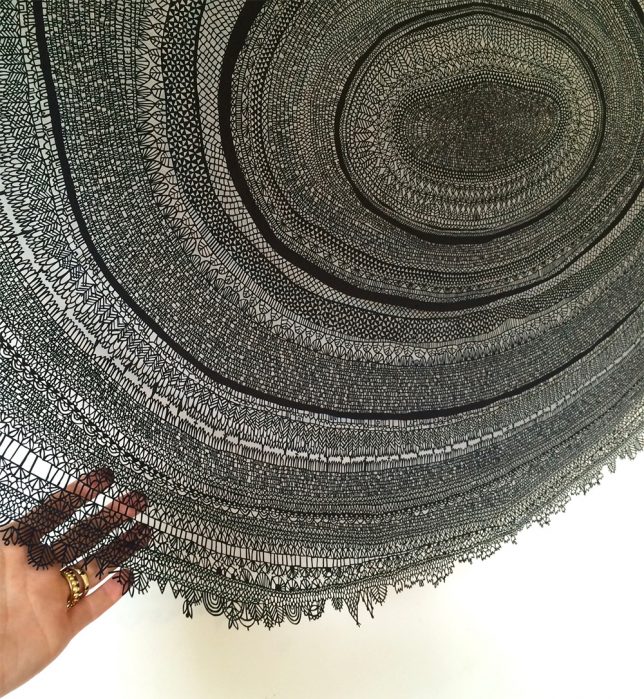
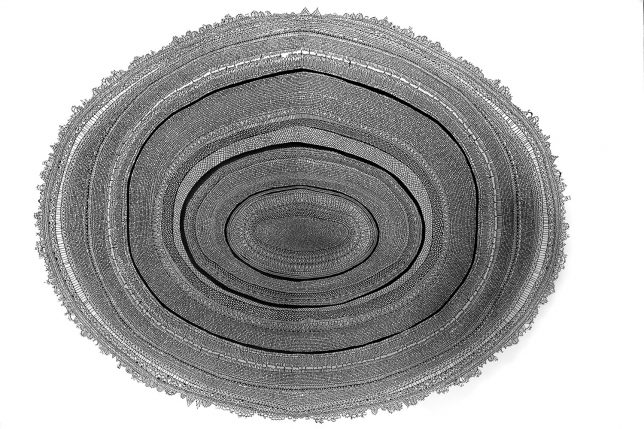
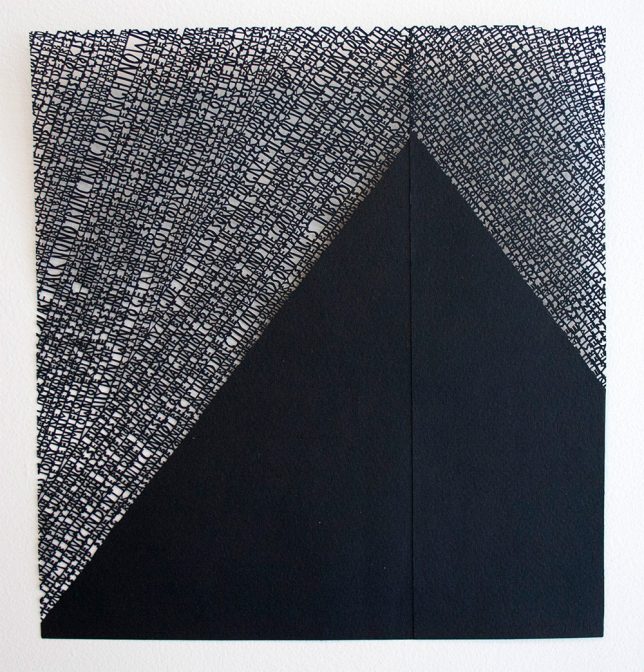
    Sometimes consisting of sentences and sometimes just a jumble of letters, these typographic works are painstakingly hand-cut from paper by artist Annie Vought. A piece called ‘Gosh I’ve Been Here Before’ measures 53” wide and consists of sentences strung together in circles like the rings of a tree.

    Playing with 3D-Printed Letter For by Thomas Wirtz

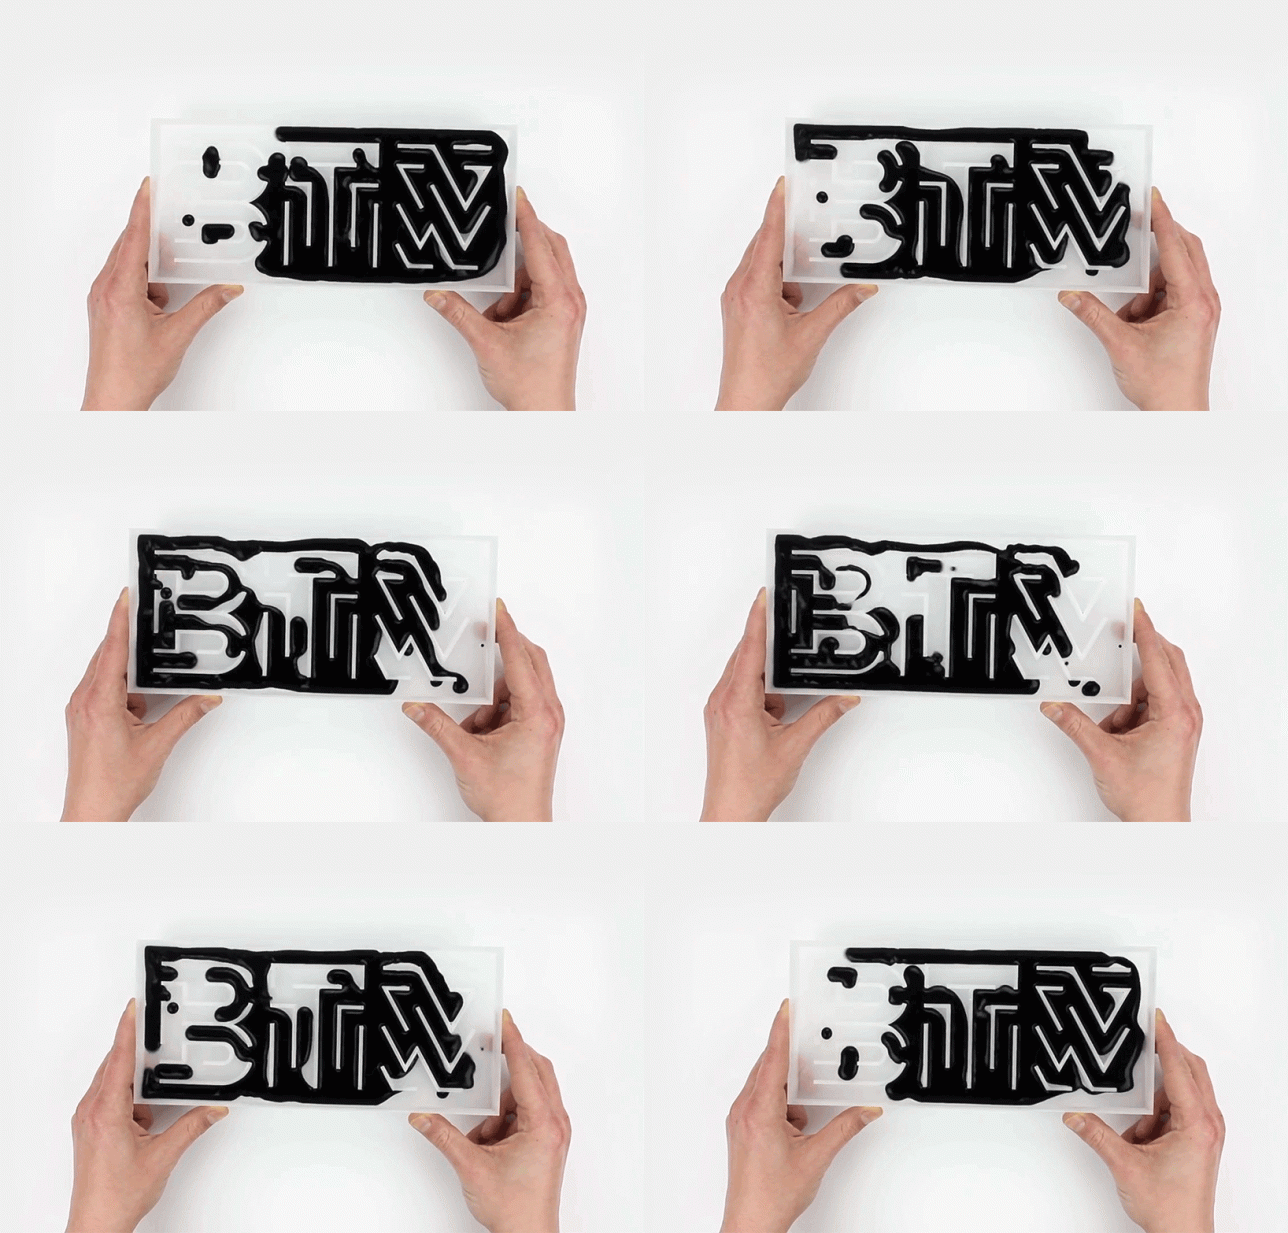
    Designer Thomas Wirtz created his own typeface, 3D-printed a series of acronyms like ‘BTW,’ ‘FYI’ and POV’ and used them as forms for experimentation with physical media like ink, dye, fire and colored gases.

    Letter-Shaped Desks by Benoit Challand

    Individual works stations are designed in the shapes of letters to spell out messages in an open-plan office environment, where you tend to either find zero privacy or a maze of cubicles. Designer Benoit Challand aims to celebrate the beauty of large-scale typography while bringing some fun into these spaces, demonstrating the concept with tiny models.

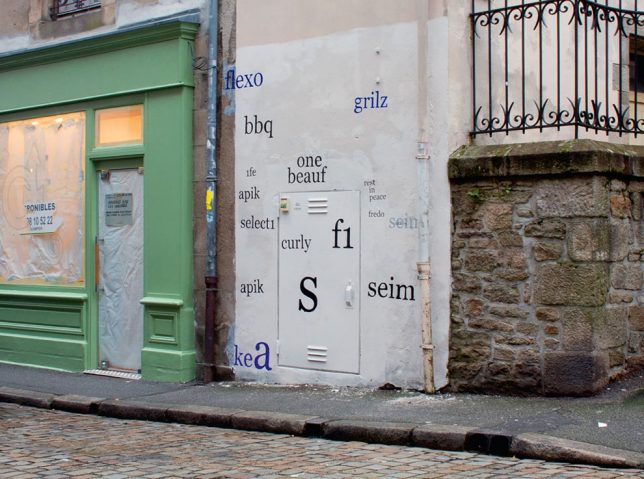
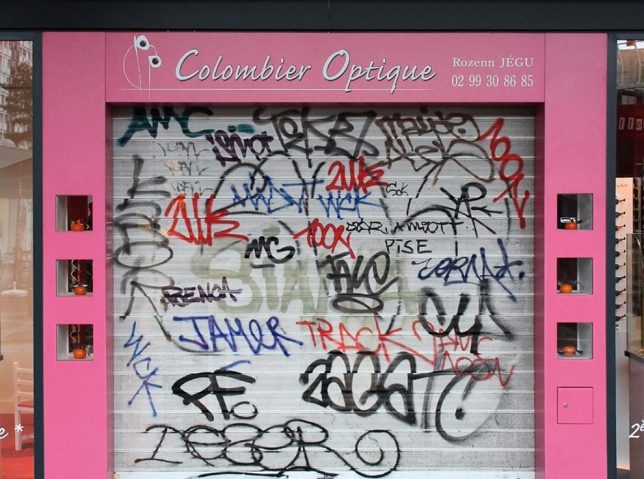
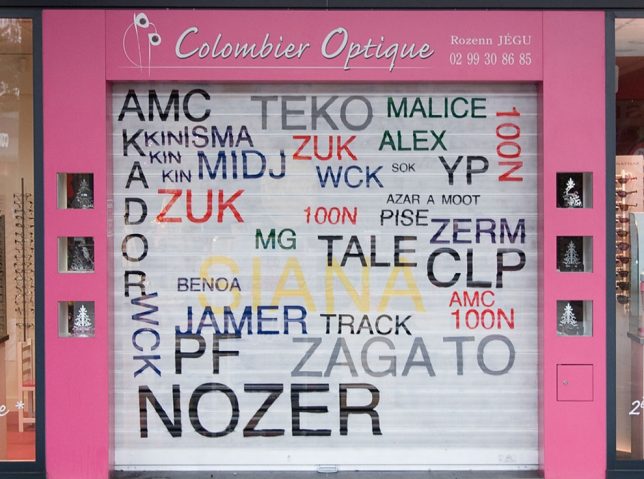
    Legible Graffiti by Mathieu Tremblin

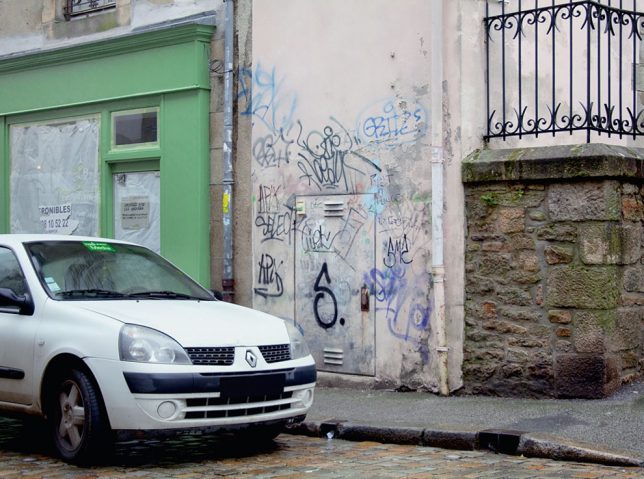
    Ugly spray-painted tags are a dime a dozen, and almost always illegible. Artist Mathieu Tremblin basically took any artistry out of the tags by converting them into basic typeface, showing us how nonsensical it all is when simply spelled out.

    Next Page – Click Below to Read More:
    Art Of Typography 13 Text Based Designs Spell It All Out

    Share on Facebook


    [ By SA Rogers in Art & Sculpture & Craft. ]

    [ WebUrbanist | Archives | Galleries | Privacy | TOS ]


    WebUrbanist

  • CROZ DIY camera offers just the basics in a tiny clear case

    CROZ, a small DIY camera that first appeared on Kickstarter in October 2016, is now available for purchase. This camera is shipped as a do-it-yourself kit that requires buyers to assemble the device. The resulting camera, once fully assembled, is quite small and features a clear case that makes the internal components visible. The CROZ camera was developed by Taiwanese company Paper Shoot and designed by Hyle Design.

    CROZ is a digital camera, though it lacks a display for previewing and reviewing photos. The camera features a 5MP CMOS sensor, LARGAN Precision Lens, four photo filters (B&W, Color, Sepia, and Blue), a microUSB connection port, and ‘automatic image algorithms.’ The entire camera, including the two AAA batteries that power it, weighs 98g / 3.4oz and measures in at 12mm / 0.45in thick.

    Photos are stored to an SD card (up to 32GB capacity supported). Users can swap out the lenses based on need, as well; the kit ships with a wide-angle lens and a fisheye lens. Paper Shoot, which is offering the kit for $ 3,899 NT / $ 129 USD / £100 GBP, explains, “CROZ is designed to be simple and straight forward – it is a digital camera, period.”

    Via: PetaPixel

    Articles: Digital Photography Review (dpreview.com)

  • Photojournalists reveal their favorite publications to work with and what they pay

    Photographer Genna Martin on assignment for Seattle PI.

    Columbia Journalism Review recently surveyed a group of photojournalists on their favorite publications to work with based on several criteria, including arguably the biggest one – pay. As a result, they’ve published an article revealing the day rates for some top publications as well as some insight into other factors, such as balancing a lower day rate with exposure to a wider audience.

    So by the numbers, how do top publications stack up for freelance photographers? CNN comes out on top with the best day rate at $ 650, though National Geographic is close behind with typical rates between $ 500-650. Harper’s Magazine’s rate was hard to pin down but reported rates varied from $ 500 up to $ 1000 per day. 

    The New York Times’ recently boosted rate of $ 450 per day makes it more competitive with the top-paying outlets, but CJR notes that the photographers they spoke with acknowledged the Times’ wider reach and top-notch editorial staff go a ways to compensate for the lower pay. Coming in with the lowest day rate of the bunch is the Washington Post, offering $ 350. 

    Check out the full article at Columbia Journalism Review for some interesting insights on working for these top publications.

    Articles: Digital Photography Review (dpreview.com)

  • Weekly Photography Challenge – Insects

    Earlier I share 19 images of bugs for you to use as inspiration.

    By wsquared photography & creative

    By Craig D

    Weekly Photography Challenge – Insects

    Time to get outside and find some bugs to photograph. Go macro if you’re so inclined. Here are some articles to help you out:

    • 4 Tips for Photographing Bugs and Insects
    • How to Get Stunning Macro Photos with Your Mobile Phone
    • 10 Tips for Photographing Dragonflies
    • Backyard Macro Photography Safari
    • Behind the Scenes of Marvellous Macro Insect Imagery

    By trekchina0907

    By LadyDragonflyCC – >;<

    By Stefano

    Share your images below:

    Simply upload your shot into the comment field (look for the little camera icon in the Disqus comments section) and they’ll get embedded for us all to see or if you’d prefer, upload them to your favorite photo-sharing site and leave the link to them. Show me your best images in this week’s challenge. Sometimes it takes a while for an image to appear so be patient and try not to post the same image twice.

    Share in the dPS Facebook Group

    You can also share your images on the dPS Facebook group as the challenge is posted there each week as well.

    The post Weekly Photography Challenge – Insects by Darlene Hildebrandt appeared first on Digital Photography School.


    Digital Photography School

  • 10 Tips for Advanced Lightroom Users

    If you’ve been using Lightroom for a while maybe you’re ready to take your processing to the next level. Here are 10 tips for advanced Lightroom users and professionals, brought to you by Photos in Color:

    Some of the tips they mentioned reference such topics as these:

    • How to Create Your Own Lightroom Presets
    • New Graduated and Radial Filter Features in Lightroom 6
    • How to Understand the Lightroom Tone Curve
    • How to Create an Effective Workflow and Image Organization
    • Four Advantages of Using Lightroom Collections
    • 12 Creative Photography Project Ideas to Get you Motivated
    • How to Experiment with Different Editing Styles to Find Your Own

    There’s more, just watch the video and apply to them to your work now.

    The post 10 Tips for Advanced Lightroom Users by Darlene Hildebrandt appeared first on Digital Photography School.


    Digital Photography School