Month: October 2017

  • Nikon D850 in-depth autofocus test

    We’ve spent some serious time assessing the autofocus system on the D850; from portraits to bicyclists, we’ve found out just how precise this camera’s focus is, and how well its subject tracking will keep up. Check it out for yourself in our updated First Impressions review.

    Articles: Digital Photography Review (dpreview.com)

  • New Samsung image sensors use dual pixel for fast AF and fake bokeh

    Samsung Electronics has launched a couple of new image sensor—both intended for use in mobile devices—under its ISOCELL sensor brand—the ISOCELL Fast 2L9 and the ISOCELL Slim 2×7.

    As the model name suggests, the ISOCELL Fast 2L9 is part of the Fast line-up, providing fast autofocus speeds, even in low light conditions. To achieve this, the chip is using dual-pixel technology with two photo diodes at each pixel location. This not only speeds up autofocus but, according to Samsung, also allows for creation of a software-based bokeh-effect without the need for a dual-camera, which is more or less what Google’s new Pixel 2 devices do.

    The 12MP sensor comes with a 1.28µm pixel size, which is slightly smaller than the 1.4µm currently used in Samsung flagship phones.

    At 0.9µm, the pixel size is even smaller on the second new sensor, the Slim 2X7. Like the Fast 2L9, it is designed to fit into even very thin devices without the need for a camera bump, but this one comes with a higher 24MP pixel count. In low light, the sensor combines the image information captured by four neighboring pixels to increase sensitivity and reduce image noise, a process which Samsung calls Tetracell.

    Like in other ISOCELL sensors, Deep Trench Isolation technology is applied to improve dynamic range and reduce color crosstalk on both sensors.

    Looking at the technologies used in these new sensors it is evident that as a maker of both hard and software, Samsung is an excellent position to design its sensors with computational imaging applications already in mind. Unfortunately, there is no information yet on when we’ll see the new sensors integrated in actual devices.

    Articles: Digital Photography Review (dpreview.com)

  • Zeiss offering €12,000 in lenses and €3,000 trip in annual photo contest

    Photo by the 2017 winner, Kevin Faingnaert

    German optics manufacturer Zeiss has opened its annual photography competition for entries, and this year it will be offering lenses to the value of €12,000 for the best collection of images. The winning photographer will also get €3,000 to spend on travel for a photography-related project.

    Now in its third year, the Zeiss Awards partner with the Sony World Photography Awards. Winners get to go to the ceremony in London, and will have their work exhibited alongside the SWPA winners in the finalists show.

    The theme this year is ‘Seeing Beyond – Untold Stories’ and entrants are expected to submit between five and ten images that operate as a single series, along with a short description of the project.

    The Brief:

    Seeing Beyond – Untold Stories

    Photographers are again asked to look beyond the ordinary and everyday to present judges with strong series of 5-10 images that capture an ‘untold story’. The brief is intended to be understood in its broadest sense – the work could explore a familiar theme told from a different perspective or address an issue that has previously had little attention. All forms of photography are welcome, but judges are specifically looking for series of works that have a strong narrative. The ‘untold story’ the photographer is addressing must be visually clear in the submitted image.

    The competition is free to enter, and you have until February 6th, 2018 to do so. For more information, including terms and conditions, see the Zeiss Photography Awards website.

    Press Release

    ZEISS Photography Award

    Photographers from all over the world are invited to submit a photo series by 6 February 2018 in response to the topic “Seeing Beyond – Untold Stories”.

    The third round of the ZEISS Photography Award is underway – and ambitious photographers from all over the world are invited to present their work on the topic of “Seeing Beyond – Untold Stories” to an international expert jury. The photographers have until 6 February 2018 to submit a series of five to ten images here.

    “Untold Stories” can be understood in all manner of ways, but the end result should be stories that have not yet been told (in full). The works can bring to life familiar tales from a wholly new perspective – or be dedicated to topics that have received little attention to date.

    A renowned jury

    All submissions will be reviewed by a renowned jury comprising three international photography experts: British Art Director Chris Hudson from National Geographic Traveller, Publisher of Dutch photo magazine GUP Magazine Peter Bas Mensink, and Patricia Morvan from French photo agency Agence VU’ who is in charge of exhibitions and cultural projects. The submissions will be judged on both their quality and creativity. All forms of photography are welcome and judges are specifically looking for series of works that have a strong narrative.

    Attractive prizes: ZEISS lenses to the value of €12,000 and a photo trip

    The winner and shortlist will be announced on 3 April 2018. The winner can look forward to fantastic prizes: ZEISS camera lenses of their choosing to the value of €12,000 and €3,000 to put towards a photo trip. An award ceremony will take place on 19 April 2018 in London. The winning photos plus a selection of those shortlisted will be on display at Somerset House in London alongside the Sony World Photography Awards Exhibition; the winner will attend the opening of the exhibition. ZEISS will also invite the winner to the company headquarters in Germany, where they will get a peek behind the scenes of the ZEISS world and the opportunity to get to know its lenses. They will also get the chance to work with ZEISS and the World Photography Organisation.

    “Due to photo editors having seen my work through the news of winning the ZEISS Photography Award, my personal documentary work has since gone on to be printed in magazines and newspaper around the world,” says last year’s winner Kevin Faingnaert, who wowed the judges with his photos of life on the Faroe Islands. “Winning the award helped secure more clients but, more importantly, my self-confidence as a photographer has certainly grown since the win.”

    The ZEISS Photography Award is hosted jointly by ZEISS and the World Photography Organisation. Last year, around 4,700 photographers from 132 countries submitted more than 31,000 photos.

    Dates

    All the dates for the ZEISS Photography Award 2018 are listed below:

    • 10 October 2017: Competition open for submissions
    • 6 February 2018: Competition closed for submissions
    • 3 April 2018: Winner and shortlist announced
    • 19 April 2018: Award ceremony and gala dinner in London
    • 20 April to 6 May 2018: Winner’s photos and selected photos from the shortlist on show at Somerset House in London

    For further details about the ZEISS Photography Award, the Terms and Conditions of Participation and to apply, please visit www.zeiss.com/zpa2018.

    Articles: Digital Photography Review (dpreview.com)

  • The magic of ultraviolet nature and macro photography

    Ultraviolet photography is something that relatively few photographers explore, but it’s a fascinating realm to explore with less of an investment in equipment than most people think.

    Much of my photography revolves around the world that we cannot see with our own eyes. This “unseen world” approach can make otherworldly beautiful images from everyday ordinary subjects. Using light beyond our own spectrum is a great way to start these explorations—enter the world of ultraviolet photography.

    To clarify: There are two types of ultraviolet photography. UV reflectance and UV fluorescence. UV reflectance is using a light source that contains UV light (such as the sun or a full-spectrum light source) and collecting only the ultraviolet light that hits the camera sensor. This requires a camera modification similar to what you would do for infrared photography, but on the other end of the spectrum.

    It can reveal hidden patterns in flowers that only insects can see, like a bulls-eye pattern in sunflowers and what effectively appears as a “landing strip” in many flowers to attract pollinators.

    The bottom-right image above is made by collecting UV light. The bottom middle is visible light and the left is an infrared image of the same sunflower. While the dark pattern is certainly interesting, things become almost magical when you make the flower fluoresce (large image). UV fluorescence requires a regular unmodified camera, but careful attention to ensure only pure UV light hits the subject. If anything in the frame fluoresces, visible light bounces back to the camera.

    Interestingly, just about everything in nature fluoresces to some degree. You may have heard about scorpions or certain millipedes glowing under UV light, but if you bring forward enough UV-only light, everything can “glow”. The intensity of the light is key, and it needs to be “pure” as even a fraction of a percentage of spill-over into the visible spectrum will contaminate your results.

    This is a typical setup for an ultraviolet shot. Each of these Yongnuo 685 flashes has been modified to output exclusively UV light, and the process only takes about five minutes. You need to disassemble the flash (Warning: this is high voltage equipment you’re opening up. You can seriously hurt or kill yourself if the flash isn’t properly discharged and you touch the wrong components. If you’re unsure how to deal with equipment like this, give it to a professional.) and remove two pieces of plastic that are in front of the xenon flash tube. These control the flash beam but also block UV light.

    There are two screws and a few clamps under the rubber circles on the sides of the flash, it’s not a complicated procedure. With these gone and the flash reassembled, you need to filter the light down to UV-only. I use a combination of two 77mm filters that do an awesome job: the Hoya U340 and the MidOpt BP365. Each of these filters on their own leak a very small portion of the visible spectrum; one leaks red, the other leaks violet. Together, they block it all. Conveniently, they also allow infrared light to pass through which the camera can’t see either, so they can serve multiple purposes.

    The cost for each flash modification was around USD$ 500, so getting into this area of photography costs less than a good lens.

    With three of these flashes at point-blank range at 100% output, the above image still needed to be shot at ISO 5000. Aphids being feasted on by a ladybug on a plum leaf never looked so bizarre. I’m unsure of the exact reason, but aphids and small spiders tend to fluoresce green.

    Most insect eyes fluoresce blue, but flowers can contain many different colors—a yellow lady slipper orchid maintains its yellow “shoe”, but the ordinarily-green leaves glow red.

    The key here is constant experimentation. Some flowers or insects are completely uninteresting in the way they fluoresce, while others are shockingly vibrant. It’s important to note that nothing can ever see the world this way—it requires that all visible light be filtered from the light source. Insects can see reflected UV, like this cicada image:

    But when you photograph that same cicada in a dark room and collect the visible light? The clear wings turn into a science-fiction shade of glowing blue. The same is true for certain species of dragonflies, though most insects with smaller wings are unresponsive. Some research has been done into this and seems to link the elastomeric protein “resilin” and its nitrogen content to these glowing features but I’m shocked at the lack of scientific articles on the topic.

    As a photographer (and not an entomologist or scientist in any way), I simply explore this unknown realm with childhood curiosity.

    $ (document).ready(function() { SampleGalleryV2({“containerId”:”embeddedSampleGallery_8755985974″,”galleryId”:”8755985974″,”isEmbeddedWidget”:true,”standalone”:false,”selectedImageIndex”:0,”startInCommentsView”:false,”isMobile”:false}) });


    Don Komarechka is a nature, landscape, and macro photographer based in Barrie, Canada. His macro work has been highlighted in international publications. Don is an author, educator, and adventurer with a passion for revealing “the unseen world.”

    To see more of his work, visit his website or follow him on Facebook and Flickr.

    Articles: Digital Photography Review (dpreview.com)

  • Video: Watch the Milky Way ‘appear’ as you get farther and farther from LA light pollution

    According to much of the Interwebz, the residents of Los Angeles were so shocked to see the Milky Way during a 1994 blackout, that many of them called 911. The real story is a bit less dramatic—people called observatories, NOT 911, to ask about the ‘strange sky’ they had seen—but the sad fact remains that LA and many other cities suffer from light pollution so intense that you can’t see more than a few stars in the night sky, let alone the Milky Way.

    This fact inspired landscape and astrophotographer Asif Islam to create this short film titled Where are the Stars? The film is a simple collection of timelapses, created by Asif at progressively darker locations he found while driving farther and farther away from Los Angeles.

    What begins with a timelapse of a heavily light-polluted night sky above LA, totally devoid of stars, ends with an impossibly bright and saturated Milky Way timelapse captured in the Great Basin desert.

    Asif’s goal was to inspire us to get away from light pollution, while simultaneously showing just how bad it’s become in major metropolitan areas like LA and NYC. “We are losing our connection with the night sky,” he writes in the video’s description. Which is a shame, he maintains, because staring at the night sky has the ability to, “keep our overworked, politicized lives simple, and makes us kind [and] thoughtful.”

    Watch the video for yourself up top, and then head over to Facebook or Instagram to see more of Asif’s beautiful astrophotography.

    Articles: Digital Photography Review (dpreview.com)

  • 3 Tips to Help You Take Better Autumn Photos

    I’ve recently returned from leading a photography workshop in the Alaska Range, south of my home in Fairbanks, Alaska. The trip was timed with the peak of fall colors. My students and I spent dozens of hours over the week, exploring the vibrant colors, and trying really hard to make the weird orange, red, and yellow landscape look the way we wanted it to in our autumn photos.

    It occurred to me that autumn, photographically speaking, is weird. It throws our perception of colors through a loop. The world, normally a mix of blues and greens, suddenly shifts to crazy warm tones of yellow, orange, and red.

    4 Tips to Help You Take Better Autumn Photos

    To effectively photograph autumn colors, you need to refocus not just your camera, but also your brain. The standard compositional “rules” of landscape photography shift quite a bit during the fall. The background, which for much landscape work is the actual subject of the image (think big mountains) becomes the setting rather than the subject in the autumn. Our attention falls to the foreground, where the colors are exploding.

    In this article, I’m going to cover three composition types for autumn: details, broad landscapes, and local landscapes. When mixed together, these three types of images will help you tell a compelling visual story of your autumn experience.

    #1 – The Details

    4 Tips to Help You Take Better Autumn Photos

    Photographing details lies in the fuzzy gray area between macro and landscape photography. Sometimes it’s one or the other, sometimes it is a little bit of both. In general, however, I see photographing the details as another part of landscape work. These images tell a small, but important part of the story.

    Mentally, details give us a starting point for seeing the way a landscape will come together, and they also play an important role in providing a sense of scale. The small bits of the scene are rarely captured in a big landscape photo, and yet they are a very important part of our experience in the field. The details too should be an important part of the story we are telling our audience.

    4 Tips to Help You Take Better Autumn Photos

    Lens choice

    Close-up work requires a lens capable of a relatively close focus, or a powerful telephoto. I’ve used big 500mm and 600mm for this kind of shot and I’ve used wide angles that have the ability to focus a few inches away from the lens. But most often I use a moderate telephoto with decent macro capabilities. Nothing fancy, just a good lens that lets me get close to the subject.

    4 Tips to Help You Take Better Autumn Photos

    Whichever you choose, these kinds of images rarely have a great deal of depth. Even photos from a low perspective only show a few inches from front to back. Therefore detail shots are usually about pattern and color. Here are a few things to look at as you compose:

    1. Consider how the lines in the image interact. Do they cross distractingly or guide your eye around the frame in a pleasing way?
    2. Which color dominates? In the autumn, colors like red can be overwhelming and often need to be balanced by cooler greens or blues.
    3. Isolate your subject by cropping out extraneous details, or using a shallow depth of field.
    4. Embrace the autumn colors, but don’t overwhelm your viewer with too much of the same thing. Good images usually show a variety of textures and colors.

    #2 – The Local Landscape

    4 Tips to Help You Take Better Autumn Photos

    When you zoom back a bit from the details, you get local scenes within the landscape. This type of image is rarely shot wide, rather you apply medium to strong telephotos to isolate compelling parts of the scene. I really like these kinds of shots. They allow enough space to apply the elements of both depth and scale, and yet are tight enough that distractions are more easily avoided and make great autumn photos.

    4 Tips to Help You Take Better Autumn Photos

    This type of shot is particularly suited to autumn photography because the fall colors are by nature, patchy. Using a short to moderate telephoto, you can select the patches of dramatic color that may be surrounded by brown in late autumn or green early in the season.

    Consider using focal lengths in the 70-200mm range, and select a part of the landscape that draws your eye. Find lines that guide your image through the frame, not out of it, or look for juxtapositions of color and texture.

    #3 – The Grand Scene

    4 Tips to Help You Take Better Autumn Photos

    I’m going to be honest here. In the fall, when the colors of my home state are going off like fireworks, it is rarely the wide open scenes that draw my eye. However, sometimes the scope and size of the landscape cannot be ignored. It is in those rare moments that I reach for my wide angle lenses.

    And yet, my focus often remains close to me. The foreground in the autumn, perhaps even more than other times of the year, is vital. When shooting wide, I will often get low, using my background not as the subject, but as the setting for something bright, flashy and interesting close by.

    4 Tips to Help You Take Better Autumn Photos

    Use the foreground

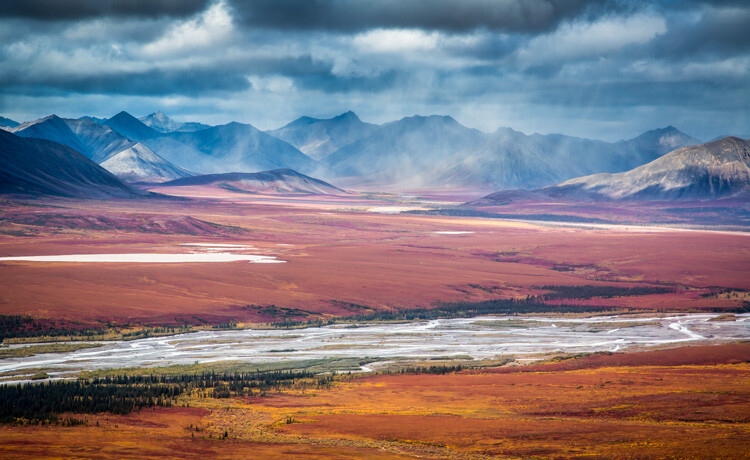
    I was shooting in late August in Denali National Park. The colors were bright and beautiful, and on one sunny day, the mountains of the Alaska Range, including Denali itself, had emerged from behind the clouds to loom, white and glaciated, over the landscape. It was beautiful, and yet my focus kept falling on the colors in front of me. I didn’t ignore that dramatic backdrop, but I used it as just that, a backdrop.

    When shooting wide, don’t forget about the details I noted earlier, nor the patterns of local landscapes. Those two are integral to the wide scene and will help you understand how the elements of the landscape fall together.
    4 Tips to Help You Take Better Autumn Photos

    I once heard it said that wide-angle landscapes were easy. I disagree entirely, wide angles are the hardest because there is so much space for distraction. Understanding and including compelling foreground subjects, like a splash of fall color will take you a long way toward creating a dynamic wide angle landscape.

    Bonus tip – Bring it all together

    In a world where most of our images end up on Facebook and Instagram, the art of a photo story is fading. Stand-alone shots get the most attention, the most likes, hearts, or whatever, on social media, but they do a lousy job of telling the whole story. Details, local scenes, and wide landscapes in combination are far superior.
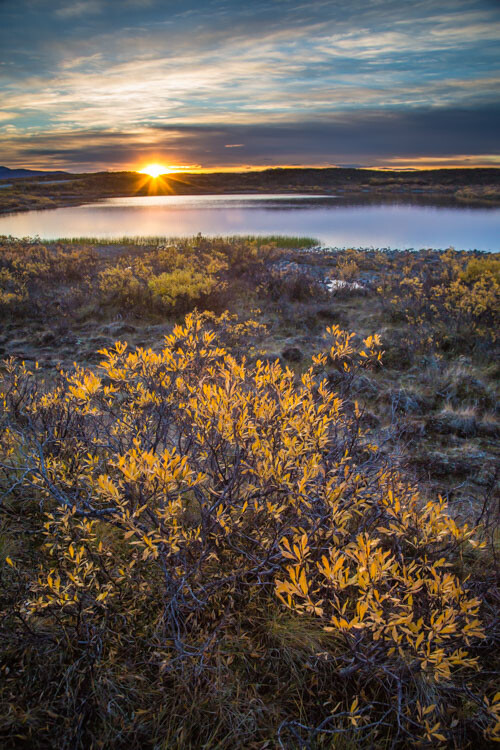
    4 Tips to Help You Take Better Autumn Photos

    In conclusion, I encourage you to tell the whole story by embracing numerous shots. Use the focal lengths available to you, all of them. Through your lens, explore the fall landscape, and share your autumn photos in the comments section below.

    The post 3 Tips to Help You Take Better Autumn Photos by David Shaw appeared first on Digital Photography School.


    Digital Photography School

  • Playful Kirigami: Touch-Activated Paper Animals Pop into Action

    [ By WebUrbanist in Design & Products & Packaging. ]

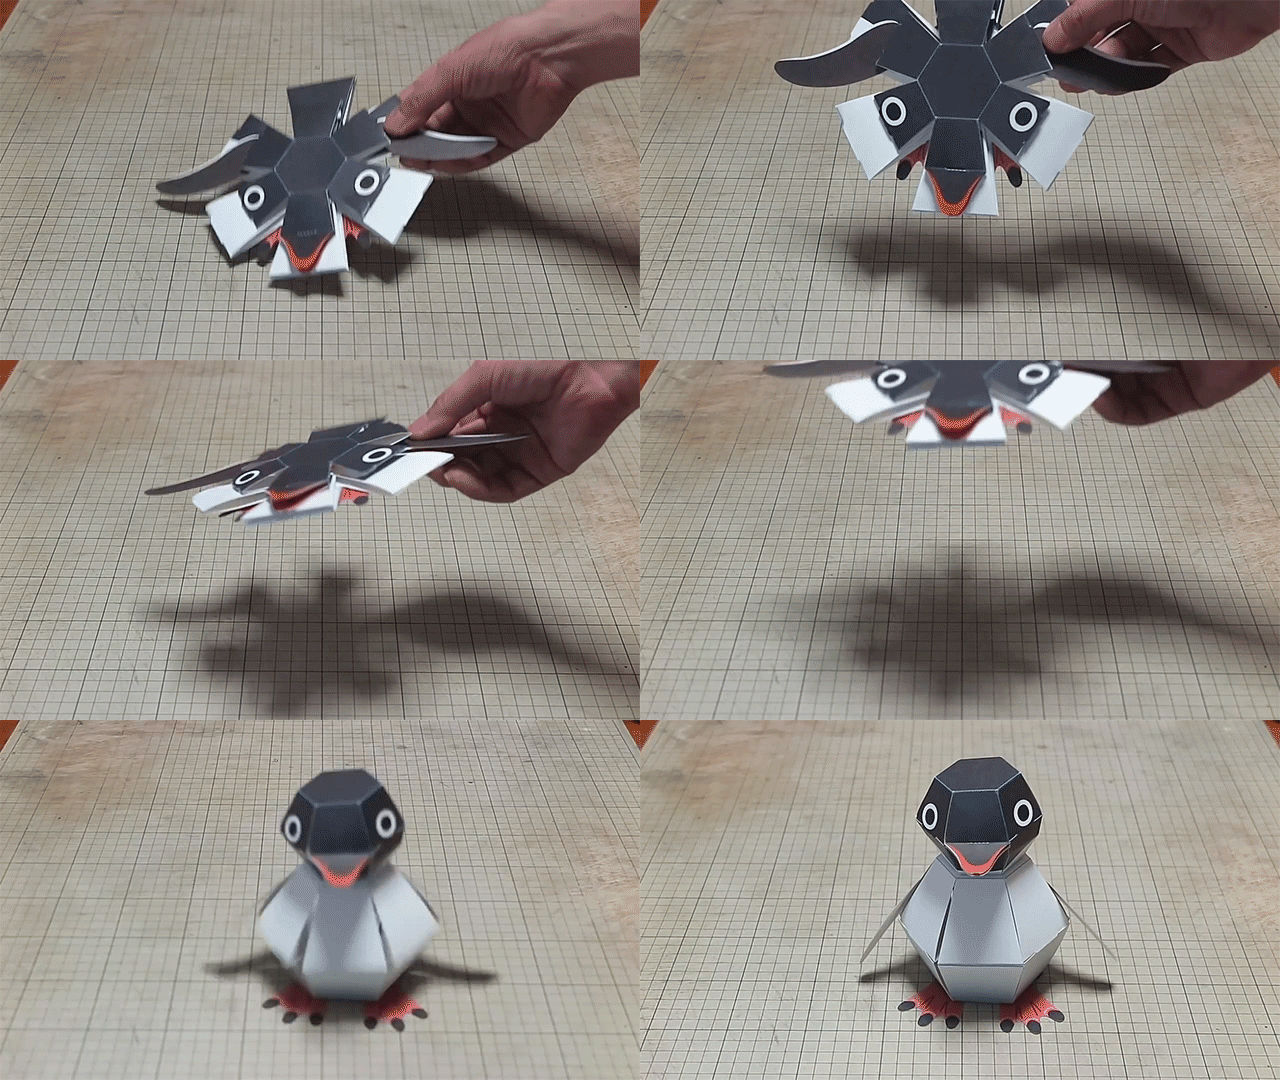
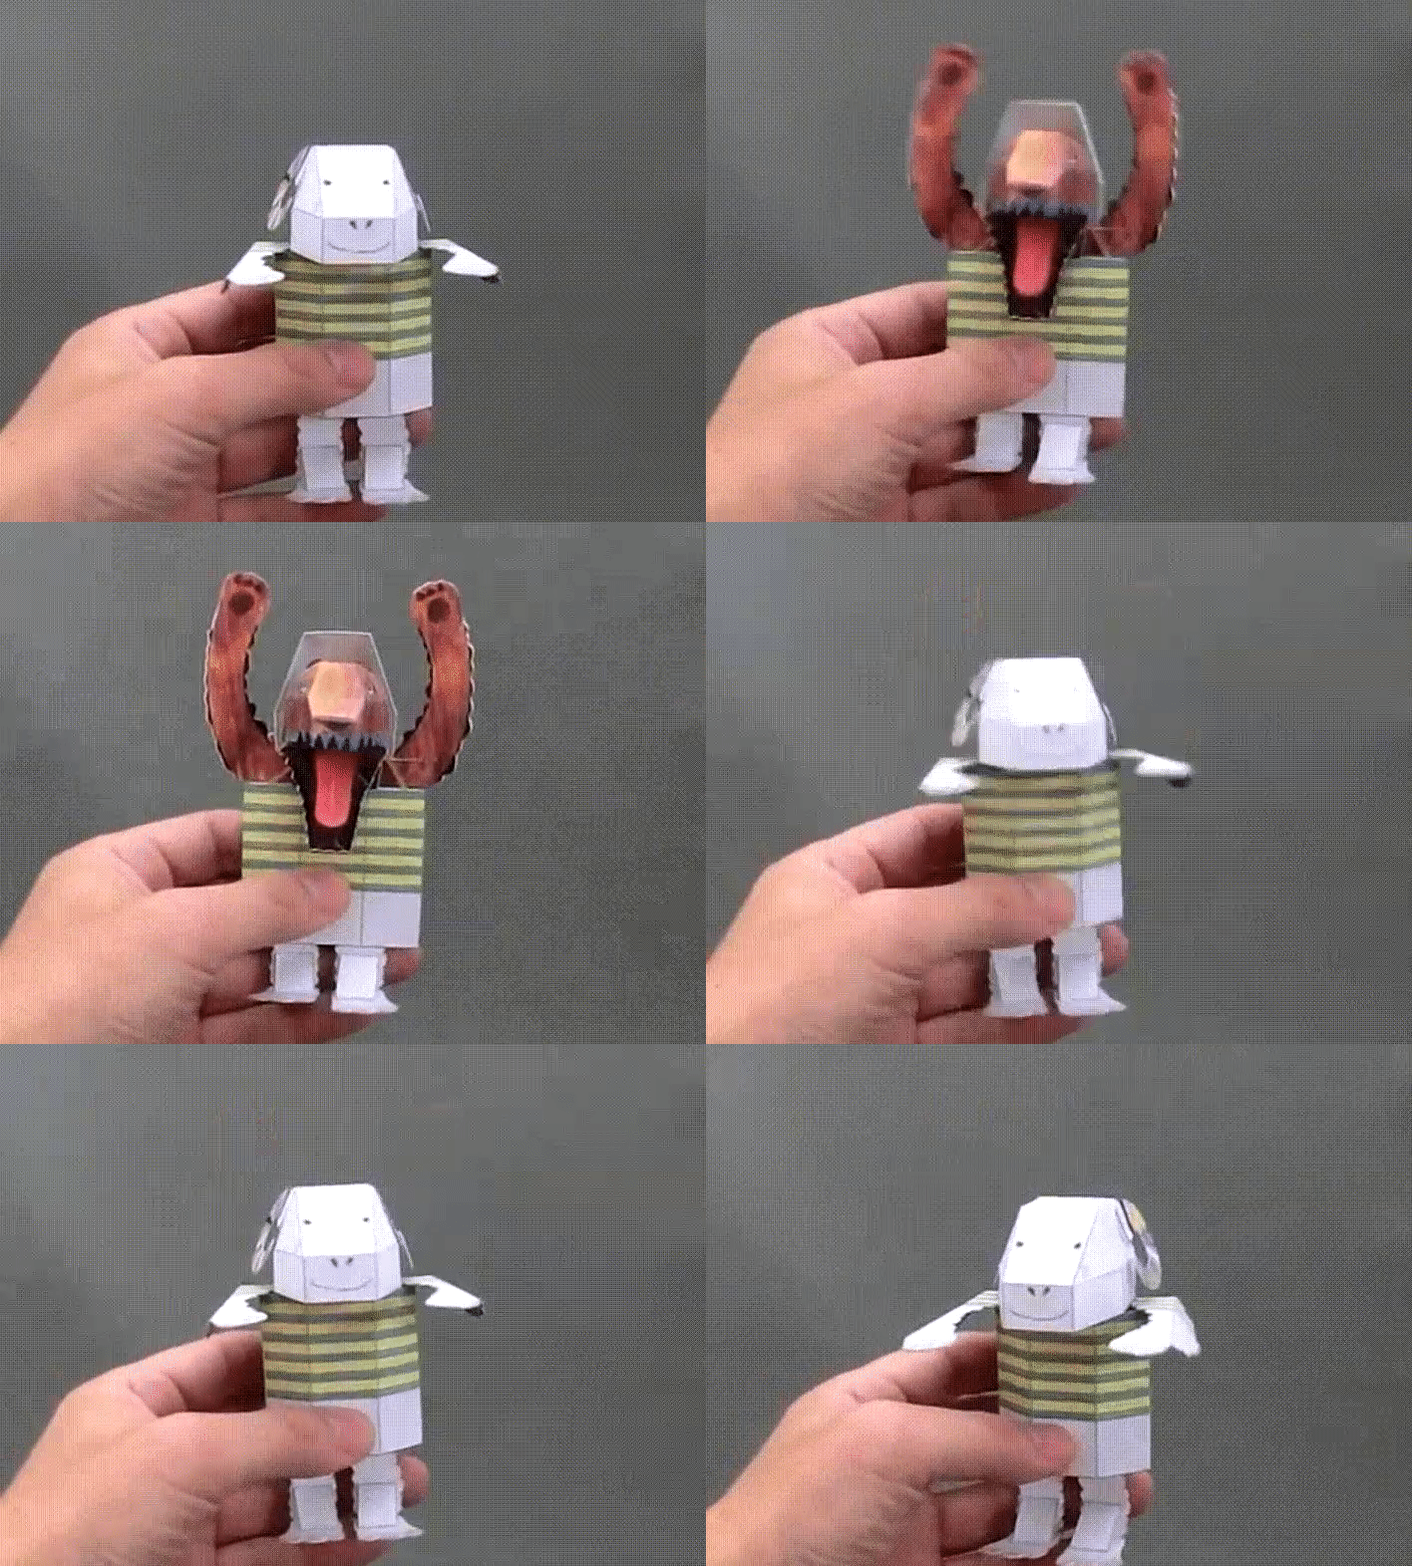
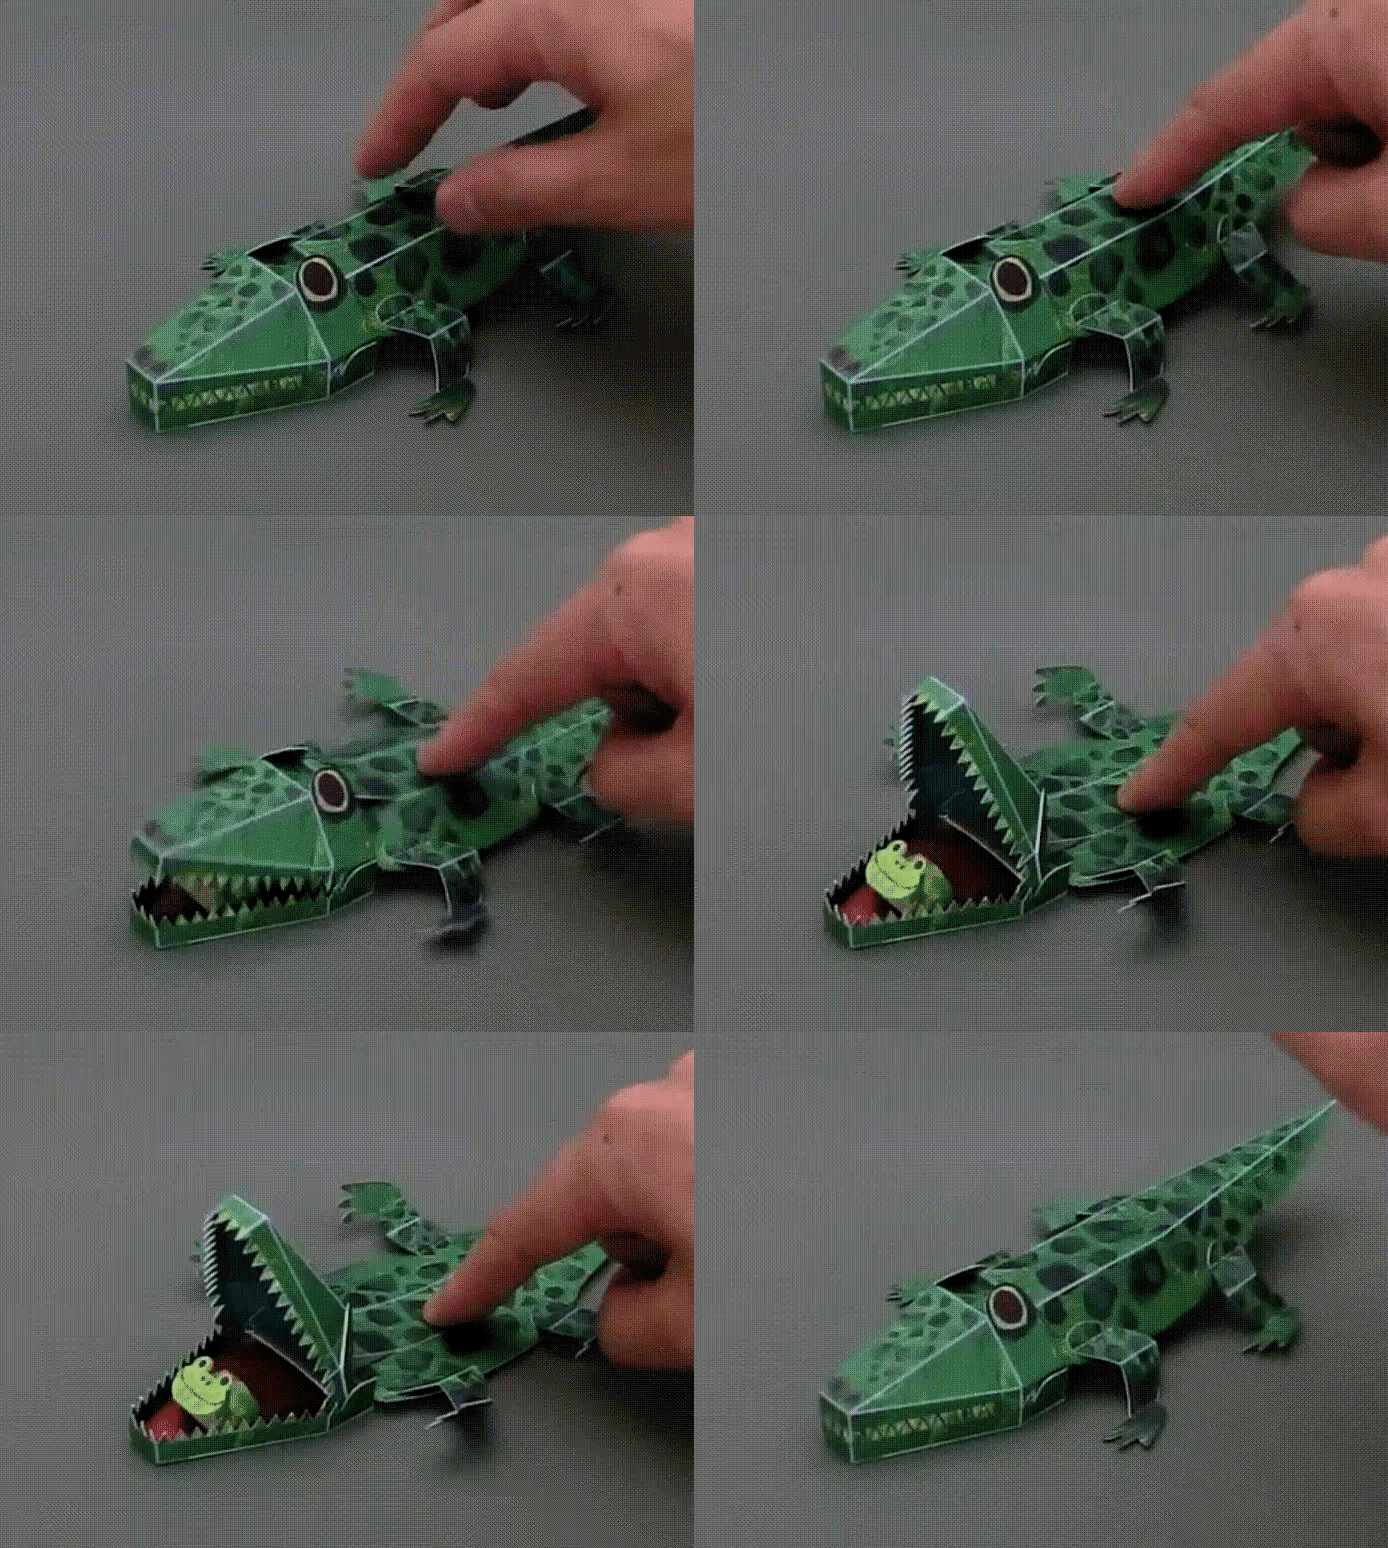
    Acting out scenes from storybooks or animating real activities, these deceptively simple-looking, folded-paper toys leap, bounce, roll and hatch into action when played with.

    Japanese designer Haruki Nakamura was inspired by the ancient art of kirigami, a variation on origami that involves cuts as well as folds, but takes it to the next level with his playful animals.

    The specific behaviors of the toys often follow the natural reactions of a given animal, like an armadillo rolling itself up for protection when threatened.

    Combining kirigami with karakuri, the art of mechanical puppets actived by touch, led him to these neat hybrid creatures that one can poke, prod, press or drop into action.

    In some cases, the activities are innocent and entertaining, like a turtle popping into its shell or a chick hatching from an egg. Others are humorously sinister, showing wolves in sheep’s clothing or a tortoise being eaten by an alligator. For now, alas, these works are only available in Japan.

    Share on Facebook


    [ By WebUrbanist in Design & Products & Packaging. ]

    [ WebUrbanist | Archives | Galleries | Privacy | TOS ]


    WebUrbanist

  • How to Make a Little Planet Quickly and Easily in Photoshop

    Do you find your panoramas a bit flat? Would you like to create a whole little planet out of a single street or square? Do you want to make fun, eye-catching images in just a few minutes without any new equipment or apps? Then this article is for you!

    What is a Little Planet

    Maybe you’ve heard about the “tiny planet” or “little planet” effect but don’t know exactly what that is. Maybe you have seen them but don’t know how to do them. Well, let’s start by explaining that a tiny planet is a spherical panorama and is technically called a stereographic projection.

    The result of this effect is that your traditional landscape will now be circular and thus look like a planet floating in space, water, or sky depending on the background of the panorama you’re using.

    PlanetReggio - How to Make a Little Planet Quick and Easy in Photoshop

    Little planets are very trendy since it became possible to capture 360 x 180 degree panoramic shots. However, in this tutorial I’m going to show you how to do them from any straightforward bi-dimensional rectangular photo. I’m using Photoshop for this, but you can do it in most post-processing programs, even the free ones like GIMP.

    Subjects for a Little Planet

    A landscape or a panorama are the best choices, however you can get interesting results applying this effect to other kind of scenes. For example, I used it in this photo from the interior of a library, see how the spiral lines add depth to the space?

    Library How to Make a Little Planet Quick and Easy in Photoshop

    Also, if you apply it to a portrait the result is like looking through a peephole.

    Clown How to Make a Little Planet Quick and Easy in Photoshop

    How to Make a Little Planet

    Okay, back to the instructions. First you need to open your image in Photoshop and alter the proportions of your photo so that it becomes a square. To do this go to Menu > Image > Image Size. Once the Image Size pop-up window opens, make sure you deactivate the “constrain proportions” option or else the entire image will resize proportionally. Once you do that, make sure the width and the height values are the same.

    Size How to Make a Little Planet Quick and Easy in Photoshop

    Now you will see your image distorted, like stretched out. Don’t worry about it, that’s what we were looking for here.

    Rotate the Image

    Distortion How to Make a Little Planet Quick and Easy in Photoshop

    Now that you have your square you need to rotate it. To do it you go to Menu > Image > Image Rotation > 180 degrees.

    Rotation

    Now you will see the image upside down.

    Upsidedown

    *Note: if you want your planet to be inside out you skip this step! At the end, I’ll show you the results with and without this rotation.

    Apply the Effect

    The final stage is to apply the effect. Go to Menu > Filter > Distort > Polar Coordinates. In the pop-up window you will see a preview of your little planet; make sure that the Rectangular to Polar option is marked and click OK.

    PolarCoordinates

    Voila a Little Planet

    There you go, your own little planet! You can rotate the image (like you did in step 2) until you find the orientation that works best for your image. You can also use the clone tool if you need to blend the merging of the borders or iron out any final details. And of course, you can fix contrast and exposure, as you would do with any photo.

    Final How to Make a Little Planet Quick and Easy in Photoshop

    And here is the one inside out if you skipped the second step and didn’t rotate the image:

    Insideout How to Make a Little Planet Quick and Easy in Photoshop

    So you see, it was only a matter of three steps. However, to get better results, especially if it’s your first few planets let me give you some tips and tricks:

    Tips and Tricks

    Use a photo with a wider ratio, like 2:1 and more. If you don’t have that, a landscape (horizontal) photo will still do better than portrait (vertical) one.

    StartLandscape How to Make a Little Planet Quick and Easy in Photoshop

    Compose your photo with the rule of thirds leaving the top and bottom sections with minimal information and the details in the middle area. In this example, I have the sky on the top, trees in the middle, and ground on the bottom.

    Make sure the horizon line is completely straight. If it wasn’t like that in the original shot, it’s very easy to fix. First, pick the ruler tool from the toolbox (if you don’t see it just press and hold the eyedropper and you’ll find it). Then click and drag a straight line from one side to the other. Finally, click on the Straighten Layer button on top.

    Ruler How to Make a Little Planet Quick and Easy in Photoshop

    The edges will merge better in the planet if the left and right edges of your panorama are similar. When possible, like it would be in the case of a forest, for example, you can copy the left side, flip it and paste it on the right side. That way they will match perfectly.

    Edges How to Make a Little Planet Quick and Easy in Photoshop

    Your Turn

    Now you can create a whole universe of little planets from nature to urban landscapes, the possibilities are endless.

    UrbanPlanet

    I invite you to share your planets here in the comments section below.

    The post How to Make a Little Planet Quickly and Easily in Photoshop by Ana Mireles appeared first on Digital Photography School.


    Digital Photography School

  • Video: Meet the world’s fastest camera slider

    Photographer, filmmaker, and ultra-creative YouTuber Daniel DeArco recently put together something really interesting: the world’s fastest camera slider. At least, he *thinks* it’s the world’s fastest camera slider. But even if it isn’t, the practical effects he’s able to get by shooting with this slider are really interesting.

    In the two videos embedded here, he (above) shows off some of his experiments with his new toy—including regular motion shots and some interesting slow motion panning and zooming movements—before diving into a behind the scenes look and outtakes (below).

    According to DeArco, one of his main goals is to create a faux bullet time or ‘Matrix’ effect by shooting slow motion while moving the camera at high speed.

    I shoot a lot of movement and action, and wanted to shoot high speed, WITH the camera in high speed––since you can’t fake gravity. My goal was to achieve a similar effect to what you see in, “The Matrix”, when Neo is dodging bullets.

    Check out the results for yourself in the two videos embedded here, and then head over to DeArco’s YouTube channel or Instagram account to see more of his creative work.

    Outtakes

    Articles: Digital Photography Review (dpreview.com)

  • The camera I almost bought (again and again): The Canon PowerShot G5

    At this point in my life, I could probably write a series of articles on cameras that I considered buying, almost bought, or actually did buy before reconsidering and returning them. Of all of the cameras that would make that list, the Canon PowerShot G5 is probably the model that I almost bought more times than any other.

    Released in 2003, the PowerShot G5 was in that respect a companion model to the EOS 10D – my first personal DSLR. The G-series was traditionally marketed at enthusiasts and semi-pros, with the idea being that while most photographers couldn’t afford or quite justify a DSLR, cameras like the G5 could deliver a similar user experience, with comparatively good image quality and limited system cross-compatibility, for less money.

    The thinking was that photographers making the expensive transition away from film and towards digital, might use the G-series as an affordable halfway point before investing fully in a DSLR. Conversely, professionals or well-heeled amateurs that owned a 10D or EOS-1D-series DSLR might consider a camera like the G5 as a second body, for backup and travel.

    To court both sets of customers, Canon made sure that the G5 looked and worked broadly like the EOS-series DSLRs that it was marketed alongside. It was black, for one thing, which immediately made it look more ‘professional’ than the silvery G2 and G3 that proceeded it. It offered Raw mode, and was powered by the same ubiquitous BP-511 battery as the 10D and 300D. The G5 also featured the familiar EOS exposure mode dial and front control dial of the EOS-series, and it even had a hot shoe, for full E-TTL compatibility with Canon’s range of Speedlites.

    And like a DSLR it had an optical viewfinder. A blurry, low-accuracy tunnel-type viewfinder, sure, and nowhere near a match even for the dim finder in the EOS 300D, but it was better than nothing, and handy in some situations. More useful was the fully-articulating rear LCD screen on the back, which no DSLR could match.

    As far as image quality was concerned, the G5 was a solid performer by the standards of its time, but not spectacular. Its lens range of 35-140mm equivalent and reasonably fast maximum aperture of F2-3 were decent for 2003, but the zoom was limited at the long end, and while adapters were available to extend the range, they were clumsy and heavy (because they were lens adapters).

    There was even a general feeling, amusing to recall now, that 5MP represented a degree of ‘maturity’ when it came to digital imaging.

    I remember the G5 being more desirable to me than the G3 simply by virtue of being matte black, and (mostly) metal-bodied, but looking at it now, it seems blocky and inelegant. In my opinion the more-rounded G1, G2 and G3 have actually aged a little better, despite being physically a little larger. Opinion in the DPReview office on this point is divided (by which I mean Dan disagrees with me).

    Apart from its color, the biggest differentiator between the G5 and the earlier G3 was the bump in pixel count from 4 to 5 megapixels. In practical terms, the increase in effective resolution was very modest (“not worth it” as we opined in our review at the time) but 5MP came to be regarded as something of a benchmark among enthusiasts and within the photo press. From 1-4MP, each megapixel jump had brought noticeably improved resolution, but from 4/5MP onwards, generational increases in image quality became more subtle.

    There was even a general feeling, amusing to recall now, that 5MP represented a degree of ‘maturity’ when it came to digital imaging. Perhaps this was more of a psychological benchmark than anything, but it was real nonetheless.

    One of the reasons I nearly bought the PowerShot G5 so often is that my EOS 10D spent so much of the first year of its life being sent repeatedly back to Canon to have its autofocus system adjusted. In the end though, I just couldn’t afford it (the G5 retailed for $ 799 in the US when it was new, which from memory worked out at about £600). After a frustrating few months, my 10D was (finally) fixed, and at that point I didn’t have any need for a backup. The following year I ended up buying an IXUS 50 (SD400 Digital ELPH) for social photography and low-profile shots at concerts, which was a good deal more pocketable than the G5. The PowerShot G6, which replaced the G5 in 2004, offered greater resolution and a more refined user experience in a more stylish body, but the tacky silver chrome finish turned me off.

    I did buy a PowerShot G5 eventually though, after fifteen years of thinking about it. This past weekend, for $ 9 at my local thrift shop. As you can see from the images in this article, it’s cleaned up pretty nicely. Another itch scratched off the list.

    Do you have any cameras in your past that ‘got away’ at the time? Let me know.

    Read our PowerShot G5 review

    Canon PowerShot G5 samples gallery (2003)

    $ (document).ready(function() { SampleGalleryV2({“containerId”:”embeddedSampleGallery_5830030407″,”galleryId”:”5830030407″,”isEmbeddedWidget”:true,”standalone”:false,”selectedImageIndex”:0,”startInCommentsView”:false,”isMobile”:false}) });
    Articles: Digital Photography Review (dpreview.com)