Month: October 2017

  • Review of the new Spekular Modular LED Light System

    I was fortunate enough to get hold of the new Spekular Modular LED kit from the people at Spiffy Gear a little bit earlier than most. So I’ve been using it for a couple of months now on everything from a personal portrait project to a product shoot of a whole load of shoes, and lots of other things in between.

    In the box with the Spekular Modular LED kit

    The kit comes in a handy carry case that keeps all of the gear together. You get four of the Spekular LED bars (I’m just going to call them bars, you might want to call them something else) and clips to join them together, along with a mounting connector that has a metal 1/4″-20 thread. This allows you to screw it onto a light stand, or as I’ve been doing, onto a tripod base-plate and using it on top of a tripod, which allows me to move the light where I need it. You get a multi-voltage power supply and a bit of documentation in the box, too.

    Review of the new Spekular Modular LED Light System

    The kit ships with a regular power supply and plugs in and is controlled very easily on one of the light bar units, with the power running from what would be 0% to 100% in step-less increments. There is also an external battery kit that you can pick up if you’re looking to use Spekular away from a power outlet.

    Setting it up

    Review of the new Spekular Modular LED Light System

    The mounting bracket that is included simply slips along the back of any of the light bar units. You can adjust exactly where you’d like it to be connected to the unit, and then you simply connect it to a light stand or via a tripod plate or any other stand/magic arm with a 1/4″-20 connector.

    Review of the new Spekular Modular LED Light System

    Let us move swiftly on! Take a look at how the unit works and what it can do, according to the Spiffy Gear video below, and then we’ll get on with how well it worked for me in real-world situations!

    Using Spekular in the real world

    I’ve read a little of what others are saying around the web, a few people mentioned that they don’t like the specular highlights the kit gives, to which I’d say, “So set it up differently!

    You can set the unit up as something that resembles a traditional rectangular LED panel, or you can set two kits up as a crazy epic star-like looking thing! As with any art/photography, the resultant look you’re after is subjective, and that’s fine! You can get seriously creative with this Spekular Modular LED kit, and that flexibility really impressed me.

    Review of the new Spekular Modular LED Light System

    Spekular for portraits

    The first shoot I took the Spekular kit along to was one of my own. It’s a portrait series that I’m working on, based on men’s mental health. The Spekular kit was on a Kupo Click light stand slightly above and forward of my camera position.

    It was only a test, but I was very happy with the results! (Yes, that’s a self-portrait below, I’m taking the photograph using Sony’s Play Memories with my A7R II).

    Review of the new Spekular Modular LED Light System

    Spekular for product shoots

    The other main use I’ve had with the Spekular kit was on a spur of the moment product shoot for a friend. I needed to photograph 20 pairs of shoes for a website. This is something I’ve not done much of, but I was very interested to try out the kit and see if it could provide the results that were needed for this job.

    The thing I found about using the Spekular kit was that it provided a really great quality of even light when positioned correctly. I used a Kupo C-Stand and positioned Spekular, set up in a square format, over the top and slightly forward of the product. This really cut down on shadows!

    Review of the new Spekular Modular LED Light System

    Yes, these shoes have wings!

    Review of the new Spekular Modular LED Light System

    Great, even light for products.

    Review of the new Spekular Modular LED Light System

    The shoes were photographed for a web-store, my friend was very happy – yay.

    Each light bar puts out 14.5W of light which is kinda similar to a 150W halogen light. The lights have a 94+ CRI (CR-What? Read What CRI is here)

    So, what’s the verdict?

    Still not convinced? Here’s another video showing the Spekular LED light in use.

    What did I like about the Spekular Modular LED light system? In two words, almost everything. The build quality is great, the unit stays level when attached from one side, it doesn’t twist like plastic units tend to do. I’d love to start using the kit with a battery pack to make it a little more portable.

    One of the things I need to work on, but fixed very easily with Rosco Cinefoil ($ 34 for 25′ of the stuff) was the light spread. Naturally LED lights don’t tend to be super focused, so you need to find a way to shape them if that is the look you’re after. I found it very simple to do using flags or Cinefoil kind of shaped like barn-doors.

    In my opinion, the Spekular kit is very good value compared to other options on the market considering what you get, how well it appears to be built (keep in mind I’ve only had the kit since July 5th), and how well it works.

    Spiffy suggests that Spekular is “the Swiss army knife of LED lighting,” and I’d tend to agree! Well done!

    Five Stars, Spiffy Gear, Five stars!

    The post Review of the new Spekular Modular LED Light System by Sime appeared first on Digital Photography School.


    Digital Photography School

  • Not quite as good? Nikon D850 versus Nikon D5 subject tracking

    Video: D850 versus D5 subject tracking

    Photographer Matt Granger’s YouTube channel is chock-full of videos that run the gamut from fairly technical testing to fun challenges and prize giveaways. But we took particular notice when, last weekend, he pitted his new Nikon D850 against his Nikon D5 in terms of autofocus tracking. (What can we say; we’re nerds.)

    But why even bother? After all, the D850 and D5 purportedly have the exact same autofocus hardware—performance should be virtually identical. In fact, in our conversations with Nikon, we were told that the D850 includes an additional processor to handle autofocus calculations, just like the D5; they also claimed this processor was omitted from the D500.

    More importantly, we were told flat out to expect ‘D5 levels of performance’ from the D850.

    So why is it that, during an early shoot with the D850, Granger said, “I felt like I was getting more [images] well-tracked with the D5 than I did with the D850.” Cue the tests in the video below:

    Granger performed both low-light and daylight tests. In the former, his subject moved primarily in the X axis (read: across the frame); in the latter, his subject moved in all three dimensions. Both cameras were set to shoot at 7fps (the D850’s max), and shared all other settings as well.

    In both instances, Granger concludes that the D850 is simply not as good at tracking moving subjects as the D5.

    In the first low-light test, he notes some hesitation: the AF point occasionally lagged behind the subject before catching up (though at 3:00, where he says the D5 does not exhibit this behavior, it looks like the D5 also hesitates a bit, but perhaps not as severely).

    We’ve been told to expect ‘D5 levels of performance’ from the D850’s autofocus system.

    In the second test, the D850 really struggled to track the subject as she moved between shade and direct sun, seemingly performing better if the subject was initially acquired in bright light.

    Of course, Granger concludes that this disparity isn’t really a reason to ignore the D850 or cancel that pre-order. In fact, there have been similar claims across the interwebz of autofocus performance disparities between previous Nikon cameras that are supposed to share the same AF system (the D810 and D4S for example—although we haven’t dug into those). But it’s definitely something worth testing further.

    So, given our recent coverage and in-progress full-review, what does the DPReview staff make of all this?

    Our experience so far

    For white water kayaking, we found the D850’s 3D Tracking to perform very well indeed.

    We’ve been shooting a lot with the Nikon D850 over the past couple of weeks, and as with just about any recent high-end Nikon camera, we find subject tracking to work very well. Even though the D850 comes with that excellent AF selection joystick, sometimes we find it preferable to let the camera do some of the work for us.

    In particular, when shooting white water kayaking in Oregon, 3D Tracking performed admirably. That shouldn’t be too much of a surprise, though, considering these are fairly distinct subjects, particularly in terms of color, when compared with their surroundings.

    As with Matt Granger, though, we’ve been surprised by some of our own experiences while shooting with the D850. With both the D5 and even the D500, we’ve become accustomed to being able to initiate 3D Tracking on a subject’s eye for a tight headshot, and have the camera track it remarkably well as either the camera or subject moves.

    This sort of candid kid shot is a situation in which accurate 3D Tracking or Sony’s Eye AF both come in very handy.

    With the D850 though, we’ve noticed it is more apt to be ‘jumpy,’ in that it will jump from our subject’s eye to another portion of their face. Further complicating our assessment of this sort of behavior is that it seems to be inconsistent—sometimes the D850 will track perfectly, other times it gets distracted by something else in the scene.

    We also noticed some inconsistency in a situation where we’ve historically been able to rely solely on 3D Tracking, namely: motocross. With the D850, we were able to get a ton of keepers using 3D Tracking, but sometimes, when we looked through our bursts and found that one perfect moment, it would be slightly out of focus because the AF point had jumped from one part of the rider or motorcycle to another.

    When we switched to a type of zone focusing called D25, we came away with a better hit rate, so long as we kept the zone over our subject (Note: you would expect this result from just about any camera with advanced autofocus).

    3D Tracking on the left nailed focus in this instance, but D25 on the right nailed focus more reliably, more often.

    So what’s next?

    More photos. Lots more photos.

    We’ll be doing our standard autofocus treatment on the D850, including our bicycle tests and our close-range, low-light autofocus evaluation. We’ll also be seeking out sporting events in the Seattle area to see if we can draw some parallels between our usual evaluations and real-world shooting situation performance.

    We should also note that, in both Granger’s testing and our own experience, we haven’t yet been able to use Nikon’s new battery grip for the D850. For it to be as even a comparison as possible, we’ll be looking to add the grip and the much more powerful EN-EL18a battery if at all possible.

    Only more time and more testing will tell if the D850 can truly stand up to the D5’s autofocus performance, though we should reinforce that D5-level subject tracking is an awfully lofty benchmark to reach for. In our experience, it’s a benchmark that has remained out of reach of any camera to date, and whether or not the D850 measures up will be revealed in our full review.

    Articles: Digital Photography Review (dpreview.com)

  • Leica M10 added to the studio comparison tool

    Released early this year, the M10 is Leica’s latest digital rangefinder, offering a slimmer design and refined controls. We’ve just been given a reviewable sample unit, and set it up in front of our studio scene to see what it can do.

    Of particular note is a newly developed 24MP full-frame sensor. It’s claimed to be unique to the M10, and has not been developed by Sony, as with many of its 24MP competitors. In our own shooting and preliminary testing, we can see that the M10 is a good performer: with the right lens and proper focus, it is capable of incredibly sharp results when shooting Raw. Be aware that when paired with a sharp lens, the M10’s combination of a fairly modest (for full frame) pixel count and no AA filter can lead to moiré in your images.

    Also, particularly enthusiastic viewers will note a slight reduction in sharpness with shutter speeds of 1/60 – 1/125 sec., indicating a smidgen of shutter shock. But due to the inherent tolerances of rangefinder focusing mechanisms among other factors, this is unlikely to ever be the most significant source of softness in real world images.

    In terms of JPEG quality, we continue to find that colors (skin tones in particular) could use some attention, with yellowish greens and blue-tinged reds. Sharpening could be more sophisticated too, considering the crispness of the Raw output. In terms of high ISO quality, the M10 performs very well indeed, but it is still slightly outmatched by the best of the competition above ISO 6400.

    But don’t just take our words for all this – check out the M10 in our studio comparison tool for yourself.

    Check out the Leica M10 in our studio comparison tool

    Articles: Digital Photography Review (dpreview.com)

  • GoPro’s 5.2K 360-degree Fusion camera officially launched, costs $700

    The GoPro Hero6 was the big news to come out of GoPro’s launch event yesterday, but it’s not the only thing the company revealed. CEO Nick Woodman also officially launched the previously-announced and still somewhat-mysterious GoPro Fusion—the company’s 360° 5.2K action camera.

    The GoPro Fusion was first teased at CES in 2016 and revealed in April of this year, but other than its ability to shoot 5.2K spherical video at 30fps, we really didn’t know much about it. Official release date was set for “Fall” and people mostly forgot about it… until yesterday, that is. We found out a lot more about Fusion the launch event.

    In addition to that video spec, the Fusion uses its two lenses to shoot 18MP spherical photos, captures 360° sound, is waterproof to 16feet (5 meters) without any external case, and features ‘gimbal-like stabilization’ that is achieved using the built-in accelerometer, gyroscope, and compass. Additional features include time lapse video and photo modes, night lapse and burst modes, voice control in 10 languages, and built-in GPS, WiFi and Bluetooth.

    Here are a few video breakdowns of the different features built into the camera, like that gimbal-like stabilization and something called ‘OverCapture’:

    The GoPro Fusion is already up for pre-order on the GoPro website. It will cost you $ 700 and GoPro plans to ship the Fusion later this month. Click here to find out more or pre-order yours now.

    Articles: Digital Photography Review (dpreview.com)

  • 5 Reasons for Lightroom Photographers to Use the Edit In Photoshop Feature

    Since its Version 1.0 release in 2006, Adobe Lightroom has gone from strength to strength, firmly establishing itself as the go-to software for photographers around the globe. With each new update, you’ll be relieved to find you have fewer reasons for awakening the software’s fuller-figured big brother, Photoshop CC.

    That said, there are some limitations with Lightroom that have stood the test of time. Thankfully, with more signups for the Creative Cloud Photography plan, there are now few photographers without access to both solutions. But for the times you need it, here are five reasons you’ll likely find yourself firing up Photoshop CC for better results.

    1 – Cloning and Healing

    Lightroom is a whiz at removing simple sensor spots from that top left corner of your images (Nikon users, you know what I’m talking about!). Punching Q then A allows me to quickly visualize any distracting spots with the handy white on black overlay, and their removal is typically a swift one-click solution using the Spot Healing tool.

    However, the same cannot be said when attempting to remove distractions from more complex textures such as dust spots in the grass, for example, or people, as in the image below. For those situations, I rely on the smarter algorithms and expanded capabilities of Photoshop.

    Cloning before - 5 Reasons for Lightroom Photographers to Use the Edit In Photoshop Feature

    Want to feel like the only person at Angkor Wat? Then, you’ll need Photoshop!

    To remove and replace objects that Lightroom cannot handle, start by right-clicking the image and choosing Edit in Photoshop. Then create a duplicate layer (CTRL/CMD + J) of your image in Photoshop (I generally do this every time I start processing so I can always get back to the original if I make a mistake or don’t like the result).

    Next, erase the distraction with the Eraser Tool (E) so that you can see a “missing piece” where the culprit used to lie (be sure to turn off the visibility of the original background layer if nothing appears to have been erased). Select the area using the wand tool (W) and then in the menu bar at the top of your screen choose Select > Modify > Expand (choose around 5 pixels as your setting).

    Next, choose Edit > Fill and select “Content-Aware” in the Contents dropdown list. Hit OK and Photoshop will attempt to replace what you’ve erased with something sensible.

    Cloning demo - 5 Reasons for Lightroom Photographers to Use the Edit In Photoshop Feature

    A before, during, and after shot showing the simple removal of people from an image using Erase and Content-Aware Fill.

    I’ve been able to seamlessly remove crowds of people from the image you see here using this technique, and the process took only around two minutes. Whereas Lightroom relies on finding a similar texture it can use to cover up distractions/blemishes, Photoshop uses its clever algorithms to create its own texture.

    Cloning final - 5 Reasons for Lightroom Photographers to Use the Edit In Photoshop Feature

    Going, going, gone! Photoshop makes light work of the unwanted people in the image.

    2 – Digital Blending

    Sometimes you just can’t quite capture enough dynamic range in your image to get away with a single exposure (at least not without introducing an unacceptable amount of noise or strange artifacts). While Lightroom has attempted to cater to those who wish to combine exposures with the introduction of HDR Photo Merge, using the feature can sometimes lead to incredibly flat images that are tricky to process (and in the case of the image you see below, caused the sun to completely disappear by virtue of it not appearing in both of the photographs).

    Hdr both frames - 5 Reasons for Lightroom Photographers to Use the Edit In Photoshop Feature

    Pulling up the shadows on the darker of these two exposures would introduce too much noise, and so HDR seemed the way to go.

    Lightroom hdr attempt - 5 Reasons for Lightroom Photographers to Use the Edit In Photoshop Feature

    …if only it wasn’t for Lightroom’s attempt to fix global warming.

    Lightroom hdr after post-production - 5 Reasons for Lightroom Photographers to Use the Edit In Photoshop Feature

    The plight of a freezing earth aside, even after post-production in Lightroom, the blended exposure looks flat and uninteresting.

    The advanced masking abilities of Photoshop, combined with a technique called Luminosity Masking makes combining exposures much simpler. Using this technique, you choose exactly what appears from each exposure, so blending images that have uncommon elements (as in the case of the sun in the example image) is simple.

    Photoshop hdr blend - 5 Reasons for Lightroom Photographers to Use the Edit In Photoshop Feature

    Not only is the sun retained, but the image looks punchier overall, too.

    3 – Advanced Tone and Color Control

    The local adjustment tools in Lightroom including the Adjustment Brush (K), Graduated Filter (M) and Radial Filter (Shift+M) give you far less need for Photoshop than was the case before they were introduced. They are excellent targeting tools, yet they all suffer a major weakness – there is no access to HSL (Hue, Saturation, and Luminosity) adjustments.

    In daytime landscape images, you’ll often want to deepen the blue of the sky. While this can be done using the HSL panel, the problem is that blue is not a color found exclusively above the horizon, as is the case with the walls and clothing in the example image below. The only way I could deepen the blue here would also cause detrimental effects to the blue everywhere else. Targeting the sky with the Adjustment Brush didn’t give me access to the necessary HSL sliders.

    Color control before - https://digital-photography-school.com/understanding-the-hsl-panel-in-lightroom-for-beginners/

    I wanted to bring a bit of life to the sky in this image. But in Lightroom, there is no way to adequately control the blues without affecting the same tones in other areas of the image.

    Color can be better controlled in Photoshop by hitting Select > Color Range, then using the eyedropper tool to select a color you want to affect in isolation. You can then create an adjustment layer of your choice to affect the selected area; most often you’ll find a Hue/Saturation adjustment is the best method.

    The benefit of this last method is a dramatic one: Whereas in Lightroom you can only make wholesale adjustments, i.e. changes that affect the entirety of the image, to Hue, Saturation, and Luminosity, you aren’t subject to the same limitation in Photoshop. By selecting an appropriate color, then masking out the effect in undesirable areas, you’ll retain more control, as is the case with the image below.

    Color control after - 5 Reasons for Lightroom Photographers to Use the Edit In Photoshop Feature

    Targeting only specific areas while retaining full access to every adjustment Photoshop offers is hugely appealing. Note the sky is darkened here but not the wall or people’s clothing.

    To achieve my aim, I simply created a Hue/Saturation adjustment layer and then masked away the effect from everywhere but the sky. I’d tried all manner of adjustments in Lightroom but could only get the sky to look how I wanted at the expense of adding too much blue elsewhere.

    Another great option when this happens is to simply create two virtual copies in Lightroom, one with the sky (or another problem area) as you want it, and another before you did the damage with the other edit. You can then blend the two together in Photoshop.

    4 – Stitching Panoramas

    When Adobe announced they’d be adding the Panorama Photo Merge feature to Lightroom, I figured that’d be yet one more thing scratched from my “Must use Edit in Photoshop” list. Alas, it wasn’t to be, predominantly because of the likelihood of “blank canvas” – the phenomenon where you’ll find blank, white space in your Lightroom panoramas. Try it for yourself. CTRL/CMD + Click to select all of the images you wish to stitch, then right-click and select Merge > Panorama. I bet there’s an area missing from the photograph.

    Lr pano demo - 5 Reasons for Lightroom Photographers to Use the Edit In Photoshop Feature

    Here you see Lightroom’s attempt at creating a 6-frame panorama.

    The effect is caused by the distortion inherent to some degree in every lens, and Photoshop will produce near identical results. Where Photoshop excels, however, is in its ability to offer a more flexible solution. In Lightroom, you are left to merely crop away the now-useless areas. But in Photoshop you can use the same Content-Aware Fill method described in #1 above to cleverly re-create a convincing replacement area of sky (although you may want to try expanding your selection by 20 or so pixels, as opposed to the 5px recommended for removing smaller items).

    Left to the solutions in Lightroom, I’d have been forced to crop away more of the sky than I’d have liked in this image. With Photoshop I was even able to replicate some tricky texture in the water at the bottom of the frame. I still needed to crop away a little of the image, but nowhere near as much.

    Pano in photoshop - 5 Reasons for Lightroom Photographers to Use the Edit In Photoshop Feature

    Pano complete - 5 Reasons for Lightroom Photographers to Use the Edit In Photoshop Feature

    Photoshop’s Content-Aware Fill allowed me to retain much more of the final image and forced less cropping.

    5 – Chromatic Aberrations

    Lightroom generally does a pretty good job of dealing with chromatic aberration, the color fringing that can appear where dark and light tones meet. You’ll often see this in daytime cityscapes where the top edges of buildings meet a bright sky, for example, usually manifesting itself as a green or purple edge straying into the brighter tone.

    Chromatic aberration before - 5 Reasons for Lightroom Photographers to Use the Edit In Photoshop Feature

    While this nun is a holy person, the blue glow on the shoulder is a bit much.

    Lightroom has a couple of ways of dealing with this. First, there’s the Remove Chromatic Aberration checkbox in the Lens Corrections panel. I’d say 90% of the time, this is enough to correct the problem. Where the fringing persists, heading into the manual tab of the same panel allows you to grab the Fringe color Selector (the eye-dropper-like icon) and click on the offending area.

    This will generally fix a more complex problem, but every once in a while you’ll encounter fringing so stubborn that Lightroom can’t handle it. This happens most frequently with blue fringing, which Lightroom is pretty much powerless against. Fortunately, blue fringing is quite rare, but it does happen.

    Fringe color selector - 5 Reasons for Lightroom Photographers to Use the Edit In Photoshop Feature

    Lightroom is powerless against the dreaded Blue Glow!

    You could try to desaturate the offending edge with Lightroom’s adjustment brush but you run the risk of accidentally straying into the surrounding area. Alternatively, you could try to completely desaturate the blue and cyan in the HSL panel. In this case, I didn’t want to do either of those as it would put my blue-green background at risk, making it look far too much like color-select for my liking.

    Photoshop affords so much more control in fixing this problem. It’s as simple as heading to the menu bar to hit Select > Color Range and then clicking on the color fringing with the eyedropper tool that appears automatically. This will create a selection based on that very blue causing the problem.

    By altering the “Fuzziness” you’re basically setting color sensitivity. The lower the number, the more precisely Photoshop will select that color; the higher the number, the more leeway you give the software to find similar colors. Don’t worry if there’s an identical or similar color elsewhere in the image that Photoshop picks up on; it’s easy to mask that out later.

    Once you see that your mask has isolated the problem area well enough, open a Hue/Saturation adjustment layer, which should have automatically applied your selection as a mask. Reduce saturation in the Blues and Cyans until the problem is gone. If you’ve accidentally desaturated some other important area of your photograph, click on your mask, grab the black brush, and mask it out. Easy.

    Color range with mask - 5 Reasons for Lightroom Photographers to Use the Edit In Photoshop Feature

    Targeting doesn’t get any easier.

    Chromatic aberration demo

    The nun’s blue glow is successfully removed. I’m not quite sure how she’d feel about this.

    Conclusion

    The next time one of the few remaining weakness of Lightroom is exposed, you can try one of the above techniques so the software doesn’t have to get in the way of your vision.

    Have you found any other Lightroom limitations? Please share in the comments below.

    The post 5 Reasons for Lightroom Photographers to Use the Edit In Photoshop Feature by Chris Cusick appeared first on Digital Photography School.


    Digital Photography School

  • Art of Deception: Pencil Drawings Look Like Colorful 3D Splashes of Paint

    [ By WebUrbanist in Art & Drawing & Digital. ]

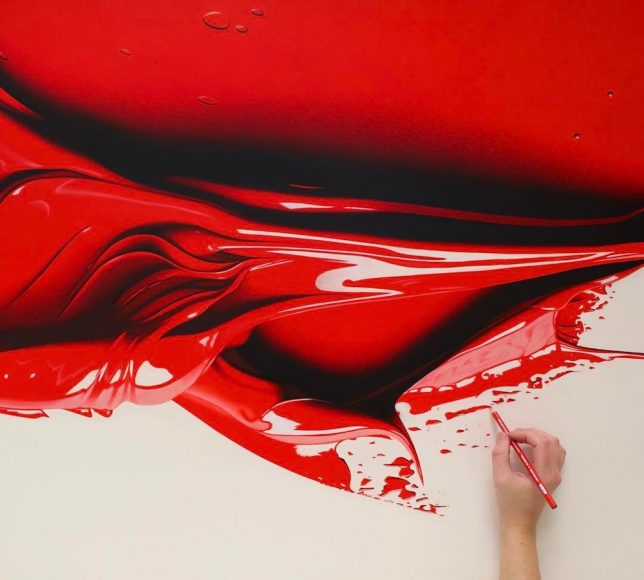
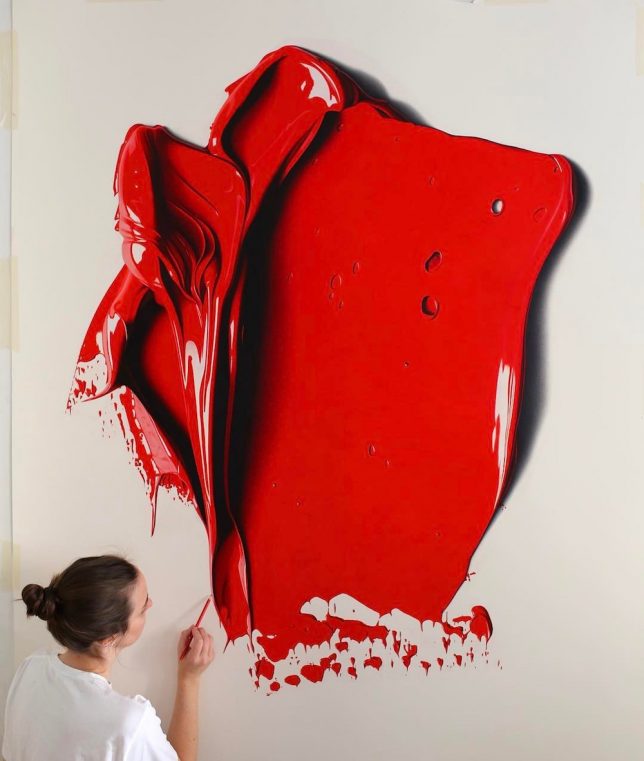
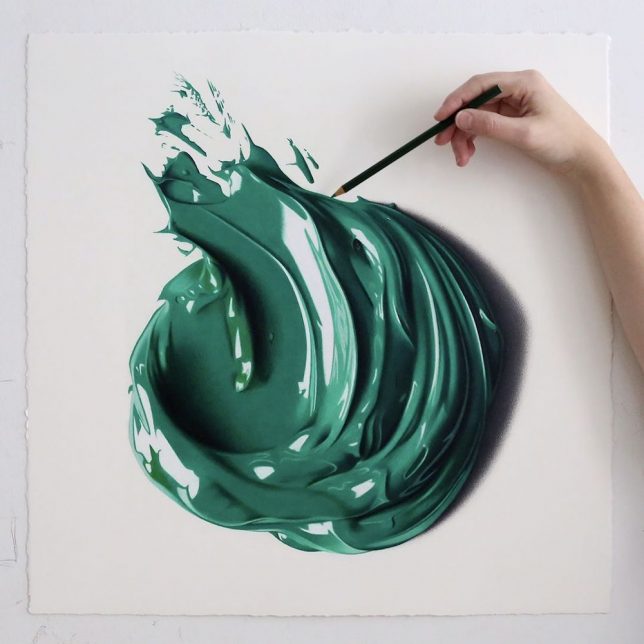
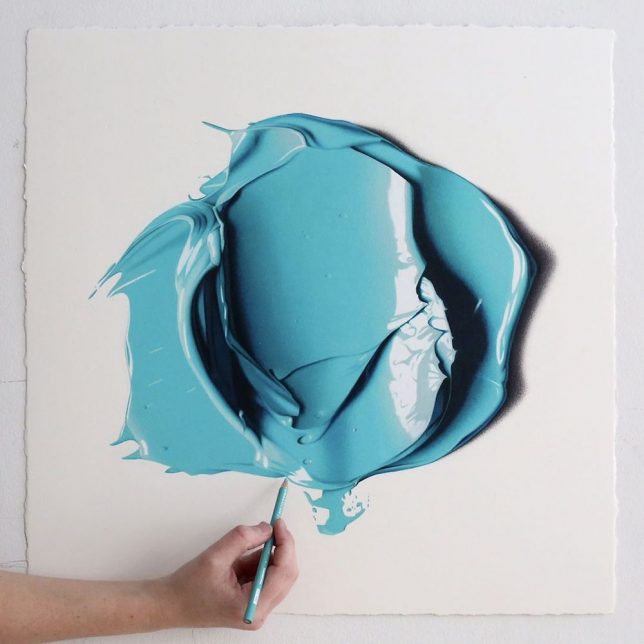
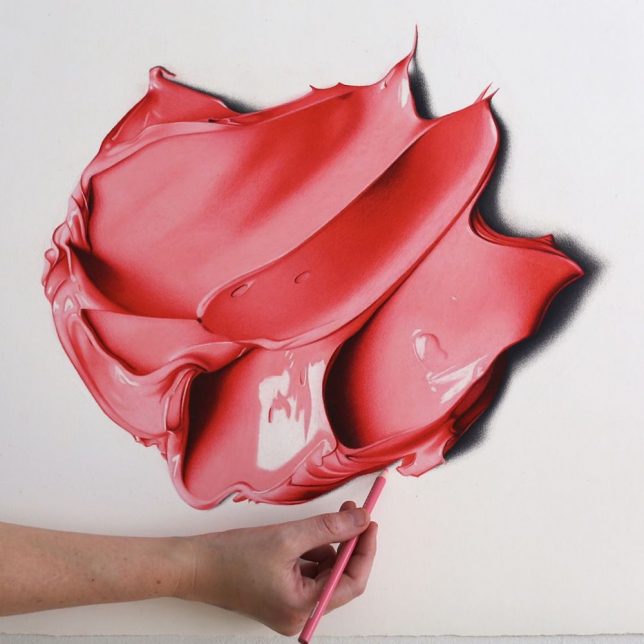
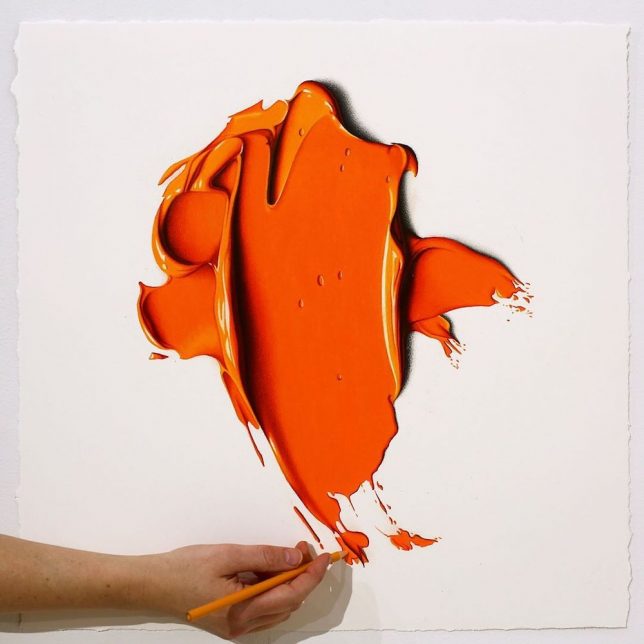
    Seeming to rise up off the canvass, a viewer would be impressed to discover these swaths of paint to be two-dimensional in nature, but then further shocked to realize the material isn’t paint at all but pencil.

    Australian artist Cj Hendry has an eye for hyper-realism, but in this series: instead of using it to draft convincing landscapes or portraits has turned to emulating oil paint.

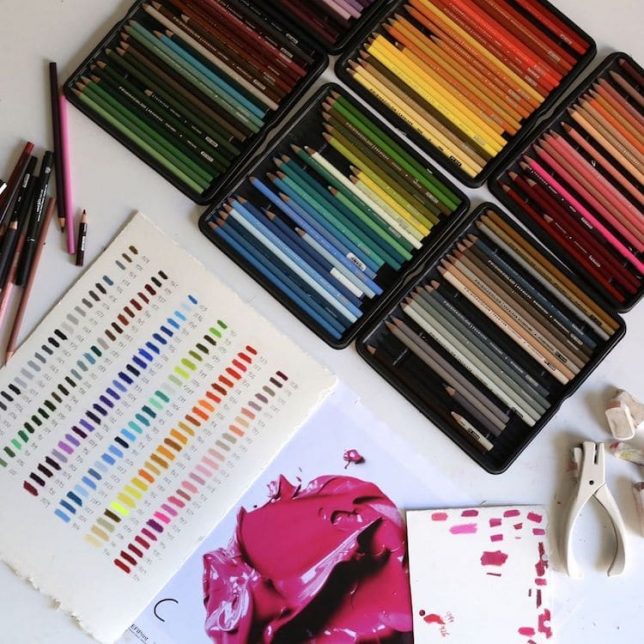
    Layers of carefully applied pencil slowly add depth and dimension to the flat surface, capturing the lush appearance of semi-liquid paints. The effect is so convincing the artist often includes a hand and pencil in photographs of the work to highlight the fact that what is being seen is both two-dimensional and drawn with pencils.

    It is a dramatic shift from previous work by Hendry done in black and white. And going to color didn’t mean just picking one per piece, either — each of these colorful works employs a number of different colors, which is not at all obvious at a glance.

    Share on Facebook


    [ By WebUrbanist in Art & Drawing & Digital. ]

    [ WebUrbanist | Archives | Galleries | Privacy | TOS ]


    WebUrbanist

  • 7 Steps to Improve Your Closeup Candid Street Photography

    Many people want to improve their street photography or get involved with this genre for the first time. But the major aspect that holds them back is the issue of taking close candid pictures of people without their permission. While I promise that it gets much easier over time, it can very difficult to get over the hump early on.

    7 Steps to Improve Your Closeup Candid Street Photography

    However, there are some steps you can take that will help ease you into the world of street photography if you do it right. Here are a few important tips that I believe will make shooting candid street photography much easier for you.

    1. What to do if you get caught

    Before we talk about how to get closer to your subjects, the first step is knowing what to do if something happens. The toughest aspect of getting into street photography is the fact that you will feel very uncomfortable with the idea of someone catching you and asking what you are doing, at first. However, while those situations are usually rare, if you handle them the right way, they don’t have to be all that bad.

    7 Steps to Improve Your Closeup Candid Street Photography

    To help ease your fears, it is important to know what to say if anyone should stop you and ask you if you took their photo. Smile, own up to it and say that you are a photographer or photography student doing a photo project on the area and the people in it. Tell them you thought they looked great and wanted to add them to it. Just be honest and open about it. If they then seem uncomfortable, offer to delete the photograph. It can even help to carry a business card with your photography information and to offer to email them the photograph after. The more direct and pleasant you are, the more disarming it will be.

    To further keep yourself out of trouble, pick and choose the people you photograph carefully. It can help to stay away from photographing anyone who looks like they are in a bad mood, anyone with some sort of mental disability, or anyone who is homeless.

    2. Light camera and prime lens

    Street photography can certainly be done well with an SLR and a zoom lens. I shot for a long time with that setup. However, using a smaller camera such as a mirrorless, micro 4/3rds, or a Leica will make you much less noticeable. In addition, it will be lighter, which will make you faster and can only help with street photography. The difference is night and day.

    By using a prime lens you will get used to the fixed focal length which will make you much more spontaneous. You will be able to intuitively know what your camera can capture before you even bring it up to your eye. That, and your camera will be smaller since zoom lenses are usually very large. With a light camera and lens, you will eventually notice yourself capturing images so quickly that your subject barely even notices you. This is the type of thing that is much tougher to do with an SLR and big zoom lens.

    3. Picking a spot / getting in the middle

    7 Steps to Improve Your Closeup Candid Street Photography

    The next tip, which is often the most important, is to go where the action is and get right in the middle. It will be important for you to eventually photograph in all types of situations, from less busy to very crowded, but particularly when you are learning, go where a lot of action is happening. Go to fairs, get out at busy times, shoot from busy corners. The more that is happening, the more invisible you will be, and the less you will be noticed by other people. This will help a lot with your comfort level.

    By picking a spot and letting your subjects come to you, you change up the dynamic of the situation. Instead of you entering their personal space, they will be entering yours. You will seem less creepy and intrusive because you will already be there with a camera. It will look like you belong.

    In addition, when a moment occurs, you will already be the right position. You will be able to spend more of your energy watching your surroundings for a good moment to occur. This, of course, doesn’t mean that you shouldn’t photograph while you are walking and exploring, just that you should carve out some time to linger in a specific spot.

    4. Acting

    7 Steps to Improve Your Closeup Candid Street Photography

    There are some photographers who will run up to people and get right in their face. If that’s your thing, more power to you, but many photographers prefer to be less conspicuous about it. We want to capture an interesting moment, we love to people watch, but we want to try to make the situation as comfortable as possible for both parties, and we want to be inconspicuous enough to not ruin the moment.

    This is where a little acting can come into play. The most important thing is to act like you don’t notice the person you want to photograph that much. Look at things behind them, and to the side. They just happen to be in your way. Play the role of tourist, looking around. The more you do this, the more you will be able to get away with taking the photo unnoticed.

    5. The camera snap and the way you move your camera

    7 Steps to Improve Your Closeup Candid Street Photography

    Similar to the last point, the way you move your camera can play a big part in keeping the situation candid. There is one thing that most photographers do, called the camera snap, where they take the camera away from their eye instinctively right after they take an image. Of course, there will be shots that you take so quickly that people won’t notice. But for other moments when the people notice you, this will often give away the fact that you were taking their photograph. Instead, take the picture and keep the camera up to your eye. Then move the camera away like you were taking a picture next to them and slowly remove the camera from your eye.

    Similarly, you do not always have to point your camera directly at people right away to capture the image. Instead, point the camera above or to the side of your subject as if you were taking an image of something behind them. Then at the last second, move the camera over them, take the image, and move on.

    6. Hold the camera up high

    7 Steps to Improve Your Closeup Candid Street Photography

    Whenever possible, try to keep your camera in your hands and at attention when you are photographing. If you allow it to hang off your neck, then when an amazing moment occurs you will have to locate and grab the camera before putting it to your eye. This is the least conspicuous way to capture an image.

    Instead, try to keep the camera up high as much as you can. Then, when you take an image you will stand out less. It will feel much less conspicuous.

    7. Zone focusing

    7 Steps to Improve Your Closeup Candid Street Photography

    Zone focusing is the technique of turning your camera to manual focus mode, pre-focusing it to a distance of about 8-10 feet, and then capturing your subject once they are in the range of sharpness for your camera. This is easier to do with a wide-angle lens with a medium to small aperture such as f/8 to f/16 so that there is more area of your image in focus. Keep in mind that this is a skill that can be improved – there are many photographers who can zone focus well even at f/2.

    You can read more about zone focusing here, and while it is a little difficult to learn at first, you will quickly get much better at it. The main benefit of this type of focusing is so that you no longer have to lock the autofocus in on your subject. This allows you to be a little more spontaneous with your shooting, and it will give you an added split second to take the photograph. That, in turn, will allow you to better capture those very fast moving moments.

    Most importantly, it will allow you to be a little more candid than you can be using autofocus. Since you won’t have to point the camera directly at your subject to lock in the focus nor will you have to look through the viewfinder to make sure you are focusing correctly, you can be much more inconspicuous. This will allow you to shoot from the hip and still know that your shots will be sharp.

    Conclusion

    I hope these tips help you do better candid street photography, and with more confidence.

    So get out there, get close, and capture some amazing and spontaneous photographs!

    The post 7 Steps to Improve Your Closeup Candid Street Photography by James Maher appeared first on Digital Photography School.


    Digital Photography School