Month: December 2015

  • Behind the Shot: Prince of the Night

    ‘Prince of the Night’. Parque Nacional Los Glaciares, Argentinian Patagonia, April 2014

    In this article I’d like to take you far away to Parque Nacional Los Glaciares, a well known national park in Argentinian Patagonia. I visited Patagonia in April 2014 and spent a month scouting for my ‘Giants of the Andes’ photo workshop and Fitz Roy Annex. I shot in several locations in Argentina and in Chile, and among those, I spent several nights in Campo Poincenot, a camp offering relatively short hiking distances to some very good view points of Mount Fitz Roy, one of Patagonia’s most renowned landmarks.

    On one of these days we hiked to Laguna Sucia (‘Dirty Lagoon’ in Spanish). It’s so named because before the glacier that formed it receded, the lagoon was always littered with icebergs. When I visited, there were no icebergs to be found anywhere near the bank.

    The hike to Laguna Sucia isn’t long, but it’s mostly on loose rock, which is no fun at all. Basically you need to always watch your step: some rocks might shift and tumble when you step on them, others are covered with ice so you might slip – you get the idea.

    Loose rock on our way to Laguna Sucia. Image courtesy of Santiago Siro Folcini.

    Since we wanted to shoot the lagoon and Mount Fitz Roy both at night and during sunrise, we decided to camp there, but as we didn’t want to carry the tents, we only carried our sleeping bags and inflatable mats. We set up our ‘sleeping quarters’ under a large boulder close to the lagoon and went on to explore the area.

    Setting up camp in a most unusual location. Image courtesy of Santiago Siro Folcini

    After shooting the lagoon and the mountain at sunset, I started looking for nighttime compositions. I was thinking about shooting the moonlight glowing on the very top of the mountain (the same way the sun glows on tops of mountains producing Alpenglow), so I had to wake up before moonrise. This meant it was going to be very, very dark, and thus I had to compose and leave the tripod at the same place, so when I returned, I only had to find it, attach the camera and I’d be ready to shoot. I found a composition I liked, set the tripod and went back to ‘camp’. The moonrise was at about 3 a.m., so we set up the alarm for 2:30 and went to sleep.

    Upon waking up, things didn’t look so good. Clouds had accumulated and blocked the moonlight, so all plans for glow fell through. We were quite disappointed but decided to stay around and see what happened. And surely enough, half an hour or an hour later, the clouds dispersed and the mountain was bathing in moonlight. This was the moment I had been waiting for. I went back to the tripod (which was still at the same spot) and took the shot.

    Before discussing how I made the shot, I’d also like to show you two additional images I took at the same place, at later stages. I call them ‘Prince of Crimson’ and ‘Prince of Gold’, and it’s pretty clear why when you see the colors. I really like these images (‘Crimson’ is probably the best of the three), but I had much less to say about them, and so I chose the night image as the topic for this article. By the way, I named the images so to allude to the name of the mountain, literally meaning ‘Son of King’.

    If only I had left the tripod in the same place for the last shot… I’m still sad about it!

    Settings and Execution

    To shoot this image, I used my Sony A7R and a Canon 16-35 F2.8L with a Metabones III adapter.
    The image is a composite of 3 different shots, each taken for a slightly different purpose. Let’s view the untouched Raw files.

    The leftmost image is a relatively short exposure for the sky and reflection. It was taken at ISO 6400, F2.8 and 30sec exposure. The middle image is a longer exposure, just over 2 minutes at ISO 1600, F2.8 to preserve the luminosity. From this image I took the mountain itself and the other parts of the background, except for the sky which at this exposure time had unwanted startrails. The last image was taken with very similar parameters to the second, but the focal point was on the foreground. I used this image to focus-stack the foreground and background, to get sharpness across the image.

    Composition

    The composition isn’t very complicated. The only point really worth mentioning is that the specific location was chosen since the rocks in the foreground follow a similar contour to that of the mountains’ reflection. This contributes greatly to the flow of the image. 

    Post Processing

    As I’ve mentioned, the image is a composite of the 3 shots above. Before combining them, I needed to make some initial tweaks in Adobe Camera Raw (ACR). The first thing I did was apply the lens profile, to avoid aberrations and counteract some of the vignetting. I also changed the white balance to better match what I had seen with my eyes, and made some other minor adjustments, visible in the screenshot below.

    Next I did some local adjustments. I brightened the foreground (to balance the global contrast) and boosted contrast and clarity in the reflection part, to enhance detail.

    I was then ready to combine the images. This wasn’t such a hard task, as the different parts were very distinct. I placed the three images as layers in Photoshop and aligned them (Edit->Auto Align layers). The top layer was the sky layer, and I had to delete the mountain from it in order to get the cleaner version of it from the mid layer. I selected the part I wanted to delete, refined the selection (Select->Refine Edge) and deleted it, exposing the layer below. Once done, I merged the two top layers.

    I was left with a top layer with a blurry foreground, and a bottom layer which I had to expose to get the sharp foreground rocks. I manually deleted the foreground, following the contour of the rocks to avoid exposing the blurry reflection in the bottom layer.

    Once finished, I merged the layers and was left with a flattened image.

    My next goal was to increase local contrast and enhance detail in the image, which has a lot of flat parts. Initially, I used luminosity selections to enhance contrast without losing detail in the highlights or shadows. I selected the midtones and used a levels adjustment layer to boost contrast.

    At this point I was pretty happy with all but the higher-left part of the image. It felt too bright compared to the foreground and the right side, so I needed to work on that separately. I selected the bright parts and refined the selection once again. I then used a levels adjustment layer to darken it, while keeping it brighter than the other parts of the image, which made sense as it was directly lit.

    The last task was to take care of unwanted color, caused by high ISO and shadow recovery. As you might notice, the sky is spotted with purple blotches, and the foreground seems too green. Both these color problems were dealt with in the same way: a color blend layer. The process is as follows: you duplicate the image layer, select blend mode ‘color’, and then whatever the pixel color on the top layer, it passes to the bottom layer as well. To cancel the purple in the sky, I had to select the sky without selecting the stars. I did that by selecting the whole image, and then subtracting a very light luminosity selection, until I had a selection which almost didn’t contain stars. I then used the pipette tool to sample the sky’s blue color and gently painted it in.

    The same was done with the foreground rocks. I sampled the foreground color I wanted and painted a color layer, until the rocks were grey, as they were in reality.

    All that was left was to convert to the sRGB color space, perform size reduction and sharpening and I was finally done.


    Erez Marom is a professional nature photographer, photography guide and traveler based in Israel. You can follow Erez’s work on Instagram, Facebook and 500px, and subscribe to his mailing list for updates.

    If you’d like to experience and shoot some of the most fascinating landscapes on earth with Erez as your guide, you’re welcome to take a look at his unique photography workshops around the world:

    Land of Ice – Southern Iceland
    Winter Paradise – Northern Iceland
    Northern Spirits – The Lofoten Islands
    Giants of the Andes and Fitz Roy Annex – Patagonia
    Tales of Arctic Nights, Part I and Part II – Greenland
    Earth, Wind and Fire – Ethiopia

    Selected articles by Erez Marom:

    • Behind the Shot: Dark Matter
    • Mountain Magic: Shooting in the Lofoten Islands
    • Behind the Shot: Nautilus
    • Behind the Shot: Lost in Space
    • Behind the Shot: Spot the Shark
    • Quick Look: The Art of the Unforeground
    • Behind the Shot: Watery Grave
    • Whatever it Doesn’t Take
    • Winds of Change: Shooting changing landscapes

    Articles: Digital Photography Review (dpreview.com)

  • Warum fotografiere ich eigentlich Akte?

    @ Corwin von Kuhwede

    Ein Beitrag von: Corwin von Kuhwede

    Seit 2005 bin ich im Bereich der professionellen Aktfotografie tätig. Da war es nur eine Frage der Zeit, bis ich mir selbst die Frage stellen musste, warum ich eigentlich Akte fotografiere. Das klingt nach einer einfachen Frage, aber eine ehrliche und aufrichtige Antwort darauf zu finden, war gar nicht so einfach.
    kwerfeldein – Fotografie Magazin | Fotocommunity

  • Weekly Photography Challenge – Snow White

    Check out these images of snow I rounded up earlier today.

    Thomas Hawk

    By Thomas Hawk

    Weekly Photography Challenge – Snow White

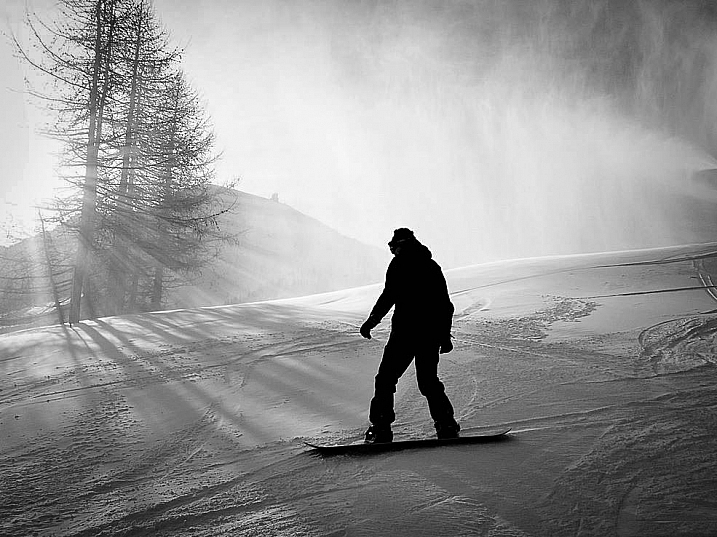
    This week your challenge is to go photograph something snow white – so what that means is that if you do not live in a place where it snows you can still shoot based on the theme white. Try doing a white subject on a white background, something high-key.

    Howard Ignatius

    By Howard Ignatius

    Howard Ignatius

    By Howard Ignatius

    Sheree Zielke

    By Sheree Zielke

    Thomas Hawk

    By Thomas Hawk

    Rene De Paula Jr

    By rene de paula jr

    Will Montague

    By Will Montague

    Ben Raynal

    By Ben Raynal

    Share your images below:

    Simply upload your shot into the comment field (look for the little camera icon in the Disqus comments section) and they’ll get embedded for us all to see or if you’d prefer upload them to your favourite photo sharing site and leave the link to them. Show me your best images in this week’s challenge. Sometimes it takes a while for an image to appear so be patient and try not to post the same image twice.

    Francisco Gonzalez

    By Francisco Gonzalez

    Randi Hausken

    By Randi Hausken

    Jérémy Lelièvre

    By Jérémy Lelièvre

    googletag.cmd.push(function() {
    tablet_slots.push( googletag.defineSlot( “/1005424/_dPSv4_tab-all-article-bottom_(300×250)”, [300, 250], “pb-ad-78623” ).addService( googletag.pubads() ) ); } );

    googletag.cmd.push(function() {
    mobile_slots.push( googletag.defineSlot( “/1005424/_dPSv4_mob-all-article-bottom_(300×250)”, [300, 250], “pb-ad-78158” ).addService( googletag.pubads() ) ); } );

    The post Weekly Photography Challenge – Snow White by Darlene Hildebrandt appeared first on Digital Photography School.


    Digital Photography School

  • Form Follows Treehouse: Tiny Green Canopy Home Tops Wood Trunk

    [ By WebUrbanist in Architecture & Houses & Residential. ]

    living tree building

    Wrapped in living greenery, the upper story of this solar-powered, tree-shaped dwelling branches outward, set upon a wooden framework supporting it from below.

    tree trunk shape house

    Designed by Elevate Structure Inc. in Hawaii (photos by Corey Lum for Civil Beat), the 40-square-foot-base expands upward to a 400-square-foot second floor above, overhanging to provide shade for outdoor uses (patios or parking) underneath.

    tree house interiors

    Eco-friendly features include living and breathing exterior walls that can also be used to grow edible produce, self-sufficient solar power generation via side and top panels and rainwater storage and collection (up to 1,500 gallons).

    tree house shape

    The modular structure was originally designed as an easy-to-ship, simple-to-build and off-the-grid solution for remote parts of Oahu, but the target has since been expanded due to broader public interest.

    tree house living walls

    While they work wonderfully as elevated homes, the units can also be used for other purposes, including small stores, cafes, offices, gyms and/or storage spaces.

    From its creators: “Inspired by Hawaii’s natural beauty, Elevate founders Tiffany and Nathan set out to create these innovative structures to help care for the environment and help people. The pressure of existing global issues – insufficient water availability in areas, poor air and water quality in others, and high energy consumption are exacerbated by the increasing population density and demands of urban environments – combined with their streak of entrepreneurship brought the Elevate unit to life.”

    Share on Facebook


    [ By WebUrbanist in Architecture & Houses & Residential. ]

    [ WebUrbanist | Archives | Galleries | Privacy | TOS ]


    WebUrbanist

  • RED Scarlet-W and Scarlet-W Monochrome unveiled: shipping starts in February

    RED has introduced its new Scarlet-W and Scarlet-W Monochrome pro-grade cameras. Both models feature RED’s Dragon sensor with recording options that include 5K/60fps, 4K/150fps, and 2K/300fps. Additionally, the Scarlet-W Monochrome makes it possible to capture black and white footage with enhanced resolution and improved light sensitivity. Thanks to a durable and lightweight design, Scarlet-W is suitable for on-the-go projects.

    RED says its new offering makes ‘obsolescence obsolete’ by using the DSMC2 accessories line, which is also compatible with RED’s Red Raven and Weapon cameras. The same modular design found on RED’s other cameras comes with Scarlet-W and is joined by an interchangeable lens mount.

    Scarlet-W (body-only) is priced at $ 9,950 USD/€10,040 EUR/£7,175 GBP with shipping set for February 2016. Deposits are now being accepted at $ 1,000 USD. Packages are also available starting at $ 14,500 USD.


    Press release:

    ANNOUNCING THE INDUSTRY-CHANGING SCARLET-W CAMERA

    Today RED introduced the newest addition to the RED DRAGON® family, SCARLET-W. Bringing an unparalleled level of accessibility to content creators everywhere, SCARLET-W combines RED’s intuitive camera design—including integrated mounting points, interchangeable lens mounts, simultaneous REDCODE® RAW and Apple ProRes recording formats, intelligent OLPF system, and in-camera 3D LUT outputs—with a RED DRAGON sensor to provide a solution that blends flexibility and accessibility with high-end performance.

    Coupling RED’s wide dynamic range and renowned color science with simultaneously recording capabilities in REDCODE RAW and Apple ProRes, SCARLET-W provides shooters with the best image quality possible in any format. Professionals are empowered to capture their vision exactly as they see it with recording frame rates of 5K at 60 frames per second (fps), 4K at 150 fps, or 2K at 300 fps when shooting REDCODE RAW.

    SCARLET-W is estimated to begin shipping in February 2016, with deposits now being accepted through the RED website or with a RED Authorized Dealer. Customers have the choice to purchase the camera BRAIN® only—with either a color or black and white monochrome sensor—or the SCARLET-W Base I/O V-Lock Package, which provides the key components necessary to get out and start shooting. Additionally, current SCARLET DRAGON® owners are eligible to receive a $ 2,500 discount on the SCARLET-W Base I/O V-Lock Package price (Only available through RED.COM).

    Articles: Digital Photography Review (dpreview.com)

  • 11. Dezember 2015

    Das Bild des Tages von: Jens

    Bundes, leuchtendes Halbrund eines Riesenrades vor der Silhouette einer Stadt mit Kirchturm, vor einem nachtblauen, sternenlosen Himmel.

    Im Ausblick: Kritik am Pirelli-Kalender, Dronen fotografieren Flüchtlinge und eine TV-Show.
    kwerfeldein – Fotografie Magazin | Fotocommunity

  • 28 Wintery White Snowy Images

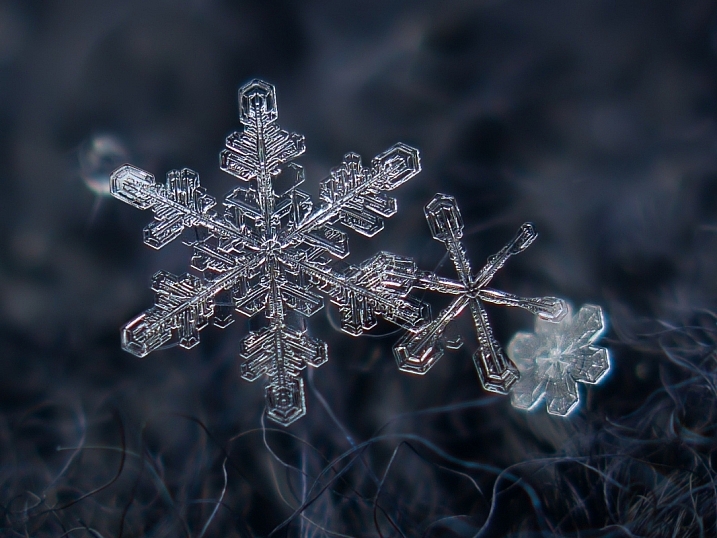
    For those of us who live in the northern hemisphere, the ground is probably covered in snow for many of us by this time of the season. So what better reason is there to get out and photograph all that white fluffy stuff?

    Here is that wintery white stuff in some snowy day images:

    Adam Foster

    By Adam Foster

    Jenny Downing

    By jenny downing

    Tim Donnelly

    By Tim Donnelly

    Maf04

    By maf04

    Visit Finland

    By Visit Finland

    Shigemi.J

    By Shigemi.J

    Mika_Oulu

    By Mika_Oulu

    Adam Vradenburg

    By Adam Vradenburg

    Andrew Smith

    By Andrew Smith

    Gerry Balding

    By Gerry Balding

    Rodney Campbell

    By Rodney Campbell

    Maziar Hooshmand

    By maziar hooshmand

    Russ Seidel

    By Russ Seidel

    Julie Falk

    By Julie Falk

    Shawn Harquail

    By Shawn Harquail

    Pascal Bovet

    By Pascal Bovet

    Alexey Kljatov

    By Alexey Kljatov

    Kamyar Adl

    By Kamyar Adl

    Several Seconds

    By Several seconds

    Mike Norkum

    By Mike Norkum

    Rishi Bandopadhay

    By Rishi Bandopadhay

    Ishrona

    By Ishrona

    Roman Boed

    By Roman Boed

    Javier

    By Javier

    Flood G.

    By Flood G.

    Vida Dimovska

    By Vida Dimovska

    Brian Colson

    By brian colson

    Roman Schmitz

    By Roman Schmitz

    googletag.cmd.push(function() {
    tablet_slots.push( googletag.defineSlot( “/1005424/_dPSv4_tab-all-article-bottom_(300×250)”, [300, 250], “pb-ad-78623” ).addService( googletag.pubads() ) ); } );

    googletag.cmd.push(function() {
    mobile_slots.push( googletag.defineSlot( “/1005424/_dPSv4_mob-all-article-bottom_(300×250)”, [300, 250], “pb-ad-78158” ).addService( googletag.pubads() ) ); } );

    The post 28 Wintery White Snowy Images by Darlene Hildebrandt appeared first on Digital Photography School.


    Digital Photography School

  • California dreaming: The zen of photography with Rinzi Ruiz and Jonathan Alcorn

    Street photographer Rinzi Ruiz and photojournalist Jonathan Alcorn are both based in the Los Angeles area, but their personal photography takes them to very different places. Ruiz thrives in the bustle of downtown L.A., while Alcorn loses himself photographing skateboarders and surfer-types at Venice Beach. They each find their zen in these environments, shooting until the sun is low in the sky, letting everything slip away except for the shot. Take a look at what zen means to these photographers, and let us know in the comments where you find yours.

    $ (document).ready(function() { SampleGalleryV2({“targetContainerClass”:”sampleGalleryImageViewerContainer”,”galleryId”:”1437225618″,”isEmbeddedWidget”:true,”selectedImageIndex”:0,”startInCommentsView”:false,”isMobile”:false}) });


    This is sponsored content, produced with the support of Samsung. What does this mean?

    Articles: Digital Photography Review (dpreview.com)

  • Michael Kenna: Japan

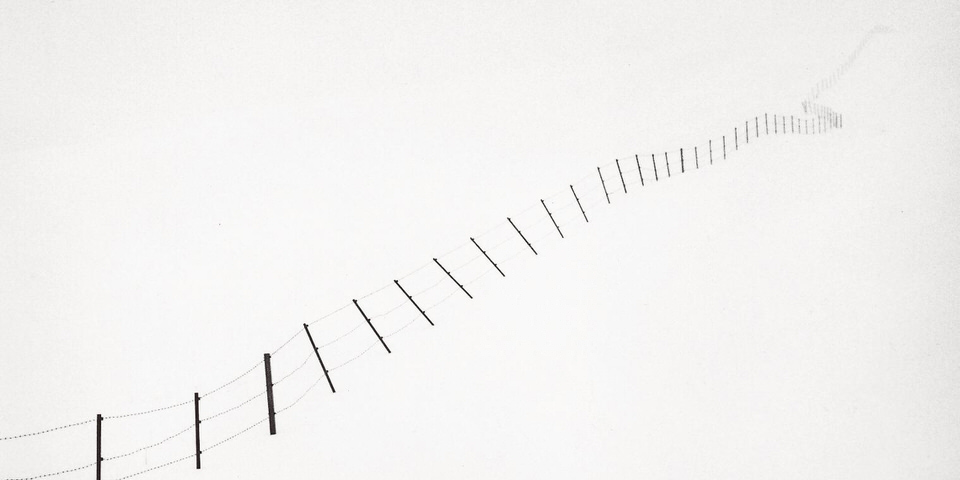
    Ein Zaun zieht sich durch eine verschneite Landschaft.

    Michael Kenna gehört zu den renommiertesten Landschaftsfotografen und hat sich mit seinem stillen, zurückgenommenen Stil weltweit einen Namen gemacht. Beim Verlag Prestel hat Kenna vor Kurzem einen prächtigen Bildband mit dem Namen „Forms Of Japan“ publiziert, den wir Euch in der letzten Ausgabe der 5 Fotobücher des Monats bereits kurz vorgestellt haben.
    kwerfeldein – Fotografie Magazin | Fotocommunity

  • Sculptural Skyscraper: Ornate NYC Design Redefines Tower Decor

    [ By WebUrbanist in Architecture & Houses & Residential. ]

    ornate manhattan skyscraper concept

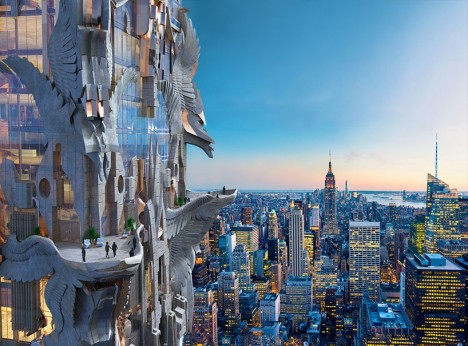
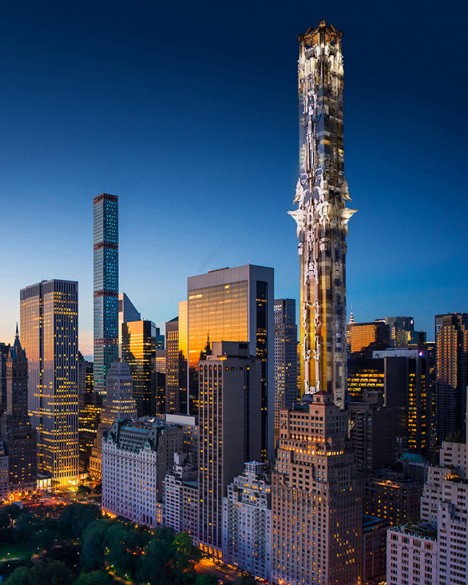
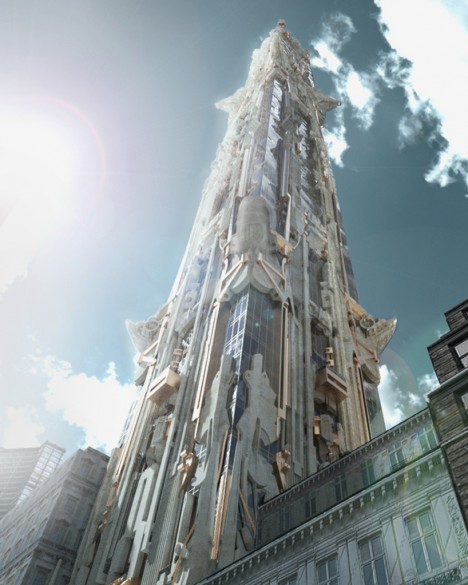
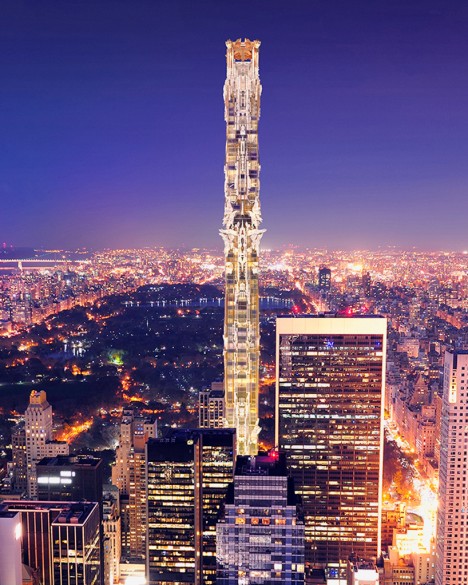
    Architect Mark Foster Gage has unveiled stunning plans for this 100-story, skyline-defining structure for Midtown Manhattan with views of Central Park. Commissioned by a developer to explore a statement-making skyscraper, the work includes carved figures and ornate balconies.

    ornate midtown tower design

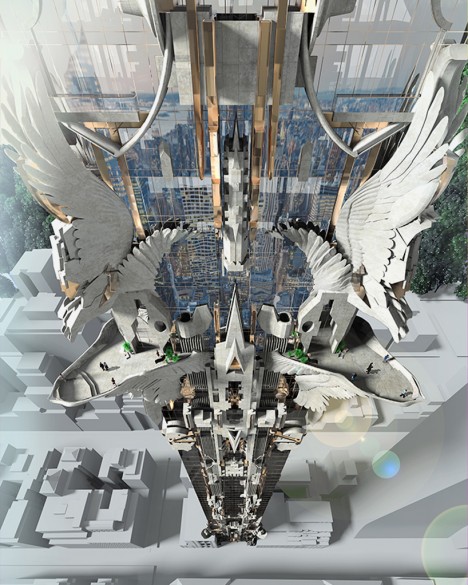
    No expense was spared, at least in this conceptual stage: limestone-tinted concrete cladding and hydroformed sheet-bronze details are accompanied by brass-tinted alloy wrapping structural extrusions and enclosures. The program features ballrooms and restaurants at various heights as well as a mid-structure retail ‘sky lobby’.

    ornate facade balcony level

    Early skyscrapers puzzled architects initially, and many were envisaged as lower-height buildings (featuring a plinth at the base and crowned with decorative roofs) with the central portion stretched vertically. Then Modernists came along, smoothing out lines and discarding sculptural effects for glass and steel. This design goes a step behind recalling early towers, including iterative and undulating embellishments from top to bottom.

    ornate street view building

    Of course, there was a logic to architectural predecessors with elongated central zones – they were street-friendly at the bottom, and sky-friendly at the top, saving cost and complexity in the middle.

    Whether such an extravegant reinterpretation of skyscrapers as this represents is indeed desirable or even feasible remains an open question. Still, there is something to be said for attempting to bring non-minimalist beauty back to tall buildings.

    ornate towering structure nyc

    In many ways, this approach represents a hybrid of old skyscrapers and new city-in-the-sky attitudes championed by contemporary architects, mixing programs at various levels to create a sort of self-contained structure for living, working and recreating.

    Share on Facebook


    [ By WebUrbanist in Architecture & Houses & Residential. ]

    [ WebUrbanist | Archives | Galleries | Privacy | TOS ]


    WebUrbanist