Month: December 2015

  • 4 Good Reasons Why You May Want to Wait to Share Client Photos

    A few decades ago the Heinz company ran a series of commercials featuring people patiently waiting for their ketchup to be poured from glass bottles, each ending with the tagline, “The best things come to those who wait.” Even though these ads seem kind of silly now, they do have a lesson for photographers: sometimes it pays to be patient, especially when sharing photos with your clients.

    Almost every time I return from a photo shoot, and start going through the pictures on my computer, I get caught up in the excitement and have a nearly unbearable urge to start sending pics, previews, and first-looks to my clients. I often can’t wait to share my work with them so they can see for themselves how things turned out. However, if you take the opposite approach and apply the brakes a bit, you and your clients will have a much more positive experience, and you will be better prepared for the long run and the rewards it brings. If you are the type of person who, like me, wants to send your clients a few sneak peeks or previews before you deliver your finished pictures, here’s a few reasons you might want to reconsider that practice.
    wait-to-share-photos-family-kids-park

    1 – Put your best foot forward

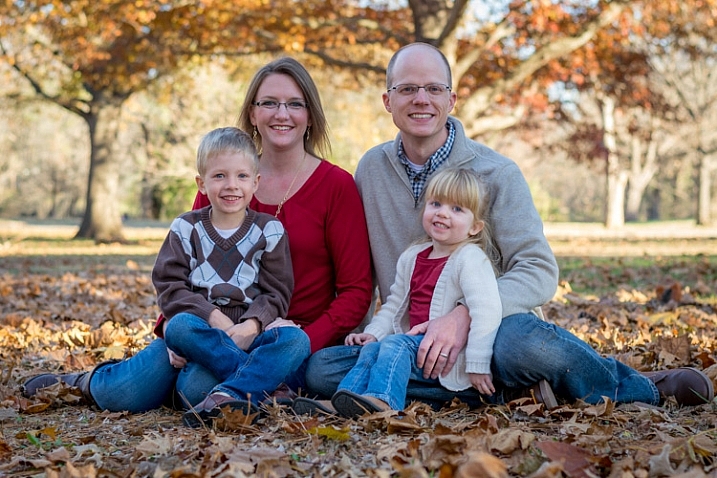
    Recently I spent an hour in the park taking pictures of a family, and as I was going through nearly a thousand images in Lightroom later that evening, I came across a few that I just had to share with the parents. They were so precious, and their little girl looked like she was having the time of her life, so I knew they would be thrilled to get a couple photos right away. I sent them to the mother’s mobile phone and she responded with ecstatic adulations, and a few minutes later the pictures showed up on Facebook where they immediately got dozens of likes and a handful of comments like “Great shot!” and “Lovely family!” So far so good, right? I mean, where’s the harm in sending a few pictures the evening after a photo session if that is the result?

    My goal in sending a few initial photos was to give my clients a sneak peek (that’s literally what I said when I texted her: “Here’s a sneak peek from today’s session!”) which would whet her appetite for the rest of the photos, but in doing so I essentially ruined the surprise. It’s like sneaking a peek, to use the expression, beneath the wrapping paper a week before Christmas and getting a glimpse at your presents–it’s fun, but it makes the actual unwrapping a bit anticlimactic, since you already know what to expect.

    Another problem with this approach is I found a few other pictures later on that were even better, but by then the surprise had worn off. Yes the clients were still thrilled to get their images, but by the time I had the official gallery all put together, with watermarked proofs for sharing on social media, the excitement had worn off and her friends were not as interested as they were initially. I basically sacrificed quality on the altar of immediacy, and in doing so hurt my brand just a tiny bit in the process.
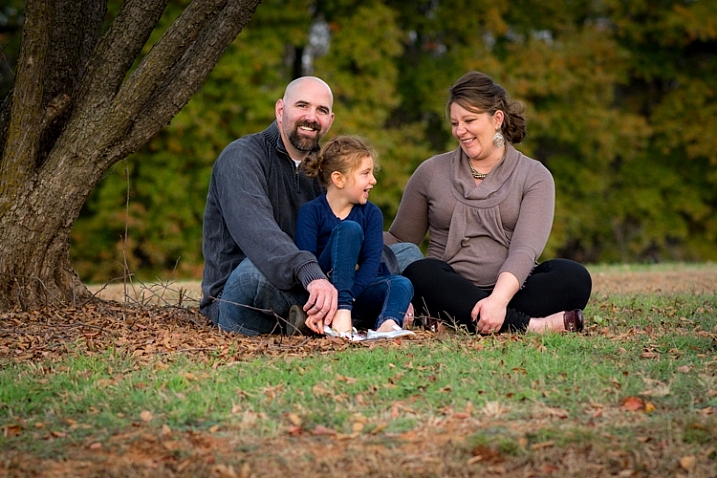
    wait-to-share-photos-family-tree

    If I had simply waited until all the photos were finished and given my clients everything when I was truly ready to do so, I would have had much better results overall. Every photo would have been personally selected, properly edited, and appropriately watermarked for sharing on social media. My client’s photos would have looked better and so would my photography operation in general. This same scenario has repeated itself time and time again, and often my wife has to talk me down from the edge. I’m eager to share a few quick photos, but if I just wait a week or two until they are actually ready for sharing, the results are always better for everyone involved.

    2 – Initial edits are usually not the final edits
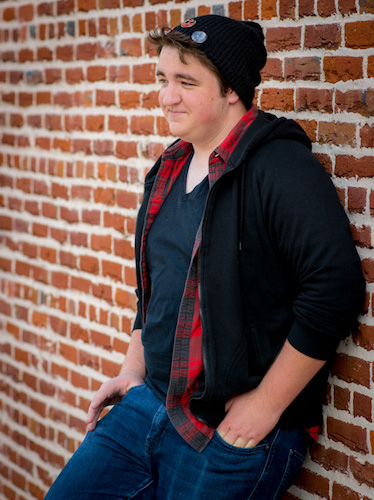
    wait-to-share-photos-senior-brick-wallThis second lesson is more practical and less emotional, but it rings true for me every time. My initial edits to my pictures are almost never the same as my final edits, and thus rushing to share images right away inevitably leads me to getting an inferior product into the hands of my customers. My editing workflow in Lightroom looks something like this:

    1. Import all photos
    2. Apply custom portrait presets
    3. Pick out my favorites
    4. More editing
    5. Cut out more photos
    6. Edit again
    7. Cut down again
    8. Edit, tweak, enhance
    9. Export the best of the best for printing and sharing

    If I share a preview of the session with my clients, it’s usually after step 4, or worse, step 3. (Which sadly has been known to happen more times than I care to admit.) That means I am giving my client, and everyone with whom they share those sneak peeks, images that are quantitatively inferior to what I am capable of producing. If you were baking a cake that you know needs 30 minutes in the oven, would you serve it after 25 minutes because you can’t wait for your guests to taste it? No way! You would serve it only when it’s done and give your friends the highest quality dessert possible as a result. We should give our photographs, and the people with whom they are shared, no less than the time they need to be the quality they deserve.
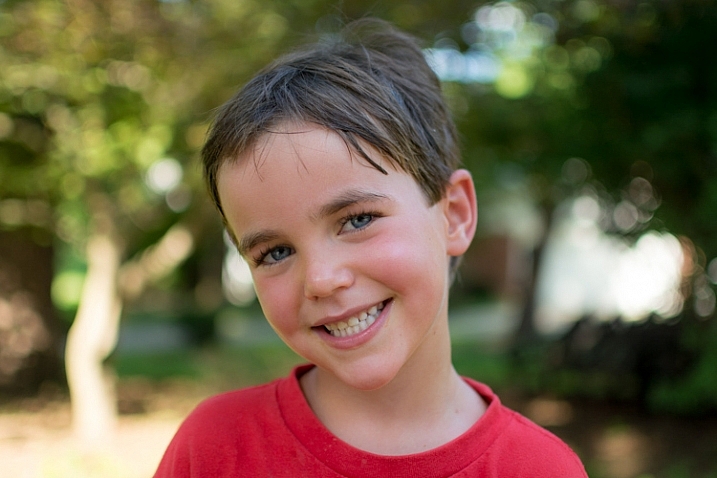
    wait-to-share-photos-child-red-shirt

    3 – People think things that take longer, are higher quality

    Think for a moment about something special you have in your life: a physical object, a trinket or knicknack, or something with function or purpose like a bookshelf or cabinet. More likely than not, the things we hold dear, and to which we assign greater value, have one thing in common – they were constructed with care over time. Humans often assign greater significance to things that we know took a long time to create. Spelunkers gaze in awe at natural rock formations and crystals that were formed bit by bit, over millions of years. We pay more for wines that has been aged over time, even though they are often no better than their one-year-old counterparts. Rome itself, so the saying goes, was not built in a day. Why then are we, as photographers, so quick to share photos with our clients, if people expect that quality takes time?

    I know how tempting it can be to want to share a few pictures right after you are done with a photo session. It hapens to me almost every time! It might get you some immediate accolades from your clients, but can be somewhat counterproductive in the long run. Early sharing can send the wrong signal to your clients, and their friends, about the quality of your pictures. Think about it from your clients’ perspective – would you feel good about spending $ 500 on a photo session if the photographer finished editing your images in one day, or would you rather know that he or she spent a week or two to get the colors, the cropping, and other edits just right?
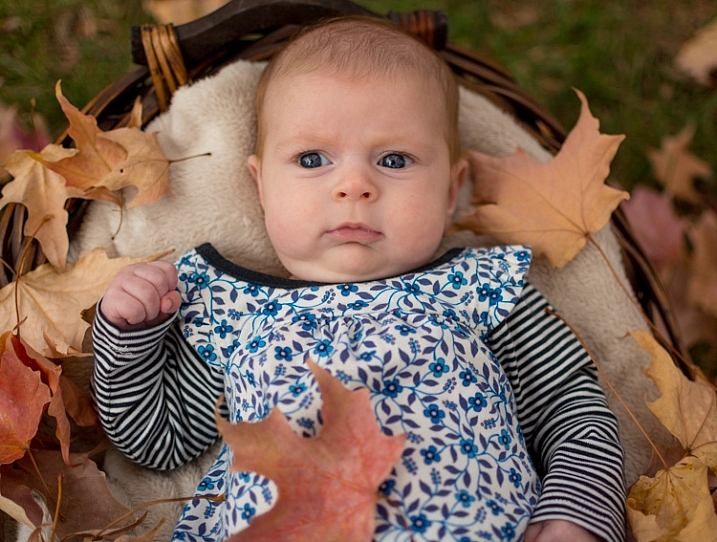
    wait-to-share-photos-baby-basket

    If your clients have to wait a week or two for their pictures they will assign a much greater value to them, because they know it took you longer to arrive at the final product. When I think about giving clients a preview or sneak peek, my wife, ever the voice of reason, usually pulls me back from the edge and reminds me that we’re only helping our business in the short term. That is not creating the type of high-quality perception we want people to have when they think about having us do their pictures.

    4 – Sharing photos early cheapens your talent and skill

    One of the nice things about the prevalence of smartphones is that everyone has a camera. Of course the downside to this is many people also consider themselves photographers, when they may not have all the training, experience, and skill that most of their professional counterparts possess. While I’m not one to judge, and far be it from me to say whose work has value and whose work does not, I do know that if you want people to spend money on your photography services, you need to give them a reason to do so.

    Why should I pay someone $ 1500 to shoot my wedding if my friend says he can do it for half that with his new Canon Rebel and a kit lens? Why should I pay $ 300 for pictures of my kids when my sister can just use her  iPhone with its really nice camera? The reason is because you, as a photographer, are much more than just a person with a camera. People are paying you for your knowledge and skills, your ability to work with people and capture their emotions, and to create beauty and art with the press of a shutter button. You have experience shaped by years of trial and error. Sharing pictures within hours of taking them can send your clients a signal that your work is no different than anyone else with a halfway decent camera.

    wait-to-share-photos-birthday-cake

    It was so tempting to share this photo with the girl’s mother right away, but after a week I had taken more time to properly edit it to where it was much better than the original.

    By carefully culling your photos from a session, taking time to edit them to perfection, and choosing only the best of the best to eventually give to your clients, you are sending a message that you might not be the fastest game in town, but you mean business, and do quality work. To use another food analogy, anyone can stop at a fast food burger joint and get a quick meal. For a quality top-notch hamburger you need a sit-down restaurant where your food takes a decent amount of time to prepare. Even if both establishments get their beef from the same distributor, the public perception of the latter will almost always be greater than the former, partly for the simple reason that you don’t get your food right away. The same holds true for photography – the best things come to those who wait.
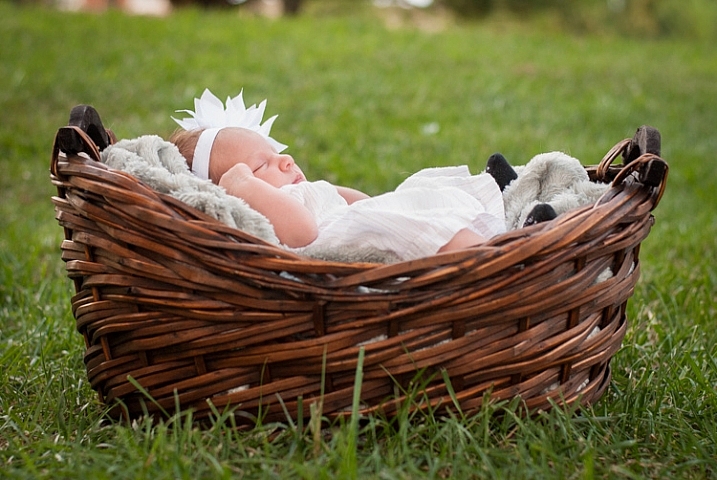
    wait-to-share-photos-baby-basket-park

    Of course one obvious problem here is how long to wait. As a general rule I like to give my clients their images within two weeks, and often a bit sooner. Much more than that and they can get a bit annoyed, as you would also have a problem waiting two hours for a hamburger, no matter how tasty it was. Every photographer is different, and the length of time depends on many different variables, but as long as you set your clients’ expectations upfront you should be fine. You might even benefit from over-estimating the length of time it will take, and then delivering your pictures a bit sooner. This type of under-promising and over-delivering can go a long way towards building goodwill with your clients, and give them an even more positive impression of you and your work.

    What about you? Do you like to share your photos online right away or take your time? I’m interested to hear your thoughts in the comments section below.

    googletag.cmd.push(function() {
    tablet_slots.push( googletag.defineSlot( “/1005424/_dPSv4_tab-all-article-bottom_(300×250)”, [300, 250], “pb-ad-78623” ).addService( googletag.pubads() ) ); } );

    googletag.cmd.push(function() {
    mobile_slots.push( googletag.defineSlot( “/1005424/_dPSv4_mob-all-article-bottom_(300×250)”, [300, 250], “pb-ad-78158” ).addService( googletag.pubads() ) ); } );

    The post 4 Good Reasons Why You May Want to Wait to Share Client Photos by Simon Ringsmuth appeared first on Digital Photography School.


    Digital Photography School

  • Readers’ Showcase: Rob Kearney

    Readers’ Showcase: Rob Kearney

    NYC April, 2007. New York in the rain is just so very photogenic. The Canon 50mm 1.2 does an amazing job of isolating subjects and accentuating texture. Photo by Rob Kearney

    At the ripe age of 19, Rob Kearney had developed an encyclopedic knowledge of cameras and a position at a local camera shop (for which he was the only applicant). With his Leica M6 and 50mm Summicron, he fancied himself the Cartier-Bresson of New Haven, Connecticut. He continued his education as a freelance photo assistant in New York City, eventually detouring into full-time photo retouching, and now shoots street scenes and graphic-inspired still life for himself. 

    Learn more about his career in our Q&A, and see more of his personal work at his website. Would you like to be featured in an upcoming Readers’ Showcase? Let us know! Be sure to include your DPR user name and a link to your online portfolio.

    Readers’ Showcase: Rob Kearney

    Photo by Rob Kearney

    Where are you from and what’s your history with photography?

    I was born in Texas, raised in Ohio and Connecticut, and have been living in NYC since 1989. I’m 47.

    My interest in photography started around age 7 or 8, but began strictly as a fascination with cameras and lenses. For years, I was far more interested in the camera as a physical object than I was in taking photographs. I knew all the latest models and brands, but I never really took any pictures, save a few snaps with a cheap 110. Other kids had football posters on their walls; I had a home made collage of cutouts of cameras from Popular Photography. Looking back, I was a pretty weird little kid.

    After a brief stint at the university of college, I lucked into a job at a camera shop chain in New Haven, CT., imaginatively called The Camera Shops. The manager was instantly intrigued (perplexed) by my level of knowledge of cameras, contrasted with my young age, and my utter lack of photographic skills. I was also the only one who applied.

    Soon after starting the job, thanks to a generous employee discount, I got my first 35mm; a used Minolta X370 with a 50mm lens. Within a year I had worked my way up to a Nikon FM2 with a couple of lenses, and by the end of 2 years, I’d finagled my way into a Leica M6 with a 50mm Summicron.  

    I spent the rest of my money on Tri-X and processing. I fancied myself the Cartier-Bresson of New Haven, which of course I was not, even remotely. But I did manage to join a Yale camera club and was given lots of encouragement by the members. I was 19.

    Readers’ Showcase: Rob Kearney

    Sagaponack, NY, August 2010. A favorite. Photo by Rob Kearney

    (cont.) Through some of the connections I’d made with local photographers at the camera shop, I found out about an opening at a professional shop in NYC (which was eventually bought by Calumet). I got the job and had a start date before I even found an apartment. 

    I worked in the rental department and learned as much as I could about medium format, large format and studio strobes, hot lights, and grip equipment, while also building relationships with photographers and their assistants.

    After a few months, with a nudge from of a couple of the shop’s customers, I quit and joined the freelance photo assistant pool. NYC still had a bustling photo district back then, with rental houses, labs and studios all concentrated within a few blocks around 20th St and 5th Ave.

    I spent the next several years assisting over 100 photographers, my morning commute zig zagging across the photo district. For the first few years, I worked for anyone and everyone, from a guy who was merely cataloging machine parts with a view camera, to a luxury real estate photographer, to a guy who photographed ONLY gardens, to Annie Leibovitz. Towards the end of my assisting career, I concentrated on working with advertising still life photographers. I liked the attention to detail in still life, the slower, more methodical pace, not having to lug equipment on location, and the catered lunches. 

    Readers’ Showcase: Rob Kearney

    NYC AC. August, 2013. Photo by Rob Kearney

    (cont.) While assisting, I started to put together my own portfolio of advertising/editorial work and shop it around town. Unfortunately, this was right around the time, in the late 90s, when stock photography started booming, digital started pushing aside film, and budgets started to plummet. Assignments were becoming harder to find, as art directors started using more stock. Lower budgets and digital cameras meant clients weren’t interested in paying for film and processing, which meant ditching my entire 4×5 view camera system. And relationships between photographers and ad agencies became more tenuous, as art directors wanted to work with the next new kid, who was shooting digital, with a cool new technique and look, and who worked cheap.

    The days of big budget contract shoots with clients flying in and catered lunches was on the wane. I had apprenticed a little too long and was emerging at the wrong time into a marketplace that was very different from the one I’d signed up for.

    Readers’ Showcase: Rob Kearney

    NYC March, 2007. This lady had so clearly spent a lot of time and effort on the way she looked, I had a hunch she wouldn’t mind me taking her photo. After I snapped the picture, she gave me a sort of knowing look and a half smile that said, ‘Yeah, I know, I look pretty awesome.’ Photo by Rob Kearney

    (cont.) I had another small problem. I was trying to make my ‘schtick’ shooting in natural light. I had built up a decent portfolio, of advertising quality images, all shot with natural light, indoors and out, while every other competing photographer was shooting in a studio with strobes. Art directors all seemed to like my portfolio, but the concept of shooting something important for an advertisement using unpredictable, and generally unrepeatable, natural daylight was a bit too scary for them. If they hired me to shoot something with long hard shadows and it was cloudy come shoot day; game over. If they wanted me to shoot 20 handbags with the same lighting in a day, but the sun went down before we were done; game over.

    In the end, my method of shooting simply wasn’t controlled enough for big agencies to take a chance on me. And I loathed the idea of putting all the time and effort into a laborious studio shoot, like I’d been doing as an assistant for the past several years, for half of the former going rate.

    So I was faced with a decision; try to make a go of shopping my portfolio around and make a piece meal living with small editorial assignments and stock shooting, or forge a new direction.

    Readers’ Showcase: Rob Kearney

    NYC September, 2013. This is one of my favorite images because it’s so flat, colorful and abstract, it could be a painting. In reality, it’s a carpet store window, with a beat up graffiti covered metal frame around it, reflecting traffic lights. Even though I took it, I still forget what it actually is sometimes. Photo by Rob Kearney

    (cont.) I decided to learn Photoshop. I spent a few years honing my skills, then started doing retouching for some of the photographers I’d worked for as an assistant. Over time, I realized I had somewhat of an advantage over people who only knew Photoshop but never worked in studios. I spoke the same language and understood the photographers, especially the still life guys.

    By 2005, I was freelance retouching 5 days a week. I stayed freelance for a few more years. Then in 2009, I took a position at a fashion retouching studio called Gloss. At the time, there were no dedicated ‘still life’ retouchers on staff, and there was very little still life work. Little by little, I carved a small niche at the studio, and everything related to still life came my way. Eventually the clients took notice and started sending more still life work our way.

    Today I oversee a team of 7 retouchers, all focused strictly on still life – cosmetics, watches, jewelry, etc. All the while, I have been taking pictures, for myself and friends and family. It’s very freeing to shoot without worrying about getting paid for it. Of course, getting paid for it wouldn’t be so awful. 

    Readers’ Showcase: Rob Kearney

    NYC August 2012. Lamp with ceiling. Photo by Rob Kearney

    How does your day job influence your photography?

    As a full time retoucher, I’ve learned to make my own photos look better faster, more efficiently, and hopefully less noticeably post processed. With a few exceptions, I try not to take retouching too far on my personal work. I don’t do a lot of pixel level modifications (cloning/healing, etc), but I do use color and lighting adjustments to bring out the essence of what I see. And because I’m paid to have a critical eye, I tend to be more selective about which images of my personal work I choose to spend time processing, retouching, and ultimately share with others.

    Readers’ Showcase: Rob Kearney

    Nantucket September, 2014. I try to avoid obvious shots, but I couldn’t NOT take this. Photo by Rob Kearney

    What do you shoot with? 

    Currently, I use a Sony RX1 and occasionally a Cyber-shot RX100. I’ve spent the vast majority of my career shooting with a 50mm, so the Sony’s 35mm has been both a bit of a compromise and a challenge. Since getting it, I’m more drawn to landscapes than previously, but my tighter ‘still life’ images have taken a bit of a back seat. For street and outdoor travel shooting, it’s a lot of fun. Truth be told, I am missing my old Canon full frame and 50mm F1.2 combo quite badly, though I certainly don’t miss the bulk or weight. 

    Readers’ Showcase: Rob Kearney

    NYC September, 2013. I’ve always been fascinated by the spectrum of greens, yellows, oranges and blues in the various light sources you see when looking at an apartment building from outside. But the people in the rooms just see the kitchen light, the bedroom light, the living room light, etc. They don’t perceive the different colors. Photo by Rob Kearney

    Are you happy with your gear? What do you wish it could do better?

    The ergonomics, build quality, size and weight of the RX-1 are nearly perfect. I do wish it wasn’t quite so noisy in low light, and focused more quickly and decisively. When I get a noisy soft image, I just tell myself ‘that’s the look!’ and move on, but I am always on the lookout for a compact full frame that handles low light better, and focuses faster.

    Previously, I’ve had Canons, Nikons, and Panasonic M43s. I’ve gotten great pictures from all of them, and an iPhone too. I don’t really care what I’m shooting with as long as I get an image that’s either reasonably sharp and well exposed, or beautifully messed up. I had a foggy Nikon 55mm macro that had a broken diaphragm for years. Everything that passed through that lens looked like a dream. I still miss it!

    Readers’ Showcase: Rob Kearney

    NYC July, 2014. The city has such a wide variety of random lighting, and dogs. Photo by Rob Kearney

    What sorts of subjects are you drawn to photographing in your personal work?

    Working in advertising for 20 years will definitely have an affect on your sense of light, color, and composition. I’m always drawn to little vignettes; pools of light, or pockets of color that could pass for an ad. I prefer images that stand well alone and don’t need to be part of a group of images to tell the story. I don’t purposely shoot ‘themes’ or ‘series’. I like the concept of the photograph as a singular thing, like a painting. I try to shoot with the idea in the back of my mind that someone somewhere might like to hang the picture I’m making on their wall.

    Readers’ Showcase: Rob Kearney

    Nantucket September, 2013. Once you see them, I think the birds are the stars of this image. Photo by Rob Kearney

    What are the elements of a photograph you’ve taken that you’re happy with – what makes a keeper?

    A keeper to me can be many things. It can be funny. It can evoke a sense of calm. It can be something abstract that doesn’t seem photographic at all. I like images that are lush, or stark, colorful or monochromatic. Cold. Warm. Disturbing. Comforting. I’m definitely a photographic omnivore. If I had to ascribe one word or concept to my work, it would be simplicity. Less is definitely more in my book.

    Readers’ Showcase: Rob Kearney

    NYC July, 2012. I work on the 12th floor of a building facing the Empire State. The view is always varied and often dramatic, but rarely this intense. I was literally waiting for the UFO to appear through the clouds. Believe it or not, there is very little post processing here. Photo by Rob Kearney


    Your home city of New York is a frequent subject in your photography. In your opinion, what’s unique about it as a photographic subject compared to any other major city?

    New York is a great muse because it’s so brimming with varied subjects and weird/dramatic/beautiful light, 24/7. There are so many people, places, and things, packed into such a small area, that you could swing a camera on a rope and get great shots. New York is also the city of change, for better or worse. Things are in such constant flux that nothing gets the chance to become old and boring.  

    The challenge is to hone in and isolate your subjects, in a sea of frenetic distractions (or embrace the distractions as the subject). The other great thing about living/shooting in New York is that when you travel away from it, the contrast of calm, serenity, and beauty outside the city is that much more inspiring. It’s always amazing to me how people who live outside the city so often take for granted the beauty that surrounds them, because they see it every day and have become blind to it.

    Readers’ Showcase: Rob Kearney

    Photo by Rob Kearney

    What advice would you give a beginning photographer?

    Don’t get caught up in tech specs; megapixels, corner sharpness, fall off, etc. Some of the greatest photographs ever taken are blurry and noisy. The most important pieces of equipment are your eye and your instinct, and the best camera in the world is the one you have with you. I rarely see a great photograph ruined by a so-so camera, but I’ve seen plenty of so-so pictures come out of state of the art cameras.

    Articles: Digital Photography Review (dpreview.com)

  • 6 Photoshop Tools Every Newbie Should Learn

    In the days before digital imaging, if you truly wanted to elevate your photography to the level of art, you learned how to process your images in the darkroom. You learned dodging, burning, masking, sandwiching negatives, flashing and fogging – all designed to get the most out of your images, and deliver your artistic vision to your viewers.

    Photoshop-tools

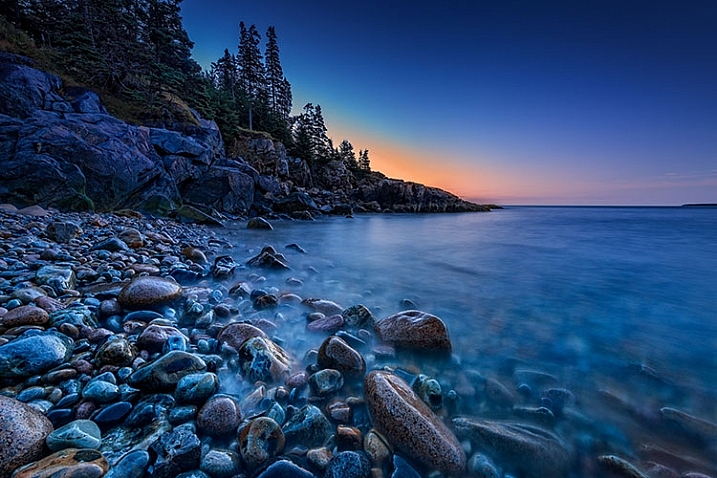
    The finished image after Photoshop, using the tools discussed below.

    With the advent of digital imaging, photographers have a new way to bring their artistic vision to life, known as the digital darkroom. While there are several different applications available for photographers, one has become synonymous with photo editing, and that is Adobe Photoshop.

    Many of the tools in Photoshop can trace their origins to the wet darkroom of yesteryear. If you’re new to Photoshop, it can seem overwhelming the first time you open an image in the program. I’ve created this list of six must-know Photoshop tools to help you get started editing your images. These aren’t by any means the only tools needed, and there are of course tools within the tools to figure out, but this list should give you some idea of where to start. The great thing about most tools in Photoshop is that there are a lot of sliders, meaning you can experiment and see what each tool does, then undo it if you don’t like it.

    1 – Adobe Camera Raw

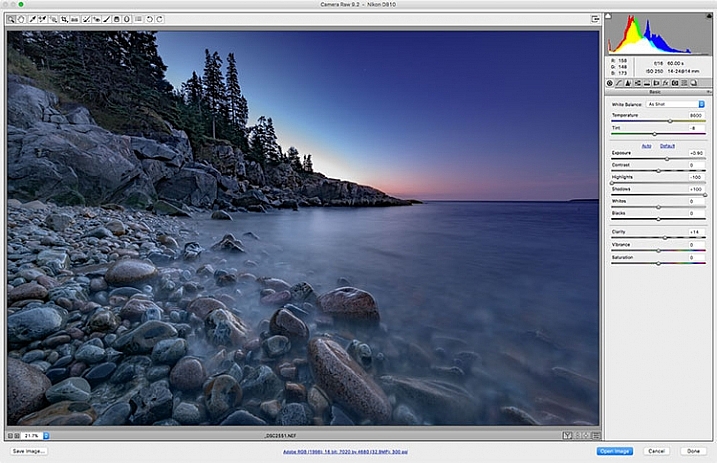
    Adobe Camera Raw is a series of sliders and tabs used for processing RAW files. The beauty of the RAW file is you can make changes to the file non-destructively and change them again later if you choose.

    Adobe Camera Raw is a series of sliders and tabs used for processing RAW files. The beauty of the RAW file is you can make changes to the file non-destructively and change them again later if you choose.

    It is my personal belief that if you aren’t photographing RAW images, you are doing yourself a disservice as a photographer. When you allow your camera to process your image into a JPEG, you are throwing out potentially critical information from your image. You are trusting your camera to make creative decisions for you about the color, contrast, tone, and more, with regards to your image.

    To get the most out of your image, you’ll want to set your camera to capture the image as a RAW file. A RAW file contains unprocessed, uncompressed, grayscale data from your camera’s image sensor, as well as metadata about how the image was captured. Adobe Camera RAW is the plugin for Adobe PhotoShop that can take this information and process a color image.

    When you open a RAW image in Adobe Camera RAW, you’ll be presented with a toolbar across the top, and a tool palette on the right side. The tool palette is divided into 10 tabs: Basic, Tone Curve, Detail, HSL/Grayscale, Split Toning, Lens Corrections, Effects, Camera Calibration, Presets, and Snapshots.  The tabs I use most in my workflow are Basic, Lens Corrections, Effects, and Camera Calibration.

    The beauty of a RAW file is that you can change the settings using the sliders, and other tools, as often as you like. If you don’t like what you’ve done, or you want to try something different, you can always revert the image back to the original settings, and the file is the same as it was when you downloaded it from your camera. Don’t be afraid to play with the sliders and see what they do. You can’t ruin the RAW file, so you might as well see what everything does. For more on using Adobe Camera Raw, check out Understanding the Basic Sliders In Adobe Camera Raw.

    2 – Layers and Layer Masks

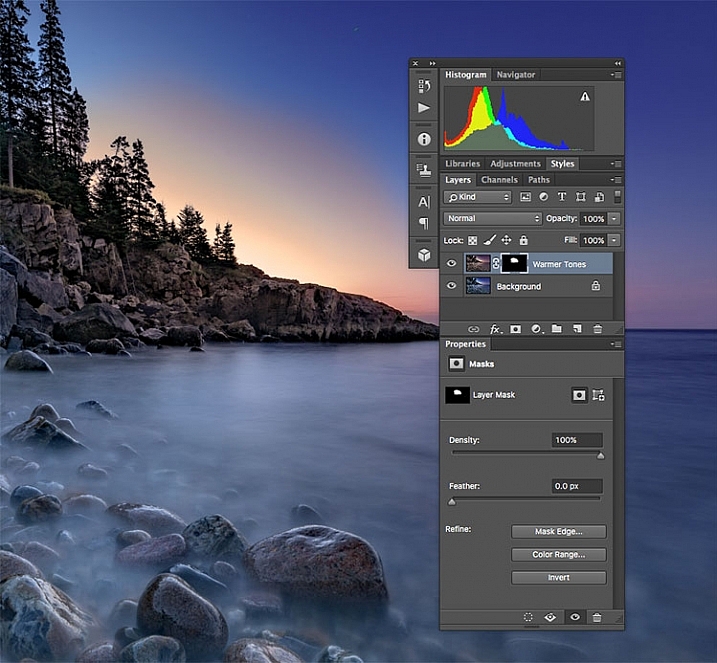
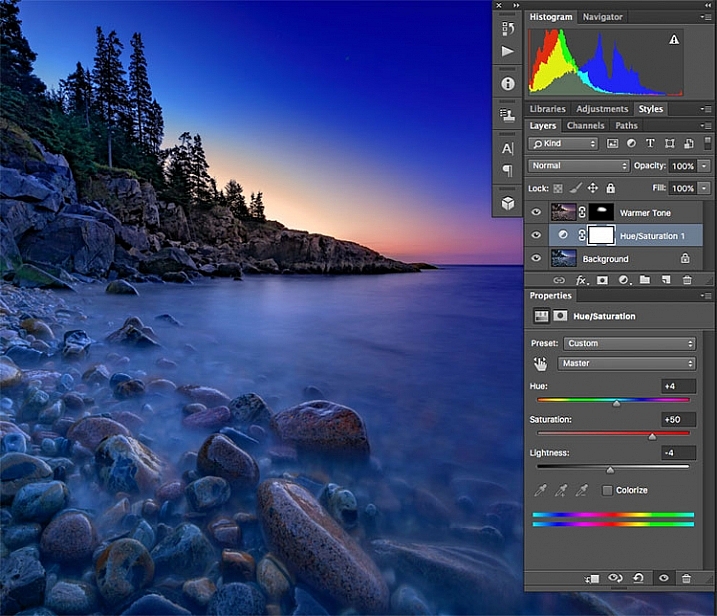
    I created a duplicate layer to warm up the sunrise a bit and look more like it appeared when I was there. But since I still wanted the cooler tones on the rocks, water, and the rest of the sky, I used a layer mask to show only the warmer tones where I wanted them.

    I created a duplicate layer to warm up the sunrise a bit and make it look more like it appeared when I was there. But since I still wanted the cooler tones on the rocks, water, and the rest of the sky, I used a layer mask to show only the warmer tones where I wanted them. The white area of the mask for the layer called, “Warmer Tones” shows the area of that layer that is showing through.

    I consider this number 2a and 2b. If you’re going to learn layers, you’re going to have to learn layer masks as well. In Photoshop, one of the first things you’ll notice when you open an image is the Layers Palette on the right side of the screen. Initially, it will likely only have one layer called “Background” which contains your image.  You can add new layers as needed. You can also add empty layers which will allow you paint, draw, or copy portions of the image below onto them, and you can use layers to create a composite from multiple images. Layers can be adjusted to different opacities using the opacity slider at the top of the palette, so they can be made partially translucent which allows the layers underneath to show through.

    In addition, you can create layer masks, which allow you show or hide portions of a layer, and allow you to see the layer or layers beneath. You do this simply by painting with black on the layer mask to hide that part of the layer, or painting white to show that part of the layer.

    Layers give you room for quite a bit of creativity, allowing you to edit areas of an image non-destructively. If you don’t like what you did, simply delete the layer and start over. You can sandwich together two separate images, much the way you’d sandwich negatives in a wet darkroom, and create photo composites. For more on using layers, read A Beginner’s Introduction to Using Layers.

    3 – Blend Modes

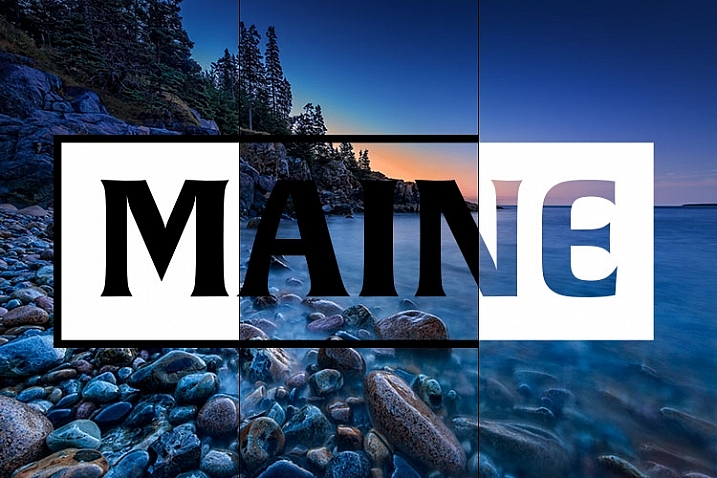
    This image shows two different blend modes. On the left, Normal is selected, so the white box with the black text appear as I drew it. In the center, the blend mode is set to Multiply, so the white disappears and the black remains. On the right, Screen is selected, which shows the white area and shows the black.

    This image shows three different blend modes. On the left, Normal is selected, so the white box with the black text appear as I drew it. In the center, the blend mode is set to Multiply, so the white disappears and the black remains. On the right, Screen is selected, which shows the white area and hides the black.

    As mentioned above, the Opacity Slider allows you to blend the active layer with the layers beneath. The Blend Modes, found in a drop-down menu to the left of the Opacity Slider, work in a similar fashion, but use different mathematical calculations to change the appearance of the layer being blended for different things. For instance, if you simply duplicate the image on a new layer and set the Blend Mode to: Multiply it will darken the image by about a stop, and Screen Blend Mode will lighten the image by a stop. If you create a layer on top of your image with black text inside a white box, using Multiply will eliminate the white box, and allow the layer below to show through. Screen will do the opposite (see image above).

    As of Adobe Photoshop CC 2015, there are 27 Blend Modes. The two modes I noted above are ones I use often, usually adjusting the opacity slider as well to get to my final look. Knowing what each mode does will help in choosing which one to use for your particular purpose. Darren Rowse put together a great tutorial, An Introduction To Blend Modes In Photoshop to give you a more in depth look at Blend Modes. You can also check out The First 3 Blend Modes You Need to Understand.

    4 – Adjustment Layers

    I used an Adjustment Layer on the cooler layer to bump up the color saturation a bit.

    I used an Adjustment Layer on the cooler layer to bump up the color saturation a bit.

    Photoshop Adjustment Layers are a great way make changes to an image, without actually changing the original file. It’s an easy way to try things, such as adjusting contrast or saturation, so that you can go back and change it again later – as long as you’ve kept the layers in tact by saving as a PSD or a TIFF file, formats that both support layers.

    There are 19 different adjustment layers, which can be combined to create different effects on your image. Some basic uses are color adjustment, contrast adjustment, saturation, and black and white conversion. In addition, you can use Layer Masks to apply the effects in specific areas only, rather than the entire image, if you so choose.  You can also adjust the Opacity of an adjustment layer to reduce the effect of the adjustment on your image.

    Adjustment layers provide a ton of flexibility when editing an image, without forcing you into a change that can’t be undone easily. For more on Adjustment Layers, check out Photoshop: Applying Fixes using Adjustment Layers and Masks and Burning and Dodging with Adjustment Layers and Layer Masks.

    5 – The Spot Healing Brush

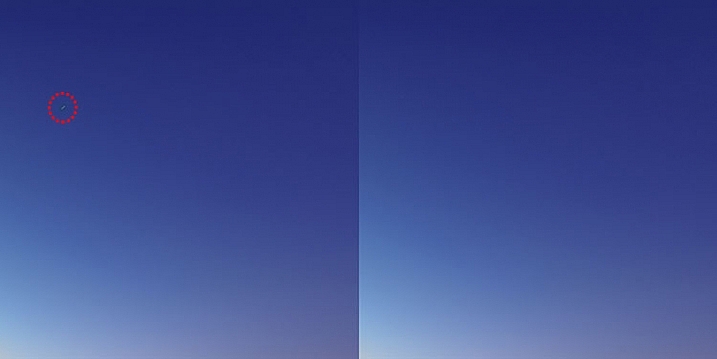
    There were a few stray star streaks in the sky that I wanted to eliminate, so I used the Spot Healing Brush to quickly remove them.

    There were a few stray star streaks in the sky that I wanted to eliminate, so I used the Spot Healing Brush to quickly remove them.

    The Spot Healing Brush is one of the primary retouching tools in Photoshop, allowing you to remove blemishes and errors, or other parts of your photos. In the digital age, the bane of all photographers’ existence is dust on the imaging sensor, and the Spot Healing Brush provides a quick and easy way of removing those fromyour images.  The Spot Healing brush works similarly to the Cloning Stamp tool, in that it samples from one area of the image to correct other areas.

    The Spot Healing Brush automatically detects the content or texture of the surrounding area, and attempts to replicate it wherever you click in the image. There are several options to work with which appear at the top of the screen. These include brush size and hardness, Blending Mode, and the type of fix you want to use, such as Content Aware, Create Texture, or Proximity Match. Each image will have different needs, depending on the content, so it’s best to experiment with the various settings if you find you’re not happy with the results you’re getting.

    The Clone Stamp Tool

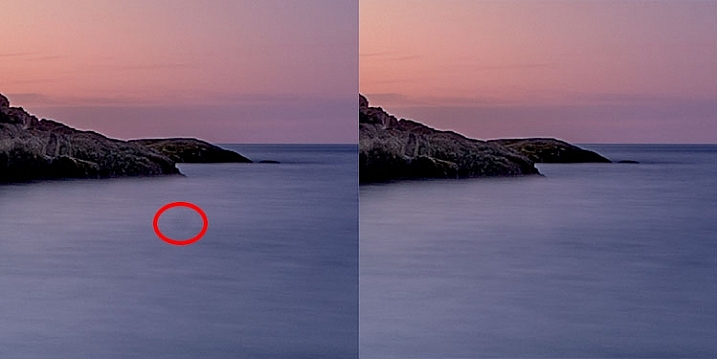
    I had a few dust spots on my sensor. This one in the water, circled in red, did not respond well to the Spot Healing Brush, so I used the Cloning Stamp to sample and area of the water and stamp it over the dust spot.

    I had a few dust spots on my sensor. This one in the water, circled in red, did not respond well to the Spot Healing Brush, so I used the Cloning Stamp to sample an area of the water and stamp it over the dust spot.

    As I mentioned above, the Clone Stamp Tool and the Spot Healing Brush are similar in that they are both used for retouching images, and both use sampled areas of the existing image. The Clone Stamp, however, allows you to select the area from which to sample by holding the Command key and clicking (on Mac) or CTRL and click (on Windows), and creates an exact copy of the area you sample. Then you simply click on the area you want clone out and a copy of the area you sampled appears.

    Again you have some options at the top of your screen, including Blend Modes, Opacity, and whether or not to sample a specific layer, or use all layers. You can also change the edge hardness and size of the stamp. The clone stamp works well when you have a well-defined edge to maintain, such as the wall of a building. The Healing Brush tries to blend edges, which can cause a blurred mess when you really need a clean edge. For more on using the Clone Stamp, head over to 12 Tips for Mastering the Clone Stamp Tool in Photoshop

    These six tools in Photoshop are my go-to tools for editing my images. I would estimate that about 90% of my image editing is done using these tools. What are some of your tried and true Photoshop tools?

    googletag.cmd.push(function() {
    tablet_slots.push( googletag.defineSlot( “/1005424/_dPSv4_tab-all-article-bottom_(300×250)”, [300, 250], “pb-ad-78623” ).addService( googletag.pubads() ) ); } );

    googletag.cmd.push(function() {
    mobile_slots.push( googletag.defineSlot( “/1005424/_dPSv4_mob-all-article-bottom_(300×250)”, [300, 250], “pb-ad-78158” ).addService( googletag.pubads() ) ); } );

    The post 6 Photoshop Tools Every Newbie Should Learn by Rick Berk appeared first on Digital Photography School.


    Digital Photography School

  • Die 5 Fotobücher des Monats

    Ein Stapel Foto-Bücher und Bände sitzen auf einem älteren Sessel.

    Wir sind tatsächlich beim letzten Teil der monatlichen Fotobuch-Empfehlungen angelangt und finden nun zu einem krönenden Abschluss für das Jahr 2015. Wir haben uns mal wieder an den Tisch gesetzt und über zahlreiche Fotogenres hinweg die Neuerscheinungen auf dem Büchermarkt inspiziert.
    kwerfeldein – Fotografie Magazin | Fotocommunity

  • Discover the Secrets of Natural Light Photography With This 70% Off Deal

    As we announced yesterday – today is Day 1 in our 12 Deals of Christmas dPS – and we’re kicking things off with fantastic deals on or popular Natural Light eBooks.

    You can pick either one up for $ 7 (65% off) or grab them both for an even more amazing price of just $ 12 USD (a 70% saving).

    PicMonkey Collage

    The eBooks are:

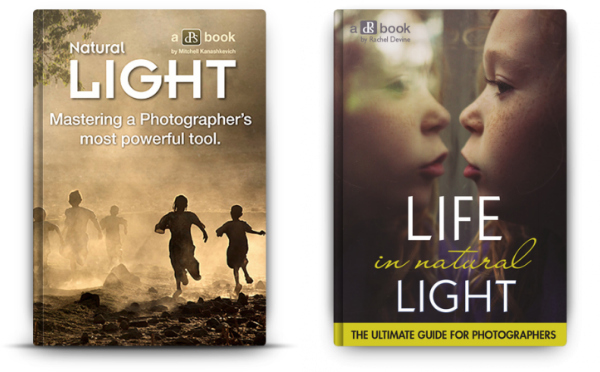
    • Natural Light: Mastering a Photographer’s Most Powerful Tool – by travel photographer Mitchell Kanashkevich
    • Life in Natural Light: The Ultimate Guide Guide for Photographers – by family photographer Rachel Devine

    These eBooks are normally $ 19.99 – today only either one is $ 7 USD!

    Both of these beautifully illustrated and informative eBooks tackle this vitally important topic for photographers from different perspectives but together they make a beautiful little bundle of learning for just $ 12 (70% off).

    Taking beautiful photos using nothing but the light around you can often seem as difficult as using the Jedi Mind Trick to get the people in your lens to sit still. But these two books will help you see your photography in… well…. a whole new light.

    We could go on about these eBooks all day but this deal only lasts 24 hours so head to our 12 Days of Christmas Page and grab yours before this deal is over.

    googletag.cmd.push(function() {
    tablet_slots.push( googletag.defineSlot( “/1005424/_dPSv4_tab-all-article-bottom_(300×250)”, [300, 250], “pb-ad-78623” ).addService( googletag.pubads() ) ); } );

    googletag.cmd.push(function() {
    mobile_slots.push( googletag.defineSlot( “/1005424/_dPSv4_mob-all-article-bottom_(300×250)”, [300, 250], “pb-ad-78158” ).addService( googletag.pubads() ) ); } );

    The post Discover the Secrets of Natural Light Photography With This 70% Off Deal by Darren Rowse appeared first on Digital Photography School.


    Digital Photography School

  • dPS 12 Days of Christmas: Save up to 94% on Some Great Photography Training

    It’s that time of year where we at dPS kick off our annual 12 days of Christmas campaign!

    12 deals christmas dps

    This is the sixth time we’ve run this and this year we’ve got our biggest deals yet!

    Here’s how it works.

    Every day between now and Christmas we have put together a fantastic deal on some photography training products. We’ll set them live on this page (the first one goes up tomorrow).

    In the coming 12 days you’ll see some of our own dPS eBooks at discounts we’ve never offered before as well as some deals from other photography sites that we’ve negotiated on your behalf.

    Deals this year are as high as 94% off!

    Each deal only lasts for 24 hours so you’ll need to be quick!

    Get Notified of Each Deal

    To get notified of each deal as soon as it goes live simply subscribe via email here:


    (function($ ) {window.fnames = new Array(); window.ftypes = new Array();fnames[0]=’EMAIL’;ftypes[0]=’email’;fnames[1]=’FNAME’;ftypes[1]=’text’;fnames[2]=’LNAME’;ftypes[2]=’text’;}(jQuery));var $ mcj = jQuery.noConflict(true);
    Don’t worry we keep your email completely private and you can unsubscribe at any point if you find the deals are too many!

    We’ll also be updating the deals here on the blog and on our Facebook page.

    Our first deal goes out to those who are subscribed in the next 24 hours so keep an eye on your inbox and don’t forget you only get 24 hours to grab each one!

    googletag.cmd.push(function() {
    tablet_slots.push( googletag.defineSlot( “/1005424/_dPSv4_tab-all-article-bottom_(300×250)”, [300, 250], “pb-ad-78623” ).addService( googletag.pubads() ) ); } );

    googletag.cmd.push(function() {
    mobile_slots.push( googletag.defineSlot( “/1005424/_dPSv4_mob-all-article-bottom_(300×250)”, [300, 250], “pb-ad-78158” ).addService( googletag.pubads() ) ); } );

    The post dPS 12 Days of Christmas: Save up to 94% on Some Great Photography Training by Darren Rowse appeared first on Digital Photography School.


    Digital Photography School

  • Review: Incase DSLR Pro Pack Backpack

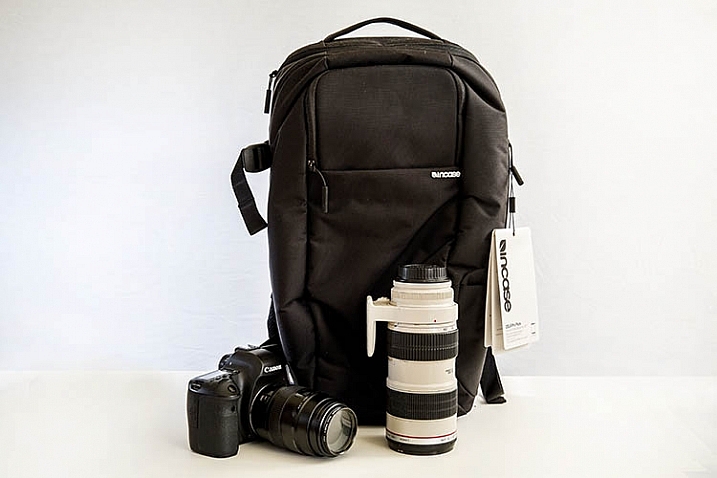
    As a freelance photographer, my office while on assignment is, more often than not, whatever I can carry on my back. Everything from my multiple pieces of DSLR camera gear and laptop, plus its accessories, must fit in a bag (or two) to be ready to whip out at a moment’s notice. This presents a constant dilemma of figuring out the most efficient, yet safe, way to carry and store very expensive electronics while on the go. At this point, there are a myriad of DSLR laptop bags out there, but I’ll show you why the Incase DSLR Pro Pack is my new favorite travel companion.

    Incase DSLR laptop backpack

    Lightweight and sturdy

    The first thing you’ll notice about this bag is that even when it’s empty, it’s super light. Weighing in at 2.7 lbs (1.22 kg), this bag won’t weigh you down while on the go. It’s also made of sturdy 840D nylon material that will protect your gear from the elements.

    Incase DSLR laptop backpack

    Thick padding for lots of gear

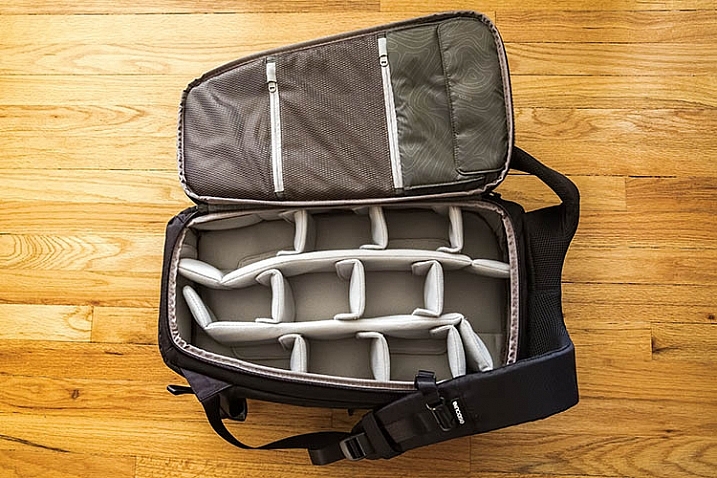
    First, let’s take a look at the most important part of this bag: where it stores your camera gear! Out of the box, this bag comes preconfigured with soft, thick, padded dividers (also fully adjustable). Don’t tend to carry that much camera gear? You could likely come up with a configuration that can hold other things, like clothes or shoes if you’re traveling. You will likely need to customize this grid of padding to yourr own liking depending on how much gear you’re looking to carry.

    Incase DSLR laptop backpack

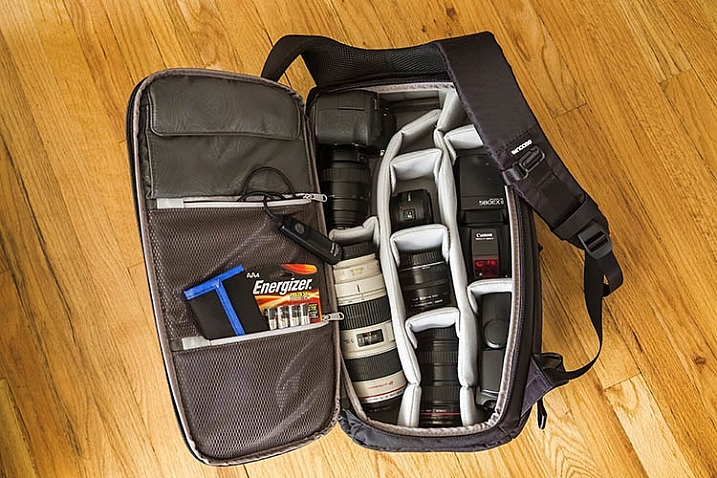
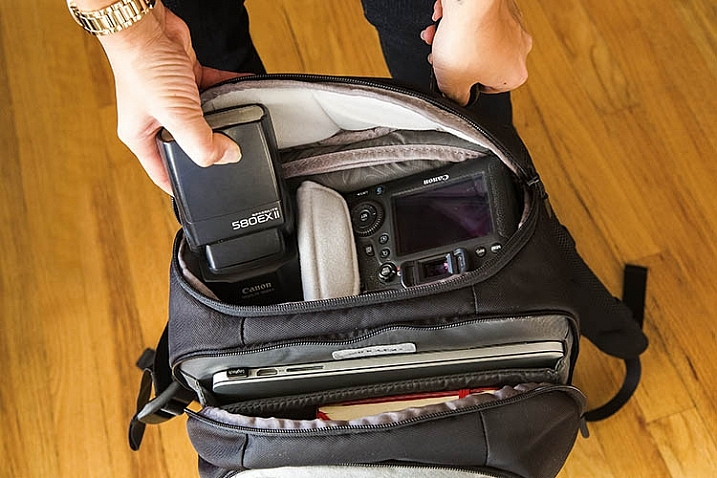
    On a typical freelance photography assignment, I’ll bring loads of gear, and I was impressed with how it all fit into the backpack. My kit below includes the following:

    • (1) Canon 6D DSLR with 100mm f/2.8 macro lens attached
    • (1) Canon 16-35mm f/2.8 wide-angle lens
    • (1) Canon 70-200mm f/2.8 telephoto zoom lens
    • (1) Canon 24mm f/2.8 prime lens
    • (1) Canon 50mm f/1.8 prime lens
    • (2) Canon 580 EXII flashes
    • A bag of accessories including: remote release cable, extra batteries, and remote flash triggers

    Incase DSLR laptop backpack

    Unique design for easy access to gear

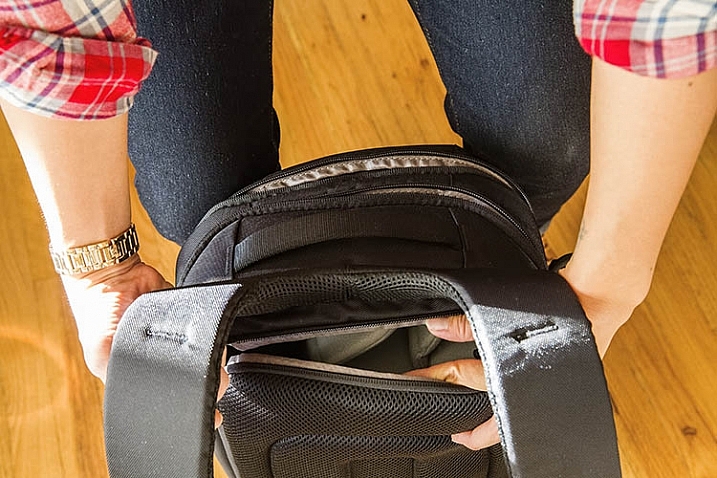
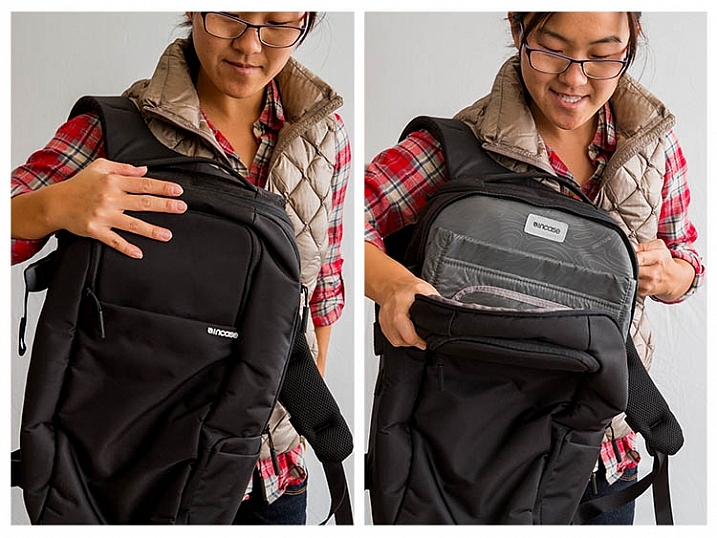
    Perhaps the best feature of the Incase DSLR Pro Pack bag is the unique way it stores your gear. Instead of opening from the outside, you actually unzip the camera compartment from the bag’s backside. This can make it tough to access all of your gear at once, but here’s the genius part – the bag’s design allows you to easily unzip the top of the camera section and take out a couple pieces of gear that are stored closer to the top. In the demo photo below, you can see how it works.

    Incase DSLR laptop backpack

    Incase DSLR laptop backpack

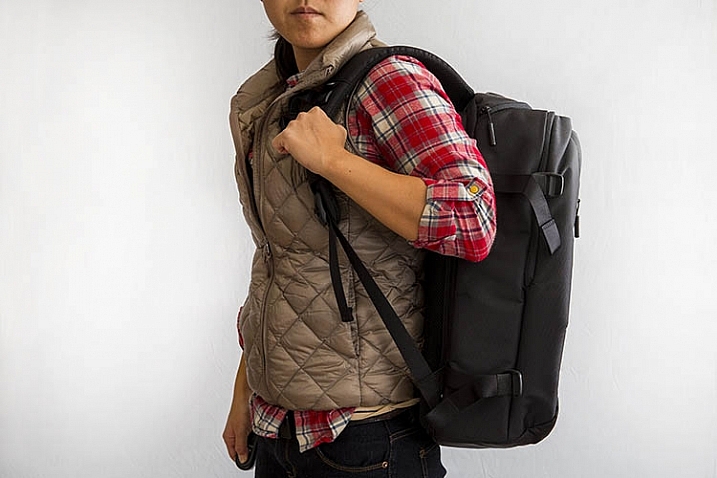
    Speaking of the back of the bag, check out that thick, mesh material lining the back and straps. They feel as comfy as they look, keeping your back and shoulders protected as you haul your gear around.

    Side pocket for tripod or monopod attachment

    If you travel with larger items such as a tripod, monopod or umbrella, you could also tack that on to this bag with the buckles, and extra pocket located on the right-hand exterior of the bag.

    Extra room up front for more office accessories

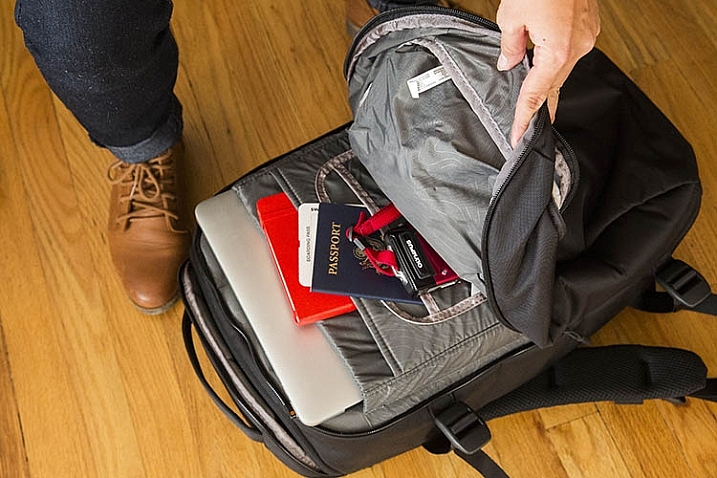
    Since the bag’s backside provides primary access to photo gear, that means the front pockets provide very easy access to the rest of the accessories you choose to pack. In this case, that could include a laptop (up to the size of a 15″ MacBook Pro), a notebook, pocket-sized point and shoot camera, and important documents like your passport.

    Incase DSLR laptop backpack

    Incase DSLR laptop backpack

    Two things I wish were included

    Ergonomics are a top feature to look out for when selecting a new backpack. While this backpack is ergonomic in many ways, including the mesh back padding and a secure chest strap, I wish there were also waist straps. This would make me feel a bit more comfortable if I were hauling my full camera and laptop kit around on my back.

    Another feature I’d like to see (especially as a Seattle resident) is the inclusion of a rain jacket. While I have no doubt that the bag’s durable 840D nylon would protect my gear from a light sprinkling, I’m not so confident about it handling a downpour very well.

    Overall a high rating for this bag. Have you tried this one or any other camera/laptop backpacks out? Please share your favorite in the comments below.

    googletag.cmd.push(function() {
    tablet_slots.push( googletag.defineSlot( “/1005424/_dPSv4_tab-all-article-bottom_(300×250)”, [300, 250], “pb-ad-78623” ).addService( googletag.pubads() ) ); } );

    googletag.cmd.push(function() {
    mobile_slots.push( googletag.defineSlot( “/1005424/_dPSv4_mob-all-article-bottom_(300×250)”, [300, 250], “pb-ad-78158” ).addService( googletag.pubads() ) ); } );

    The post Review: Incase DSLR Pro Pack Backpack by Suzi Pratt appeared first on Digital Photography School.


    Digital Photography School

  • Tips for Using Flash to Enhance Outdoor Nature and Landscape Photography

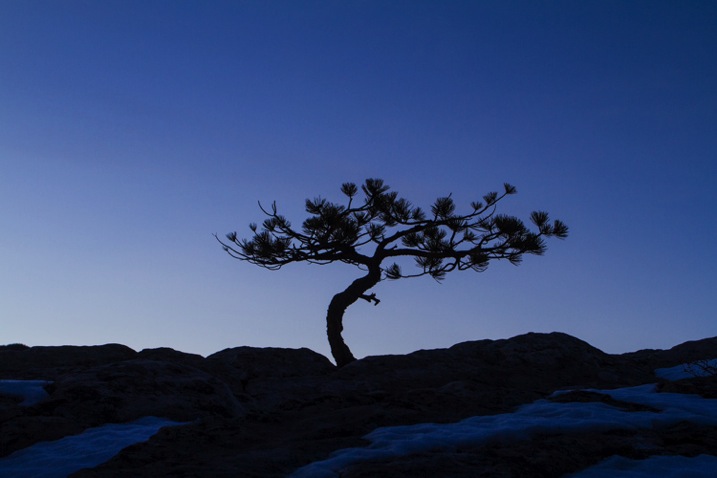
    Late on a winter evening, I was photographing atop a ridge in Colorado’s Front Range. I had been working on some landscape shots, but with the light fading from the sky, the thought of beer and food was beginning to overwhelm my desire to stay out. The colors were shifting to the deep tones of blue hour, and the light was long gone from the hills. About to give up and head home, I spotted a lone juniper atop a rocky outcrop, perfectly silhouetted against the deep blue of the mountain sky. I sighed, tempted to ignore the scene, but instead put my camera back on the tripod, walked over and composed a shot. With a click, I snapped the shutter.

    CO KenCaryl evening 30Dec2011 6

    The image was decent, nice blues with a clean black foreground, but it needed some warmth, an element to contrast with the abundant cool tones. “If only I could get a beam of sunlight to reach back above the horizon…” I thought to myself.

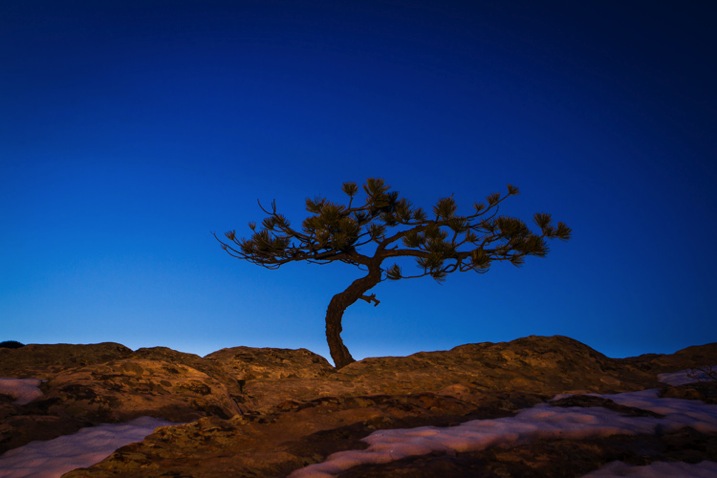
    Wait a second… I didn’t need the sun, I had a flash and a remote trigger in my bag. I pulled it out, all thoughts of beer and food forgotten, and placed the flash on a boulder a few feet to my left. I set it low, to 1/4 of full power, then took a shot.

    Better, I thought, looking at the image glowing on the back of my camera, but still not right. The light coming from the flash was too cool, lacking the warmth I wanted. Digging back in my bag, I emerged with a pack of gels and slapped a half cut of CTO (color temperature orange) over the flash, and clicked off another.

    CO KenCaryl evening 30Dec2011 7

    “Now we’re talking”, I muttered. A warm beam of light crossed the rocky foreground to light up the tree. Never mind that the actual sunlight disappeared 45 minutes before, I could re-create it with a little artificial light trickery. A few adjustments to the flash’s positioning and brightness, and I had my keeper shot. Finally, I could go home.

    Using Flash Outdoors

    For most photographers, flash is relegated to the studio, and if used outside it is usually restricted to portraiture. But there is so much more potential for artificial light. Landscape and wildlife photography can often benefit from a little flash, and with some creativity, it can bring out the best in your images. Here are a few tips to help you get using flash for your outdoor nature and landscape photography.

    To get started, you’ll need a few things in your bag:

    • At least one flash
    • Some kind of remote trigger (I use cheap and simple wireless triggers I found on Amazon for a few bucks)
    • A selection of multi-colored gels
    • A flash stand or assistant
    • For night photography, a strong headlamp or hand-held flashlight is a good addition to the kit
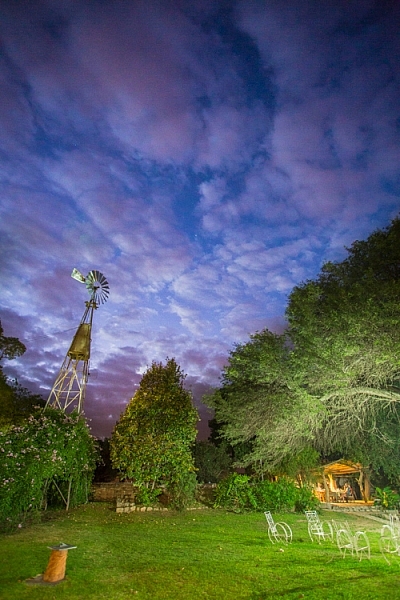
    A windmill stands in the garden of the Finca Santa Anita in Salta Province, Argentina.

    A windmill stands in the garden of the Finca Santa Anita in Salta Province, Argentina.

    General Guidelines

    As with almost all flash use, for best results, you’ve got to get the light off your camera. On-camera, straight flash, looks weird and unnatural. I like to say that photographic rules are meant to be broken, but this one seems universal: get the flash off your camera.

    Get the flash off your camera

    Direction of light, and how much to use it, is a matter of your personal vision, but here are my thoughts: Artificial light should either look so natural, you don’t notice it comes from a bulb, or so obvious, that it’s clear the scene was lit for artistic reasons. Anything in between usually doesn’t work.

    As with all successful photography, you need to think through your image, and the story you are trying to tell. Do you want a natural-looking scene or are you aiming for an artistic portrayal of your subject? Once you have an answer to that question you can move forward.

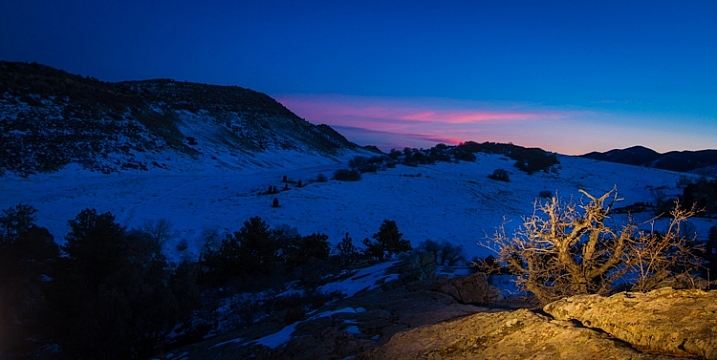
    Scrubby pines grow from the rocks of the Dakota Hogback in the foothills of Colorado outside Denver, late evening.

    Scrubby pines grow from the rocks of the Dakota Hogback in the foothills of Colorado outside Denver, late evening.

    Imitating Natural Light on the Landscape

    The near-dark hours before dawn and just after sunset, or full night, are the most suitable times to add a bit of light to a scene. A natural look is usually subtle and may rely heavily on the light that is already available to you. In my example of the juniper tree, I kept the flash setting low, and warmed the light with a gel to get a sun-like look. Finding the right balance between flash and ambient light is critical.

    The further you get from the flash, the dimmer, and harder the light becomes. A flash aimed toward the ground will be very bright close to the strobe, fading quickly to invisibility. When setting your scene, use the test button to look at the throw of light across your subject. Aim it carefully, and take advantage of the flash’s zoom to consolidate the beam just where it is needed.

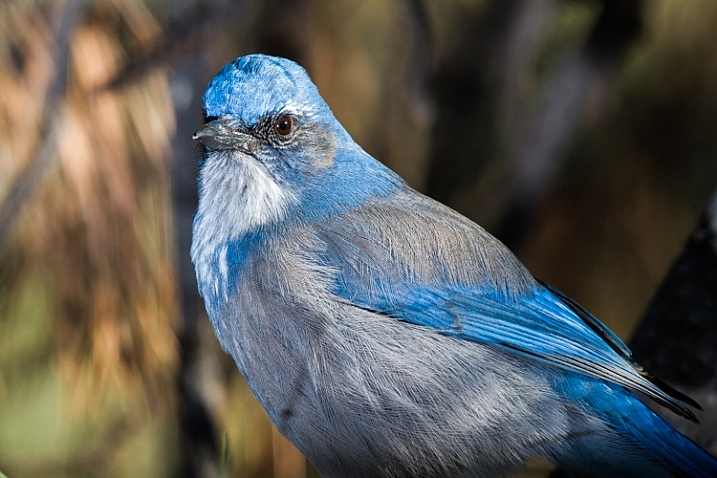
    A Western Scrub Jay perches in a tree in the foothills of the Rocky Mountains outside Denver, CO, USA.

    A Western Scrub Jay perches in a tree in the foothills of the Rocky Mountains outside Denver, CO, USA.

    Adjusting Exposure

    Once set, pop a shot or two, and check the results on your LCD. Almost always, you’ll find you need to adjust the flash brightness, placement, or the ambient light exposure.

    When using flash remember this: adjust ambient light with the shutter speed, and flash with the f-stop (aperture).

    For example, if you want to bring out more brightness in the sky, lengthen your shutter speed, if you want to increase the apparent brightness of your flash, open up the aperture. This is effective for small adjustments in camera, and keeps you from having to constantly readjust flash settings.

    Lighting Your Vision – Artistic Styles

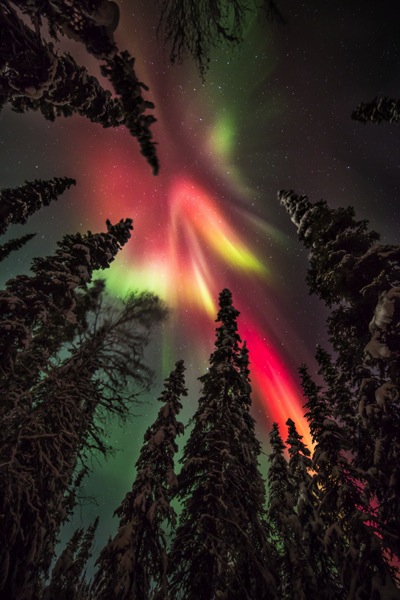
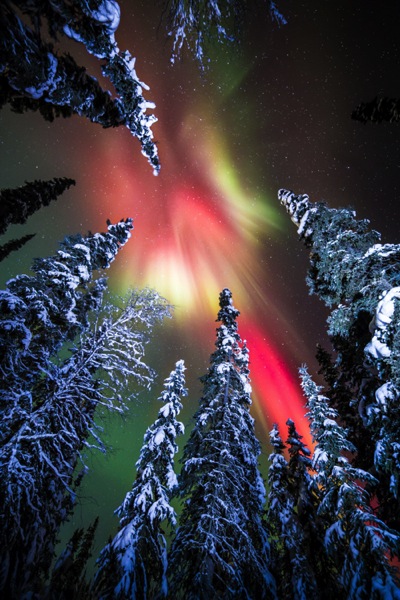
    An artistic look is more straight forward, but light direction, intensity, and color are just as important. I often photograph the northern lights around my home in Fairbanks, Alaska. Often the moon, stars, or aurora itself, are sufficient to illuminate the foreground, but at times, it fades to black as you can see below.

    AK FAI aurora 112073 17

    In such cases, a splash of light is just what I need. When photographing the aurora, or the night sky in general, I rarely carry an actual flash, but I’m always wearing a headlamp. During a typical 5-10 second exposure, if I need a little extra texture or warmth, I can pan the beam quickly over the foreground, “painting” it with light as I did in this image.

    AK FAI aurora 112073 18

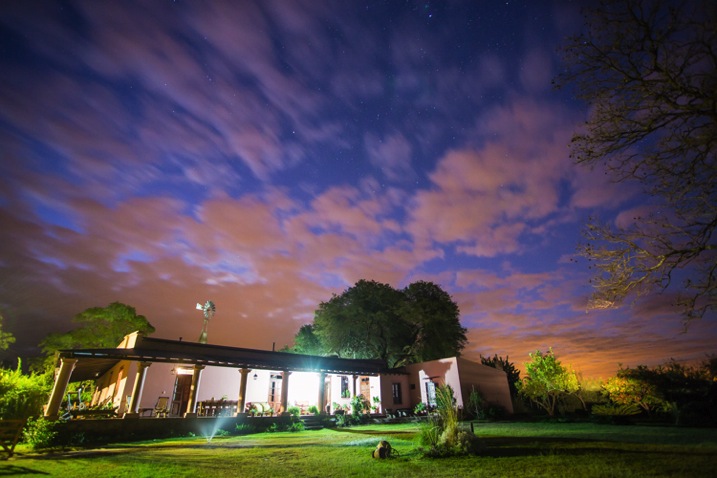
    Light from a typical LED is very cool, but cover it with CTO gel, and nice warm tones result. Light painting is a popular technique, but one that requires some practice to make sure your subject is evenly lit, and not too bright. Mixing light painting and ambient can be very effective to even out brightness in an image, and compensate for highlights. In Argentina, a few years ago, I was shooting a historic farmhouse during the late evening. Bright porch lights on the house needed to be evened out, so I painted some key parts of the scene.

    Arg Salta SantAnita house night 104133 18

    A warning: painting light can mess with the color of a digital image. If you use your camera’s automatic settings, as I do, light painted images will often require some color correction in post-processing. Shoot in RAW to be sure you retain this flexibility.

    Wildlife

    Flash can also play an important role in wildlife photography. Birds in particular are often down low in dark forests, where natural sunlight is rarely found. The flat, boring light beneath the foliage can be replaced by the directional light of a flash.

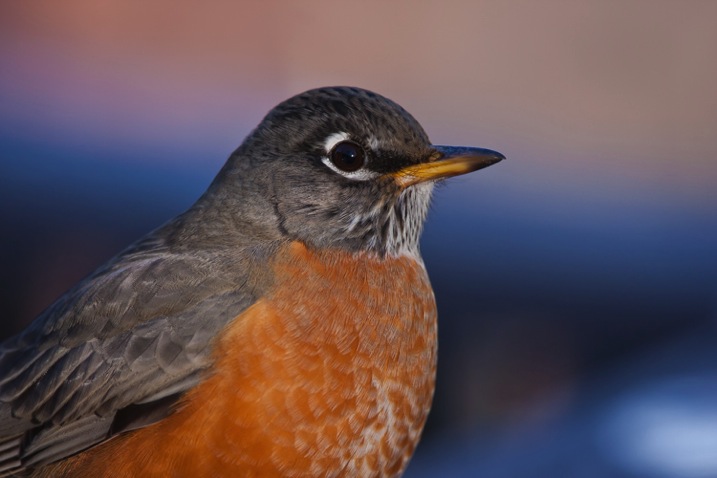
    CO Dec2009 AMRO 3

    When using flash with a long telephoto, you can often get away with on-camera, or bracket-mounted flash, as I did of the portrait of the American Robin above. Using camera-mounted flash is easy with TTL (Through The Lens) compatible strobes. In fact, this technique is so easy, that I’m not even going to go into it, because more interesting possibilities exist.

    Where I live in Alaska, the winters are long, and during the few hours of daylight, the sun is often hidden behind trees or clouds. The birds I love to photograph are usually stuck in flat, gray light. There are a few trees in my yard that the birds prefer. By setting up a flash (or two), gelled with CTO to emulate the absent sun, I’ve managed to create some well lit portraits of these guys.

    RBNU 21Dec2011 2

    The method is similar to lighting a landscape. You’ve got to choose your flash placement to avoid shadows, and since there is rarely a chance to replicate a poorly exposed shot, it’s best to get your settings right and then leave them in place throughout the shoot. In this case, I was going for an almost studio-like look, so I took advantage of the white snow as a background, making the final image appear almost as a cut-out.

    ORJU 22Dec2011 2

    I like to put my flashes atop a tall stand to get them over my head like a low angle sun. Done right, the set up and exposure takes only a few moments, and the results can be great.

    Conclusion

    Artificial light in the outdoors offers a great opportunity to create unique images. Think through your shots, consider where extra light can be added, and what role it will play in the final image. Not every situation requires it, in fact, most don’t. But there are times when that extra pop of light can take a photo from mundane to extraordinary.

    Have you tried using flash with your nature or landscape photography? Please share your tips and images in the comments below.

    googletag.cmd.push(function() {
    tablet_slots.push( googletag.defineSlot( “/1005424/_dPSv4_tab-all-article-bottom_(300×250)”, [300, 250], “pb-ad-78623” ).addService( googletag.pubads() ) ); } );

    googletag.cmd.push(function() {
    mobile_slots.push( googletag.defineSlot( “/1005424/_dPSv4_mob-all-article-bottom_(300×250)”, [300, 250], “pb-ad-78158” ).addService( googletag.pubads() ) ); } );

    The post Tips for Using Flash to Enhance Outdoor Nature and Landscape Photography by David Shaw appeared first on Digital Photography School.


    Digital Photography School

  • 12. Dezember 2015
    Das Bild des Tages von: Luna Khods

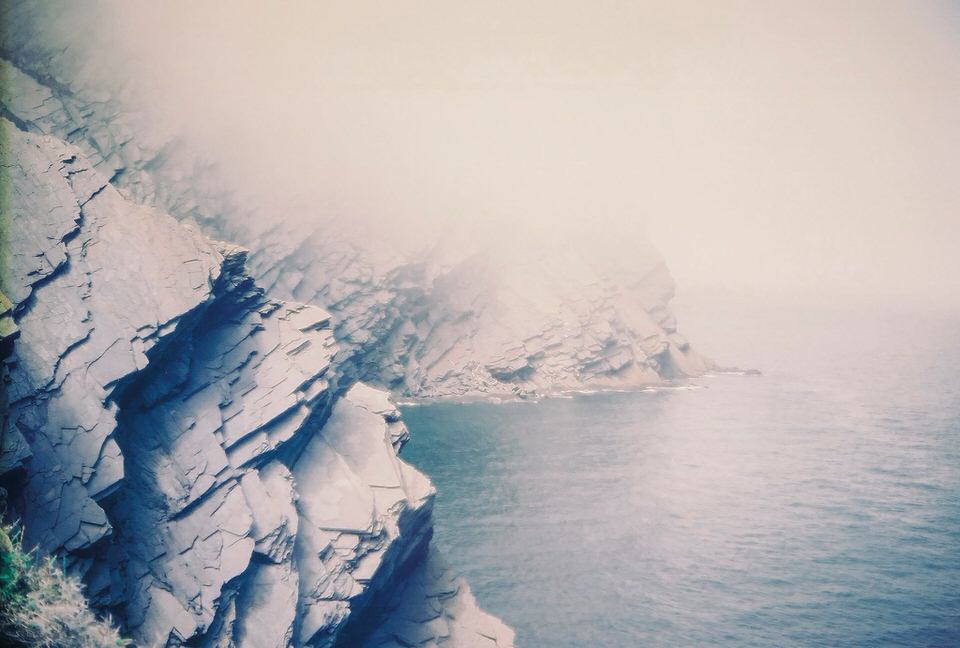
    Felsen am Meer.

    Bild des Tages auf kwerfeldein: Analoge Felsen.
    kwerfeldein – Fotografie Magazin | Fotocommunity

  • Geometry + Humanity: Beirut Shutterbug Abstracts Everyday Life

    [ By WebUrbanist in Art & Photography & Video. ]

    abstract building facade

    Photographing real people in actual places, Serge Najjar manages to make the mundane seem strange and fantastical, highlighting the intersection of humans and the architectural spaces they inhabit.

    abstract roof jumper

    abstract window looker

    His planned-looking portraits of people in urban environments are surprisingly spontaneous, appearing staged but usually featuring strangers he has never met and captured as he wanders cities.

    abstract circles building

    abstract flag architecture

    Technically, Najjar, a lawyer by trade in Beirut, Lebanon, is not even a professional photographer, though the beauty and popularity of his work would suggest otherwise.

    abstract window view

    abstract side view

    His work, which spans from his home city to Rome and Berlin, features both generic architecture and famous places, all with his eye for making the familiar stream foreign and fresh.

    abstract folded window

    abstract shadow building

    While there are common threads, themes and angles to much of his photography, it is impossible to describe the commonality strictly in terms of perspective, as various works break the very conventions he generally follows.

    Share on Facebook


    [ By WebUrbanist in Art & Photography & Video. ]

    [ WebUrbanist | Archives | Galleries | Privacy | TOS ]


    WebUrbanist