DJI, the maker of Phantom drones, has introduced a stabilized handheld 4K video system that uses a gimbal head to produce smooth video footage. The DJI Osmo is a handle-mount with a 3-axis head that senses movement and cancels out sudden jerks and bumps to ensure the camera moves slowly and the footage looks professional. Read more
Month: October 2015
-
Verwelkte Blumen

Ein Beitrag von: Konrad Winkler
Der Schatten eines Nachmittags schneidet sich seine Diagonale vom Gelb der Fassade ab. Im Flur wächst eine Silhouette auf dem Hall von Schritten. Der Kneipier grüßt mich, als sein Kopf aus der verdunkelten Diagonale erscheint. Ich nicke zurück.
kwerfeldein – Fotografie Magazin | Fotocommunity -
JPEG Committee contemplates adding DRM to image format
Change may come soon for the web’s most widely adopted image format. Earlier this week at a meeting in Brussels, the JPEG Committee discussed adding a DRM (Digital Rights Management) security feature to the regular JPEG image format. Read more
-
Built of Bombs: Unexploded Ordinance Turned Into Boats & Homes
[ By WebUrbanist in Culture & History & Travel. ]

A legacy of living in the most-bombed country per capita in world history, Laotian citizens have spent decades since the Vietnam War dealing with close to 100 million undetonated objects of local destruction.

In the 1960s and 1970s, the US covertly dropped hundreds of millions of bombs on the country, at an average rate of one bomb per eight minutes. Today, converted bomb remnants are visible across the country, used virtually intact to loft houses above flood planes, hollowed out and turned into watercraft or containers, or stripped down for scrap.

An entire (now shrinking) nationwide industry has grown up around finding, stripping and transforming cluster bombs into metal pieces and parts deconstructed or refit for various new uses. In many villages, bombshells are visible throughout the built environment.

Photographer Mark Watson took a cross-country bike trip and documented these remarkable cases of reuse. “Scrap from such widespread bombing has been utilized in people’s homes and villages,” Watson said, “for everything from house foundations to planter boxes to buckets, cups and cowbells.”

While it may sound at first like an uplifting story of turning swords into ploughshares, there is a dark side to this tale. To this day, over 100 people die annually from accidental detonations, either from bombs still loose in the countryside or in attempts to deactivate or convert found ordinance.
Non-profit organizations working to clear the country of this danger estimate it may yet take another century to complete the cleanup process (via Inhabitat and Mark Watson of Highlux Photography).
Want More? Click for Great Related Content on WebUrbanist:

Throw a Bouquet: Guerrilla Seed Bombs & Flower Grenades
Filling shotgun shells with flower seeds is just the latest (and loudest) in a long line of designs for guerrilla gardeners. If you are looking for a little …
Click Here to Read More »»

Yarn Bombs! 51 Victims of Knitted Graffiti
Yarn bombing is graffiti that grandmothers approve of! They consist of quickly knitted additions to street objects and sculptures. Why? Because it’s fun!
Click Here to Read More »»
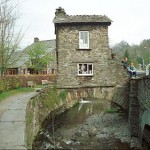
Modern Trolls: 10 Bridges Turned to Homes & Mini-Cities
Inhabited bridges were once very common all across Europe and other parts of the world. Today, not many remain, but will they make a resurgence in the future?
Click Here to Read More »»


[ By WebUrbanist in Culture & History & Travel. ]
[ WebUrbanist | Archives | Galleries | Privacy | TOS ]
-
Tips for Doing Fall Portraits
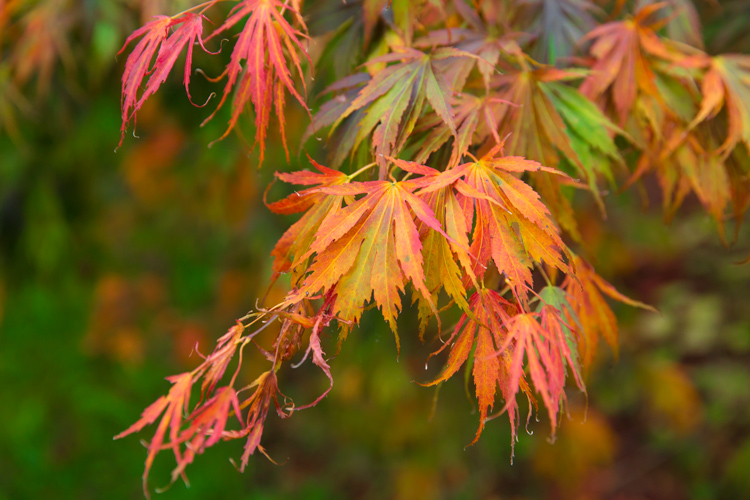
Autumn provides photographers with an abundance of colours and amazing light. When captured right, autumn can create images which are the envy of everyone.
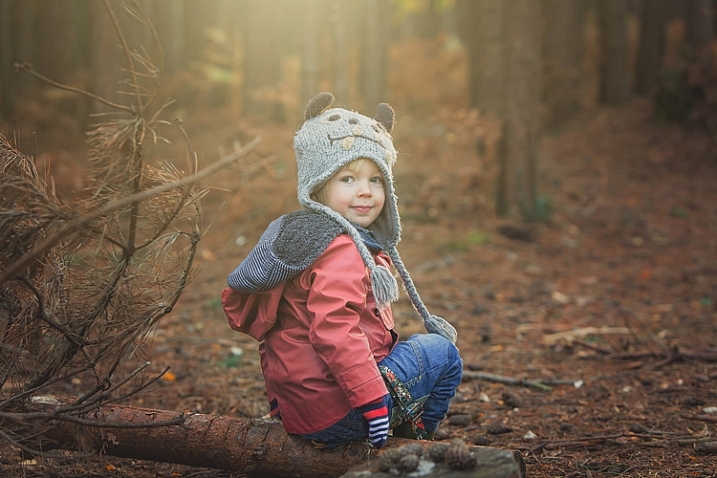
For family photos, autumn can provide you with amazing backdrops, and a variety that can be matched by no other season. For this article, I took my own two children for a walk in the woods to do some fall portraits. Photographing other people’s children is always easier than your own, so I thought it would be a great exercise, and we may also even get some nice pictures of our own children for once. So here are some fall portrait tips to get you started.
Preparation
Preparation is the key to any successful shoot. Of course ensuring your camera equipment is charged, you have clear cards, and your gear is clean seems like a no brainer, but it’s often the fundamentals that we overlook. Clearing cards can be daunting for those starting out, but just double check that you have downloaded everything, then use the Format function (in the camera) that will give you a completely clear card. There are rumors that deleting single images in-camera can lead to corrupting the card, so it’s best to use the Format function.
Make sure you check the weather. Here in the UK, as well as many other parts of the world, it can change quickly at this time of year. Check with a few sources about local weather. It’s such a pain to get everyone together, get in the car and travel for some time, only to be rained out. Although, even rain in autumn can provide some great image opportunities, if you are dressed correctly.
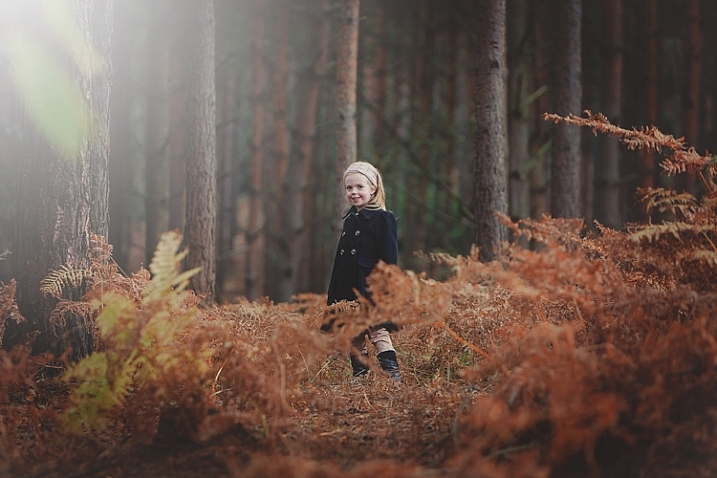
Sunrise and sunset can give us the best light. However, dragging your family out of bed for a photo shoot is always going to be tough. Aim to start your shoot about an hour before sunset. This Golden Hour is favored by many professional portrait photographers, as the light is more flattering and you may even get a great sunset. You can look up sunset times for your local area. It can be surprising how early it gets dark, and you want at least a good hour of shooting before the sun goes down.
Make sure everyone dresses appropriately. It’s getting colder, and it’s one less thing to worry about if everyone is warm during the walk back to the car. While we still think it’s lovely and warm outside, believe me, it gets cold pretty quick when the sun starts to go down. Also have a change of clothing available for everyone. It can be wet and muddy and some of us are prone to falling over!
Make sure you bring snacks and drinks. Especially if you are photographing children. They will get bored and hungry way before you do, so anything to help keep them going while you master that perfect shot the better.
Editor’s note: if you are photographing other people’s kids have the parents bring snacks that the kids like. Never give food to other people’s kids without asking the parents, there may be allergies or special diets.
Clothing advice for portrait photographers:
Clothing choices are always important for portraits, but in fall it can really make a difference to your image. Try and have everyone wear natural tones that will either compliment the colours of the leaves and trees, or blend in. My son wore a dark red sweater, as we knew the area had very vivid reds in the trees. My daughter wore black and white which is a timeless combination that blends in well. My son also wore a grey hood that coordinated with his sister.
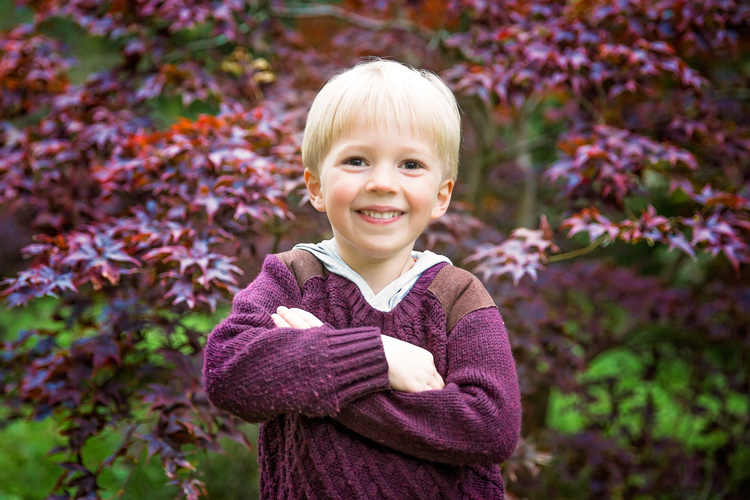
Try and avoid clashing patterns or colours amongst your subjects by discussing it in advance, and maybe come up with a colour theme that everyone can include. Also avoid t-shirts or sweatshirts that have dominant logos. If he could, our son would have Star Wars logos on everything. This can of course date an image, and is also very distracting.
Try and have a few changes of clothes available. This will not only provide variety in your images, but in the wet and possibly muddy conditions, you may well need them, especially for any children.
Location
Location is essential for any shoot, but for autumn you want to find the best colours and textures you can. Things can change really quickly. The leaves can change over a couple of days, but it often doesn’t happen until later than you think. For this article, we actually struggled to find autumn colours despite it being early October. You also need to check that the leaves are still there. A heavy wind can take them down overnight, so don’t wait too long after you have scouted your spot to shoot.
We searched online for arboretums, these are great places that have collections of interesting trees. Of course, your local forest would be great too.
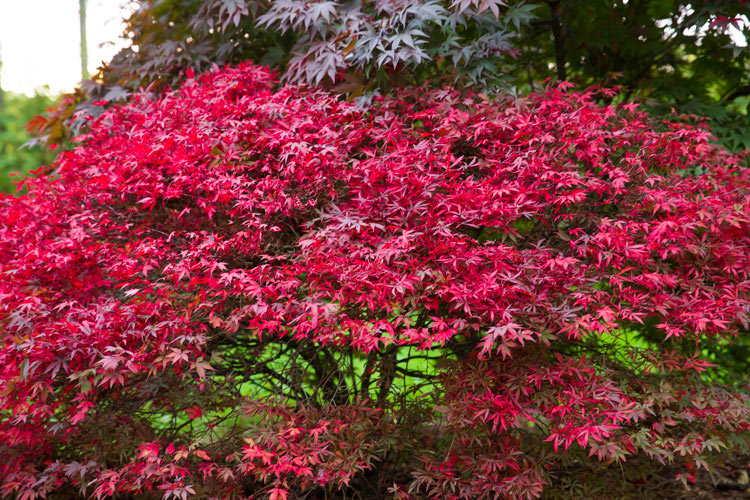
Use social media for location tags to see what other people have photographed over the last few days, at or near the same location. Instagram, Twitter and even Trip Advisor are fantastic for this. You may also get to see a great place that you may not have found otherwise.
The technical bits
For my shoot, I was using a Canon 5D Mark 3 and took the 24-70mm f/2.8 Mark 2, and the 70-200mm f/2.8 Mark 2. These of course are professional cameras and lenses, but any modern camera whether a DSLR, point and shoot, or even a smart phone should provide great images. In fact, I find the iPhone 6 has great range of colours and light.
If you are using a DSLR, you can really play with the aperture (f-stops) to get a range of looks without moving location. To get a super blurry background, set your aperture to the lowest number. On my lens, this is f/2.8. Some lenses can go lower and some are limited to higher setting. Even with a kit lens that comes with your camera, you should be able to get to around f/5. If you want the leaves and your family in focus, try increasing the aperture to f/8 or even f/22. Do be careful though because at f/22 your shutter speed will be significantly slower, and you may well need to increase your ISO to compensate.
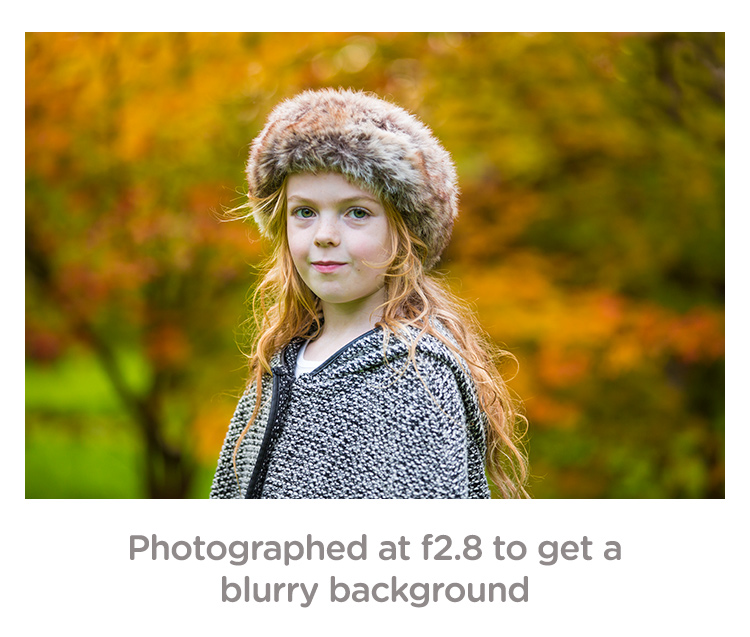
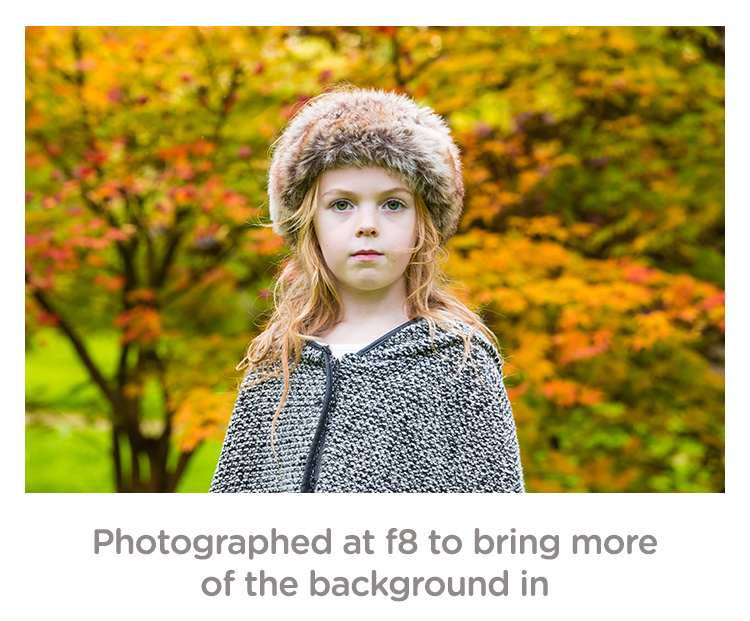
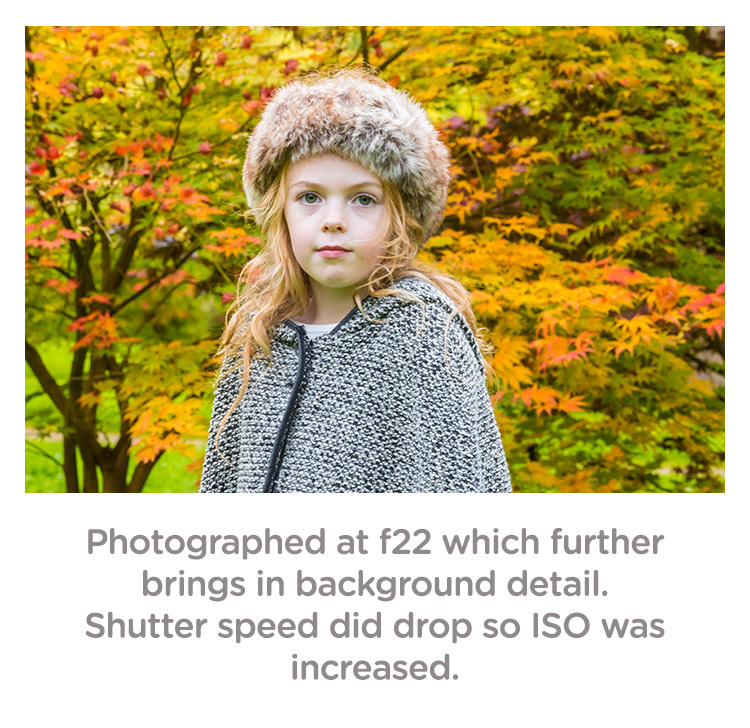
I photographed the images above in Aperture Priority (AV on a Canon, and A on a Nikon). This is when you decide the aperture and the camera sets the shutter speed. Keep an eye that the shutter speed doesn’t geet too slow (1/60 as a minimum). If it does, increase your ISO.
Personally, I always shoot in RAW. For me it just allows me that flexibility afterwards. However, with modern cameras, JPEGs are very versatile, and don’t break up as much as they used to. Some cameras allow you to capture a RAW and JPEG at the same time. This is great so you have the RAW to go to if need be.
White Balance: for these images, I shot in cloudy White Balance. It warmed up the colours, although I did alter these in Camera RAW processing later, it did give me a great starting point. If you are using your manufacturer’s own software, you should be able to change the white balance quite easily.
Getting natural smiles and reactions from children
You know your own children very well. You know the songs they like and what gets them interested. However, they are also very comfortable around you, and may decide to walk off just as you get your camera settings right. Here are a few tips to get a natural reaction.
As in the images in this article. I asked my children to laugh hysterically for no reason at all. This got a huge overreaction which although is a great animated image, is not what we were after. What did happen is that as they calmed down from that, they had natural smiles. They thought it was funny and continued smiling naturally.
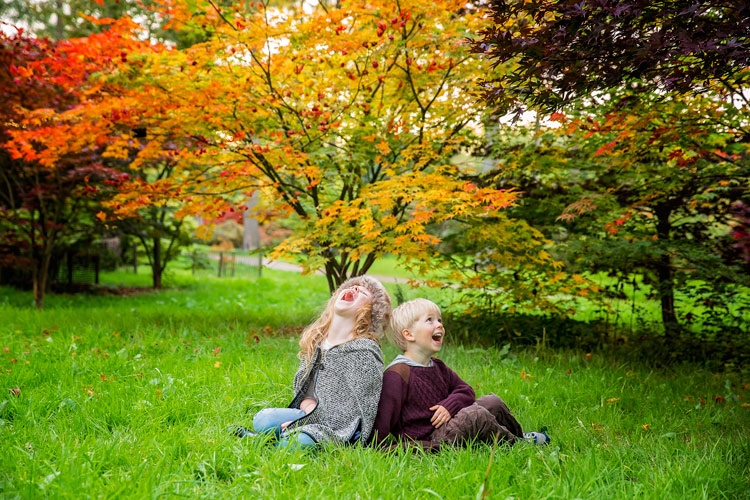
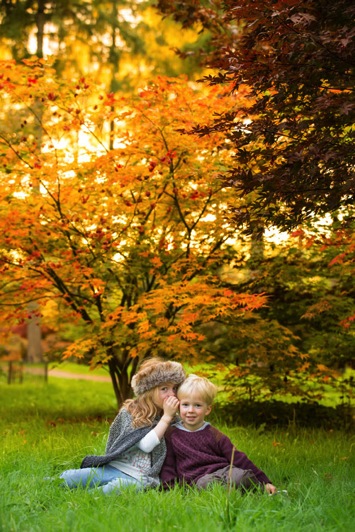
If you have more than one child, ask one to tell the other a secret. This will always get them giggling.
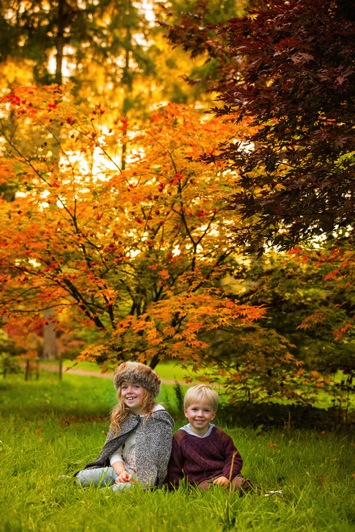
With just one child, ask them to tell you or the camera anything that they are interested in. Our son will talk for hours about anything Star Wars or Marvel. With our daughter we can ask her math questions, which gets a range of reactions.
Sing them a song but get it wrong. For some reason, this is the funniest thing ever to kids. Basically, do anything to distract them or get a reaction, but not by saying CHEESE!
Editing your images
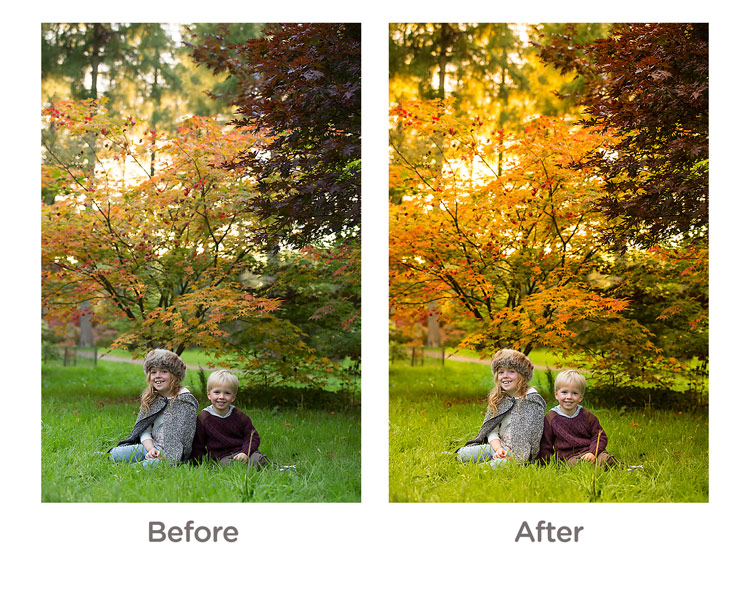
For editing, I used Camera RAW processor which is part of Photoshop. However, most cameras come with editing software, or you can use something like Lightroom which is quite affordable. I actually kept the editing quite simple. The main thing I did was to go to the saturation panel and increased my Reds, Greens and Yellows. This really brought some punch to the image.
And finally…
Please print your images in some way. As parents, we are great at taking images, but not doing anything with them. Don’t worry about capturing the most amazing image, just get something that captures your family and print it some way.
googletag.cmd.push(function() {
tablet_slots.push( googletag.defineSlot( “/1005424/_dPSv4_tab-all-article-bottom_(300×250)”, [300, 250], “pb-ad-78623” ).addService( googletag.pubads() ) ); } );googletag.cmd.push(function() {
mobile_slots.push( googletag.defineSlot( “/1005424/_dPSv4_mob-all-article-bottom_(300×250)”, [300, 250], “pb-ad-78158” ).addService( googletag.pubads() ) ); } );The post Tips for Doing Fall Portraits by Sean Gannon appeared first on Digital Photography School.
-
Save the dates: PhotoPlus Expo next week in New York
Next week sees the return of PhotoPlus Expo, the largest photography and imaging show in the United States. Held October 21-24 in the Javitz Center in New York City, PPE 2015 will play host to more than 100 educational seminars, Photo Walks and Master Classes, and over 250 exhibitors displaying thousands of products. As usual, DPReview will be at the event, reporting from the show floor. Read more
-
3 Tips for Taking Photos of Flowers
Flowers are everywhere, and sometimes just the thought of going out to take pictures of their pretty petals can seem downright cliché, because so many people do it. However, one reason flower photography is so popular is because these kinds of pictures can capture incredible beauty, without a great deal of effort. It’s fun to go outside and document the incredible array of colors that can be found in flowers, but it’s just as common to look at your photos later and discover that they might not be as good as you had hoped.
Fortunately there are a few easy steps you can take to not only improve your own flower photography, but help you get out and enjoy the beauty of nature while you’re at it.
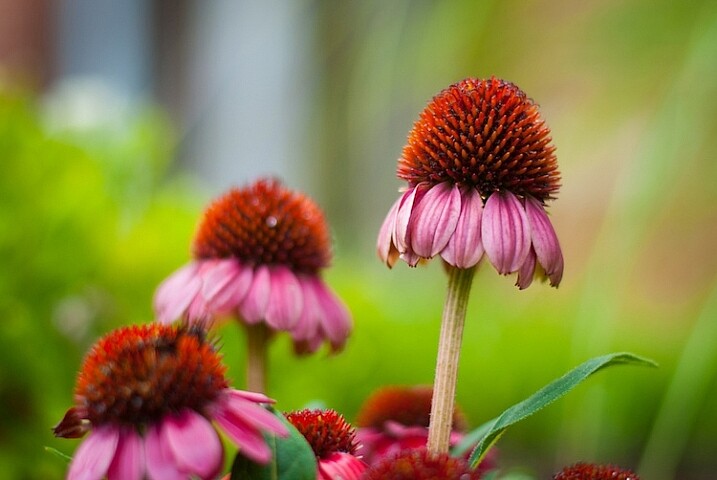
50mm f/1.8, 1/640 second, ISO 200
Everyone has their own unique style when it comes to photography, and taking pictures of flowers is no exception. Some people like flowers in isolation, whereas some like to see a whole field of blossoms in one shot. Some like to use techniques such as over-saturation or selective coloring, while others find these approaches distasteful. Therefore the following tips are not to be considered universal, or the be-all-end-all when it comes to taking pictures of flowers. They are a few lessons I have learned over the years that work for me, and hopefully they will give you something to think about the next time you step out to capture the beauty of nature.
Give your image a clear focal point
All good photos have a subject, or something on which the viewer’s attention is to be fixed. Some pictures can have multiple subjects, but rarely will you find a good image (flower or otherwise) with no subject at all. Where flowers are concerned, you might want to focus on just one flower, or have your viewers see many of them at once, but at the end of the day it should be readily apparent to anyone who sees your photo just what they are supposed to be looking at.
For example, the following image is decent, but as a viewer it’s difficult to notice the flower in the center amidst all the other blooms in the background. In essence, there is no one clear focal point even though there is a flower in the center of the frame.
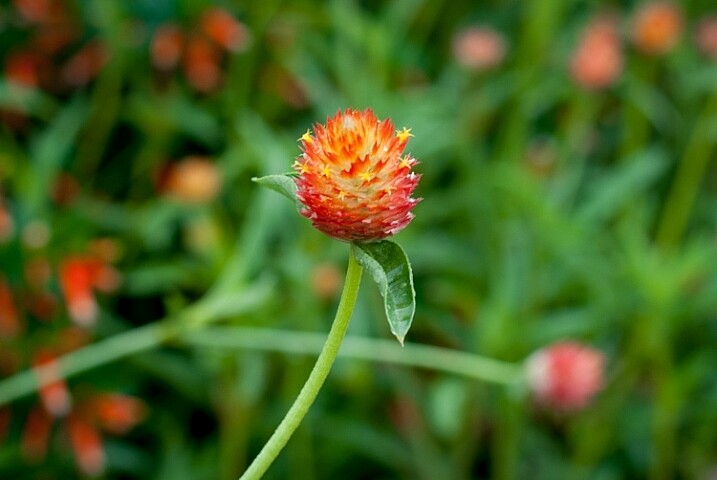
50mm f/4.8, 1/60 second, ISO 100
There are several things that can be done to fix the problem, but one of my favorite techniques is to simply use a wider aperture on my lens. I re-shot the same image using a much bigger aperture, which resulted in a shallow depth of field, rendering the flower in focus while the rest of the background shows up as a silky smooth blur. Looking at the second image, there is no doubt at all as to what the subject of the photo is, and what viewers are supposed to focus their attention on.
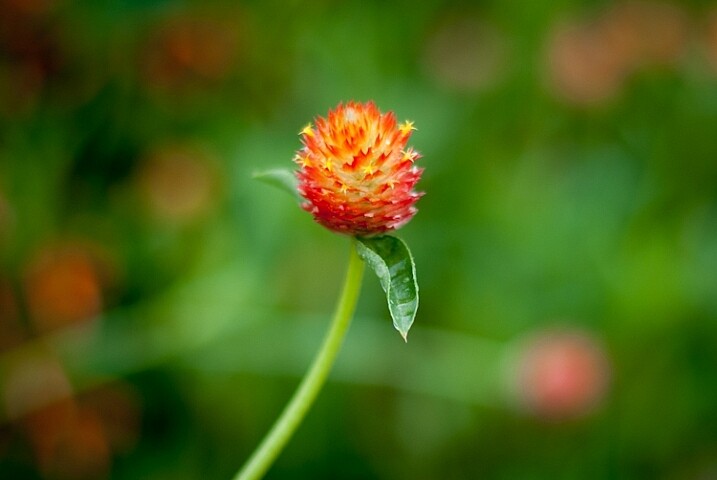
50mm f/1.8, 1/350 second, ISO 100
Another way to make sure your image has a clear focal point is to utilize colors that complement or contrast with one another. The purple flowers in the image below stand out because they contrast quite nicely with the green background, which draws the viewer’s attention immediately and creates a nice focal point for the picture as a whole.
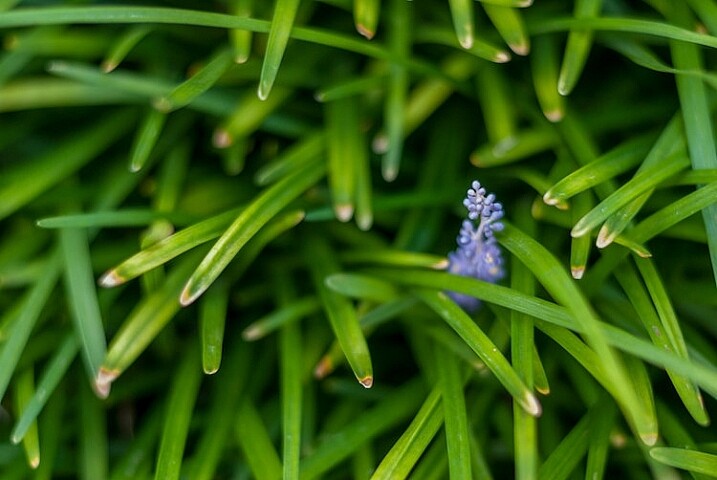
50mm f/1.8, 1/200 second, ISO 100
You can use multiple techniques to achieve the desired effect, such as the picture below of an orange lily that stands out clearly from the background thanks to contrasting colors, while also using a wide aperture to make the background appear blurrier. Be careful not to use an aperture that is too wide, though: depth of field can be a fickle mistress, and shooting at f/1.8 or f/1.4 might seem like a good idea, until you realize that only half of your flower is in focus and the rest is a fuzzy mess.
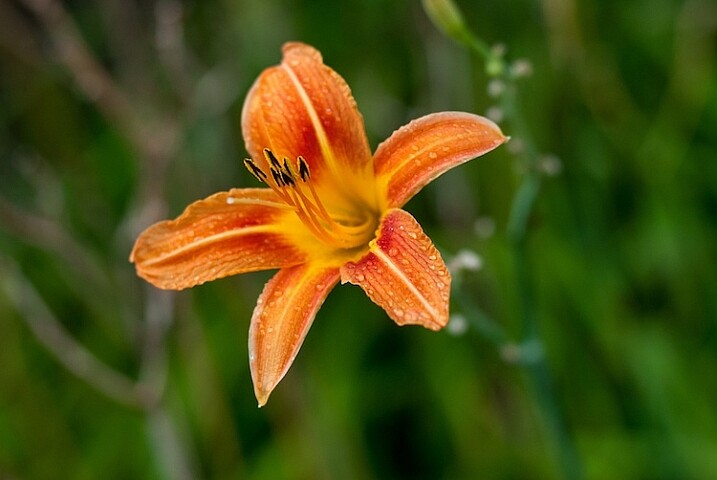
50mm f/2.8, 1/400 second, ISO 200
This last picture (below) is similar to the one above, but ultimately fails because there is no obvious focal point. Notice how the flower itself almost blends in with the background, and the inclusion of two additional blossoms just behind the red one and in the bottom corner of the frame. These problems cripple the image and keep it firmly in my “Rejected” category in Lightroom, but I’m using it here as an example of what not to do.
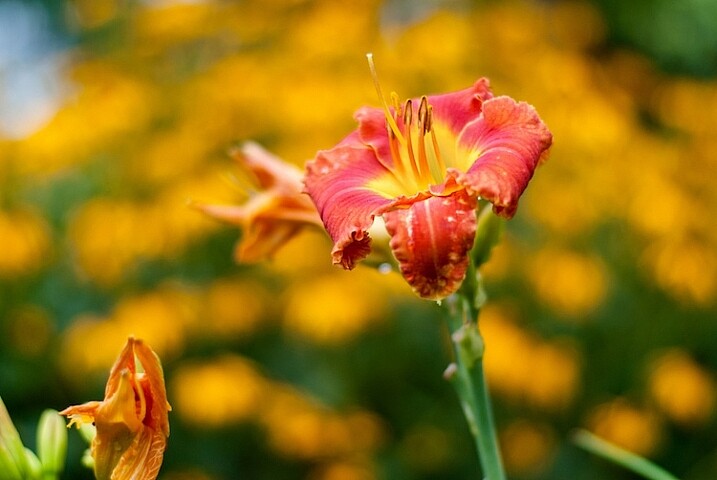
50mm f/1.8, 1/1000 second, ISO 200
I could have easily fixed this picture by looking at the flower from a different perspective, but alas, I did not and am left with an image that is almost unusable because the subject, what should be the focal point, blends in so much with the rest of the image that it’s difficult for the viewer to know what to see. Finding a clear focal point for your images might take a bit of practice, but the results will be well worth your efforts.
Find the right camera angle
It’s not uncommon to see people taking pictures of flowers with their cameras pointed down from eye level. While doing so may produce decent results from time to time, you will often find that selecting a different angle will yield much more interesting results. The red blossom in the picture below was a few feet off the ground so I did what most people would do: I pointed my camera down and pressed the shutter button.

f/1.8, 1/320 second, ISO 100
There’s a couple of things wrong with this picture, but to me the most critical problem is that it’s just not very interesting. Looking at flowers from your normal eye level can sometimes produce pleasing photos, but often you will get better results if you move around a bit, and seek out a more interesting angle. After taking the initial picture I crouched down and shuffled among the plants for a bit until I found a better perspective from which to shoot the photo.

While not perfect, this is certainly a much better composition than the original shot, and it shows the flower in a whole new light. You can not only see more detail on the petals, but it stands out more from the background, and even utilizes a bit of foreground elements to add depth. The drop of water on the left side which is an afterthought in the original, is now featured quite prominently, and adds a nice accent to the rich red tones of the flower petals. All this was made possible because of a quick and simple change in my perspective. While this doesn’t always guarantee better photos it is a fun way to try something new, and even explore a bit more of your surroundings than you otherwise might.
Shooting macro-style pictures is another fun way to get creative with choosing the angles on your shots, provided you are willing to look for some unusual perspectives. My cousin Beth took the following picture of a cosmo flower with nothing more than her iPhone 5s, and a $ 50 Olloclip lens attachment, that lets her get extraordinarily close-up photos of just about anything. By shooting from a creative perspective instead of straight down, and using complementary colors of yellow and purple, she was able to take a gorgeous picture that might otherwise have looked quite mundane and ordinary. Her Instagram account is filled with images just like these that she took with her phone, which also illustrates that you don’t need to spend a great deal of money to get incredible photos of flowers.
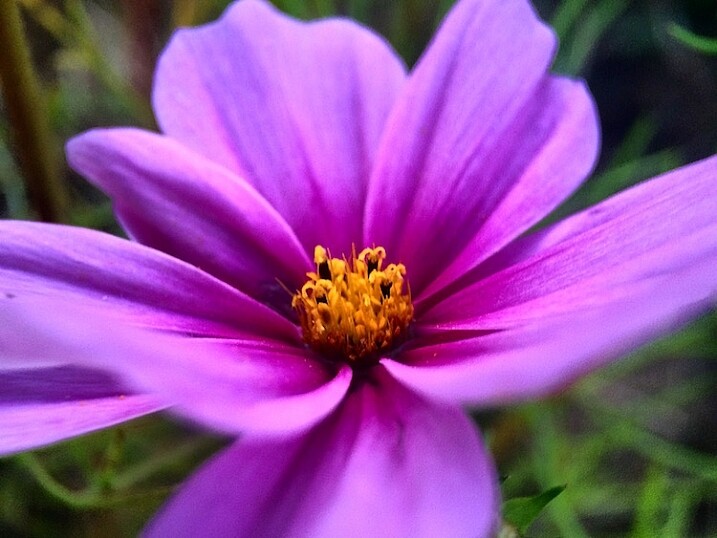
Compose with the whole scene in mind
Taking good flower pictures is about more than just a few pretty petals, but everything in front of and behind them as well. Finding creative ways to avoid conflicting colors between your subject and the background or foreground is nice, but you can step things up a notch by actively using these elements to enhance your shots.
For example, I had many options available when I took the following shot of some yellow kosmeyas. I could have just focused on the flower in the foreground, but by taking all the other elements of the scene into account, I was able to create a much richer and more interesting picture. I shot into the early morning sun, before the dew had evaporated, so I could make creative use of backlighting, and was so pleased with the result that a large print of this is now hanging in my living room.
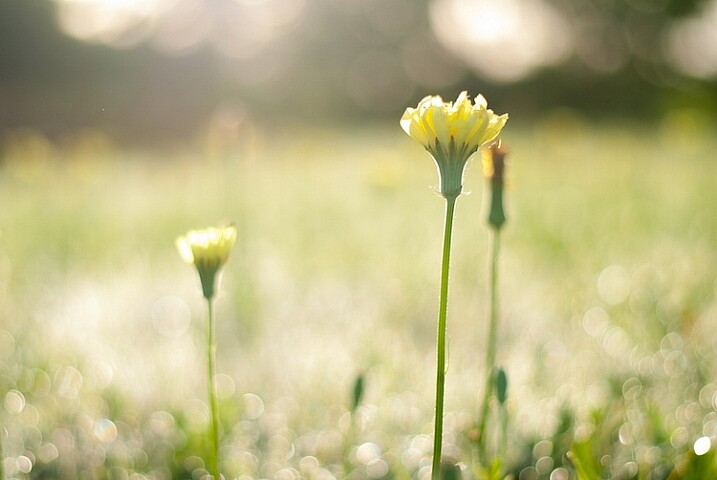
50mm f/2.8, 1/750 second, ISO 100
Even the background elements themselves can add interesting colors and patterns that you might not otherwise consider, as long as you pay attention when shooting, and use a careful eye with regard to composition. As I took the photo below, I saw a sidewalk running through the background, so I spent several minutes not just adjusting my camera settings, but also looking at the sidewalk and using that as an intentional compositional element. I like the way it cuts horizontally through the image and serves to accentuate the oranges in the flower at the center.
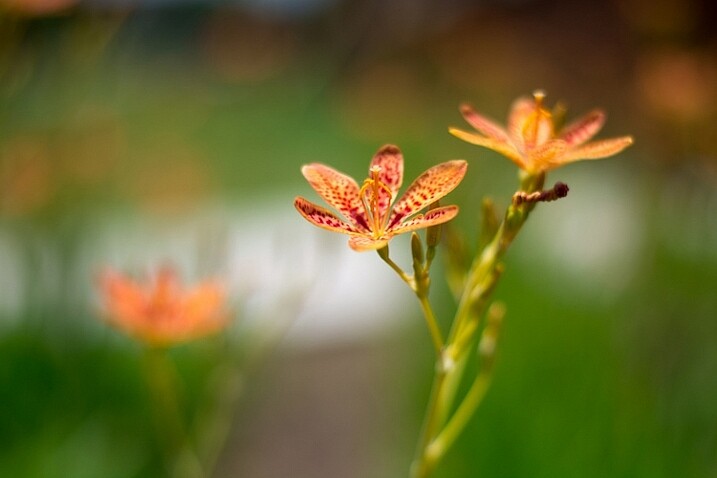
50mm f/1.8, 1/8000 second, ISO 100
I want to leave you with one final example when I did not use this technique, and was quite disappointed with the photo that I almost got. Several months ago I spent a while following a butterfly around on a sunny day. When it finally landed on a flower and let me get close enough to take a photo, I eagerly snapped away without taking the rest of the scene into account.
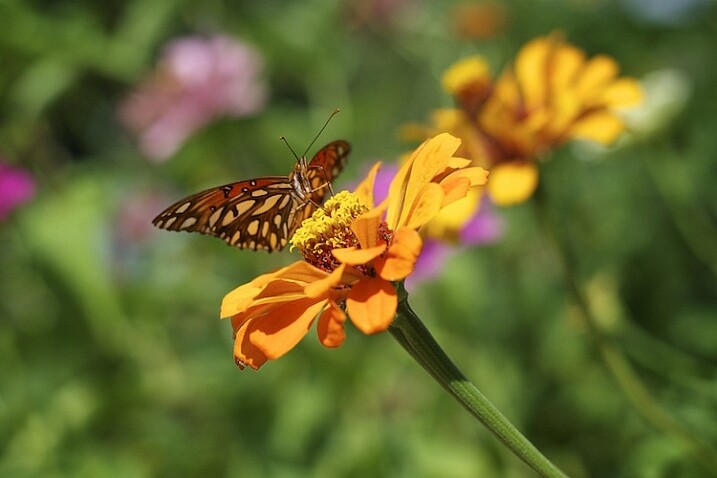
50mm f/2.8, 1/3000 second, ISO 200
If only I had scooted mere inches to the right I would have isolated the flower and the butterfly against a nice green background, but instead I did not take the whole scene into account, and got an image with no clear focal point and a big splotch of blurry orange right behind my subjects. I could have used the background elements to my advantage, but instead I was careless and overeager. This was actually a good learning experience for me though, as it helped me take much better photos in the time since.
As I mentioned at the outset, these are just a few examples and tips that you could employ to get better flower pictures but I’m curious to find out what has worked for you. What are your favorite tips and tricks to get better images of flowers? Leave your thoughts in the comments below.
googletag.cmd.push(function() {
tablet_slots.push( googletag.defineSlot( “/1005424/_dPSv4_tab-all-article-bottom_(300×250)”, [300, 250], “pb-ad-78623” ).addService( googletag.pubads() ) ); } );googletag.cmd.push(function() {
mobile_slots.push( googletag.defineSlot( “/1005424/_dPSv4_mob-all-article-bottom_(300×250)”, [300, 250], “pb-ad-78158” ).addService( googletag.pubads() ) ); } );The post 3 Tips for Taking Photos of Flowers by Simon Ringsmuth appeared first on Digital Photography School.
-
Temporary Retrofit: Micro-Dwellings for Unoccupied Buildings
[ By WebUrbanist in Architecture & Houses & Residential. ]

Designed for empty warehouses or buildings under construction, these material-light shelters provide functionality for liminal interiors either past their prime not yet in use. Places like the infamous Tower of David, a restarted project previously inhabited by skyscraper squatters, would be an ideal candidate for this sort of system.

A polyethylene-coated metal grid frames these modest shelters, serving as walls and doors and supporting interior shelves and an exterior fabric facade. A plastic-laminated plywood floor floats above concrete or whatever raw surface is found in a target structure. Nylon nets provide a degree of privacy while letting in light and can be covered by opaque cloth as well.


Each dwelling can be completed with just $ 1200 and while no heating or cooling is included the system is intended to work well in tropical or other climates supporting open-air living. Since a stable roof and floor are provided, the main task is simply filling in gaps for habitation.


All(zone) drew inspiration for their Light House from traditional architecture of Thailand, often designed to be collapsed and moved as needed.


The light and flat-packable materials make it easy to ship these systems in conventional containers or other forms of transit, making them suitable possibilities for emergency shelters as well.


The designers tested their prototype by deploying it in a parking garage and staying within their mockup module for a few nights.
Want More? Click for Great Related Content on WebUrbanist:

Modular Retrofit: Bamboo Micro-Homes in Deserted Factories
A pragmatic twist on visionary plug-and-play architecture, this project combines a cheap and fast-growing material with existing (abandoned) infrastructure to …
Click Here to Read More »»
Luxury Retrofit: New 440-Square-Foot Condo Hidden in Old Garage
Boxed in on both sides, this once-homely little garage space is now a cozy high-end condo, its rusted white corrugated metal front replaced with a …
Click Here to Read More »»

Live Between Buildings: Narrow Micro-Homes Fill City Gaps
Playful yet thought-provoking, this project asks: what do we do with small leftover spaces in cities … particularly in urban areas where even a few …
Click Here to Read More »»
[ By WebUrbanist in Architecture & Houses & Residential. ]
[ WebUrbanist | Archives | Galleries | Privacy | TOS ]
-
15. Oktober 2015
Das Bild des Tages von: Carla Cabras

Im Ausblick: Umdenken bei Playboy und Pirelli, Billy the Kid und Nassplatten.
kwerfeldein – Fotografie Magazin | Fotocommunity -
Bold Border Checkpoint: Cantilevered Curves Welcome Visitors
[ By Steph in Architecture & Public & Institutional. ]
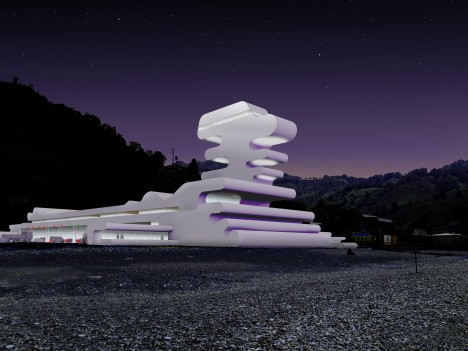
Passing over the border between Turkey and Georgia isn’t an experience you’re soon to forget thanks to the surreal, undulating concrete customs checkpoint structure looming over the Black Sea. A major stop for business travelers, yet located in the sleepy village of Sarpi, the building offered a chance for the client – Georgia’s Ministry of Finance – to make a lasting impression on visitors, representing the new, modern incarnation of the formerly Soviet-run country.

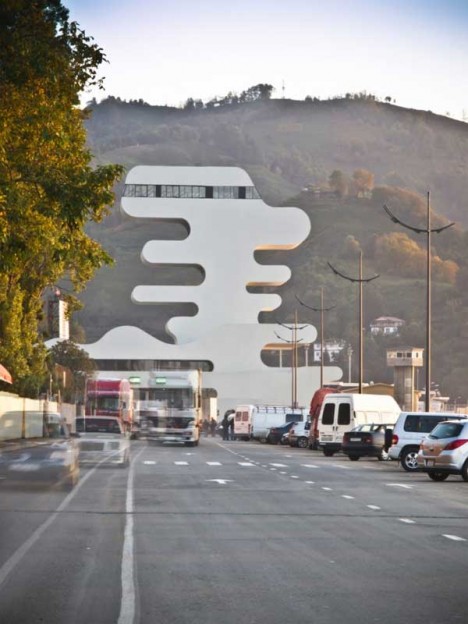

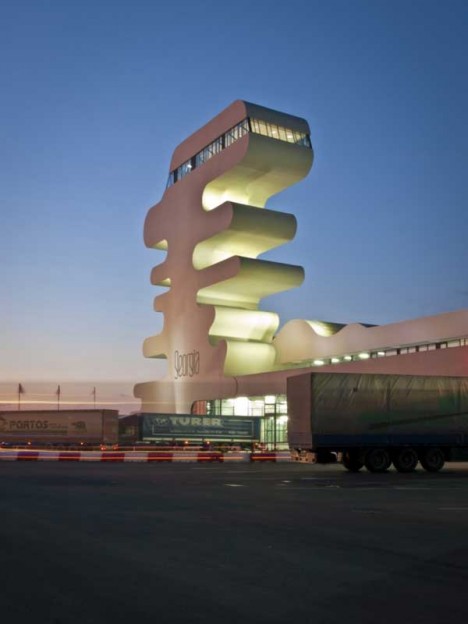

The main volume of the building is low and long, lean as a ship, as if it’s making its way through the streets to launch itself into the water. From one end of this structure rises a strange tower with multiple cantilevered levels overlooking the coastline. It’s topped with a viewing platform, and in addition to the customs facilities, houses a cafeteria, staff rooms and a conference room.
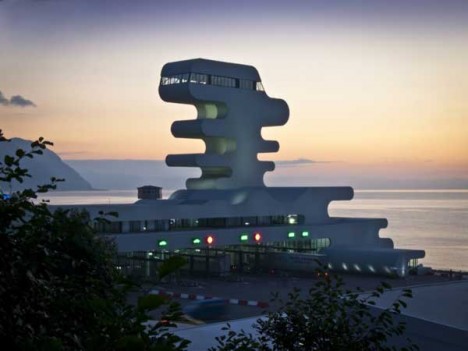
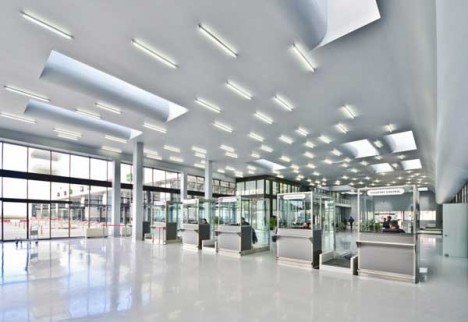
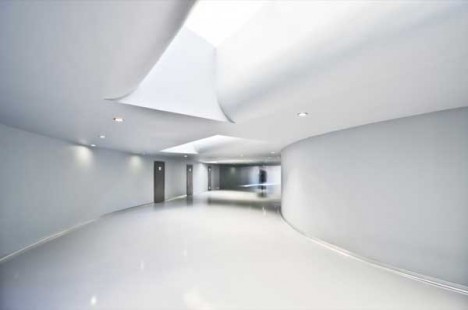
Berlin-based architect J. Mayer H. wanted to represent “the progressive upsurge of the country” in visual form, departing from the usual architectural style of the region. While the highly unorthodox shape of the building fits in well with the rest of the architect’s oeuvre, including the Georgia rest stop pictured below, it’s also somehow fitting for a region still filled with bizarre Soviet monuments.
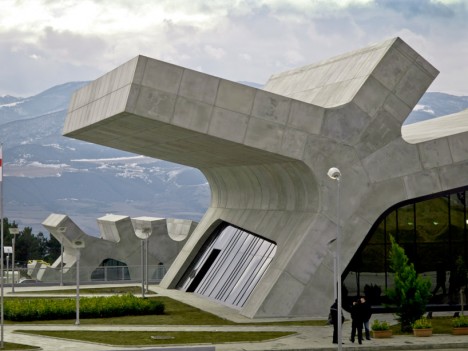
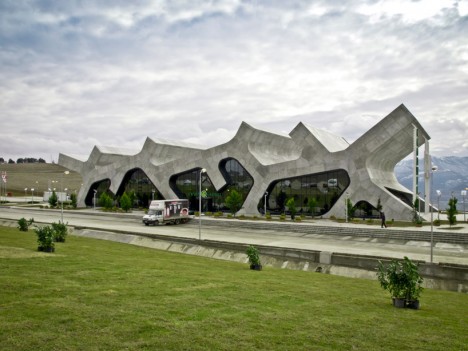
With its sculptural profile, the structure almost seems more like an oversized piece of public art than a functional building, reminiscent of the incredible futuristic concrete monuments built by the Soviets that can still be found in Yugoslavia today. In this sense, the Sarpi checkpoint almost seems retrofuturistic. Some people say it looks like an abstracted profile of Snoopy.
[ By Steph in Architecture & Public & Institutional. ]
[ WebUrbanist | Archives | Galleries | Privacy | TOS ]