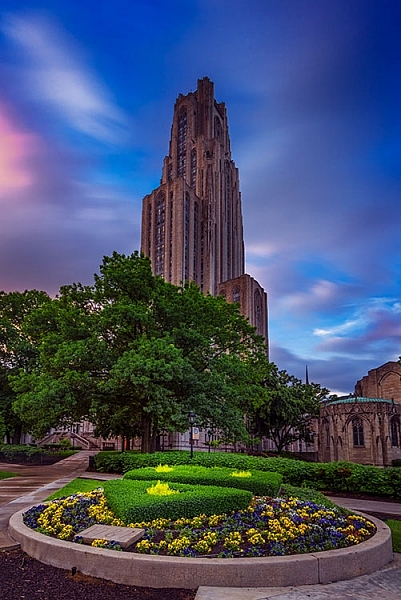
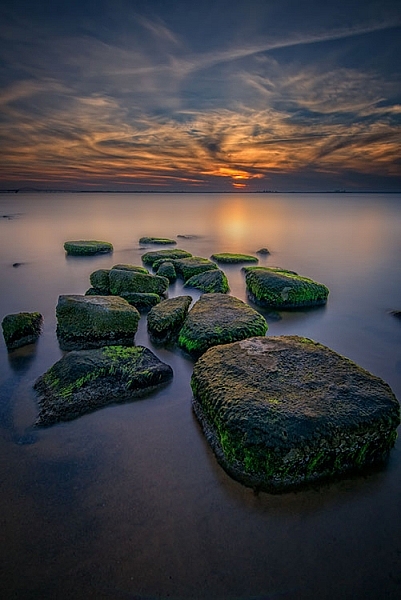
Month: October 2015

  • 10 Photography Website Mistakes That Might be Repelling Your Potential Clients

    If you are serious about your photography business, then you most likely have your own photography website already (if not, you should set one up right away). You are probably really proud of it and consider it the best website under the sun. However, numerous mistakes can be found on almost every photographer’s site. These mistakes could be fatal for your business, since they can easily repel your potential clients. We are talking big agencies, companies and even government organizations, not just regular consumers who want you to be their wedding photographer.

    Here’s some good news: these mistakes can be fixed easily once you know what they are based on.

    We have recently researched thousands of photographers’ websites when looking for professional vacation photographers for our new project. We were quite surprised by the number of mistakes we had encountered on them. On top of that, several particular mistakes kept constantly repeating!

    Some seem obvious, some of them not, but almost every photographer’s website is guilty of at least one or two of these mistakes. So, here comes the checklist of some of the most common photography website mistakes that might save some of your serious assignments:

    1) Your name is missing

    This is probably the most obvious mistake. However, you would be really surprised how many websites are anonymous. A nickname may be great, it might help you look like a mysterious artist, but it definitely won’t help you to get new inquiries.

    Your name is your only brand. You should be proud of it and present it to the public as much as you can. So put your name out there! Visibly! And buy yourself a domain with your name if possible.

    1 example of good website be proud of your name

    Example of good website, be proud of your name: Kristina Kislitsyna

    2) You’re using cheap web templates

    Do you want to run a successful photography business? Then you have to invest in it, at least a little. Start with investing in a decent website. A few hundred bucks and a skilled friend will have the work done in a blink of an eye, you’ll have a nice, basic, yet original website.

    However, I implore you, do avoid those cheap template websites with the provider‘s logo all over the place.

    3) Your contact information is missing

    Email address is the key. Your client needs to find it quickly and easily. Contact forms might not seem like a bad choice at first, however, they most certainly are. Lots of big clients prefer to contact you via email, because they want to have a copy of the email that they send to you.

    If you insist on having a contact form, put your email address next to it and let your client decide. Here’s a secret tip – insert your email address as an image with your email on it so bots cannot find it and you save yourself from getting tons of spam.
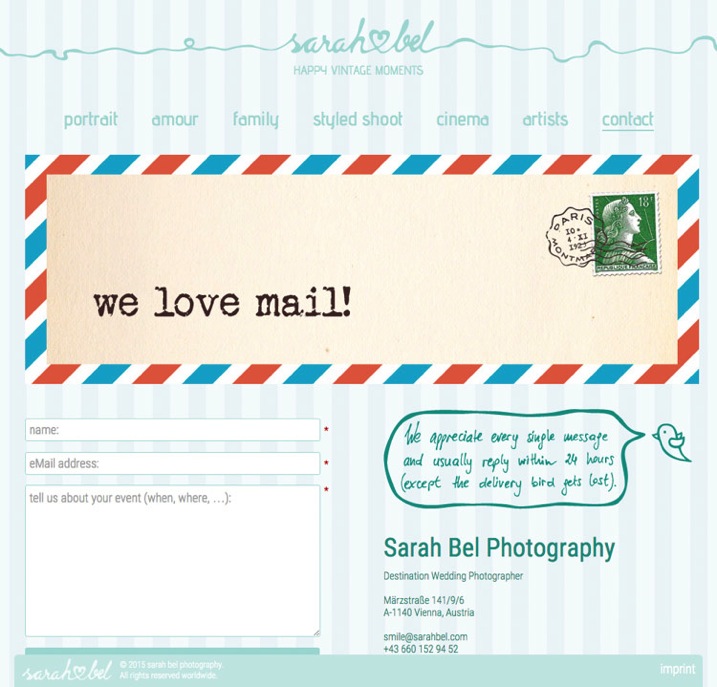
     

    2 example of good website put your email address next to the contact form and let your client decide www sarahbel com

    Put your email address next to the contact form and let your client decide: Sarah Bel Photography

    4) Check your spam box

    This one is closely connected to the previous point. Inquiries from agencies, companies, and other projects often end up in the spam box or junk folder. It doesn’t matter which email service you use to communicate with your client, but it is essential to check your spam box every few days. This is the only way to avoid those embarrassing moments when you respond to an important inquiry after several months, and indeed, it is usually too late at that point.

    5) There’s music playing on your website

    Do I have to add anything else? Hello, it’s 2015! Everyone is listening to Spotify or YouTube while browsing the internet. The last thing people want is to be interrupted by the blasting of your favourite music.

    6) Your pricing is hidden

    It’s okay if you don’t want to share the pricing on your website, it’s also okay if you want to share it, but you definitely need to decide which way you want to go! If you want to show your prices, do so visibly, clearly, and in a special menu category. If you don’t want to share them, then say so clearly (and add your email address at that point, so that the client can contact you regarding the pricing details right away).

    There’s nothing weirder and more suspicious than a small hidden grey link to a PDF pricing guide that cringes at the bottom right corner of an About Me page.

    3 example of good website clear statement about where to find pricing www verapavlovaphotography com

    Example of what to do – clear statement about where to find pricing: Vera Pavlova Photography

    7) Your website is too slow

    On photography websites, this is most often caused by high-resolution and uncompressed photos. I know, we are photographers and we are proud of our latest cameras with great dynamic range and stuff. Still, these things are usually not that important for our potential clients. You need your website to be fast! And because of that, you need to compress photos for your website – compress them big time (150-200kb is a good maximum file size for website images, any bigger will slow your site down). Speed is the king in the realm of photography websites.

    8) There’s no English version

    This one is for photographers from non-English speaking countries. Yes, English is the most important language in the business world nowadays, so you need to have an English version of your website if you want to target the worldwide market. If you don’t have the time, or the resources, to prepare two language versions, then go for an English only site.
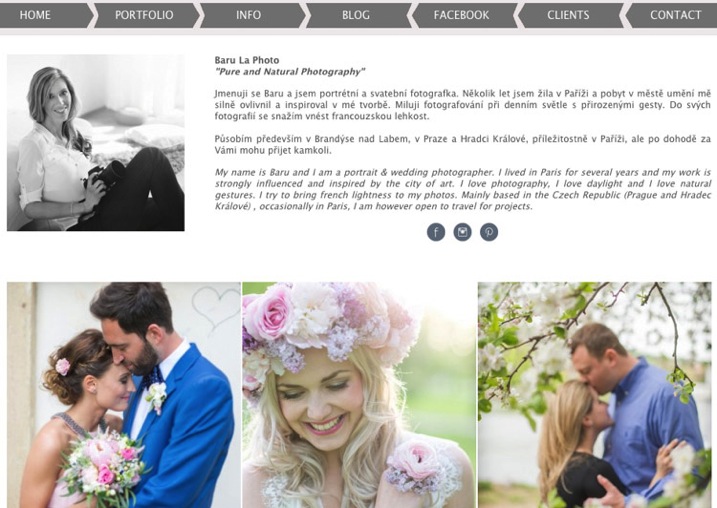
    4 example of good website two language versions including English www barulaphoto com

    Example of a website with two language versions including English: Baru la Photo

    9) Your location is missing

    Lots of (semi)professional photographers try to target the whole world, thus the only location info that you can find on their website is “available worldwide”. Okay, it’s great to know that you’re willing to travel, but clients are sometimes looking for local know-how. Always specify your location (at least by the city).

    10) There are no links to social media

    Social media is the new place to check testimonials and references to your work. It is crucial for your potential clients to be able to quickly find their way to your profiles on social media. The rule “the more, the better” applies here 100% – Facebook, Twitter, Pinterest and Instagram are necessary. You name the others…
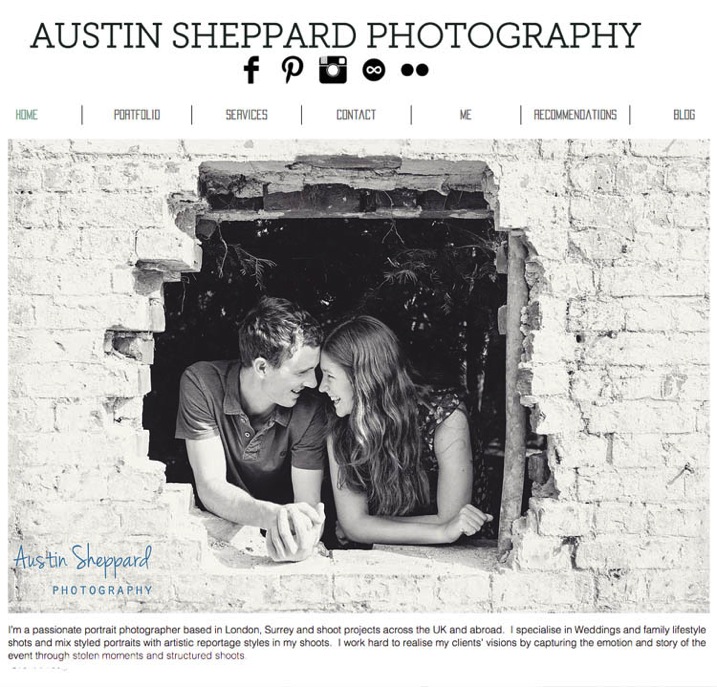
    5 example of good website clearly visible links to social media www austinsheppardphotography com

    Example of clearly visible links to social media: Austin Sheppard Photography

    Summary

    You put a great amount of energy and time to build up your website. It would be pity to reduce the possibility of attracting potential clients just by making some small mistakes that you can get rid of quite easily. I hope that this article will show some practical examples of such possible changes.

    We would also love to hear from you! Are there any other mistakes that you suggest avoiding on photography websites?

    googletag.cmd.push(function() {
    tablet_slots.push( googletag.defineSlot( “/1005424/_dPSv4_tab-all-article-bottom_(300×250)”, [300, 250], “pb-ad-78623” ).addService( googletag.pubads() ) ); } );

    googletag.cmd.push(function() {
    mobile_slots.push( googletag.defineSlot( “/1005424/_dPSv4_mob-all-article-bottom_(300×250)”, [300, 250], “pb-ad-78158” ).addService( googletag.pubads() ) ); } );

    The post 10 Photography Website Mistakes That Might be Repelling Your Potential Clients by Matej Slezak appeared first on Digital Photography School.


    Digital Photography School

  • Taped Shut: 15 More Closed & Abandoned Video Stores

    [ By Steve in Abandoned Places & Architecture. ]

    video-store-tape-headz-1a
    Since you can’t rewind time, these 15 abandoned video stores sit paused in retail limbo waiting for hipsters to spark an unlikely VHS cassette revival.

    video-store-tape-headz-1b

    video-store-tape-headz-1c

    Now you see it, now you don’t… a phrase that applies equally to video rental stores AND the movie cassettes they rented. Take Tape Headz Video in Washington D.C., which appeared to be a thriving concern when Flickr user jm3 snapped its brightly-lit overhead outdoor sign in May of 2005. Fast-forward to July of 2006 and, courtesy of Flickr user Daniel Lobo (Daquella manera), we note that Tape Headz Video has joined countless other video rental stores in retail limbo. Hope you returned that tape… well, never mind.

    25th Hour

    video-store-24-hours-2a

    video-store-24-hours-2b

    Looks like time finally ran out for 24 Hrs Video, a picturesque yellow-painted video cassette sales & rental store in beautiful Brooklyn, NYC. Flickr user TIA (This is Awkward) snapped the sad but somehow soothing scene on September 2nd, 2013, a short time after the official notice of lease termination was taped (ironic, that) to the store’s front door.

    Video Empty

    video-store-MD-14

    Video MD in Passaic, NJ appears to have died of natural causes: Netflix and Redbox, to be exact. Talk about yer Prognosis Negative. Flickr user Jeffs4653 snapped the storefront (complete with abandoned shopping cart and overflowing trash bin – stay classy, New Jersey) on August 6th, 2010. Still no cure for Snookie.

    Desire To Expire

    video-store-named-desire-4a

    video-store-named-desire-4b

    The delightfully-named “A Video Store Named Desire” made quite an impression on tape-renting Angelenos, though whether said impression was positive or negative depended much upon one’s dealings with Mike, the Santa Monica Blvd store’s oft-crusty owner. The vast majority of Yelp reviews bemoan the store’s closing in the summer of 2015, however, and note the loss of a beloved local film-culture icon.

    Pat’s Passed

    video-store-pats-video-5

    We’re not sure how long Pat’s Video in Carrollton, Kentucky was in business but that sign wouldn’t be out of place a century ago… except for the “video” part, of course. Flickr user Joey Harrison captured the lonely state of this abandoned video store in November of 2011.

    Next Page – Click Below to Read More:
    Taped Shut 15 More Closed Abandoned Video Stores

    Share on Facebook


    [ By Steve in Abandoned Places & Architecture. ]

    [ WebUrbanist | Archives | Galleries | Privacy | TOS ]


    WebUrbanist

  • 5 Tips for Using the Blend If Feature in Photoshop

    In this video Blake Rudis, from EverydayHDR, shows five really useful tips for using the Blend If feature, which is available in Photoshop when working with layers.

    The five methods for using Blend If:

    1. Adding sharpness to your image
    2. Removing noise
    3. Adding saturation
    4. Vignetting
    5. Adding a texture to your photo

    Get the downloads he mentions in the video here:

    Using the Blend If sliders allow you to really control where you want the affects to apply, without complicated masking and brushing in and out details. Give it a try, it may save you a ton of time editing!

    googletag.cmd.push(function() {
    tablet_slots.push( googletag.defineSlot( “/1005424/_dPSv4_tab-all-article-bottom_(300×250)”, [300, 250], “pb-ad-78623” ).addService( googletag.pubads() ) ); } );

    googletag.cmd.push(function() {
    mobile_slots.push( googletag.defineSlot( “/1005424/_dPSv4_mob-all-article-bottom_(300×250)”, [300, 250], “pb-ad-78158” ).addService( googletag.pubads() ) ); } );

    The post 5 Tips for Using the Blend If Feature in Photoshop by Darlene Hildebrandt appeared first on Digital Photography School.


    Digital Photography School

  • Like father, like son: Hawkeye Huey’s knee-high portraits of the American West

    Hawkeye Huey’s photos don’t follow traditional photography conventions of composition or exposure. They’re often blurry, cut off subjects, and use hard flash. The National Geographic-represented photographer is launching his first photo book with a little help from a Kickstarter campaign and a lot of help from his partner in crime – his dad, Aaron Huey. Read more

    Articles: Digital Photography Review (dpreview.com)

  • Die 5 Fotobücher des Monats

    Ein Stapel Foto-Bücher und Bände sitzen auf einem älteren Sessel.

    Obwohl der Oktober erst etwas mehr als zwei Wochen alt ist, hat er es schon in sich. Nicht nur dank der Buchmesse finden sich unter den Neuerscheinungen viele „Schwergewichte“, also Fotografen mit großen Namen. Einen „Magnum-Bonus“ oder dergleichen gibt es trotzdem nicht; einige Berühmtheiten haben es noch nicht einmal in die Liste geschafft, weil es gleichzeitig so schöne Bücher von weniger bekannten Fotografen gibt, die wir Euch dringend ans Herz legen wollen.
    kwerfeldein – Fotografie Magazin | Fotocommunity

  • Planning Your Photoshoot – Review of the App: LightTrac

    Getting to know when is the best time of the day, or the best lighting conditions in specific locations, is key for the outdoor photographer. Whether you are shooting landscapes or portraits outside, it is always good to know in advance what to expect in terms of lighting at your desired location. Of course, as the old saying goes, there’s an app for that.

    LightTrap-App-Review-3

    While there is no shortage of similar applications, I find LightTrac easy to use and understand. It basically helps to plan outdoor photo sessions in advance, by finding the right lighting conditions and time, depending on the specific location you want to photograph.

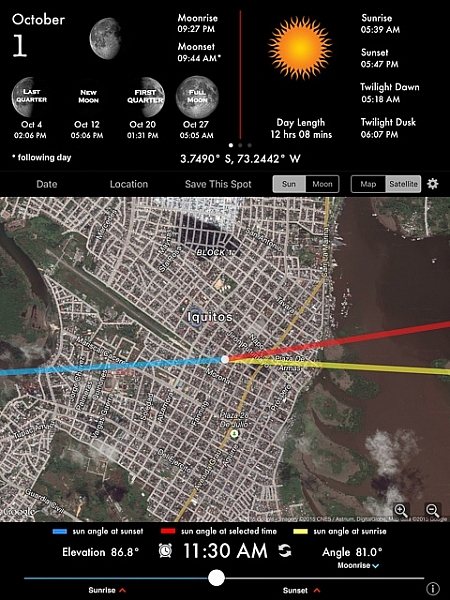
    The application calculates the angle of the sun, the moon, and plots the results on top of a map for any location in the world. While using LightTrac you can pick any date and time, at any place, then visualize the position and elevation of the sun and moon. It’s quite handy to be able to know not only what time sunset or sunrise will be, but more importantly, the relative position of the sun.

    Here is the list of features for the iPad and iPhone version:

    • Find angle and elevation of sun for any location and time
    • Find angle and elevation of moon for any location and time
    • Find sunrise, sunset and twilight times for any day
    • Find moonrise, moonset and moon phase for any day
    • View when full moon, new moon, first and last quarters occur
    • View elevation chart and azimuth chart for sun and moon
    • Integrated compass view on the iPad
    • Search locations by address, city or zip code
    • Save multiple locations and switch between them easily
    • Use address book to pick locations from your contacts’ addresses
    • Share your saved locations easily with fellow photographers via email
    • Easily export your locations to KML file to view on other apps
    • Does automatic timezone detection
    • Available in English, German and French languages

    There is also an Android version with a more limited list of features.

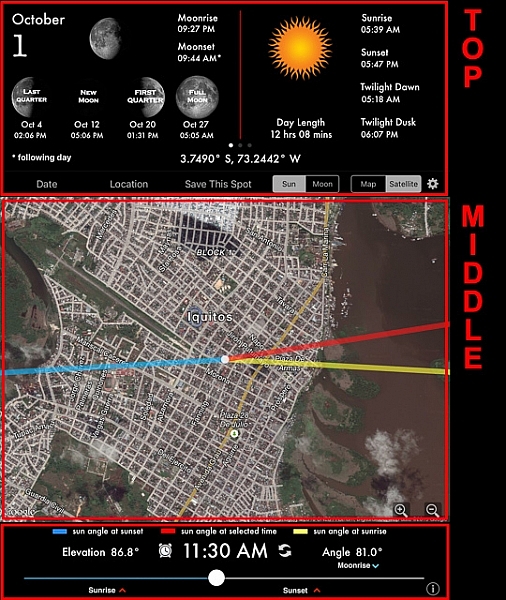
    The application is very easy to read and understand. The screen is mainly divided into three sections: top, middle and bottom.

    LightTrap-App-Review-2

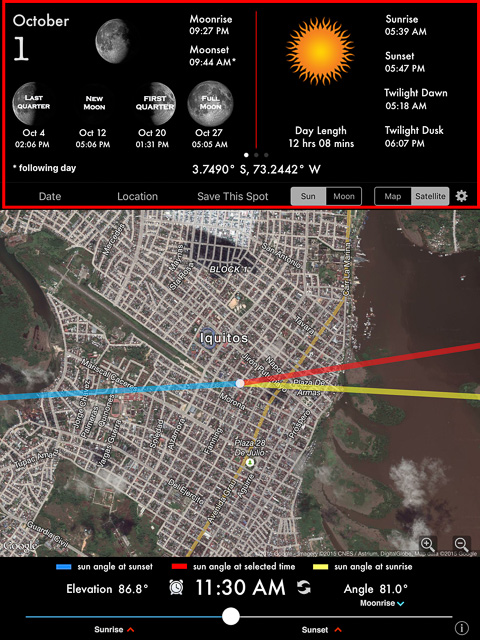
    The upper section of the application’s screen shows the date and all information pertaining to moonrise and sunrise with times, including twilight for dawn and dusk. It also display the lunar phases for the month, and GPS coordinates. If you are looking to search information for a specific place, you can tap in “Location” and either enter your own GPS coordinates, or make a search by city name. The same can be done with “Date”; just tap to enter a date in the future.

    LightTrap-App-Review-1

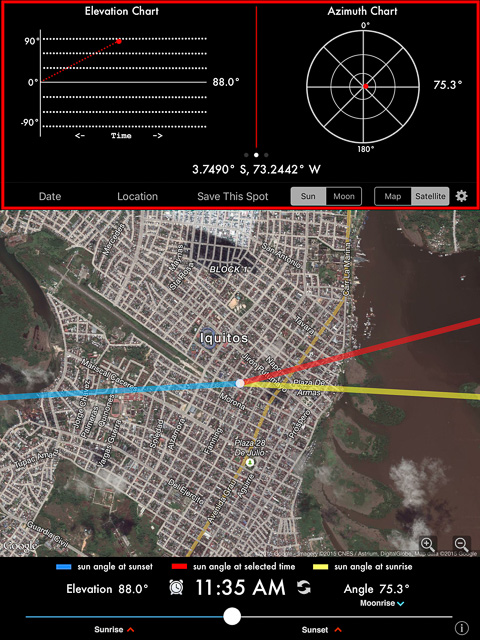
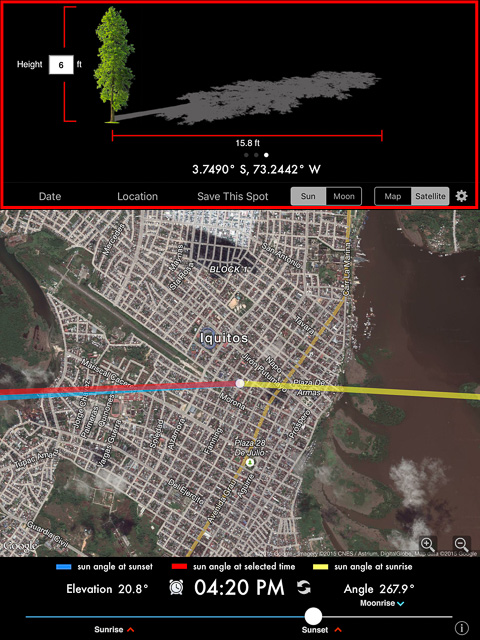
    But the upper section provides much more information. Just by sweeping to the left, there are two more screens. The first one will show you an elevation chart and an azimuth chart; these sets of tools basically help you to determine the position of the sun in the sky related to your location at a certain time of the day.

    LightTrap-App-Review-5
    That’s practical information for sure, but it seems a bit geeky to me. I’d rather use the second screen. If you sweep one more time, the following illustration will show you the shadows projections from an object; it’s more practical and easier to understand than the previous screen.

    LightTrap-App-Review-4

    As you can see in the screen captures above, the middle section shows a map with super-imposed information of the sun’s angle. The sun’s angle at sunrise is marked in yellow, at sunset in blue, and the red line will show the sun’s angle at any time you select. The selection can be easily done by moving the slider of the bottom section, and as you do, the time changes and the red line that represents the sun angle moves accordingly, emulating the position and movement.

    There is also a very useful tool in the bottom section. If you tap in the clock besides the time, a window will pop up offering you to set a reminder, an alarm, or even add to your calendar that specific event.

    In conclusion, LightTrac is a simple but practical tool that is very useful for the outdoor photographer, because one the best ways to create beautiful photos is to properly plan the best time of the day to shoot. This application allows you to do that very precisely and in advance.

    googletag.cmd.push(function() {
    tablet_slots.push( googletag.defineSlot( “/1005424/_dPSv4_tab-all-article-bottom_(300×250)”, [300, 250], “pb-ad-78623” ).addService( googletag.pubads() ) ); } );

    googletag.cmd.push(function() {
    mobile_slots.push( googletag.defineSlot( “/1005424/_dPSv4_mob-all-article-bottom_(300×250)”, [300, 250], “pb-ad-78158” ).addService( googletag.pubads() ) ); } );

    The post Planning Your Photoshoot – Review of the App: LightTrac by Daniel Korzeniewski appeared first on Digital Photography School.


    Digital Photography School

  • 17. Oktober 2015

    Das Bild des Tages von: Birgit Schiejok

    Ein Segelboot auf dem Meer.

    Wer muss beim Anblick eines Segelschiffs nicht auch automatisch an Geflüchtete denken?
    kwerfeldein – Fotografie Magazin | Fotocommunity

  • Volcanic Architecture: World’s Largest 3D-Printed Structure

    [ By WebUrbanist in Architecture & Public & Institutional. ]

    3d printed time lapse

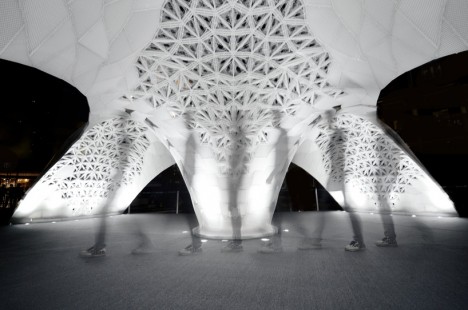
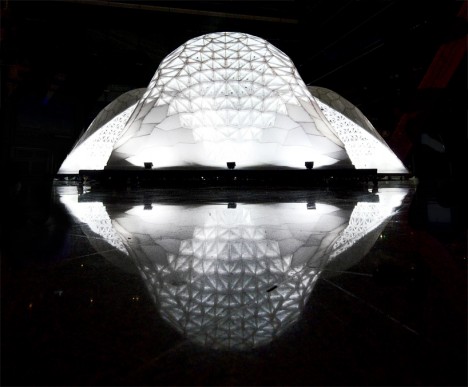
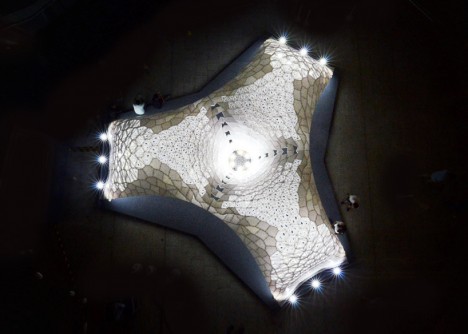
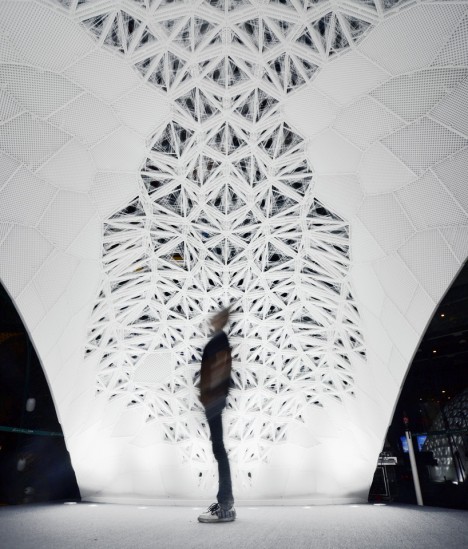
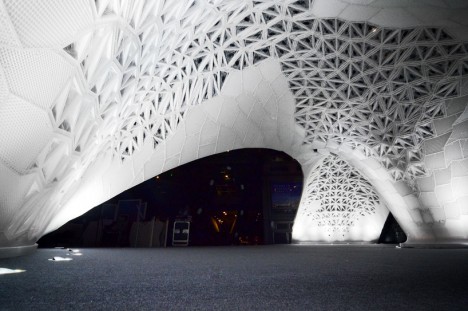
    Inspired by the complex organic shape of a volcanic eruption, this 1,086-piece pavilion in Beijing has just been awarded a Guinness Book of World Records distinction for the largest 3D-printed structure in the world.

    3d whole structure

    3d printed structure above

    Created by the Laboratory for Creative Design, the VULCAN stands nearly 10 feet tall and spans 24 feet across, named after the Latin name for the Roman god of fire.

    3d printed silk cocoon

    Its robust geometric components reference the divine, while a fragile web of cocoon-inspired interconnections between panels are inspired by man.

    3d printed pavillion

    Human-scaled arches overhang an open space below, formed by three ramping forms flanking each entry and rising up from fragile points of floor contact.

    3d under dome

    Th endeavor took 30 days and 20 large-scale 3D printers to complete, then 15 people for 12 days to assemble the pieces on site into the whole pavilion.

    3d details

    3d selfie

    “VULCAN represents a new reality – that modern architects are able to achieve their ideal design quality from concept to construction using digital design and fabrication methodologies,” said Yu Lei at Beijing Design Week. “This development will increasingly blur the boundaries between technology and art.”

    Share on Facebook


    [ By WebUrbanist in Architecture & Public & Institutional. ]

    [ WebUrbanist | Archives | Galleries | Privacy | TOS ]


    WebUrbanist

  • Writer’s Favorite Lens – Nikon 16-35mm f/4

    favorite, lens, nikkor, 16-35mm, ultrawide, wide angle, landscape

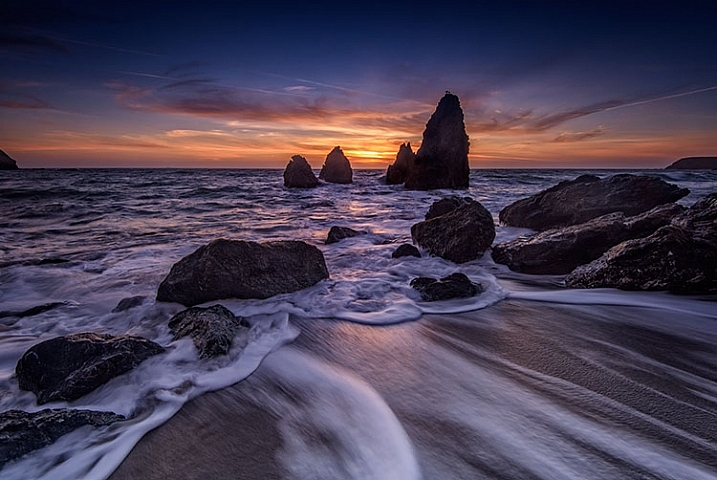
    Rodeo Beach, Marin County, California

    Asking me which lens is my favorite is somewhat akin to asking me which one of my two children I love the most. The simple answer is, “the one that will get me the shot I want!” I will also tell you, it depends on the subject I’m shooting. If I’m photographing a portrait, I’m more likely to choose my 85mm f/1.4. But primarily, I am a landscape photographer, so as I look back at some of my favorite images, I will say that most have been made using my AF Nikkor 16-35mm f/4G ED.

    As I have grown as a photographer, I must admit I have become more and more enamored with the ultra-wide angle point of view. I enjoy seeing things in that perspective, and using the wide angle to emphasize foreground objects. I do also own the 14-24mm f/2.8 lens, but one thing sets the 16-35mm apart for me – that is the ease with which filters can be used. More on that in a bit.

    First, some technical specs:

    • Focal Length:  16-35mm
    • Maximum Aperture: f/4
    • Minimum Aperture: f/22
    • Format: FX
    • Vibration Reduction: Yes
    • Dimensions: 3.2 in.(82.5 mm)
    • Weight: 24 oz. (680g)
    • Price: $ 1259 USD

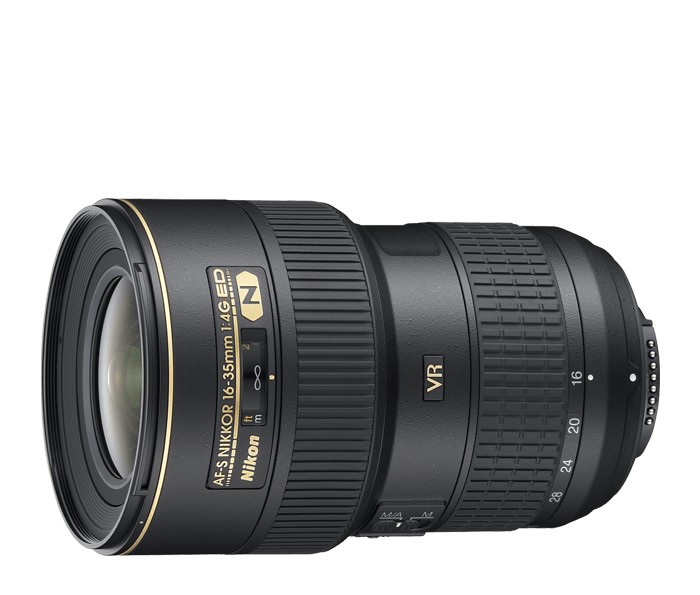
      AF Nikkor 16-35mm f/4G ED VR II, my favorite lens

      Courtesy of Nikon

    Ultra-Wide Angle Coverage

    As a landscape photographer, I love using the perspective of an ultra-wide angle lens to be able to distort perspective and emphasize foreground objects. I often find that 24mm just isn’t wide enough to do what I’d like. Also, the 2x zoom to 35mm adds some nice versatility on the wide angle end of things. I can go from ultra-wide at 16mm to moderately wide at 35mm, without needing to change lenses to my mid-range zoom.  This provides me with a little more flexibility than the 14-24mm.

    While that lens can go just a bit wider, there are several trade-offs that make the 16-35mm more appealing. In addition, I find the lens to be tack sharp throughout the range, with very little if any chromatic aberration (color fringing that can happen in high contrast areas). While the maximum aperture of f/4 may give some photographers pause (believing that f/2.8 is a necessity) I find that more often than not, I am shooting this lens while mounted on a tripod, and stopped down for maximum depth of field.  Being able to shoot at f/2.8 just isn’t a requirement for me. Keep in mind, I am using this lens on a Nikon D810. If you are using a DX body, the lens’ coverage won’t be as wide.

    my favorite lens, photography, landscape, wide angle, ultrawide angle, landscape,

    Lower Fox Creek Schoolhouse

    Using Filters

    As a landscape photographer, the ability to use filters is no small consideration. While I have filters for my 14-24mm lens, they are quite large. If I’m trying to travel light, I can’t always fit them in the bag, and those filters only fit the 14-24mm. My 100mm filter kit fits all of my lenses except for the 14-24mm, so it’s more economical in terms of space if I only carry that one kit and use my 16-35mm as my ultra-wide option when a filter is needed. The 16-35mm takes a 77mm sized filter for screw ins, or 77mm mounting ring if I’m using my drop-in filters. That matches most of my other lenses, making it convenient in terms of compatibility with accessories.

    my favorite lens, photography, landscape, wide angle, ultrawide angle, landscape,

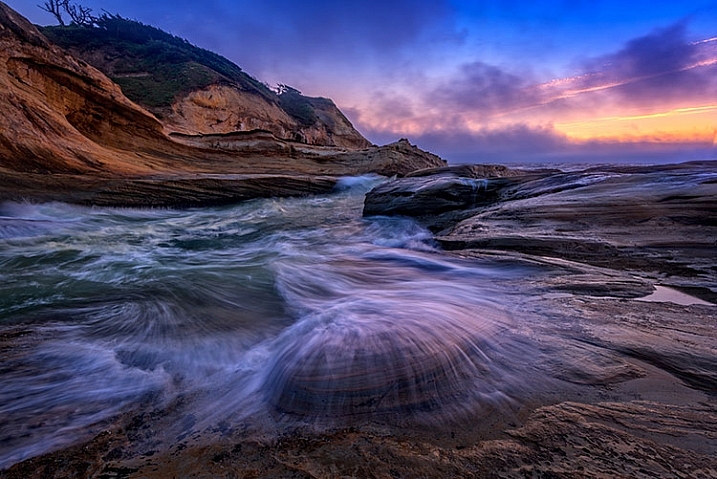
    Cape Kiwanda, Oregon

    Image Stabilization

    While it’s not typically deemed necessary in an ultra-wide angle lens, the inclusion of VR, or vibration reduction (sometimes also called image stabilization) is a nice plus for this lens. Other lens makers have also begun including it in their competitors in this range. As I said, I am generally on a tripod when shooting with this lens, but there are times when hand-holding is necessary. Having the option of turning on the VR to give me some extra help in steadying the camera, gives me a great sense of reassurance that my images will be sharp. This is of particular importance when standing on a bridge, which can vibrate due to cars on the roadway, or when photographing in a place where tripods aren’t allowed.

    my favorite lens, photography, landscape, wide angle, ultrawide angle, landscape, cityscape, architecture

    Cathedral of Learning, University of Pittsburgh

    The Bottom Line

    For me, it’s all about the image. Size and weight are a distant second. Is the lens sharp? Yes. Is the field of view what I want? Yes. Can I use it with my filters to achieve my final image? Yes. It is the positive answers to those three questions that make this lens my favorite for photographing landscapes. Come back and talk to me about my favorite portrait lens another time.

    my favorite lens, photography, landscape, wide angle, ultrawide angle, landscape, sunset

    Great South Bay, NY

    googletag.cmd.push(function() {
    tablet_slots.push( googletag.defineSlot( “/1005424/_dPSv4_tab-all-article-bottom_(300×250)”, [300, 250], “pb-ad-78623” ).addService( googletag.pubads() ) ); } );

    googletag.cmd.push(function() {
    mobile_slots.push( googletag.defineSlot( “/1005424/_dPSv4_mob-all-article-bottom_(300×250)”, [300, 250], “pb-ad-78158” ).addService( googletag.pubads() ) ); } );

    The post Writer’s Favorite Lens – Nikon 16-35mm f/4 by Rick Berk appeared first on Digital Photography School.


    Digital Photography School

  • Photo prodigy: The images of 17-year-old Taylor Gray

    Taylor Gray may be young, but he’s serious about photography. After taking a borrowed DSLR on a backpacking trip, Gray was hooked on photography and found a new love for adventure and travel. See some of the young photographer’s work. Read more

    Articles: Digital Photography Review (dpreview.com)