Month: December 2014

  • Built for Bond: 10 Impossibly Luxurious Spy-Inspired Designs

    [ By Steph in Architecture & Houses & Residential. ]

    James Bond Boat House large

    Over the past half-century, the James Bond movie franchise has inspired countless suits, man caves and cheesy spy gadgets, but it has also led designers and architects to create some pretty incredible luxury yachts, jets, houses and accessories. There’s even a fan-designed laser watch that can light a match from across a room.

    James Bond Aston Martin – Spectre

    James Bond Aston Martin 1

    James Bond Aston Martin 2

    The luxury vehicle maker Aston Martin has been collaborating with the James Bond movie franchise for half a century, and recently unveiled its latest model, ‘DB10,’ for the upcoming ‘Spectre’ film. The British carmaker has designed a car for each of the 24 movies, but this one was developed under close watch of director Sam Mendes in order to create ‘Bond’s ultimate vehicle.’

    James Bond-Inspired Boathouse Built Over a Cave

    James Bond Cave House 1

    James Bond Cave House 2

    James Bond Cave House 3

    McKenzie Strickland Associates essentially designed the Balnearn Boathouse, located on the shore of Loch Tay, after a James Bond movie marathon, envisioning a house that looks deceptively small and simple (if beautiful) from land, but boasting a fun secret. The home was built over an artificial cave that’s invisible from shore, so a speedboat can be driven in and tethered to the ceiling.

    Futuristic Avro Business Jet by Design Q

    James Bond Avro Business Jet 1

    James Bond Avro Business jet 2

    Futuristic aircraft designer Design Q has proposed a luxurious jet called the Avro Business Jet, an airplane “that James Bond would have loved.” Named for the character of ‘Q,’ who designs all of the cool gadgets hidden in everyday objects in the films, the jet is designed “to appeal to dynamic and forward-thinking owners who live life in the fast lane; the interior is bristling with technology and gadgets that are discretely concealed in the hand-crafted furnishings but available at a moment’s notice.”

    Next Page – Click Below to Read More:
    Built For Bond 10 Impossibly Luxurious Spy Inspired Designs

    Share on Facebook


    [ By Steph in Architecture & Houses & Residential. ]

    [ WebUrbanist | Archives | Galleries | Privacy | TOS ]


    WebUrbanist

  • The Q Button – What Every Canon DSLR Photographer Needs to Know

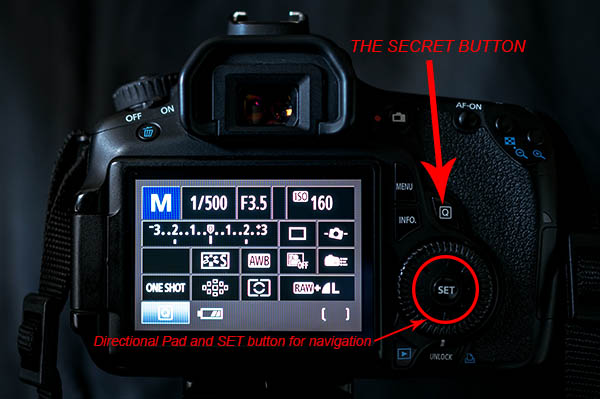
    Cameras can be super complex these days. Buttons, knobs and switches are everywhere. How can you remember what all of them do and where to begin? Well, Canon has given you a secret button to use that allows you to access all of those most important functions within your complex machine. Perfect, where is this secret button you ask? It’s right on the back of your camera marked with the letter Q. It’s not really a secret, it’s just under utilized.

    COVER IMAGE

    The Q Button

    What does Q stand for? Quick. The button makes navigating just that. Using the button gives you quick access to all of the major functions that you need. Let’s go through some of those functions so you can see how easy it is use your camera. Grab your Canon and let’s try it out.

    How to use it

    Go ahead, give the Q button a press while watching the LCD screen on the back of your camera. As you see it highlights one of your current settings. Depending on your Canon model this may light up the current selection in a blue/green color or it may outline it with an orange box. Next you can cycle through your settings by using the directional pad located around your SET button. Simply highlight the setting you want to change and then you have a couple of options.

    First, and easiest, is to roll your settings dial while it is highlighted. This will cycle through your options for that particular setting. Your second choice is to push the SET button while a setting is highlighted. This will lead you to a more detailed screen showing all of your options for that setting.

    The Secret Button

    Canon also made things easy by providing a description of each option at the bottom of the LCD as you scroll through. At first it will be more beneficial to use the second option so you become familiar with what settings are available, and what the symbols mean. Once you get that down, using option one to zip through the settings is a breeze.

    As a beginner it can be really helpful using the LCD screen and the Q button so you can see everything about the exposure and settings right in front of you. When you depress the shutter button half way the current exposure reading will be displayed on the meter on your LCD. This makes it really easy to adjust your settings while seeing how each element of exposure (aperture, shutter speed and ISO) is affecting the meter.

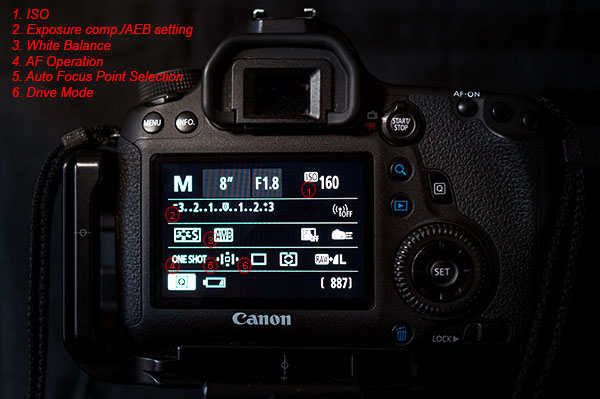
    Some of the settings you will adjust most are ISO, exposure bracketing, white balance, focus type, focus point and drive mode. When you use these techniques they each can be adjusted in seconds!

    Visual Guide

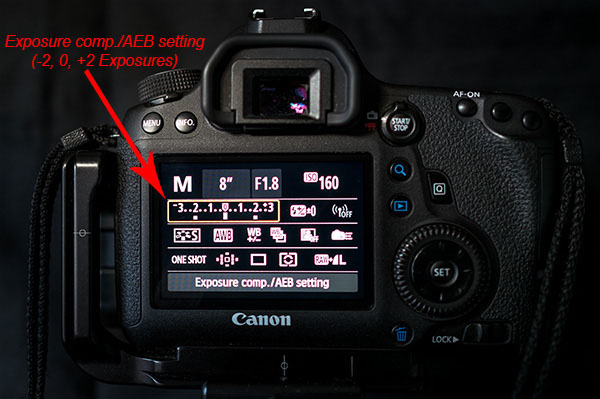
    The Q button is particularly useful when you are bracketing exposures for HDR. Press it and highlight the Exposure Compensation/AEB setting. Now spin your settings dial to the right and watch as the light meter changes to three lines in lieu of the typical single line. Set the lines as far apart as you want your bracket to be (i.e. -1, 0, +1 or -2, 0, +2). Last, use the directional pad to highlight the Drive Mode setting. Again scroll to the right until you reach the Self-timer (2 seconds/remote setting). Now, once you fully press the shutter button your camera will wait two seconds and then take all three exposures that you set. It’s as simple as that.

    Exposure comp

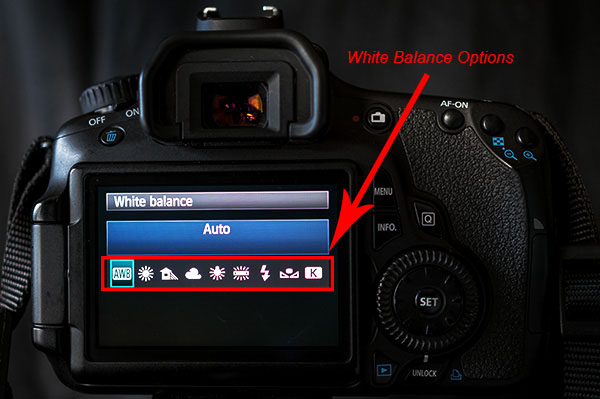
    As the light, and your shooting situation, changes your white balance settings need to be adjusted. You typically don’t find a special button for this important setting. Once again the Q button makes your life easy. As you scroll through the options you will see some simple pictures for each WB setting. A sun for sunny, a cloud for cloudy, a lighting bolt for flash, etc. Sometimes it is easier to see what your options are by looking at a picture. If not, Canon still gives you the description of the WB setting.

    White Balance

    Next up is the Auto Focus Point Selection. This is seriously one of the hardest functions to find on most cameras. Again, made easy by Canon. Press the Q and then use the directional pad to navigate to the AF Point Selection. Spin that dial and watch as the points spiral around to each individual focus point at your will.

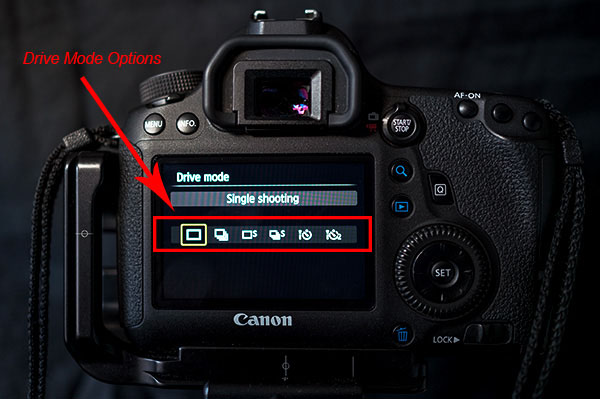
    Do you switch between shooting action and still subjects often? If so you may find yourself digging through the menu to find your Single and AI Focus options and the Drive Modes. Simply press the Q button and move over to the AF Operation. Roll your dial and you can choose ONE SHOT, AI FOCUS or AI SERVO. Then you can navigate over a couple of settings to the Drive Mode and choose between Single, Continuous Shooting or Timer Mode.

    Drive Mode

    Some Canon models are equipped with an internal level that is accessible from the Q menu. This is really helpful when you are shooting landscapes on a tripod. When in the menu highlight the Electronic level. Press the set button and a level looking like it belongs in the cockpit of an airplane shows up on the LCD. Tilt your camera from side to side and watch how the level changes. When your camera is horizontally level the line will turn green. This can definitely save you some time and heartache in post-processing when trying to make your horizon lines straight. It takes the guess work out of it for you.

    As you can see the Q button is the most powerful and useful button on your camera. Navigating through those complex menus are over. Once you use the secret button you will begin to wonder why any of the other buttons even exist, with the exception of the shutter of course. Go ahead and feel free to start spreading the secret. Have fun!!!

    googletag.cmd.push(function() {
    all_slots.push( googletag.defineSlot( “/1005424/_dPSv4_mob-all-article-bottom_(300×250)”, [300, 250], “pb-ad-78623” ).addService( googletag.pubads() ) );
    } );

    googletag.cmd.push(function() {
    mobile_slots.push( googletag.defineSlot( “/1005424/_dPSv4_mob-all-article-bottom_(300×250)”, [300, 250], “pb-ad-78158” ).addService( googletag.pubads() ) );
    } );

    The post The Q Button – What Every Canon DSLR Photographer Needs to Know by Jack Thatcher appeared first on Digital Photography School.


    Digital Photography School

  • Tips to Help You Prepare for a Successful Portrait Session

    One of my favorite types of photo shoots is families with kids. It’s fun to spend an hour talking and laughing with people while taking photos. I enjoy being a small part of creating images that will preserve their precious memories for the rest of their lives. But these types of sessions don’t always work out as you might like, and even when you think you have all your ducks in a row something might pop up at the last minute that sends everything into a tail spin. Fortunately, with a bit of planning and preparation you can put a few things in place that will help your portrait sessions be freeing, fulfilling, and fun for everyone involved.
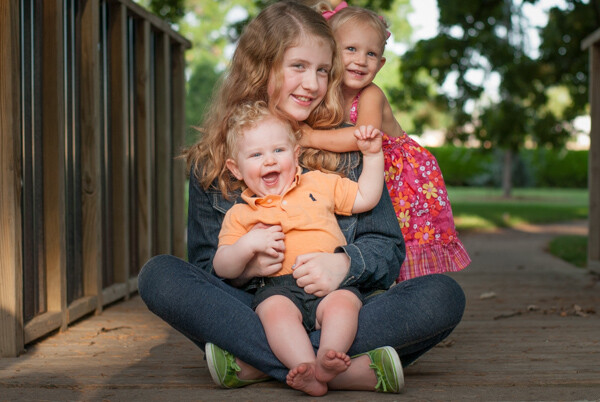
    kids-bridge

    Set Expectations

    Whether you are taking photos of friends, family, clients, or even your own kids, one of the most important things you can do is make sure you are going to deliver what they want. Your subjects will have their own preconceived notions of what types of pictures they are looking for, and they might not always be the same as what you have in mind. If you can make sure everyone is on the same page before you even take out your camera, the entire process from posing, to shooting, to editing, will be much, much smoother.

    Whether you know your subjects or not, it’s important to make sure they are familiar with, and approve of, your own picture style and portrait process. Showing your subjects some of your existing work is a good way to give them an idea of your style and help them see if you would be a good fit. This can be as simple as sending them some sample photos by email, directing them to an online portfolio, or sitting down and having a conversation about the type of photo shoot they are wanting.

    Every photographer has a unique approach to his or her craft, and interacts with people in their own way. Do you take classic headshot portraits or do you like to experiment with various poses? Do you let subjects, especially kids, run around and play or do you like to control every element of the photo shoot? Do you shoot outdoors, in a studio, or a mix of both? Will they be able to share the photos online with a watermark, or do you require them to order physical prints? This might seem a bit too nitty-gritty, but dealing with these issues up front will save you a lot of hassle and headaches down the line.
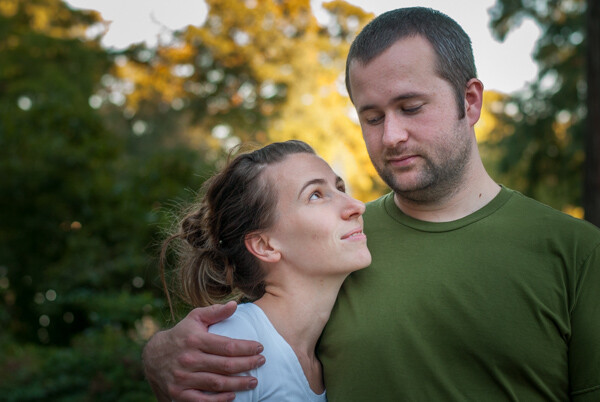
    couple-sunset

    Not all photographers have their own website, but if you do you can include information such as the types of sessions you normally do, how much you charge, where you are willing to travel, etc. This information is good to know, but it often takes a little more to see if you are really the right person for your subjects. Think of the last time you went to a restaurant: did you just order right from the menu, or did you ask your waiter some questions about the food before deciding what you want? To address this, it’s good to have some sort of dialog with your subjects before you take a single photo. You can encourage people to contact you via email or a form on your website, send you a text or tweet, or post questions on a public Facebook page. It might seem like a lot of work to go through all this, but the more you work to set proper expectations for your subjects, the smoother the entire process will go.

    One of the best ways to safeguard yourself against liability in case your subjects are unhappy, is to use a contract. This is especially important if you plan on charging money, and critical if you are doing something big like a wedding or bar mitzvah. If people are paying big bucks for your services, it’s essential that everyone is on the same page upfront. Without a formal contract wherein all parties involved agree on the services to be provided, things can devolve into he-said-she-said after your clients get the photos. Don’t think of this as a punitive measure, though – approach the contract as an opportunity for both you and your clients to help safeguard against miscommunication and make sure what you are going to provide aligns with what they want.

    kids-flowerpot

    Scout the Location

    If you shoot indoors, this step is obviously not all that important. But if you plan on taking pictures outdoors it is critical that you know the area first. Just because you drove past a nice park or a friend told you about a rustic barn, doesn’t mean these places will be good locations for photo shoots. Go to the locations in person, get out of your vehicle, and walk around to see what things are like. If at all possible, do this at the same time of day you plan on taking pictures to make sure the light is similar, and ask yourself questions such as:

    • Where is the light coming from?
    • What features of the location are shaded?
    • What background elements can I use in the shots?
    • What existing features (fence, wall, bench, pond, tree, staircase, etc.) can I use for posing my subjects?
    • Are there lots of people around, and if so, what angle can I shoot from to avoid them in the background?

    baby-basket

    Normally this spot is full of people, but we picked a time to do the shoot when it was relatively quiet.

    Even if you have already been to a location such as a field, beach, or alley, it’s still a good idea to check it out before your photo session if you have never used it specifically for taking pictures. If you approach the location with a critical photographer’s eye you will notice many things that have probably escaped your gaze previously, but could severely impact the photo session if not taken into account. It’s also a good idea to have a backup location in mind in case of bad weather, but make sure your clients are well aware of this and are able to meet you there if you do have to change plans.

    Bring Blankets (and more)

    This last tip might sound trite, but it has saved me on many occasions. And every time I forgot to bring blankets, I wished I had. Since I do most of my photo sessions outdoors there are many things simply out of my control. Some of these can be mitigated, like using reflectors or a flash if the light is poor, or having your subjects wear warm clothes if a cold front comes through the night before, but it’s amazing how many times a simple blanket has saved the day when all hope seemed lost.

    Blankets can give your subjects something to sit on, wrap themselves up in, or just play with as you are snapping their photos. Blankets can comfort fussy children, diffuse a tense situation, or even (and yes this has happened to me more than once) cover up the mess left behind by a flock of geese the day before. They can also serve the practical function of adding a bit of color to your photos, or complementing the clothes that your subjects are wearing.

    There are other items that come in handy as well. Recently I was photographing a couple and their infant son, and though I had already scouted the location at the specific time the shoot was to take place, I did not take into account one critical element: dew on the ground. I wanted to get some shots of their son holding his head up and looking around, but since the grass was all wet it nearly turned our fun photo shoot into a chore for the parents as well as the child. Thankfully I brought an old piece of canvas along, which not only gave the boy a soft dry surface to lay on, but was also big enough to accommodate the whole family on some wider shots.

    baby-canvas

    The ground was too wet to lay on, so I asked his parents if we could use a simple piece of canvas. They obliged, and the final result turned out quite well.

    If you are taking pictures of children, bring some toys that they can play with, or kid’s books for them to read. Better yet, contact their parents beforehand and have them bring their own favorite toys and books from home. I also like to have some sundry joke items like fake teeth or googly eyes to help make kids smile, which tend to work well for teens and adults too. If your subjects are a bit older, they might want to wear a favorite jacket, bring an artifact such as a football or set of golf clubs, or even have their photo taken with a pet. While you might not be able to provide all of these yourself, a little bit of preparation beforehand will give you an idea of what they want and help you go about planning for the shoot so you are not caught off guard.

    child-book

    This boy’s favorite book not only gave him something to do while taking photos, but it will be a nice reminder when his parents look back on this picture years later.

    These tips are things that have worked for me, but are there other tips you have for successful photo shoots? Share your ideas in the comments section below.

    googletag.cmd.push(function() {
    all_slots.push( googletag.defineSlot( “/1005424/_dPSv4_mob-all-article-bottom_(300×250)”, [300, 250], “pb-ad-78623” ).addService( googletag.pubads() ) );
    } );

    googletag.cmd.push(function() {
    mobile_slots.push( googletag.defineSlot( “/1005424/_dPSv4_mob-all-article-bottom_(300×250)”, [300, 250], “pb-ad-78158” ).addService( googletag.pubads() ) );
    } );

    The post Tips to Help You Prepare for a Successful Portrait Session by Simon Ringsmuth appeared first on Digital Photography School.


    Digital Photography School

  • Go Au Naturel: Shooting Portrait in Natural Light

    When I first bought my little Canon AE1 back in 1993 and started shooting, I couldn’t afford a flash. I shot everything in natural light, and I think I made every mistake known to mankind, so for those who would like to learn from my mistakes, this one’s for you!! Backlight When I was a little girl, my mother would Continue Reading

    The post Go Au Naturel: Shooting Portrait in Natural Light appeared first on Photodoto.


    Photodoto

  • The 19 Most Popular DSLRs Among our Readers

    Every few months we like to report back to the dPS community which cameras (and other gear) are most popular with our readers. Today we’re going to take a look at the highest selling DSLRs among our readers over the last 4 months (as ranked by the reports that Amazon gives us*).

    As usual you’ll see it is largely a battle between Canon and Nikon (who dominate this class of camera) and that at the top of the list we see entry level DSLRS most popular (mainly due to their price). Further down the list we see more serious (and expensive) contenders.

    Note: Amazon currently have some great specials at the moment on cameras and gear as part of their Holiday Promotions.

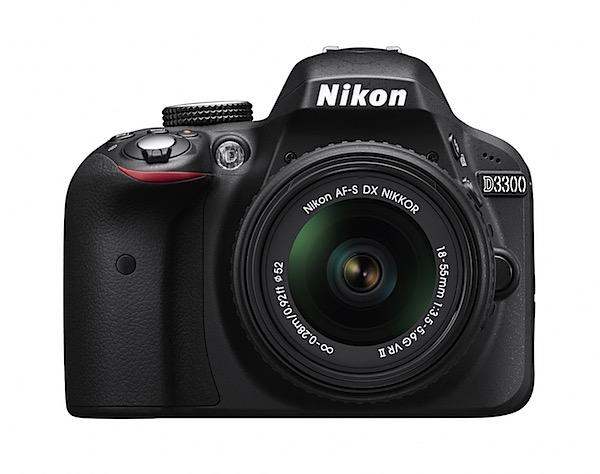
    1. Nikon D3300

    81aLEVAFXnL._SL1500_.jpg

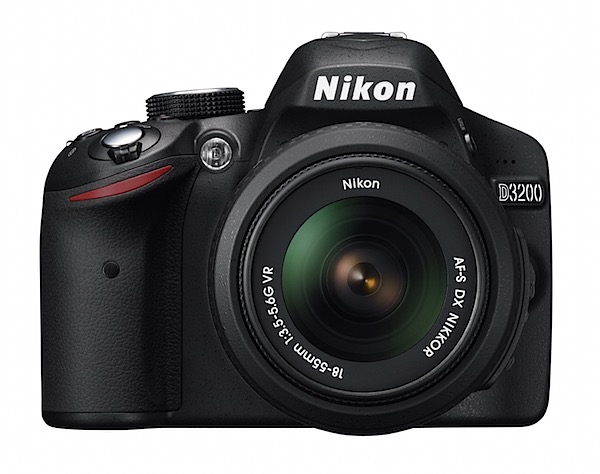
    2. Nikon D3200

    91WSe2OKasL._SL1500_.jpg

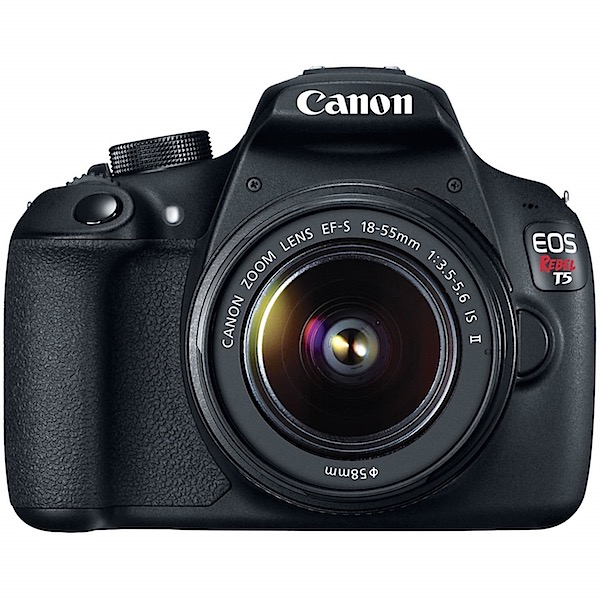
    3. Canon EOS Rebel T5

    71tz63oxXqL._SL1500_.jpg

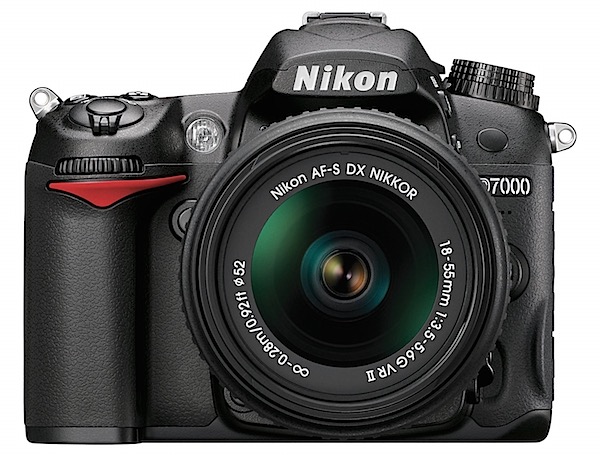
    4. Nikon D7000

    918RKSCRpBL._SL1500_.jpg

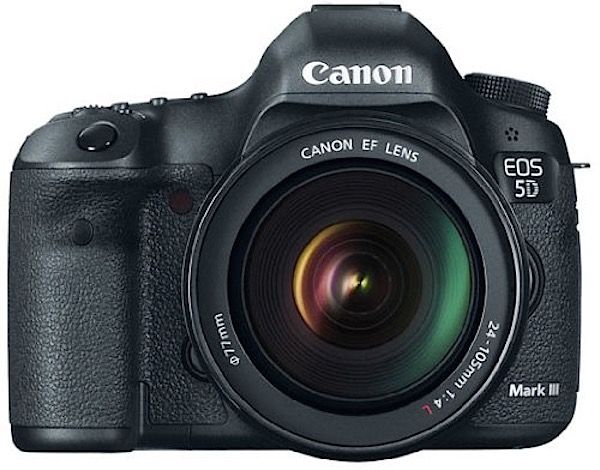
    5. Canon EOS 5D Mark III

    51a0nRQhFzL.jpg

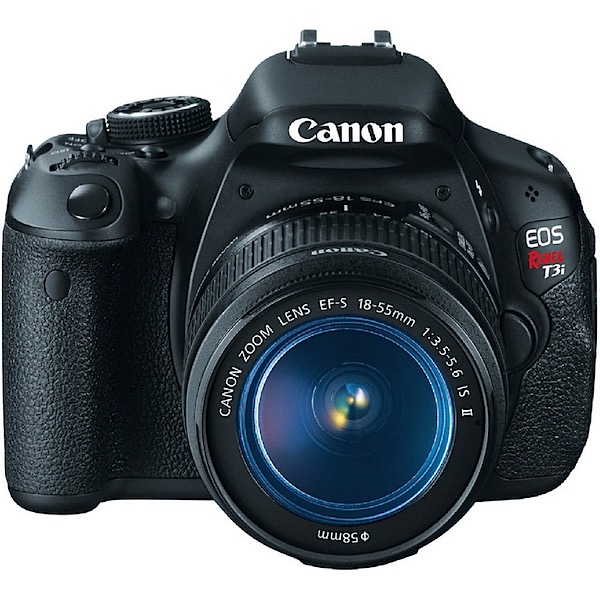
    6. Canon EOS Rebel T3i

    71hurE69ltL._SL1000_.jpg

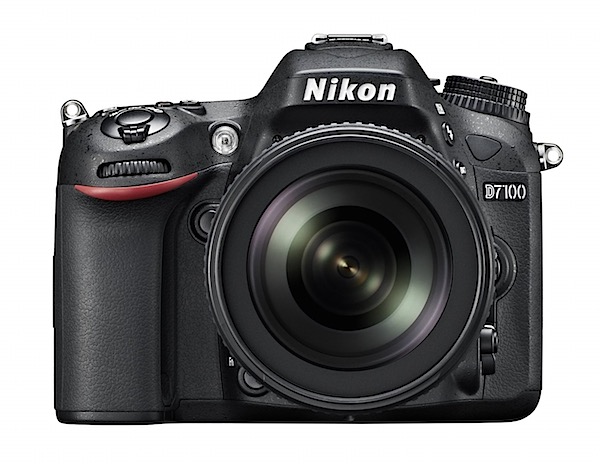
    7. Nikon D7100

    d7000.jpg

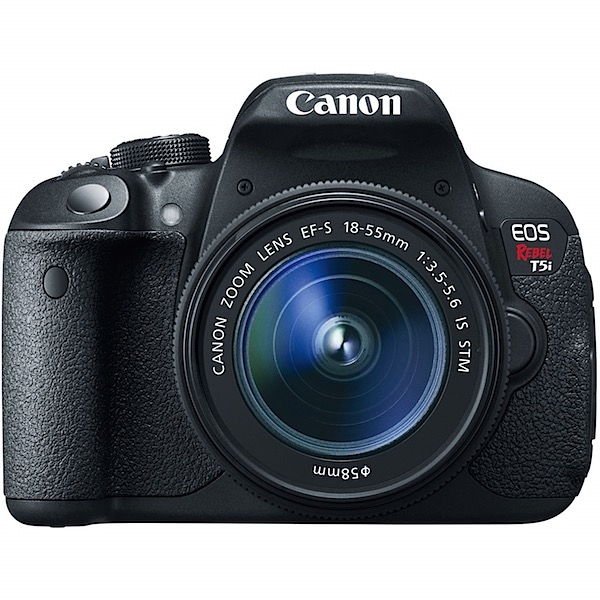
    8. Canon EOS Rebel T5i

    t5i.jpg

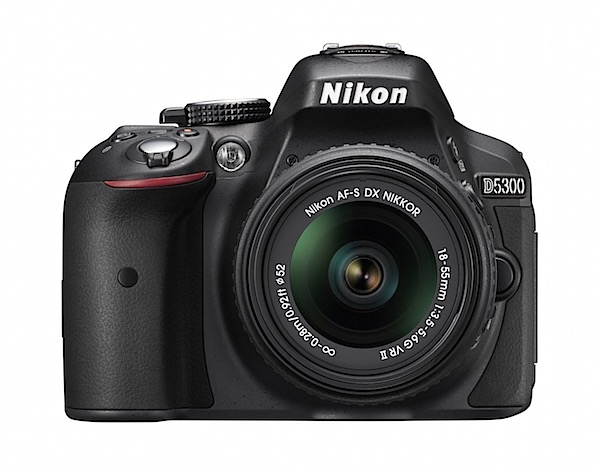
    9. Nikon D5300

    5300.jpg

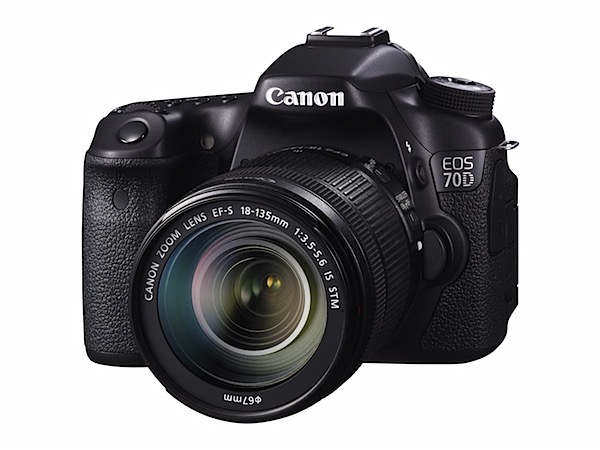
    10. Canon EOS 70D

    70d.jpg

    Here’s the next 9 most popular DSLRs.

    1. Nikon D5200
    2. Nikon D3100
    3. Canon EOS 7D Mark II
    4. Nikon D750
    5. Nikon D810
    6. Canon EOS 6D
    7. Sony A77II
    8. Sony SLT-A58K
    9. Pentax K-5 IIs

    *Note: this list was compiled from reports supplied to us from Amazon.com where we are affiliates. One of the ways dPS is able to cover its costs and be a sustainable business is that we earn a small commission when readers make a purchase from Amazon after clicking on our links (including those above). While no personal details are passed on we do get an overall report from Amazon about what was bought and are able to create this list.

    googletag.cmd.push(function() {
    all_slots.push( googletag.defineSlot( “/1005424/_dPSv4_mob-all-article-bottom_(300×250)”, [300, 250], “pb-ad-78623” ).addService( googletag.pubads() ) );
    } );

    googletag.cmd.push(function() {
    mobile_slots.push( googletag.defineSlot( “/1005424/_dPSv4_mob-all-article-bottom_(300×250)”, [300, 250], “pb-ad-78158” ).addService( googletag.pubads() ) );
    } );

    The post The 19 Most Popular DSLRs Among our Readers by Darren Rowse appeared first on Digital Photography School.


    Digital Photography School

  • Lowline NYC: World’s First Underground Park Slated for 2018

    [ By WebUrbanist in Architecture & Cities & Urbanism. ]

    lowline prototype rendering

    Using fiber optics as “remote skylights” to pipe illumination down from the surface, this bold plan aims to transform a century-old trolley station into a bright and green subterranean park. New York City is a natural candidate, having already inspired rail-related and elevated parks around the world with its innovative High Line Park.

    the low line diagram

    the lowline abandoned station

    Located beneath Delancey Street in the Lower East Side of Manhattan, the former Williamsburg Bridge Trolley Terminal is adjacent to active lines but has itself been abandoned for over 50 years. Proposed as the site of the Lowline, the space is being vetted for structural feasibility as well as civic support – discussions with the MTA as well as the city are ongoing and progressing.

    lowline test area subterranean

    lowline installation prototype mockup

    lowline light collector demo

    As shown above and below, the group behind the project is already working with the city on crowd-funded prototypes that demonstrate the technologies to be deployed on the target site, including tests of illumination levels with live greenery.

    lowline surface generated solar

    lowline real life test

    Boasting 20-foot ceilings and multiple blocks of open space, the dilapidated station still has a lot of deserted-place charm including old cobblestones, trail tracks, vaulted ceilings and vintage signage.

    lowline technology lights plants

    lowline conept design

    lowline rendering

    Much of this will be preserved, rehabilitated and otherwise highlighted in the renovation, creating a balance between new design, urban exploration and historic context. “To explore our vision in greater detail, we commissioned a preliminary planning study in 2012 with Arup, the global engineering firm, and HR&A Advisors, the leading consultant behind the High Line. The study concluded that the Lowline was not merely technically feasible, but would also vastly improve the local economy and the adjacent transit hub. Once built, the Lowline would be a dynamic cultural space, featuring a diversity of cultural programming, youth activities, and popular retail.”

    underground solar collection stratregy

    lowline tree underground

    lowline conceptual design phase

    The ingenious sun-redirecting technology has already been tested, and works as follows: “Designed by James Ramsey of Raad Studio, the proposed solar technology involves the creation of a “remote skylight.” In this approach, sunlight passes through a glass shield above the parabolic collector, and is reflected and gathered at one focal point, and directed underground. Sunlight is transmitted onto a reflective surface on the distributor dish underground, transmitting that sunlight into the space. This technology would transmit the necessary wavelengths of light to support photosynthesis, enabling plants and trees to grow. During periods of sunlight, electricity would not be necessary to light the space.”

    Share on Facebook


    [ By WebUrbanist in Architecture & Cities & Urbanism. ]

    [ WebUrbanist | Archives | Galleries | Privacy | TOS ]


    WebUrbanist

  • emerge macht Druck

    Es gibt viele Fotografen, die sich über lange Zeit leidenschaftlich einem Thema widmen und auf politische, sozial- oder gesellschaftskritische Art und Weise damit auseinander setzen.

    Manch einer dokumentiert gesellschaftliche Randgruppen, ein anderer begleitet eine Zeit lang einen einzelnen besonderen Menschen und zeichnet uns durch seine Bilder ein Portrait der Person, ein dritter zeigt uns das Leben von Menschen in Krisengebieten.

    Allen diesen Fotografen ist gemein, dass sie ein Thema gleichermaßen journalistisch und beharrlich verfolgen, um mit ihren Bildern darauf aufmerksam zu machen.

    eine exemplarische Doppelseite aus dem ersten emerge Printmagazin

    Das Online-Magazin emerge bietet solch engagierten Fotojournalisten seit nunmehr vier Jahren eine Plattform und zeigt immer wieder bewegende Arbeiten junger Bildjournalisten, die mal aufreibend und mal erhellend sind, mal berührend und mal bedenklich.

    Des Öfteren schon haben wir Euch in unseren sonntäglichen browserFruits auf solche Bildstrecken aufmerksam gemacht, nicht zuletzt, weil auch uns bei kwerfeldein die Qualität der dort vorgestellten Arbeiten überzeugt und begeistert.

    eine exemplarische Doppelseite aus dem ersten emerge Printmagazin

    Jetzt wagt emerge den Schritt hin zum Druck. Parallel zu den Online-Bildstrecken, die es auch weiterhin geben wird, soll es von nun an in regelmäßigen Abständen auch ein gedrucktes Magazin geben. „Wir wollen pro Heft ein Thema aus verschiedenen Blickwinkeln und mit unterschiedlichen Stilmitteln darstellen“, so Kevin Mertens, einer der Redakteure von emerge.

    Das Thema der ersten Ausgabe ist „Migration“. Durch Interviews, Kolumnen und Artikel wird es aus unterschiedlichen Perspektiven beleuchtet. „Wir möchten starken Geschichten eine Chance geben, die vielleicht bisher nicht in das Schema der bekannten Magazine gepasst haben“, so Kevin weiter.

    eine exemplarische Doppelseite aus dem ersten emerge Printmagazin

    Um die Produktion des ersten Heftes zu finanzieren, hat das emerge-Team eine Crowdfunding-Kampagne ins Leben gerufen. Wird die Fundingschwelle von
    5.000 € erreicht, ermöglicht das die Herstellung des Magazins im Offsetdruck, mit Fadenbindung, auf hochwertigem Papier und deckt weiterhin die Vertriebskosten.

    Wird das Fundingziel von 8.000 Euro erreicht, erhalten auch die Fotografen, Autoren und Grafiker ein Honorar für ihre Arbeit. Ihr könnt das Vorhaben noch bis Sonntag, den 14. Dezember 2014 unterstützen. Als Gegenleistung winken je nach Spendenbeitrag ein Küsschen auf die Wange, ein Exemplar des ersten Heftes, der Bildband emerge 011, signierte Fine-Art-Prints der im Heft publizierten Fotografien, Portfolio Reviews, Workshops und vieles mehr.


    kwerfeldein – Fotografie Magazin | Fotocommunity

  • Tamron 16-300mm Di II VC PZD real-world samples

    The Tamron 16-300mm Di II VC PZD is a general purpose ‘carry everywhere’ zoom for users of APS-C format DSLRs. Covering an equivalent focal length range of 24-450mm, this lens should be a perfect camera for travel and day-to-day use, allowing you to frame a huge variety of different subjects without changing lenses. We’ve been using one for a while and we’ve prepared a gallery of samples. Click through to take a look

    Articles: Digital Photography Review (dpreview.com)

  • Heavy Hitters: 2014 High-end Full-Frame Camera Roundup

    Full-frame sensors have made their way into more and more cameras, and are no longer reserved for DSLRs only. Whether you are a pro, an enthusiast, or simply looking to upgrade to a body that offers the most firepower possible, we’ve got you covered in our high-end full frame camera roundup. Read more

    Articles: Digital Photography Review (dpreview.com)