Month: December 2014

  • 11. Türchen: Lomography

    Lomo'Instant

    11. Türchen

    Unser heutiges Türchen verspricht jede Menge Spaß. In ihm liegt die neue Sofortbildkamera Lomo’Instant von Lomography, mit der Ihr Eure Erinnerungen festhalten und direkt in Händen halten könnt. Mit viel Zubehör lädt sie zudem zu kreativen Experimenten ein.

    Die Kamera ist klein und leicht und so perfekt zum Mitnehmen, bietet aber jede Menge Möglichkeiten. Sie enthält einen Blitz mit Farbfiltern und ein eingebautes Weitwinkelobjektiv. Drei weitere Objektive lassen sich zur Kamera dazukaufen: Ein Portrait-, ein Makro- und ein Fisheye-Objektiv.

    Weitere Funktionen gibt es, um Langzeit- und Mehrfachbelichtungen zu machen. Ein kleiner Spiegel an der Kamera hilft bei Selbstportraits. Die Kamera nutzt die Fuji-Instax-Mini-Filme, die eine Außenabmessung von 54 x 86 mm und einem Bildfeld von 46 x 62 mm haben.

    Lomo'Instant

    Die Lomo’Instant gibt es in schwarz, weiß und in der Sanremo Edition mit braunem Leder. Wir verlosen im Türchen die schwarze Ausgabe inklusive den drei Zusatz-Objektiven. Das Set ist 129 € wert. Der Preis der Kamera ohne weitere Objektive liegt bei 99 €.

    Um die Kamera zu gewinnen, schreibe einen Kommentar unter bürgerlichem Namen und gültiger E-Mail-Adresse bis heute um 24 Uhr. Danach verlosen wir sie per Zufallsgenerator unter allen Kommentatoren. Die genauen Gewinnspielregeln findest Du hier. Viel Glück!


    kwerfeldein – Fotografie Magazin | Fotocommunity

  • 5 Ninja Tips to Speed Up Your Lightroom Workflow

    Currently on for 33% OFF is Johny’s Lightroom Essentials for Landscape Photographers Course. Grab it now, only until December 23rd, 2014.

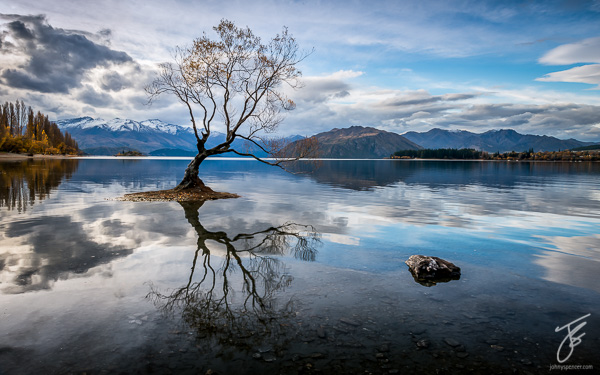
    DSC 8831 Edit
    Here are five things that will make a huge difference to your Lightroom workflow by making you more efficient and saving you time.

    1. Solo Mode

    Solo Mode

    Do you get frustrated scrolling up and down the panels looking for the right adjustment or setting? If so, then your frustration is over. Right click on one of the panels and in the drop down menu, select Solo Mode. Solo Mode only allows you to have one panel open at a time, so every time you open a panel the last one you had opened, closes. This allows you to easily see all the panels at once and find what your looking for quickly.

    2. Auto Advance

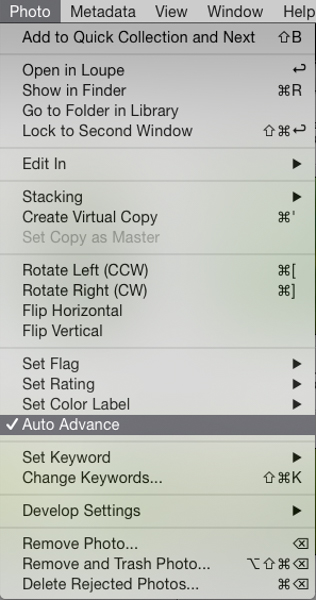
    The best way to find your keeper images after a shoot is by using flags. All you need to do is use the keyboard shortcuts; P for pick, and X for reject. This is a super fast way to power through your shoots. The problem is once you pick or reject an image you need to then click a right or left arrow key or mouse click on the next image to make the next selection. That’s where Auto Advance comes in. To turn it on make sure you’re in the Library module, then in the menu under Photo select Auto Advance. With this enabled, each time you flag an image Lightroom will move to the next image in the film strip automatically. This may not sound like a huge thing but believe me, when you have several hundred images to sort through saving one keystroke on each image will save you heaps of time.

    Auto Advance

    3. Quick Collections

    Collections are super important in Lightroom. Using them is the best way to quickly switch between groups of images in the Develop module without switching back to the Library module and digging through your folders. Quick Collections is a term I’ve coined, but honestly this is the quickest way to create a collection. It’s really simple. Just grab a folder of images you want to make a collection from, then click and drag the folder to the collections panel. Once you see a blue bar appear, drop the folder and BOOM, instant collection.

    Quick Collections

    4. Turning Off Auto Show Panels

    To give you more real estate on the screen it’s a great idea to hide the side panels when you are not using them. The perfect place to do this is with left panel in the develop module as most of the time everything you need is in the right panel. The problem is once it’s hidden and every time you mouse over to the left of the screen the panel pops out. That might be fine a couple of times but after a while you’ll find that it becomes annoying and starts to slow down your workflow. It’s easily fixed by right clicking on the panel disclosure triangle, and selecting manual from the drop down menu. This will stop the panel from opening automatically. When you want it back, just click on the triangle to show the panel.

    Turn Off Auto Show Panels

    5. Decluttering the Lightroom Interface

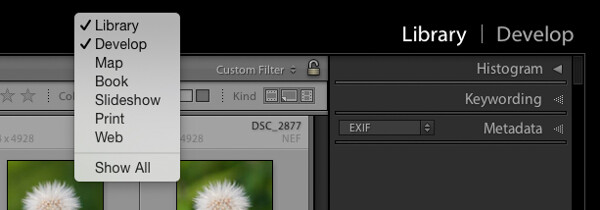
    Learning Lightroom can be very overwhelming especially when you see all the modules in the top bar and all the different panels and settings. There is so much going on in the interface, it can lead to what I call Lightroom burnout. The tip here is to turn off the modules and panels you aren’t using by cleaning up the interface. This allows you to only focus on just the things you are learning or need to use regularly. Just right click on the top bar or any of the panels, and in the drop down menu select what module or panel you want to hide, repeat the process to unhide.

    Declutter

    Like a lot of software there are many ways to achieve the same outcome. I encourage you to keep refining your workflow until you find the perfect system that works for you. Give these five tips a go; they will not only save you time, but help you on your way to achieve what I call Lightroom bliss. That is when you get to a place using Lightroom where there’s no more frustration or confusion, and it’s just all about having fun with your photography and creating beautiful images.

    Dancing Gulls

    DSC 8638

    Currently on for 33% OFF is Johny’s Lightroom Essentials for Landscape Photographers Course. Grab it now, only until December 23rd, 2014.

    googletag.cmd.push(function() {
    tablet_slots.push( googletag.defineSlot( “/1005424/_dPSv4_tab-all-article-bottom_(300×250)”, [300, 250], “pb-ad-78623” ).addService( googletag.pubads() ) );
    } );

    googletag.cmd.push(function() {
    mobile_slots.push( googletag.defineSlot( “/1005424/_dPSv4_mob-all-article-bottom_(300×250)”, [300, 250], “pb-ad-78158” ).addService( googletag.pubads() ) );
    } );

    The post 5 Ninja Tips to Speed Up Your Lightroom Workflow by Johny Spencer appeared first on Digital Photography School.


    Digital Photography School

  • Relio is a powerful LED light in your pocket

    It seems ultra-portable LED-based external light sources are the flavor of the season. Last month brought the Lume Cube, and today there is Relio. Relio is a 35mm small aluminum cube that uses a USB connection as power source for its LED light. It can be mounted on tripods and other camera supports using a 1/4-inch standard thread. Read more

    Articles: Digital Photography Review (dpreview.com)

  • Lytro software update introduces Focus Spread feature

    Lytro’s processing software just received a significant update. Lytro Desktop 4.1 provides some additional features for users of the Illum light field camera, including Focus Spread, which allows photographers to pick beginning and ending points for depth of focus. Learn more

    Articles: Digital Photography Review (dpreview.com)

  • The 30 Most Popular DSLR Lenses with our Readers

    Over the last week we’ve published posts revealing the most popular DSLRs and Compact System cameras among our readers (based upon what they’ve been buying in the last 3 months).

    Today we’re looking at the best selling and most popular DSLR Lenses*.

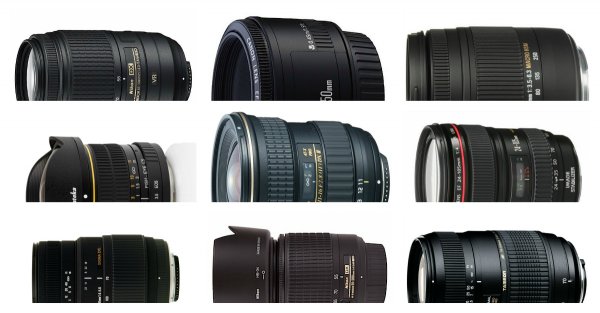
    popular lenses

    This list is completely dominated by Canon and Nikon lenses so we’ve decided to break them out separately into two lists and then have put the 6 other lenses (from a variety of manufacturers) into a third list.

    Note: at this stage we didn’t see any major trends in lenses for compact camera systems which is why we’ve not featured any hear. We expect this market to grow as the mirroless/compact system cameras continue to grow in popularity.

    Canon DSLR Lenses

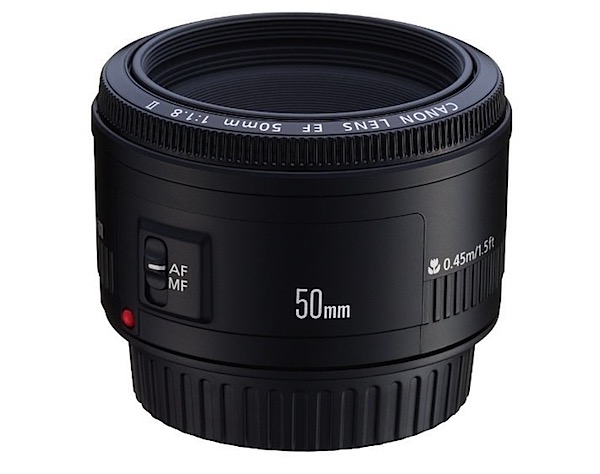
    1. Canon EF 50mm f/1.8 II Camera Lens

    71BuU2ZyOeL._SL1500_.jpg

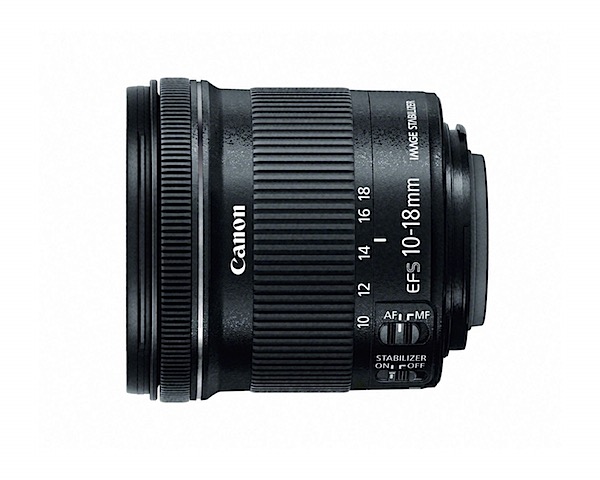
    2. Canon EF-S 10-18mm f/4.5-5.6 IS STM

    81bWpDA6EyL._SL1500_.jpg

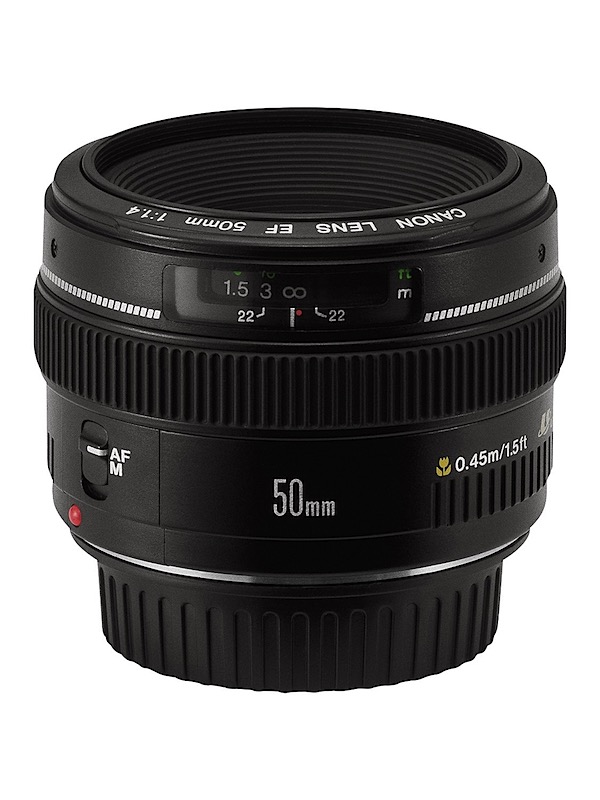
    3. Canon EF 50mm f/1.4 USM

    91fYqb6yGBL._SL1500_.jpg

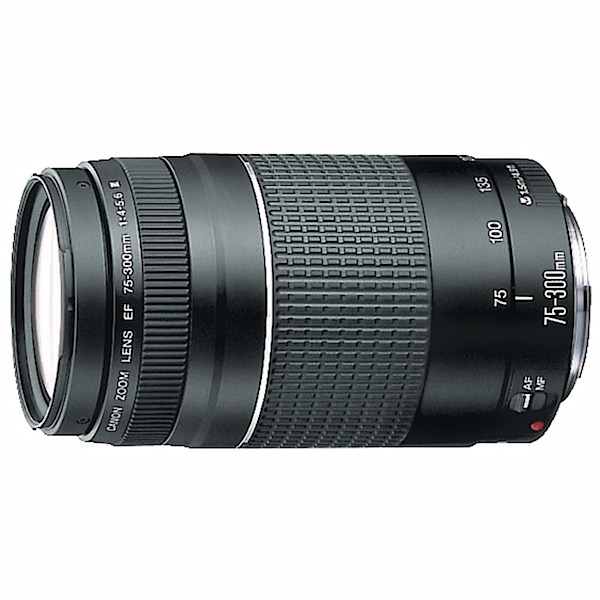
    4. Canon EF 75-300mm f/4-5.6 III

    71qY4hAxpoL._SL1500_.jpg

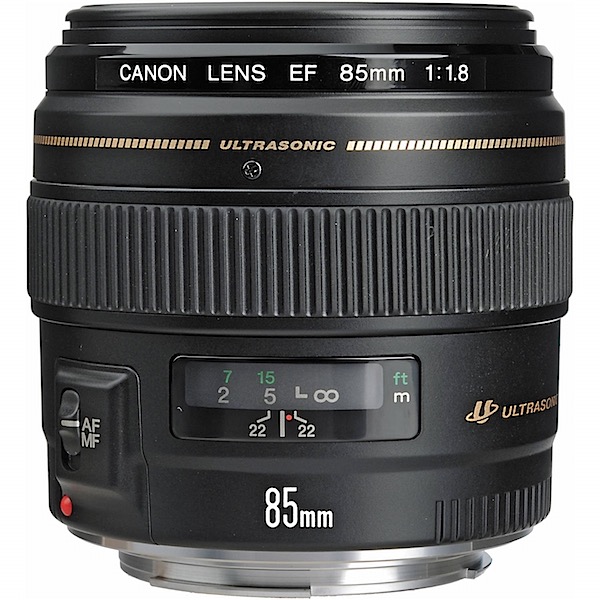
    5. Canon EF 85mm f/1.8 USM

    81XPZ7sQqsL._SL1500_.jpg

    1. Canon EF 24-70mm f/2.8L II USM Standard Zoom Lens
    2. Canon EF 40mm f/2.8 STM Lens
    3. Canon EF 24-105mm f/4 L IS USM
    4. Canon EF-S 17-55mm f/2.8 IS USM
    5. Canon EF-S 18-55mm f/3.5-5.6 IS II SLR Lens
    6. Canon EF 50mm f/1.2 L USM
    7. Canon EF 100mm f/2.8L IS USM Macro

    Nikon DSLR Lenses

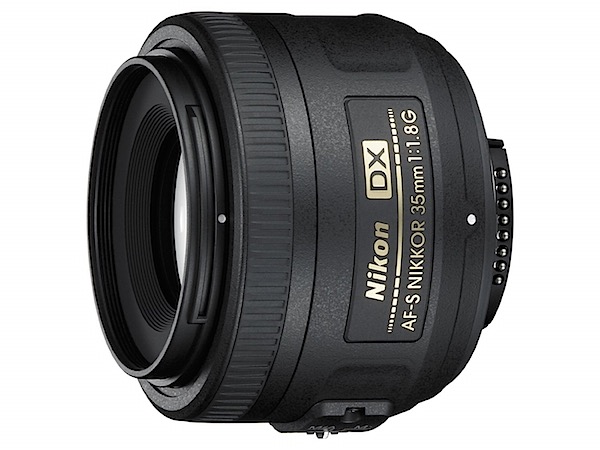
    1. Nikon 35mm f/1.8G AF-S DX

    71dJUbFOcEL._SL1500_.jpg

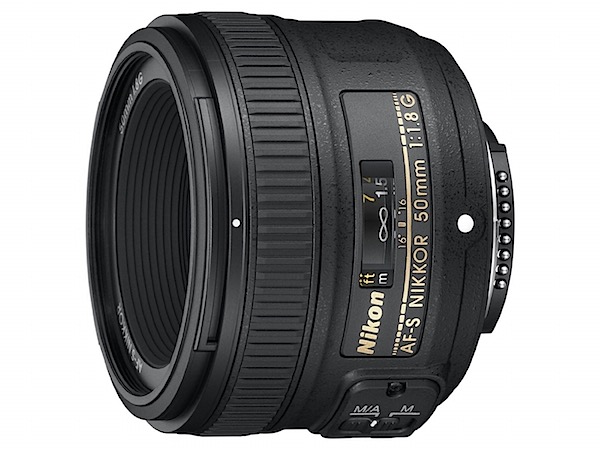
    2. Nikon 50mm f/1.8G AF-S NIKKOR FX

    712T0jBdPhL._SL1500_.jpg

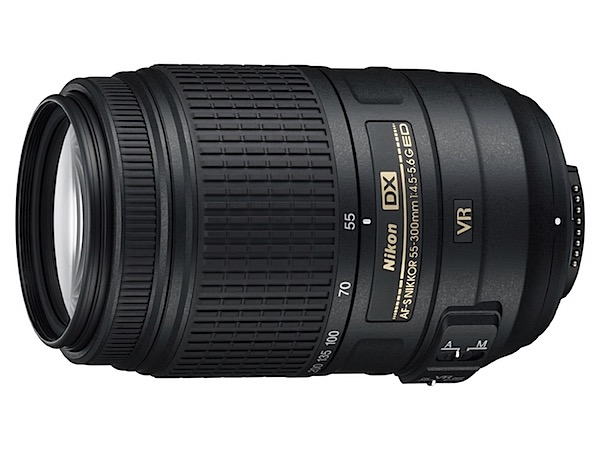
    3. Nikon 55-300mm f/4.5-5.6G ED VR

    71dAI8JvOTL._SL1500_.jpg

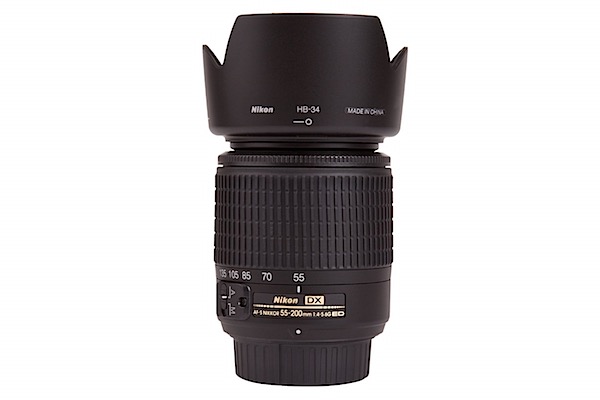
    4. Nikon 55-200mm f/4-5.6G ED IF AF-S DX

    71Ehi1XZoxL._SL1500_.jpg

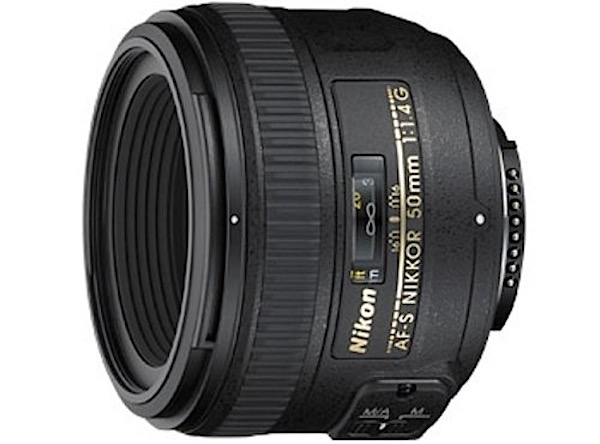
    5. Nikon 50mm f/1.4G SIC SW Prime AF-S

    41lq816JqzL.jpg

    1. Nikon 70-300mm f/4-5.6G AF
    2. Nikon 40mm f/2.8G AF-S DX Micro
    3. Nikon 28-300mm f/3.5-5.6G ED VR AF-S
    4. Nikon 85mm f/1.8G AF-S
    5. Nikon 18-55mm f/3.5-5.6G VR II AF-S
    6. Nikon 18-200mm f/3.5-5.6G AF-S ED VR II
    7. Nikon 18-300mm f/3.5-6.3G ED VR AF-S DX

    And also worth noting are the following other lenses made by other manufacturers.

    Other DSLR Lenses

    1. Sigma 70-300mm f/4-5.6 SLD DG Macro. (for Nikon DSLRs) Also available for Canon,Minolta and Sony and Pentax cameras.
    2. Tamron AF 70-300mm f/4.0-5.6 Di LD Macro (for Canon DSLRs). Also available for Nikons, Konica Minolta and Sony and Pentax cameras.
    3. Sigma 18-250mm f3.5-6.3 DC MACRO (For Canon DSLRs). Also available for Nikon and Sony cameras.
    4. Opteka 6.5mm f/3.5 HD Aspherical Fisheye for Canon DSLRs.
    5. Tokina 11-16mm f/2.8 AT-X116 Pro DX II (for Nikon DSLRs). Also available for Canon and Sony and Minolta cameras.
    6. Tamron AF 18-200mm f/3.5-6.3 XR Di II (for Canon DSLRs), Nikon, Konica Minolta and Sony and Pentax.

    *Note: as with our previous best seller lists this list was compiled from reports supplied to us from Amazon.com where we are affiliates. One of the ways dPS is able to cover its costs and be a sustainable business is that we earn a small commission when readers make a purchase from Amazon after clicking on our links (including those above). While no personal details are passed on we do get an overall report from Amazon about what was bought and are able to create this list.

    googletag.cmd.push(function() {
    tablet_slots.push( googletag.defineSlot( “/1005424/_dPSv4_tab-all-article-bottom_(300×250)”, [300, 250], “pb-ad-78623” ).addService( googletag.pubads() ) );
    } );

    googletag.cmd.push(function() {
    mobile_slots.push( googletag.defineSlot( “/1005424/_dPSv4_mob-all-article-bottom_(300×250)”, [300, 250], “pb-ad-78158” ).addService( googletag.pubads() ) );
    } );

    The post The 30 Most Popular DSLR Lenses with our Readers by Darren Rowse appeared first on Digital Photography School.


    Digital Photography School

  • Future Materials: Lightweight Carbon Fiber Architecture

    [ By Steph in Conceptual & Futuristic & Technology. ]

    carbon fiber architecture 3

    The buildings of the future might just look as lightweight as a spiderweb, seeming as if they could blow away at any moment, while actually being incredibly strong. In the past, architects had to choose between delicate looks and durability, but the development of new composite materials unveils all sorts of possibilities. The c-LITH research project demonstrates the strength of digitally fabricated carbon fiber filaments stacked in small sections.

    carbon fiber architecture 2

    carbon fiber architecture 6

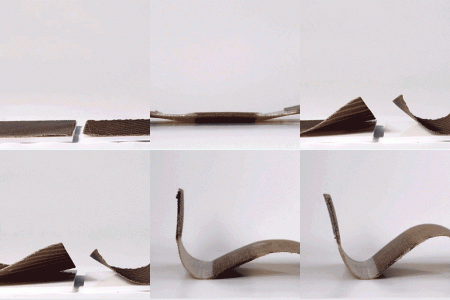
    The team created a prototype that’s 14 feet tall and 8 feet wide at the base, yet uses only 30 pounds of material. It’s made of 143 wound carbon fiber filament ‘bricks’ that can be scaled up for architectural production. The use of carbon fiber has been fairly limited in architecture, as it usually comes in panels like those used for airplanes, and isn’t exactly cost-effective.

    carbon fiber architecture 4

    carbon fiber architecture 5

    Michigan-based architecture firm Area used inexpensive cardboard molds to create the sections using carbon fiber filament pre-pregnated with epoxy resin to keep it malleable until baked. They built their own low-heat oven to cure the sections at 260 to keep the cardboard from catching fire. Once finished, the pieces were soaked in water so the cardboard could be removed.

    carbon fiber architecture 7

    The resulting bricks are stacked into a tetrahedral geometric shape, and pins connect the components, making them easy to assemble and disassemble. The designers see the possibilities as virtually endless, and it’s fun to imagine what could be made with this material at a larger scale.

    Share on Facebook


    [ By Steph in Conceptual & Futuristic & Technology. ]

    [ WebUrbanist | Archives | Galleries | Privacy | TOS ]


    WebUrbanist

  • 6 Tips for Photographing Dogs in Action

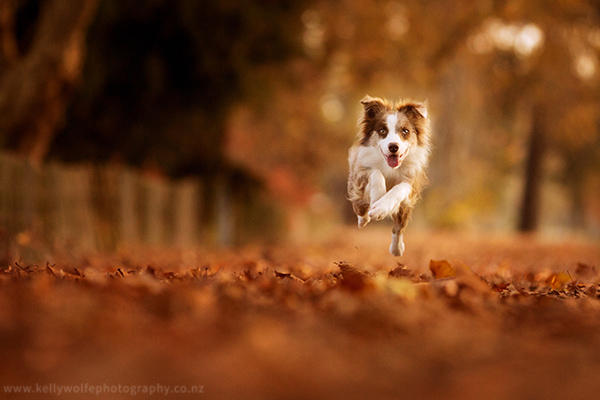
    Canine action images are my absolute favourite thing to photograph. The freedom you can see in their expressions that split second as they leap into the air in excitement, and being able to freeze that moment into a single photograph is amazing. It’s a lot of fun for the photographer, dog, owners and is a good challenge too!
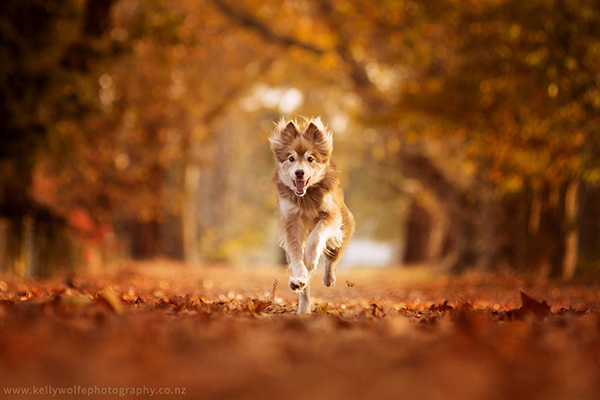
    ArticleImage1

    Safety first

    Before you attempt any of the tips in this guide, please remember that no image is worth risking the safety of you or the animal. With dogs it is important that you only choose locations where dogs are permitted, that are secure and well away from hazards such as roads, and that you are able to keep the dog under control while they are moving. Also be aware that some dogs may not be willing or able to go at a full-out run. This is okay. When photographing pets, the goal is to capture the personality of the animal. If they aren’t comfortable running then just capture them at their own pace.
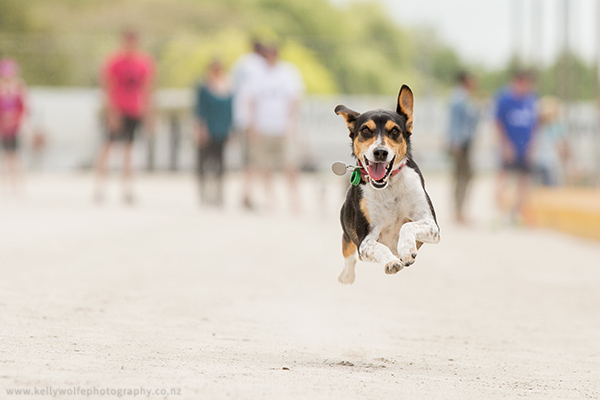
    PoochRacing

    The dogs need to have fun too!

    The key to good animal photography, in my opinion, is remembering that your animal handling skills are equally important to the shot as your photography skills. Anyone can take a perfectly focused photo with a bit of practice, but the expression that you capture in your images is what will set them apart from the rest. To get expression from the dog, it is important that both you and the owner use a very positive, encouraging voice when calling the dog, and have plenty of rewards waiting for them by the camera. Some of my personal favourites include squeaky toys, tennis balls, favourite dog treats and peanut butter.
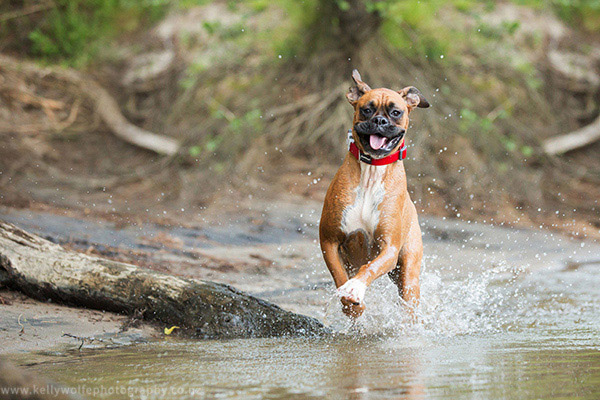
    ArticleImage2

    How do you get the dog to run the right way?

    It is helpful to know a bit about the dog’s training level, health and personality before you begin. This allows you to create a plan of action for the best way to capture the image you have in your mind. It also gives you the information that you need to keep you and the dog safe.

    For well-trained dogs with a reliable sit and stay, I have the owners ask the dog to stay in a spot around 20 metres from where I am shooting. The owners then stands directly behind me and calls them towards the camera. For younger dogs, or ones with less training, using a secure location becomes even more important. I recommend using a quiet dog-friendly park, or even the dogs own backyard to reduce distractions. If you have another person that is able to help keep the dog in place then this can be used in place of the sit/stay. Another option is to keep the dog on a lead and have the owner run alongside them. The lead can be kept or you may choose to remove it later using Photoshop. Also consider whether you need to direct them at all. Some of my favourite action images have been captured while the dogs were simply being themselves, racing around having a blast with their favourite toys during their session!

    ArticleImage3

    Choose your settings wisely

    Now that you have the tools to get the dogs going in the right direction, it’s time to focus on capturing the fun! Grab your camera and your favourite telephoto lens. My current combination is the Canon 5D MkIII with a Canon 70-200mm f/2.8 lens, though many images in this article were created with a Canon 60D. Choose a spot a good distance away from the dog which will give you plenty of opportunity to catch the right moment in their run. Also try and get down to their level. This will give you a fresh perspective of the dog and also make it easier to capture the expressions on their face as they run towards you.
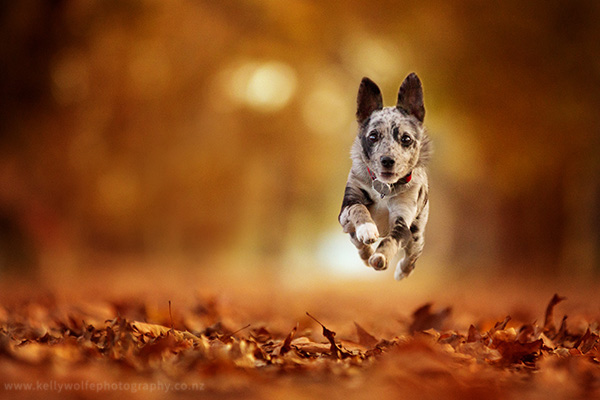
    ArticleImage4

    I photograph all my sessions in full manual mode as I enjoy having complete control over the final image. Generally I start with a shutter speed of 1/1000, an aperture of f/2.8 and adjust the ISO to suit. If you aren’t comfortable with full manual mode yet, using shutter priority mode or sports mode are both good starting points for these types of images. As you have more practice, you will find the combination of settings that works best for you and the type of photos you like to create.
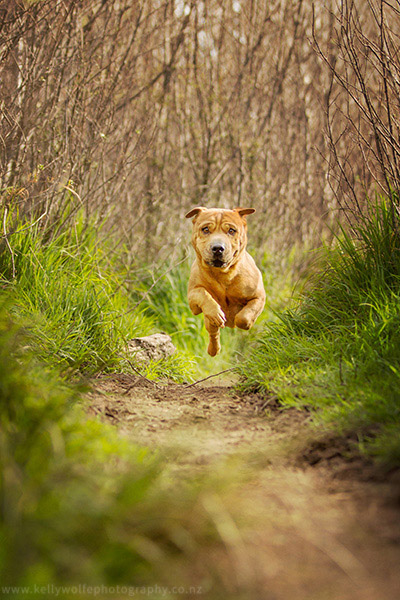
    ArticleImage5

    Nail that focus

    One of the most difficult parts of photographing dogs in action is nailing the focus. I recommend using a single focus point with the camera in AI servo mode and back button focusing. This means that the camera will continue to refocus on that single point as long as you are holding down that back button. If you aren’t already using back button focusing, give it a try – it is a great tool to have for all types of photography.
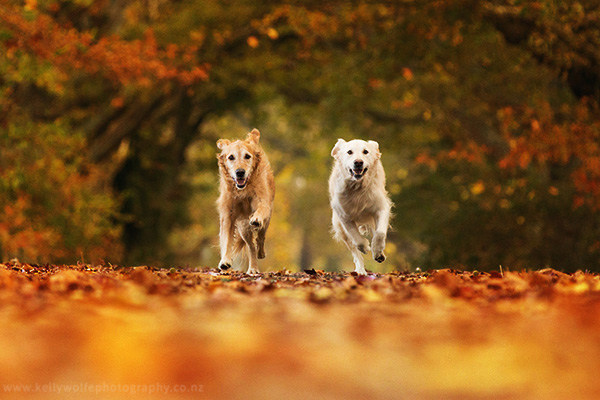
    ArticleImage6

    Timing is everything

    Another challenge you face with action images is getting the timing right. I recommend trying a method that many horse riders use. When any new rider starts taking horse jumping lessons, one of the first things they learn is to count the horses strides. Counting aloud each time the horse’s leading leg leaves the ground, this helps riders to feel when a horse is going to take off and be prepared for the jump that follows.

    This same technique works for photographing any type of animal photography. Focus on the dog as they run. Each time the dog’s front legs leave the ground, count aloud. This will give you a steady and reliable time to take the photo, and you can easily adjust it to capture different moments in their movement. This technique is definitely easier with larger dogs with longer strides, but with practice it will get easier to see the stride. Keep working at it!
    ArticleImage7

    Do you enjoy photographing dogs in action? I would love to see some of your work! Share them in the comments below.

    googletag.cmd.push(function() {
    tablet_slots.push( googletag.defineSlot( “/1005424/_dPSv4_tab-all-article-bottom_(300×250)”, [300, 250], “pb-ad-78623” ).addService( googletag.pubads() ) );
    } );

    googletag.cmd.push(function() {
    mobile_slots.push( googletag.defineSlot( “/1005424/_dPSv4_mob-all-article-bottom_(300×250)”, [300, 250], “pb-ad-78158” ).addService( googletag.pubads() ) );
    } );

    The post 6 Tips for Photographing Dogs in Action by Kelly Wolfe appeared first on Digital Photography School.


    Digital Photography School

  • Sony World Photography Awards judges revealed as deadline for entries nears

    The World Photography Organization has announced its judges for the 2015 Sony World Photography Awards. Photo editors from major publications around the world make up the judging committee. The competition is open to youth, amateurs and pros alike and is accepting entries until early January. The organization has also released a selection of standout submissions. Read more

    Articles: Digital Photography Review (dpreview.com)

  • Alien Skin offers Exposure 7 with Raw support

    Alien Skin software has announced Exposure 7, a new version of its flagship film emulation software. This iteration introduces non-destructive Raw editing, supporting files from a number of Canon and Nikon cameras as well as a handful of mirrorless models from Fujifilm, Olympus and Sony. Read more

    Articles: Digital Photography Review (dpreview.com)

  • When NOT to use a Polarizing Filter

    Yes I just blasphemed against the gods of landscape photography. Not using a polarizing filter for landscape photography could be considered sacrilegious among some circles and indeed, I myself have written ad nauseam of the importance of this simple yet powerful photographer’s tool.

    When not to use your polarizer

    Now I’m going to selectively contradict myself. The fact is that in most outdoor photography situations a circular polarizing filter can hugely improve your photographs, but there are times when leaving that shady piece of glass off the lens can actually gives better results.

    What does a circular polarizer do?

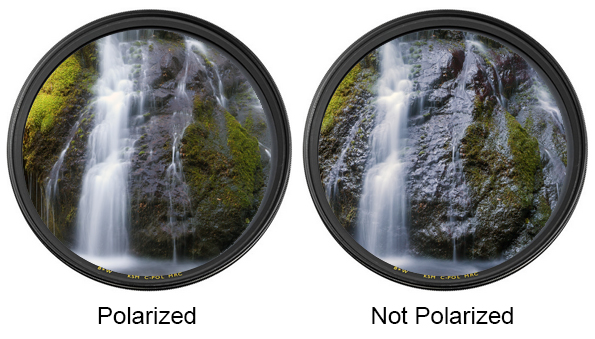
    Circular Polarizer Comparison

    As I’ve mentioned in my previous article (Why you MUST Have a Polarizer), a polarizer reduces reflected light before light enters your lens. The term circular refers to the fact that the filter can be turned by hand to engage or disengage the polarizing effect. This is most effective on reflective surfaces such as water, glass, wet rocks, cars.

    Most of the time you want to control those reflective surfaces and reduce the glare of reflected light, but what if you like that super wet look and the glare on certain surfaces? Let me show you some examples of where I felt that NOT using a polarizer actually made for a better image.

    When feflected light has colour

    When NOT to use a Polarizwer for landscape photography

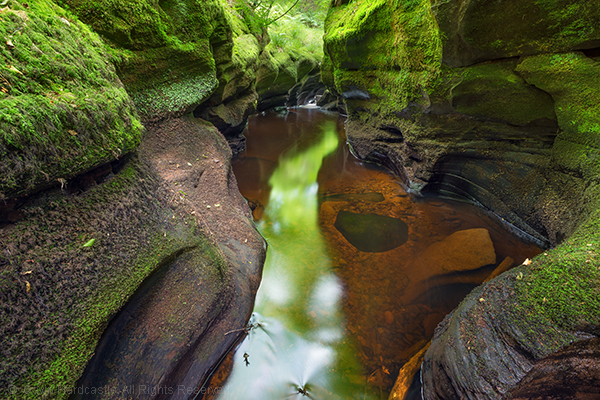
    In the image above, I decided to remove the polarizer because the reflected side light on the wet rocks in the foreground had a distinct red colour which I really liked. Using a polarizer would have reduced this red reflected light and would have made for a less dramatic image.

    When you want that super wet look

    When not to use circular polarizers in landscape photography

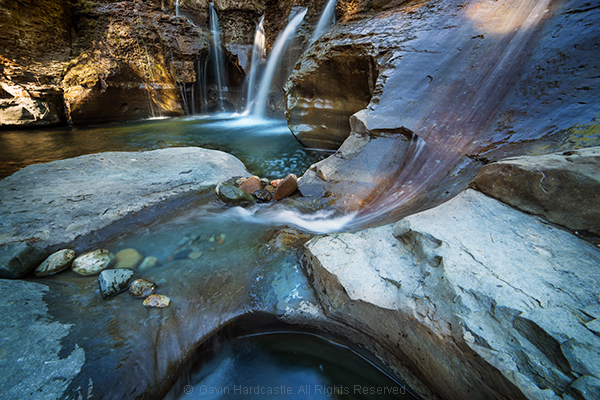
    With this image I found that the wet rocks had lovely highlights that caused a soft glare from reflected sun light. Even though the highlights didn’t really have any dramatic colour like the previous image, I still felt that wet look made for a better image so I opted not to use the polarizer

    In very low light or totally shaded areas

    When you don't need to use polarizers in landscapes.

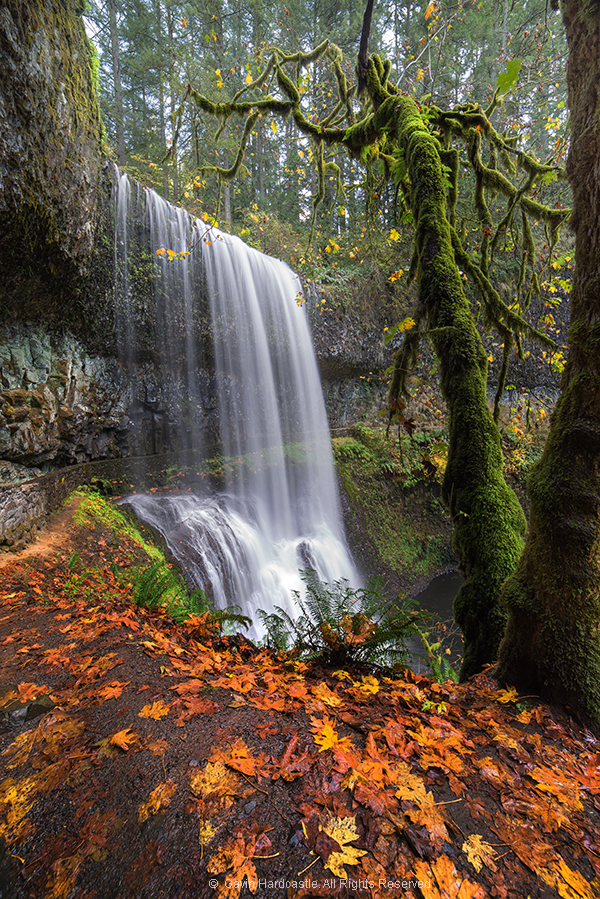
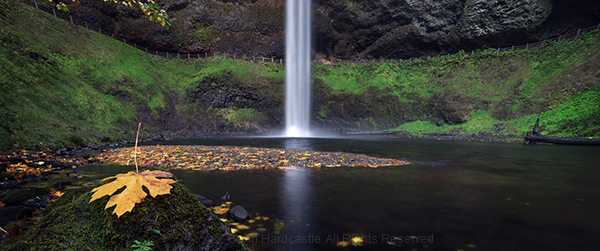
    This shot of Silver Falls State Park was a long exposure in very dim light, inside a canyon that had no direct sun light at the time. When the sun has gone down and it’s starting to get dark, there’s little point in using a polarizer for a scene like this.

    The only wet surfaces that could cause glare are the wet leaves in the foreground and it was so dim that there was no glare at all.

    Night shooting

    Don't use a polarizer for full moon photography

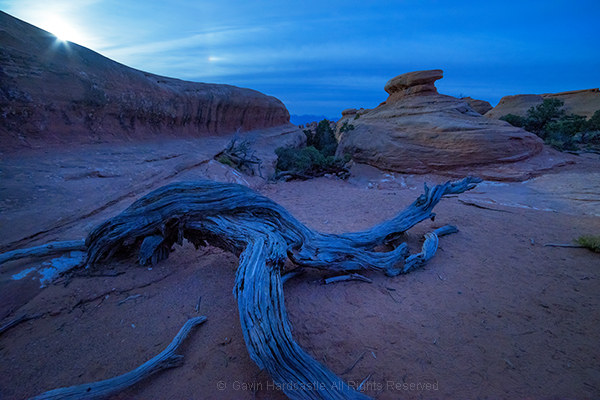
    When you’re shooting in the dark of night, it’s mostly likely that you’ll want to get as much light as possible into your lens. A polarizer is going to reduce the amount of light and force you to use a longer shutter speed or higher ISO setting. Do yourself a favour and remove the polarizer. In the full moon shot above, the polarizer would only have served to slow down my shutter speed.

    When you want reflections in water

    Not using a polarizer in landscape photography at Silver Falls State Park

    Here’s where you want the best of both worlds. Let’s say you like the look of your image WITH the polarizer on. Your colours are nicely saturated and all of the glare has been reduced from the surfaces but you’re annoyed to see that the lovely reflections in the water have either vanished or diminished.

    The simple answer is to take two shots. One with the polarizer engaged and another with the polarizer disengaged, or removed entirely. You can easily blend those two exposures in Photoshop to take the best elements from each. With the shot above I really enjoyed the look of the reflected waterfall in the pool so I took two shots with different polarizer settings and then combined them.

    When you want to shoot rainbows

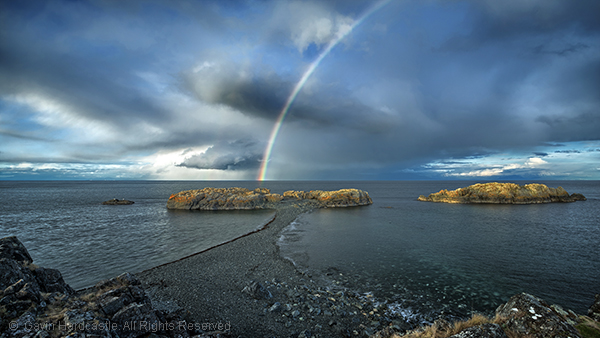
    Don't use a polarizer when shooting rainbows

    I’m sure I’ll be corrected by our more well educated readers, but from a polarizers standpoint, a rainbow IS reflected light and that means that if your polarizer is engaged, the rainbow will perform a disappearing act in your photo. Disengage or remove the polarizer and presto, it’s back in your photograph.
    But still, don’t forget your polarizer

    As I mentioned at the start of this article, most of the time my polarizers live on the front of my lenses. If I leave the house and forget my polarizers I’ll actually turn around and drive home because they’re such an essential part of my kit. That being said, it’s important to recognize when conditions call for the removal of said polarizer and I hope this article helps you to identify those golden moments so that you can get your best shots.

    googletag.cmd.push(function() {
    tablet_slots.push( googletag.defineSlot( “/1005424/_dPSv4_tab-all-article-bottom_(300×250)”, [300, 250], “pb-ad-78623” ).addService( googletag.pubads() ) );
    } );

    googletag.cmd.push(function() {
    mobile_slots.push( googletag.defineSlot( “/1005424/_dPSv4_mob-all-article-bottom_(300×250)”, [300, 250], “pb-ad-78158” ).addService( googletag.pubads() ) );
    } );

    The post When NOT to use a Polarizing Filter by Gavin Hardcastle appeared first on Digital Photography School.


    Digital Photography School