Adobe Camera Raw and DNG Converter 8.7.1 final releases are now available, adding support for the Sony Alpha 7 II and a handful of lens profiles. A bug related to chromatic aberration with the Samsung NX1 has also been addressed in this update. Read more
Month: December 2014
-
9 Tips to Help you get Sharp Focus at Night
Autofocus is so good on modern cameras that most photographers use it all the time. It seemingly never lets you down. But, let’s say it’s nighttime and you are going to do some shooting. You find a good spot. You set up your tripod. You go to focus your camera using the autofocus. You can feel the camera’s focus ring twisting back and forth, trying to focus. But it never gets there. The camera keeps hunting for a focus spot but never finds one.
Uh-oh. What are you going to do now?
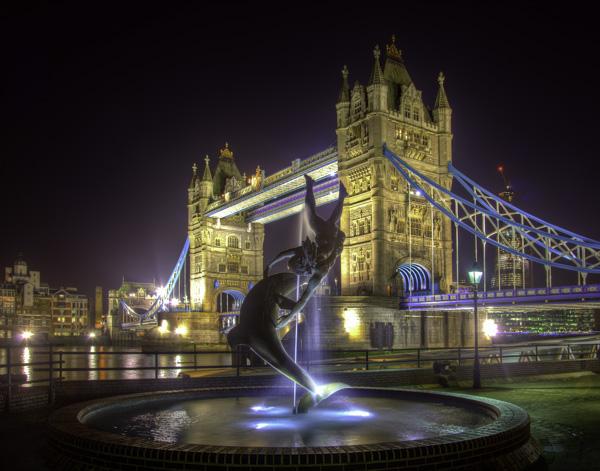
Actually, this problem doesn’t arise only at night. Your camera will typically have trouble focusing in any really dark scene. So here are some tips for dealing with that situation and focusing your camera when it is dark:
1. Aim for the bright spot
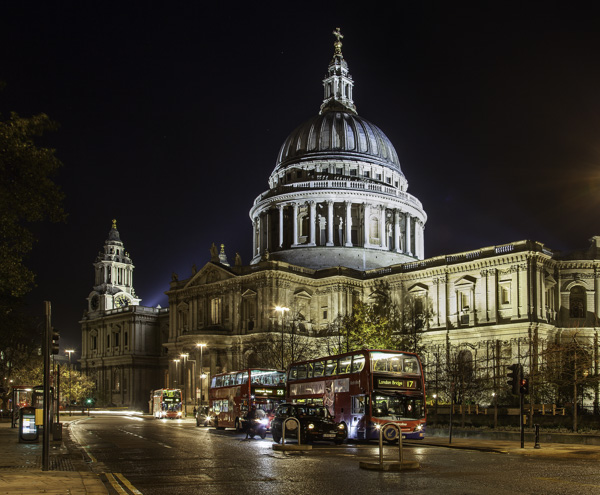
Sometimes you can still use your autofocus. Even though it is dark, most night scenes will have a bright spot or two. They might be streetlights, or a lit-up building, or even the moon. That bright spot can be used to set your autofocus.
To do so, find a bright spot that is reasonably close to your desired plane of focus (i.e., the same distance away as your focal point). Autofocusing on that point should take care of your problem. Just focus on that bright spot in a normal fashion and your camera is now focused on something the same distance away as your subject. You should then be able to take your picture with proper focus.
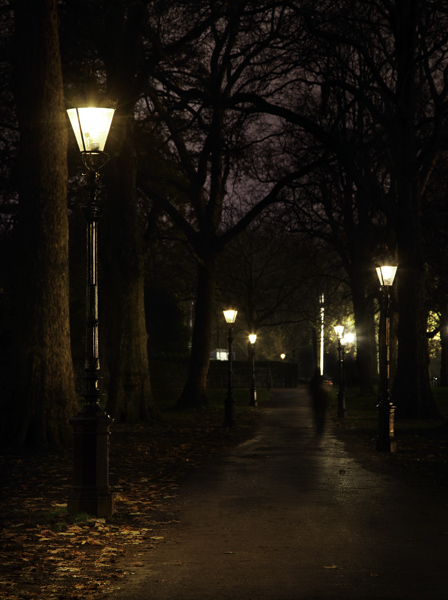
2. Focus on the edge
Most cameras focus using something called contrast detection. That means the camera will have the best chance at finding something to focus on if you aim at the area of high contrast between something bright and the dark background. So don’t aim your focus point at the middle of the bright spot in your frame. Rather, focus on the edge of the bright point. The camera will use the contrast between the very light and the very dark tones to focus.
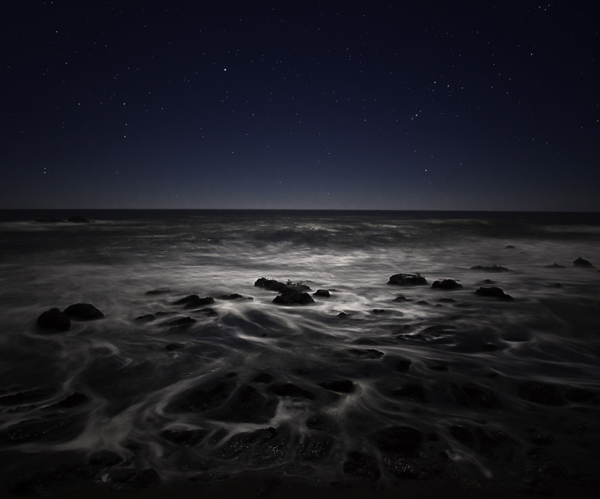
3. Use a flashlight
If you are attempting to autofocus on a relatively close subject, you can use a flashlight to assist with the focus. This is one of the many reasons to keep a flashlight in your camera bag.
To do that, shine your flashlight on your subject. That will lighten it up enough for the camera to focus on it. Set your focus, then you can turn off the flashlight and take your shot.
4. Recompose after focusing
Assume you now have your focus set using the methods set forth above. But to get that focus, you had to move your camera away from your desired composition to focus on the edge of a bright spot. Move your camera back to your desired composition to get the shot. Don’t refocus as you do so though – just move the camera and take the shot with the focus you’ve already set. (You will need to either hold the shutter button part way down, use focus lock, or focus and then turn off the AF so it doesn’t attempt to refocus once you have recomposed – or see #5 below.)
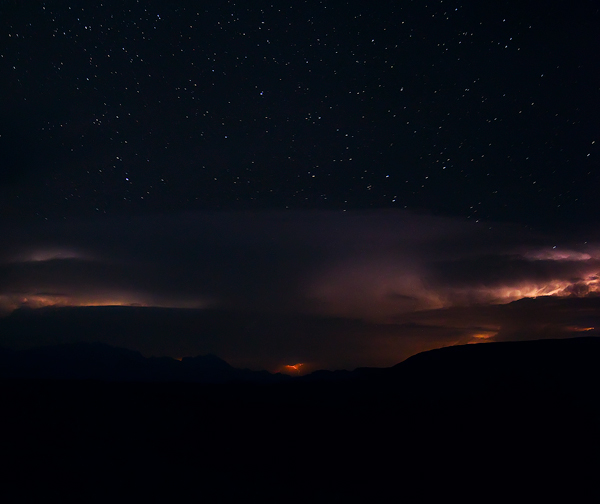
5. Use back-button focus
It is times like this, when you want to take a shot with out refocusing, that back-button focus really pays dividends. If your camera allows it, go into the menu and set up your focus so that it is not triggered when you press the shutter button halfway down, but rather is triggered when you press a button on the back of your camera. That way since your focus is not set with the shutter button, when you take the picture by pressing it there is no chance that your camera refocuses.
6. Manually focus using the lens scale
If there is nothing for you to use to set your autofocus, you might have to use the dreaded manual focus. But don’t worry, it is not difficult. In the dark, it is often easier to focus manually than hunt for something to use for autofocus.
Higher-end lenses make it easier to manually focus. In a high-end lens there should be a scale on the front that tells you the distance (in both feet and meters) at which you are focused. Use that to set the focus.
You might need a flashlight to see the scale. This is yet another reason to keep a flashlight in your camera bag.
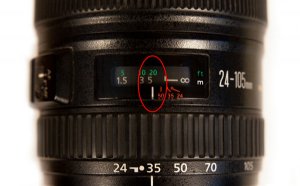
7. Manually focus by guestimating
If you cannot find a point to focus on, and your lens does not have a distance scale, all is not lost. You can guestimate and get it right in a lot of cases.
To do so, make sure you are shooting with a high aperture value (small opening, large f-number). That will create a wide depth of field to give you some wiggle room in your focus. Specifically, the wide aperture will make a wider range of things acceptably sharp in your frame.
In addition, be sure you are shooting with a wide angle lens. This is not the time to try anything telephoto. The wider angle of view creates a more forgiving environment for your focus.
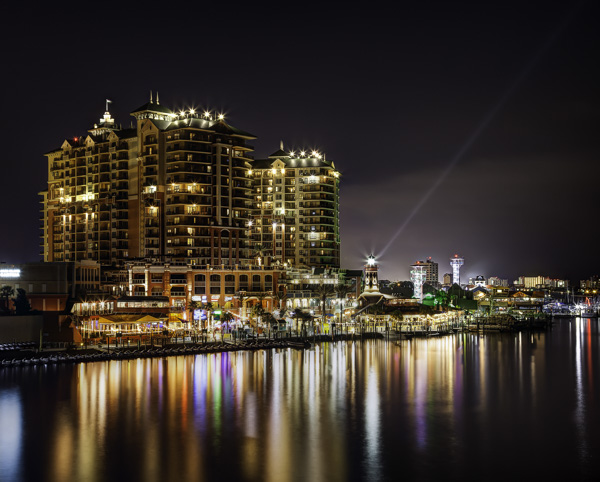
With a wide aperture and the wide angle of view, you have a broader latitude in your focusing. Now manually focus your camera. If you are shooting a broad scene that extends to infinity, set the manual focus just shy of infinity. The latitude you built-in will make things acceptably sharp all the way to infinity and a certain distance in front of your focus point as well. That will give you the best chance of having the whole scene in focus.
8. Use Live View
If you can see anything on your camera’s LCD using Live View, then you can use that to manually focus. This is frequently better because you can zoom in on your subject and clearly see if you have nailed the focus. Try using this whenever possible, as it allows a degree of control over focus that is not otherwise possible.
9. Remember you get a do-over
One of the beautiful things about digital photography is that shooting is free. Unless your scene is moving in front of you, you get a free do-over. Use it liberally. Take a shot, look at it on the LCD, and if the focus isn’t right, just do it again. If your camera allows it, go ahead and zoom in on the preview to clearly see the detail and whether or not you have nailed the focus.
Conclusion
These tips will help you set your focus at night or when you are in a very dark scene. In fact, some of these tips will also help in broad daylight when the camera thinks it is dark because you are using a 10-stop neutral density filter. Try them when your autofocus is hunting but not finding the focus. You should be able to nail the focus in almost any situation.
googletag.cmd.push(function() {
tablet_slots.push( googletag.defineSlot( “/1005424/_dPSv4_tab-all-article-bottom_(300×250)”, [300, 250], “pb-ad-78623” ).addService( googletag.pubads() ) );
} );googletag.cmd.push(function() {
mobile_slots.push( googletag.defineSlot( “/1005424/_dPSv4_mob-all-article-bottom_(300×250)”, [300, 250], “pb-ad-78158” ).addService( googletag.pubads() ) );
} );The post 9 Tips to Help you get Sharp Focus at Night by Jim Hamel appeared first on Digital Photography School.
-
My Biggest Photography Failures and What I Learned

“Success is a poor teacher. We learn the most about ourselves when we fail, so don’t be afraid of failing. Failing is part of the process of success. You cannot have success without failure.” – Rich Dad, Robert Kiyosaki
I was at a high-pressure shoot recently, and one of my clients was watching me make adjustments to my camera and lighting. They commented, “How do you remember all that stuff? You make it all look so effortless.”. The truth is that after thousands of photo shoots it has become second nature, but this wasn’t always the case.

I broke a wedding.
Why am I always checking and rechecking exposure? Because I broke someone’s wedding. Yep, broke it.
The wedding was ten years BD (before digital) and very early in my career. I was so inexperienced that I didn’t realize the flash tube on my external flash was only emitting about 1/4 of its power and, as a result, I underexposed all the images by three to four stops. They could not be salvaged. I only managed to get one useable frame.
At the time, I just wanted to crawl into a hole and stay there, but this nightmare scenario defined the style of fill flash lighting I still use today.
I also developed a pre-shoot protocol that ensured I would never have this kind of disaster again. I always test all my equipment before a shoot and check and recheck exposure as I’m shooting.
“Fears are nothing more than a state of mind. Most great people have attained their greatest success just one step beyond their greatest failure.” – Napoleon Hill
If I had not experienced this crushing blow early in my career, I might have become more slap dash as a photographer and prone to more failures, steering my career to go in another direction.
By Trevor Dennis
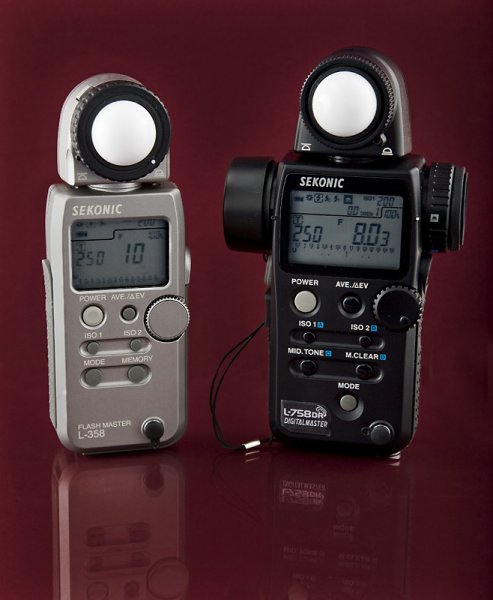
Why do I always use a light meter? Because I ruined the shot of my life by looking at my camera screen for the exposure and my hair light ended up being three stops over exposed. That shot should have stopped traffic. Instead, I lost a client.
Why do I back up twice while I’m shooting? Because an assistant (accidentally) dumped an entire shoot into the trash. I’m still in need of therapy over that one.
I’m proud to admit that I have failed spectacularly on countless occasions.
The aftermath was always the same. I’d have a complete meltdown and become a bit tired and emotional. I’d then spend a week at home curled up in the fetal position watching entire seasons of One Tree Hill and consuming my body weight in Nutella.

By Janine
As painful as each failure is, I learned something new each time, and I never made those mistakes again. They became burned into my brain.
“Failing is one of the greatest arts in the world. One fails toward success.” – Charles Kettering
You need to go out and fail, time and time again. Get up, cry for a bit, learn, grow, and move on.
At the time, these failures were devastating but I now know that my spectacular failures and toughest moments have been my greatest teachers and have molded me into the photographer that I am today.
I’m also proud to be part of a massive club of spectacular failures who have all gone on to achieve remarkable success.
Here are a few of my favorites:
- Comedian Jerry Seinfeld completely froze during his first stand up gig and was booed off stage. He went back the next night was a huge success and went on to become one of the most successful American comedians in history.
- Elvis Presley got fired from one of his first gigs and was told, “You ain’t goin’ nowhere, son. You ought to go back to drivin’ a truck.” Elvis Presley is one of the greatest recording artists of all time.
- Oprah Winfrey (my hero) was fired from her television reporting job because TV executives thought she wasn’t fit to be on screen.
She went on to create and star in “The Oprah Winfrey Show” the most watched talk show in the world, turning Oprah into a billionaire. - Winston Churchill failed grade six and lost every government position he ran for. He went on to become British prime minister at the age of 62.
And one of my all time stories of how failure led to success is Apple founder, Steve Jobs. He was devastated after being removed from the company he started. Years later in a commencement speech at Stanford University he reflected:
“I didn’t see it then, but it turned out that getting fired from Apple was the best thing that could have ever happened to me. The heaviness of being successful was replaced by the lightness of being a beginner again, less sure about everything. It freed me to enter one of the most creative periods of my life.”
When he returned to Apple, he created some of the most iconic products in the world, including the iPhone, iPad, iPod, and he went on to become one of the richest men in the world.
“Never, never, never give up.” – Winston Churchill
Have you experienced any spectacular failures, and what have you learned from them? What are your strategies for coping with failure? I’d love to hear from you.
Gina is the author of four dPS eBooks including:
- Portraits: Making the Shot
- Portraits: Striking the Pose
- Portraits: Lighting the Shot
- Portraits: After the Shot
You can buy one for $ 19.99 or grab the whole bundle for only $ 49.99 (save 38%) from any of the links above.
googletag.cmd.push(function() {
tablet_slots.push( googletag.defineSlot( “/1005424/_dPSv4_tab-all-article-bottom_(300×250)”, [300, 250], “pb-ad-78623” ).addService( googletag.pubads() ) );
} );googletag.cmd.push(function() {
mobile_slots.push( googletag.defineSlot( “/1005424/_dPSv4_mob-all-article-bottom_(300×250)”, [300, 250], “pb-ad-78158” ).addService( googletag.pubads() ) );
} );The post My Biggest Photography Failures and What I Learned by Gina Milicia appeared first on Digital Photography School.
-
Last Stop: Photo Book Documents 150 Vanishing US Rest Stops
[ By WebUrbanist in Culture & History & Travel. ]

For the last five years, this photographer has been traveling around the United States and capturing an eclectic but dying breed of roadside architecture: the American rest stop.

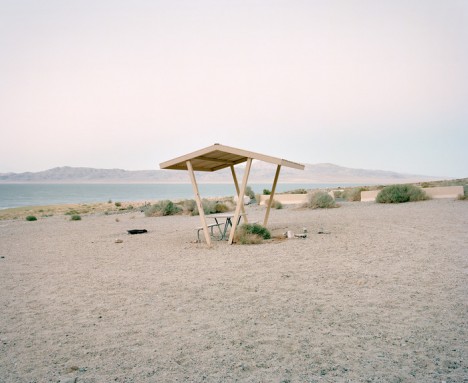


Ryann Ford of Austin, Texas, who has taken 150 pictures of these to date, notes that this architectural typology has been associated with ” rest, relief, hospitality, and nostalgia” for the last half-century. The shots shown here include Big Bend National Park, Texas (FM 170), Walker Lake, Nevada (U.S. 95), Thackerville, Oklahoma (I-35), Clines Corners, New Mexico (U.S. 66/I-40), Monument Valley, Arizona, and more.


Though The Last Stop has just reached her crowdfunding goal on Kickstarter, there is still time left to support the project in return for this oversized coffee table book which will be filled with 100 pages of images and stories. It represents both an aesthetic treat but also a critical archive of these structures, many of which are being abandoned or destroyed. Polaraids, prints and other prizes are also available.


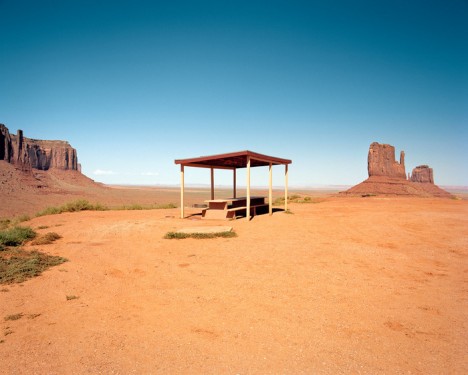

“When interstate highways were first built, passing up many small towns, rest stops were a way to reconnect people to the places they were traveling though. They gave small towns a chance to show their cultural significance. Rest areas have become relics of America’s roadside past. These sites not only illustrate a unique period in the American travel experience, but are significant for the architectural forms found within them.”
Want More? Click for Great Related Content on WebUrbanist:

Empty Spaces: Photo Book Documents Eerie Urban Ruins
Crumbling cathedrals, decaying theaters and half-destroyed camping cabins: urban explorer Johnny Joo has seen it all, and he doesn’t just document these …
Click Here to Read More »»

Go Somewhere Else: 8 Abandoned Roadside Rest Stops
Rest stops and welcome centers are to highway travel what oases are to desert caravans, with one exception: when an oasis dries up, the camels unload anyway.
Click Here to Read More »»

The Bus Stops Here! 34 Bus Stop Guerilla Marketing Hacks
Most bus stops are… less than stellar. Unfortunately, the only way most bus stops generate excitement is through advertiser-driven guerilla marketing.
Click Here to Read More »»


[ By WebUrbanist in Culture & History & Travel. ]
[ WebUrbanist | Archives | Galleries | Privacy | TOS ]
-
Vertical City Farming: Undulating Mixed-Use Urban Community
[ By WebUrbanist in Architecture & Houses & Residential. ]

Designed to provide a spaces for public gardening as well as senior living, this hybrid complex has a rich array of green roofs, terraces and facades allowing for locally-grown produce as well as civic interaction.


Responding to the fact that by 2030 a full 20% of Singapore’s population will be retirement-aged, SPARK Architects sought to address high-density housing, sustainable architecture and urban agriculture in this complex.


The layered concept involves ground-level farms and gardens open to the citizenry as well as individual, upper-level plots that retired persons can work at their leisure.


Further, “the environmental sustainability and efficiency of ‘Home Farm’ [is] enhanced by proposed features such as the collection of rainwater, for use in aquaponic systems, and the use of plant waste for energy production.”


The curvilinear master plan provides maximum sun exposure and variegated views throughout the complex, encouraging residents to walk around to exercise, interact with neighbors and experience a diverse set of internal and city views.
Want More? Click for Great Related Content on WebUrbanist:

Dense City: Mixed-Use ‘Urban Alloy’ Transit Hub for New York
Taking advantage of air rights above existing an transportation nexus, this design integrates elevated train lines, apartments, offices and shops to create a …
Click Here to Read More »»

Vertical Forests: 2 Lush Urban Towers Support 16,000 Plants
Skeptics of improbably green skyscraper concepts might want to take a moment of silence to appreciate the successful construction of these two beautiful …
Click Here to Read More »»

3D City Farms: 5 Urban Design Proposals for Green Towers
Here are five of these remarkable architectural designs for sustainable (and stylish) urban farm towers that may revolutionize agriculture as we know it.
Click Here to Read More »»
[ By WebUrbanist in Architecture & Houses & Residential. ]
[ WebUrbanist | Archives | Galleries | Privacy | TOS ]
-
Lomo’Instant vs. Fuji Instax mini 90

Schon lange liebäugle ich mit einer kleinen Sofortbildkamera. Ich habe früher viel mit der SX-70 fotografiert, damit jedoch vor ein paar Jahren aufgrund des hohen Preises und der Qualität der neuen Filme aufgehört. Nun suche ich nach einer Alternative, um schnell schöne Momente festhalten zu können.
Die Fuji Instax mini 90 NEO CLASSIC erschien bereits 2012. Ende November dieses Jahres brachte Lomography die Lomo’Instant heraus. Da beide Kameras die Fuji-Instax-Mini-Filme nutzen, kann man sie ganz wunderbar miteinander vergleichen.
Lomography schickte mir für den Test die Lomo’Instant Black im Set mit drei Objektiven im Wert von 129 €. Von Fuji bekam ich die Fujifilm Instax Mini 90 Neo Classic im Wert von 124,89 €. Preislich nehmen sich die beiden also nichts, aber wie sieht es technisch aus?

Lomo’Instant mit 35-mm-Portrait-Objektiv und Blitz

Fuji Instax mini 90 NEO Classic mit Blitz
Optik und Verarbeitung
Beide Kameras sind aus Plastik, auch die Objektive, was bei dem Preis nicht verwundert. Dafür sind sie schön leicht und liegen angenehm in der Hand. Die Fuji Instax ist ein wenig kleiner und durch das einfahrbare Objektiv sehr gut zu transportieren. Möchte man alle Objektive für die Lomo’Instant mitnehmen, dann benötigt man etwas mehr Platz.
Die drei mitgelieferten Objektive haben dafür zum Schutz Objektivdeckel. Das eingebaute Weitwinkelobjektiv ist jedoch nicht durch einen Deckel geschützt. Die Fuji Instax wirkt insgesamt durch die digitale Anzeige und das ausfahrbare Objektiv viel digitaler als die Lomo’Instant, bei der man fast alles mit Schaltern einstellt.

Lomo’Instant mit eingebautem 27-mm-Weitwinkel-Objektiv und Blitz

Fuji Instax mini 90 NEO Classic
Im Paket enthalten
Das Set von Lomography kommt mit drei Objektivaufsätzen für Portrait-, Makro- und Fisheye-Aufnahmen. Sie enthält ein eingebautes Weitwinkelobjektiv, auf das die zusätzlichen Objektive aufgeschraubt werden. Zusätzlich gibt es noch vier Farbfilter (farbige Folien), die vor den Blitz gesteckt werden können. Die Kamera arbeitet mit vier AAA-Batterien, die dazu gekauft werden müssen. Die Bedienungsanleitung ist wunderbar übersichtlich und leicht zu verstehen.
Die Fuji besitzt nur ein eingebautes 60-mm-Objektiv. Sie läuft mit einem wiederaufladbaren Akku, das Ladegerät liegt dem Paket bei. Zusätzlich im Paket ist ein schmaler, schwarzer Schultergurt und eine Bedienungsanleitung, die etwas schwer zu durchschauen ist.

Lomo’Instant mit 170°-Fisheye-Objektiv

Fuji Instax mini 90 NEO Classic
Der Sucher
Die Lomo’Instant kommt mit einer kleinen Herausforderung: Das Objektiv liegt natürlich nicht auf der Höhe des Suchers, weshalb sich das Bild, das ich durch den Sucher sehe, nicht mit dem Bild, was die Kamera macht, deckt, wie man es vielleicht von digitalen Kameras gewohnt ist. (Parallaxenfehler) Aber ich bekam schnell ein Gefühl dafür und korrigierte vor dem Auslösen ein wenig nach unten links.
Schwieriger wird es dann schon mit den Objektivaufsätzen. Ob Fisheye oder Makroobjektiv – das, was man durch den Sucher sieht, ändert sich natürlich auch nicht. Die ersten Bilder sind daher ziemlich schief gegangen. Der richtige Bildausschnitt ist gerade beim Makroobjektiv sehr schwer zu finden.
Die Fuji hat einen Zielpunkt und Parallaxenausgleich und behebt damit dieses Problem. Was man durch den Sucher sieht, sieht man nach dem Auslösen auch auf dem Bild.
Ich bin mir sehr sicher, das Lomography sich bewusst gegen diesen Parallaxenausgleich entschieden hat, denn es passt nicht zu ihrem Motto „Don’t Think, Just Shoot“ und den 10 goldenen Regeln.

Lomo’Instant mit 35-mm-Portrait-Objektiv ohne Blitz

Fuji Instax mini 90 NEO Classic mit Blitz
Möglichkeiten
Beide Kameras bieten die Möglichkeit für Langzeitbelichtungen. Bei der Fuji ist dies jedoch auf maximal 10 Sekunden begrenzt. Auch bei der Mehrfachbelichtung punktet die Lomo’Instant, denn sie erlaubt unbegrenzt Mehrfachaufnahmen, während die Fuji sich auf Doppelbelichtungen beschränkt.
Bei den Makroaufnahmen kommt man mit der Lomo 10 bis 15 cm nah ans Motiv, während die Fuji nur bis zu 30 cm scharf stellt.

Lomo’Instant mit Makro-Objektiv ohne Blitz

Fuji Instax mini 90 NEO Classic mit Blitz im Makro-Modus
Generell bietet die Lomo mehr Spielraum für Experimente dank der verschiedenen Objektive. Die Fuji hat zwar einen Landschafts- und Makromodus, mit diesen stellt man jedoch nur die Schärfebereiche ein, am Bildausschnitt ändert sich nichts.
Die Fuji hat noch zwei weitere Modi: Den Partymodus zum besseren Ausleuchten von Hintergründen und den Kindermodus für sich schnell bewegende Objekte. Bei beiden Kameras kann man selbst Belichtungskorrekturen vornehmen und beide besitzen auch einen Stativanschluss.
Die Lomo hat eine Blende zwischen f/32 und f/8 und damit die größte Blende im Sofortbildbereich. Die schnellste Verschlusszeit beträgt 1/125 s. Die Fuji Instax hat die Fixblende f/12,7. Im Unterschied zur Lomo’Instant hat die Instax jedoch einen programmgesteuerten Verschlusszeitenbereich von 1,8 bis 1/400 s.

Lomo’Instant mit 35-mm-Portrait-Objektiv und Blitz

Fuji Instax mini 90 NEO Classic mit Blitz
Der Blitz
Bei den niedrigen Blendenwerten kommt man um die Nutzung des Blitzes in Innenräumen kaum herum. Bei beiden Kameras kann man den Blitz an- und ausschalten und im Automatikmodus nutzen. Zudem besitzen beide einen intelligenten Blitz, der je nach Licht die richtige Blitzstärke wählt.
Ich habe jedoch stark das Gefühl, der Blitz der Fuji ist intelligenter, denn die Bilder waren fast immer perfekt ausgeleuchtet und kamen auch mit extrem schwierigen Lichtsituationen klar. Der Blitz der Lomo’Instant hingegen war oft zu hell, was dazu führte, das man vom Motiv oft nur noch wenig sah. Deshalb habe ich ihn draußen selten genutzt und die Bilder sind entsprechend dunkel ausgefallen.

Fuji Instax mini 90 NEO Classic unter schwierigen Lichtverhältnissen

Lomo’Instant mit 35-mm-Portrait-Objektiv und Blitz
Die Bilder
Obwohl beide Kameras die gleichen Filme benötigen, unterscheiden sich die Fotos am Ende doch. Die Bilder aus der Lomo’Instant wirken viel analoger und haben eine Vignette. Die Bilder der Fuji sind gleichmäßig ausgeleuchtet und wirken daher digitaler.
Fazit
Die Fuji Instax mini 90 NEO Classic hat mich sehr überzeugt, da ich persönlich schnell gute Ergebnisse möchte. Die Kinder beim Spielen zu fotografieren, ist damit einfach möglich. Der Parallaxenausgleich ist für mich sehr wichtig. Die Bilder werden mit der Kamera meist gut.
Lomography-Fans werden die Fuji jedoch schnell langweilig finden, denn Experimente lassen sich mit der Lomo’Instant eher realisieren. Sie bietet mehr Möglichkeiten, dafür muss man jedoch auch hin und wieder Bilder in Kauf nehmen, die nichts werden. Hat man ein Gefühl für ihre Eigenheiten entwickelt, wird das aber sicher auch viel einfacher. Wer keine Lust auf Überraschungen hat, sollte sich die Fuji genauer ansehen. Auch mit ihr kann man dank Doppel- und Langzeitbelichtung etwas experimentieren.
Für größere Experimente sind mir die Filme jedoch noch etwas zu teuer. Ein Doppelpack der Fuji-Instax-Mini-Filme mit insgesamt 20 Bildern kostet zwischen 17 und 20 Euro, wodurch ich schnell begann, die nichts gewordenen Fotos in Euro umzurechnen.
-
11. Dezember 2014
Das Bild des Tages von: sinnen

Fotolinks des Tages
1. Teuerstes Foto der Welt: Sentimental und clichéhaft
Es ist also wahr. Peter Lik hat mit „Phantom“ das teuerste Foto der Welt verkauft. Doch das Echo, welches vom Guardian zurückkommt, ist alles andere als ehrfürchtige Lobpreisung: Jonathan Jones quittiert Peter Lik Sentimentalität, Romantisierung und einen (sehr!) schlechten Geschmack. Außerdem stellt die Kritik in Vordergrund, dass das Bild selbst überhaupt keine Besonderheiten vorweisen kann, da das Internet voll mit Bildern von diesem Ort mit exakt dem gleichen Lichteinfall ist. Jones postuliert, dass der Käufer töricht war, sein Geld für ein pittoreskes Bild herauszuwerfen, in dem er es mit hoher Kunst verwechselte. ? ansehen
2. Wie Ebola-Ärzte fotografiert wurden
Das TIME Magazine ernannte kürzlich die „Ebola Fighters“ zur Person des Jahres, die mit Leib und Leben gegen die tödliche Epidemie kämpfen. Zwei Fotografen sorgten im Auftrag des Magazines dafür, den Ärzten ein Gesicht zu geben und sie zu portraitieren: Jackie Nickerson und Bryan Schutmaat. Wie kam es zur Auswahl dieser beiden Fotografen und auf welche Qualitäten wurde Wert gelegt? Dies und einige Hintergrundinformationen zur Entstehung der Portraits beantwortet der dazugehörige Artikel im Magazin. ? ansehen
3. Lytro kann jetzt Fokus-Spreizung
Lytro ist bekannt für die einzigartige Kapazität, in einer Aufnahme den Fokuspunkt anzubieten, und zwar postfotografierend in der Nachbearbeitung. Doch das Unternehmen geht mit dem Update der Desktop-Software auf 4.1 einen Schritt weiter und bietet erstmals die Möglichkeit der Fokus-Spreizung an. So geht die Schärfe über einen Fokuspunkt hinaus und es kann festgelegt werden, wo sie beginnt und an welcher (anderen) Stelle endet; in einem Bild können unterschiedliche Blenden vereint werden. DPReview bietet neben der theoretischen Erklärung zusätzlich ein Beispielbild und ein Demo-Video von Lytro an. ? ansehen
-
ACDSee Ultimate 8 introduces layer-based editing
ACD Systems has announced ACDSee Ultimate 8, bringing for the first time layer-based editing to its Digital Asset Management and image manipulation software. It offers the same image adjustment capabilities provided by ACDSee Pro 8 with the added ability to create and manipulate layers, as well as support for 32-bit and 64-bit transparency. Read more
-
Win One of Three Lenses from Tamron!
Over the last few years here at dPS, we’ve run very some very popular competitions with our partners to give away to lucky dPS readers some of their great photographic products.
We are lucky enough to be able to do it again this week!
For this competition, Tamron is giving away THREE prizes!
These three unique prizes are designed to help every level of photographer create BETTER pictures. Tamron is the world’s most awarded photographic lens line. Each will be won by a different dPS reader. Here’s what you could win:
- Tamron 16-300mm Di II VC PZD Macro – Value $ 629
- TWO – Tamron SP 70-300mm Di VC USD – Value $ 449
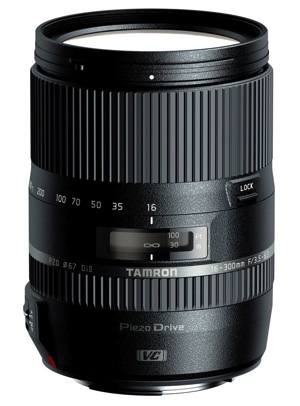 Tamron 16-300mm Di II VC PZD Macro
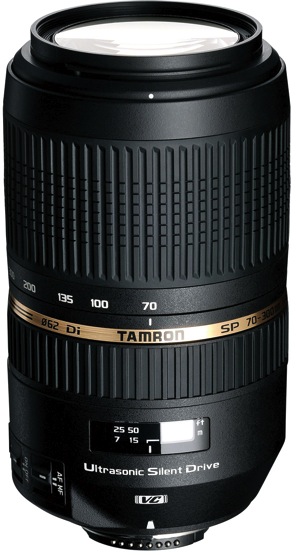 Tamron SP 70-300mm Di VC USD
Learn a little more about Tamron here: Tamron.com
How to Win
To win this competition you’ll need to:
- Visit the above lens information pages and learn more about each lens and its core use.
- Leave a comment below and tell us why you’d like to win and HOW you would you utilize each lens. Please note: there is a limit of 1 entry per person.
Do this in the next 14 days and on December 26, 2014, the sales team at dPS will choose what it considers the best three answers and we will announce the winners in the following days.
Deadline Is December 23, 2014 at Midnight PDT (UTC-8). Comments left after deadline will not be considered.
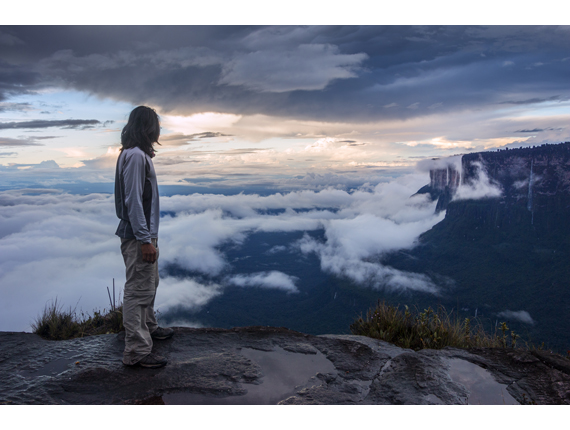
Photo by Ian Plant
By best – we’re looking for people who have an understanding of the lenses and how they will best suit your needs. So you’ll need to check out the product pages to put yourself in the best position to win.
There’s no need to write essay length comments to win – but we’re looking to hear what you like about the lenses and how it would help your development as a photographer, professionally, personally, or both.
This competition is open to everyone, no matter where you live – but there is only one entry per person. To enter – simply leave your comment below.

About Tamron
Disclaimer: Tamron is a paid partner of dPS.
googletag.cmd.push(function() {
tablet_slots.push( googletag.defineSlot( “/1005424/_dPSv4_tab-all-article-bottom_(300×250)”, [300, 250], “pb-ad-78623” ).addService( googletag.pubads() ) );
} );googletag.cmd.push(function() {
mobile_slots.push( googletag.defineSlot( “/1005424/_dPSv4_mob-all-article-bottom_(300×250)”, [300, 250], “pb-ad-78158” ).addService( googletag.pubads() ) );
} );The post Win One of Three Lenses from Tamron! by Darlene Hildebrandt appeared first on Digital Photography School.
-
7 Tips and Etiquette for Taking Portraits in Public
Facial expressions, skin and hair, and sad or sparkly faces have attracted the artist’s eye since the first caveman recorded his first story on rock. Facial features have the power to convey stories. A single image says more than a thousand words. If you are a photographer who shares this joy in the human form, you would recognize that each person is unique and beautiful in his or her own way. If you are a portrait photographer, you know how humbling it is when you are given the privilege of taking a photo.
Storytelling through portraits requires a code of conduct that should be observed. Through my experience, I have developed some rules that I follow, and I would like to share some tips and etiquette of taking portraits in public with you.
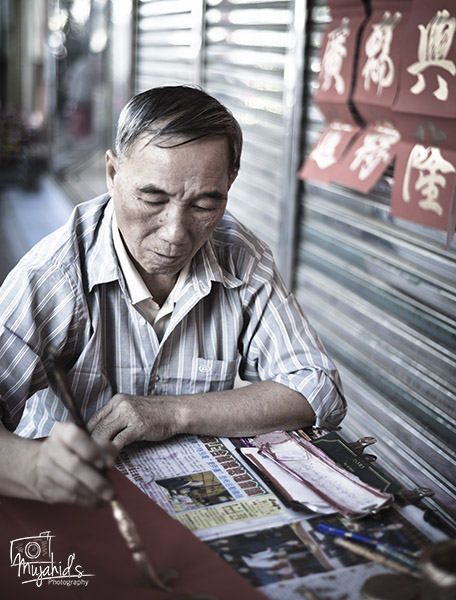
You can not only admire the beauty of the person, but also his work and workplace.
#1 – Show Your Presence
Smartphone holders, tourists, and casual snappers with DSLRs have made the jobs of serious portrait photographers a bit difficult. Photography overload has contributed toward a sort of over saturation in the population – perhaps the subjects have become weary. You are never sure of the reaction when you point your camera toward a person. If you see someone you would like to take a photo of, try to stand around for a while and become part of the scene. Observe the movements and dynamics, even try to catch their eye, but do not make the person feel uncomfortable.
#2 – Engage
If you don’t know the language, at least learn the local words to greet people. Remember, every culture has its signs of respect and ways to start a conversation, so keep those in mind. Show interest in whatever he or she is busy doing, selling, or offering. Engaging in such a manner normally makes people comfortable, and often less skeptical, of to your forbidding-looking, long lens. You come across first as an individual with a personality. Try to engage with something that you believe will be appreciated, be it about their children or their surroundings – sound them out, gauge a response. Of course, lack of response is answer enough that you do not proceed to take their picture.
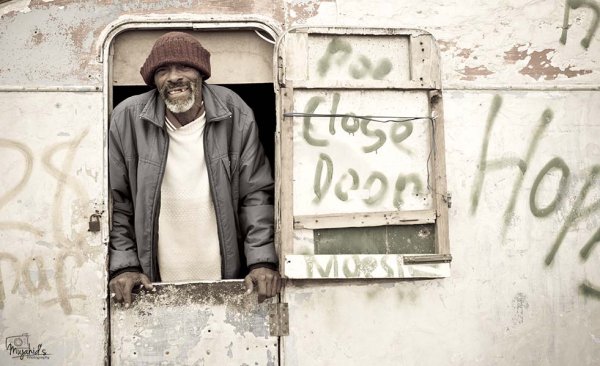
Freek, the fisherman. I said hello to him as I passed by his caravan. We chatted for a while before I opened my camera bag and requested a photo.
#3 – Ask Permission
You are allowed to take photos in public spots, even without permission. Portraits need all of what we have discussed so far. However, this is not an hour long process; you need to get to the bottom line soon. Ask permission. If it is given, help the person posing as per your preference. Do not feel bad if they refuse, accept it politely and pleasantly, and remember especially then, to be respectful. A few things I learned along the way:
- A guard asked me to gain permission from the shop owner first (cool guard!).
- I was once told by a religious person that his faith doesn’t allow taking photos.
- A tribesman allowed me to take photos of men and children only, and not of the women.
- A young girl allowed me to take her photo on condition that I would never upload it; it was for my eyes only as she was comfortable with me but not the general public.
#4 Remember People
You cannot do justice to a portrait if you do not include at the very least the name and background of the person, and preferably also age. You need to know who they were, and what their life was like. It is first and foremost a sign of respect to the person whose image you have used for your own purpose, but secondly you will realize how powerful your portraits become when contextualized. I currently use my smartphone to note down these details, but am considering carrying a dictaphone. A simple notebook will do.
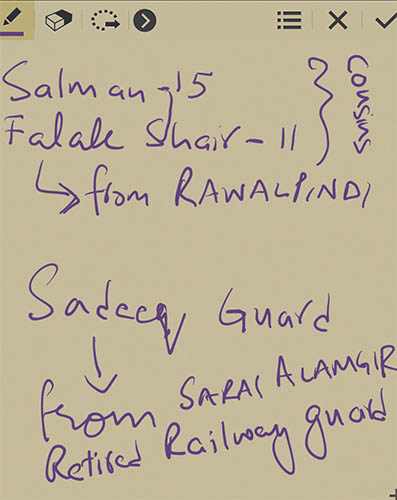
Capture their names, ages and origin.
#5 Show the results and make people feel good about themselves
If your camera allows previews, show it immediately, and get feedback. Sometime the best ideas come from the person in front of the lens. Make your new friend smile and even chat while you are taking photos. I often ask questions while I am busy taking photos. I believe it is a great technique which helps people calm down. When they are animated about something important to them, it reflects in the photo. If you have a companion with you, sometimes having them strike a conversation allows for the opportunity of candid shots of your subject with spontaneous expressions.
“Wow, you are in grade 2. This is so cool buddy, I wish I was in grade 2 again”.
“Were you a solider before Mr. Sadeeq? I feel that strength in your eyes”.
“Enrique, you remind me of my cousin… he has a beautiful mustache like you”.

After I showed the first shot to this umbrella-making lady, and told her she looked beautiful, she felt shy and even gave me a big smile.
#6 Respect their possessions
I have not followed this rule strictly, and I have regretted it several times in retrospect, after the moment passed. Once, after taking photo of a guard, I proudly showed it to him, and he asked, “Where is my gun? It is not in the photo”. His voice echoed in my mind for many days, I had missed an important aspect of what made him a guard! Not only was it integral to his identity, but what an important prop I had omitted in error. Take two.
Take a photo of the people with their surroundings to remember what they were doing. It will help you in your story telling one day!
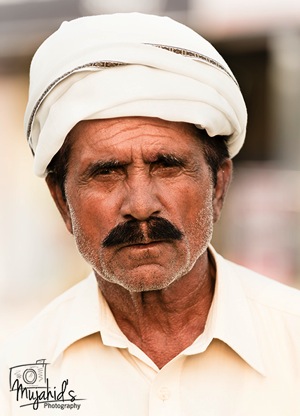
Take #1 – first photo.
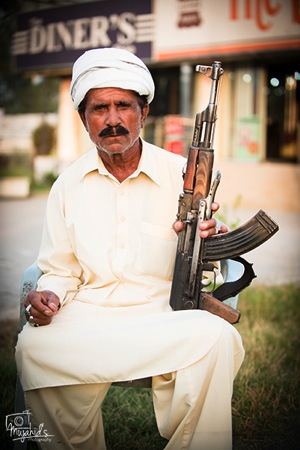
Take #2 – photo with guard’s belongings, i.e. his gun.
#7 Say Goodbye and inform them of the use of their photo (legal)
Greet properly. Ask if they would mind if it was published or uploaded. Some photographers even carry model releases on their person, for use as required. If this is not feasible, as far as language allows, at the least make your subject aware that you may use the images. Later, if you were to personally or commercially use the images, depending on the laws of your country which are variously lax and stringent, you may either need to submit a model release and/or affidavit along with the photo to make its use legal.
Remember to be informed and aware of not only the etiquette of taking portraits, but also of the legal requirements which will vary from country to country, and are a topic of their own. Be particularly cautious when photographing the faces of minors without formal consent of their parents. I still have inadequate knowledge in this area myself.
I hope these tips would help you in your portrait photography. I look forward to seeing your feedback and learning from you all.
googletag.cmd.push(function() {
tablet_slots.push( googletag.defineSlot( “/1005424/_dPSv4_tab-all-article-bottom_(300×250)”, [300, 250], “pb-ad-78623” ).addService( googletag.pubads() ) );
} );googletag.cmd.push(function() {
mobile_slots.push( googletag.defineSlot( “/1005424/_dPSv4_mob-all-article-bottom_(300×250)”, [300, 250], “pb-ad-78158” ).addService( googletag.pubads() ) );
} );The post 7 Tips and Etiquette for Taking Portraits in Public by Mujahid Urrehman appeared first on Digital Photography School.