Month: December 2013

  • Beginner’s Guide to Waterfall Photography

    There are few things more majestic than a flowing waterfall, whether it’s on the Niagara river or the little stream behind your house. There are many ways to photograph these natural wonders, and I’ve compiled a few tips, tricks, and techniques to help you get waterfall images that do justice to their elegant beauty.

    waterfall-photo-2b

    Equipment Choices

    The equipment you need will depend on what type of photo you want to make. But you probably won’t make that decision until you are on location, so here is what I usually keep in my camera bag if I’m planning on shooting a waterfall.

    • Tripod – As with most forms of landscape photography, a tripod is your best friend. It will allow you to compose your scene very precisely and give you the flexibility you need if you decide to shoot long exposures.
    • Circular polarizing filter – This is an essential piece of equipment when photographing water to allow you to remove reflections and glare from the water’s surface. You might not need this if the frame is filled with the waterfall, but you will want it handy if you decide to include a pool of water in the foreground. It will remove the reflection and allow you to see through the water to any interesting rocks underneath.
    • Neutral density (ND) filter – If you decide to shoot a long exposure and it happens to be the middle of the day when there is a lot of light, you will need this gray-tinted piece of glass placed in front of your lens. It blocks some of the light from hitting your sensor, allowing you to use a slower shutter speed. These are sold in varying strengths, and can be stacked for different levels of light absorption.
    • Lens cloth – Useful for cleaning water spray off of your lens or filter. I like to use little pieces of ShamWow for absorbing water drops. They are helpful for cleaning water off the rest of your camera too, and even your tripod legs when you are done.
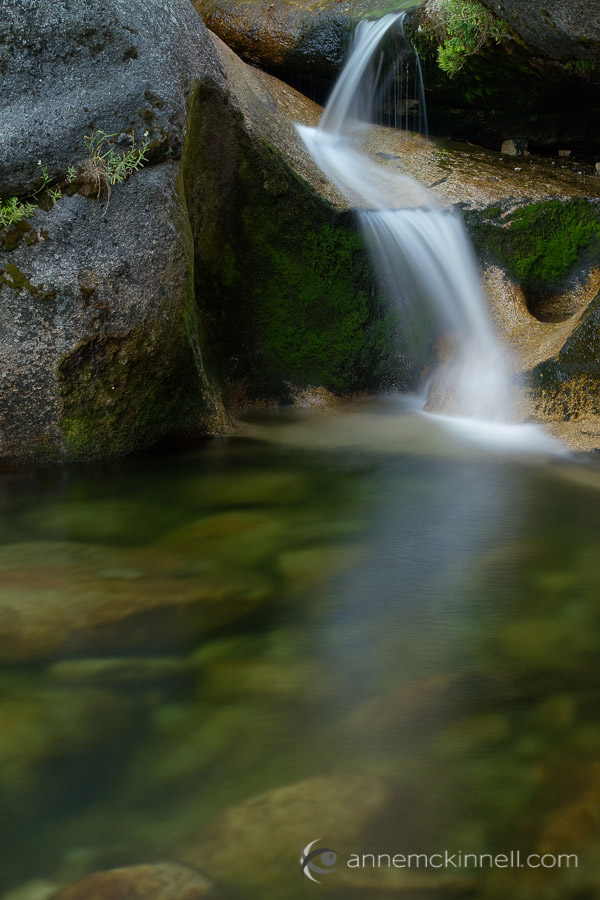
    waterfall-photo-1b

    Camera Settings

    The camera settings you use will depend on what kind of photo you’re after:

    Silky waterfalls

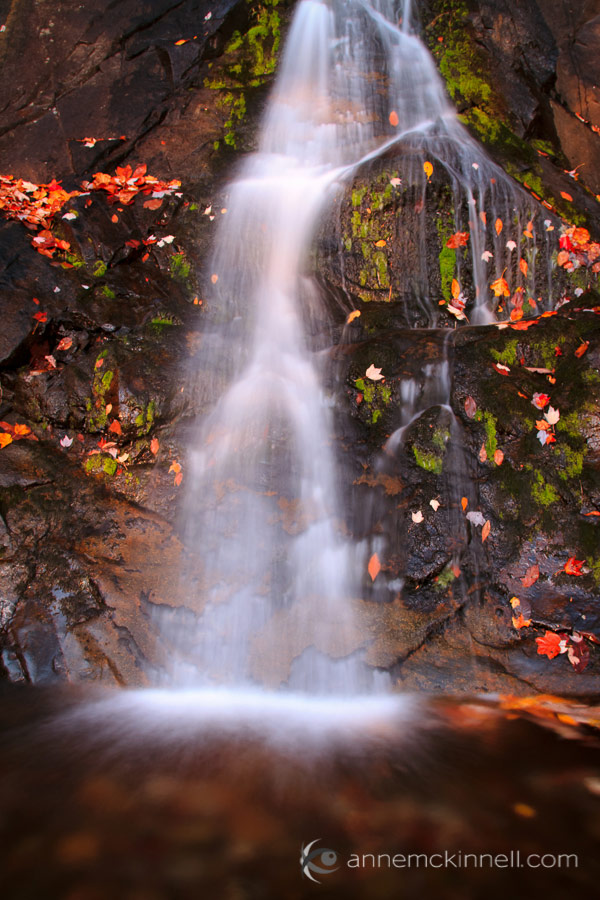
    To create that silky smooth blur popular with waterfall photography, you’ll want to use a slow shutter speed for a long exposure. With your camera mounted firmly on a tripod, set it to shutter priority mode (usually “S” or “Tv” on your camera’s mode dial) and set your ISO as low as it will go (usually 100). Then, select a shutter speed between one half second to four seconds to achieve a nice amount of blur.
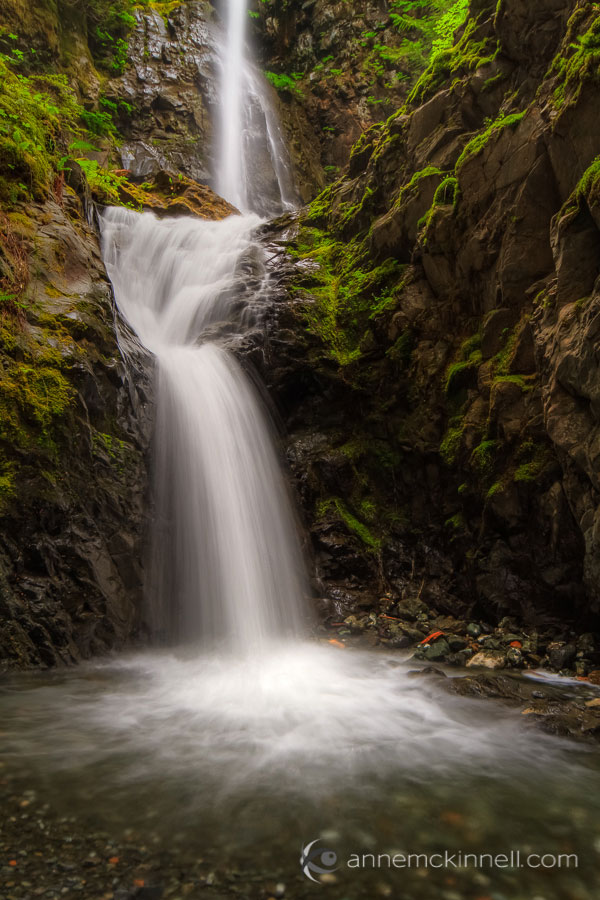
    waterfall-photo-5b

    Experiment with different shutter speeds to get the amount of blur you want. The best shutter speed will depend on how fast the water is moving, so getting the shutter speed just right takes a bit of experimentation. If you cannot get a slow enough shutter speed for the effect you want, use a smaller aperture so that less light enters the camera. That will allow you to select a longer shutter speed. If you still need a slower shutter speed, that’s when you can use a neutral density filter to block some of the light.

    Keep in mind that when using a long shutter speed, if there are any plants or trees in your frame they may have an opportunity to move if there is any wind, and then everything in the image will be blurry. For this type of a scene, it is usually better to photograph earlier in the day when there is little wind.

    Freezing the motion

    Especially interesting when photographing violent falls, this requires just the opposite technique – you want a fast shutter speed to capture a brief moment and suspend the water’s movement in the air. Use shutter priority mode and select a faster speed such as 1/500th of a second or faster.
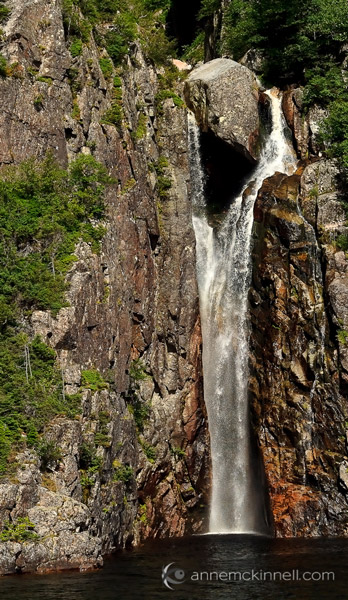
    waterfall-photo-3b

    For this technique you wont need a neutral density filter and you might even be able to get away without using a tripod. If you are in a low light situation, to get a fast shutter speed you may need to use a larger aperture such as f/5.6 to let more light in, and you can increase the ISO to 200, 400 or as high as you need to go to allow a fast shutter speed.

    Detail shots

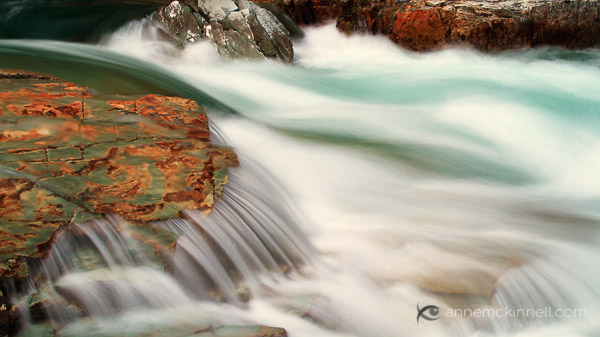
    Instead of getting a broad landscape style shot, you might want to close in on an interesting rock, plant, or other detail of your scene. For this, compose your shot (use a tripod if possible) and turn your camera to aperture priority mode – “A” or “Av” on your mode dial. This will allow you to have control over the depth of field, or how much of the picture is in focus from front to back.

    The aperture value is shown as an f-stop. F-stop numbers are a little confusing because the smaller numbers represent a larger opening and vice versa. I find it helpful to think of it as a fraction. F/8 is smaller than f/4 because 1/8 is smaller than 1/4.
    waterfall-photo-6b

    Small apertures let less light in, but they increase the sharpness in the foreground and background. Large (or “wide”) apertures, on the other hand, mean that only part of the picture is in focus, while the rest becomes soft and out of focus.

    Look at your scene and decide what you want in focus and what should be blurry. If you want to isolate your main subject, choose a large aperture (small f/number) such as f/4 or f/2.8 to make the background out of focus. If the background is important to the picture, choose a small aperture (large f/number) like f/16 or f/22 to make the entire scene sharp and clear.

    Composition

    There are many compositional techniques to employ when creating waterfall images. First and foremost, remember the rule of thirds and how your eye is drawn through the image. Use the leading lines inherent in flowing water to create visual pathways for the viewer to follow, remembering that corners are very strong entry and exit points in the frame. Pay attention to both the foreground and background, and don’t forget to pay attention to what’s around the water, as well as the falls themselves.
    waterfall-photo-4b

    Field techniques and summary

    • When you arrive at any scene, the first thing to ask yourself is, “What makes this place unique?”. Pay special attention to that quality.
    • Bracket your shots to make sure you get the best possible exposure – this means taking several pictures using different apertures and shutter speeds, and also making several different images using the camera’s exposure compensation (+/-) to brighten or darken each shot to a different degree. See your camera’s manual for specific instructions on how to use these features.
    • Shoot in the uncompressed RAW format to allow for more flexible fine tuning in post processing. RAW images must be processed with a compatible photo editing program, or software that was included with your camera.
    • Experiment – most of all, don’t get stuck making the same type of photograph all the time. Try to make a long exposure, a fast exposure, some detail shots, and try different perspectives so you come home with a variety of images from your photo shoot.

    Gear mentioned in this article

    • tripods – link to some of the best, and most popular brands
    • neutral density filters – make sure to get the right filter size for your lens, or biggest one and a step down ring to your smaller ones
    • lens cleaning cloth

    The post Beginner’s Guide to Waterfall Photography by Anne McKinnell appeared first on Digital Photography School.


    Digital Photography School

  • All That You Need in Your Camera Bag for a Successful Wedding Photography Shoot

    There are many challenges to successful wedding photography, and it can be a hectic day, even for skilled photographers.It includes the photography of activities involving the wedding and photographs of the family members, friends and couple before the marriage, as well as coverage of the wedding day and post wedding. It’s a viable endeavor that supports the efforts of many Continue Reading

    The post All That You Need in Your Camera Bag for a Successful Wedding Photography Shoot appeared first on Photodoto.


    Photodoto

  • Tamron announces availability of 150-600mm F/5-6.3 telephoto zoom

    Tamron_SP150-600mm_Di_VC_USD.png

    Tamron has announced that its SP 150-600mm F/5-6.3 Di VC USD telephoto zoom will go on sale on December 19th in Japan, and 17th January 2014 in the USA. The lens will feature optical image stabilization and an Ultrasonic Silent Drive autofocus motor, and be compatible with both full frame and APS-C SLRs. It will be available first in Canon mount, with Nikon and Sony versions to follow. Pricing is still to be confirmed.

    News: Digital Photography Review (dpreview.com)

  • 16. Türchen: WhiteWall

    16. Türchen

    Die eigenen Bilder groß an der Wand hängen haben und das auch noch in Museumsqualität. Möglich ist das Dank Whitewall. Hier findet Ihr alles, was Ihr dafür benötigt: Verschiedenste Drucke, Passepartouts, Rahmen und Bildaufhängungssysteme.

    Es gibt sogar Fotokunst, solltet Ihr nicht Eure eigenen Arbeiten übers Sofa hängen wollen. Auf dem „Kunstmarkt“ gibt es limitierte Editionen toller Fotografen zu kaufen. Und wer schon genügend Bilder in der Wohnung hat, der kann schlussendlich auch ein Fotobuch gestalten und binden lassen.

    WhiteWall

    Bei so viel Auswahl verliert man schnell mal den Überblick und für alle, denen Entscheidungen schwer fallen, stellen wir hier die Alu-Dibond-Produkte vor.

    Bilder auf Aluminius kaschiert wirken durch den fehlenden Rahmen zeitlos und minimalistisch. Whitewall bietet den Direktdruck auf Alu-Dibond, gebürstetem Aluminium und den echten Foto-Abzug auf Alu-Dibond an. Zum Schutz liegt bei letzterem auch eine hauchdünnen UV-Folie über dem Abzug.

    Aluminium hat mehrere Vorteile, es ist stabil und leicht. Mehr über diese Druckart findet Ihr hier auf den Info-Seiten von WhiteWall.

    WhiteWall

    WhiteWall macht gleich mehrere Leser von kwerfeldein glücklich, denn in diesem Türchen liegen fünf Gutscheine mit einem Wert von je 50 €. Selbstverständlich könnt Ihr diesen einlösen, ganz ohne einen Mindestbestellwert beachten zu müssen. Nur eine Barauszahlung ist nicht möglich.

    Um einen der fünf Gutscheine zu gewinnen, schreibe einen Kommentar unter bürgerlichem Namen und gültiger E-Mail-Adresse bis heute um 24 Uhr. Danach verlosen wir sie per Zufallsgenerator unter allen Kommentatoren. Die genauen Gewinnspielregeln findest Du hier. Viel Glück!


    kwerfeldein – Fotografie Magazin

  • Art of Building contest: Vote for your favorite photo

    Lady_in_Waiting_by_Linda_Wride.JPG

    An eerie view from Alcatraz, the use of child labor in India and a symbol of the Soviet Union’s past industrial rush are some of the finalists in this year’s international Art of Building photography competition run by the Chartered Institute of Building. A panel of judges shortlisted 15 images. Now the contest turns to you to decide the winner. Learn more

    News: Digital Photography Review (dpreview.com)

  • Vom Lesen des Lichts

    Ein Beitrag von: Stavros Stamatiou

    Obwohl ich mich schon 30 Jahre mit der Fotografie beschäftige, habe ich eigentlich das Gefühl, ein neuer Fotograf zu sein. Da ich weit entfernt von großen Städten lebte, war es für mich unmöglich, Seminare und Worshops zu besuchen. So nahm ich jede Möglichkeit wahr, die mir blieb.

    Ich las viele Bücher und Magazine und besuchte Fotoausstellungen. Ich richtete mir eine Dunkelkammer ein und verbrachte viele Stunden in dieser magischen Höhle. In den letzten sechs bis sieben Jahren ändere sich dann alles stark.

    Das Internet hielt mich auf dem Laufenden und ich kam in Kontakt zu vielen großenartigen Fotografen. In Fotoforen traf ich auf Menschen mit derselben Leidenschaft. Ich begann, das Wesen der Kunst der Fotografie zu erforschen sowie die dazu gehörenden Fragen des „Was“, „Wie“ und „Warum“ zu vertiefen.

    © Stavros Stamatiou

    © Stavros Stamatiou

    Zur gleichen Zeit brachte mich ein anderer Umstand in der Fotografie weiter: Ich begann, von der analogen Fotografie in die digitale zu gehen, die mir die Möglichkeit gab, ohne große Kosten zu experimentieren. Und als meine Kinder groß waren, hatte ich auch mehr Zeit, die Fotografie systematischer anzugehen.

    Heute lebe ich in einem Vorort von Thessaloniki und arbeite als Lehrer im öffentlichen Bereich. Ich besuche Workshops und Seminare, die sich mit künstlerischer Fotografie beschäftigen und zeige auch selbst meine Arbeiten in Ausstellungen.

    © Stavros Stamatiou

    © Stavros Stamatiou

    Ich fotografiere täglich. Es ist eine Notwendigkeit, tief in mir, die mich dazu drängt, das zu tun. Ich fotografiere, weil ich durch die Fotografie lerne, die Welt um mich zu sehen. Ich liebe das „Lesen“ von Licht und spiele mit den Schatten.

    Ohne dabei den Blick auf die einfachen, täglichen Dinge zu verlieren, auch wenn es nur Bilder von Objekten oder Ausdrücke der Menschen sind. Die Gunst des Surrealismus, die entsteht, enthüllt die Geschichte, die ausgeblendet ist.

    Ich mag die Straßenfotografie vor allem, weil sie rein ist und sie mich wach hält. Ich akzeptiere die Tatsache, dass die Wirklichkeit mehr Fantasie hat als ich. Die Realität bietet mir die Inhalte, die ich brauche, um ein Foto zu machen. Und, wie Fred Herzog sagt: „Der Inhalt kann nicht hergestellt werden. Das, was ich finden kann, ist besser als das, was Sie machen können…“

    © Stavros Stamatiou

    © Stavros Stamatiou

    Eine andere Sache, die ich an der Straßenfotografie mag, ist das Zufällige und Unberechenbare. Selbst, wenn ich glaube, alles unter Kontrolle zu haben, suche ich nach dem Unvorhersehbaren. Meyerowitz stellt klar: „Das Beste an der Straßenfotografie ist, dass das Unvorhersehbare auftritt.“

    Ich bin selten gereist, sodass meine Fotos alle in einem Radius von 20 Kilometern um mein Haus aufgenommen wurden. Ich besuche immer dieselben Orte, gehe dieselben Wege.

    Es klingt vielleicht langweilig, aber es macht mir Freude, zu entdecken, wie dieselben Dinge sich mit verschiedenen Lichtverhältnissen, Jahreszeiten oder Menschen verändern. Außerdem erinnert es mich an Elliot Erwitts bekannten Ausspruch: „Man kann überall Bilder finden.“


    kwerfeldein – Fotografie Magazin

  • Infinity Rooms: Mirrored Spaces Reflect Endless Starlight

    [ By WebUrbanist in Art & Installation & Sound. ]

    mirror room off center

    The experience calls the mind the climactic moment of the classic 2001: A Space Odyssey by Arthur C. Clarke, in which our protagonist stares into the void and proclaims “it’s full of stars” in awe before being whisked off to a galaxy far away.

    mirror infinity installation nyc

    mirror room vertical shot

    This pair of eye-popping installations in New York by Yayoi Kusama  at the David Zwirner Gallery takes visitors into a field of suspended and spectrum-spanning LED lights, organically staggered like stars, and wall-to-wall, floor-to-ceiling mirrors.

    mirror room self shot

    mirror room infinite selfie

    The all-encompassing effect extends to the very door you enter through and close behind you, leaving you and as plank (Silver Surfer board, perhaps) as the only objects in a sea of apparent infinity(images by Steven Meidenbauer, and Rebecca Dale Photography via Colossal).

    mirror room star lights

    The artist has been making rooms along these lines for nearly half a century, but in these latest LED-filled wonderlands are the most immersive to date. The show also includes a series of illuminated sculptures, projected videos and wall-hung paintings, but culminates in this pair of these so-called Infinity Rooms that seem to step beyond the boundaries of an art gallery in exist in worlds all their own.

    Share on Facebook


    [ By WebUrbanist in Art & Installation & Sound. ]

    [ WebUrbanist | Archives | Galleries | Privacy | TOS ]


    WebUrbanist

  • Review Canon Powershot S120 Digital Camera

    Review Canon Powershot S120 Digital Camera

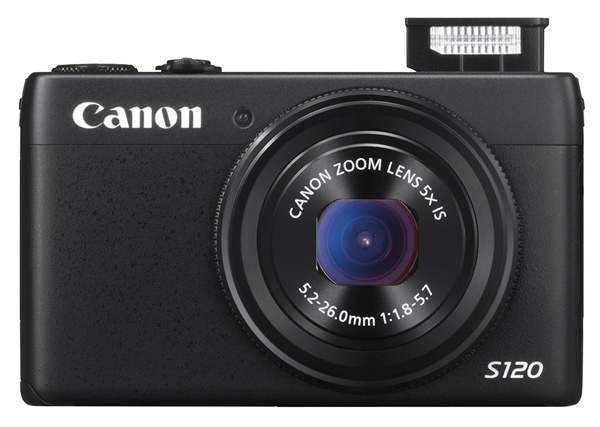
    Canon S120 review Blk front 2

    You could wonder at my bravado in reviewing this tiddler when all it seems to offer is a digicam with moderate specs and little else. Aah! But look further!

    Features and Specs

    Its story begins with Canon’s well-tried DIGIC 6 processor, along with a relatively large CMOS sensor. The maximum aperture is a generous, optically stabilized f/1.8, which does, quickly fall to f4 once you start zooming. However, it is the first S-series model to feature an f/1.8 lens and the 24mm wide end is extremely useful for tight interiors.

    But the S120′s specs are well worth comparing to the highly regarded SX50 HS, which I reviewed a year ago, equipped with a powerful 50x optical zoom.

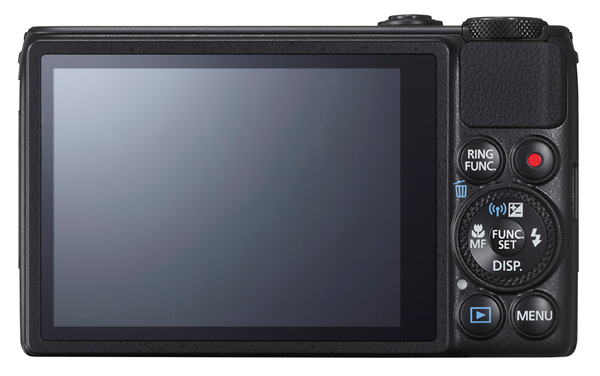
    Canon S120 review Black Back

    This one is a much less powerful beast optically, with a moderate 5x optical zoom, but it also has a larger CMOS sensor and a continuous shooting speed of up to 12fps. It’s also considerably smaller, more easily pocketable and easier to use.

    Much like almost every camera offered in 2013, the S120 has inbuilt WiFi connectivity, so it can hook up directly to smart devices and social networks. Settings can be adjusted in a number of ways: through the dedicated control buttons, via the 7.5 cm touch screen or with the lens control ring. The camera also supports GPS tagging via a mobile, allowing location data to be added to shots using Canon’s dedicated app for smart phones/tablets.

    Maximum image size is 4000×3000 pixels, leading to a final print size of 34x25cm print (13.4×9.8″) at 300 dpi.

    Video can be shot in 1920×1080 Full HD quality MPEG4. If you shoot stills during a video record the latter stops.

    A look around – physical features and controls

    The camera is, as I have said, very pocketable and viewable, thanks to the 7.5cm LCD screen which does not, unfortunately, tilt. Oh well!

    Top deck, at left is the tiny pop up flash; to the right is the power button and the shutter button that encircles the zoom lever; at the extreme right is the mode dial with positions for auto and hybrid auto shooting, P,A,S,M, custom settings, movie, camera effects (high dynamic range, fish eye, background defocus, mono etc) and scene effects (portraits, snow, starry skies, fireworks, time lapse etc).

    You can adjust shutter speed or aperture — and manual — value by rolling the control dial to that setting (Tv, Av or M), then twirl a ring at the base of the lens. Simple! Just like a real camera!

    There are plenty of people out there who will enjoy the easy access to the camera and scene effects offered by the camera and I wouldn’t mind betting there are plenty of newbie DSLR owners who still have no idea how to set the camera to handle these off-beat beat subjects.

    The only flaw I found in the top deck layout was the difficulty of tapping the recessed power button. For the life of me, I can’t suggest an alternative arrangement!

    Canon s120 review Ring Function

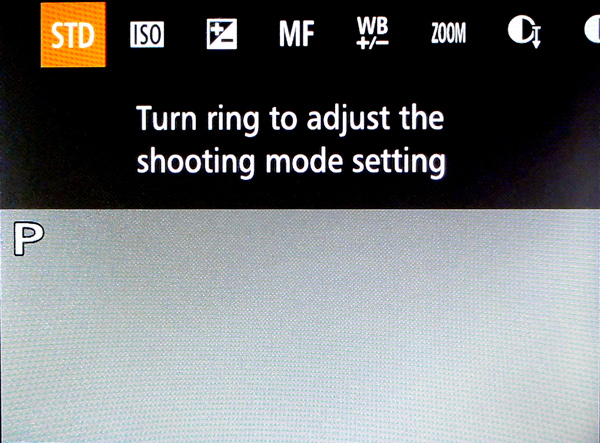
    Rear: at top right is the familiar red video record button and, to its left, is a button titled Ring Function which gives direct access to such things as ISO, exposure compensation, manual focus, white balance correction, dynamic range and shadow correction. The latter takes the S120 into a totally different area, with access to high control of your picture making. Worth some study. Lower, we find the control dial with settings for exposure correction, macro shooting, flash and display options.

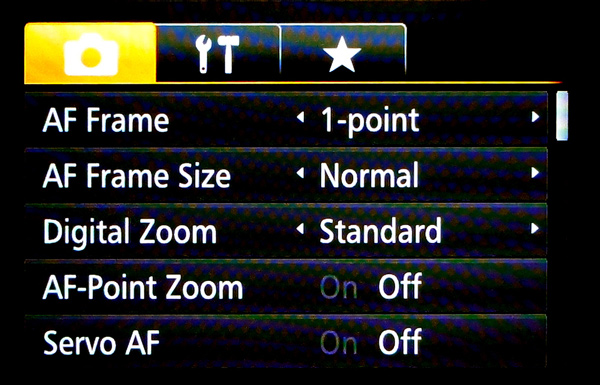
    Canon S120 reiew Menu

    Beneath the dial are found the replay and menu buttons, with the latter offering a fairly extensive extensive list of options. Noteworthy also is the on screen level indicator, and that’s about it.

    Sample images from the Canon S120

    Canon s120 review Centre screen 1

    Canon S120 review Decorations 2

    Canon S120 review Flowers 2

    Canon S120 review Parking 2

    Startup time

    It took two seconds from power on the first shot, then about a second between shots.

    Distortion

    There was a small amount of barrel distortion at the wide end of the zoom but no problems at the telephoto end.

    ISO Tests

    Canon PowerShot S120 ISO 100

    Canon PowerShot S120 ISO 400

    Canon PowerShot S120 ISO 800

    Canon PowerShot S120 ISO 1600

    Canon PowerShot S120 ISO 3200

    Canon PowerShot S120 ISO 6400

    Canon PowerShot S120 ISO 12800

    Noise begins to creep in at ISO 3200. By ISO 6400 noise is up a little more but what is really noticeable is the fall off in definition, both of which factors make shooting at ISO 12,800 a none event, compounded by some ugly pixel clumping at that setting.

    Overall comments

    • Quality: average
    • Why you’d buy the camera: small; a surprisingly generous list of picture control options; nice wide 24mm wide end of the zoom
    • Why you wouldn’t: zoom is not long enough for sports photography
    • It’s not a big deal, but the S120 is one of the few digicams that let you replay your images by tapping that button — and not needing to fire up the power button first

    If you’re still using a simple digicam but have higher ambitions, shoot-wise, this would make an ideal bridge camera to sharpen your camera skills before you leap into the fast running waters that encircle a DSLR!

    Good gear!

    Specs

    • Image Sensor: 12.1 million effective pixels
    • Sensor: 15mm CMOS
    • Metering: Evaluative, centre-weighted, spot
    • Lens: f1.8-5.7/5.2-26mm (24-120mm as 35 SLR equivalent)
    • Exposure Modes: Auto, Program AE, shutter and aperture priority, manual
    • Shutter Speed: 15″-1/2000 second
    • Memory: SD/SDHC/SDXC (UHS Speed Class 1 compatible)
    • Image Sizes (pixels): Stills: 4000×3000 to 640×480
    • Movies: 1920×1080, 1280×720, 640×480
    • Continuous Shooting: 9fps
    • Viewfinder: 7.5cm LCD screen (922,000)
    • File Formats: RAW, JPEG, MPEG4
    • Colour Space: sRGB
    • ISO Sensitivity: Auto, 80 to 12,800
    • Interface: USB 2.0, HDMI mini, AV, WiFi, DC input
    • Power: Rechargeable lithium ion battery
    • Dimensions: 100x59x29 WHDmm
    • Weight: 217 g (inc. battery, card)
    • Price: Approximately $ 400 see Amazon
    • Web: Canon.com

    DPS Rating: 3

    The post Review Canon Powershot S120 Digital Camera by Barrie Smith appeared first on Digital Photography School.


    Digital Photography School

  • Your Biggest Photography Fears (And How To Beat Them)

    It’s not the quality of your images that’s stopping you from making more sales and building even a part-time photography business. It’s your fears. To get them out of the way and create the growth you deserve, you first have to identify them — then squish them. You’ll probably find at least one — and possibly five — of those fears here.

    Fear of Specialization

    This isn’t a fear that’s unique to photography; it applies to just about everyone entering an industry for the first time. You don’t know where the best opportunities lie. You’ve got an empty schedule book and no sales to your name. You’re afraid that stating that you specialize in one topic or one style will limit your opportunities. So you create a website that declares you’re available for any work at all. You offer portraits and weddings, seniors and baby shots. And you create a portfolio of generic images that are attractive but predictable. They have no particular style that marks them out from the competition.


    That’s an approach that might work for a while. But it should soon become clear which images clients like the most, and are willing to pay the most for. Once you’ve figured that out, you can earn more by specializing. When Christian Keenan switched from news photography to wedding photography, for example, he stuck with the documentary style that had won him a World Press Photo award. His images are black and white. There are no formals, no family photos and no engagement shots. His approach is clear and it won’t suit everyone. Clients looking for traditional color photography won’t use him. But there are enough couples who want the kind of unique images that he supplies to make him one of the UK’s most successful wedding photographers.

    Fear of Rejection

    Thousands of outlets are looking to buy and sell images created by talented photographers. Photo editors at magazines care less about who shot the photo than what that photo will do for their readers. Gallery owners love nothing more than discovering and nurturing new talent. It’s what brings them into the business. The Photographers Market, a guide to publications, agencies and galleries that buy images, is nearly 700 pages long and in its print form could double as a house-brick.

    Somewhere among those pages are enough buyers to keep you shooting and earning from your photography for as long as you want.

    But to reach them you’re going to have to contact a lot of people who won’t want your photos.

    They won’t want them because they don’t match their market or their readers. They won’t them because they already have a list of image suppliers that they’re happy to buy from or because they only buy from professionals or because they couldn’t be bothered to wait for your website to load.

    They won’t want them because they don’t think your pictures are good enough.

    You’ll hear all of those reasons and they’ll hurt every time you hear them. And every now and then, you’ll hear a yes. “Yes, we’ll take that picture.” “Yes, we can put your photo in an exhibition.” “Yes, I like that. Do you have any more?”

    Rejection will happen. But it’s just something you have to hear to land acceptance.

    Fear of High Prices

    Take a look through photography section of craft site Etsy and you’ll find plenty of the kinds of images that you could shoot easily. There are pictures of places (which tend to sell well) and of people, of animals and of flowers. They’ve usually been carefully edited to make them more artistic and to suit the site’s buyers, but the prices for prints usually fall somewhere between $ 30 to $ 60.

    It’s no surprise that if you pitch the prices too high, sales will fall off. But it’s also true that if you pitch them too low, sales will fall off. As one photographer on the site has told us:

    It’s important not to lowball yourself even if you think it might help you sell at first (it usually won’t!). Buyers will only value your work if you value it yourself.

    Demanding an amount for your images that would make you think twice about buying them can feel scary. But you have to cover your costs, including the printing, the framing and the delivery charges. And you have to show that your work is rare enough and good enough to be attractive. Look at what other photographers are charging in the same outlet and keep your prices in the same range — even if those prices look high to you. They won’t look high to the buyers.

    Fear of Investment

    Photography costs money. Cameras have come down in price but they’re not free and lenses aren’t cheap. Once you’ve laid out on the basic equipment, you still have to pay for a website, travel costs and advertising.

    If you’re serious about earning from photography, you will have to make those investments.

    There are ways you can reduce them. Time on Facebook can spread the word about your business cheaper than an ad in The Knot. SEO can win your site clicks for less money than experimenting with AdWords. Renting, borrowing or sharing a display tent can let you experiment with art fairs before investing in your own booth. Usually, what you save in dollars, you’ll lose in hours.

    But rather than think about the amount you’ll be paying, consider the amounts you’ll be making when you land sales. Being willing to make those investments in yourself is the most important sign that you’re serious about earning from photography.

    Fear of Commissions

    There are two ways to make money from photography: you can create an image and try to find someone who wants it; or you can accept a commission from someone to shoot images that they know they want.

    The first only carries a risk to yourself. The second carries a risk to the client. Come back from the wedding without the pictures the couple expects, and you could find yourself with a lawsuit.

    Being willing to accept a commission shows that you’re ready to step up. You can start small: shoot friends’ weddings instead of giving them a gift or take pictures of the products made by a family business so that they won’t get mad if they’re less than professional. Start with commissions that either have low expectations or which can be fixed.

    It doesn’t take more than a few successful, low-scale commissions to give you the confidence to say “yes” to the big jobs, beat your fears and build your business.


    Photopreneur – Make Money Selling Your Photos