Category: Uncategorized

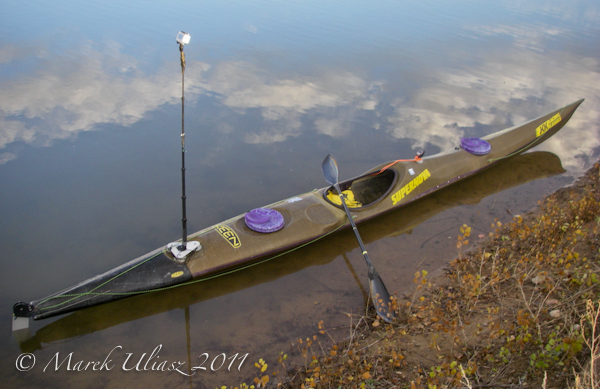
  • South Platte River with GoPro Hero HD Camera and Thunderbolt Kayak

    I just started my 2011/12 cold season of paddling on the South Platte River. On October 14 I took the Thunderbolt kayak for upstream/downstream paddling workout starting at Kersey. I did a little bit more than 3 miles up river just passing the confluence with the Poudre River. It was a beautiful summer weather and the river had a good flow > 700 cfs.

    Buy GoPro HD Cameras @ GoPro.com South Platte River

    I was testing my new GoPro HD Hero camera. I didn’t shoot video, but I started from my favorite interval mode taking still pictures every 60 seconds. I did a lot of this kind of shooting with my Pentax Optio cameras. GoPro Hero was mounted with a suction cup from Sticky Pod on the front deck of my kayak. A detachable LCD screen makes it much easier to position the camera and play back there results of your shooting. I will be reviewing features of the GoPro camera and different mountain options, especially, the GoPro Hero suction cup mount with my own based on Sticky Pod product.

    The pictures turned to be pretty good. Of course, the pictures shot in full sun were in general too contrasty. For this post I choose pictures shot in a partial shadow or after sunset. The initial shot under the bridge, not particularly scenic spot, is quite interesting. The concrete bridge structure acted as a huge reflector. Well, it’s all about light.

    South Platte River

    During that trip I tested my new GoPro® HD Helmet HERO™ Camera

    South Platte River
    South Platte River

    Related posts and links:
    GoPro HD Helmet Hero at Amazon.com | detachable LCD screen | Kingston 32 GB Class 4 SDHC Flash Memory Card | GoPro Suction Cup Mount
    South Platte River below Denver, Colorado
    GPS/photo river guide
    Biking and Packrafting – A Selfsupported Classic Run on the South Platte River near Greeley
    My Photography During the 2010 Missouri River 340 Race


    paddling with a camera

  • BTS: Time Magazine’s Protesters

    Seldom do we get such a long-form look at the production of what is quickly becoming an iconic group of photos. The BTS video below is of Peter Hapak's assignment to cover the world-wide protester phenomenon in 2011, for the Time cover story in which they were collectively named Person of the Year.

    I have watched it several times now — as a journalist, a photographer, a lighting guy and certainly as a human.

    There's a lot to learn. Read more »


    Strobist

  • 11 Ways You Can Improve Your Photography – A Free E-Book from Craft and Vision

    free_cover_medium

    Craft & Vision just released a new and free e-book 11 Ways You Can Improve Your Photography edited by David DuChemin. It’s a compilation of articles from their library of e-books. A lot of of great information!

    1. Make your images more dynamic by Piet van den Eynde
    2. Tame your digital exposures by David DuChemin
    3. The power of the print by Martin Bailey
    4. Learn to direct the eye by Michael Frey
    5. Understand the stages by Alexandre Buisse
    6. Create projects and collaborate by Andrew S. Gibson
    7. Refine your composition by Nicole S. Young
    8. The power of the moment by Eli Reinholdsten
    9. Forget the lens stereotypes by Piet van den Eynde
    10. Slow down and learn to see by Stuart Sipahigil
    11. Make stronger portraits by David DuChemin

    I have downloaded and read several e-books from Craft and Vision including two books by Piet van den Eynde on using off camera flash, Making Light, and (micro)STOCK From Passion to Paycheck by Nicole S. Young aka Nicolesy. And, of course, I am also a fan of paper books by David DuChemin:

    VisionMongers: Making a Life and a Living in Photography
    Within the Frame: The Journey of Photographic Vision
    Vision & Voice: Refining Your Vision in Adobe Photoshop Lightroom


    paddling with a camera

  • How to Operate a Remote Camera Mounted on a Kayak Bow or Mast

    supernova-111011-2

    I often shoot movie clips or still pictures in an interval mode (time lapse) with a camera mounted on a kayak deck or bow or on a mast, so out of reach from a cockpit. I am often asked how I am turning my camera on and off.

    I am using two “paddling” cameras right now, Pentax Optio W30 and GoPro HD Hero, and I don’t really have a solution for a remote control.

    • I have to stop to turn a camera on/off. Since, I am usually paddling on small lakes or rivers it is my typical situation.
    • A camera is running until the memory card is full (not so difficult for shooting video).
    • A camera is running until a battery dies like in my 2010 Missouri River 340 race.
    • I have a paddling partner to help.
    • Or, you can build a folding mast which would allow you to reach a camera like Mark Sanders did.

    Turning the camera on/off is a more problem when you are shooting video. You can shoot a huge amount of still pictures. From hundreds of pictures shot during a 1-2 hour paddling workout I can only select a few which I am ready to show here.

    Remote Control

    Pentax is offering a waterproof remote control which works with the newest models from their line of waterproof cameras: Pentax Optio W90 and Pentax Optio WG-1. pentax-remote-control_0 It is fairly cheap at ~$ 20. If my Optio W30 dies I am going to upgrade to WG-1.

    Are you using that Pentax remote control? Please share your experience!

    A remote controller, Wi-Fi BacPac and Wi-Fi Remote. will be available for GoPro Hero cameras in February 2012. I’ve bought LCD BackPack for my GoPro – really helpful in setting the camera on a kayak and reviewing pictures or video. I believe that the new Wi-Fi BacPac is interchangeable with the LCD display.

    Occasionally, I am mounting my Canon DSLR camera on a kayak deck, but that’s a different story and I don’t really recommend that.

    beaver-pond_101206_1a

    Related posts:
    A Bird’s-Eye View of Kayaking with GoPro Hero Camera
    How to Make a Simple Camera Mount for a Kayak Deck – Video Mast
    Kayak Video Camera Mast – Sticky Pod Combined with Monopod
    Sticky Pod Review – A Suction Cup Camera Mount for Kayak Photography


    paddling with a camera

  • darkly inspiring…

    If you’re going to try, go all the way. Otherwise don’t even start.

    This could mean losing girlfriends, wives, relatives, jobs, and maybe your mind.

    It could mean not eating for three or four days.
    It could mean freezing on a park bench.
    It could mean jail. It could mean derision.
    It could mean mockery, isolation.

    Isolation is the gift. All the others are a test of your endurance.
    Of how much you really want to do it.

    And you’ll do it, despite rejection in the worst odds.
    And it will be better than anything else you can imagine.

    If you’re going to try, go all the way.

    There is no other feeling like that.
    You will be alone with the gods. And the nights will flame with fire.

    You will ride life straight to perfect laughter.

    It’s the only good fight there is.

    Henry Charles Bukowski
    1920 – 1994

    Tweet This Post Stumble This Post


    F/1.0

  • Nikon Coolpix P7100 Review

    If you’re dithering between a mirrorless and a DSLR camera for serious, down-to-earth photography, this one from Nikon fits exactly that role.

    Sure, the lens is fixed but it is a Nikkor that equates to 28-200mm as a 35 SLR equivalent: a 7.1x enlargement in fact. Very cleverly, Nikon has also installed an optical viewfinder: tiny but useful.

    Agreed, the CCD captures only 10.1 megapixels, meaning you can snare a maximum image size of 3648×2736 pixels or as a 31x23cm print. But note: the CCD measures a largish 15mm across the diagonal. Compare the Nikon V1, with a diagonal of 16mm.

    One negative: you have to forgo Full HD video with the P7100: max res is only 1280x720p, although I did find the AF and exposure control worked effortlessly while shooting video. A downer is that you can’t shoot stills while recording video: and it interrupts the video run.

    Nikon Coolpix P7100 front.jpg

    However, Nikon describes the P7100 as “the top model in the COOLPIX series.”

    After only five minutes with the new camera, fiddling with the controls and scanning the copious viewfinder menus, I have to agree.

    Nikon P7100 top.jpg

    Nikon Coolpix P7100 back.jpg

    Nikon Coolpix P7100 Features

    This one sits in the same territory as Canon’s well-regarded G-series of fixed lens compacts — but IMHO the Nikon does it better.

    Luna Park full tele.JPG

    With camera in hand, the first thing you notice is the articulated screen that can be lowered 81 degrees from the vertical or upward by 105 degrees. But no sideways swing!

    I particularly liked the external controls, especially the smallish knob/button at left: this gives direct control of ISO setting, bracketting, image quality/size/file format, custom picture control and white balance. After many years reviewing cameras that call for endless digging into viewfinder menus to access these features, this method has to be the pick of all the approaches.

    Look across to the right of the top deck and you find the mode dial that takes you into auto, Program AE, shutter and aperture priority plus manual — and another button that gives direct access to exposure compensation, scene modes, effects. There are also three interesting positions on the mode dial that effectively give you three custom user settings.

    It’s worth noting that there are four new special effects: zoom exposure, defocus during exposure, cross-processing and creative monochrome.

    Grainy.JPG

    These are fascinating. Take ‘creative monochrome’: you can vary the degree of graininess or you could even render the image as a solarised one. With ‘cross-processing’ you can simulate the effect of processing a colour negative in chemicals intended for reversal film … or vice versa!

    I have to admit that the method of selecting special effects and scene modes left a little to be desired: you begin by rotating the mode dial to either, then you must hit the menu button to make your specific choice. Surely a better way would be to present the choices on screen immediately the mode is selected.

    The interesting zoom memory is operable with the use of the Fn1 button, sited on the front surface. Not sure in my own photography how I could use this but possibly a useful feature when you have to match angles; up to three focal lengths can be logged.

    There is a panorama mode, along with supplied software (Win and Mac) to stitch the images together: sure, it’s not as elegant as Sony’s approach where the images are stitched within the camera … but at least it’s there.

    People in distorting mirror.JPG

    Other niceties: a neutral density filter that can apply an exposure cut of three f stops. With this you can enjoy slower shutter speeds and shoot those dreamy, motion blurred images of breaking waves and other movement.

    The big plus for many people is RAW capture (Nikon calls it NRW and it has to be converted), giving image files free of compression artefacts present in JPEG capture.

    Startup

    About a second and a half from startup In could shoot the first shot; follow-ons about a second apart.

    Distortion

    I was surprised to find there was obvious barrel distortion at the wide end of the zoom but negligible pincushion distortion at the tele end.

    Nikon Coolpix P7100ISO Tests

    Nikon P7100 ISO 100.JPG

    Nikon P7100 ISO 800.JPG

    Nikon P7100 ISO 1600.JPG

    Nikon P7100 ISO 3200.JPG

    The image noise only became noticeable at ISO 3200 but, even then, shots of some subjects could still be useful.

    Nikon Coolpix P7100 Verdict

    Why you’d buy the P7100: multiple external control points; pocketable.

    Why you wouldn’t: you want Full HD; the 7.1x zoom range is not enough for you.

    Having waded through a mountain of DSLRs, mirrorless models and piles of boring point-and-shooters this one shines out like a beacon on a foggy night.

    A black note: the battery must be charged while in the camera, so you can’t go shooting while charging a second battery. Bummer!

    Well done Nikon!

    Nikon Coolpix P7100 Specifications

    • Image Sensor: 10.1 million effective pixels.
    • Lens: Nikkor f2.8-5.6/6-42.6mm (28-200mm as 35 SLR equivalent).
    • Effective Sensor Size: 15mm CCD.
    • Metering: Matrix centre-weighted and spot.
    • Exposure Modes: Auto, Program AE, shutter and aperture priority, manual.
    • Shutter Speed: 60-1/4000 second.
    • Continuous Shooting: 1.2 fps.
    • Memory: SD/SDHC/SDXC cards plus 94MB internal memory.
    • Image Sizes (pixels): Stills: 3648×2736 to 640×480.
    • Movies: 1280x720p 24fps, 960×540 30fps, 640×480 30fps.
    • Viewfinder: 7.5cm LCD screen (921,000 pixels).
    • File Formats: NRW (RAW), JPEG, MPEG4.
    • ISO Sensitivity: Auto, 100 to 6400.
    • Interface: USB 2.0, AV, HDMI mini.
    • Power: Rechargeable lithium ion battery, DC input.
    • Dimensions: 116.3×76.9×48 WHDmm.
    • Weight: 395 g (battery and card).
    • Price: AUD599.

    Post originally from: Digital Photography Tips.

    Check out our more Photography Tips at Photography Tips for Beginners, Portrait Photography Tips and Wedding Photography Tips.

    Nikon Coolpix P7100 Review


    Digital Photography School

  • the solution to the elinchrom quadra umbrella mount

    When I was looking at reviews of the Elinchrom Ranger Quadra, one of the most common complaints people seemed to have was the fact that they couldn’t mount standard umbrellas on it (Elinchrom uses a 7mm umbrella shaft, while most others in the US use an 8mm shaft).

    Now this seemed kind of silly to me – first off, the Quadra head is extremely small and lightweight – hanging anything larger than a *tiny* umbrella off it just seems like a recipe for disaster.   Secondly I thought to myself “I mount umbrellas on speedlights all the time and they have no umbrella holder whatsoever – why is the quadra any different?”  The solution:

    The plain ol’ vanilla Umbrella Swivel.  Beloved of “Strobists” everywhere, it provides a secure slot/mount for the umbrella, placing the weight & torque on itself rather than the strobe head.  Screw in a post on top, plop the Quadra head on that and good to go.  You can even still use the angle of the quadra head itself to hit the sweet spot of the umbrella.

    Personally this is just fine for me.  works great for my umbrellas, Apollo softboxes and Softliters…but let’s say you need the light more “on axis” with the umbrella shaft (maybe to fit the hole in one of the new PLM diffusion screens for instance…)  I found the easiest thing is to simply take a second swivel, and use it to “hang” the head off the umbrella shaft itself.  The head is light enough that it doesn’t put undue strain on the shaft (or the swivel).

    Kinda kludgy but it works.  Personally I don’t bother – mounting it on the swivel itself is quick, easy and gets the job done with hardware that I’m already carrying anyway for my speedlights.

    So there you have it:  Mounting umbrellas on the Quadra made easy!

    Tweet This Post Stumble This Post


    F/1.0

  • Choosing a Photography Workshop Or Tour

    It’s in the gloom of the Northern hemisphere’s winter that many people start planning trips for the new year. It’s also a time some of us upgrade our cameras when the big sales hit in December and begin looking for a teacher to help them get more out of it. A perfect time to talk about choosing a photography workshop or instructional tour.
    While I lead workshops and tours around the USA and world, I have been on the other side of the coin on more than one occasion in the past. Choosing who you will learn from can be intimidating and a large financial and time risk. I used those experiences and time spent consulting with other tour operators to come up with a list of questions and items to think about when you decide you want to learn more from a local or international instructor.

    Do They Listen?

    This is the most important aspect, in my opinion. Many people can stand up in front of a class and drone on and on from a textbook. A good instructor will listen to what you are interested in learning and adjust topics to meet those needs. If the structure is still fairly stiff, the instructor can at least relate instructed topics to situations important to you.

    Is There A Solid Structure Or Is It Flexible?

    Will this workshop be a recital of text or can you work in your own topics? Will the tour have opportunities for individual exploration or do you have to stick to a particular path? One is not necessarily better or worse, it is simply best to know so expectations can be set accordingly.

    Do They Ask For Your History Beforehand?

    This is an indicator, again, of how much you will learn. If the topics can be molded, there is a better chance the instruction will stick for you. It also shows the instructor’s level of interest in you, more than just as a paycheck. Some operators will cover this step on the first day of a workshop or tour.

    What Is Included?

    Never make assumptions, especially if the trip is to a foreign country. Always ask for a complete list of what you receive for money paid. Are textbooks included? Water? Meals? Internet access?

    What Other Costs Will There Be?

    The flip side of what is included is to make sure you know what is not included as well. Again don’t assume. What about a cab from the airport to the first hotel? Entry fees? Tips?

    How Long Has The Instructor Been Leading And Instructing?

    Certainly more time spent leading groups does not always equate better leading, but it often is an indicator. It also shows if the instructor loves what they do. If they have not been instructing long, get an idea of what they were doing before coming into this line of work. Also ask for references. Sure, they will suggest people who enjoyed previous instruction, but hopefully you can dig a bit deeper by asking past clients.

    Do They Have Any Writing You Can Check Out?

    Check previous writing by the instructor if you can find it. Blogs and Facebook will help you see what type of voice the instructor typically uses. It also helps show how well they communicate topics that can be confusing. And it will arm you with a list of questions when you talk with them (see last item below).

    Is There Any Follow Up?

    Is the workshop or tour over and you’re on your own? Or can you ask followup questions? It is not vital if it is one way or another, but it is important to know before signing up. Personally, as a student, I prefer to have the opportunity to ask questions days later as the concepts sink in and I have a chance to practice.

    Will Your Equipment Meet The Minimum Standards?

    Some workshops are aimed at the true beginner. Some at intermediate or advanced. Will your point and shoot camera or 4/3rds version work well for the workshop? Will you get more out of it if you had a DSLR? Don’t waste your money on a workshop that will tell you how to use different aperture settings if you can’t set your aperture.

    What Can You Expect To Walk Away With?

    Ask the instructor to list what new knowledge you will gain after your time together. Some workshops also offer software or books for review.

    What Is The Refund Policy?

    This is pretty easy; how much of your money can you get back if plans should change? Can you reschedule and apply the fees you have paid?

    Can You Get A Copy Of The Syllabus?

    Websites often list the basics to draw you in. Ask for a complete list of topics covered to see if your time will be well served. If 40% or more of the workshop covers topics you are already solid with, consider private instruction to fill in the gaps.

    Lastly, if at all possible (and especially when booking a longer tour) get on the phone with the instructor and chat. While many of these questions can be answered in email or by browsing websites, talking on the phone or in person will let you know how the instructor communicates and if you get along. If the workshop is short, just a day or two, compatibility is not too much of an issue if they can deliver on topics covered.

    But on a longer trip, it’s more vital to make sure you can communicate well with the instructor. You don’t have to be best friends, but a good instructor will make you feel welcome and should be able to listen to your wants and desires for your time together.

    As you may suspect, many of the DPS writers enjoy helping others learn about photography. Below is a list of workshops offered by DPS writers. Each has different areas of interest and topics covered, as well as geographic locations served.

    • Jim Goldstein – Photo Tours and Workshops in California, Montana and Utah
    • Natalie Norton – Photo Workshops in Hawaii and Photo Business Instruction
    • Christina Dickson – Photography Business Instruction
    • Valerie Jardin – Photo Tours In France starting in 2013
    • Helen Bradley – Adobe Lightroom, CS5 and Elements Instruction, Individual Instruction
    • Matt Dutile – Individual Photo Instruction
    • Elizabeth Halford – Individual Instruction, Remote Consultation
    • Neil Creek – Night Sky Photography Workshops
    • Peter West Carey – Photo Workshops, Lightroom Workshops, Individual Instruction in Washington, Oregon and California, and Photo Tours to Nepal, Bhutan and India
    • Rachel Devine – Camera Therapy Workshops

    And if you need help looking for an instructor or workshop, my favorite resource (for photography and other subjects) has been TeachStreet.com.

    What other questions do you typically ask an instructor before signing up for a workshop or tour? Please add your input in the comments section below.

    Post originally from: Digital Photography Tips.

    Check out our more Photography Tips at Photography Tips for Beginners, Portrait Photography Tips and Wedding Photography Tips.

    Choosing a Photography Workshop Or Tour


    Digital Photography School

  • 5 Steps to Better Composition

    A Guest Post by Andrew S Gibson – author of the brand new eBook – Beyond Thirds.

    Here are five tips for improving your composition. You may be surprised to learn that none of them involve the rule of thirds. There’s a good reason; it’s one of the first things photographers learn, so most of you are aware of this ‘rule’ (I prefer to think of it as a guideline) already.

    Learning the rule of thirds is a bit like taking driving lessons and being told that you press the gas pedal to accelerate and the brake pedal to stop the car (and nothing more). It covers the basics, but you know that there’s a lot more to driving than that. It’s the same with composition.

    1. Stop Composing According to the Rule of Thirds

    better-composition-01.jpg

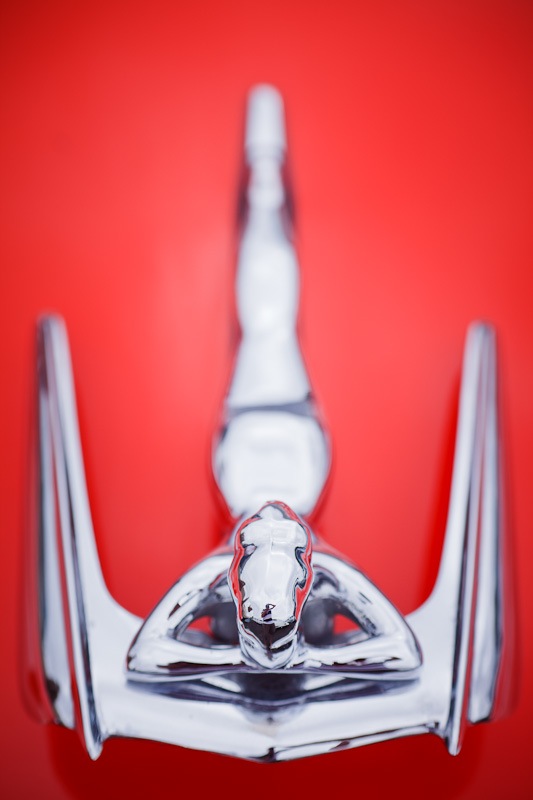
    The thing is with the rule of thirds is that sometimes it works, sometimes it doesn’t. The thirds are not always the best place to position the subject. The above photo is a good example – the symmetrical shape of the hood ornament demanded a central composition. How do you know when to ‘break’ the rule of thirds? Read on to find out.

    2. Be aware of Balance

    better-composition-02.jpg

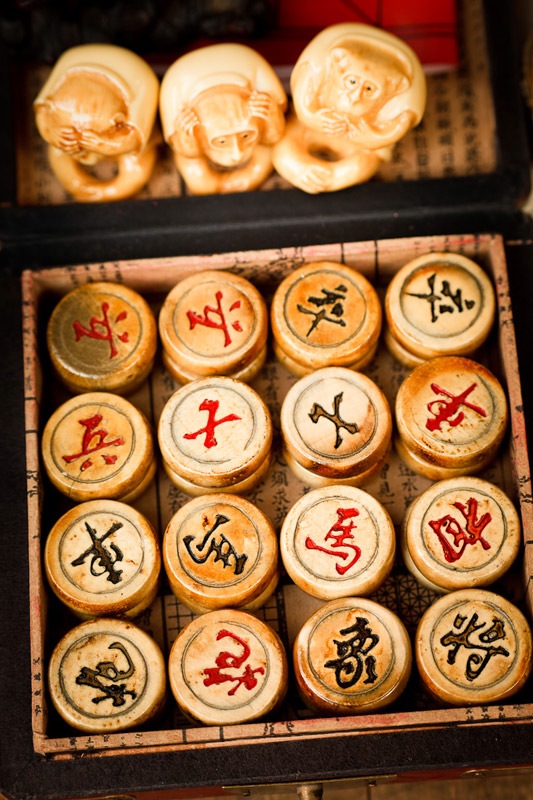
    One of the questions I ask myself when I take a photo is what is the relationship between the subject and the rest of the image? How do the two balance out? This is something that I judge by feel more than anything else. A balanced image has a peaceful, harmonious feel. The photo above is balanced – the three monkeys and the chinese chess pieces have an equal ‘weight’ within the composition. The warm colours are also quite harmonious and in balance with each other.

    You may wish to create a more dynamic image – in which case see tip 4.

    3. Simplify

    better-composition-03.jpg

    Make you compositions as simple as possible. You can do this by excluding anything that isn’t necessary. Often this just means moving closer to your subject so that there is less stuff in the background. You could also use a longer focal length, as the narrower field of view excludes more of the background.

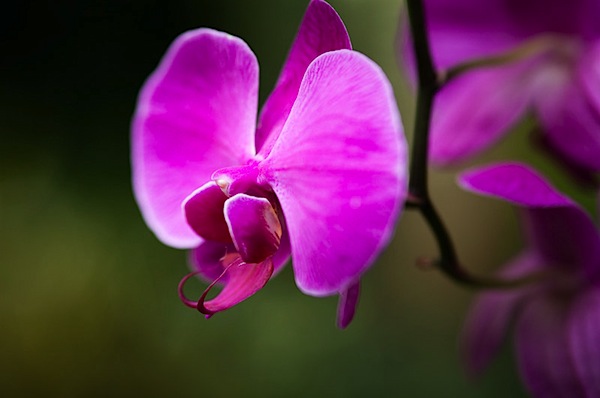
    Another technique is to use a wide aperture to throw the background out of focus. The idea is to try and eliminate anything that distracts from the main subject of your photo. That’s what I did with the above photo, to concentrate attention on the flower.

    4. Use Lines to Create Dynamic Tension

    better-composition-04.jpg

    Lines are a powerful element of composition, and the viewer’s eye naturally follows any lines in your images.

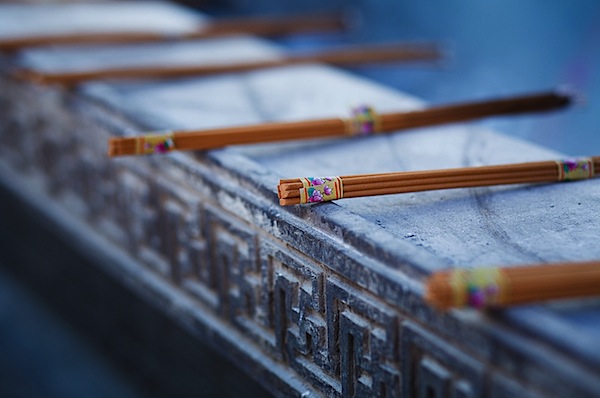
    One use of line is to create a sense of depth. You can do this with lines that travel from the front of the image to the back. Diagonal lines are more dynamic than straight ones. Horizontal lines are least dynamic of all. The line of the altar in the above photo, taken in a temple in Shanghai, creates a strong sense of movement and depth.

    5. Work the Subject

    If you find a good subject, sometimes it’s a good idea to take lots of photos. The key is to think about what you are doing, rather than ‘machine gunning’ away. Ask yourself how you can improve the composition. Try taking photos from different angles, or with a different focal length. This is called working the subject, and you’ll often find that it helps you take stronger images.

    Beyond Thirds

    You can learn more about composition by buying my latest eBook, Beyond Thirds, from Craft & Vision today – it’s only $ 5!

    Andrew S Gibson is a freelance writer based in Auckland, New Zealand. He is the Technical Editor of EOS magazine and writes photography eBooks for Craft And Vision. including The Evocative Image and Beyond Thirds. Follow Andrew on Facebook here.

    Post originally from: Digital Photography Tips.

    Check out our more Photography Tips at Photography Tips for Beginners, Portrait Photography Tips and Wedding Photography Tips.

    5 Steps to Better Composition


    Digital Photography School