Category: Uncategorized

  • Paddling Self Portrait on the South Platte River

    South Platte River

    October 15, 2011. Paddling self portrait on the South Platte River above Kersey, Colorado. Camera: GoPro Hero HD 2 mounted on a kayak deck with sticky pod (a single suction cup). See South Platte River with GoPro Hero HD Camera and Thunderbolt Kayak.

    .


    paddling with a camera

  • The Ultimate Guide to Zone Focusing for Candid Street Photography

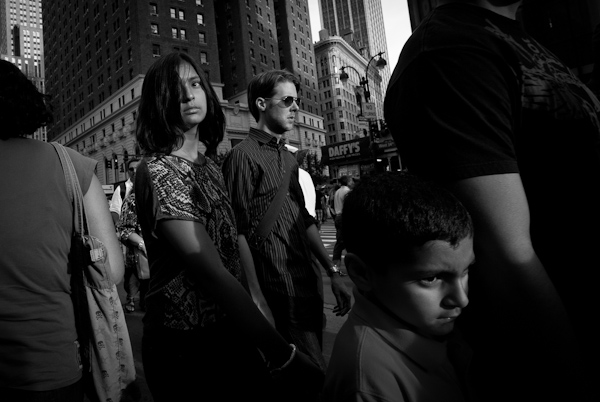
    Glance, 34th Street

    1/320th at F11, ISO 800 (17mm) – Canon 5D Mark II.

    Capturing strangers candidly, yet tack sharp, is probably the toughest technical skill to learn in street photography.

    With a genre such as landscape photography, you can find your location, plan your shot, wait patiently for the correct lighting, and make sure that you are ready to pounce when the perfect moment hits.  But candid street photography is an entirely different beast.  Often, you are presented with a moment so quickly that your reaction time is severely tested.  It is so tough to frame correctly, focus correctly, and capture a spontaneous shot at the right moment, all while trying to keep things candid.

    The solution?  Learning to zone focus.  Not every street photographer zone focuses, but the ones that do swear by it.  While I use autofocus when I can, I too swear by it.  And with a little practice, it’s not all that hard to learn.

    Honestly, it’s way harder to explain it than it is to actually do it.

    Depth of Field (DOF)

    Tiger

    Tiger

    1/250th at F4, ISO 3200 (28mm) – Canon 5D Mark II.

    Before we go into what zone focusing is, we need to talk about the factors that go into creating DOF.  If you know this already then feel free to skip to the next section.

    The term Depth of Field refers to the area in front of and behind a subject that you focus on that will appear acceptably sharp.  For instance, say you focus on a subject that is 10 feet away.  Depending on your camera settings, that might mean that everything from 8 feet away to 14 feet away will be acceptably sharp.  That would be your depth of field.  Also, keep in mind that the area behind your subject that is acceptably sharp will always be greater than the area in front of your subject, and in many cases much greater.

    Depending on four factors, your aperture, your focal length, the distance that you are focusing at, and on your camera’s sensor size, your depth of field can change drastically.  Here are the four factors in detail:

    1. The smaller your aperture, the more DOF there will be in a scene.  So if you are shooting at F16, much more of your scene will be sharp than if you are shooting a F2.8.
    2. The wider your focal length, the more DOF there will be in a scene.  So if you are shooting at 28mm, much more of your scene will be in focus than if you are shooting at 100mm.  This is why I rarely zone focus using a lens longer than 35mm.
    3. The further away you focus, the more DOF there will be in a scene.  So if you focus on a person 10 feet away, then you may have a range of three feet in front and six feet behind your subject that will be sharp (depending on the other three factors), whereas if you focus on a person that is 3 feet away, you may have a range of 3 inches in front and 6 inches behind your subject that will be sharp.
    4. The larger your camera’s sensor is, the less DOF there will be in a scene.  If you are using a full frame camera like the Canon 5D, then there will be less DOF then if you are shooting with a camera with a smaller sensor, such as the 7D, 60D, or a micro-4/3rds camera, with the same settings.

    Here is a website to test out these different depth of field factors: http://www.dofmaster.com/dofjs.html.  Keep in mind that the term ‘acceptable range of sharpness’ is just an opinion.  As your subjects veer further from the focus distance of your lens, they will appear less and less sharp, whether or not they are in the ‘acceptable’ range on the chart.  So practice with your own camera and lens to figure out what is ‘acceptable’ to you.  This website is only a general guide to get your started.

    Zone Focusing

    Traveler

    Traveler

     1/400th at F8, ISO 1600 (17mm) – Canon 5D Mark II.

    Zone focusing is pre-focusing your camera to a certain distance away, say 10 feet, guessing the DOF that you will have at that distance with the settings you are using, and then photographing subjects as they enter that range, and hopefully as close as possible to the actual focus distance on the camera.

    It is also being able to change your focus distance quickly and accurately, without looking, as a subject moves closer or further from you.

    The reason for doing this is that both using autofocus and turning the manual focusing dial takes time (and often will be noticeable to your potentially candid subjects) and most of the time things happen so fast on the street that you need to be focused ahead of time.  If your camera is already focused to an average distance away, then you can just wait for your subject to enter that range and there will be no delay from when a moment happens to when you are able to click the shutter.  It will be instant.  In addition, this will allow you to shoot without looking through the viewfinder, if you decide that you want to ‘shoot from the hip.’

    Here is a specific example based on common settings that I use.  With the 5D Mark II and a 28mm focal length, if I pre-focus my camera to 8 feet away at F8, then everything from around 5.5 feet to 15 feet away will be ‘acceptably’ sharp.  Of course, as you get to the outer areas of that range the subject will not be perfectly sharp, but for fast-moving street photography, it gives me a serious range to work with.  At F11 or F16, even more so.

    Manual Focus Meter, 5D Mark II

    The only problem is that you need to have a lens with a manual focusing meter, such as the one in the photo above, that shows you the distance that the camera is focused at and is easily manipulated.  Many cameras and lenses don’t have this but some will tell you the focal length in the camera’s menu or viewfinder.  While not perfect, this will work somewhat.

    But if you want to do candid street photography then I highly suggest getting a lens with a manual focus meter.

    So it should be obvious to you why we generally want the range of sharpness to be as great as possible when zone focusing (unless you want more bokeh for aesthetic reasons).  It is for when we mess up slightly in guessing how far something is away so that there will still be enough leeway for our main subject to be sharp, or so we can get multiple subjects at different distances to all be relatively sharp.  These are two reasons that many street photographers prefer to use wide-angle lenses, such as 28mm or 35mm.  My go-to focal length is generally 28mm.

    It is also the reason why you want to shoot at a high ISO in street photography (unless the light is strong).  If you shoot with a high-ISO, it allows you to shoot with a smaller aperture.  With my 5D Mark II, ISOs of 800, 1600, and 3,200 are usually my standards (unless the light is strong).  For many cameras, the ISOs may not be ideal at these levels, however that is quickly changing these days with each new camera released.  Test your camera at different ISO settings to see what its acceptable range is.

    Guessing Distances

    If you are like me then you often do street photography in less than ideal lighting, such as in the subway system.  When you’re shooting at F16 in bright sunlight, you don’t have to think as much about it.  It won’t matter much if your subject is 9 feet away versus 10 feet away.  But when you are shooting at F2.8 in the subway, it really does matter.

    Reflection, Subway

    Reflection, Subway

    1/250th at F2, ISO 3200 (35mm) – Fuji X100.

    For this reason, it is important to learn the distances away from your camera’s lens, all the way up to around 12 feet away.  I suggest using a tape measure and measuring out the distances, from 2 feet from your lens all the way to 12 feet.

    Go out and practice.  Find different objects and try to guess how far they are away.  Before I go out I will still pick an object around eight feet away and focus on it to make sure I’m guessing my distances right.  It’s a skill that you need to constantly calibrate.  I have gotten a lot of strange looks over the years from people who have seen me focusing intently on lampposts 8 – 10 feet away.

    The other reason to get good at guessing distances is that people move and scenes develop.  You might want to capture a person walking towards you at both 10 feet and 5 feet away.  So when you hold the camera you want to always have one of your hands on the focusing ring.  Practice manual focusing back and forth from 10 feet to 8 feet to 6 feet and so on.  Eventually, you’ll be able to capture someone walking towards you sharp at both 10 feet away and 6 feet away, without having to look through the viewfinder.  It’s an incredibly effective technique.  Doing this well, however, can be tough.

    Couple, St. Marks Street

    Couple, St. Marks Street

    1/320th at F5, ISO 1600 (28mm) – Canon 5D Mark II.

    My final word of advice is that if you have the time to autofocus or manual focus with a viewfinder on a subject without them noticing, then do it.  That is much more consistently accurate than trying to guess distances and zone focusing.  But for a majority of the time, zone focusing will be your best and quickest weapon on the street.

    Post originally from: Digital Photography Tips.

    Check out our more Photography Tips at Photography Tips for Beginners, Portrait Photography Tips and Wedding Photography Tips.

    The Ultimate Guide to Zone Focusing for Candid Street Photography


    Digital Photography School

  • 6 Reasons Why Photography Matters

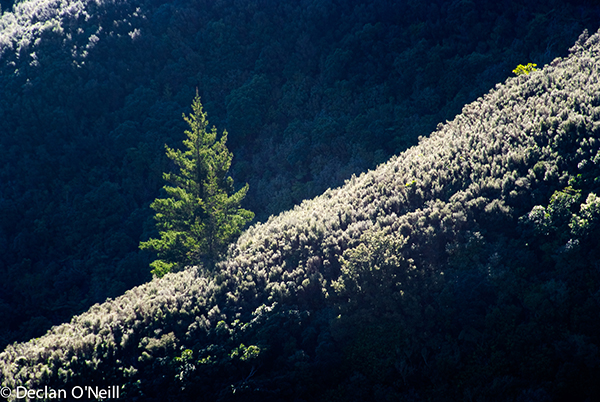
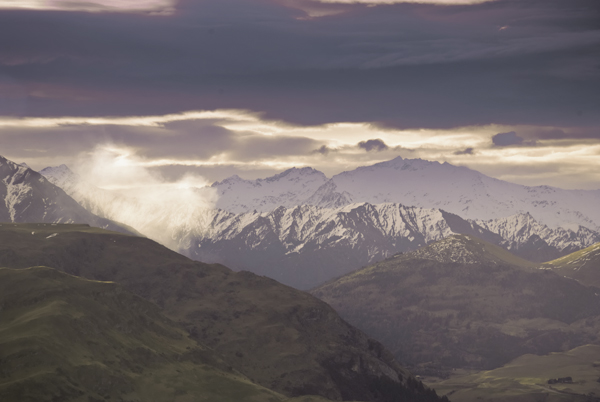
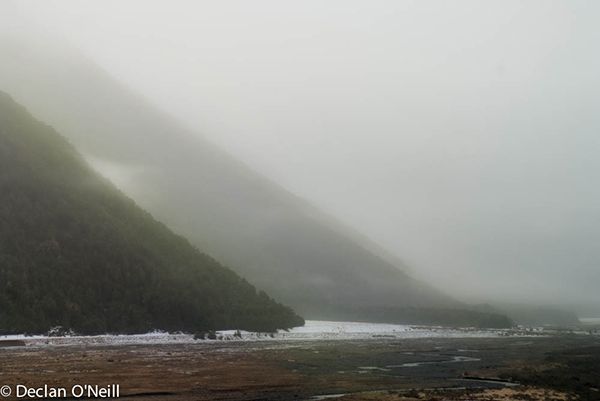
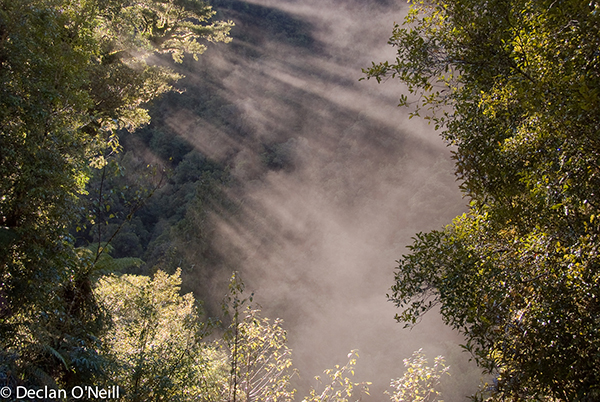
    Declan O’Neill is a professional photographer who lives in the South Island, New Zealand. He travels extensively capturing the beauty of New Zealand’s extraordinary landscape. The photographs which accompany this article are part of a series entitled ‘The Anatomy of Melancholy’ which is dedicated to the memory of his sister, Ann, who died from Multiple Systems Atrophy.

    1. Our photographs tell us what is important to us

    When you ask people what possessions they would rescue from their burning house, one of the most frequent answers is the photograph album or a computer with their digital images. When in panic mode it’s interesting that we would probably grab photos rather than valuable jewelry. This impulse to save our recorded memories is a powerful force which tells us much about the role of photography in our lives and our constant desire to distil our most precious moments into images.

    Why photography matters 1

    We preserve the important events and people in our lives. The ceremonies of birth and birthdays, marriages and anniversaries, holidays and new houses are all recorded because they matter. Photographs are our personal story, a timeline of our lives filled with faces and places that we love. They are our story, which we can share with others. The hundreds of images come together to form a narrative of our lives.

    2. Photographs are part of our legacy

    Once I remember sitting in a train as it passed a playground where children were standing to attention for the annual school photograph. Across the front row sat the teachers and behind them, hundreds of children neatly preened and uniformed. For the briefest second the entire assembly was motionless. We were passing just as the photographer clicked the shutter. Suddenly, as if in slow motion, the huge group scattered as children escaped their enforced immobility. The neat rows dissolved and broke into individuals who were now kicking footballs or huddled in friendship groups. None of those children realised that the photograph was probably going to outlive them. A couple of generations later it might surface among old papers in an attic and someone would search for granddad among the fresh young faces. Photographs matter because they freeze moments of our lives which pass unremarkably and which seem to have little importance to us at the time. The significance, however, may be for others who search for the person we once were or the places we once knew. They can be small pieces of a jigsaw that complete the larger picture of our lives.

    Why photography matters 2

    3. Photographs allow us to share and to communicate.

    Images are much more than a simple record. Photography speaks to the best and most generous part of our human nature – the desire to share what we find beautiful and interesting with others. You only have to look at Flickr and a multitude of photo sharing sites to see this impulse at work. Millions of people sharing their personal, passionate and sometimes quirky take on the world around them. Our images can involve a world of strangers in our life. How powerful is that?

    Why photography matters 3

    4. Photography makes us artists

    Photography allows us to express ourselves through an art form. We notice a beautiful landscape or an old man’s lined face and we want to capture it. Each of us will have a different reason to do so but, essentially, we want to create something. However humdrum our nine-to-five lives may be, the creation of an image makes us an artist. It feels good.

    5. Photography is a complex language

    Our images can express joy and sorrow, wonder and sympathy. Every human emotion can find a place in photography. For many years I never valued my photographs of overcast landscape because I believed that there was no beauty in a land with muted colours and a leaden sky. I wanted the land to be alive with colour and vibrancy. However, lack of colour in a landscape makes you search for other things that often go unremarked in bright sunlight. It could be a symmetry of hills or a tree standing out from a forest of thousands. I have suffered from depression for most of my adult life and photography gave me a language to express feelings for which I can find no words. We have a miserably poor vocabulary for mental illness and photography has allowed me to develop a visual language for some of the most difficult emotions.

    Why photography matters 4

    6. Photography has the power to move us

    Photographs can grab our attention and speak directly to our emotions. Nick Ut’s photograph of a crying Vietnamese girl whose clothes have been burnt away by napalm embodies the power of a single image. At a more subtle level, we can learn lessons about a whole range of emotions. Grief has the power to wash away the luminance and chrominance of our lives. There is no magic way to restore them at will. We have to be patient. But while waiting we can search for the shapes and patterns that are still there in the greyness. They will lead us back to colour eventually. At moments of great sorrow in my life I have used images to express that hope of returning colour.

    Why photography matters 5

    Photography, at its best, is a powerful language which speaks to our emotions. It allows us to tell our story and show others our framing of the world around us.

    Declan O’Neill is a professional photographer living in the South Island of New Zealand.
    site: www.newzealandlandscape.com

    Post originally from: Digital Photography Tips.

    Check out our more Photography Tips at Photography Tips for Beginners, Portrait Photography Tips and Wedding Photography Tips.

    6 Reasons Why Photography Matters


    Digital Photography School

  • 20 Pro Tips For Photographers on Google+

    20 Pro Tips For Photographers on Google+

    Google+ continued to grow last month. Although slowing a touch after June’s big run, it’s clear that Google+ is emerging as a major and important social network going forward. Like most networks, those connecting earliest benefit the most in the end. It pays to be an early adopter as far as social networks are concerned.

    Many different and independent communities are emerging on Google+. More than any other community, photographers have thrived on Google+. Every day millions of new photos are added to Google+ and photographers have flocked to the site to interact in many ways around their work.

    Every now and again I hear from photographers saying that they just don’t get Google+, that despite seeing so many others succeed here, they just can’t seem to gain any traction. At the end of the day a basic tenant of any social network is that you get out of it what you put into it. None of us can expect to simply post our photos and have the abyss that is the world wide web immediately recognize our artistic brilliance and talent and propel us to new heights of exposure.

    Social networks take work. They take tending to. They take activity and participation. With this in mind, I thought I’d share 20 Pro tips that might help you do better at Google+.

    1. Consider not watermarking your work. Many photographers and viewers dislike having to consume watermarks and signatures. A person who posts unwatermarked photographs never alienates anyone. Someone who posts watermarked photos will likely alienate at least some. I know all the arguments about your work being stolen and all that — this post is not about how to avoid having your photos stolen though, it’s about how to gain exposure on Google+.

    Lots of folks, like me, generally dislike consuming watermarks and so we don’t follow a lot of photographers who use them. For what it’s worth, it’s super liberating to stop caring about whether your photos are stolen on the web or not.

    This is not a hard and fast rule, but if you’re not gaining traction on Google+ you may want to ask yourself is it me, or is it my watermark?

    2. Respond to every question someone asks you on your photo. As you develop a following over time, inevitably you will be asked questions on your photos. What settings did you use? Where did you take this? Did you use a filter on this? Look for opportunities to interact with others on your photos. It’s your job to stay on top of the comments on your photos most of all. If someone asks you a question on your photo and you don’t respond to them, they probably won’t ask another one.

    3. Use the +username feature on Google+ and ask lots of questions of others. Show an authentic curiosity and interest in the work of others. Google+ is not just a place for you to share your work. It’s a place for you to learn and grow as a photographer. If you have a question about a photo, ask it — and when you ask it, always +username the person you’re asking. If someone is super popular and busy, they might not always be able to get back to you, but a lot of people will get back to you.

    By +username mentioning someone it creates a hyperlink to their name and it also sends them a notification in their G+ notifications and possibly into their email. I routinely go through my mentions (sorry I can’t keep up with all of them) and answer lots of questions that people have for me about my own work. If you comment on my photo without a +username mention there’s a bigger chance I might not see it. If you use the +username I’ll be more likely to see it. Don’t abuse this, but if you do have a question, don’t be shy. Ask it and +mention the person you are asking.

    4. Participate in some of the photography related shows on Google+. Lotus Carroll and I broadcast Photo Talk Plus every Wednesday night. Trey Ratcliff’s Variety Hour is on Mondays. Life Through the Lens, The Photoshop Show, The Billy Wilson and Tibby Show. You can find some great G+ hangout shows on Keith Barrett’s Vidcast Network.

    Many of these shows have chat rooms that go on when they broadcast live. Watch the show and chat with other photographers during the show. You’ll meet some of the most active photographers on Google+ and make new friends.

    5. Sharing is caring. If you see something you really like, share it. The other day I saw this kick ass photo that my sister took of my wife and I shared it. You have to be careful about balancing your stream with your own work and shared work, but people love it when you share their work. When you share something, don’t just share it, add a note about why you like it and what caught your eye particularly.

    Most importantly, +mention the person whose work you are sharing in your note about why you like their work so that they are notified that you’ve shared something of theirs.

    Also be sure to +1 and comment as much as you can too. If you like something don’t be shy. +1 every single thing you like. If something stands out in particular comment too.

    6. Post regularly. If you really want to be active on Google+ I think you need to post at least once a day if you can. It’s easy. It only takes a few seconds to send a photo to G+. Build a folder up of work that you want to share so that it’s easily accesible on your computer even when you don’t have time and just pop a photo up regularly.

    Nothing is a turn off like looking at someone’s G+ stream and seeing that they haven’t posted in 6 weeks. There are even scripts which people use to uncircle inactive people on G+. I try to post 5 photos a day spread out throughout the day on G+. This feels about right to me for what I do. You may not have the output I do or the inclination to post that often, but post regularly so that people know you are serious about using G+.

    7. Fill out your profile as completely as possible. Have a creative avatar. Give yourself a description. Add in the other social networks where you have accounts. Take advantage of your photostrip on your profile page. Don’t just use the generic circle pattern that Google puts there if you don’t upload something. Here’s my profile. Your profile says a lot about who you are.

    8. Don’t be a jerk, offer unsolicited criticism, troll, etc. Try to avoid negativity as much as possible. Don’t bitch about how something on G+ sucks, or how you can’t believe how unfair something is.

    In fact, be super nice to everyone you meet. Be authentically positive. I’ve been on the web for over a decade and it took me a while to learn this one myself. Nobody wants to hang out with someone who is bitching all the time. If you feel you need to criticize something, do it respectfully, genuinely and make sure that a person that might feel criticized by your remarks knows that it’s not personal.

    I don’t mind people who want to respectfully debate something, but yeah, haters gonna hate. Haters also gonna get blocked though. It’s so easy to block someone on G+. I block people all the time. Then you’re completely invisible to me.

    Also, unless you know someone really well and know that they actually *want* your unsolicited criticism on their photo, don’t offer it up. Keep it to yourself. Yes, someone may actually want that, but a lot of people won’t — and if you don’t know them well enough to know what kind of person they are it’s best not to tell them that their HDR is garish or that they should go back to photography school and start over. Art is subjective, always remember that.

    9. Don’t post gifs, crazy memes, stuff that’s being passed around Facebook and other stupid crap. People hate this stuff. They will uncircle you. If it’s *your* cat and *you* took the photo and *you* came up with the witty caption, *and* it’s caturday, maybe, just maybe, but otherwise avoid this stuff like the plague. The rare exception to this is if the meme is ABOUT someone in the community. Feel free to participate in these.

    10. It’s YOUR job to get your friends here from other networks, not Google’s. Don’t be lazy. Don’t blame G+ for not getting all your Facebook friends over here. These people are your base. Don’t let them say no. Keep bugging them over and over again and get them on Google+. Post often on your other networks linking to your Google+ page and talking about how cool a place it is and how all your friends should come join you.

    Many of my favorite people on G+ came here because I posted non-stop on Flickr about how much fun I was having on Google+. Make sure your profile pages on your other networks include a link to your Google+ page. Go on Twitter and Facebook and tell other photographers especially that they should be on G+. Write blog posts (like this one) about how great G+ is. There is only one person to blame for your copout that all your friends are on Facebook instead of Google+: YOU! Make it your personal goal to bring these people over!

    11. Try to post your best work. Especially on weekday mornings. Nothing gets you followers like really well done work.

    12. Keep an eye out for popular circles that are shared on Google+. If someone shares popular circles on G+, they are someone you might want to try and get to know. Don’t just ask them as a stranger to put you in their photographers circle — instead make it a point to try and get to know them, to try and interact with them. Hopefully this can happen authentically and organically. If you *do* get to know someone and know them well and they’ve just overlooked your work in their circle, maybe you can ask them then. Popular circles are one of the biggest ways to gain new followers on G+. Make some circles and share them yourself too. Don’t go crazy or overboard with this, but try it out.

    13. Participate in active conversations. Look for active conversations on other people’s photos and participate on them. There is constantly a debate or conversation going on somewhere on Google+. Find it and participate.

    14. Be funny. Everybody loves humor. Because of this everybody loves Michael Seneschal.

    15. Participate in social games and activities. There are so many daily themes on G+ now. Some of them are really well curated and followed. #selfysunday, Macro Monday, Christa Rae’s Photography Scavenger Hunt, etc. Here’s a whole bunch of G+ photo themes for you to explore.

    16. Developing friends on any social network takes time. Just like in real life. People need to get to know you a little bit first.

    When I first met Gino Barasa I thought he was a stalker, hell, I still think he’s a stalker but a really cool stalker now.

    Especially if you are male and the person you are interacting with is female there will be some natural tension there. Females get a lot of crap thrown at them online. There’s a lot of crazy people out there in internetland. Some people are creepy. Don’t expect everyone just to immediately recognize you for what a great guy you are. Don’t overdo it. Just be natural and be yourself. If someone doesn’t like you for some reason, don’t let it bother you. Lots of people don’t like me.

    17. Make sure that there are photos of you on your photos of you page. This makes you seem like a real person. If nobody else has posted any, do a few self portraits yourself or put some family photos up that show you. This makes you feel more approachable and human. Don’t worry if you’re not a total hunk like Michael Bonocore, just get those photos of you up and you’ll be that much more inviting.

    18. Participate in hanoguts and follow up. There are always hangouts going on G+. Don’t be shy. Jump into one. Introduce yourself. Say hello. Spend an hour or so just chatting with folks. Get to know them.

    If there is someone who you find interesting, be sure to follow them after the hangout. Maybe even set up a special circle for “people I’ve done hangouts with” and make sure to go back and interact with their posts. Also look for G+ photowalks in your area. These are GREAT ways to interact in a highly personable way with people in the community.

    19. Let people know more about you than just your photography. I’m a photographer, but I’m also a husband and father, a blogger, a caretaker of two awesome labradors. I love San Francisco and Oakland and great restaurants and food and wine and especially music. Share not just what you make but who you are.

    20. *MOST IMPORTANT* Keep at it. Don’t give up. Charles Bukowski once said that endurance is more important than truth. I don’t know if it really is, but I’ve always liked the way that sounded. DO NOT GIVE UP. It will take you a while to build up friends/traction/an audience etc. This does not just happen overnight. Keep at it and I guarantee you if you plug into the community like I’ve described above and you are a genuinely nice and authentic person, you’ll end up getting a ton out of Google+ both for you and your photography.

    By the way, if you want to find some active photographers on G+ to get to know, be sure and check out my 2,000 Kick Ass Photographers on Google+ circle.

    You can follow me on Google+ here.

    Do you have more tips on using Google+? Be sure to add them here!


    Thomas Hawk Digital Connection

  • 6 WordPress Photo Gallery Themes That Spark Excitement

    In this shorter roundup, you will see six WordPress photo gallery themes, all of which spark excitement when playing around with the demos.

    In previous roundups, we’ve shared a variety of photographer website templates.  Each cost a bit of money, some a lot and some a little.  So here, you will see some that are free.

    Photocrati

    wordpress photo gallery theme

    • Still the number one & All-in-one WordPress photo gallery theme, so it should be included.  At $ 89 and a 30-day money back guarantee, there is no reason to pass this theme up.
    • Build a beautiful photography website, fast.
    • Galleries management system
    • Sell images with ecommerce galleries!
    • Dozens of styles, customize everything.
    • Great SEO and social media so you’ll be found!

     Touchfolio

    touchfolio

    • Responsive
    • Skinning system based on LESS CSS
    • Two types of portfolio
    • Multiple gallery pages allowed, grouped by category

     Grid

    gridthemeresponsive

    • Responsive Theme
    • Infinite Scroll

    Panoramica

    panoramica

    • Customizable background color and textures
    • Homepage slider
    • Homepage features
    • Portfolio using custom post types

    Architekt

    architekttheme

    • Responsive
    • Geometric
    • Portfolio custom post type

    Pegasus

    wordpress-photo-gallery-theme
    • Responsive
    • 8 color schemes
    • Portfolio custom post type

    Looking for more?

    If you want more, visit other roundups:

    • 10 Stunning WordPress Templates for Photographers
    • 24 Free And Premium Portfolio And Photo Gallery WordPress Themes
    • 50 Best WordPress Gallery Themes
    • 10 More WordPress Themes for Photographers
    • 30 High Quality WordPress Photography Themes for 2012

    Share your favorite WordPress photo gallery theme by commenting below.

    dslrBlog

  • This Remote Flash Power Control Hack is Genius

    Some ideas are as brilliant as they are obvious—in retrospect.

    With some minimal soldering skills, Strobist reader Ilya Terentyev (originally from Moscow but currently in Beijing) is using a cheap, auxiliary remote to control the power levels of a manual flash remotely.

    It should be noted that the hack is only possible on flashes with a simple, mechanical switch for increasing and/or decreasing the power level. The discussion thread is here.
    __________

    (Thanks to BudroWilson for the tip.)

    -30-


    Strobist

  • On Photographing People: Pt. 1

    Sara Lando is an occasional contributor to Strobist, but is also a commercial photographer based in Milan, Italy. Today, I am very pleased to present the first in her three-part series on photographing people.

    Let me back up. A few months ago, I met with all of the Strobist's correspondents in Los Angeles. We were brainstorming to fill the knowledge gaps in the site's content. Suddenly Sara started off on this tangent on all of the things that get lost in the shuffle when thinking about lighting and lenses and cameras, etc. Picture a tiny Italian woman gesturing continuously as she uncorks a full brain dump (from a very, very creative mind) on all of the little things that many people never think of when photographing others.

    As I was listening I kept thinking, "Someone should be writing this stuff down RIGHT NOW."

    English is Sara's second language, and I normally smooth it out a little when editing her pieces. Not today. I am sending this through largely untouched. Should you come across an unusual way to express something, just imagine the Italian accent behind it. Read more »


    Strobist

  • My First Photo Processed With Trey Ratcliff’s Awesome New Lightroom Preset Package

    My First Photo Processed With Trey Ratcliff's Awesome New Lightroom Preset Package

    The shot above is of Friday night’s sunset. A great group of Google+ pals, Amy Heiden, Ricardo Lagos, Jonathan Goody, Brian Matiash, Michael Bonocore and my wife Julia Peterson got together to go out and shoot a bus graveyard in Williams, CA. Here’s a group shot that Bonocore made.

    This shot is also the first shot I’ve processed using my good pal Trey Ratcliff’s new package of 76 new Lightroom presets. Trey’s presets rock hard and I’d encourage you to go check them out. Trey’s given a ton to the photography community online and this is a great way to support that effort and his generosity while picking up these awesome presets yourself. This is the first time these presets have ever been made available to the public.


    Thomas Hawk Digital Connection
  • Are You Planning on Buying a New Digital Camera?

    With new cameras coming along every week or two from major manufacturers I’m finding more and more of our readers actively researching new cameras and gear.

    Whether it’s upgrading to a DSLR from a point and shoot, updating that older model DSLR from a few years ago to get more features, buying a second smaller camera to complement a larger DSLR or trying out some of the new mirrorless cameras that are on the market – you’re not alone if you’re planning on getting a new camera.

    So – lets run a poll and see how many dPS readers are on the hunt!

    Note: There is a poll embedded within this post, please visit the site to participate in this post’s poll.

    Looking forward to seeing the results of this poll!

    Post originally from: Digital Photography Tips.

    Check out our more Photography Tips at Photography Tips for Beginners, Portrait Photography Tips and Wedding Photography Tips.

    Are You Planning on Buying a New Digital Camera?


    Digital Photography School

  • Don’t Wait Until You Lose Your Photos for the First Time to Begin Working on Your Backup Strategy

    “Because I’m a jerk who doesn’t back up data, I’ve lost at more than a year’s worth of photos, emails, documents, and more. And, really, who knows what else.” — Mat Honan

    Mat Honan was hacked yesterday and apparently lost more than a year’s worth of his photos. Like Mat, I too have lost photos in the past. If you shoot enough it’s almost inevitable, unless you are very, very meticulous about your backup strategy.

    As strong as I think my backup strategy is today, I realize that it can still be stronger and plan on improving it later this year when the Drobo Mini is out. I’ll get more into this in a bit.

    First off though, I’m sorry you were hacked Mat. That really sucks. I’ve had my Twitter account hacked before too. It’s not fun. After they hacked my Twitter account, they got into my blog and some of my other sites. It took time and money to clean it all up. It’s misery.

    I’m not going to chide you about not having your photos backed up. People that chide you or mock you about that are assholes. It’s like kicking someone when they’re down. So while I’m using your experience to illustrate a point, it’s meant in a very sympathetic way.

    I’ve known a lot of people over the years that have lost photos. It’s happened to so many people. The problem is that most people don’t start seriously working on a backup strategy until *after* they lose their first batch of photos. Everybody always means to work on a back up strategy, but it’s not fun. It’s tedious and boring. It’s so much more exciting to be out shooting or publishing your photos to the web than to be working on a backup strategy. Having lost photos though I can tell you that the sinking feeling you feel when that happens is just horrible and you must begin working on a strategy so what happened to Mat doesn’t happen to you.

    I always tell photographers that one of the best things that can happen to you is *almost* losing your photos. Almost losing them because you don’t actually lose them, but it’s enough of wake up call for you to take backing up your photos more seriously.

    In my case I have terabytes of data and so most cloud storage solutions simply are not economical. The cheaper plans would take years (because they throttle your data — I’ve tried them) and the more expensive plans from folks like Amazon and Google are simply too expensive for me. I don’t have hundreds of dollars per month to spend on storing my photos.

    So it’s up to me to develop my own back up strategy and here is where I am today.

    1. Photos that I’m working on are on my MacBook Pro. This drive is a 750GB internal flash drive. This is backed up to a time machine drive. If I lose my MacBook Pro or my hard drive fails I’ve got this time machine drive. This time machine drive is kept in a fire proof safe that is bolted to a cement floor when I’m not using it.

    2. All of my “to be processed” photos (organized into folder by date) are kept on Drobos (I’ve got six). These are photos that I will eventually move over to my MacBook Pro to work on them. These Drobos are kept in the fireproof safe.

    3. All of my “archived” photos that I’ve already processed along with the Lightroom Catalog for that day are kept on Drobos in my safe.

    4. All of my processed JPG files, my finished photos, that are waiting to be uploaded (about 22,000 right now) are kept on my MacBook Pro hard drive, which is backed up with time machine and another copy is kept on a Drobo. My photos that I have already processed as JPGs and have been uploaded to Flickr are kept in folders by the month uploaded on a Drobo.

    Another periodic backup of all of my processed photos is done and these are kept on USB hard drives locked in a drawyer at my office. Another hard drive of some of my most important processed photographs and family photographs is kept on a hard drive at my parents house in Southern California.

    The weakness in my strategy? My RAW files aren’t backed up beyond storing them on Drobos in a locked safe today. Part of this is the sheer number or RAW files that I have. I haven’t added them up but I probably have at least 10 terrabytes of RAW photos.

    I feel sort of ok having the drives replicated in the Drobos. I have had drives fail in my Drobos before and was able to simply eject the old drive and add a new one in and have all my stuff back. I’ve also had one Drobo fail. When a Drobo fails you can just put all four drives from your old Drobo into a new Drobo and get it back (this was my experience). Replicated data should be your first line of defense though and not your only line of defense.

    Your second line of defense should be against theft, fire, natural disaster, etc. I’m sort of covered here. I feel pretty good about being protected against theft. The safe is huge, almost as tall as me. It took four guys to get it into the basement. I didn’t realize how large a safe I’d bought from Costco and it’s a lot bigger than I really need. It’s bolted to a cement floor in the basement. I’m currently remodeling my basement and am putting up walls that will prevent it from ever leaving the basement without moving the walls. I’m also putting it inside a wine cellar with a locked door on it. I feel pretty covered against theft.

    As far as fire or other natural disaster? Who knows. I’m not comfortable with my strategy there. The safe is fire proof, but I’m sure it’s only good up to a point.

    My other weakness is when I’m travelling on the road. Right now I dump all my photos on my hard drive which is backed up with time machine. The problem though is that I almost always fill up my MacBook Pro’s hard drive and have to dump some photos on an external USB drives. These files are then unprotected until I get them home and get them on a Drobo.

    So what will I do differently this year? Later this year I’m going to buy a Drobo Mini when they come out. These small portable units are ideal to use as primary storage on the road. They use the smaller laptop drives which are more durable and robust than 3.5 inch drives. The new Drobo Mini is a Thunderbolt device so it will be fast. I’ll use this as my primary storage device on the road. This way I’ll have enough storage to always have my data replicated (the first line of defense) on the road.

    The other thing I’ll use this new Drobo Mini for though is to fix a glaring weakness in my current strategy. At present my RAW files do not enjoy the ultimate line of defense of off site storage. So later this year I’m going to use the Drobo Mini to make back up copies of all of my RAW files (both “to be processed” and “archive” RAW originals) Because the Drobo Mini takes smaller laptop drives these will take up less space and be more durable and portable. I’ll then rubberband the four laptop drives from the Drobo Mini together and get a safe deposit box in a bank vault. This is where I’ll keep these RAW files. Periodically I’ll go visit my box to add new laptop drives to the box. I’ll also keep a copy of all of my processed photos here as well.

    Once I make these changes later on this year I think my back up strategy will be even better. I’m sure it can get even better still, but the important thing is that I’m working on a strategy and that it’s evolving and moving forward.

    What is your backup strategy? I wonder what percentage of people are like Mat and would lose precious photos if someone stole their computer or they were hacked or whatever. I bet it’s a pretty high number.

    The new Drobo Minis likely will be out by the end of September, along with the new Thunderbolt Drobo 5D. If you want one you should pre-order and get on the waiting list because they’ll likely be hard to get early on. You can pre-order directly from Drobo here. You can pre-order from Adorama here.

    Disclosure: Drobo is a sponsor of our weekly photography show Photo Talk Plus. I’ve used them for years though even before that and have been happy with them personally speaking. They are not for everybody though and if you are doing something else, that is fine too. The important thing is that you do have *some* sort of strategy — and if you don’t have some sort of strategy that you plan to start one as soon as possible, whatever that may be.


    Thomas Hawk Digital Connection