Category: Uncategorized

  • 10 Surefire Tips To Help You Capture Better Images of Your Children

    take pics of kids article2.jpg

    Do you LOVE taking pictures of your children? Do often wish you could get better images of them? Whether you are using a point and shoot camera or a DSLR, MCP Actions, creator of Photoshop actions and Lightroom Presets, is here to help you take better photos of your kids and grand kids.

    take pics of kids article.jpg

    6 tips and tricks to photographing your children:

    1. Get a little closer. One of the biggest differences you can make is to get closer to the subject in your photo. Sometime we are caught up with getting the nice scenery behind them and our children get lost in the image.
    2. Look for different angles. One way to get more variety in your photos is to look for different angles instead of always taking them straight on.
    3. Try to engage your kids. Be silly, make funny faces, jump around, sing silly songs. They will be more likely to give you natural expressions and they will have more fun.
    4. Try distracting your kids. It can be hard to get young children to stay still for a photo. Try putting something on your head like reindeer antlers or put something on the top of your camera like a fuzzy sticker. You will get their attention and they most likely look straight at your camera.
    5. Natural is OK. We all have this notion that we want the perfect portrait of our children. Remember to capture the every day moments. The blank stares in space, the moody, sullen moments, the quiet moments, these are all memories that you will want to look back upon, not just the smiling picture perfect moments
    6. Know when to stop. If you are starting to get upset with your kids then its time to put the camera away and try again another day.

    take pics of kids article4.jpg

    4 Tips and Tricks for lighting:

    1. Golden hour! The best time of day to take outdoor pictures is one hour after sunrise or one hour before sunset. The light is soft and pretty during those hours and the shadows are not as harsh. The next time you head to the beach, take your kids out for a nice walk one hour before sunset and bring your camera!
    2. Overcast days are the best! Whenever we have an overcast day I run and get my camera and head outdoors with the kids. The clouds create a diffuser over the sun and it softens the light and minimizes shadows. My favorite outdoor images have been taken on overcast days.
    3. Look for open shade. A great place is a porch, gazebo or under a tree. This will help your children from squinting.
    4. Back light. If you have to take pictures in bright open sun be sure to place the sun behind your child rather than putting the sun behind you. This will make a pretty halo of light behind your child and will also make them less likely to squint!

    take pics of kids article5.jpg

    Remember to have fun! I love documenting my children’s youth with photographs whether it’s with my DSLR or my iPhone. Some of my favorite images of my children are not the posed holiday cards images but rather the spontaneous, in the moment images that capture what they are doing and how they are feeling!

    take pics of kids article6.jpg

    Jodi Friedman, the owner of MCP Actions, makes photo editing easier and faster with Photoshop Actions, Lightroom Presets and Online Training. Her colleague, Tracy Callahan of Memories by TLC, is a portrait studio specializing in newborns, young children and maternity sessions. Together they offer a one-of-kind online Newborn Photography Workshop. To learn more about MCP’s Newborn Photography Online Mentoring: The Start to Finish Workshop click here. Make sure to follow MCP Actions on Facebook and to subscribe to their blog, for more great photography and editing articles.

    Post originally from: Digital Photography Tips.

    Check out our more Photography Tips at Photography Tips for Beginners, Portrait Photography Tips and Wedding Photography Tips.

    10 Surefire Tips To Help You Capture Better Images of Your Children


    Digital Photography School

  • Bent Shaft Paddle and Racing Outrigger Canoe


    bent shaft paddle and racing outrigger canoe

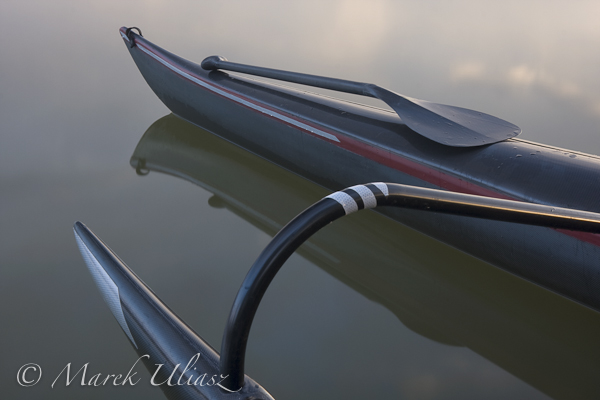
    July 29, 2008. One of my ZRE carbon lightweight paddles on a bow of Surfrigger outrigger canoe. In addition to my local Colorado waters I paddled Surfrigger in the 2003 WaterTribe Eveglades Challenge and in the 2009 Missouri River 340 race. Camera: Canon EOS 40D with Canon EF-S 17-55mm f/2.8 IS USM lens.

    This picture is available for licensing as a royalty free image from my stock photography portfolio.

    Related post:
    Photo Impressions on Surfrigger, My Outrigger Canoe
    My 2009 Missouri River Race as Recovered from a GPS Track
    WaterTribe Everglades Challenge 2003
    Kayak and canoe paddling in my stock photography portfolio


    paddling with a camera

  • Silhouettes by Eli Powell

    When I was a child, my mother made silhouettes of me each year- showing my bowl haircut and giant nose. She traced my outline with a pencil on black craft paper, then framed it on a white background.

    A silhouette is a distilled image- an outline of a whole. By simplifying the subject, all the “clutter” and extraneous information can be removed. Now that I’m starting my own family, it’s no surprise that I am returning to the silhouette to tell our story. It’s summertime in Boulder, Colorado. This means afternoon thunderstorms. My wife and I walked out to the parking lot the other day and make this dramatic silhouette.

    Silhouettes by Eli Powell

    © Eli Powell – Nikon D700, 24-70 mm @ 62mm, 1/125s, F6.3, iso400

    One of the easiest ways to create a silhouette is by backlighting the subject. This can be via natural light (shooting into the sun for example) or in this case via off-camera lighting. The “harder” the light source is, the sharper the silhouette will be. For dramatic effect, under expose the image so only the silhouette remains.

    Silhouettes by Eli Powell

    © Eli Powell – Nikon D700, 24-70mm @24mm, 1/125s, F3.5, iso 800

    Here is a “before” image of the shot above. This is what the parking lot looked like to the naked eye. You can see that by underexposing the “clutter” disappears, and the subject is able to shine through.

    Silhouettes by Eli Powell

    © Eli Powell – Nikon D700, 24-70 mm @ 62mm, 1/125s, F6.3, iso400

    One of the biggest issues with silhouettes (and backlighting in general) is avoiding lens flare. Lens flare happens with the light source shines directly on the lens. Flare leads to loss of contrast, sharpness & can produce color spots on the image. To avoid flare, use a lens hood and carefully position the camera (or light) so that there is not a “line of sight” between the two.

    Eli Powell is a Boulder Wedding Photographer specializing in modern wedding photographer. He live in Boulder Colorado with his wife & cat, and travels throughout Colorado photographing love.

    Website: http://elipowellphotography.com

    dslrBlog

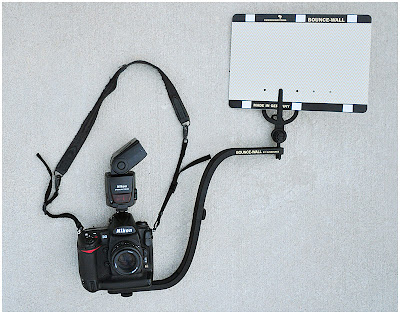
  • Bounce-Wall: The Genius/Insanity Line Goes Commercial

    There is a fine line between genius and insanity, and it's a line the DIY readership of this site has proudly straddled at times.

    But this time, the genius/insanity line is being straddled by a commercial product. Lemme 'splain… Read more »


    Strobist

  • Early Spring Stand up Paddling in Northern Colorado

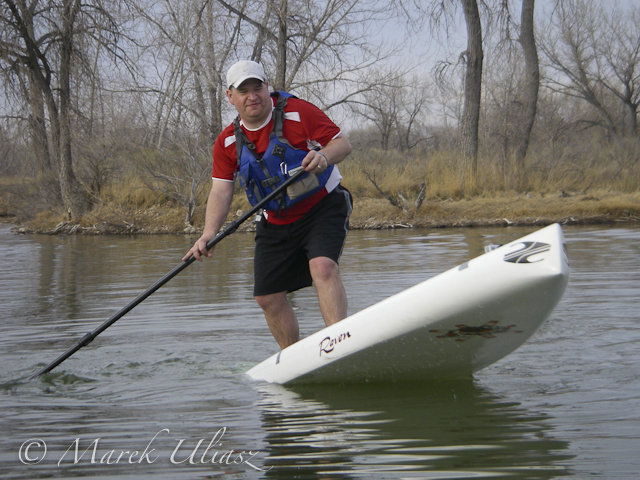
    March 25, 2012. Rob Bean testing his new stand up paddling board (Boardwork Raven) on Beaver Pond in Arapaho Bend Natural Area near Fort Collins, Colorado. Camera: Pentax Optio W30.

    Related post and more pictures:
    Stand Up and Paddle – Trying Boardworks Raven in Colorado
    Colorado River 2011 Race Dominated by SUPs (Stand-Up Paddlers)


    paddling with a camera

  • Biking and Packrafting on South Platte River in Northern Colorado

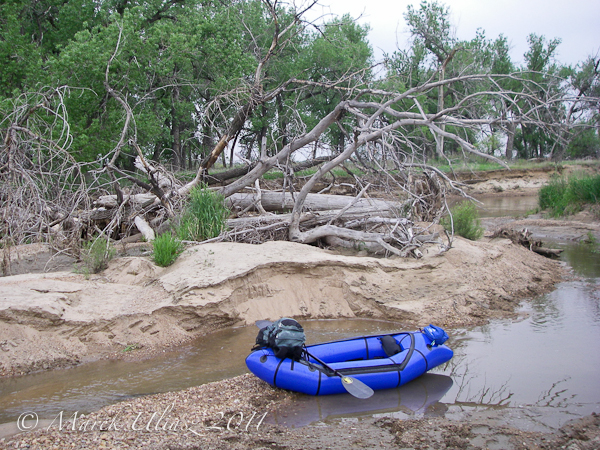
    Alpacka Yukon packraft

    June 6, 2011. Alpacka Yukon packraft at a log jam on the St Vrain Creek just above confluence with the South Platte River during biking and packrafting trip in Wildcat Mound area in northern Colorado. Camera: Pentax Optio W30.

    Related posts and more pictures:
    Wildcat Mound Run – the South Platte River by Bike and Packraft
    Biking and Packrafting – A Selfsupported Classic Run on the South Platte River near Greeley
    Inline Skating and Packrafting – Road and River Test on the South Platte
    South Platte River below Denver, Colorado
    GPS/photo river guide


    paddling with a camera

  • On Assignment: ATM Man

    I am working on a series of portraits of businesspeople for my county's Economic Development Authority, and it almost feels like I am back at The Sun shooting dailies for the biz section.

    It's been awhile since we have done a full 360-degree OA, and this is actually a good example of working on top of a fluorescent environment.

    So what the heck, let's go. Follow the bouncing ball… Read more »


    Strobist

  • Winter Paddle Training on the South Platte River near Greeley

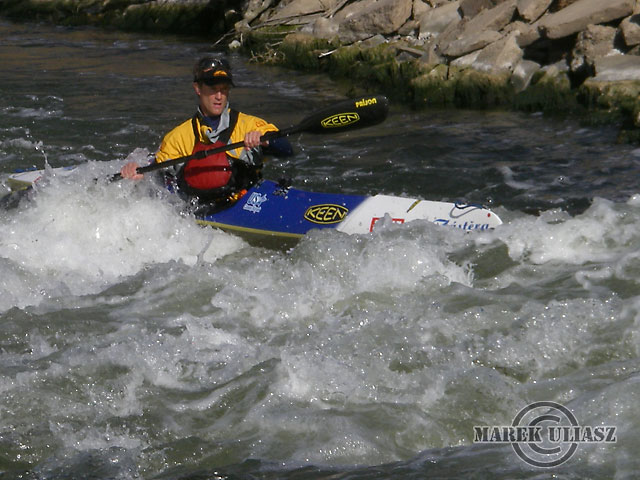
    March 15, 2009. Jeremy Rodgers in his wildwater racing kayak training below Plumb Ditch dam on the South Platte River near Greeley. We paddled 5 miles upstream from Kersey to reach the dam. The South Platte River may be the only open water for winter paddling in northern Colorado. Camera: Pentax Optio W30.

    Related post and more pictures:
    Wildwater Racing Kayak on the South Platte River


    paddling with a camera

  • The Fair by Erik Kerstenbeck

    The Fair can provide some exciting photographic opportunities ranging from the crowds, multicolored lights, vendor and game booths, strange and exotic food, farm animals and of course, the rides! Taking pictures of people at the Fair can be rewarding, but often this is frowned upon by the subject (unless you know them) and even worse, Fair Security. Keeping your focus to the rides is a safe bet. Getting gear through the front gate has not been a problem for me (including a tripod and full backpack). It is a good idea to check restrictions before arriving loaded to the gills with equipment – you may be making an extra trip back to your car after being denied entry by security.

    sphinxsmall-21

    © Erik Kerstenbeck

    Any camera with the capability of Manual Settings will allow you to experiment with capturing movement. Using slow shutter speeds allows the moving subject to blur which creates a sense of speed. Experimenting with different shutter speeds will be necessary depending on the velocity of the moving object and its motion with respect to the camera. Don’t worry too much about this – just try a few different settings, preview the results and make adjustments on the fly.

    The twilight hour is often best for this type of photography. One can still capture a properly exposed sky and the multicolored lights as they sparkle to life. Having something other than a pitch black sky will add depth to your images as well as a pleasing background. This time is short, so plan ahead for your shot. After this period, the sky will be black, so no need to rush your other work, just compose, experiment and recompose. One of the challenges of shooting at the fair, aside from the camera adjustments, is getting a good shot of the rides, without the crowds. One way to do this is to find the rides Exit ramp and set up close to there. This is the least frequented area as crowds gather at the Entrance. If possible, find a low perspective and shoot up and with a wide-angle lens. This will also eliminate any distractions. Keep in mind, with slow shutter speeds, people can walk through your shot without much effect (provided they don’t stand in front). Sometimes having a “ghost” or two also makes for an interesting image enhancement.

    This image was taken at the 2012 San Diego County Fair. Here the goal was to capture two types of motion; linear from The Sphinx and rotational from the s[pinning ride in the background. To capture this image, I mounted a Nikon D7000 on a Manfrotto tripod, equipped with Sigma 10-20mm wide-angle and cabled shutter release I carefully composed and experimented with shutter speed until I got what I wanted. To freeze the Sphinx, I used a single off camera Nikon SB600 Speedlight. There is no need to worry about White Balance, just set to Auto and correct in post (keeping in mind to always shoot in RAW).

    Erik Kerstenbeck is a San Diego Landscape and Portrait Photographer

    dslrBlog