Category: Photography

  • Learning to See, Part II

    The Hues and Use of Colour 

    Colour is to photography what verbs are to writing. –Daryl Benson

    From the day we are born we start to see the world in colour. Just like taxes and death there is no avoiding it, or at least we should hope not.

    What has developed over the years by academia is a litany of theorems best described by Encyclopaedia Britannica: “The number and variety of these theories demonstrates that no universally accepted rules apply; the perception of colour depends on individual experience.”

    If a respected reference such as Britannica recognized that no universally accepted theory could be adopted, then how can a short blog entry possibly answer the question :What is Colour?” Obviously it can’t. The task, then, is to pique your interest, encourage you to explore other references, and employ photographic technique that has proven over time to work.

    Before we delve into colour in a fast and furious way, let us step back and think of the great black and white imagery that captures our attention. By having a grasp of what truly makes a fine black and white print we can better understand what creates a lasting colour photograph.

    Once a decision has been made to photograph a scene, the beginning photographer would be well served by attempting to cut through the colour and get to the shades of grey between black and white. Then you can really start to see the image reveal itself and provide evidence of the highlights and shadows that will allow you to discern how to best establish a correct exposure for later manipulation in the digital darkroom.

    For the landscape photographer, there is probably no better place to start than with the work of Ansel Adams. Any student of photography should be encouraged to study this incredible body of work available at bookstores, libraries or on the web.

    As you review the collection, the tonal range of the prints will no doubt intrigue you. By creating a process which became universally known as “The Zone System” Adams was able to accurately pre-visualize how the final print should appear, and he exposed the negative to maximize the latitude of the medium; the blacks would be black without “blocking up” and the whites would be white without “blowing out.”

    Books have been written on the zone system so, again, I would encourage a web search for greater clarification.

    We can also use the zone system today with digital photography, and, indeed we should have a working knowledge of the topic. Fortunately for us the matrix metering systems in many cameras use algorithms in the same principal as that which allowed Adams to develop the Zone System, thus ensuring we automatically get a good exposure. Whereas Adams zone system generally worked with a tonal range measuring from zero to ten, the same white and black points in today’s digital photography measure from 0 to 255.

    I would love to have the opportunity to view an original Adams negative. I suspect it would be very flat and boring, much like a perfectly exposed “middle zone” colour digital file. The answer behind a beautiful high-contrast black and white photograph, or a colour-dripping-off-the-paper giclee print does not completely lie with the exposure, but with the darkroom manipulation techniques after the capture that was employed to “pop” the contrast.
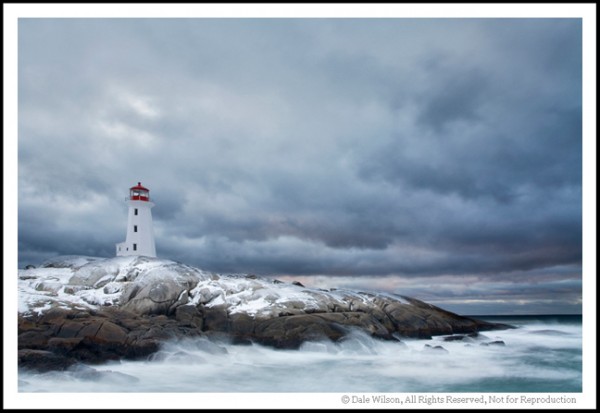
    By learning to see and understand the tonal range of the scene in black and white, the photographer will be developing an intuitive process of pre-visualizing the final image in colour and by consequence decide whether graduated filters or multiple exposures should be made for later merging in editing software. With practise this will become an intuitive process.

    As you start your creative vision process don’t let your eyes restrict you by what you see, but allow your mind to direct you by what you can create. Only then will you start to have vision true to yourself and begin developing a personal style.

    In the next entry we will look at complimentary colours.

    And remember, if you are having fun, you are doing it right!


    Post originally from: Digital Photography Tips.

    Check out our more Photography Tips at Photography Tips for Beginners, Portrait Photography Tips and Wedding Photography Tips.

    Learning to See, Part II


    Digital Photography School

  • Do You Get the Most Out of Your On-camera Flash?

    Life is happening all around you. Every day is full of amazing, once in a lifetime moments that you can’t wait to capture and share. Unfortunately for us as photographers, the moments we most want to capture often happen in less than ideal lighting conditions. This is why flash photography is a great tool to have in your arsenal. Flash Continue Reading

    The post Do You Get the Most Out of Your On-camera Flash? appeared first on Photodoto.


    Photodoto

  • On Assignment: Shiny Black Toys

    A little ways back, LumoPro approached me about doing photos of their product line. That's a lot of gear, and the whole project was more than I would have time to take on.

    But I do enjoy shooting this kinda stuff. So we compromised in that I would shoot some of their more popular items now and the photos could be used as a template for anyone who might be shooting the other items later.

    Here's the thing. Shooting shiny black objects is one of those cases where your incident meter may be very accurate, but in practice it's no help at all. Because properly exposed, a black object is, well, black… Read more »
    Strobist

  • How To Approach Street Photography In 12 Easy Steps.

    Many photographers are timid about “shooting strangers” on the street which keeps them from even trying.  Street photography is all about telling a story in a single frame and that’s a beautiful thing.  It’s normal to be reluctant or shy, but these 12 steps will gently ease you into the wonderful world of street photography that exists in your hometown or anywhere else your travels take you. There are lots of stories out there waiting to be told.  Get your camera and let’s go!

    There are stories waiting to be photographed everywhere you go.

    1- Do I need permission?

    In most countries, as long as you are in a public place, it is perfectly legal to photograph people for either editorial or fine art purposes. However, if you intend to use any of those images for stock photography, meaning using that photograph in advertising, then you need the proper model release form signed. Each country has its own laws and regulations about this, so please do your research before you photograph strangers in the streets.

    2- Hit the streets with a friend.

    It’s generally better to shoot street photography on your own.  Why?  You are more invisible that way. But if going on your own is a bit intimidating at first, take a friend along. It will help emboldened you, but also surprise you at how differently two people see the world.

    3- Start in a crowd.

    In my workshops I encourage new street photographers to start with a busy public place such as a street market or an outdoor event as a comfortable start.  You are more invisible in a crowd and can more easily overcome your fear of photographing strangers. Street performers are excellent street photography subjects to start shooting. After all, they are there to be seen and are used to being photographed plus they are part of the culture of the place you are visiting. Buskers perform to make a few bucks, so shoot away, and be generous with what you toss in their hat!

    4- Find a stage.

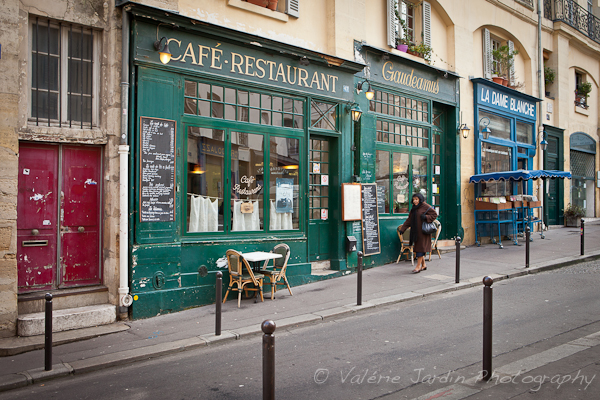
    As much as I enjoy walking for hours searching for that special moment, I often do a lot of standing and waiting if I find a really compelling background to use as a stage.  Once you find your stage, be patient and eventually the right people will walk through your frame.  When I am traveling I like to add a sense of place by carefully selecting the architecture in the background or finding signage in the local language.

    5- Don’t forget silhouettes

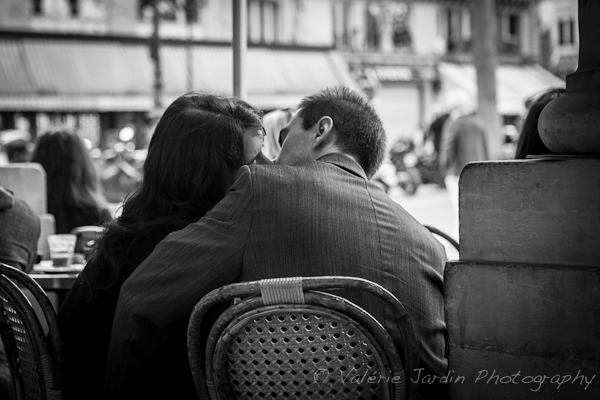
    Silhouettes are interesting subjects only if they are easily recognized. There should be no doubt as to what the image is. People with umbrellas, bicyclists or lovers holding hands are terrific silhouette images.

    6- Street portraitures

    I love the thrill of engaging a subject in a conversation!  For some of you this may be more intimidating than shooting candidly. For others, you can get over the apprehension by asking permission to make a portrait, so they are more at ease with the process. If you ask permission and it is granted, take your time. Then show them the picture on the back of your camera. Tell them why they caught your attention. Everyone enjoys a compliment!

    7- Photographing children.

    Basically, if they are in a public place, you have just as much right to photograph children as anybody else. Even so, it’s a good idea to get the okay from a parent first. My way is to simply nod towards them, show my camera and wait for their nod back. For the times when no one is around to give you the okay, use your best judgement.

    8- Should you give a copy of the photograph to your subject?

    When I do candid shots, I occasionally interact with my subject after I make the photograph. But mostly I’m invisible and they never know I took a picture. When I make a street portrait I engage them in a conversation and show them the picture on the back of the camera. If they ask for a copy I give them my card so they can email me for a digital file of their portrait. That’s the least you can do to thank them for their time.

    9- Be confident and respectful. 

    You are not doing anything wrong, but if someone objects to having their picture taken, don’t shoot! It’s not worth an argument. You may be well within your legal rights, but the most important thing is to be respectful of others. I would also urge you to avoid photographing people in vulnerable or embarrassing situations. Put yourself in their shoes. Would you feel comfortable being photographed that way? If the answer is no, then use your common sense and move on.

    10- Follow your gut instinct. 

    That’s an important step towards making street photography an enjoyable experience and one I always teach my students right away. If the situation feels wrong or dangerous, then it probably is. Trust your gut.

    11- Color or B&W? 

    This is totally a personal choice. There is no right or wrong answer. I prefer to process my images in black and white for its timeless quality, but some images are better in color and sometimes the subject is color. Let your artistic eye guide this decision.   But I will say that another advantage of monochrome is its ability to remove any distracting colorful elements from the frame, allowing the viewer to the be more drawn to the subject.

    12- It’s your vision. 

    Don’t let anyone tell you what does or doesn’t qualify as street photography, or what camera you should use. There are no official rules here. Street photography is all about telling a story, communicating an emotion. Your camera is an extension of your own artistic vision. Be patient. Trust your gut. Go out there and have fun!


    Finding a stage and waiting for the right person to walk through your frame is part of story telling with a sense of place.

    Silhouettes are interesting subjects only if the action is easily recognized.

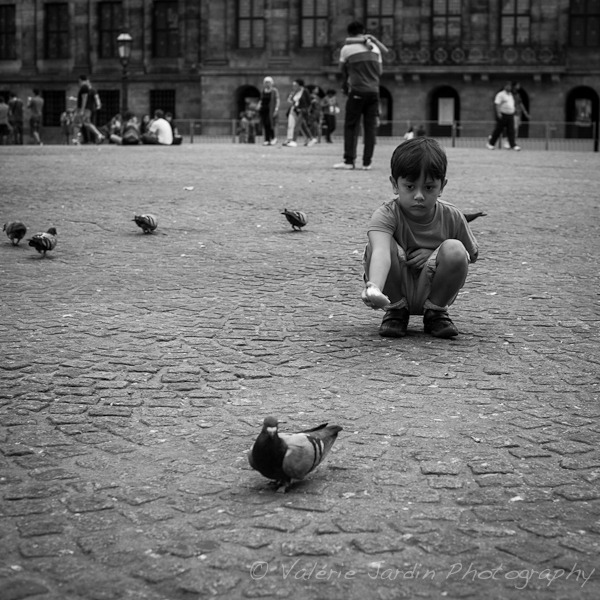
    When photographing children, use your best judgement if a parent is not present.

    Street photography is about gesture and expression.

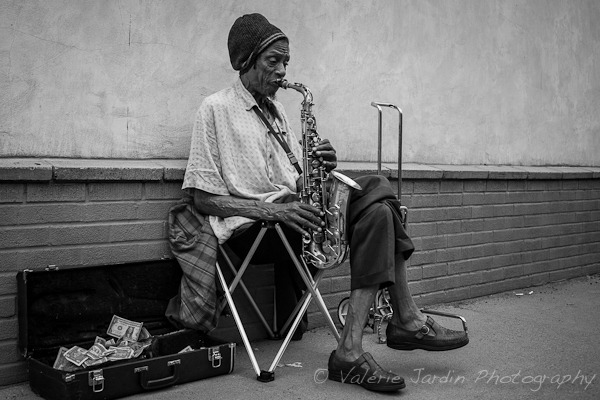
    Street performers are great subjects, especially when you first get started.

    Sometime the subject is all about color!

    Street portraits are also part of street photography. I walked by this gentleman and thought he looked cool and told him so. He gave me the ok to make a portrait.

    Several stories can happen in one frame.

    The only time I bother to carry a tripod to do street photography is to shoot long exposures for some motion blur.

    Street photography is not only about people…

    Are you currently a street photographer or aspire to become one? Please share your experience with the dPS readers.

    Post originally from: Digital Photography Tips.

    Check out our more Photography Tips at Photography Tips for Beginners, Portrait Photography Tips and Wedding Photography Tips.

    How To Approach Street Photography In 12 Easy Steps.


    Digital Photography School

  • ColorTime Out Photoshops Photoshop On Mobile

    If you love mobile device camera filters and special effects, you need not keep reading. This post takes a look at a new photo app for iOS (sorry Android users, it’s not ported there yet) devices that got me to switch off of using Photoshop Express, my previously preferred image editing app.
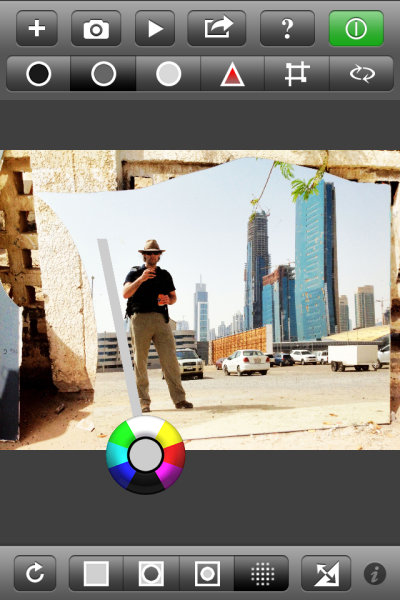
    The app is called ColorTime. Yes, a little campy, but it’s what’s on the inside that counts. At first ColorTime looked to me to be yet another gimmicky app to ‘play’ with photos and then share them to the world. I don’t need one of those so I ignored it….then kicked myself when I saw what it can do for my mobile photos.

    How It Works

    While a fine, free app in its own right, what I find most lacking with Photoshop Express is the ability to control different areas of the image differently. It’s an all or nothing proposition, much unlike all of Adobe’s programs for desktop/laptop computers. I can’t bring up shadow detail or tone down highlights. I also can’t adjust the color temperature in shadows, something Adobe introduce in its latest version of Lightroom 4.0.

    ColorTime achieves the ability to control different tonal areas while also attempting to simplify the process. A problem with adding too much functionality into a mobile app, especially for a phone, is the real estate available for controls. Think of all the icons for tools in Photoshop CS6, for instance, and then try to fit those on an iPhone screen. ColorTime skirts around this problem by allowing for multiple controls with one tool. It looked like this:

    That circle allows for cooling or warming of colors as well as lightening and darkening of tones. It is fairly simple to use and once over the initial understanding of the function, it is fun to use. Tap once on the screen and then move around the circle to emphasize each color or tone. Drag away from the circle to increase that effect. Stack changed on top of each other with first applying one, then tapping and applying another effect.

    The icons across the top allow users to adjust shadows, midtones and highlights. There is also “play” button where a range of changes will be shown as something of a movie and users can stop the show at any point when they see a rendition they like, without having to figure out all the enhancements to get there. Also on the top panel are tools to adjust saturation and to perform crops.

    Along the bottom are icons to select the whole image, edges or just the middle areas. Photographers can also paint an area they want to change with the circle tool and it’s this function that has me switching sides away from Adobe. I can paint in an area where I want to increase the brightness, but leave the rest of the image alone. This is a more finite way to adjust than using only the Highlight tool at the top. I really like this feature and it is what I have been waiting for from Adobe.
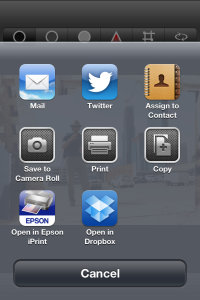
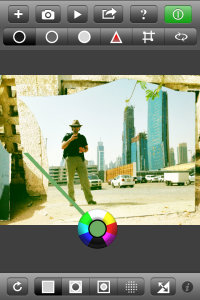
    The ‘camera’ part of the app simply uses the iDevices built in app to take pictures. Nothing ground breaking here and on par with Photoshop (although Photoshop Express does have some extra features that can be purchased). Sharing functions use the standard set of iOS tools to push your images onto the world.

    In Real Life

    I haven’t had a lot of time to shoot with ColorTime, just about a week, but I certainly have a large amount of photos to edit on my phone. And that’s the joy in using this app. I have been wary of most apps as they rely heavily on filters and flat out changing the original image toward anything that is not what appeared before the camera. That’s not ColorTime.
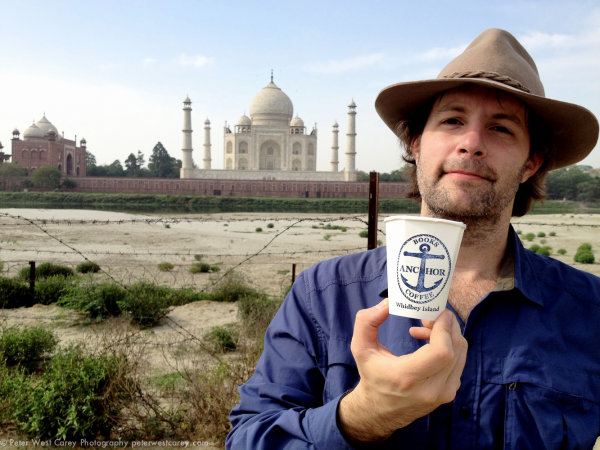
    ColorTime fills my desire to edit images closer to what I saw when shooting. This is, of course, highly subjective territory but having that control to change just one area or the other, fixing what y iPhone’s camera didn’t get right the first time, is key for me. It’s not for every user. If you’re looking for more wonkiness, you can surely create it with ColorTime but that’s not where this app excels.

    Some Gripes

    Nothing’s perfect and there are some improvements I would like to see come to ColorTime.

    1) The ability to undo. Right now, as far as I can see, I have to start completely over with the Reset tool. I can’t just take one step back after making a mistake.

    2) I’m not always a straight shooter. I want the ability to rotate my images. Just a little. Or a lot.

    3) Sometimes it’s easy to do the wrong thing. Such as, I don’t know what I want to change the very moment I put my finger to the screen, I end up waiting a fraction of a second too long and I activate the “Select” tool to paint in an area instead of using the selection I just had. This took some practice before I was accustomed to the flow.

    Examples

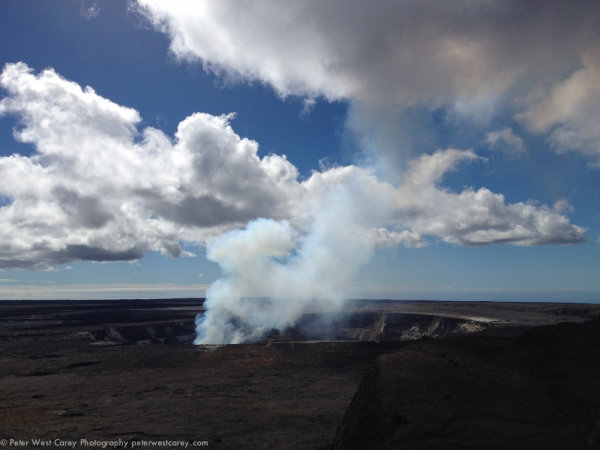
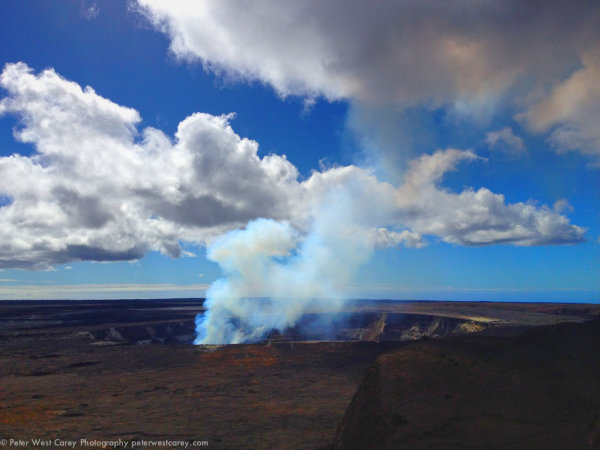
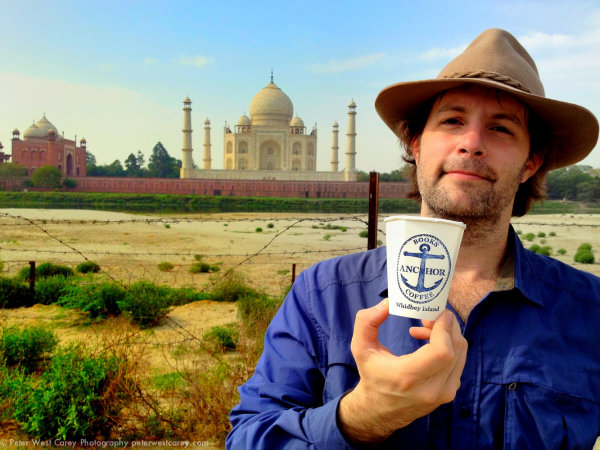
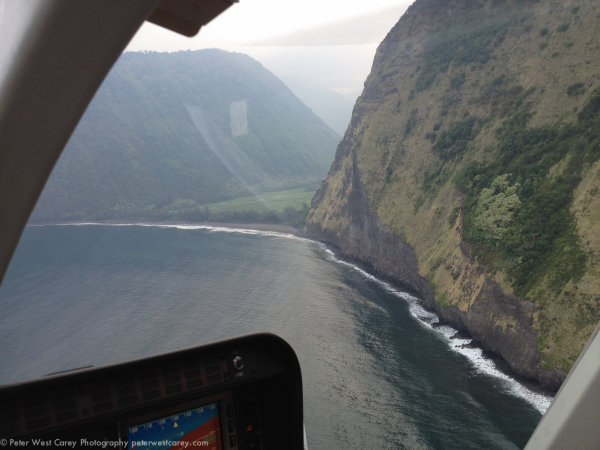
    Now then, what can it do? All these shots are starting with the iPhone 4s camera. I will first show the original and then my edit. I used a mixture with every image; selecting one area for adjustment then changing saturation differently for different areas. Removing some blue or magenta color cast by selecting the opposing color to highlight.

    At the Taj Mahal, Agra, India.

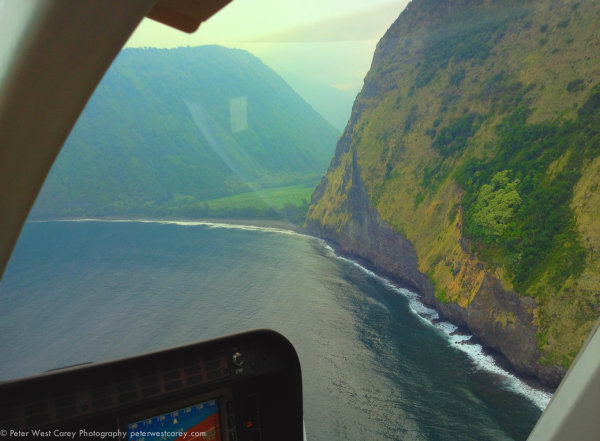
    Waipio Valley, Hawaii, The Big Island

    Kilauea Caldera, Hawaii, The Big Island

    Conclusion

    ColorTime is something I have been waiting for. Mind you, I’m the type of guy who doesn’t like 5,000 filters and effects. I want to adjust the light and dark areas differently and make somewhat finite changes. Colortime gives me control over my images on my iPhone in a way that is intuitive and useful.

    You can find ColorTime for free at the Apple App Store.

    Post originally from: Digital Photography Tips.

    Check out our more Photography Tips at Photography Tips for Beginners, Portrait Photography Tips and Wedding Photography Tips.

    ColorTime Out Photoshops Photoshop On Mobile


    Digital Photography School

  • How To Create a Motion Blur Effect in Photoshop

    Motion Blur Original

    The original image before the motion blur is applied

    Motion Blur Filter

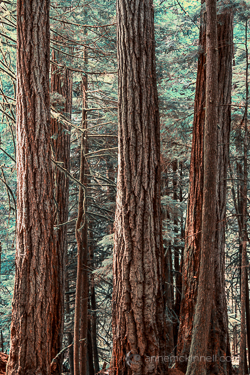
    For the first technique I am going to start with this rather boring and cluttered image I made in a forest on Vancouver Island, British Columbia, Canada.

    Maybe it wouldn’t be so boring if there was anything to show the scale of these enormous trees but it’s pretty hard to get away from cluttered in the dense forest there.

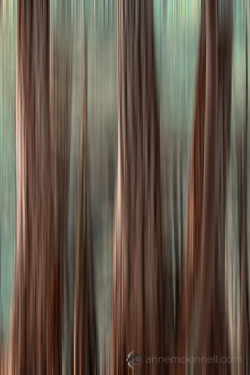
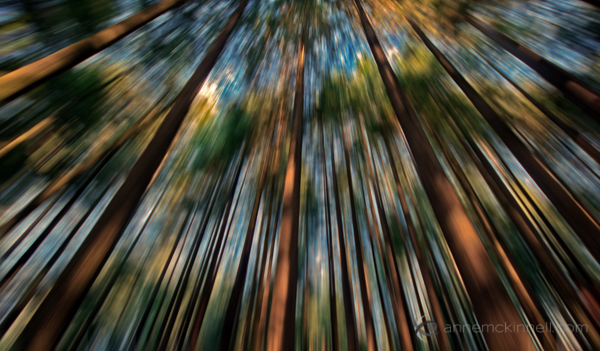
    I decided to mimic the effect of in-camera panning by using the motion blur filter in photoshop to blur the image in the same direction as the strong lines of the trees.

    Try this technique on your own forest scene or another scene with strong lines by following these steps. I am using Photoshop Elements but you can also do it in Gimp and some other photo editors.

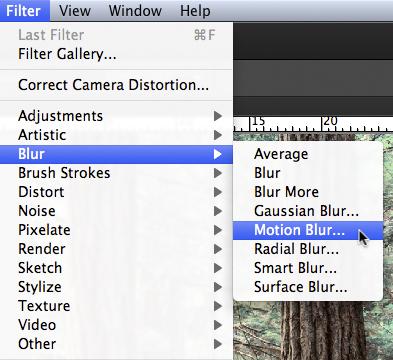
    1. Select Filter > Blur > Motion Blur

    Photoshop Motion Blur Filter

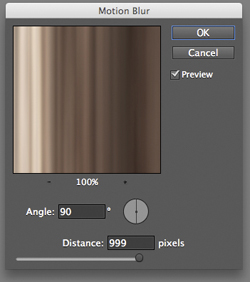
    2. Set the direction of the blur to match your image and amount of the blur to your taste. For my image I made the blur vertical and the amount maximum.

    If you have a photo editor that supports layers, make a copy of the background layer and apply the filter to the new layer. This will allow you do have some fun in step #4 below.

    Photoshop Motion Blur Filter Options

    Motion Blur Applied

    Image after motion blur is applied


    3. Crop the tell-tale edges out of the image.

    I find that you can always tell when the blur is done in photoshop, as opposed to in-camera, because the edges of the image don’t blur evenly. Why they don’t blur evenly I don’t know! But they don’t so I always crop the edges out.

    See the 100% zoom of a portion of my image below where you will see how the edges of the image don’t look right.

    Motion Blur Artifacts

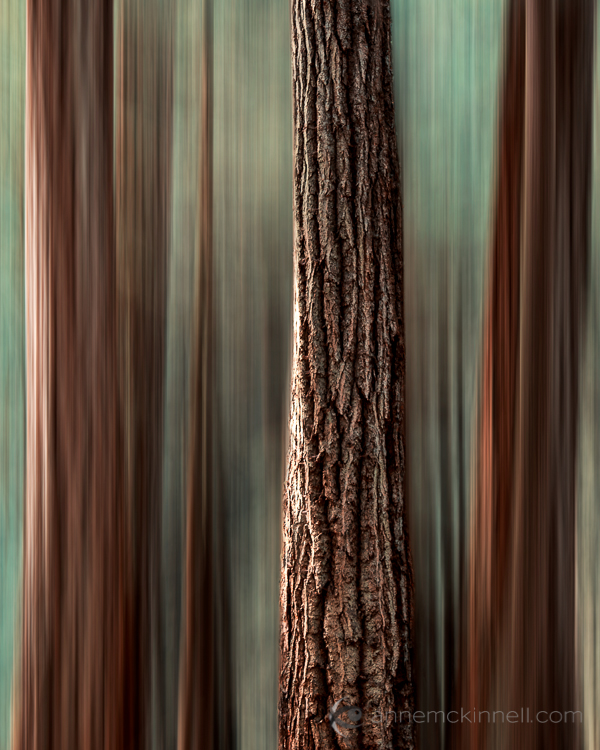
    4. To add a little something extra try revealing a part of the original image without the blur.

    If you applied the blur to a copy of the background layer as I mentioned in step #2 above you can try this. Either using a layer mask or simply using the eraser tool, remove the blur effect from a portion of the image.

    This is the final version:

    Motion Blur Revealed

    Here is a video I made that shows all the steps I took to make the final image using Photoshop Elements.

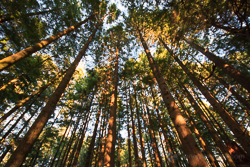
    Zoom Blur Original

    Original image before zoom blur is applied

    Zoom Blur Filter

    This technique is very similar to the motion blur effect but with a little bit of a twist.

    As you can see the original image has a few problems. The trees are mottled with light and shadow and there are blown out highlights in the sky for a start. But I like the composition of the trees the way the wide-angle lens made them appear to lean in towards the centre of the frame.

    I decided to try a zoom blur effect to emphasize the composition and even out some of the colours.

    Try this technique on your own image by following these steps:

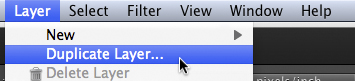
    1. Duplicate the background layer (Layer > Duplicate Layer)

    Duplicate Background Layer

    2. Rename the layer to “blur” or something else that makes sense to you

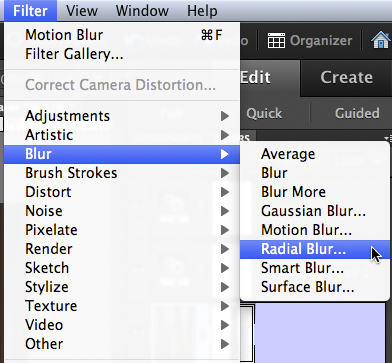
    3. In photoshop, select Filter > Blur > Radial Blur

    Photoshop Radial Blur Filter

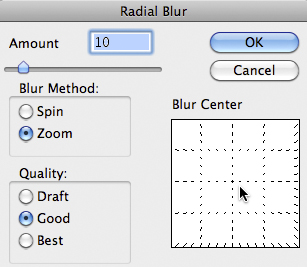
    4. Change the option from “spin” to “zoom” and, in the section of the window named “blur center”, drag the centre of the zoom from the middle to the top of the frame to match the composition of the original image

    Photoshop Zoom Blur Filter Options

    5. Crop out the blown out highlights in the resulting image

    Zoom Blur Final

    Here is a video I made that shows all the steps I took to make the final image using Photoshop Elements.

    Post originally from: Digital Photography Tips.

    Check out our more Photography Tips at Photography Tips for Beginners, Portrait Photography Tips and Wedding Photography Tips.

    How To Create a Motion Blur Effect in Photoshop


    Digital Photography School

  • How To Become A Better Photographer By Watching Movies

    I went to the movies to see Skyfall recently. As I sat amongst strangers, throwing popcorn into my mouth, it suddenly dawned upon me that what a movie, at its simplest, is just a big collection of photographs. Consider this: a movie’s sole purpose is to tell a story. So the movie-maker’s job is to position his cameras, subjects and Continue Reading

    The post How To Become A Better Photographer By Watching Movies appeared first on Photodoto.


    Photodoto

  • A project for the New Year: How to make a DIY Ground Pod

    I’ve written previously about the importance of getting down to eye level when photographing wildlife.  When eye-level means ground level, it can be awkward to support your camera whilst also supporting yourself and trying to keep your gear clean.

    Most tripods allow you to get quite low by opening the legs out as wide as possible, many actually opening out fully so that the tripod sits flush to the ground.  Whilst this is very functional, it can be pretty awkward to handle, especially if trying to pan with your subject or if you have to move to follow your subject around.

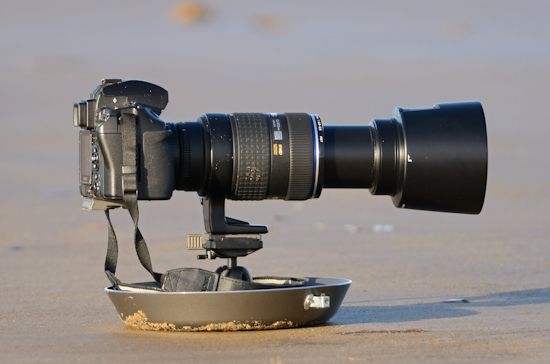
    One option to overcome this is what is known as a ground pod.  It is a plate/tray with upturned edges, that you attach your camera to, or for more flexibility, screw your tripod head to.  It supports your camera just a few inches from the ground, thus offering some protection from water splashes or sand/mud, whilst allowing easy movement in all directions.

    Completed ground pod

    Completed ground pod. You can see I'm using a ball head to mound my camera to the frying pan.

    The commercially available options are pretty expensive (approx £80/$ 100 US) so I decided to try and make my own.  I in no way claim to be the first person to do this, but thought I would share how it is done to illustrate how easy it is to make your own low-level camera support.

    You will need:

    1. A cheap frying pan – approx 10-12” diameter.  You can chose whatever diameter frying pan suits you, but a wider pan will offer more support, especially for bulky telephoto lenses.  It is a good idea for the pan to be approx 1-1.5” deep – any deeper makes adjusting your tripod head more awkward, any shallower offers less protection from water splashes, mud or sand.
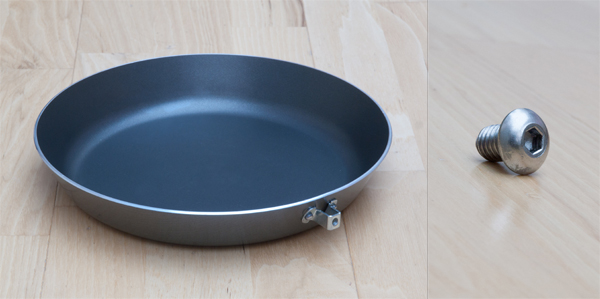
    2. A 3/8” socket head bolt, approx ½” in length.  A ‘round’ headed or ‘truss’ headed bolt is preferable.  If the pan is thick enough, a counter sunk head would be ideal, however cheap pans are normally too thin to make this practical.  Imperial sized bolts are difficult to come by in UK hardware stores, so this might involve some internet searching.
    3. A tripod head.  This is technically optional, but preferable and I am writing this post with the use of a tripod head in mind.  A cheap ball head can be found on eBay, and will be a good compromise between size and flexibility.  You don’t want anything too tall (defeats the point of trying to get so low) or anything with levers that are too wide (may be an awkward fit inside the pan).  If you don’t have a tripod head to use, you could try using a couple of blocks of wood to act as a riser to ensure the lens clears the edge of the pan)
    4. A power drill to make a hole large enough for the 3/8” bolt.
    5. A hex key/Allen key of the same size as the socket in the hex bolt.
    6. A wing nut to screw onto the bolt when the pan is not in use so you do not lost the bolt.  Any kind of nut would work, but a wind nut is large enough to be difficult to lose, and easy to use with cold hands!
    Ground pod image 1

    Left: Frying pan with handle removed, showing the riveted bracket. Left: A 3/8" hex bolt.

    The construction of the ground pod is very simple:

    1. First of all, remove the handle from the frying pan.  It should be easily unscrewed from the pan, and removing it will make the pan a less awkward shape to store.  You may well be left with a small, riveted bracket that the handle was screwed to, however this makes a convenient little place to hook the frying pan onto your camera bag using a carabiner, to save you having to carry it by hand.
    2. Turn the pan upside down, and use the power drill to make a hole in the centre of the pan.  Don’t apply too much downward force when drilling; otherwise you will end up deforming the centre of the pan, meaning your tripod head will not fit flush to the pan base.
    3. Once the hole is drilled, turn the pan back around, and use the hex key to screw the bolt through the pan and into your tripod head.

    And that is it!  Simple.

    You will want to ensure that the pan actually supports your camera and lens without toppling over before putting it to use.  If you chose a wide enough pan, this should not be a problem.

    When out on a beach or in a field you will find that using a ground pod for support makes getting down low a lot easier whilst having some confidence that your camera gear will remain free from sand, mud and water.  The pan is a good deal lighter than most tripods too, meaning you can carry less weight when out on your next wildlife shoot.

    If you already own a suitable tripod head, this project shouldn’t cost much more than the price of a cheap frying pan and is a great way of supporting your camera at ground level for those powerful and intimate wildlife portraits.

    (Thanks to Rob Cain for taking the picture of my gear on the completed ground pod, above)

    Post originally from: Digital Photography Tips.

    Check out our more Photography Tips at Photography Tips for Beginners, Portrait Photography Tips and Wedding Photography Tips.

    A project for the New Year: How to make a DIY Ground Pod


    Digital Photography School

  • Studio Lighting Setups for Portrait Photography

    This begins a series of articles on studio lighting that I put together with help from Karl Leopold at ImagesForever.net in Melbourne, Florida. Karl graciously opened his studio to me and patiently went through the basics of lighting a studio portrait. Portrait lighting is one of those deceptive subjects where it’s easy to grasp the concept, but can take years Continue Reading

    The post Studio Lighting Setups for Portrait Photography appeared first on Photodoto.


    Photodoto

  • Five Reasons to Go to Dubai for Gulf Photo Plus 2013

    Five Reasons to Go to Dubai for Gulf Photo Plus 2013

    March quickly approaches, and GPP has announced their instructors and courses.

    I happen to think this is the best photo week of its kind on the planet. If you are anywhere near that part of the world, GPPis a no-brainer. But even if you are far away, it's worth the trip.

    Here's why. Read more »
    Strobist