Category: Photography

  • Photography Bucket List – Big Sur

    As a photographer, I’ve been blessed with the opportunity to travel around to some great locations in the United States and abroad. It’s hard to tell which places are worth going to and which really aren’t that great or worth the time investment. Some places in general are worth going to but certain places within that said place should be avoided. So I thought I’d start a series of blog posts here on DPS reviewing some of the places I’ve been in hopes that it will help out other photographers with travel plans in the future. In the future, I’ll also bring in guest writers to review places they’ve been as well. So I hope you will enjoy this new series and it will help you solidify some of the places you’d like to visit, or help you skip over some as well!

    Big Sur, California – United States

    The first location I’ll be reviewing is Big Sur. I’ve been to Big Sur twice now and I can tell you with complete confidence that I will be back some day soon. Big Sur is a low populated area of wilderness along the central coast of California about two hours north of San Luis Obispo and about 4 hours south of San Francisco. I think a lot of photographers are attracted to this region because there aren’t many places in the U.S. where you can get huge mountains and an ocean in a single shot. Big Sur has the largest coastal mountain in the U.S. (Cone Peak) at just over 5,000 feet. The Pacific Coast Highway (Hwy 1) hugs the coastline the majority of the way through Big Sur. Couple that with it’s hairpin turns, scenic bridges and jaw dropping views with sprawling mountains on one side of the road and straight drops down to the ocean on the other side…and I can comfortably call it the most beautiful stretch of road I’ve driven on in the U.S. (note I haven’t driven the Road To Hana in Hawaii yet although I have driven the entire coast line of the Big Island).  The photographic opportunities here are endless and I feel as though I haven’t even scratched the surface.

    Where To Stay

    There are a few hotels to stay at if camping isn’t really your thing, but I’d suggest making reservations in advance because some of them fill up quick and you’re not going to find a La Quinta Inne or Hilton. This is the wilderness and most areas don’t even have cell phone reception. My suggestion is to camp and I can’t think of a better place than the Fernwood Resort right on the Big Sur River. In the offseason it costs around $ 35 a night but I think the normal rate is around $ 45-$ 50. That’s cheaper than any hotel you’ll find there! At Fernwood you get to camp in a tent surrounded by towering redwood trees along the banks of the Big Sur River. Sleeping at night with the sound of the river rushing by is about as peaceful as it gets. Here’s a shot from right outside my tent in the morning.
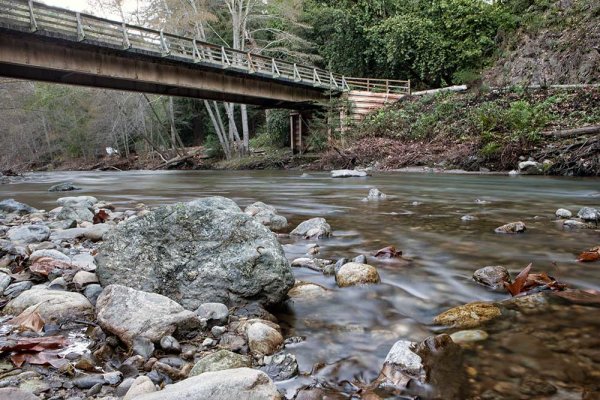
    1DS_3813

    Where To Eat

    There are plenty of restaurants scattered throughout Big Sur. When I was there with my friend Cliff Baise we ate at the Big Sur Bakery & Restaurant. Their wood fired bread board with butter and sea salt is a great appetizer, the wood fire pizzas are incredible and the local brews on the menu are a must. All things considered this place was a little on the pricey side but it was worth every penny. I think together we spent around $ 50 on the meal.

    Where To Shoot

    Now the important part: Shooting. Or, erm, photographing. No guns in Big Sur kids. Like I said before, the photographic opportunities in Big Sur are endless and I haven’t even begun to hit all the good spots. The first spot that I’d suggest going to for any photographer is Pfeiffer Beach. I only found out about this beach by asking a local where some good photo ops were. He gave me directions to go up the road from where I was and look for a sharp turn off on the right. I think I only found what he was talking about by luck but I made it and I couldn’t have been happier. When you turn off the PCH you have to travel down a two mile, single lane road to get down to the beach. Make sure you have cash on you because once you get down it costs around $ 8 to get onto the beach. From the parking lot you’ll have a quick hike to the beach. Here’s a map…
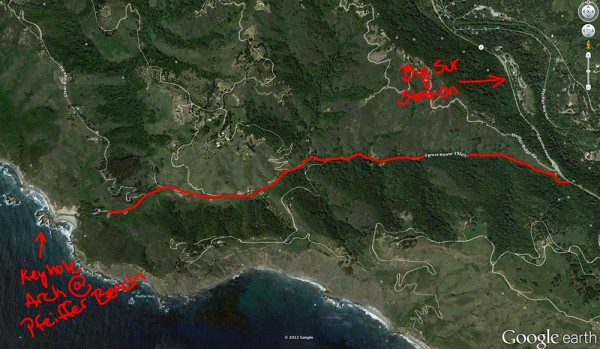
    Screen-Shot-2013-02-10-at-12.44.58-PM


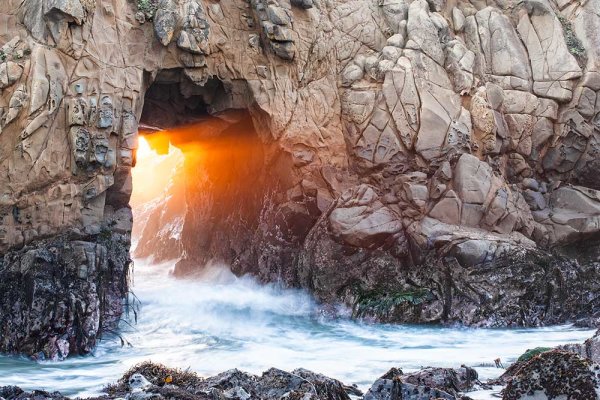
    The main attraction at this beach is a rock formation called Keyhole Arch. It’s a cave the goes straight through a huge rock in the water and waves come crashing through it every few seconds. If you come during the winter you can even catch the sun setting right through the cave making for some great photo ops. I believe the perfect time for this is around December 23rd or something like that but I’ve heard the beach is filled with photographers during that time. I was just there on January 30th and got the shot below. Even then there was one photographer there who perched up on the spot looking through the arch and wouldn’t budge. He must have taken the same photo 1,000 times that night. I was there with Cliff and eventually he just walked right in front of the guy to take some pictures from the same location. A little etiquette tip: when you are at cool place where people have to travel long distances for certain shots, be sure to share the compositions. Don’t just post up at one spot and hog it. Get your shot and move along :-) .

    bigSurKeyholeSun


    Here’s another shot from the same location that Cliff took. There’s a stream running right through the middle of the beach so he got down low to take advantage of the reflections in the smooth water.
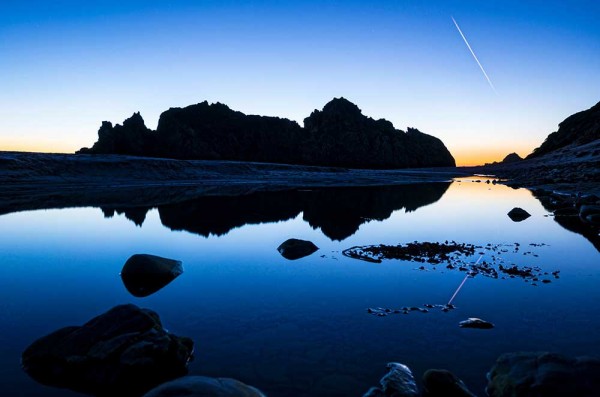
    Screen-Shot-2013-02-11-at-10.05.21-AM

    Another great thing to photograph in Big Sur are the bridges. You can’t really miss these if you drive through on the PCH. Both of the two big bridges have turn off areas right at one end so finding a place to from is easy. If you can shoot them at night or sunrise/sunset I highly suggest it! This was shot at night between the transition from nautical twilight to astro twilight. I waiting for a car to start crossing the bridge and then started a 30 second exposure.
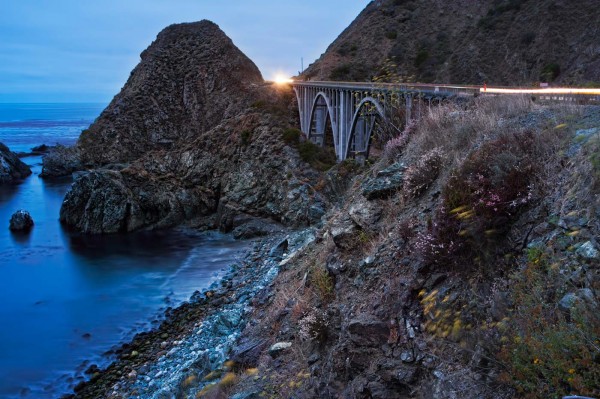
    bigSurBridge


    Drive to north end of Big Sur (getting closer to Carmel, past the Bixby Bridge) and you’ll find a nature reserve with a bunch of hiking trails leading the ocean. There’s plenty of photo ops here as well. I shot this in broad daylight with no clouds in the sky. This a great time for an ND filter. In this case I used a Lee Big Stopper, a 10 stop ND filter that allowed me to get a 90 second exposure in direct sunlight. This creates smooth water and a more ethereal feel to a scene like this.
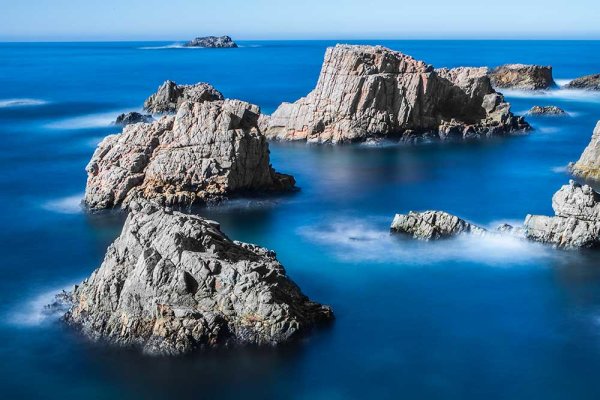
    1DS_3862

    Conclusion

    Big Sur gets 5 out of 5 stars in my book. I can’t recommend it highly enough as a photography destination. The big cities like San Francisco, Los Angeles and San Diego are nice but Big Sur is a whole other world. Whether you’re a mountain kind of person or a beach kind of person, you can have your cake and eat it too at Big Sur.

    Cliff Baise and I just got back from an epic road trip where we hit Big Sur, San Francisco, Mono Lake, Death Valley, Las Vegas and Grand Canyon on our way back to Texas. To see more images from this trip be sure to check out Cliff’s website at The Creative Gap and mine at James Brandon Photography.

    You can also follow us on Instagram for behind the scenes stuff as well: @jamesdbrandon @cliffbaise

    Post originally from: Digital Photography Tips.

    Check out our more Photography Tips at Photography Tips for Beginners, Portrait Photography Tips and Wedding Photography Tips.

    Photography Bucket List – Big Sur

    Digital Photography School

  • Improve Your Photography By Learning to Edit

    A Guest Post By: John Davenport

    You might have read the title to this post and thought that I was going to talk about how editing your photographs can make you appear to be a better photographer, but no, I really do mean better – behind the camera.

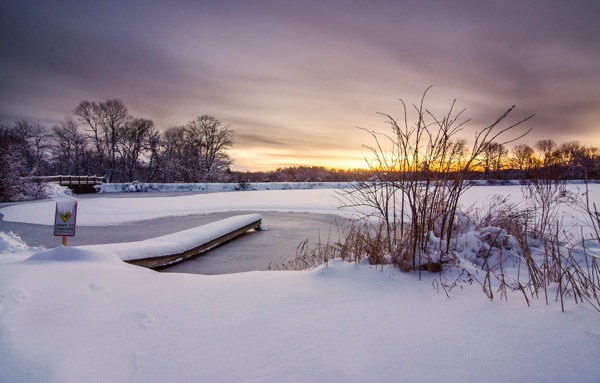
    Thin Ice

    I came across this idea of improving my skill behind the camera, by focusing on my skill behind the computer, when I was going about launching my new YouTube series, “Let’s Edit”, which focuses on how to edit photos in Lightroom.

    What Exactly Can Editing Teach Us?

    As we start out on our photography journey we are learning everything there is to know about creating a photograph. From how our camera works to how different light effects our shots and this can be a bit overwhelming – especially when we’re out in the field taking photos.

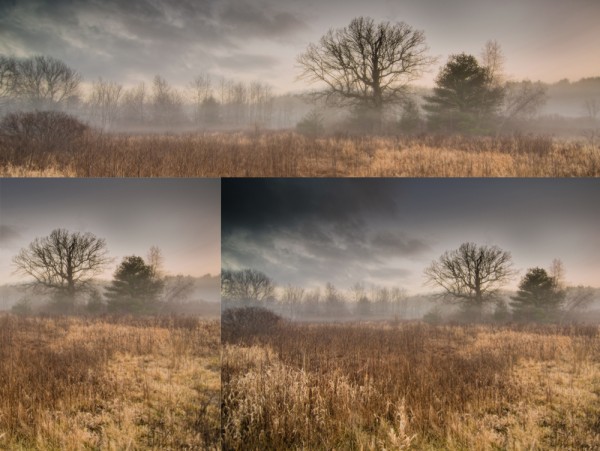
    Optional Caption: Learning to Crop Differently Can Teach Composition

    Learning to Crop Differently Can Teach Composition

    When I first started photographing landscapes I would get lost in the act of trying to fiddle with dials and buttons and forget about composition, or when I’d focus on composition I’d forget about my shutter speed or ISO settings. There is so much that goes into creating a photograph that sometimes it helps to just sit down and learn a different way. So I thought I’d try to learn to take better photographs by focusing on learning how to edit the ones I did take.

    One area that editing our photos can teach us is the idea of composition. I know there will be people screaming at the screen as they read this, maybe even ripping their hair out, when I say that cropping photos is an excellent way to experiment with composition, but it really truly is.

    You can take the same photograph and crop it countless different ways and by doing this you are training your eye to see scenes differently. Apply this knowledge of composition the next time you’re in the field and you’ll actually see those different compositions as you’re looking through the viewfinder making it possible for you to take more photographs while you’re out in the field.

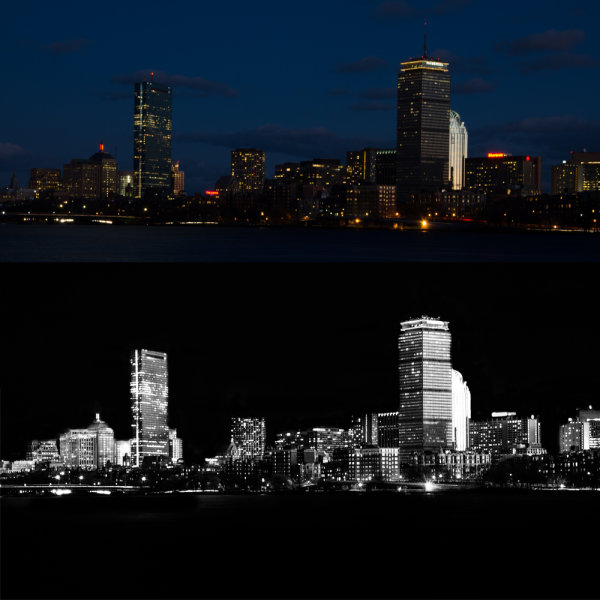
    One other area that comes to mind is learning to see things in the field that will look good once edited. Take this black and white photograph of the Boston skyline that I took while I was out photographing the city with my sister.

    By Seeing the Edit in the Field You Can Set Shots Up Accordingly

    By Seeing the Edit in the Field You Can Set Shots Up Accordingly

    By having the black and white image in my head as a concept I was able to know that by under exposing the frame then and there it’d make my life so much easier when I go about creating the final image back in Lightroom.

    Now, this is just two concepts where editing can be applied to what we do in the field, I’m curious, have you ever thought about this idea of applying what you do behind the computer in the field? Do you think you can come up with other areas of editing that will make sense when you’re behind your camera? Let us know in the comments below!

    John Davenport is an avid amateur photographer looking to make a name for himself. He has recently started a new YouTube series called “Let’s Edit” as well as launched a community site to go along with it. You can also find John on Facebook and Twitter.

    Post originally from: Digital Photography Tips.

    Check out our more Photography Tips at Photography Tips for Beginners, Portrait Photography Tips and Wedding Photography Tips.

    Improve Your Photography By Learning to Edit


    Digital Photography School

  • Easy Blog Collages With MCP Action’s Lightroom Presets

    Are you a fan of Lightroom presets?  There are so many Lighroom preset brands out there, but some of them stand above the rest.  MCP Actions is one of them, and recently they’ve released a fantastic set of presets with the purpose of giving photographers an simple way to create blog collages.

    As you can see, without leaving Lightroom you’re able to organize and generate amazing blog collages using the new MCP Actions Lightroom presets.

    Here is an example:

    blog-collages-lightroom-presets

    What do you think? Will you be picking up a copy?

    Thanks for reading,
    Scott

    dslrBlog

  • An Introduction to Wedding Photography

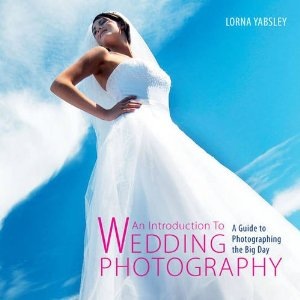
    ref=dp_image_0.jpegI remember once being invited to photograph a friend of a friend’s wedding. I declined.
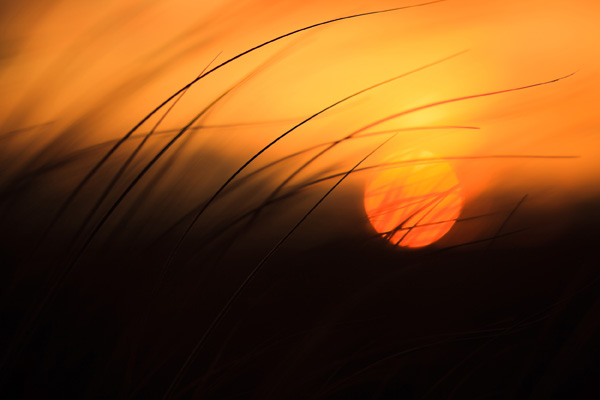
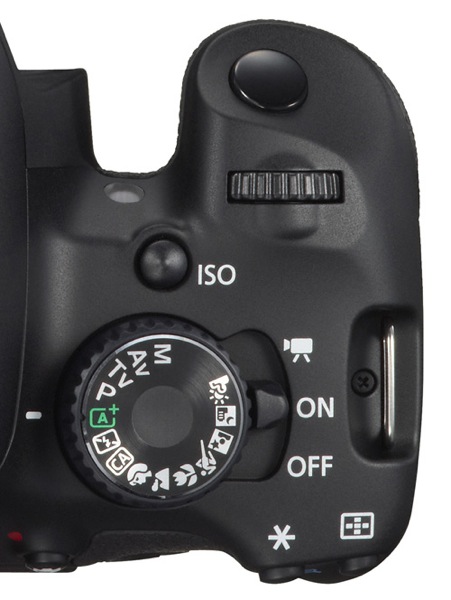
    Why? At the time I had recently interviewed a number of pros who specialised in capturing that magic in the process of creating a magazine story on that occupation. Whew! Not for me I decided. Way beyond my skill set, patience, resourcefulness and energy levels.

    So, it was with a sense of relief that I reviewed this book, safe in the knowledge that no-one, and I mean no-one, could or would ever put me through the trauma that wedding photography presents.

    For her part, author Lorna Yabsley recalls how, when starting out as a wedding photographer in the days of film, life was so much simpler and consisted of formally staged shots made in an hour long session, the best of which ‘would ultimately be shown to the client for them to choose a set of images that would be pasted into a finished album.’

    Today’s generation of wedding shooters mostly work in digital, with an endless number of shots, reviewed instantly … ‘now we have to do the job of the lab in the post production … a whole new skill base that photographers must understand and equip themselves with.’

    The book heads off with a chapter entitled ‘Understanding Weddings’ and the advice that the photographer should not dominate the proceedings, be informal, develop an eye for composition, acquire a basic knowledge of photography and understand your camera.

    Next we move into listing the skills necessary, how to deal with people, preplan, understand the plan of the day’s events, learn who are the most important people, etc.

    And we haven’t taken a shot yet!

    More ensues on getting the commission, establishing your rates, how to promote yourself, plan advertising and dealign with the couple.

    You may be surprised to find that it is only when you reach the near end of the book that 12 pages are devoted to choice of camera, lenses, accessories such as flash, etc and advice is given on what computer and printer may best suit your endeavours.

    While there is help on such matters as post production, editing etc that help deal with the digital nature of these images … but there are no hints on how to tweak the images, remove a boil on the bride’s bonce or a bald spot on the groom’s pate.

    Aside from this there is much useful advice on securing the final print sale, album design etc. Missing is any advice on how to combine video shooting with stills work. Those brave souls who do combine the chores have probably got it all to themselves!

    For those who see a business opportunity in wedding photography the book is a major helper but don’t come looking for a load of tech help.

    Impressive, large photographs make the book an attractive read.

    Author: L Yabsley.
    Publisher: David & Charles.
    Length: 160 pages.
    ISBN 978 1 4463 0258 3.
    Price: Get a price on An Introduction to Wedding Photography at Amazon.

    Post originally from: Digital Photography Tips.

    Check out our more Photography Tips at Photography Tips for Beginners, Portrait Photography Tips and Wedding Photography Tips.

    An Introduction to Wedding Photography


    Digital Photography School

  • Microstock Agency Review – Photaki

    It has been some time since visual content demand has risen on the internet, and with that some new business models have appeared, one of them being microstock. In the last years, quite a lot of microstock agencies have been created, an interesting option for contributors (photographers, graphic designers or illustrators to say some) and image buyers alike. Creative minds Continue Reading

    The post Microstock Agency Review – Photaki appeared first on Photodoto.


    Photodoto

  • Finding Your Way Around the Mode Dial

    This is the first in a series of articles by Andrew S Gibson, the author of Understanding EOS: A Beginner’s Guide to Canon EOS cameras.

    01

    Your camera’s Mode Dial is the gateway to its exposure modes. Knowing which exposure mode to use, and why, is the key to creative photography, and to taking photos like the one above.

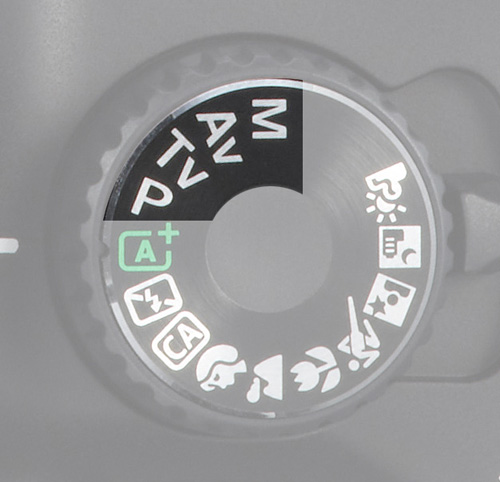
    If you want to create beautiful images then you need to know how to control your camera’s settings. It all starts with your camera’s Mode Dial (not all cameras have a Mode Dial, but most do). Here’s what the Mode Dial from the EOS 650D (or Rebel X4i if you’re in North America) looks like. It’s fairly typical of many SLR cameras:

    02

    As you can see, there are a lot of icons. This can be confusing, especially for newcomers to photography. If you’re new to using an SLR, then how do you know which mode to select?

    Let’s start by looking at Full Auto. It’s depicted by the green A+ icon on the Mode Dial of the EOS 650D (the precise term for the fully automatic mode on this camera is Scene Intelligent Auto). With other camera brands the Full Auto mode is also clearly marked by using an icon of a different colour to the rest (Nikon uses green, Pentax and Sony blue).

    Full Auto mode is aimed at photographers who don’t know how to use the camera’s more advanced controls. If you’ve just picked up a digital SLR for the first time you can set it to fully automatic and start taking photos even if you know nothing about photography.

    03

    There are several other fully automatic modes on the EOS 650D’s Mode Dial (see above). Not all cameras have these modes (they are noticeably absent on many models aimed at semi-pro and professional photographers). They have names like portrait, landscape, close-up mode etc.

    They are also aimed at photographers who don’t know how to use the more advanced controls on their camera. Their use is straightforward. If you’re taking a portrait, for example, then just set the camera to portrait mode. You don’t need to know anything about the camera or how it works to do this.

    Fully automatic modes are very helpful for photographers that don’t know much about how their camera works. But they are too restrictive to be useful to creative photographers. On Canon EOS cameras, for example, you can’t change the white balance, Picture Style, autofocus mode or shoot in Raw in the fully automatic modes. Neither can you override the camera’s selected aperture, shutter speed and ISO settings. You can’t even use exposure compensation. You are locked into the settings the camera selects, and there’s nothing you can do about it. The fully automatic modes on other manufacturer’s cameras have similar restrictions.

    The creative half of the Mode Dial

    04

    Now, these are the modes that creative photographers are interested in! They are Program Auto Exposure (P), Aperture Priority (Av on Canon EOS cameras), Shutter Priority (Tv on Canon EOS cameras) and Manual (M).

    I’m a great believer in keeping things simple. You’ll find the only exposure modes you need in this section of the Mode Dial.

    If you’re new to photography, your task as a creative photographer is to move away from the fully automatic modes and start using Program, Aperture Priority or Shutter Priority as soon as you can.

    Once you’re comfortable with using these modes, you can also consider using Manual mode. There are some compelling reasons for doing so (I discussed them in another article here).

    Let’s take a brief look at the benefits of Program, Aperture Priority and Shutter Priority modes:

    Program Auto Exposure (P)

    Often overlooked, Program is a surprisingly useful exposure mode. It works like this: you set the ISO and the camera sets the shutter speed and aperture according to the reading from its built-in exposure meter.

    Many cameras now also let you use Auto ISO. With Auto ISO activated, the camera also selects the ISO. You can usually restrict the upper (and sometimes the lower) end of the ISO range available to the camera so that it doesn’t set an ISO that is too high.

    At first glance, Program seems nearly the same as Full Auto. But the differences are crucial. You retain full control over settings like image quality (ie Raw or JPEG), white balance and Picture Style. You can use exposure compensation to override the camera’s exposure settings. And if you don’t like the aperture/shutter speed combination selected by the camera, you can use Program Shift (that’s Canon’s term, check your manual if you have a different brand of camera) to nudge the selected settings one way or the other.

    In other words, while the camera is in an automatic mode, you stay in control of the settings. This is crucial for creative photography.

    This is the sort of photo you might take in Program mode. Neither the aperture nor the shutter speed are particularly important:

    05

    The next two exposure modes really let you get creative:

    Aperture Priority (Av)

    I’m sure plenty of readers are already aware of the effect of aperture on the photo. For those of you who aren’t, here’s how it works. There are three approaches to using aperture:

    06

    1. You use a wide aperture to take a photo with shallow depth-of-field. You know those beautiful portraits you’ve seen with the background completely out of focus? That’s the sort of thing you can achieve with a wide aperture. Some photographers buy prime lenses (which have wider maximum aperture settings than zoom lenses) just to take advantage of this characteristic. I created the above portrait with an 85mm lens set to f1.8.

    07

    2. You use a small aperture to ensure that the entire scene is in focus from front to back. This is the opposite approach and one often used by landscape photographers who want everything within the scene to be rendered sharply. It’s the opposite to the first approach. I selected an aperture of f16 to create the above landscape image.

    08

    2. You use a middle-of-the-road aperture, that is one somewhere in the middle of your lens’s aperture range, to create a photo where part or most of the scene is in focus. Parts of the background may be out of focus, even if you have to look closely to see it. This is the sort of approach you would take when you want the background to be recognisable, but it’s not important for it to be completely sharp. The above photo is a good example, taken with an aperture of f5.6.

    Aperture Priority works very simply. You set the ISO and the aperture, and the camera sets the shutter speed required to give the correct exposure.

    Shutter Priority (Tv)

    You use Shutter Priority when you want to set a certain shutter speed to record any movement within the frame a certain way. Again there are three approaches:

    09

    1. Set a fast shutter speed to freeze motion. This is what sports photographers do when they freeze the motion of athletes in mid-leap. I used a shutter speed of 1/2000 second for the above photo.

    10

    2. Set a slow shutter speed to blur any movement within the scene. You would normally set the camera on a tripod to support it when you do this, although you can also use creative techniques like panning if you are hand-holding the camera. I used a shutter speed of 30 seconds and asked my model to stand still to create the photo above.

    3. Set a middle-of-the-road shutter speed that freezes most motion and lets you take a photo free from camera shake. This is the typical approach that many photographers take most of the time. But exploring fast and slow shutter speeds is fun and creative.

    Shutter Priority also works very simply. You set the ISO and the shutter speed, and the camera sets the aperture required to give the correct exposure.

    Conclusion

    There are only three modes you really need to use on your camera: Program Auto Exposure, Aperture Priority and Shutter Priority (some of the others, such as Manual or Bulb mode, will come in useful as your skills develop). But as for the fully automatic modes on your camera, it’s best to forget about them completely. They will hold you back, and prevent you from getting the full potential out of your camera.

    This article is the second in a series. The next one will take a close-up look at your camera’s colour and contrast controls.

    11

    Understanding EOS

    Andrew S Gibson is the author of Understanding EOS: A Beginner’s Guide to Canon EOS cameras. The use of the Mode Dial is one of the topics discussed in-depth within the ebook.

    Post originally from: Digital Photography Tips.

    Check out our more Photography Tips at Photography Tips for Beginners, Portrait Photography Tips and Wedding Photography Tips.

    Finding Your Way Around the Mode Dial


    Digital Photography School

  • What Type of Photographer Are You?

    A Guest Post by Ben Evans
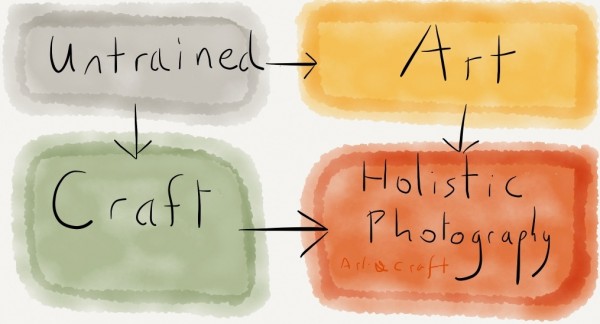
    Diagram
    Have you discovered what type of photographer you are? Doing so will make a big difference to your photography, allowing you to improve faster. If you don’t know right now, read on and I’ll help you find out.

    Photo1
    ?Okay so the first thing to understand is that Holistic Photography is both a Craft and an Art. The earliest photographers were often skilled in both painting and chemistry; an unlikely combination today.??We will see that you develop competency in craft and art separately. This understanding gives us the four Types of photographer which we’ll cover in this article.??Times have changed. Digital cameras do almost everything for you now. To take a photo on the iPad you simply press on your subject, then take the picture!??For a photographer who grew up developing film and making prints, this is amazing. Sepia-toning a photo to make it brown took ages; now there’s an Instagram filter which does it, well, instantly.??So realise that for most people, learning the craft of photography isn’t necessary to get started. Sometimes some very famous photographers know next to nothing about cameras or lighting; they just have a good ‘eye’ – and great assistants!??What is this artistic ‘eye’? Simply put, it’s the ability to ‘see’ a picture that others might miss. Cartier-Bresson had it; so did Avedon.

    A photographer with a good eye can make better photographs with a phone than an untrained person could with the best camera in the world.??There’s a hint in the last paragraph; I used the word ’untrained’. Yes, it’s possible to get this elusive ‘eye’ for yourself. How? Well the best place to start is with the principles of Aesthetics.??Of course Art also requires an oblique approach to learning, covering psychology, philosophy and heightened self-awareness; but this is beyond the scope of this article.

    Photo2??Unless they’ve developed themselves in different fields, most people begin at square one. This is our first type of photographer.??
    >The Untrained Photographer

    Photo3
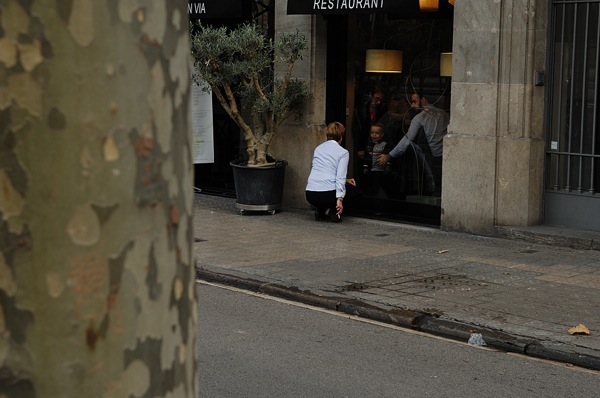
    ?The untrained photographer is someone who takes pictures. That’s all. They don’t really know what they’re doing or what they’re looking for. Of the billions of images of Facebook, most were taken by the untrained.

    Of course there is no shame in this. Photography need not be part of anyone’s life. A camera can just be a useful tool to save and communicate life’s little attractions. And just by the law of averages, if they’re out and about and take enough pictures, maybe one or two will be great.?So how do we move on from this average state? We develop our technical skill, which we’ll deal with later, or we work on our Artistic ‘eye’.??Designers, painters and the fashion-conscious have a head start. I have a friend who finds no interest in sunsets or people’s faces. Don’t take your fascination for the world for granted; a lot of people don’t have it.??A large part of having a good ‘eye’ is colour consciousness. You can study which colours work well together. A combination of blue and yellow or red and green works well, for example.

    Photo4
    ?It’s also very important to be aware of the world around you. The artist really looks at the world. They want to see what’s there, not what they think is there. Practice this.??As with most creative endeavours, experiencing what’s been done before is a catalyst for improvement. It therefore pays dividends to visit art galleries and study great artworks.??You may be doing all of these things already. Perhaps your childhood encouraged an artistic temperament. If you have a good eye already, well that’s half the battle won.??

    The Art Photographer

    ??The artist doesn’t really know anything about photography, cameras, lenses or proper technique; but they do have a good eye. This takes them quite far, especially now with Instagram, Photoshop and the ever-improving ‘auto’ modes on digital cameras. They know what they’re looking for, but not how to get there.

    It may be worth buying their finished work if the quality is good, but they’re unlikely to have enough consistency for you to consider commissioning them. They focus on the world too much and overlook the camera. Serendipity and clever dSLRs can only take you so far.

    The Practical Photographer

    ??Photography can be technically complicated, especially if you want the best image quality and need to use artificial lighting and post-processing. To develop a high degree of skill takes time and effort; so camera operators can be in demand.

    Specialised equipment can also be prohibitively expensive, further limiting the supply of reliable image-makers. They’re a safe bet, but you can’t expect too much soul or originality.

    Photo5

    Don’t assume because the subject is interesting that there’s much going on behind the camera. It’s perfectly possible to take uninspiring pictures of beautiful people or sublime landscapes if the focus is on niche techniques and maximising sharpness.??

    The Holistic Photographer

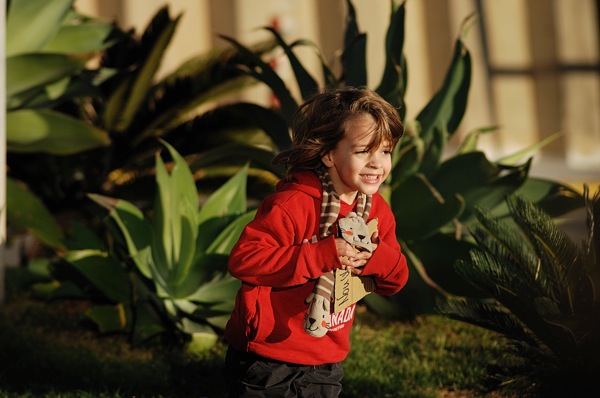
    ??As in most things, a balance produces the best results. I’m talking about the balance between the Artistic ‘eye’ and technical mastery of photography. The Holistic Photographer knows what they want to create, and they understand how to control the camera to achieve it.

    Photo6

    While very aware of the principles of aesthetics, they also have enough trust in themselves to break the rules when necessary. The camera becomes an extension of the mind’s eye, and the focus is on preserving moments or expressing ideas and feelings.

    What To Do Next?

    ??So where are you at on the journey? If you’re reading this, chances are that you’re already more advanced than most people, who are untrained. But are you focussing on developing your Art, or your Craft??
    You can see that you will supercharge your own progress by balancing both. What do you need to concentrate on? Are more visits to exhibitions in order? Or would you benefit from a month spent shooting in Manual mode so you can master exposure? Why not have a look through your photographs with a friend and find out???And the takeaway? You’ll get the best results by learning both the art and craft. Holistic Photography involves learning to See and communicating what you’ve seen effectively. It is having something to express, and understanding how to work with the realities of photography to create something tangible. Skilled artistic creation is worth striving for; you will find that it is its own reward.?

    Love photography? Get your copy of Ben’s best-selling book, ‘Photography: The Few Things You Need To Know’ for 99p now at www.GreatBigBear.com.

    Ben Evans is an English Photographer who teaches photography classes in Barcelona with Barcelona Photography Courses.

    Post originally from: Digital Photography Tips.

    Check out our more Photography Tips at Photography Tips for Beginners, Portrait Photography Tips and Wedding Photography Tips.

    What Type of Photographer Are You?


    Digital Photography School

  • Meet The Photographers Who Write For Digital Photography School ~ Barrie Smith

    You’ve been reading their articles for months or years, have you ever wondered “Who are the photographers who write for dPS”? We thought it would be a good time to introduce them to you through a series of interviews.

    Today meet Barrie Smith, Australia based writer-photographer.

    1. How long have you been shooting?

    Decades.

    Barrie Smith

    2. Do you have a full time job or are you a full time photographer?

    I am a full time writer-photographer.

     3. What does this require?

    Ability to move quickly. Many of my subjects are people stories so I may make contact with the character one day, then talk to and shoot him or her the next.

    My pictures are journalistic in style, so arty shots are not in the running.

    4. What other jobs have you held in the industry?

    Early days: film and video cameraman, then setting up and operating the TV workshop for a major international ad agency. Then directed TV commercials for a long, long time.

    As a sideline started to write about photography for Australian and international magazines.

    Wrote, photographed and self-published Australia’s only book on vintage cameras — THE CLASSICS: CAMERAS.

    When digital cameras arrived (was it 1995?) I began shooting and writing on this topic as well as reviews on cameras and software.

    Founding editor of Australian Videography and Australian Digital Camera magazines.

     4. When did you start writing for DPS and why?

    Nearly four years ago I joined the team, thanks to a tip from a fellow contributor. Enjoy my stuff on the Web. Beats the bum off conventional publishing. Immediate communication with your audience. Rapid appearance online as against months of lead time with magazines.

     5. What do you shoot with?

    Compact bridge cameras. Not a favourite of clumsy, heavy DSLRs!

     6. What would be your number one tip to any new photographer?

    It’s the driver not the car!

    Post originally from: Digital Photography Tips.

    Check out our more Photography Tips at Photography Tips for Beginners, Portrait Photography Tips and Wedding Photography Tips.

    Meet The Photographers Who Write For Digital Photography School ~ Barrie Smith


    Digital Photography School

  • 100 Clever Digital Photography Ideas [Book Review]

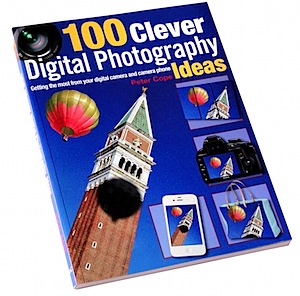
    100 Digital Photography Ideas.jpgOne of my faves is lists of ‘clever’ ideas and hints on how to improve your digital photography, so this book hit home immediately.
    Author Cope recalls that ‘there was a time, not so long ago, when photography was in serious decline …. Although cameras were becoming easier to use … people were just not buying them as they once had.” Digital cameras and photography arrived just at the right time.

    Cope’s book is an absolute treasure house, beginning with a camera parade that identifies the various camera types (camera phones, compacts, bridge, DSLR etc) and their capabilities. For example: camera phones are not ideal if you need control over your picture making, whereas DSLRs are far from ideal if you want to be a discreet snapper.

    Then follows single page helpers on such tasks as shooting for eBay auctions, making identity/passport photos, recording a car accident, making a home inventory, etc.

    The tips keep coming: when shooting table top subjects (models etc), locate the camera at table top level, use the widest lens angle and smallest aperture; when shooting jewellery, especially rings, focus on the gem and let the band go out of focus; shoot kids at eye level, focus on their eyes, use the zoom’s mid range, blur the background, avoid flash etc; when shooting sports choose a fast shutter speed, move in close, follow the action, know the event.

    A useful chapter on colour matching explains how you can colour match a house’s interior and its contents in the pursuit of the correct colour paint or furnishings. Digital cameras are far from perfect when it comes to precise colour rendering so the book suggests using a card colour checker containing colour swatches to help the paint mixer.

    There are ideas on how to make a photo comic strip, shooting in the city, capturing landscapes, making atmospheric shots in low light, being aware of cultural sensitivities, finding your way home in a strange city by shooting a ‘photo trail’ … and here’s one hint that retail outlets will ‘love’: take a shot of the product you crave in-store so you can duck home and buy online with accuracy!

    Then you can buy accessories to perform some unusual photo tricks: shoot ultra low angles with mini tripods or photo clamps, acquire a door spyhole lens, magnifying lens, Lensbaby or similar so you can shoot ultra closeups of bugs and the like.

    Shoot the seasons: while a snowy landscape is entrancing, the high brightness can fool your camera’s auto exposure function: use the snow/sand setting; shoot rainbows by turning your back on the sun; summer time shots can be improved by using flash in people shots to fill in the heavy shadows; when shooting sunsets you can improve the rendering by slightly underexposing the shots.

    Shoot a ‘flickback’ video by combining a sequence of stills that, when played back as movie, confer movement … a bit like a high speed slide show.

    Some useful tips on future proofing your shots follow: shoot RAW as often as possible; shoot at the highest resolution; shoot lots!
    Share your photo online via flickr or YouTube, etc: select your best shots; remember you don’t have to make your Web photo gallery public; some Web sites let you photo share so others can order prints.

    There’s heaps more: add borders to some of your favourite shots; add a keyline or a frame; crop shots and straighten horizons of sloppily composed shots; create a scrapbook.

    Overall, the book is chock full of information and, in one respect, is less of a book of tips and hints and more an encouragement on how to maximise your photo pursuits.

    Top book!

    Author: P Cope.
    Publisher: David & Charles.
    Length: 144pages.
    ISBN 978 1 4463 0216 4.
    Price: Get a price on "100 Clever Digital Photography Ideas: Getting the Most from Your Digital Camera and Camera Phone at Amazon

    Post originally from: Digital Photography Tips.

    Check out our more Photography Tips at Photography Tips for Beginners, Portrait Photography Tips and Wedding Photography Tips.

    100 Clever Digital Photography Ideas [Book Review]


    Digital Photography School

  • Perfecting and Playing with White Balance

    As photographers we often question the strength, type and direction of light, but because most of today’s cameras’ auto-functions are greatly enhanced, it can be easy to forget about the colour of light.

    Seasoned shooters will undoubtedly be aware of the importance of white balance, but for those new to photography or for photographers looking to go ‘off piste’ and take a more manual approach to image-capture then this whistle stop guide might be able to help. In this handy tutorial, we’ll explain not only the importance of controlling white-balance, but how it’s done and what effects can be achieved.

    Why bother with white-balance?

    In this image we wanted to exaggerate the warmth in the light hitting the leaves in the trees, so we used a 'Cloudy' present in the White-Balance options.

    In this image we wanted to exaggerate the warmth in the light hitting the leaves in the trees, so we used a ‘Cloudy’ present in the White-Balance options.

    By controlling the colour of light photographers are able to shoot with a balance that is as neutral as possible, replicating the colour of natural daylight whilst resolving issues with colour casts. Alternatively shooters can manipulate white-balance values for creative effect.

    What is the problem with using auto-white balance?

    Most contemporary cameras do a solid job at rectifying ‘problems’ with colour casts in the light, and so when a scene is put in front of the camera it will attempt to compensate for any shift in values to make the scene look as close as possible to natural daylight as possible. So say you were using an auto-white balance setting to shoot a scene flooded with a rich amber afternoon light, you may be disappointed to find the camera diluted the richness of the hue as it has attempted to cool down the scene by using a blue cast to pull back the colour balance to replicate that of natural daylight. Conversely, when you shoot with flash a cool tone is usually projected from the bulb, as such cameras set to auto-white balance will warm the picture up in-camera using an orange/amber cast. Another issue is night photography, as the colour of neon signs or street lights can often affect the camera’s reading and results in confused colour-cast frames. By setting the white balance manually you’ll find a more realistic result is attained.

    How can I control white balance?

    1. Use Presets

    Within your camera’s settings menu you should find a section labelled ‘White-Balance’. Here various presets are offered, each with an icon clarifying in what light the option should be used, for example; flash, cloudy, fluorescent, ambient, indoor, outdoor, sunset etc.  

    By telling the camera what conditions you are shooting in, it can more accurately and consistently apply values to compensate. It is especially wise to use this mode if you feel the auto white-balance isn’t on point.

    2. Use Custom

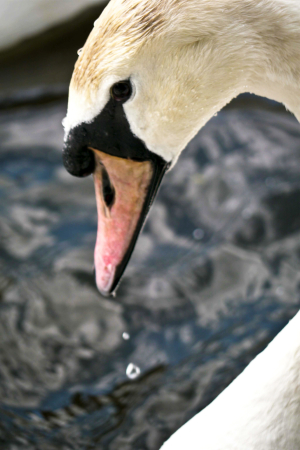
    By taking a white-balance reading from the swan's white feathers we were able to get a more realistic and natural result

    By taking a white-balance reading from the swan’s white feathers we were able to get a more realistic and natural result

    Whilst presets have their place, they can sometimes be a little wide of the mark, so to influence greater control find ‘Custom’ within the White Balance settings. This option allows you to take a reading by photographing an area of white or natural grey so your camera recognises and understands the exact lighting conditions you are working in.

    If this is the approach you want to go with, it can be a good idea to carry a piece of white or grey paper, card or plastic to take readings from when you’re out and about.

    3. Post-Production
    Should you return home to discover your images carry an unsightly colour cast, all is not lost. Almost all contemporary photo-editing software allows users to correct colour balance issues with a touch of an ‘auto colour balance’ button or slight incremental change with a slider, but by far the best option is to use a white balance Colour Picker or White Balance Tool to select a part of the image you know to be white or grey. What is more, most of these software products offer options to apply values to batches of images instantaneously, potentially saving you hours! To do this most effectively it’s best to shoot in RAW so you can have a wider scope of flexibility to resolve colour balance issue.

    What if I don’t want a neutral balance?

    Using a manual white balance will allow you resolve colour cast issues in-camera, but just as it is possible to neutralise the colour of light, it is also possible to manipulate values to create colour-thrown captures. For example, to exaggerate the rich red hues of a sunset force the camera to pump up the colour even further by using the Custom option or use a Preset such as Daylight or Cloudy to make the camera ‘think’ it is shooting a dreary scene and as such will add a warming cast. The result will be a vivacious and colour-striking sunset. There are dozens of situations when using the ‘wrong’ white balance can enhance or exaggerate the colour values of an image, it just takes a little imagination and practice.  Good luck!

    Post originally from: Digital Photography Tips.

    Check out our more Photography Tips at Photography Tips for Beginners, Portrait Photography Tips and Wedding Photography Tips.

    Perfecting and Playing with White Balance


    Digital Photography School