Thanks so much to Yahoo and Flickr for featuring me and my photography today on the Flickr blog and the Weekly Flickr. I joined Flickr back the year that they started in 2004 and publish photos there every single day. It’s been a wonderful place to build my library and archive and publish my photography. I thought they did a really nice professional job with this video. Thanks!
Category: Photography
-
Someone’s Listening: Pre-Drilled, Strapped Compact Light Stands

Many photographers who use a compact stand as the basis for an on-the-go lighting kit like to drill and strap their stands. This is something I have done since back before the early Lighting 101 days. I keep two strapped stands, as more than that on a job and you would probably case them anyway.
LumoPro, who makes the sturdy-but-compact LP605 compact stand, now also offers a pre-drilled and strapped variant. The LP605s will set you back an extra $ 5.
-30-
-
Q&A: Will My Old Flash Fry My New Remotes?
 Reader Samora Chapman asks:
I'm new to all this and I dug up my dad's Vivitar 285HV. I just got some Phottix radio triggers. Is it okay to connect them to the old Vivitar? Im scared of frying them!
Ah, the trusty old Vivitar 285. The older ones are great flashes, but with one potentially fatal flaw. You don't want to go sticking that flash on just any camera or remote… Read more »
Strobist -
Take your Time and Work the Scene
I recently shared this photo on Facebook, Google+, and Flickr, with a quick tip on how to create a starburst effect. In this article, I’d like to share the thought process behind the image, and a few of the less successful images that led up to this final shot.
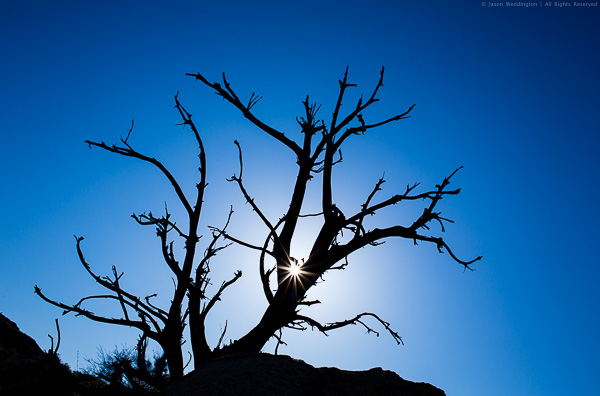
Canon EOS 5D Mark III with EF 40mm f/2.8 STM, 1/320, f/14, ISO 100
Here’s the first shot of the tree:

I shot this photo as soon as I saw the tree. It’s a fascinating tree, but not a very interesting photo. There’s just too much happening here. So I moved behind and tried a silhouette against the sky:

Sometimes your first few shots will not be the best, take your time to work the scene. Think about how you can best use the elements in the scene to create an interesting photo. There are 4 elements in this image:
1. The sun
2. The tree
3. The deep blue sky
4. The rocksI liked the tree, and I wanted to shoot it as a silhouette against the blue sky. I also thought that I could use the sun to create a starburst and add a sense of drama. But after my first silhouette attempt, I realized the sun was just to big and bright to use as a separate visual element. It was upstaging my tree. Not cool. I also didn’t like all the rocks and fuzzy vegetation at the bottom of the frame. Too many distracting elements competing for the viewer’s attention.
So I moved closer, tilted the camera 45 degrees counterclockwise to eliminate some of the foreground, and put the sun behind the tree:

Then came the decisive moment. I realized that if I allowed just a bit of sun to shine through the ‘V’ formed by two branches, I could bring back a little of that starburst, while preventing it from overpowering the image.
All in all, I shot 12 photos in two minutes to arrive at the photo that I felt was the strongest, the image at the top of this post. The key is work the scene and make small changes until you arrive at the shot you want.
I hope this behinds the scenes look at been helpful. Many of the amazing photos you see have several less interesting shots leading up to them. Next time something catches your eye as interesting, but your first few shots don’t capture that feeling, slow down and work the scene.
I appreciate feedback, please comment below or feel free to connect with me through Facebook or Google+. I’ll do my best to answer questions and reply to comments.
Post originally from: Digital Photography Tips.
Check out our more Photography Tips at Photography Tips for Beginners, Portrait Photography Tips and Wedding Photography Tips.
Take your Time and Work the Scene
-
Synology DS1512+ NAS review
Hello there! I’d just finished writing this Synology 1512+ review and subsequently deleted it all… Why, you ask? Well – I have a bit of a history in I.T. and as such, found myself getting TOTALLY geeky with my review..
Those of you that have read any of my reviews to date, here on dPS, will know that I try to keep it ‘real world‘ …So, I’m going to write it again and dispense with all the ones and zeros in an effort to help you decide if moving to a Synology NAS is the way forward, or not.
Synology DiskStation 5-Bay (Diskless) Network Attached Storage DS1512+

The Synology DS 1512+ is a 5 drive NAS that can give you up to around 15TB of space depending on how you set it up – that’s a heck of a lot. You can also add external disk shelves (DX510 @ about $ 600) that will take you upto 60TB of space… To put that into perspective, my image library is between 3 and 4TB and it spans the last 10 years.. You may have a lot more, you may have less – but one day you WILL have more.
Here are a few of the specs as per the Synology website. This little black box is no lightweight!
Synology DiskStation DS1512+ offers a high-performance, scalable, and full-featured network attached storage solution that meets the needs of small and medium-sized businesses that require an efficient way to centralize data protection, simplify data management, and rapidly scale storage capacity with minimal time spent on setup and management. The Synology DS1512+ is backed with Synology’s 3-year limited warranty.
- 194.83 MB/sec Writing, 200.31 MB/sec Reading1
- Scaling up to 15 Drives with Synology DX510/DX513
- Featuring SuperSpeed USB 3.0
- Expandable RAM Module (Up to 3GB)
- 2 LAN with Failover and Link Aggregation Support
- CPU Passive cooling Technology & System Fan Redundancy
- VMware®, Citrix®, Microsoft® Hyper-V® Compliance
- Running on Synology DiskStation Manager (DSM)
The 1512+ can come configured with hard drives already in the unit and set up, mine came without drives and I went ahead and put four 2TB drives and a single 1TB drive in the unit and set it up using Synology’s Hybrid Raid.
SO, very basically, let’s look at what all these crazy acronyms mean, shall we? (Yes, I realise half of you (us) are a little geeky and already know this stuff) RAID for example, is not something my three year old constantly does to the biscuit tin, well, it is, but in this case RAID stands for “Redundant Array of Inexpensive (or independent, you choose) Disks” which is basically exactly what it says on the tin… A bunch of disks, joined together to act in a handful of different ways as one, i’ll explain those in a bit.

NAS or Network attached storage is the next one we’ll cover… So, rather than sticking a USB or Firewire cable in the side of your computer, you can tuck this little fellow away near your home / office router (wireless modem / modem) and, obviously depending on if you have the right hardware, can connect it to your network and access it via either wireless or wired network.. Me, I use a Draytek Vigor 120 ADSL2+ modem attached to an Apple Airport Extreme.. My Synology is plugged into my Airport Extreme and I connect to it wirelessly from my computer.
Now, you asked about the different things RAID could do… Well, there are a few different ‘levels’ of standard RAID, the Synology can perform each of these, though I’m not going to bore the trousers off of you by explaining what each of them do here, you can spend a quiet evening reading up on them …as I said, I set up my NAS using “Synology Hybrid Raid” as it does what I want, and I’m semi-certain if you’re like me, it will do what you want.
- JBOD
- RAID-0
- RAID-1
- RAID-5
- RAID-5+Spare
- RAID-6
- RAID-10
These different raid levels provide everything from no disk redundancy to a lot (2x) of disk redundancy with differences in read and write speed at each RAID level… For me, how to choose what RAID level was made very simple with the Synology, as they have the Synology Hybrid Raid. SHR is based on standard RAID, but allows the device to use all of the space on each disk… You can read the exact technical details on Synology’s website if you’re into that – as I said, I wasn’t going to bust out the pocket protector in this review… I do have a good analogy though!!
You have 5 water buckets, three medium sized ones and two large ones (and no, this isn’t a Bruce Willis film) …if you fill each bucket up to the same level as the smaller buckets when they’re full, you will see you have space left in the two bigger buckets… traditionally, that space is lost if you RAID that set of disks together. With SHR, you can group that remaining space together to give you another volume (or another drive letter if that’s easier to understand, depending on how you share it…) so, the first part of your Synology will give you 5TB and the remaining space might give you an extra 2TB. Winning! Finished reading Wikipedia? Have a quick look at this RAID calculator, It’s pretty neat!
Using a NAS / RAID on its own isn’t a backup as such… Be Warned!
Whilst you have ‘fault tolerance’ when using a Synology Hybrid Raid setup, the same as with most RAID arrays, you still need a backup of your data. For example, my main portion of space is across four hard drives within my NAS as per the image below, if one of those drives should have an untimely death, my Synolgy would chuckle, beep and carry on serving data – this is how (some) RAID levels work. Here’s an overview of how my Synology is setup.
4 x 2TB Hard Drives, joined together using SHR to give me a single drive with 5.36TB of useable space – you can see that in the image below.
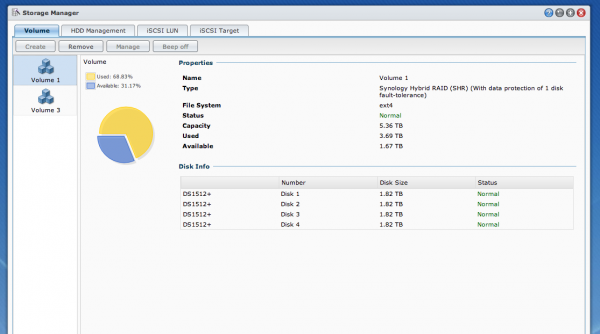
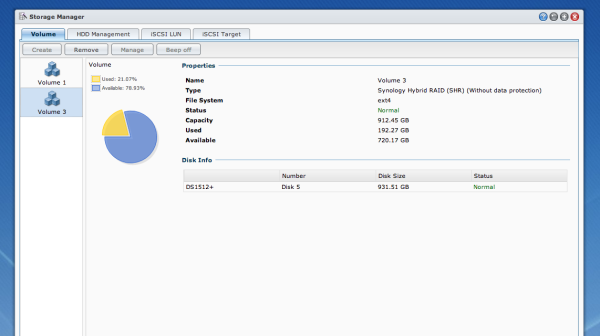
I also have a single 1TB drive in the Synology as it takes 5 disks and I didn’t have five 2TB disks, so I’ve added a single 1TB that I’ve called ‘Media’ and I use that to serve music, movies, tv shows and pictures to anyone on my network / to my Android DTV box. I also have “iTunes server” installed, this is software that installs in seconds and runs on the Synology and can serve any iTunes content out across my network to iTunes clients… (You can also add USB speakers to your Synology and play music directly from the unit… rad…)
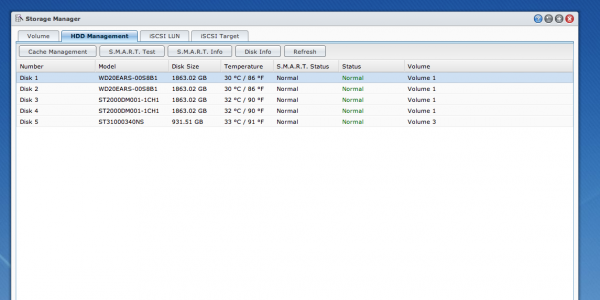
But the best thing is that I had a few of these eSata hard drives sitting around, not all the same brand or model, yet the Synology will happily treat them all nicely – have a look below at the list of drives.
So how do I use it?
After continually growing my photo library for the last 12 years or so, I have a lot of digital image files – the majority in the last four years as file size increased etc. So disks get bigger and rather than have a set of single external drives looking after my archive, I’ve employed this Synology. You can see above that I have 4 separate disks that are looking after my archive, they’re a similar size to the G-Tech I use as my working drive…
You use a G-Tech too? But didn’t you just implement a Synology?
Yes! Remember that part where I said that a NAS on its own isn’t a backup? Well, when you look at my workflow below, you’ll understand where the Synology comes into its own.
Here’s my workflow;
Take a photo -> Lexar USB 3 CF reader -> Macbook Pro with Lightroom 4 -> G-Tech 4TB which is my Firewire attached disk, the drive I work from etc. Now, where I’ve added this network attached storage drive is at this point – when I import a card full of images, I ask Lightroom to make a second copy to the Lightroom folder on my NAS, you can see in the image below..
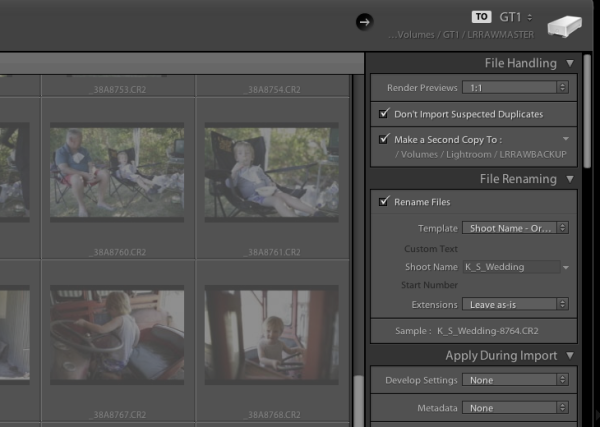
You can see at the top that I’m importing to GT1, a 4TB G-Tech Firewire drive, then below that you can see i’m rendering 1:1 previews and then below that I’m making a second copy to my Synology. All done, all backed up… At the end of my import and subsequent edit, I can export that catalogue into the same raw backup folder on the NAS and everything from that shoot is in one convenient place.
Sure, but why a NAS?
Well, yes, why a NAS? The Synology is around $ 800 and then you need to buy disks for it, whilst not the most expensive unit on the market – actually, it’s very competitively priced – it’s not spare change. For me there are a number of reasons to choose a Synology NAS, and after having the Synology installed and kindly and quietly doing exactly what I’ve asked it for a month or so, I question myself as to why I didn’t do it a LONG time ago! Here are my reasons for NAS…
- Computer independent (a Mac and a PC can read it.. which if you share drives with your missus, is a good thing!).
- It can be used for much more than a simple external drive in a one box format. WordPress server for example! take a look
- When my 5 hard drives fill, I swap them out without having to buy external drives (cost saving in the long term).
- The Synology sits quietly in a corner, stays cool and goes to sleep when I’m not using it. (depends how you set yours up)
- It serves all the music / photos / media easily and quickly.
The ability to access my data from anywhere (with an internet connection) including my phone etc, knowing that my disks are monitored and i’ll be alerted if something looks fishy, to be able to grow my disks with ever increasing storage needs… major plus ticks in my book.
The Synology was so simple to setup, yes, I have an IT background but here’s what I did to set the unit up and connect to it… Plugged it in to the power, plugged in one of the provided network cables and put that in a free network port on the back of my Airport Extreme… and, err, turned it on… That was about it! I’ve since upgraded the operating system (DSM) which is a very simple and quick task. I’ve installed the virus software on the box which is an app and manages itself. There is also a great support forum, lots and lots of enthusiastic users etc.
The Synology is a very good unit with lots of software available to do anything from manage ip security cameras to run your small business network and back up your files to an offsite location. A great tool in my toolbox of digital life.
Who is the Synology 1512+ for? Anyone with storage requirements, but I’ll be personally suggesting it to anyone looking to break free of the constant external drive purchasing circle.
I find no negatives, only positives with the Synology DS 1512+ …bravo, Synology – 11 stars
–Sime
Post originally from: Digital Photography Tips.
Check out our more Photography Tips at Photography Tips for Beginners, Portrait Photography Tips and Wedding Photography Tips.
Synology DS1512+ NAS review
-
30 Things you Should Know to Help you Start a Photography Business
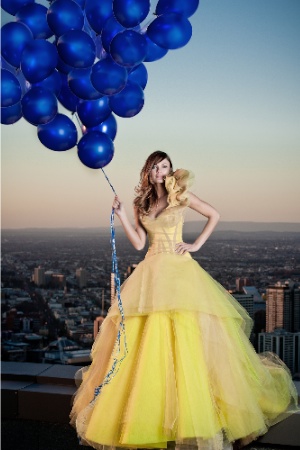 “Follow your bliss and the universe will open doors for you where there were only walls.” – Joseph Campbell
1. Find the best photography course or workshops that work for you
If you are going to invest in a photography course/workshop do some serious research first.
It’s a huge investment so find out who the teachers are. Are they industry professionals that are going to be teaching you relevant styles and techniques?
Is the style of teaching suited to your personality and photography?
Who are the ex students that have gone on to create successful careers?
Consider weekend workshops and online courses held by experts in their fields.
2. Find a great mentor
A mentor should be someone who has had a successful career, whose work you admire and is passionate about what they do. They should be available for at least one hour a month.
3. Get as much industry experience as you can
Intern with as many different photography businesses as you can, both large and small. My first interning gig was with a food photographer. I’ve also worked with high-end commercial product photographers, car photographers, and fashion and wedding photographers. I came away with valuable skills that I still use today.
4. Be Flexible when looking for an internships
When you are looking for an internship it’s often easier to offer your services on a casual daily basis or weekends or even nights rather than trying to find someone who will commit to a long-term internship.
5. Sweep the floor and scrub the toilet
I landed a full time assisting job with a fashion and celebrity photographer because he noticed I scrubbed his toilet and cleaned his studio when I had nothing to do
6. Hang around with people who inspire and support you
Some of your friends and family are going to try and talk you out of pursuing your dreams.
They have good intentions but it’s your dream not theirs.7. It takes 10,000 hours of work to become a master of your craft
If you spend 3 hours a day photographing and editing photos you will become a master at it in 10 years. There are no short cuts or magic formulas, just hard work.
8. Photography is not a job it’s a passion
When you love what you do it never feels like work.
9. Learn to embrace failure
Some of the world’s greatest entrepreneurs had spectacular failures before they found success.
Henry Ford had 5 businesses fail before he founded the successful Ford Motor Company.
Thomas Edison failed 10,000 times trying to invent the light bulb and after the 10,000th time; he succeed
Don’t be afraid to make mistakes
10. Your uniqueness is the most important asset you have
The photography industry does not need another Ansel Adams, Annie Leibowitz, or Alfred Stieglitz. Develop a unique style that sets you apart from everyone else
11. The most common cause of failure is quitting
Most people give too early. Building a business takes years, there will be set backs. Commit to the long haul.
Fact: the average entrepreneurial millionaire has been broke or nearly broke 3.2 times
12. There is no such thing as overnight success
It took me 5 years to actually make a profit. It took me ten years before that profit was enough to afford me a decent lifestyle
13. Having a full time or part time job while you build your business is a great idea
I worked full time in an Italian restaurant for the first 5 years
Having another job while I built my business had the following positive effects
- It gives you something positive do everyday while you are waiting for your first breaks
- It removes that “desperate” energy around you. Trying to find new clients in this headspace is really difficult. Nobody wants to hire someone that appears desperate it makes them wonder what is wrong with you.
- Your part time job may be the source of photography leads or your first big break. It was for me.
14. You will constantly be surprised by where your big breaks come from
I landed my first paid advertising shoot from waitresses I worked with. She introduced me to her husband who ran an advertising agency. One day he asked me to do a shoot for his agency. It was a simple product shot that should have taken an hour. I worked on it for 2 days, made a loss but earned a very happy and lucrative client.
15. Every time you are rejected means you are one step closer to success
Collecting new clients is a numbers game. In my early years I discovered that when I was showing my folio to Art Directors and Editors I was getting 30-50 “no’s” to every “yes”.
It took me many, many years to work out that this rejection is never personal. It often just comes down to potluck if you meet with someone on the same day they happen to have an assignment that suits you.
There are some very famous examples of people who experienced countless rejections before they achieved success
- Author, J.K Rowling’s manuscript Harry Potter was rejected 12 times before she found a publisher
- Walt Disney was knocked back 302 times before he got financing for creating Disney World
- Several record labels rejected The Beatles
- Colonel Sanders, the founder of KFC had his famous secret recipe knocked back a staggering 1009 times
16. Seek constructive criticism and learn from it
One of my greatest learning periods was during a 3-month stint working in a photo lab printing Black and white prints. Yes, last century when we marveled at the new mobile phone that was the size of a small refrigerator and twice as heavy.
I was shooting models tests all weekend and bringing them into the lab to print and process during the week. Two of my co-workers were 30+ year veterans who would critique my work and give me suggestions on improving technique and style.
Show your photos to as many industry professionals as you can. Ask for constructive criticism and learn from it. This is a great time of growth and learning.
Be grateful for all the praise your family and friends will always give your work but remember they will always love everything you do and may find it difficult to point out any faults.
17. Dress to impress
If you want people to take you seriously then you should take your appearance seriously.
18. Always read the fine print
Never sign a contract before reading the fine print. If you don’t understand it then find someone who does.
19. Work your strengths, hire your weaknesses
Aim towards outsourcing all the things that take you away from earning money for your business like book keeping and web design. Your time would be better-spent blogging or marketing.
20. Social Networking
Blog, tweet, flickr, facebook, instagram, google+, linkedin do it all and do it often.
Share your work, support other artists whose work you love and be generous with your information.
21. Shoot personal projects that inspire you
Unless you are lucky enough to be working for cutting edge magazines or alternative clients who love to push the envelope shooting only paid work will give you a very generic looking folio.
Shooting personal projects give you a chance to test new lighting styles, lenses, locations and it’s a brilliant way to showcase your personality.
22. Have a consistent workflow
Name and number and file every shoot in a consistent way. If you’ve ever spent hours looking for an image or even worse lost files you will understand the importance of this point.
23. Back up twice
Keep one hard drive on location and another off site. Hard drives fail. Protect your files.
24. If you pay peanuts you get monkeys
Use professional assistants. Having a great assistant means you never have to sweat the small stuff. Everything is taken care of. This means you can focus on getting the shot
25. An inexperienced make up artist or stylist can ruin and entire shoot
Work with a variety of different Hair and Make Up artists and Stylists till you find the ones that compliment your shooting style.
26. Always shoot in RAW
A RAW image file contains all the original data that the camera censor captured.
A JPEG is a compressed file that only retains about half the data of a RAW file.
Give image the best possible chance from the start. No excuses. Just shoot RAW.
27. Never store your memory cards in your back pocket and don’t shoot an entire job on one card
Pockets get holes in them and cards fail. I found out the hard way.
28. Be quiet
If you depend on your creativity for your living, then your most valuable piece of equipment is your mind. Taking time out everyday is a great way to do this and
29. Make friends with other photographers
The best advice on equipment and technique has come from spending time with other photographers. Social networking makes it really easy to connect with different photographers from all around the world.
30. Just start. Today
“Whatever you can do, or dream you can, begin it.” -Johann Wolfgang von Goethe
The first thing I did when I decided to become a photographer was to get business cards printed that said Gina Milicia PHOTOGRAPHER. Even if I wasn’t 100% convinced I was ready or good enough the simple act of printing cards made it real to me.
I started out with a basic SLR camera and a cheap zoom I borrowed from my brother. I photographed only in daylight for the first 2 years because I could not afford flash gear and worked hand held because I also could not afford a tripod.
There will never be a time when you are 100% ready. There will always be something missing. Just start. Today.
A few great books that inspired me.
- Think and Grow Rich: – Napoleon Hill
- Power Stories: The 8 Stories you MUST tell to build an epic business: Valerie Khoo
- Outliers: The Story of Success: Malcolm Gladwell
- The Alchemist: Paolo Coelho
Enjoy this post? Check out more of Gina’s advice in her new eBook – Portraits: Making the Shot (and get a bonus one free for the next 24 hours only).

Post originally from: Digital Photography Tips.
Check out our more Photography Tips at Photography Tips for Beginners, Portrait Photography Tips and Wedding Photography Tips.
30 Things you Should Know to Help you Start a Photography Business
-
What is the Perfect Compact Camera for 2013?
Good DSLRs are fine in the studio, but sometimes a camera that takes great pictures and fits in your pocket is your best asset. If your favorite camera spent most of your last vacation in the hotel room because you didn’t want to lug it around all day, you understand why they say the best camera is the one that’s Continue Reading
The post What is the Perfect Compact Camera for 2013? appeared first on Photodoto.
-
Meet The Photographers Who Write For Digital Photography School ~ Darlene Hildebrandt
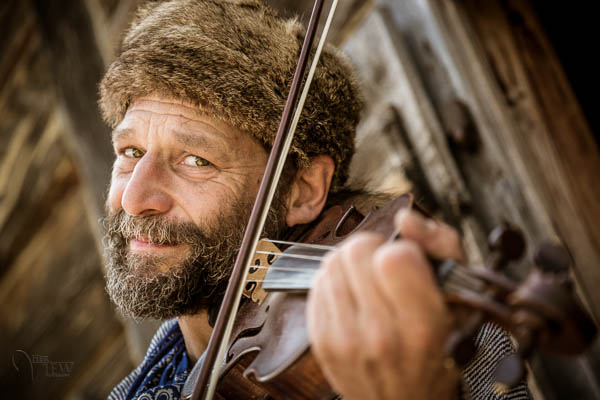
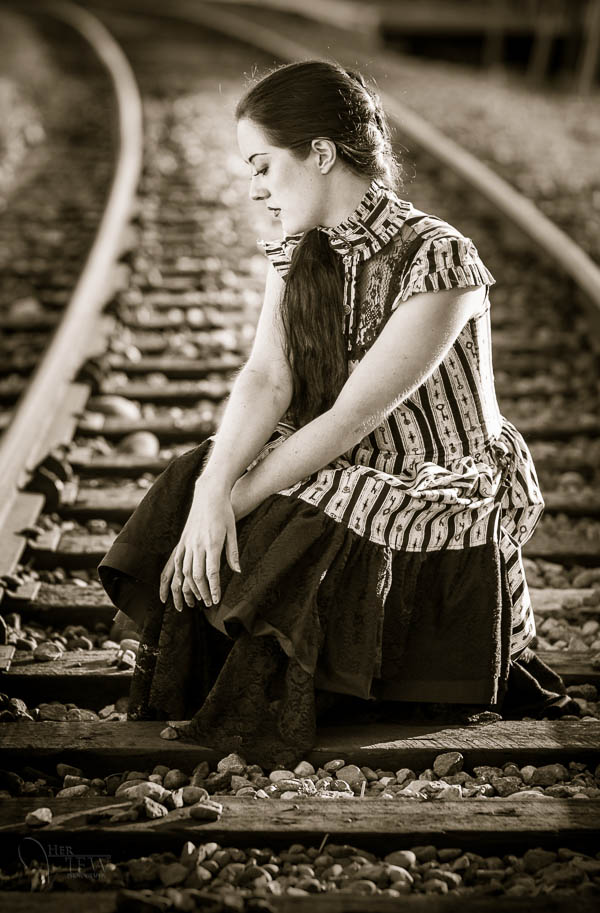
You’ve been reading their articles for months or years, have you ever wondered “Who are the photographers who write for dPS”? Today meet photographer Darlene Hildebrandt from Alberta, Canada.
1. How long have you been shooting?
I graduated from a 2 year photography program in 1988! So over 25 years now, mostly as a professional. I’ve been in the industry in many forms including: doing commercial studio work; had my own portrait/wedding studio for 12 years; was a trade rep for an album company and coached my photographer clients on business; some editorial work; travel photography; and the odd image sale for stock. I’ve also done tons of art shows and sell my work in local galleries.
2. Do you have a full time job or are you a full time photographer?
I have a part-time job at a camera store, in the accounting department of all things. Mostly because I’ve done my own accounting for years and I needed something to get me out of the house after a 6 month extended RV trip around Canada and the US. Camera discounts are also a bonus, and it has connected me with teaching photography classes which I do here at the store as well as with two other local photography schools.
The photography that I do now is mostly for myself and my articles and classes. I make most of my living teaching classes, doing private tutoring (in person and virtually using skype), leading workshops and photo tours.
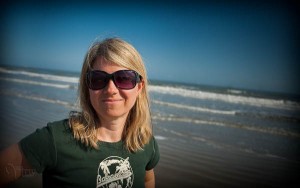
3. If you had to limit yourself to one genre of photography, what would it be and why?
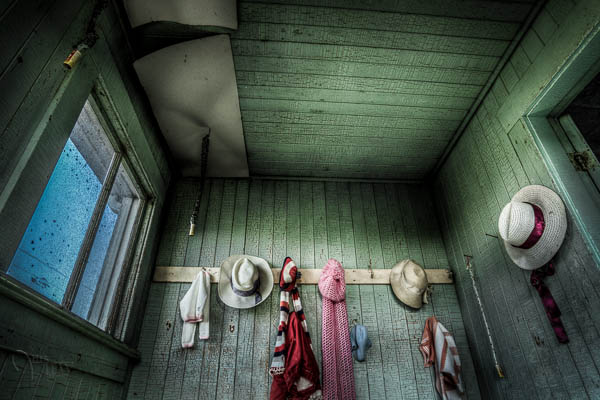
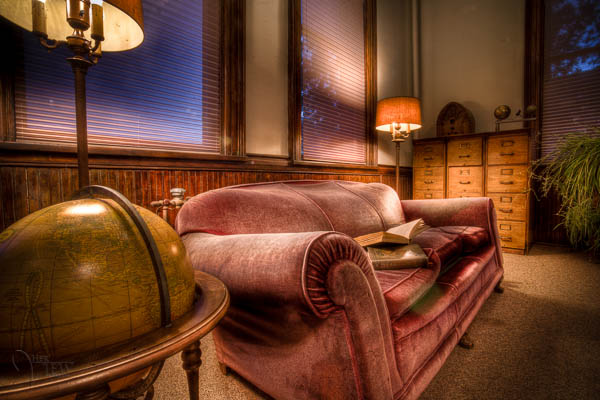
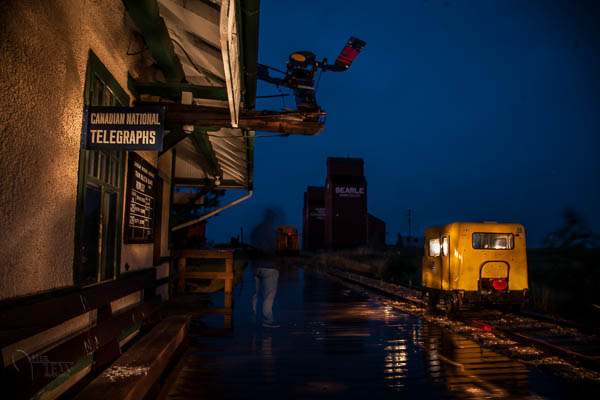
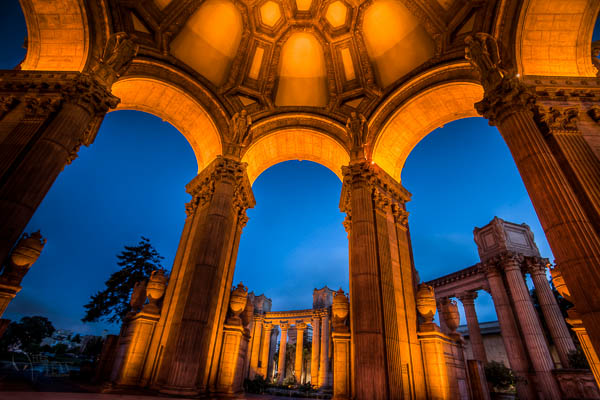
Tough question. I’d have to say travel photography, which to me encompasses fine art, urban, landscape, HDR, night photography, and people. I find joy in all those areas so I’d find it hard to pick among those. If I had to I’d say travel photography with people. Those are the images I find I want to see first when I download after a long trip. But I also love night photography and HDR, both of which I teach. Okay I can’t pick, so can I say I’d pick – “general”!
4. When did you start writing for dPS and why?
May 2012 was the date my first article was published with DPS. I wanted to teach to a wider audience than I currently had on my own site and share my knowledge with more people. DPS allows me to do that in a big way. I love hearing the comments from readers who have enjoyed my articles. Seeing their resulting images after applying my tips, and hearing how excited they are about photography is why I do this.
5. What do you shoot with and what is your favorite lens?
I’m a Canon shooter, I have a 5D MarkIII. However, not to get into a flame war here, I believe the camera is just a tool and whatever you use is just fine, be it Canon, Nikon, Pentax, Sony or something else. It’s about learning how to use it and this is the right place to do that! Not sure I have a favorite lens, but I’d say the extremes. I love either really wide angle images, or long lens tight shots. I tend to live in the 17-20mm and 150-200 range more so than I do in the middle. My wide is a Tamron 17-35mm. I also really love my 85 f1.8 for portraits.
6. What would be your number one tip to any new photographer?
Invest in education before you invest in gear. I’ve had several students want to jump from an entry level DSLR into a full frame one, thinking that it will magically make all their photos better. While there are some advantages of full frame (better at higher ISO, can get better shallow depth of field, etc) in my personal opinion mastering some of the other aspects of photography first will take you further. Things like getting the right exposure; what IS the right exposure; metering; controlling contrast; composition; lighting; choosing the right lens for the job; white balance; lighting; working with people; confidence; shooting in manual and RAW modes, and more. A full frame SLR is a big investment, but I suggest you invest in yourself first. An experienced, great photographer can do more with a crappy camera, than an inexperienced photographer can do with great camera – in my opinion.
7. What’s your next big project?
I have two projects in the works right now. First is a virtual photography class I’m collaborating on with another photographer, still hammering out the details as I write this but by the time this is published it will likely be available. It will be an 11 week (first one is free so you can try it out with no obligations, no money down), 15+ hour, live class which will incorporate lecture, Q&A, image reviews, and weekly assignments. The topic is two fold – Lightroom mastery and Image mastery, so a marriage of technical (image processing) and artistic (shooting and processing).
The second is an ebook that I’ve had in my mind for a while. It’s 75% written, now I just need to find time to finish it and process all the images. It will feature photo tips, things I learned along the way on my 6 month RV journey to reinventing myself as a photographer, as well as inspirational images.
8. Where can people go to find out more about you and your work?
My main hub is my website Her View Photography, where you can get my FREE ebook “10 Challenges to Help you Take Better Pictures Without Buying More Gear” and find out more about my upcoming photo tours, workshops and photography tutoring – both in person and virtual using Skype or Google Hangouts.
You can see some of my images on my portfolio site. My social media links are: Facebook, Google Plus, Twitter and Pinterest. Contact me here or by commenting on this article.
Post originally from: Digital Photography Tips.
Check out our more Photography Tips at Photography Tips for Beginners, Portrait Photography Tips and Wedding Photography Tips.
Meet The Photographers Who Write For Digital Photography School ~ Darlene Hildebrandt
-
Use Diptychs to Tell a Story
If a picture is worth a thousands words, how much is a diptych (pronounced diptik) worth?
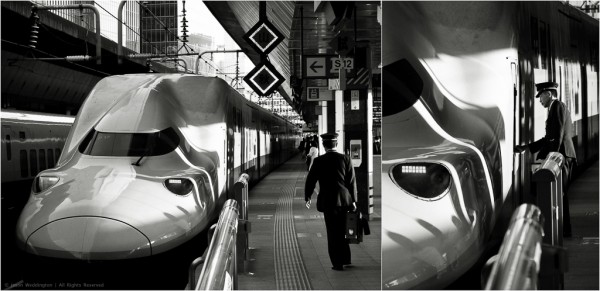
Train conductor walking to a Japanese Bullet train in Tokyo Station, Japan
Photography is about visual communication: sharing stories, ideas, and feelings through images. A diptych of two images, or parts of two images, is an impactful storytelling tool. Look for thematic, compositional, and other visual synergies that will make your diptychs more powerful than the sum of their parts.
Combine wide angle and telephoto shots
By using a zoom lens, or simply cropping a larger photo, you can combine two images that have different effective focal lengths. This can be used to complete the story and prevent the viewer from asking “what’s going on here,” like in this photo of my son collecting acorns in a park. And by the way, what is it with kids and acorns? I remember stuffing acorns into a plastic soda bottle and keeping them in my bedroom as a child…

Boy collecting acorns
This diptych from from an engagement shoot in Kyoto, Japan, tells a story by combining a “before” and “after” image.

Smartphone portrait
Think about your final aspect ratio
There are endless possibilities here. Factors to consider are how the images work together, as well as your final use for the diptych. If your image will be viewed on computer screen, a horizontal orientation will allow viewers to appreciate a large photo without scrolling. If you’re thinking about printing the photo, or showing it on a tablet or smartphone then this isn’t as much of an issue.
Here are a few diptych aspect ratio templates that I like. These are not hard and fast rules, just some ideas to get you started.

Two square images placed next to eachother

Two 2:3 aspect ratio portrait images placed next to eachother

Two 3:2 aspect ratio images placed one above the other.
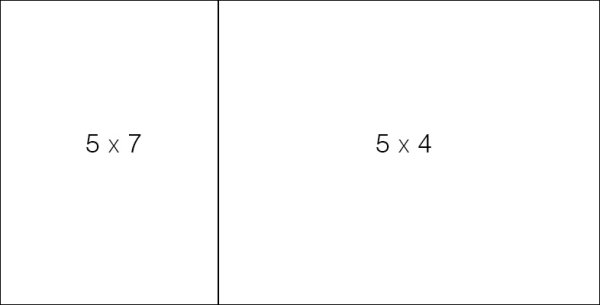
A 5×7 image next to a 5×4 image places the division between the images almost exactly at the golden ratio line of the larger diptych.
I hope this article has given you a few new ideas for how to showcase your photos. Feel free to post a link to your diptychs in the comments.
I appreciate feedback, please comment below or feel free to connect with me through Facebook or Google+. I’ll do my best to answer questions and reply to comments.
Post originally from: Digital Photography Tips.
Check out our more Photography Tips at Photography Tips for Beginners, Portrait Photography Tips and Wedding Photography Tips.
Use Diptychs to Tell a Story
-
Learning to See, Part V
The colour of the object illuminated partakes of the colour of that which illuminates it. – Leonardo da Vinci
In our past columns (see links below) we have discussed such topics as how one colour can complement or distract from a bordering colour. We have also learned that to truly see colour one has to understand how shades of grey are comprised of mere percentages of black ranging from pure white to pure black. A primary objective coming from these discussions should be an understanding of how contrast plays a primary role and is an integral component of the final image.
Let’s look a little deeper into this concept and how we might apply this knowledge in our own picture making.
For the nature photographer there are essentially two core subject matters upon which we will concentrate our efforts, those being critters and where critters live. How each is approached and photographed will depend on a litany of variables, but essentially the one constant is that we will have little control over the lighting. The quality of that light, however, will often decide how we have to approach the image and what type of photograph to make.
Generally speaking, where I live on the Tropic of Cancer, the light will be best up to about two hours after sunrise, and from two hours before sunset. It can also be safely assumed the closer you get to the equator, the more quickly the light will become harsh with contrast and hard edges shadows after sunrise. Conversely, the closer you are to the poles the longer the “golden hours” of nice warm coloured light. When the sun is high in the sky at noon it is often too harsh and creates far too much contrast to provide good photo opportunities, unless we adjust our approach.
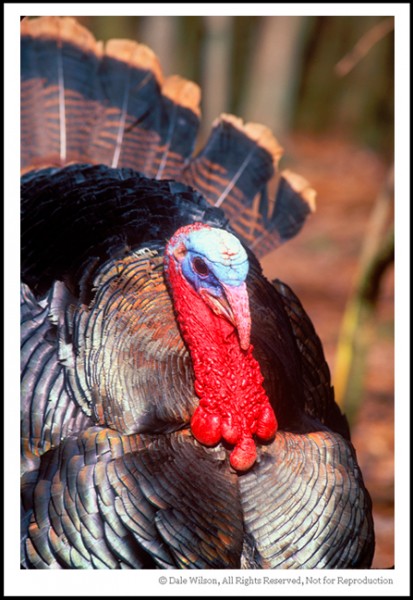
Photo 1
It has been said that beauty is in the eye of the beholder. This old gobbler, in photo 1, was having a difficult time locating a mate — evidently it wasn’t just me who thought he was butt ugly. His temperament wasn’t stellar either as I recall, let’s just say this was the last image of the sequence. With that having been said, the photograph was made around high noon and in lighting conditions that had far too much contrast for a pleasing image. By selecting a tight composition to take advantage of the contrasting colour it becomes possible to shoot throughout the entire day. Should this composition not be so tight, the image would have been far less effective. Identify the complementary colours in the scene and allow those to be the focal point while being somewhat oblivious to the subject. In this case the red is the focal point and is accentuated by the blacks.
 Photo 2
If one is driving down a country road around lunch time, some great tunes rockin’ on the radio, a cloudless blue sky overhead, the arm thrust out the window ala truck driver style … well, what could be better? Why a field full of beautiful sunflowers appearing over the next hill of course.
Should one compare the golden colour of the sunflower to the deep blue sky in image 2, you would soon realize that gold and blue are opposite on the colour wheel. As a consequence of being complementary colours (or very close to) they will immediately create a colour contrast that will work even when the light is harsh. All that remains is to get permission from the farmer to enter his field and compose the image so there are no competing colours in the viewfinder. Voila, you now have a successful photo taken at a time of day when most photographers are having a noonday nap.
If you think of the colour wheel and how colours complement each other you will soon intuitively be making photographs without even thinking of colour theory. When the scene looks good in the viewfinder it usually is, capture the image and analyse it at home.
And remember, if you are having fun you are doing it right.
Read the Full ‘Learning to See Series’ at:
- Learning to See Part 1
- Learning to See Part 2
- Learning to See Part 3
- Learning to See Part 4
Post originally from: Digital Photography Tips.
Check out our more Photography Tips at Photography Tips for Beginners, Portrait Photography Tips and Wedding Photography Tips.
Learning to See, Part V

