Category: Photography

  • Retouching with Cloning Tools: Part 3

    In Part 1 and Part 2 of the Retouching with Cloning Tools series, you learned what cloning tools are used for and the differences between each tool. In this part of the series, you will follow a step-by-step tutorial to learn how to remove power lines (or other unwanted objects) from an otherwise beautiful photograph. This particular image contains distracting Continue Reading

    The post Retouching with Cloning Tools: Part 3 appeared first on Photodoto.


    Photodoto

  • Meet The Photographers Who Write For Digital Photography School ~ Alex Smith

    You’ve been reading their articles for months or years, have you ever wondered “Who are the photographers who write for dPS”? Today we meet Alex Smith, another of the newer writers brought on to dPS last year.

    Boston Trip_043010_0352(sRGB-websize)

    1.) How long have you been shooting?

    I have been shooting for the past 7 years in some way, shape or form.

    Self Portrait-17(sRGB-websize)2.) Do you have a full time job or are you a full time photographer?

    Photography for me is a hobby that has gotten out of control. I am not a full time photographer and spend my days as a member of one of the scariest, most fear-inducing professions in the world. I work as a dentist.

    3.) If you had to limit yourself to one genre of photography, what would it be and why?

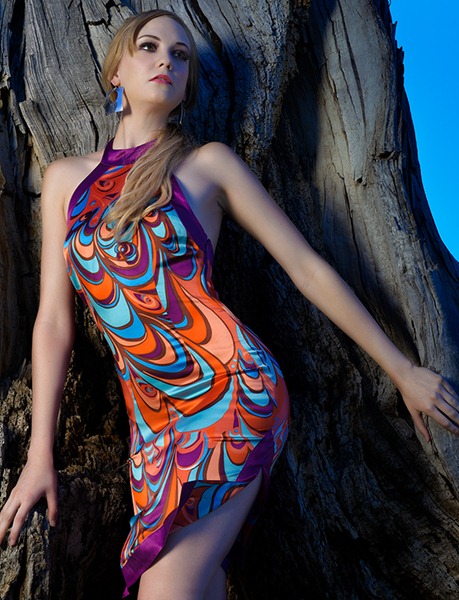
    This is a tough one. I really enjoy all aspects of photography and love to push myself into the different genres as I find I always learn something new. If I had to limit myself though, it would be to conceptual portrait/fashion photography. I love pushing my own creativity and it is a blast to come up with an idea and see it through to the final image. Not to mention you get to meet a lot of great people with which to collaborate and create.

    4.) When did you start writing for dPS and why?

    I am new to dPS as of Oct/Nov 2012. I applied to write for dPS because I feel that I have learned a great deal from the site. I wanted to be able to give back to the site by contributing and communicating what I have learned to others. Also, I hoped to be a good motivational factor and example for all the other self taught hobbyists out there that are working hard to learn photography.

    5.) What do you shoot with and what’s your favorite lens?

    I started with a Nikon D80 and moved to a Nikon D3s a few years ago. Really, my favorite lens is whatever is on my camera, but if forced to choose it is likely the Nikon 24-70 mm f/2.8. It is extremely versatile and I find that it is on my camera most of the time.

    6.) What would be your number one tip to any new photographer?

    My number one tip to anyone starting out in photography is not to let fear rule you. This is a craft and skill that takes time to learn and you should approach it as something that you will be continuously learning more about. Don’t be afraid to make mistakes, try new things and get out of your comfort zone. You have to practice and make errors to get better and you can’t let all your blunders stand in the way of your progress. Just remember that all photographers start at the same point…the beginning. Don’t be ashamed of your skill or progress and just continue to work at areas you feel you need to improve.

    7.) What’s your next big project?

    Currently, I am working on a series of themed or conceptualized portraits in collaboration with a local make-up artist. I have been getting into more styling and planning with each shoot and am excited to see where these shoots are heading.

    8.) Where can people go to find out more about you and your work?

    You can find out plenty about me here on dPS and also at www.shutterhogs.com which is an ongoing project that I am trying to develop with a colleague. Also, I am on Twitter as @shutterhogs and my portfolio can be seen at 500px.com/alexsmith88.

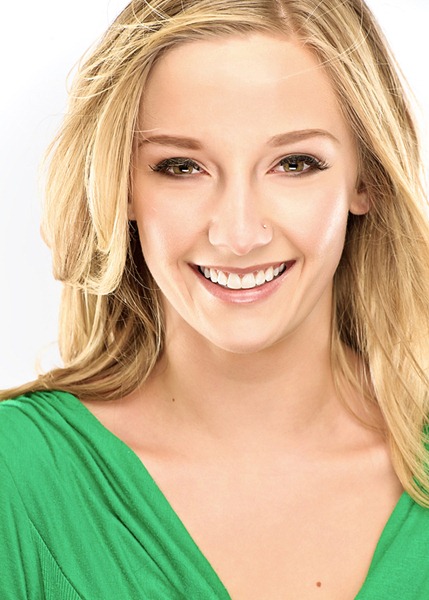
    Brittney Outdoors-34-Edit(sRGB-Websize)

    Fire Creative Make-up-293(websize)

    Denver Botanic Gardens-36(sRGB-websize)

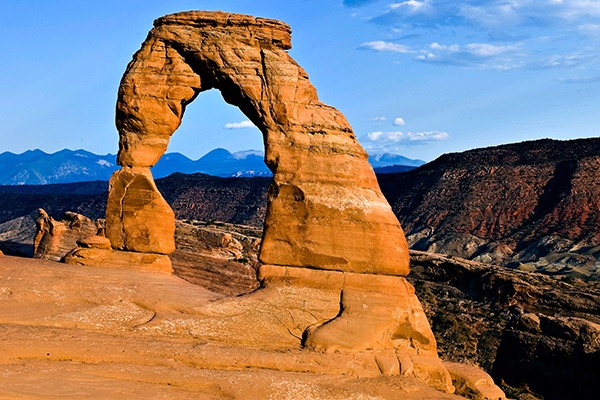
    Delicate Arch_073109_0045(sRGB-websize)

    Image 7

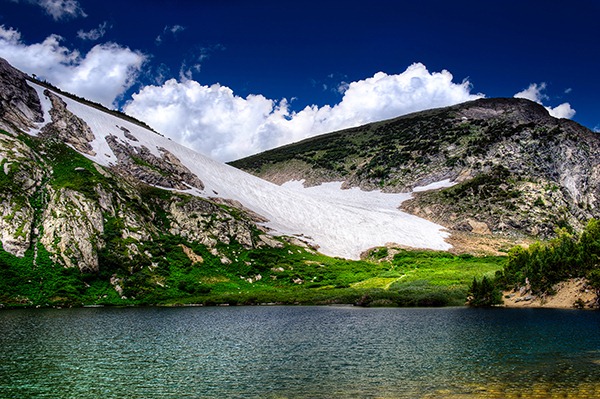
    St. Mary's Glacier HDR final (sRGB-websize dPS)

    Shayla C-56 (sRGB-DPS)Websize

    Natalie-332(sRGB-websize)

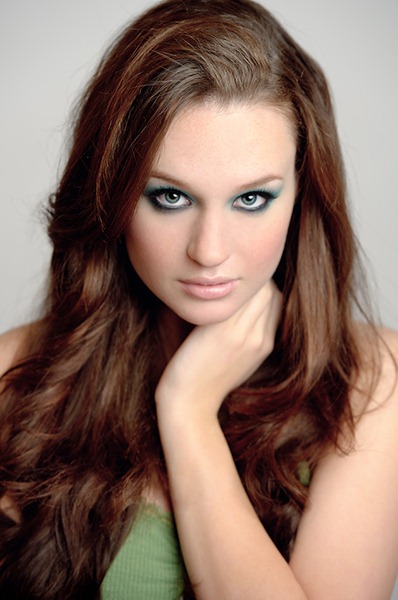
    Katie Make-up-4(sRGB-websize)

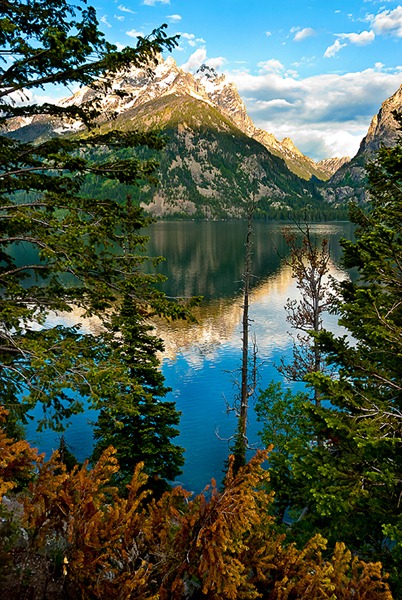
    Jenny Lake_Jun302010_0001(sRGB-websize dPS)

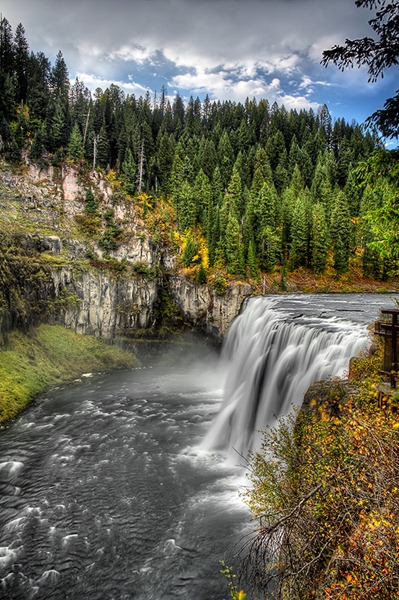
    Mesa Falls-HDR(sRGB-websize)

    Post originally from: Digital Photography Tips.

    Check out our more Photography Tips at Photography Tips for Beginners, Portrait Photography Tips and Wedding Photography Tips.

    Meet The Photographers Who Write For Digital Photography School ~ Alex Smith


    Digital Photography School

  • Unboxing the New Facebook News Feed

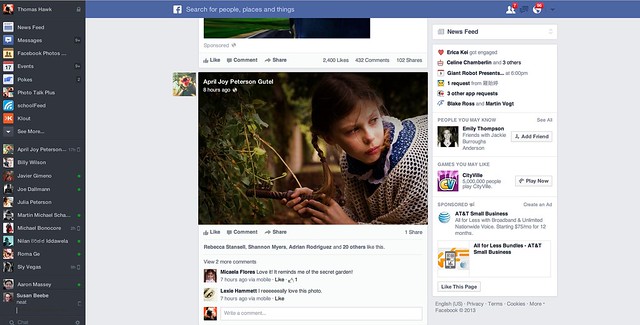
    The New Facebook Newsfeed

    I got the new Facebook news feed last night. The screenshot above is what it looks like. It’s super awesome. A very small minority of people will hate it — because a very small minority of people will hate EVERYTHING. I’m not kidding. The way some people love to bitch blows my mind sometimes. Haters gonna hate.

    Most of you will love it though. I think it’s the most significant improvement made to Facebook since Facebook started. If you’re a photographer, you especially will love it. Photos are bigger. Bigger photos have more impact. Bigger photos look better.

    When you’re eligible for it you’ll notice a little “coming soon, less clutter, more stories” box on your news feed. There is a green button to press to give it a try. If you press that green button you get the loading message. I think there was one other notice window that popped up telling me that I couldn’t go back if I went forward with it, but I can’t remember 100% on this. After this loading box the new news feed pops up.

    The Invite to Try the New Facebook Newsfeed
    Woah! What’s this?

    Loading the New Facebook Newsfeed
    Almost there!

    I’ve only played with the new news feed for a few hours, but here are just a few early observations.

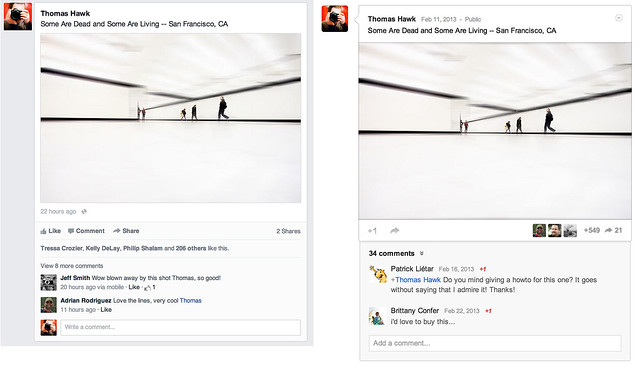
    1. Content in the new news feed feels ALOT like Google+. I’m not saying Facebook copied Google+ here, and imitation is, of course, the sincerest form of flattery and all that, but check out the two content envelopes side by side in the photo below. They are pretty darn close.

    The New Facebook Newsfeed Feels ALOT Like Google+
    Separated at Birth. Facebook new news feed on the left, Google+ on the right. Or wait, is it the other way around?

    Personally speaking I have no problem with this by the way. I love competition on the web. With competition users win. Everybody should rip everybody off and make everything look as awesome as it possibly can.

    2. Pictures are bigger and stand out more, but unfortunately so do all of those crappy memes and worse, sponsored posts (ugh! advertising — the new advertisement for McDonald’s new fish McNuggets feels even more intrusive). Please Facebook, let us pay you for a Pro account and let us opt out of all the horrible ads.

    Photos Look Bigger and Better, but Unfortunately so do the Ads
    That’s an awfully big advertisement for those new Fish McNuggets that McDonalds is selling.

    The meme’s are really my own fault though. When I started Facebook years ago, I simply accepted every single friend request, whether I knew somebody or not. Hey, I’m a friendly guy. I now realize that was a mistake. I think as I unfriend the most egregious of the meme sharers this should improve a bit for me.

    Sometimes though there is just that one person that for whatever reason you CAN’T unfriend. You know who I’m talking about. They’d take it really hard. Yet it’s that one person who keeps sharing the crappiest meme things on Facebook 50 times a day. If you’re that guy, knock it off. Sometimes I wish there was an easy way to permanently hide someone’s content without actually unfriending them.

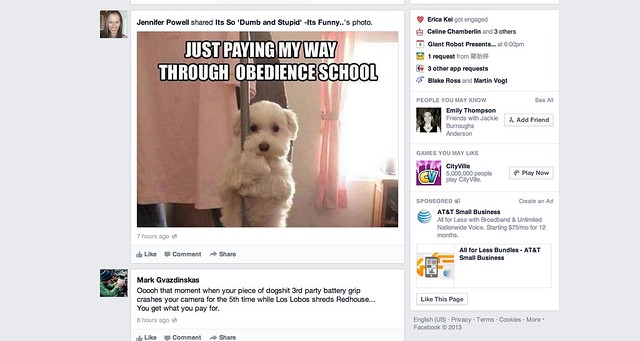
    Attack of the Facebook Killer Meme's, Now Bigger Than Ever in Your Timeline
    Attack of the killer Facebook meme’s, now even bigger than ever!

    Hey it’s a dog, hey it’s stripping. AWESOME!!!! I think I’ll reshare this on Facebook!

    3. The hide button is broken. One of the things that I like about Facebook is their move fast and break things moto. Sometimes though this means that everything doesn’t work so well. I haven’t been able to reposition photos on my timeline for weeks now. My wife can’t upload photos directly to Facebook at all. She has to upload to an album and share from the album.

    What I’ve found on the new news feed is that when I hide content, it doesn’t stay hidden. It stays hidden for that session, but if I refresh the page it comes back. I don’t know if this is just a bug for me or for everyone, but if I actually HATE something enough to hide it, I really, really don’t like it — and after I went through the pain of a two click effort, I’d really like it to stay permanently hidden from my news feed.

    4. I still haven’t figured out exactly how Facebook is repositioning photos that are less ideal for their new envelope. It seems like some portrait aspect and square aspect photos are being stuffed into a landscape frame. It also seems like some are not though — it’s weird why some are and some aren’t. I wonder if there is some sort of algorithm at play here as well, because when photos are repositioned, a lot of the time it’s a pretty smart natural reposition. Like Facebook is focusing on the eyes in photos of people.

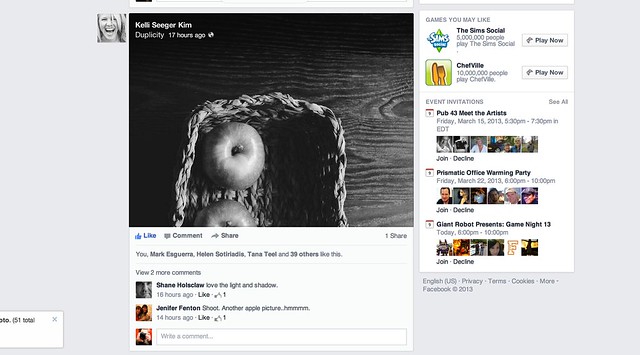
    The apple screensheet below is from my friend Kelli Seeger Kim. It’s actually a portrait oriented photograph of two apples in a basket. If you click through the image you’ll see it correctly, but in the news feed the crop is less than ideal. So sometimes this feels a little awkward.

    Sometimes Facebook Does Not Get the Repositioning for Portrait or Square Oriented Photos Just Right

    Overall the new design is clean and light and lovely. It feels very smooth and really nice. Photos really pop now that they are bigger. I’d give this redesign two thumbs up!

    Congrats to the Facebook team on the great work! You can find me on Facebook here. Come find me and let’s be friendly.


    Thomas Hawk Digital Connection

  • What to do When there’s Nothing to Shoot

    A Guest Contribution by Draycat

    There are always days when you want to take photographs but you feel that there is nothing to shoot. Here are a few ideas for days like that.

    1. Go to the Zoo

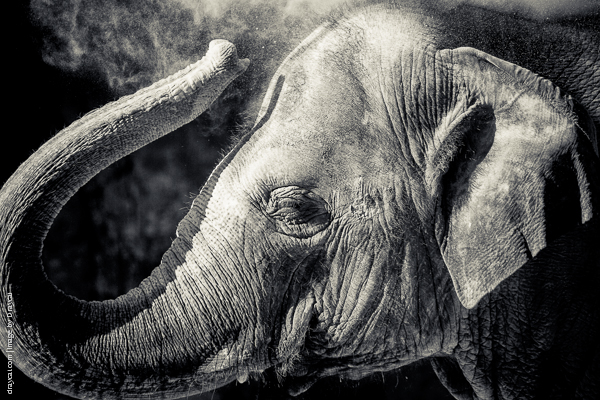
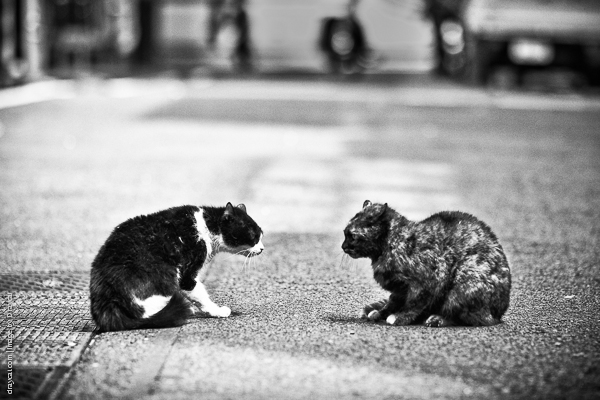
    a shot from my local zoo

    a shot from my local zoo

    The key here is to get out of your house and go somewhere where there will be something to shoot. This could be a zoo, a park, or even a local market. What you need to do is to decide a place and give yourself an assignment to help you to focus. In a park it could be that you focus on shooting abstract images of swings and slides or try some outdoor macro shots of insects and flowers.

    In a local market you could shoot images of the produce as if you were shooting for a local newspaper food section. I recently took a trip to a zoo and set myself the task of photographing the animals so they didn’t look like they were in a zoo. This helped me to consider how best to shoot them. You will also often have a few restrictions to overcome, which can help you to develop your problem-solving skills. For example, when I was shooting the elephants the compound was surrounded by a fence which consisted of thick metal ropes; as a result I had to shoot between the gaps which limited what I could do. As a result I decided to use a long zoom and shoot the elephants a lot more close up, which resulted in some interesting images.

    2. Eat a Biscuit

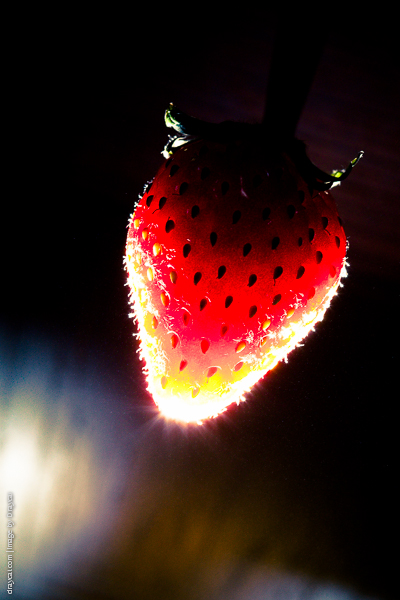
    Don't be afraid to experiment

    Don’t be afraid to experiment

    Food photography can often be a lot of fun and is very easy to do in your house. It’s not even necessary to photograph a whole meal; you can photograph some ingredients, or even something as simple as a biscuit or a strawberry. Don’t be afraid to experiment – play around with lighting, angles, distance and even focal lengths. Here is an example using a strawberry – I started off by shooting it in a traditional way, but then started messing around with my flash.

    3. Pick up some Paperclips

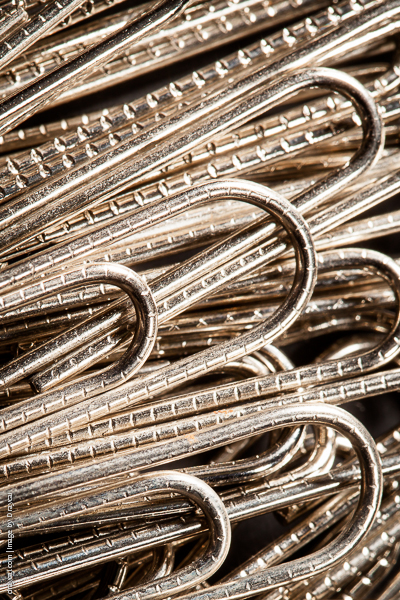
    be creative and shoot something different

    be creative and shoot something different

    We are used to seeing macro images of insects and flowers, but if you have a macro lens why not try and shoot something else; something as simple as a group of paperclips can make an interesting image, so be creative and don’t be afraid to shoot more unusual or even mundane things.

    4. Hit the Streets

    Street photography is not just about people

    Street photography is not just about people

    Street photography is a great thing to do if you like to shoot people; it will also help you to build confidence. When I first started shooting street it was a nerve-wracking experience, but after the first couple of times I began to develop more confidence. It also helps you to improve your photographer’s eye as you begin to look for stronger images. I took literally 100′s of pictures of people using their mobile phones when I started because it was easy, but eventually I realised that it doesn’t make for strong images. After that my eye really developed.

    5. Go see a Friend

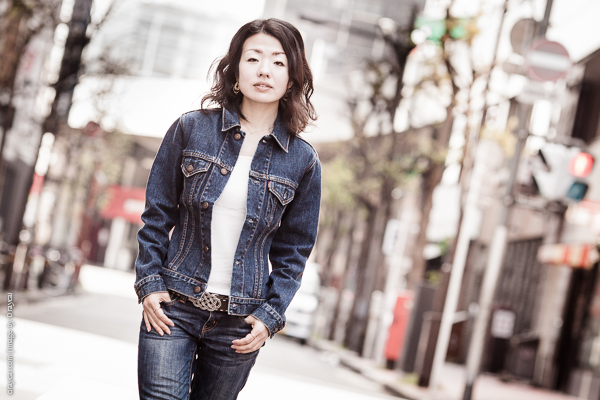
    A portrait of a friend

    A portrait of a friend

    Friends can be a great source of photography practice. Either invite a friend around or go to their house with your camera and shoot their portrait. Friends will generally be supportive, and will also be happy if they can get a nice picture to use on things like social media. I always used it as a chance to catch up with them and have a beer too. Photographing my friends was basically how I got into portrait photography, and I still do it now to practice new styles or lighting when I need to.

    6. Shoot Yourself

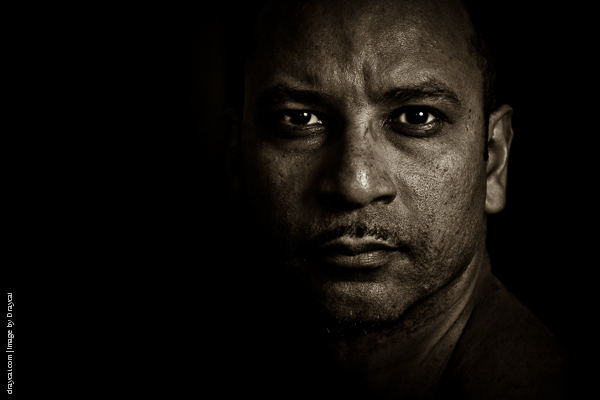
    self portrait

    If your friend can’t make it then you always have one model that you can rely on – yourself. Self portraits can be fun and interesting. Again don’t be afraid to experiment, it’s good to try something new. Play around with lighting, focal lengths, angles, even locations. Remember as well that a self portrait doesn’t have to be your face; you can focus in on a part of your body, such as your eyes, hands or feet.

    7. Grab a Beer

    As much fun after the shoot as during it!

    As much fun after the shoot as during it!

    Product photography is a good way to develop creativity. Just look around your house and you’ll see lots of products. Choose one and shoot it. Play around especially with different angles and lighting if you can. You could even imagine that you have a brief from a company to shoot for a particular magazine, so that you have to shoot in a style that will appeal to the readers. Shooting beer was always one of my favourites…for obvious reasons!

    8. Practice your technical skills

    The best photographers know their equipment back to front so that they can react quickly. It also means that they can spend more time thinking about the image itself, rather than considering what exposure they should be shooting at, because the technical side of things has become instinctive. It’s good to practice so that it can work the same way for you. Examples of things that you could do are:

    Exposure guessing – try to guess the exposure of a scene without using the camera’s light meter. Put the settings into the camera and take a shot, and then see how close you were. Practice in many different lighting situations.

    Get to know the buttons on your camera – close or cover your eyes and try to set particular exposures and change settings. This will help you to be able to make changes quickly in the future when you need to.

    Play with focal lengths – shoot the same object at different focal lengths and compare the images. This will help you to know how different lenses capture things differently so that you have a better idea of what focal length to use for each situation.

    These are just a few ideas to start you off, but the key thing is to be creative and not just limit yourself to things you’ve done before. Happy shooting!

    Draycat is British photographer, teacher and writer currently based in Tokyo, Japan. See more from him at his Website on Twitter on Facebook and on Youtube.

    Post originally from: Digital Photography Tips.

    Check out our more Photography Tips at Photography Tips for Beginners, Portrait Photography Tips and Wedding Photography Tips.

    What to do When there’s Nothing to Shoot


    Digital Photography School

  • Lines: Weekly Photography Challenge

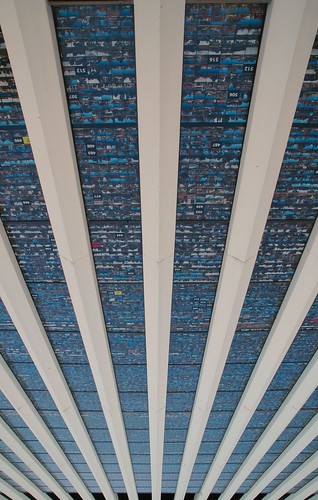
    Vertigo  - a building covered in buildingsThis week your photographic challenge is to shoot and share an image or two on the theme of ‘lines’.

    ‘Lines’ are all around us – they’re in architecture, they’re in landscapes, they’re in many of the things we use on a day to day basis.

    In photography spotting lines and working with them can really help with composition and have a dynamic impact on an image – they’re also really helpful in leading the eye of people through an image. We’ve talked about using lines in composition numerous times in the past – check out these articles before you go shooting:

    • Using Horizontal Lines in Photography
    • Using Vertical Lines in Photography
    • Using Diagonal Lines in Photography
    • How to Use Converging Lines to Enhance Your Photography

    Once you’ve taken your ‘Lines’ image upload it to your favourite photo sharing site and either share a link to it or – embed it in the comments using the our new tool to do so.

    If you tag your photos on Flickr, Instagram, Twitter or other sites with Tagging tag them as #DPSLINES to help others find them. Linking back to this page might also help others know what you’re doing so that they can share in the fun.

    Also – don’t forget to check out some of the images posted in our last challenge – Nature challenge where there were some great images submitted.

    Post originally from: Digital Photography Tips.

    Check out our more Photography Tips at Photography Tips for Beginners, Portrait Photography Tips and Wedding Photography Tips.

    Lines: Weekly Photography Challenge


    Digital Photography School

  • 2013 GPP Shootout Challenge: Photograph Greg Heisler

    The Gulf Photo Plus 2013 Shootout just concluded, and boy was it a doozy.

    The challenge: make a portrait of Greg Freakin’ Heisler, soup to nuts, in front of 350 people in 20 mins flat. No pressure there.

    Major props to John Keatley, who managed to not crack under the pressure and actually make a portrait of Heisler that was consistent with the slightly off-center Keatley style.

    Completely seriously, I want a 16×20 of this for the Strobist Cave.

    And here’s the thing: Keatley didn’t even win it. This year’s winner was Zack Arias, who suffice to say has a brass pair for what he did. You’ll definitely want to watch the video when it comes out.

    Whatever you have to do to get to Dubai for GPP, make it happen.

    -30-


    Strobist

  • Travel with Speedlights and a Smartphone? Get One of These.

    I very rarely review gadgets on this site. But this is something that may be new to many of you.

    When I travel I try to take as little gear as humanly possible. But the Tekkeon MP1580, seen above at bottom right, is on my must-take short list every time I fly with a camera.

    Here's why. Read more »
    Strobist

  • 12 Fantastic Deep Space Photos of the Planets

    Some of the greatest human achievements have been the missions to explore the planets in our Solar System, and these endeavours have also produced some of the most important and visually stunning images in the history of photography. This post brings together a showcase of some of the best planetary space photos starting with Mercury, the closest planet to the Continue Reading

    The post 12 Fantastic Deep Space Photos of the Planets appeared first on Photodoto.


    Photodoto

  • How to be Creative with White Balance

    This is the fourth in a series of articles by Andrew S Gibson, the author of Understanding EOS: A Beginner’s Guide to Canon EOS cameras.
    01

    My approach to photography is to keep things as simple as possible from a technical point of view. That helps me concentrate on emphasising with my subject, finding beautiful light and getting the best possible composition. These concepts are harder to pin down but they are the ones that are really important when it comes to creating beautiful images. Of course, the technical settings are important too, because they help you capture and make the most of the vision that you have in your mind. But keeping the technical side as simple as possible gives you time to concentrate on the other stuff.
    02

    White balance

    Now, you’re probably wondering what this has to do with white balance. Here’s the answer:

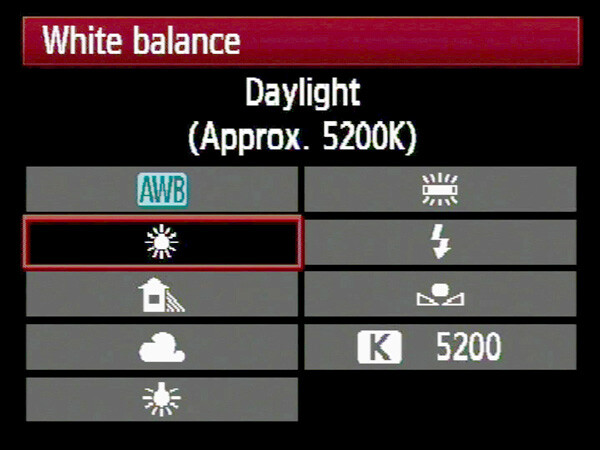
    The simplest way to deal with white balance is to set your camera’s white balance setting to daylight and then forget about it.

    If that statement puzzles you don’t worry, I’ll come back to it in a bit.

    First, let’s take a brief look at what the white balance function does.

    Colour temperature

    If this is the first time you’ve come across an explanation of white balance you may be surprised to learn that the colour of ambient light can vary. Our eyes adjust to it automatically, so we often don’t realise until it is pointed out. This phenomena is called colour temperature.
    03

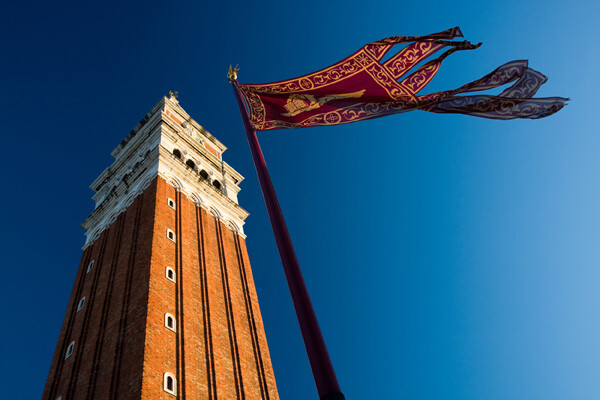
    If you take photos by the light of the setting sun, then anything illuminated by the sun’s light turns orange. That’s because the light from the sun, at this time of day, has a strong warm cast (that’s why it’s called the ‘golden hour’).

    Similarly, if you take a photo of something lit by the light of a tungsten bulb (ie at night or indoors) then the light has a strong orange colour and your subject will also come out orange.
    04

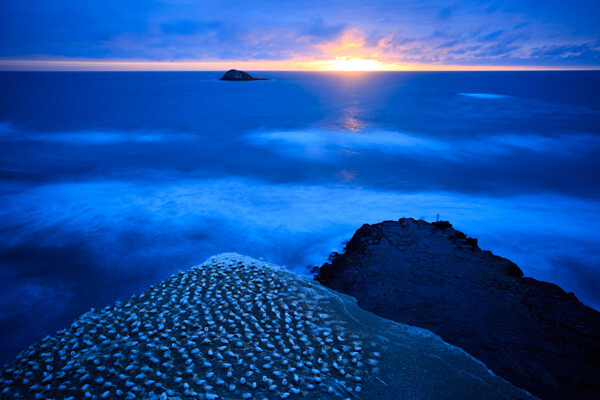
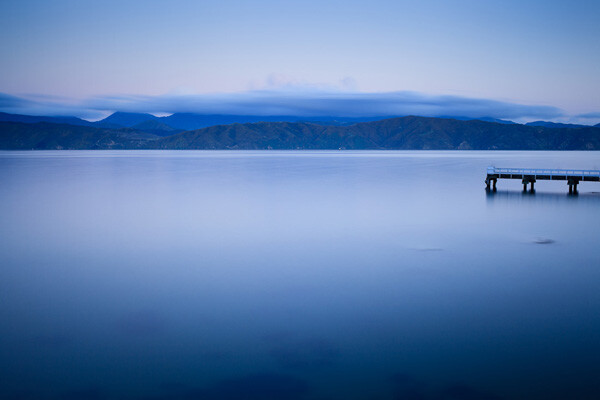
    If you take a photo after the sun has set, but while there is still a little light in the sky, then the light has a strong blue colour. I mentioned the golden hour earlier, this period is called the ‘blue hour’ by landscape photographers.

    If you take a photo on a cloudy day, the light also has a blue colour, although it is not so noticeable.

    If you take a photo of something in the shade on a sunny day, the light also has a surprisingly strong blue colour.

    If you take a photo lit by the sun at around midday it will have neutral colour. That’s because the white balance setting on your camera is calibrated to give photos with a neutral colour cast at this time of day. The exact colour of the light at this time of day depends on your geographic location and the season, so it does vary, but generally holds true.

    Candescent light

    What do all these scenarios have in common? The light in each is created by a candescent light source. That means that the light is generated by a burning object. In the case of daylight, that’s the sun (a burning ball of flammable gases). In the case of tungsten light, it’s the filament inside the bulb that is burning. There are no flames because there is a vacuum inside the bulb.

    Light produced by candescent light sources behaves predictably and is easy for your camera to cope with. It is either neutral in colour (ie sunlight at midday) or it has a warm colour cast or it has a cool colour cast.

    Daylight white balance setting

    So, why do I use the daylight white balance setting on my camera? The reason is that I always use the Raw format. That lets me make the final decision regarding white balance when I process the images in Lightroom 4 (the software I use to process all my Raw files). I can warm up or cool down the white balance as required. I also use a calibrated monitor so I know the colours I see on-screen are accurate.

    There are two benefits to setting colour temperature in post. One is that you can see the result of your adjustment right away on the monitor. The other is that you can also set the white balance on an individual basis per photo if you need to.

    If you use the JPEG format life gets a little more complicated. While there is a lot you can do to a JPEG file in post, it’s not as flexible as a Raw file. You need to get the white balance setting as accurate as possible when you take the photo. That takes more work. It can distract your attention from making the most of the light and the subject at the time of shooting, so I avoid it.

    There’s another reason I use the daylight setting, and it’s a personal one. I started in photography before the digital age, and I used daylight balanced slide film for most of my colour work. It taught me to appreciate the way that the colour of light changes throughout the day. With slide film, there is no post-processing, so you had to think about the colour temperature of the light and use filters to warm it up or cool it down if necessary. Now, I appreciate that my digital cameras make dealing with colour temperature much easier. That’s why I set it and forget it.

    Using white balance

    There are three ways to use the white balance function:

    1. To create a photo with a neutral colour cast. This is important if you’re taking say, a product photo for a catalogue company, or you want a ‘clean’ look to your photos.

    2. To emphasise the natural colour of the light. This is a creative way to use white balance. For example, if you are taking a photo of something lit by the setting sun, you may choose a white balance setting that emphasises the warmth of the light instead of trying to neutralise it.

    3. To warm up photos that benefit from warm colours. A good example is portraits. Warm light is generally the best for creating a flattering portrait. There are exceptions, but warm is generally best.

    There are some examples of photos with creative light balance at the end of the article.

    Incandescent light sources

    We’ve already looked at candescent light sources (light sources that burn). But light can also come from incandescent sources. These are light sources that produce light by a method other than burning something. The most common types you will see are fluorescent light, neon light and sodium lights (used in street lighting).

    The light from these sources is more difficult for your camera to deal with as they don’t fit neatly on the cool to warm scale of candescent light sources. They are often mixed with daylight which makes your job even more difficult. You may be able to adjust the white balance to produce a neutral coloured image in daylight, you might also be able to do it with the artificial light, but (fancy post-processing techniques aside) you can’t get the white balance right for both light sources at the same time.

    The lesson? Avoid fluorescent, neon and sodium lights as much as you can when you take photos. For example, if you are taking a photo in a building indoors lit by fluorescent light (and daylight coming through the windows) turn off the fluorescent lights (if you can) and just use daylight. Or turn off the lights and use flash instead (that’s how real estate photographers get such great results). The results will be better.

    However, there are times when you can use these light sources creatively. A good example is if you take a photo of street scene at night or at dusk. The light from different light sources may add to the atmosphere.

    Creative white balance examples

    Here are some photos where I have used white balance creatively:
    05

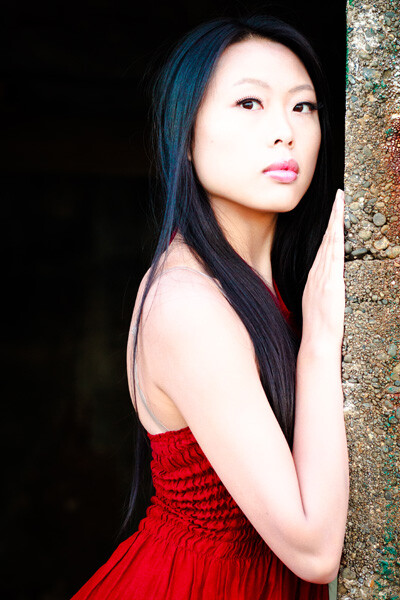
    Here’s a portrait taken in shade. The quality of light in the shade is soft and beautiful – perfect for portraits. But the colour of the light is blue. I warmed up the image in Lightroom 4.

    06
    Here’s another portrait taken in the shade. The difference is that the girl’s hair is lit by the last rays of the setting sun. That’s what has produced that lovely warm colour on her hair.
    07
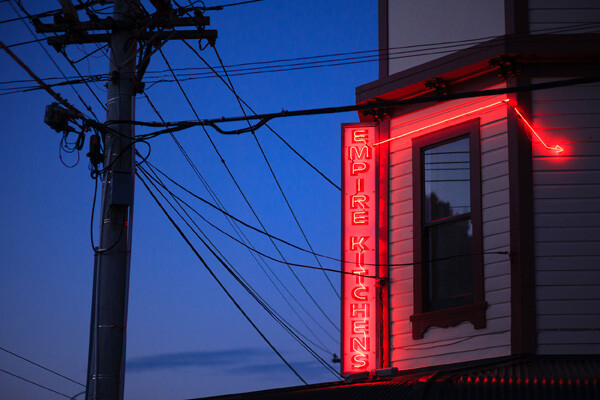
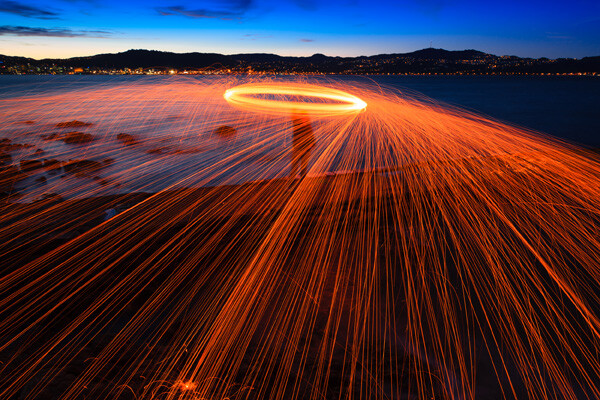
    A neon light against the evening sky. The light from the neon sign is red, and the ambient light illuminating the rest of the scene is blue. The colour contrast between the two is what makes the photo.
    08

    Steel wool spinning. Again, the colour of the ambient light at this late hour is blue. The light of the from the buildings in the distance and the burning sparks from the steel wool spinning is orange. There is a strong colour contrast between the two.

    Previous articles

    This is the fourth in a series of four articles. You can read the previous articles here:

    Introducing the Creative Triangle

    Finding Your Way Around the Mode Dial

    Understanding Colour on Your Digital Camera

    Understanding EOS

    09

    Andrew S Gibson is the author of Understanding EOS: A Beginner’s Guide to Canon EOS cameras. The use of white balance is one of many topics explored within the ebook.

    Post originally from: Digital Photography Tips.

    Check out our more Photography Tips at Photography Tips for Beginners, Portrait Photography Tips and Wedding Photography Tips.

    How to be Creative with White Balance


    Digital Photography School
  • 3 Ways To Get Sharper Close-Ups

    In close-up photography, one of your biggest goals is to draw attention to your subject–you want to make it really stand out.

    One way to make your subject stand out is to make it the sharpest part of the image, since the viewer will usually look at the sharpest thing first.

    But, how do you make your subject super sharp? Well, here are three simple ways:

    1. Photograph your subject in front of a contrasting background

    Things appear sharp when there’s a strong contrast along their edges, so one way to get sharper close-ups is to photograph your subject in front of a background that contrasts with your subject. The background can either be a contrasting color or it could be much lighter or darker than your subject. The key is strong contrast.

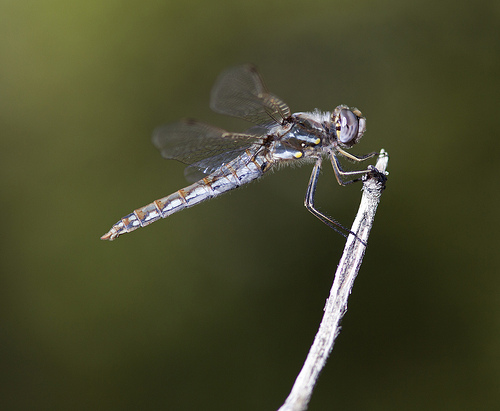
    Vmhawk

    For example, one of the reasons why the dragonfly is so sharp in the photo above is because the dragonfly is very bright while the background is much darker. This strong contrast helps make the dragonfly look sharper.

    2. Use the sweet spot of your lens

    Most lenses have a particular aperture that produces the sharpest images of the lens. Sometimes this difference in sharpness is pretty dramatic, so it’s a good idea to be aware of the “sweet spot” of all your lenses. It’s usually one or two stops down from wide open. So, a lens that has a widest aperture of f/4 is generally sharpest at f/8. This isn’t always the case though, so it’s best to test your lenses yourself to be sure.

    If you use Canon, Nikon, or Sigma lenses, then you can experiment with a helpful tool at The Digital Picture to find the sharpest aperture of your lenses.

    3. Position your camera so it’s parallel to your subject

    When you focus your lens on something, what you’re really doing is focusing on a geometrical plane that’s parallel to your camera’s sensor. Everything that’s on this plane will be in completely sharp focus, so it’s important to position your camera so it’s parallel to the most important plane of your subject.

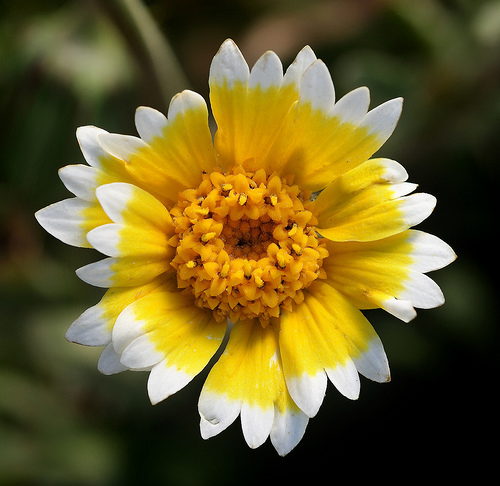
    Tidytips

    For example, one of the reasons why the wildflower is so sharp in the photo above, is because I spent a lot of time carefully positioning my camera so it’s sensor was parallel to the top of the flower. This helped keep all the flower’s petals in sharp focus.

    But, the sharpest photo isn’t always the best photo

    Sometimes it’s tempting to concentrate entirely on getting a sharp photo, because all you have to do is follow some rules like the ones above. But, it’s important to remember that composition still comes first. Sometimes you won’t always be able to get the sharpest photo because doing so would compromise the vision you had for the image.

    For example, sometimes if you position your camera so it’s parallel to the most important plane of your subject, then you’ll end up with a poor background.

    So, these tips aren’t meant to be followed all the time. They’re just some things to consider when you’re trying to get a sharper image.

    About the Author: Steve Berardi is a nature photographer and software engineer. You can read more of his articles on nature photography at the PhotoNaturalist. Also, be sure to check out his eBook on Wildflower Photography.

    Post originally from: Digital Photography Tips.

    Check out our more Photography Tips at Photography Tips for Beginners, Portrait Photography Tips and Wedding Photography Tips.

    3 Ways To Get Sharper Close-Ups


    Digital Photography School