Category: Photography

  • Understanding Colour on Your Digital Camera

    This is the third in a series of articles by Andrew S Gibson, the author of Understanding EOS: A Beginner’s Guide to Canon EOS cameras.
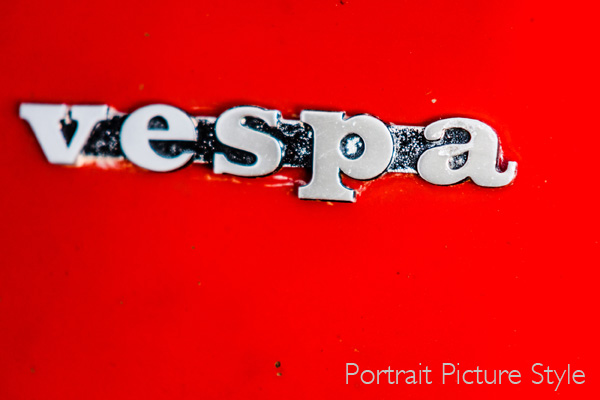
    01

    Joel Meyerowitz once asked ‘If the world is in colour, why shoot it in black and white?

    Okay, I can think of plenty of good reasons for working in black and white, but it seems that most photographers work in colour a great deal of the time. And when you work in colour, you naturally want to configure your camera to give the best possible results. To do so, it’s important to understand how your digital camera records colour.

    You may be wondering why this matters. Surely, digital cameras just accurately record the colours of the subject? Well, the truth is it doesn’t work like that. To understand why, we need to look at the nature of digital capture.

    02

    Digital capture

    The creation of a digital photo occurs in two stages.

    The first step happens when you take a photo. The shutter opens, light reaches the sensor, and then the shutter closes again. The sensor’s photodiodes react to the light that hits them and this information is converted to electronic form in a series of millions of bits and bytes.

    The second step depends on the file format setting you have selected on your camera.

    When you select Raw, the data captured by the camera’s sensor is compressed and recorded onto the memory card as a Raw file. The camera also generates a small JPEG file that is embedded in the Raw file so that you can preview it on your camera’s LCD screen.

    When you select JPEG, the camera converts the information captured by the sensor into a JPEG file and then ditches the information captured by the sensor. The main aim of the JPEG format is to save memory card space (the file sizes are smaller) and to give you a file that doesn’t need any post-processing.

    When the camera creates a JPEG file, it does so using the colour settings that you have dialled into the camera. Changing those settings alters the way the camera records colour.
    03

    Colour settings

    There are two colour related settings you need to know how to use. One is white balance (I’ll tackle that in the next article in this series).

    The second setting has a different name depending on the camera you have. It is called Picture Style on my Canon EOS cameras. It’s the term I’m accustomed to so it’s the one I’m going to use in the article.

    Nikon calls it Picture Control.

    Sony calls it Creative Style.

    Pentax calls it Custom Image.

    Olympus calls it Picture Mode.

    Fuji calls it Film Simulation Mode. I like this name as it describes exactly what the settings do – emulate the look of various Fuji film types.
    04

    What’s the purpose of Picture Styles?

    The purpose of Picture Styles, believe it or not, are to imitate the effects of using different films in the camera. Let me elaborate (I realise that this will seem a little abstract to anybody who hasn’t used a film camera).

    If you use film, then you would select a film type that records the subject in a way that suits the subject.

    For example, the film of choice for many years for most landscape photographers was Fuji Velvia. This was a high quality slide film that recorded deeply saturated colours. It emphasised hues like green and blue, making it ideal for creating punchy landscape photos.

    On the other hand, if you are taking photos of people, Fuji Velvia is a poor choice of film. You would be better off using something like Kodak Portra. This is a colour negative film designed to give a softer, less saturated image with good skin tones.

    In digital cameras, the idea that photographers should be able to change the colour settings to suit the subject they are photographing led to the development of Picture Styles. The same principle applies – you set the Picture Style that is most appropriate to the subject that you’re shooting.

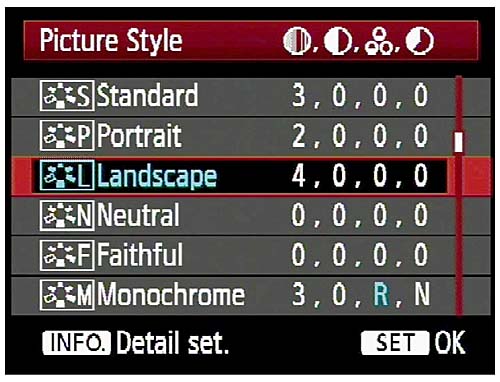
    Let’s take a look at the default options on EOS cameras (check your camera’s manual for details if you own a different brand):
    05

    Out of the six, the three you would use most often are:

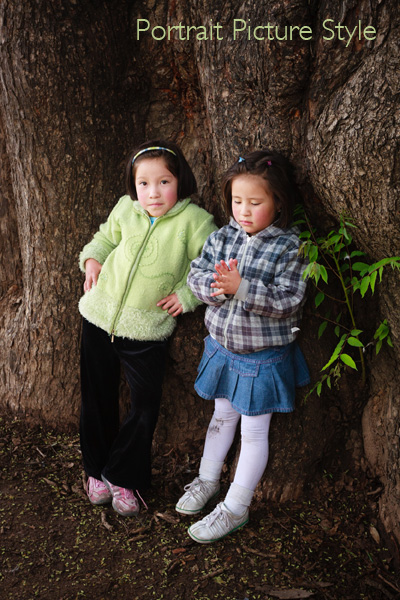
    Portrait: For when you’re taking portraits. Obvious enough really. This Picture Style is designed to give warm, flattering skin tones.

    Landscape: Also straightforward. This Picture Style gives slightly sharper images than the portrait Picture Style and deeply saturated blue and green tones. It’s intended for landscape photos.

    Standard: This is what you would use for just about every situation that isn’t a portrait or a landscape. It gives deeply saturated reds.

    Neutral and faithful: These two Picture Styles are nearly identical and are designed to give soft, neutrally coloured JPEG files that are intended to be processed further in Photoshop. Given that most photographers who want to post-process now shoot Raw, these have virtually become redundant.

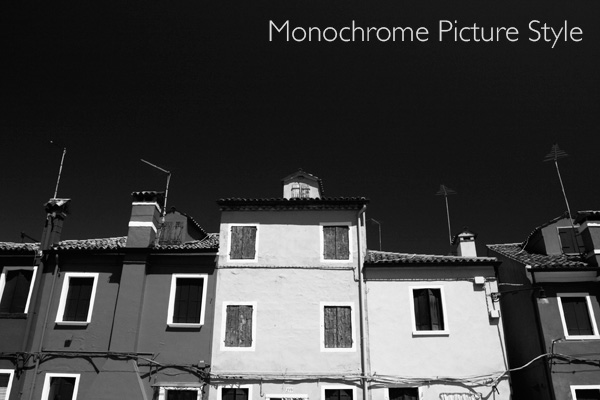
    Monochrome: For black and white images. If you’re serious about black and white photography you’ll get much better results by shooting in Raw and converting the colour image to monochrome in post-processing. But, this Picture Style may come in useful if you want to dabble or simply don’t like to process images on a computer (not everybody does).
    06

    What is a Picture Style?

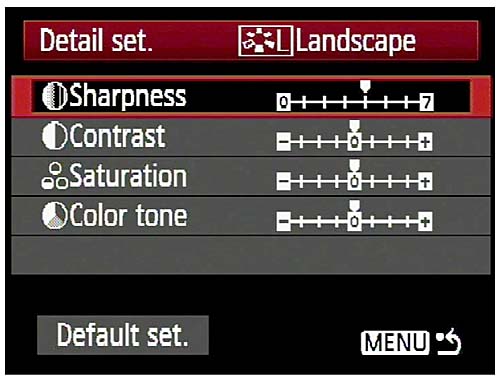
    On Canon cameras, a Picture Style is made from four different settings. They are sharpness, contrast, colour saturation and colour tone. You can change any of these in the camera’s menu to alter the way a Picture Style works. This gives you a lot of control over the way your photos turn out.

    Moving beyond Picture Styles

    The Picture Style control is very useful if you use the JPEG format. But, as I touched on before, a lot of photographers now use the Raw format. Raw processing software has improved over the years to the point where the benefits in terms of image quality are too great to be ignored.
    07

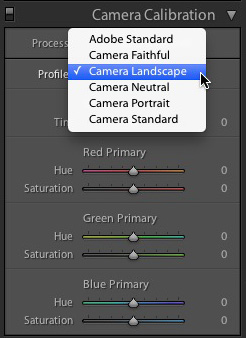
    If you shoot Raw you don’t have to select the Picture Style at the time you take a photo. The Raw processing software lets you select the Picture Style at the time you process the file (the screenshot above is from Lightroom 4). That means you can select the Picture Style that most suits the image, and switch between the different options to see which you prefer.

    Advanced workflow

    If you use a program like Lightroom to process your Raw files, it has so many options for controlling and altering colour that the initial Picture Style you select may become irrelevant if you make lots of changes. If you use Lightroom presets to process your files the Picture Style hardly matters at all.

    The same goes for Photoshop if you use Photoshop actions to change the look of your photos. Picture Style is just a starting point, and the result of the actions you use will have a much greater effect on the final result than the Picture Style you started with.

    Conclusion

    In short, the usefulness of the Picture Style setting depends very much on your shooting style and workflow.

    If you use the JPEG format, then Picture Style is very useful as (along with the white balance setting) it determines the way in which your digital camera records colour.

    If you use the Raw format, the Picture Style may not be very relevant at all. It provides a starting point and you may choose to use your Raw processing software to create a completely different look.

    Did you know that the white balance setting is just as important as Picture Style when it comes to colour photography? I’ll explain why in my next article.

    Previous articles

    These are the earlier articles in the series:

    Introducing the Creative Triangle

    Finding Your Way Around the Mode Dial
    08

    Understanding EOS

    Andrew S Gibson is the author of Understanding EOS: A Beginner’s Guide to Canon EOS cameras. The use of Picture Style is one of many topics explored within the ebook.

    Post originally from: Digital Photography Tips.

    Check out our more Photography Tips at Photography Tips for Beginners, Portrait Photography Tips and Wedding Photography Tips.

    Understanding Colour on Your Digital Camera


    Digital Photography School

  • 5 Awesome Ways to Grow as a Photographer

    Often beginners in photography are asking me the same question – “How can I become more creative as a photographer?” I truly believe that it’s creativity that drags our attention to the image. I’ve seen thousands of technically flawless images that meant nothing to me, while sometimes one image with noise and not that perfect light stroke me, because it Continue Reading

    The post 5 Awesome Ways to Grow as a Photographer appeared first on Photodoto.


    Photodoto

  • Understanding HD Video [Book Review]

    Understanding HD VideoAfter a careful read of Chiz Dakin’s book, I came to the conclusion that — for the right reader — her volume is the ant’s pants, the bees’ knees of ‘how to’ books in the video field.

    The right reader? Well that comes down to those who are competent in stills photography, own a DSLR or a CSC camera and know how to work with different lenses, be savvy with ISO, histograms etc.

    CSC? Compact System Camera or what could also be called a MILC (Mirrorless Interchangeable Lens Camera).

    I also figure it would probably not be right for the hardened videographer, accustomed to video camcorders, as most of the info within its pages is aimed at the stills brigade … and how jump ship into the world of movies.

    High end cameras such as Canon’s EOS MkII and MkIII and Nikon’s D800 are becoming increasingly popular with feature film and documentary makers due to their reasonable price (compared to high end video cameras) and ability to use lenses with focal lengths that image to a full frame 35mm area. Lenses of these focal lengths enable photographers to work with a reduced depth of field and produce that ‘film look’. The odd thing is that the true 35mm movie frame is roughly half the size of the 35mm still frame! Oh well!

    The early chapters take the reader through the differences between camcorders and movie-enabled still cameras: their radically different ergonomics; limited recording time; tricky sound capture arrangements; challenging focus ergonomics etc.

    Then we get into the language of video shooting: how to capture movement; framing the scene; managing or supplementing light; creating an acceptable storyline; selecting camera angles.

    Quite a few pages are devoted to creating the story line, which may at first seem an odd subject in what could be seen as a techy book. But, different to stills photography, video making is a linear process: scene one comes before scene two etc.

    It may seem overkill when there follows a chapter listing the personnel on a typical video crew but, as many festival entrants know, even on a simple, home made video you can often need a Director (of course!), a Producer, camera operator, lighting gaffer, grip, art director etc to produce something with more going for it than a simple home movie.

    More about the basics: how to select locations; pick the right time of the day or even the right time of the year; choose camera angles; ‘crossing the line’ rules.

    Then we get to discuss differing types of cameras, with an admission that even smartphones can have their place in the scheme of things, especially when ‘you need to record somewhere that you couldn’t (or wouldn’t) want to put a bigger camera.’

    Lenses come into view with explanations of how effective focal length is affected by sensor size and the roles of prime lenses vs zooms, extreme wide angle lenses, macros, teles and shift lenses.

    There is much essential and useful info on memory cards, transfer bit rates, the different file formats, NTSC vs PAL, bit rates, frame rates etc.

    There is one piece of advice that is, to my mind, worth the book’s cover price alone: if you set the camera to auto exposure, when panning the camera from a dark area to a light one it will cause distracting exposure shifts. Better to switch to manual exposure so the lens aperture, shutter speed and ISO setting will all be locked.

    Result: exposure stays the same wherever the camera is pointed.

    Overall, an enormously useful book, full of all the stuff you need to make movies!

    Author: C Dakin.
    Publisher: Ammonite Press.
    Distributor: Capricorn Link.
    Size: 14.5x18x1.5cm. 192 pages.
    ISBN: 978 1 90770 862 6.
    Price: Get a price on Understanding HD Video (Expanded Guide Techniques) by Chiz Dakin at Amazon (22% off at present).

    Post originally from: Digital Photography Tips.

    Check out our more Photography Tips at Photography Tips for Beginners, Portrait Photography Tips and Wedding Photography Tips.

    Understanding HD Video [Book Review]


    Digital Photography School

  • Win One of Two Photography Courses from New York Institute of Photography

    NewImageOver the last two years here at dPS we’ve run very popular competitions with the New York Institute of Photography to give away to lucky dPS readers some of their great photographic teaching.

    Due to popular demand – we’re doing it again this week!

    This year NYIP is giving away two prizes

    Fundamentals of Digital Photography

    Fundamentals of Digital Photography

    These two prizes are designed to be helpful for two different levels of photographers. Each will be won by a different dPS reader. Here’s what you could win:

    • Fundamentals of Digital Photography – worth $ 499
    • Complete Course in Professional Photography – worth $ 1499
    Complete Course in Professional Photography

    Complete Course in Professional Photography

    Both courses include comprehensive and illustrated lesson books, CD Audio Guides, DVD Video Training, Photo Projects and Professional Evaluation and Personal Student Advisers. Learn a little more about how New York Institute of Photography works in this video:

    How to Win

    To win this competition you’ll need to:

    • visit the above two course information pages and choose which of the two courses suits your needs more. Choose one that you’d like to win.
    • leave a comment below and tell us which one you’d like to win and WHY you’d like to participate in the course. Please note: there is a limit of 1 entry per person.
    • do this in the next 8 days and on Tuesday 12th March the team at NYIP will choose the best 2 answers and we will announce the winners in the following days.

    By ‘best’ – we’re looking for people who have an understanding of what the course offers and how it suits their needs. So you’ll need to check out the course pages to put yourself in the best position to win.

    There’s no need to write essay length comments to win – but we’re looking to hear what you like about the course and how it would help your development as a photographer.

    This competition is open to everyone around the world no matter where you live – but there is only one entry per person.

    To enter – simply leave your comment below.

    Post originally from: Digital Photography Tips.

    Check out our more Photography Tips at Photography Tips for Beginners, Portrait Photography Tips and Wedding Photography Tips.

    Win One of Two Photography Courses from New York Institute of Photography


    Digital Photography School

  • Making Sharper Wildlife Photographs – [Part 1 of 2]

    Canon EOS Digital Rebel, Canon 100-400 F4.5-5.6L IS lens @400mm, 1/800th of a second at F8, ISO 400 - Hand held

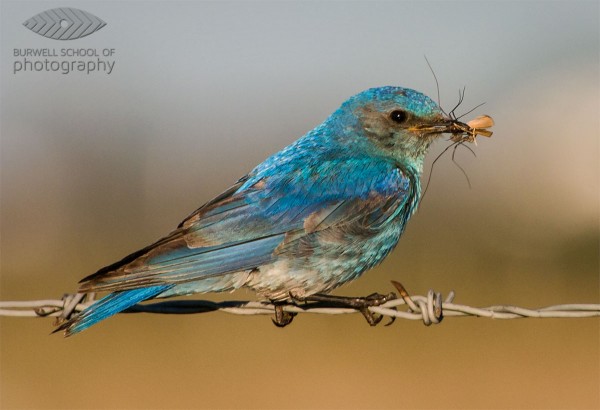
    Mountain Bluebird with prey: Canon EOS Digital Rebel, Canon 100-400 F4.5-5.6L IS lens @400mm, 1/800th of a second at F8, ISO 400 – Hand held

    A contribution by Paul Burwell from Burwell School of Photography

    If there is one area that seems to flummox more aspiring wildlife photographers it is the subject of making sharp images. You’d think that with today’s modern cameras and equipment that there’d be no problem going home with sharp images after each wildlife encounter. Un fortunately, that isn’t the case and I’m going to provide you with some tips and tricks to make sure you’ve got the best possible chance of making sharp images.

    Lenses

    One of the truisms in wildlife photography is that it is virtually impossible to have too much lens. This means it is extremely rare that the wildlife critter you are trying to photograph is too big in your viewfinder and in fact the opposite is much more common. Not everyone can afford one of the prime super-telephoto lenses that the major manufacturers produce. These lenses in the range of 300mm to 800mm can set you back anywhere between $ 5,000 and $ 11,000 respectively. Unless you’re a pro or a serious amateur with a healthy bank balance, these lenses aren’t feasible for the average user.

    So, what’s a person to do? My recommendation is to purchase the largest telephoto lens you can afford. And when you’re looking at telephoto lenses, you want the biggest number of millimetres that you can afford. Common lens lengths include 200mm, 300mm and 400mm.

    If you end up purchasing a zoom lens, look for one that has the shortest range possible. Why? Because in general, the more extreme the range the lens covers, the lower the quality at all those ranges. Therefore, I’d choose a lens that gives a range of 70-300mm over a lens that gives a 35-3500mm range every time. You also want to purchase the fastest lens you can afford. All lenses have a maximum aperture they can photograph at.

    A lens rated at F2.8 is two stops faster than a lens rated at F5.6 and allows four times as much light to reach the camera’s sensor. Because wildlife is often photographed under challenging lighting conditions, a faster lens allows for faster shutter speeds which equals sharper images.

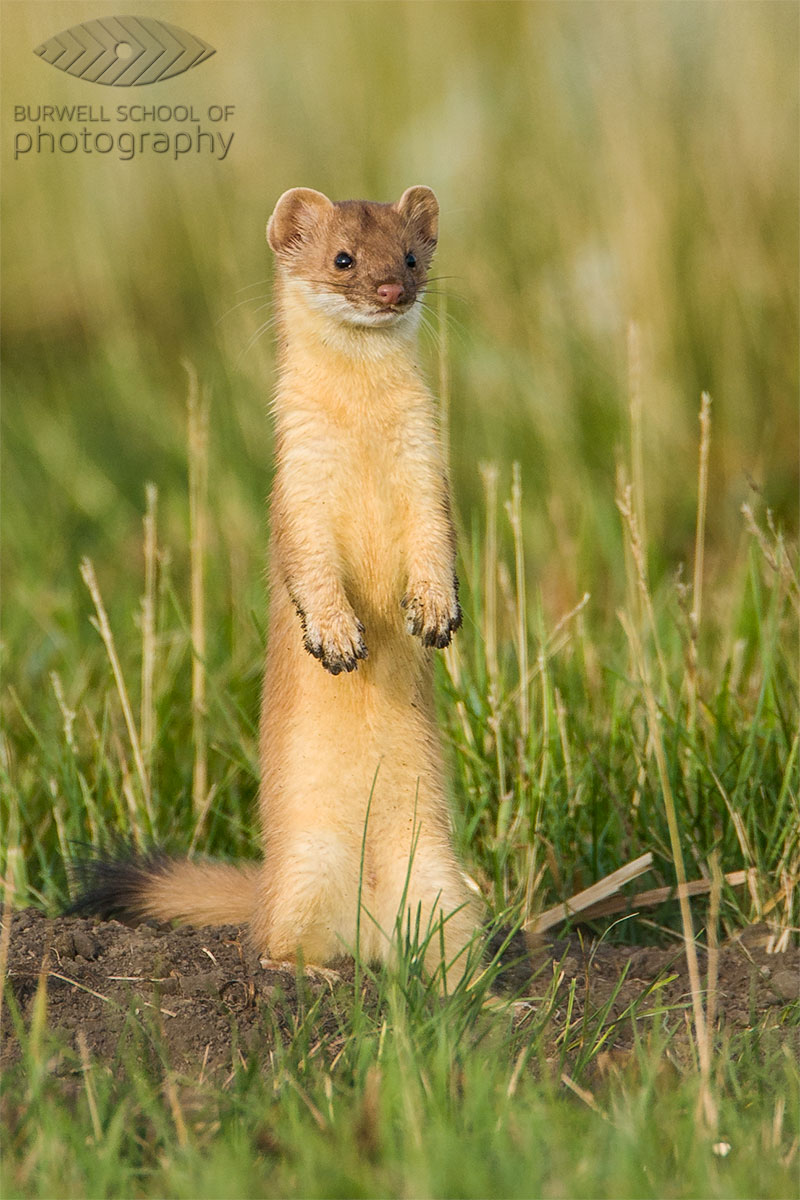
    Long-tailed Weasel pauses outside of ground squirrel burrow: Canon EOS Digital Rebel,  Canon 500mm F4L IS, 1.4x Extender II @ 700mm, 1/500th of a second at F7.1, ISO 200 - Hand held

    Long-tailed Weasel pauses outside of ground squirrel burrow: Canon EOS Digital Rebel, Canon 500mm F4L IS, 1.4x Extender II @ 700mm, 1/500th of a second at F7.1, ISO 200 – Hand held

    Teleconverters/Extenders

    I also recommend purchasing a teleconverter (or extender). Teleconverters are rated by the number of times they magnify your lenses range. So, if you’re using a 1.4x teleconverter on a 300mm lens, you’ve now got yourself a 420mm lens. Unfortunately, this comes at the cost of some light and so if your 300mm lens was rated at F2.8, a 1.4x teleconverter will cost you one stop of light and it will effectively become a 420mm F4.0 lens. Stay away from the two-times (2.0x) teleconverters unless you happen to own one of those multi-thousand dollar prime super-telephoto lenses we were discussing earlier.

    You’ll often hear that teleconverters degrade the quality of the image and this is true, but there is a trick for overcoming this problem. The solution? Stopping down up to a full stop. If you’re not familiar with the terminology, stopping down means using a smaller aperture setting (smaller aperture == larger f-stop number).

    While it is a general practice to photograph wildlife wide open (at the lenses largest opening or smallest f-stop) to separate the subject from the background, I recommend practicing with your lens/teleconverter combination to see how much you need to stop down to make sharper images. Depending on the lens I’m using, I find I need to stop down between 1/3 of a stop up to a full stop.

    Support

    What else can you do to get sharper images? Use some sort of support. I’ve met a few photographers who have no problem making sharp images hand-holding over 6.5kg (14 pounds) but the majority of people will make sharper images using support. Buy the highest quality tripod you can afford. Make sure the tripod is rated to support at least the amount of weight you’re going to put on it. High quality tripods can be pretty pricey but another alternative to consider that will also give your camera/lens combinations great support is a monopod.

    These handy devices also provide excellent support for even the heaviest equipment and they are a lot easier to pack and move about. If you want to save some money, (and who doesn’t), consider purchasing aluminum tripods and monopods over carbon fibre. They aren’t quite as light and they get cold as heck in the winter, but they are strong and a whole lot more affordable.

    So, now that you’ve got yourself the best wildlife photography equipment your pocket book will allow, stay tuned for my next column (next week) where I’ll give you the tips and tricks you’ll need to make the sharpest photographs possible.

    Until then, get out there and practice, practice, practice!. Photograph ducks at the local pond or go to a dog park and capture some of the action there. Regardless of whether you are in a remote location or on your own back deck, the more familiar you are with your equipment, the better chance you’ll have of making an award winning shot.

    Paul Burwell is the owner Burwell School of Photography

    Post originally from: Digital Photography Tips.

    Check out our more Photography Tips at Photography Tips for Beginners, Portrait Photography Tips and Wedding Photography Tips.

    Making Sharper Wildlife Photographs – [Part 1 of 2]


    Digital Photography School

  • Nikon 1 V2 Review

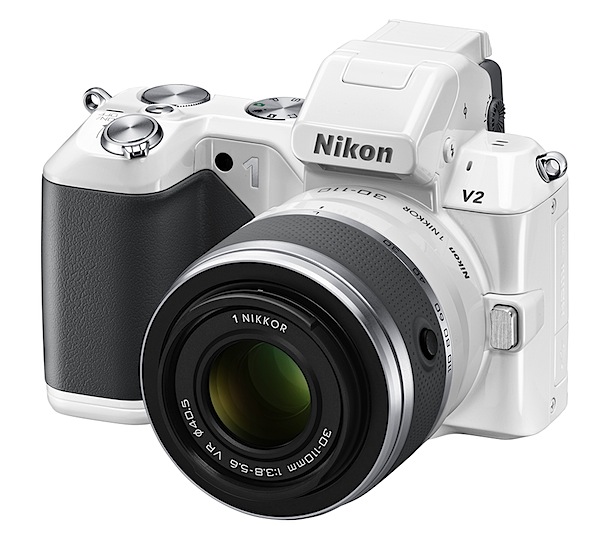
    Nikon 1 V2 Review white.jpg

    Straight out of the box I have to say the Nikon 1 V2 is the sexiest camera I’ve ever wrapped my mitts around.

    In ivory, with a finish reminiscent of a highly polished car’s enamel, the camera is a stand out. Unlike most other mirrorless interchangeable lens cameras (MILC) the Nikon 1 V2 has a pronounced speed grip that is so effective it rivals even that of high end DLRs. The body is possibly pocketable but maybe not so easily with a lens mounted, but overall the body is quite small. And there’s a black body if your dress style is more modest.

    Nikon 1 V2 Review.jpg

    Nikon 1 V2 Review back.jpg

    Nikon 1 V2 Review top.jpg

    The body is quite a departure from the launch Nikon 1 model which also was less endowed pixel-wise at 10.1 million pixels capture; unlike the newcomer, it had no internal flash while the new model also now offers a command dial.

    The latter, set into the top deck right next to the electronic turret viewfinder, offers access to auto plus PASM exposure modes; to the right are the power toggle, shutter button, video record and command dial.

    The rear surface presents four buttons that take you to replay, menu, display options and trash. Off to the right is the four way jog dial that has options to apply exposure compensation, continuous shooting and self timer plus flash options. Note: to the rear of the flash is a Nikon 1 i-TTL hot shoe port, allowing the use of optional lighting and camera accessories.

    The CMOS captures 14.2 million pixels and a maximum image size of 4608×3072 or 39x26cm as a print.

    MPEG4 video can be recorded at Full HD res of 1920×1080 pixels. You can’t capture stills while in movie mode and I found also in movie mode the auto focus does not track while you’re recording … so you have to tap the shutter button occasionally to bring it to heel! Perhaps the Nikon 1 lenses designed specifically for this camera behave differently.

    Nikon 1 V2 Features

    The camera is fairly feature full and indicates that Nikon is dead serious in pursuing the MILC portion of the market.

    Nikon 1 V2 Menu.JPG

    For one thing, the hybrid auto focus system relies on a 73 point AF array to deliver accuracy and very precise focus, even on moving subjects.

    Continuous shooting is a stand out: photographers can capture approximately 15 up to 45 fps; you can also shoot a run of 40 frames at approximately 60 fps. Taking it further, you can shot at 400 or 120 fps with a size limitation of 640×240 or 320×120 pixels respectively. The camera’s internal memory can store up to 100 successive images.

    A novel mode is the Enhanced Motion Snapshot Mode which saves a four second movie file plus a separate JPEG image; alternatively you can save a 10 second movie file without a separate JPEG image.

    And there’s Best Moment Capture Mode, an advanced creative mode that allows you to ‘slow down’ a moment while you are shooting. By pressing the shutter button halfway down when focused, photographers can capture approximately 1.33 seconds of live action, while the subject is displayed at five times slower than real time. Helps you catch that instant when things are happening real fast.

    Cars 1.JPG

    Cars 3.JPG

    Then there’s Smart Photo Selector, where you can capture up to 20 shots with a single tap on the shutter button: the camera will then automatically select the five best images, based on optimum exposure, focus and facial recognition. You can also shoot simultaneous Full HD video and high res stills of a subject.

    Viewing is via a turret finder and the rear 7.5cm LCD screen: I found the top finder to be useful only as a sighting tool, with the image quality very poor. Rear screen? FIne!

    Lenses

    The camera was supplied with an AF-S Nikkor f1.8/50mm lens that was fixed to the camera with the FT1 optional adaptor: the end result was a somewhat bulky piece of kit but at least the adaptor did provide a secondary tripod mount in its base. This 50mm translated to a 135mm optic in 35 SLR terms, so it was far from ideal.

    As it was not a VR lens, it provided no vibration reduction, which made video shooting a tricky challenge. To find out exactly what lenses can be used: http://imaging.nikon.com/lineup/acil/accessories/mount_adapter_ft1/compatibility.htm

    When purchasing the V2 you can get a twin lens kit with a 10-30mm and a 30-110mm. More info on Nikon 1 compatible lenses can be found here.

    Nikon 1 V2 ISO Tests

    Nikon 1 V2 ISO 160.JPG

    Nikon 1 V2 ISO 800.JPG

    Nikon 1 V2 ISO 1600.JPG

    Nikon 1 V2 ISO 3200.JPG

    Nikon 1 V2 ISO 6400.JPG

    All the way up to ISO 3200 I considered the camera to be on top of its game. By ISO 6400 noise and lack of definition to be past a useful level.

    Nikon 1 V2 Review Verdict

    Quality: impressive.
    Why you’d buy the V1: access to Nikkor lenses; small form factor.
    Why you wouldn’t: no vari-angle finder.

    There’s a lot to like in this model. It will please many Nikon fans. A classic Nikon.

    Nikon 1 V2 Specifications

    Image Sensor: 14.2 million effective pixels.
    Metering: Matrix, centre-weighted and spot.
    Lens Mount: Nikon 1 mount.
    Exposure Modes: Program AE, shutter and aperture priority, manual.
    Effective Sensor Size: 13.2×8.8mm CMOS.
    35 SLR Lens Factor: 2.7x.
    Shutter Speed (stills): 30 to 1/4000 sec (mechanical) or 30-1/16,000 sec (electronic) plus Bulb and Time (with optional remote). Flash sync: 1/250 sec (mechanical shutter) or 1/60 sec (electronic).
    Continuous Shooting: 5 fps as well as 10, 30 or 60 fps using the Electronic (Hi) shutter.
    Memory: SD/SDHC/SDXC cards.
    Image Sizes (pixels): Stills: 4608×3072 to 2304×1536.
    Movies: 1920×1080/60i and 30p; 1280×720, 640×240, 320×120.
    Viewfinder: 12mm (1,440,00 million pixels); 7.5cm LCD screen (921,000 pixels).
    File Formats: JPEG, NEF (RAW), JPEG+NEF, MPEG4.
    Colour Space: sRGB, Adobe RGB.
    ISO Sensitivity: Auto, 160 to 6400.
    Interface: USB 2.0, HDMI mini, audio input, accessories.
    Power: Rechargeable lithium ion battery, DC input.
    Dimensions: 107.8×81.6×45.9 WHDmm.
    Weight: 337 g (inc battery and card).
    Price: Get a price on the Nikon 1 V2 Body Only or Nikon 1 V2 with a 10-30mm VR 1 NIKKOR Lens or Nikon 1 V2 with a 10-30mm & 30-110 VR 1 NIKKOR Lens.

    Post originally from: Digital Photography Tips.

    Check out our more Photography Tips at Photography Tips for Beginners, Portrait Photography Tips and Wedding Photography Tips.

    Nikon 1 V2 Review


    Digital Photography School

  • Meet The Photographers Who Write For Digital Photography School ~ Helen Bradley

    You’ve been reading their articles for months or years, have you ever wondered “Who are the photographers who write for dPS”? Today we meet Helen Bradley, a long time writer on the site.

    helenbradley_image3

    1. How long have you been shooting?

    I have been shooting seriously for about ten years. I started quite by accident. I needed some slides for an art class so I borrowed a Pentax K-1000 film camera, got some quick instructions on how to use an SLR and headed out shooting. It was love at first click!

    hb red hair smaller2. Do you have a full time job or are you a full time photographer?
    I am a full time freelance lifestyle writer and part of what I do is to write tutorials, and produce videos and books about photography, Photoshop and Lightroom.

    I also write about Microsoft Office and iPad apps so I get to include my photographs in what I do every day. If my photos aren’t the subject of a photography or post production tutorial, they’ll be illustrating a tutorial on some application or other.

    3. If you had to limit yourself to one genre of photography, what would it be and why?

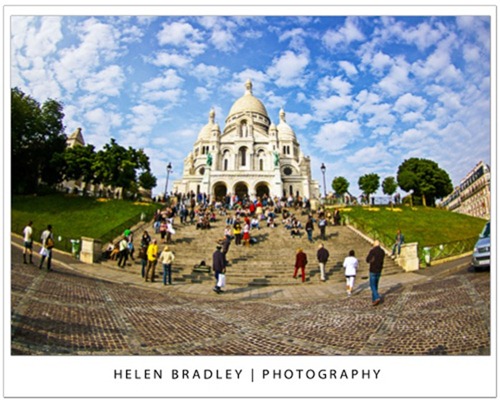
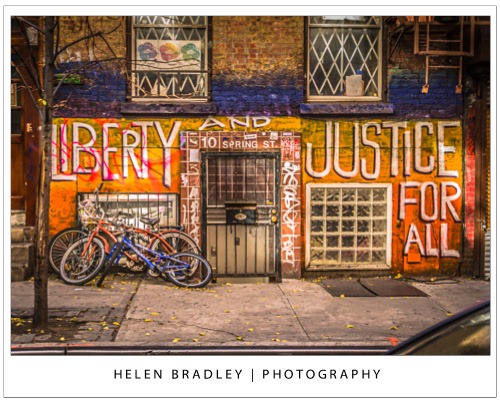
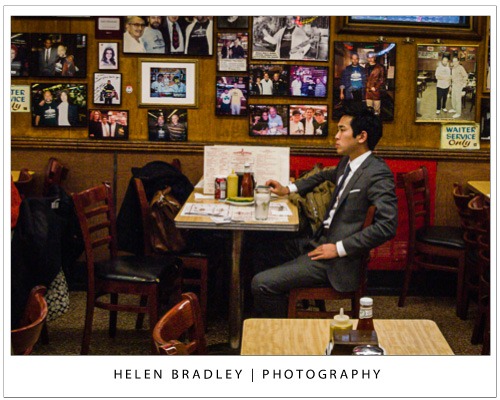
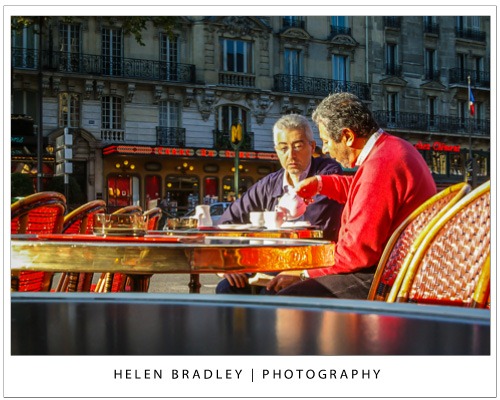
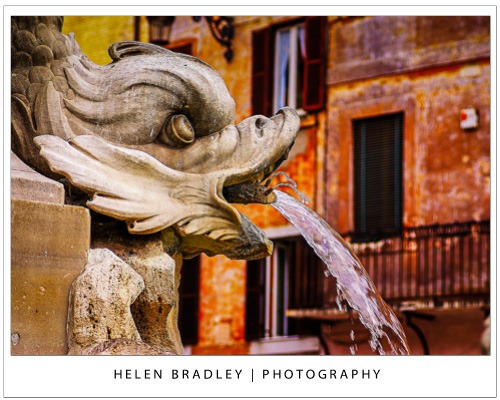
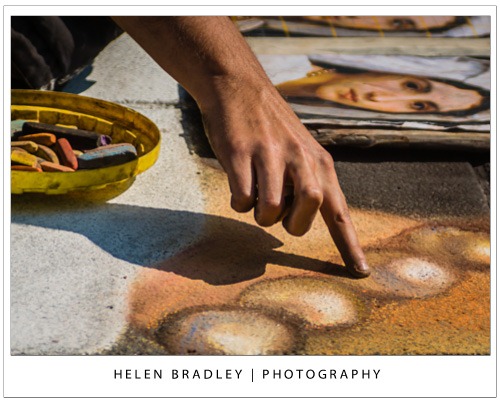
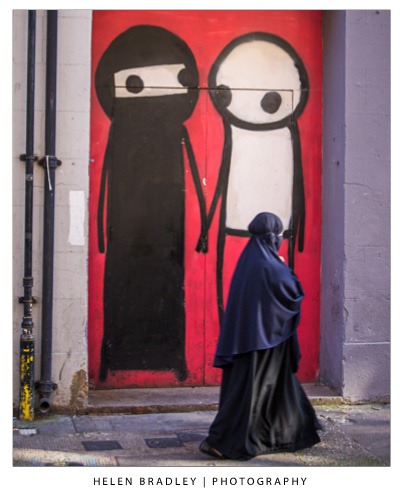
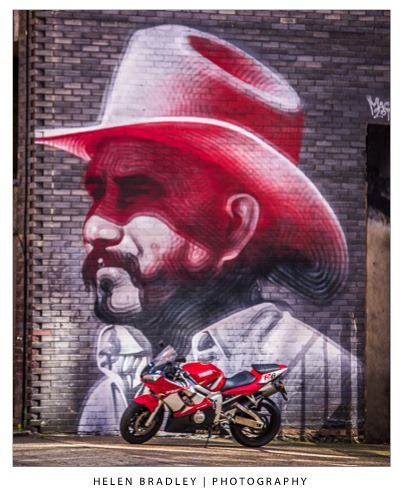
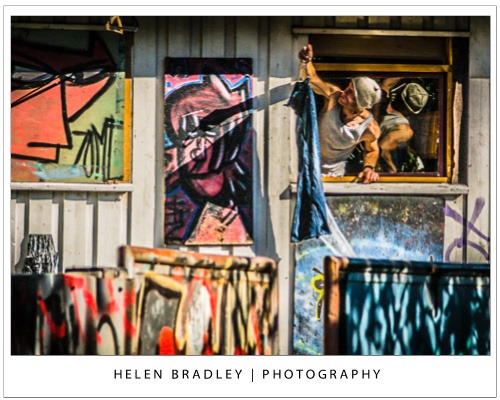
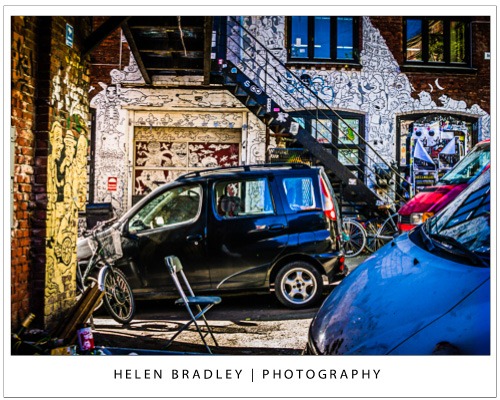
    It would have to be street photography. I love city streets and the noise, dirt and bustle of big cities. I get a thrill from finding a really great piece of street art, stencil art or cool person to shoot. I like the buzz of shooting on the streets and interacting with people that I meet. I’ve met some really interesting people whom I’ve either photographed or spent time talking with because they too have a camera in their hand – or a paintbrush.

    4. When did you start writing for dPS and why?

    I started writing for dPS in December 2008. I’d seen a note saying Darren was looking for writers and being an Aussie I felt that that might tip the balance in my favor. I love writing about fun and interesting stuff. I’m a strong believer in something I once heard Guy Kawasaki say – that you should eat like a bird and poop like an elephant. He meant you should learn and absorb everything you can then spread the information far and wide. This is what I live to do so dPS was a logical fit for me.

    5. What do you shoot with and what’s your favorite lens?

    I am a camera junkie. I have boxes of film in my fridge, I own a Holga, a refurbished Polaroid land camera, a point and shoot converted for IR capture, a Lens Baby and my trusty Pentax K-7 and a bag of lenses.

    My favorite lens is a 28-200 3.8-5.6 Tamron lens. It’s a great everyday lens – it’s the only lens I carry when I am out on the streets, it can capture pretty much anything and it’s not too heavy or awkward to hand hold.

    6. What would be your number one tip to any new photographer?

    Carry your camera with you. All the time. Everywhere. It’s really, really difficult to take a photograph without one.

    7. What’s your next big project?

    Thank you for asking! I’ve just launched a book in the 57 Secrets series. The book is 57 Secrets for Working Smarter in Photoshop and you can learn more about it at http://www.57secrets.com/photoshop.htm. It is available as a Kindle ebook and a printed book from Amazon.com http://www.amazon.com/57-Secrets-Working-Smarter-Photoshop/dp/161038010X/ref=sr_1_2?ie=UTF8&qid=1357091649&sr=8-2&keywords=57+secrets+photoshop

    8. Where can people go to find out more about you and your work?

    My web site and blogs are all at: http://www.projectwoman.com

    I have a craft blog at: http://www.craftinggoodness.com

    Find me on Facebook: http://www.facebook.com/projectwoman

    Twitter: http://www.twitter.com/helenbradley

    YouTube channel: http://www.youtube.com/user/HelenLBradley

    Google Plus: https://plus.google.com/116149445148279071329/posts

    I also offer classes on Photoshop, Photoshop Elements and Lightroom and one on one training. Details here: http://projectwoman.com/articles/44PhotoshopTraining.htm

    helenbradley_image1

    helenbradley_image2

    helenbradley_image4

    helenbradley_image6

    helenbradley_image5

    helenbradley_image7

    helenbradley_image8

    helenbradley_image9

    helenbradley_image10

    helenbradley_image11

    helenbradley_image12

    Post originally from: Digital Photography Tips.

    Check out our more Photography Tips at Photography Tips for Beginners, Portrait Photography Tips and Wedding Photography Tips.

    Meet The Photographers Who Write For Digital Photography School ~ Helen Bradley


    Digital Photography School

  • 10 Up and Coming Young Photographers to Watch Out for in 2013

    Want to know who’s going to be taking the photography world by storm this 2013? We’ve already shared with you the world’s most famous photographers and now it’s time to meet the rising stars. We’ve scoured the web in search of 10 young photographers that display talent and vision. It’s not easy breaking into the competitive world of photography, but Continue Reading

    The post 10 Up and Coming Young Photographers to Watch Out for in 2013 appeared first on Photodoto.


    Photodoto

  • Nature: Weekly Photography Challenge

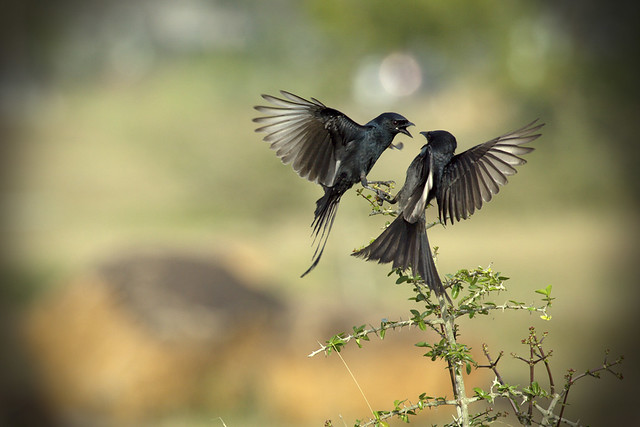
    ? The Drongo Love ? Happy Valentine's Day ?

    Earlier today we published the first of two posts in a series on Wildlife photography so thought this week we might give you an opportunity to practice the tips in it by making our challenge on the topic of ‘Nature’.

    It is a little broader than ‘wildlife’ because not every dPS reader is in a position to photograph animals in the coming week but if you’re able to we’d love to see what you can do.

    Feel free to photograph any aspect of nature you like. It could be some macro photography of flowers or insects in your back yard, you might want to get out to the beach and do some seascapes or shoot a sunset, you might find yourself drawn to the countryside for some landscapes or you might head to the zoo for some zoo photography!

    It is totally up to you.

    Once you’ve created your Nature upload it to your favourite photo sharing site and either share a link to it or – embed it in the comments using the our new tool to do so.

    If you tag your photos on Flickr, Instagram, Twitter or other sites with Tagging tag them as #DPSNATURE to help others find them. Linking back to this page might also help others know what you’re doing so that they can share in the fun.

    Also – don’t forget to check out some of the images posted in our last challenge – Diptych challenge where there were some great images submitted.

    Post originally from: Digital Photography Tips.

    Check out our more Photography Tips at Photography Tips for Beginners, Portrait Photography Tips and Wedding Photography Tips.

    Nature: Weekly Photography Challenge


    Digital Photography School

  • PocketWizard Plus X Remotes Break the $100 Barrier

    This is what I have wanted from PocketWizard for a long time: a sub-$ 100 remote.

    Basically, the new Plus X transceiver has everything you really need—and nothing you don't. Full details below.

    Read more »
    Strobist