Category: Photography

  • 15 Fantastic Freckle Photos

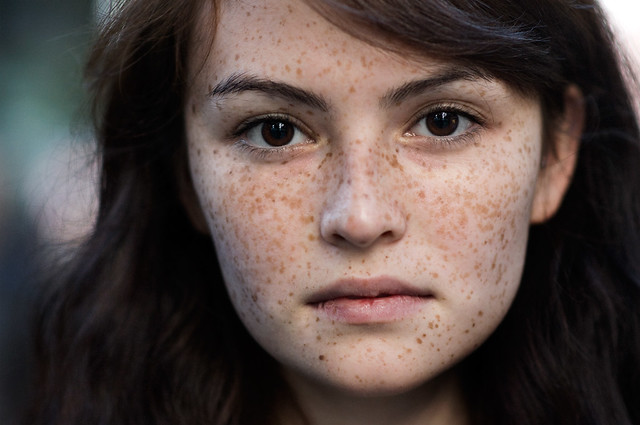
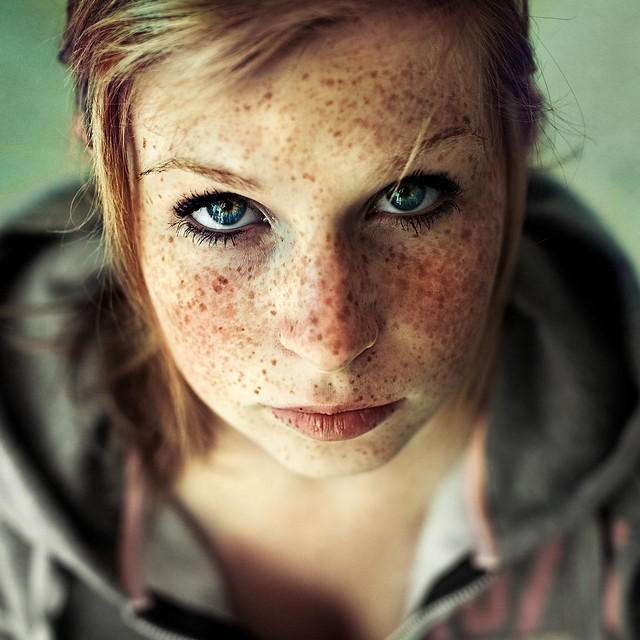
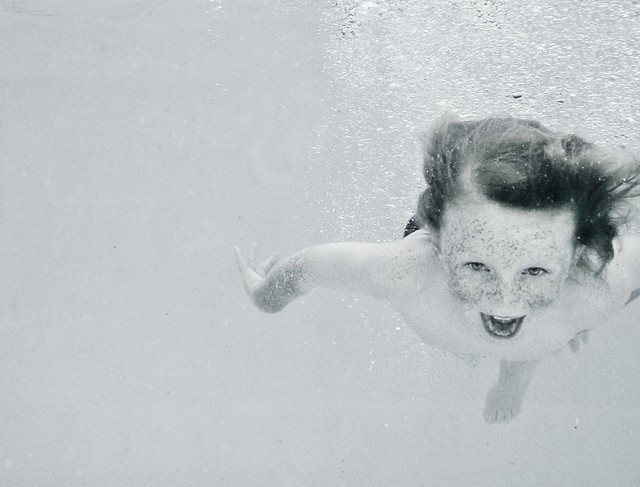
    You can put this image collection down into the slightly silly category but I just spent a fun hour looking at portraits that feature people with freckles.

    A young stranger: Quebec Rainbow gathering 2009: Gäya 7 years old

    I’m not sure why I ended up on this quest – perhaps it’s some subconscious therapeutic activity from growing up as the red headed kid with freckles – but I love some of these shots.

    While the freckles in many of these shots have been highlighted a little with some post production – hopefully they provide some of you fellow freckle faced photographers with some inspiration :-)

    Click the images to be taken to the photographers Flickr page to learn more about them and the images in this post.

    Project: Art Installation Japan

    mermaid

    Stranger #77

    grazie.

    La réalité est lente, changé de direction

    ninel

    Infinity

    The future is bright

    the freckled boy

    Passin' the Time

    indian summer

    La réalité est lente, changé de direction

    little merman

    Untitled

    Post originally from: Digital Photography Tips.

    Check out our more Photography Tips at Photography Tips for Beginners, Portrait Photography Tips and Wedding Photography Tips.

    15 Fantastic Freckle Photos


    Digital Photography School

  • How To Photograph Dragonflies

    A Guest Contribution by Steve Berardi from PhotoNaturalist.

    Pennant

    Dragonflies are among the most photogenic insects. They usually have bright contrasting colors that make them really stand out in their natural environment, and their large size makes them easy to photograph with a standard telephoto lens.

    However, there are a few difficulties with photographing them too: they get scared easily and sometimes it seems like they just never land somewhere and take a break so you can photograph them!

    So, here are a few things to keep in mind when photographing these amazing insects:

    1. Look for them near ponds and streams

    Most dragonflies hang out very close to bodies of fresh water: lakes, ponds, and streams. So, when you’re scouting out places to photograph them, make sure it’s a place where you can walk right up to the shoreline of the water (some nature preserves are in fragile habitat, so they won’t let you get too close to the water).

    Meadowhawk

    Some species can be found farther away from water too (such as the Variegated Meadowhawk pictured above), but you’ll find the most dragonflies near freshwater.

    2. They’re most active on sunny days

    Dragonflies need the heat of the sun to warm their bodies and fly, so they’ll usually be most active on clear sunny days.

    But, that doesn’t mean you shouldn’t look for them on cloudy days too. They’ll be a lot harder to find on cloudy days, but they’re also a lot easier to approach since it’s harder for them to fly away without the heat of the sun. You’ll also get a nice softly diffused light on them with cloudy skies.

    Each weather condition has its advantages and disadvantages.

    3. Be very very patient with them!

    It’s very easy to scare dragonflies and sometimes it may seem like they NEVER land, but the key is patience. If you scare them away, then be patient–they’ll likely come back to that same spot to perch (dragonflies typically return to the same perch all day), you might just have to wait for ten minutes.

    Also, some species perch a lot more than others, so again the key to photographing those species who don’t perch often is to wait patiently or wake up super early and try to photograph them before sunrise–if you’re lucky, you’ll even catch a few of them covered in dew.

    4. Position your camera so its sensor is parallel to the dragonfly’s body

    You only get one geometrical plane of sharp focus, so it’s important to put as much of your subject in this plane as possible. You can do this by carefully positioning your camera so its sensor is parallel to the body of the dragonfly. Then, just make sure you focus on the eyes of the dragonfly.

    5. Take shots from lots of different angles

    One of the most rewarding parts of photographing insects (or anything in nature) is that it helps you identify your subject–it gives you an opportunity to look more closely at them. However, sometimes the only thing that separates one dragonfly species from another is a few dots on their wings. So, it’s good to shoot photos from lots of different angles to help you identify the dragonfly later.

    6. Pay attention to the background

    When you’re photographing such an interesting subject like a dragonfly, it’s easy to focus entirely on them and forget about your background. But, a good background is important for any kind of close-up photography, because it can really help draw attention to your main subject: the incredible looking dragonfly.

    So, when you’re out there looking for dragonflies to photograph, pay close attention to your background. Ideally, you want it to contrast with the colors of the dragonfly.

    7. Use a small aperture — between f/11 and f/16

    One of the most frustrating parts of photographing dragonflies is getting their entire body in sharp focus, since you won’t always be able to photograph them with your camera parallel to their body.

    So, one way to deal with this is to use a fairly small aperture, usually somewhere between f/11 and f/16 works well. This will also put more of your background in focus, so make sure you find a dragonfly with a background that’s very far away (at least a few feet).

    What did I miss?

    If you have another tip for photographing dragonflies, then please share it with us by leaving a comment below. Thanks!! :)

    About the Author: Steve Berardi is a nature photographer, software engineer, and founder of PhotoNaturalist. You can usually find him hiking in the beautiful mountains and deserts of southern California. Read more of his articles on nature photography at PhotoNaturalist.

    Post originally from: Digital Photography Tips.

    Check out our more Photography Tips at Photography Tips for Beginners, Portrait Photography Tips and Wedding Photography Tips.

    How To Photograph Dragonflies


    Digital Photography School

  • The 13 Most Popular DSLRS Among dPS Readers [May 2013]

    It has been 4 months since we updated our ‘Popular Cameras and Gear’ list here on dP – a list of the hottest selling cameras and accessories among our readers (based upon what they are buying on Amazon*).

    So today I have updated the most popular DSLR list of cameras. What follows is the most popular camera DSLR bodies.

    It is topped by Canons Rebel T4i which tops the list for the first time after quite a long reign of the T3i (now in #2 spot).

    1. Canon EOS Rebel T4i

    61W0knoTL2L._SL1500_.jpeg

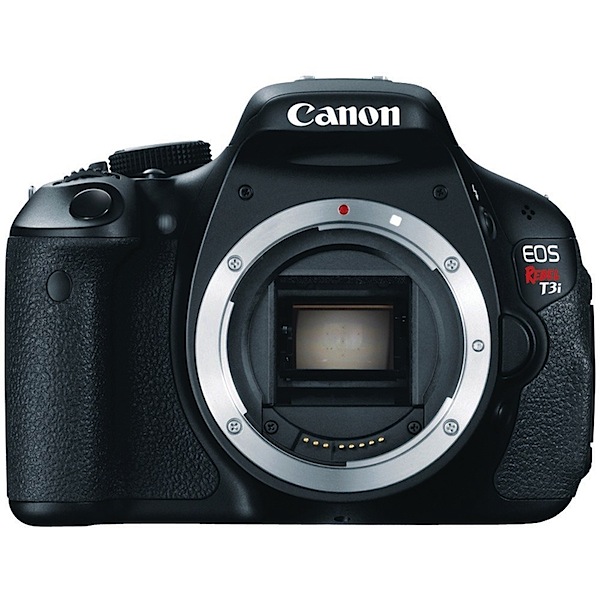
    2. Canon EOS Rebel T3i

    _images_I_71lbwO52tvL._AA1000_.jpg

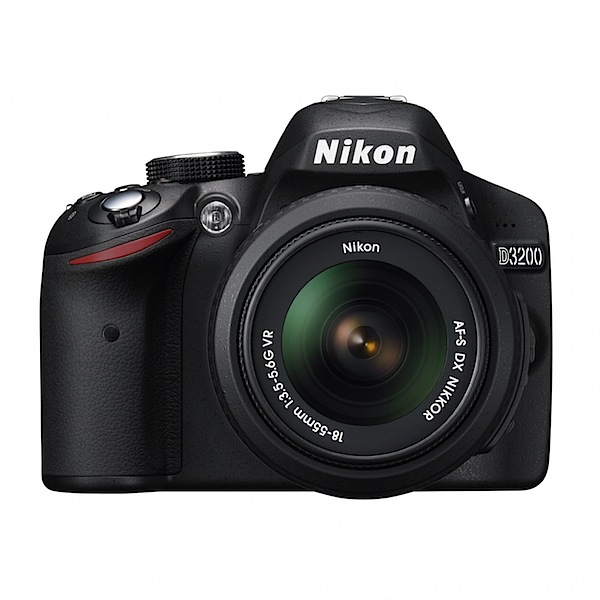
    3. Nikon D3200

    _images_I_91WSe2OKasL._AA1500_.jpg

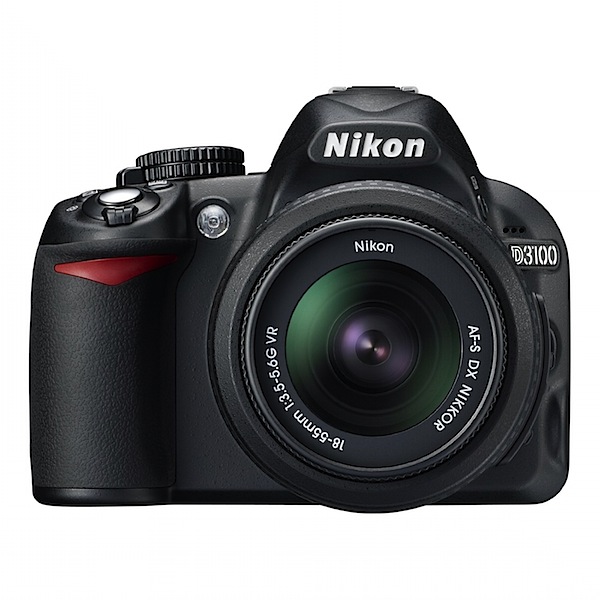
    4. Nikon D3100

    _images_I_713u2gDQqML._AA1500_.jpg

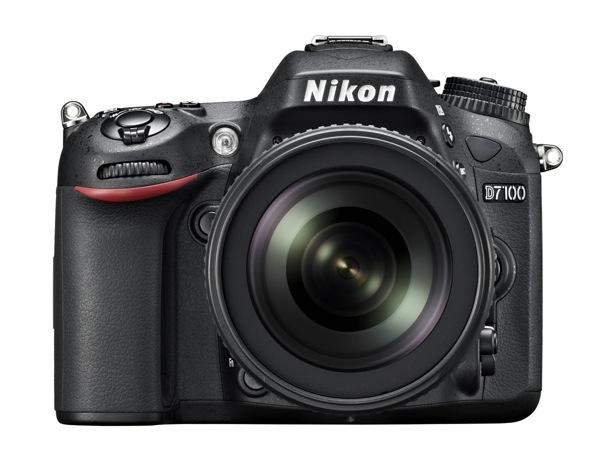
    5. Nikon D7100

    91Ns138GTAL SL1500

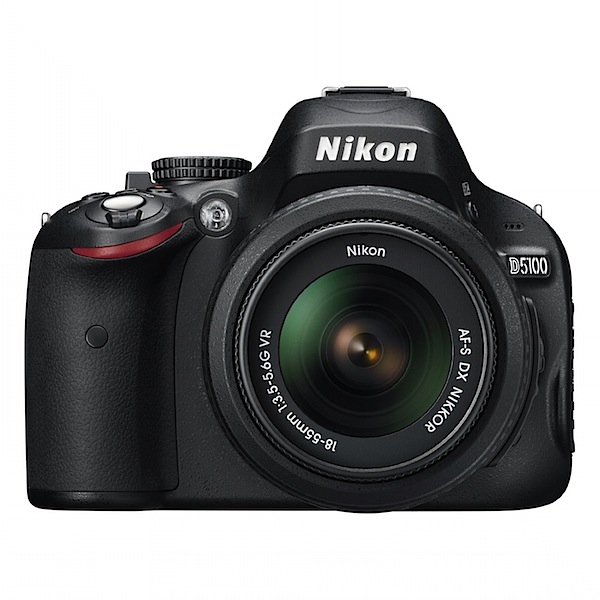
    6. Nikon D5100

    _images_I_81PnDu4O7tL._AA1500_.jpg

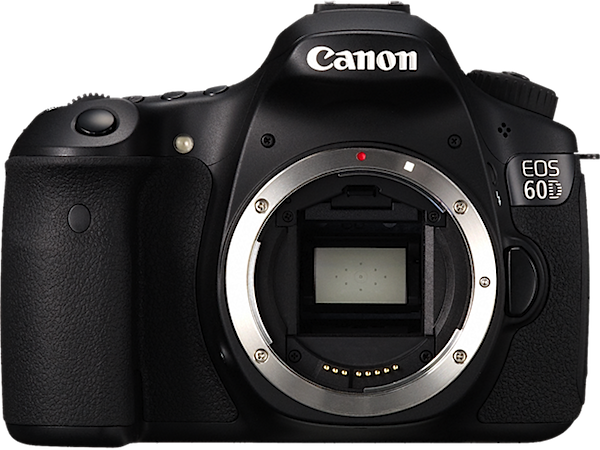
    7. Canon EOS 60D

    60D_07_AUS.png

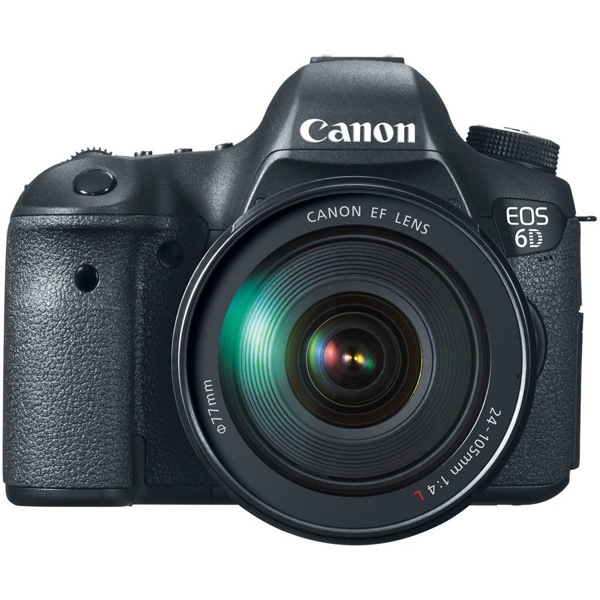
    8. Canon EOS 6D

    71lm0i0NUiL SL1000

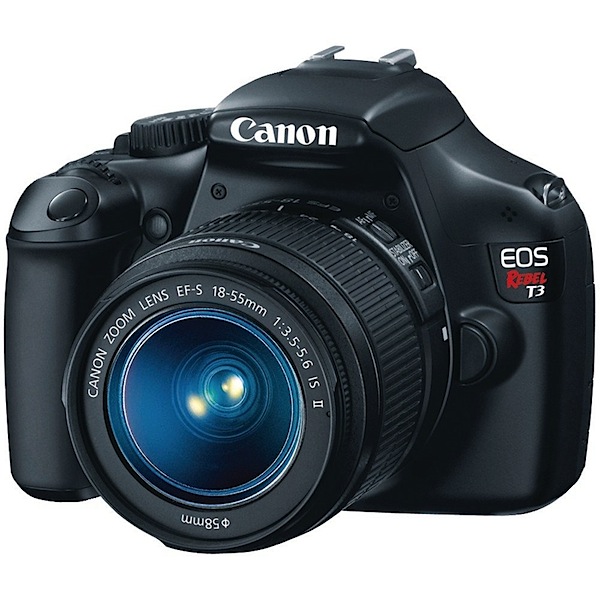
    9. Canon EOS Rebel T3

    _images_I_71AKBVTvZdL._AA1000_.jpg

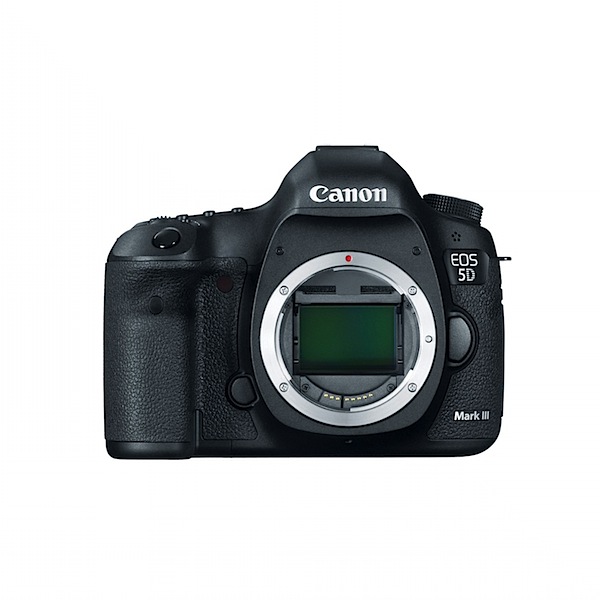
    10. Canon EOS 5D Mk III

    _images_I_71X9b9JhO8L._AA1500_.jpg

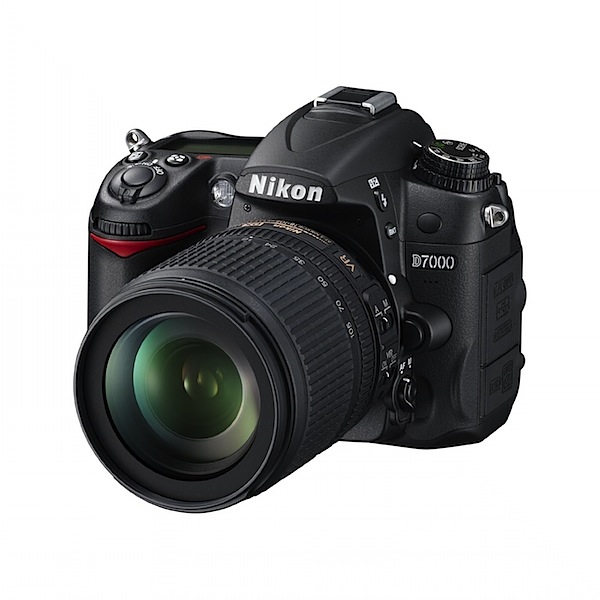
    11. Nikon D7000

    _images_I_71yf785aBmL._AA1500_.jpg

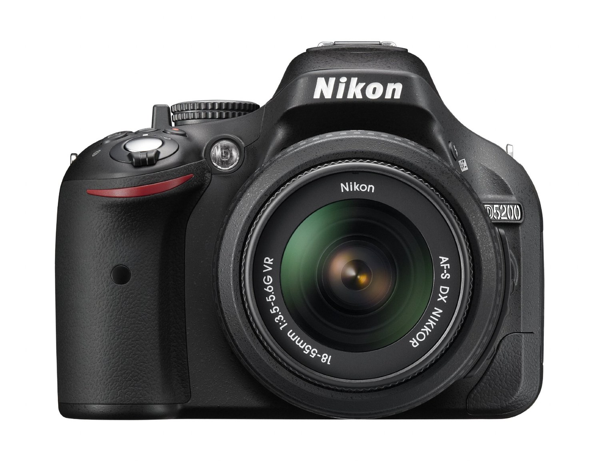
    12. Nikon D5200

    NewImage

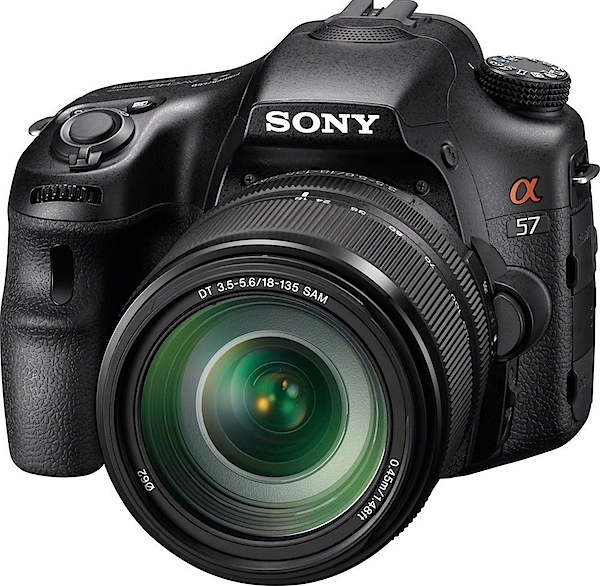
    13. Sony Alpha SLT-A57M

    71-X96zbUiL._SL1000_.jpeg

    As usual, this list isn’t a list of the ‘best’ cameras – just what people are buying on Amazon right now.

    **Note: this list was compiled from reports supplied to us from Amazon.com where we are affiliates. One of the ways dPS is able to cover its costs and be a sustainable business is that we earn a small commission when readers make a purchase from Amazon after clicking on our links (including those above). While no personal details are passed on we do get an overall report from Amazon about what was bought and are able to create this list.

    Post originally from: Digital Photography Tips.

    Check out our more Photography Tips at Photography Tips for Beginners, Portrait Photography Tips and Wedding Photography Tips.

    The 13 Most Popular DSLRS Among dPS Readers [May 2013]


    Digital Photography School

  • Light Painting Part Two – Photoshop

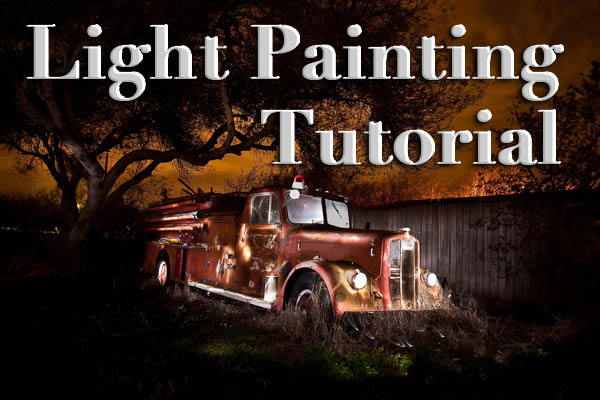
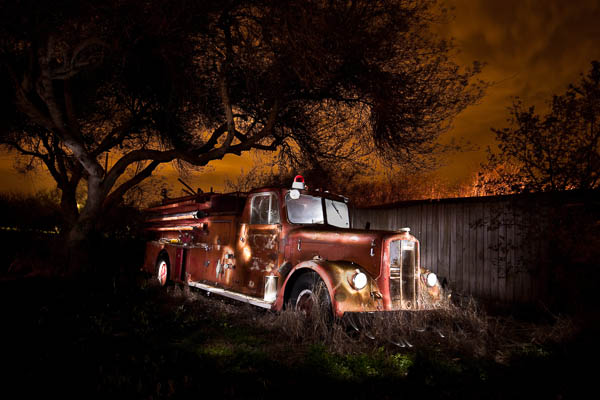
    "1956 Le France Pumper"

    In Part One of  the Light Painting Tutorial I went over how to do the photography part: equipment, camera settings, set up, lighting, potential pitfalls, and step by step instruction on how to do light painting shots.  In this article Part Two, we’re going to take a look at how to combine multiple exposures in Photoshop.

    WHAT YOU’LL LEARN IN THIS TUTORIAL

    • how to create one big layered file of all your images
    • what layer settings to use to “turn the lights on” with each added image
    • how to get rid of any unwanted areas of each image
    • how to easily “dim the lights” on any shots that were too bright
    • saving your final combined image as a masterpiece

    Combining images in Photoshop is surprisingly quick and easy

    What you need to do this:

    • a series of images of the same subject, shot with the same angle of view (you didn’t move the tripod), with each image lit just a little differently
    • Photoshop (CS or Elements) or some other photo editor that uses layers
    • a basic knowledge of how to use layers, blend modes and masking in your photo editor
    • a computer with good memory and speed – creating multi-layered documents can sometimes slow down your computer if you have an old processor, not enough RAM (put as much in as your computer will hold, I have 6gb and want more but I’m maxed on my 6 year old MacBookPro) or your hard drive is overly full (you want your hard drive never to go over 75% full max, otherwise it will bog down).

    Note: if your computer is slow you may not need a new one: just upgrade your RAM and get a bigger hard drive or empty a bunch of stuff off and see if that helps.

    STEP ONE OPENING YOUR FILES AS LAYERS

    If you are using Adobe Lightroom, you can open your original files directly from Lightroom into Photoshop (wherever I mention Photoshop you can use CS, Elements or your usual editor that has layers capabilities). I do find however that if you are shooting Raw opening 12 or more Raw files into Photoshop really tends to bog it down. So in this case I have exported JPGs first and then opened those into Photoshop. If you are opening from Lightroom directly follow these steps:

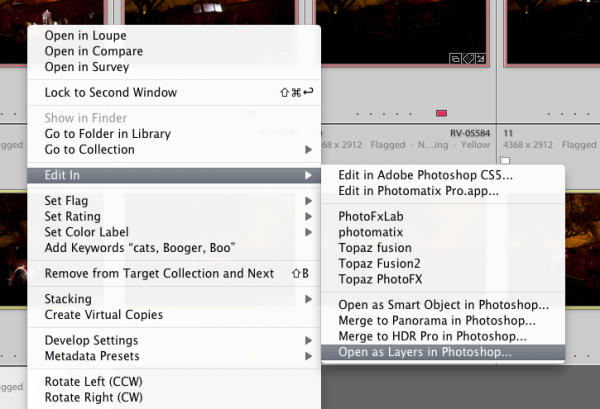
    • select all the images of your scene so they are highlighted
    • right click on one of the thumbnails
    • from the pop up menu choose “Edit in” and then “Open as layers in Photoshop” like shown below in Figure #1
    open-as-layers-from-LR-to-PS

    Figure #1

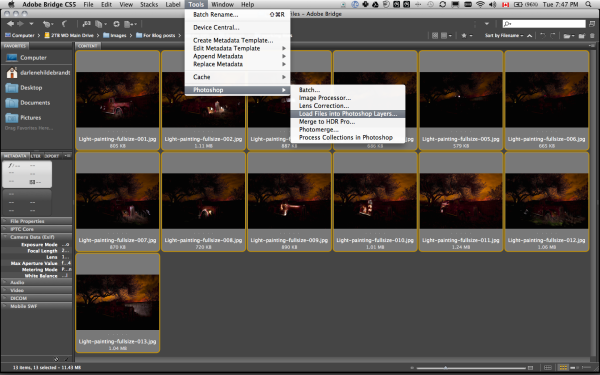
    If you are using Photoshop you will follow almost the same steps using Bridge (or the mini browser where you can see your thumbnails)

    • select all the images of your scene so they are highlighted
    • go to the Tools menu
    • select Photoshop > Load files into Photoshop layers (as shown below in Figure #2)
    Open as layers from Bridge

    Figure #2

    STEP TWO ALIGNING THE LAYERS

    Once you have all your files opened as layers into one document in Photoshop you want to make sure they are perfectly aligned.  If you used a tripod and it didn’t move they should be pretty close, but we want to make sure they are perfect. Follow these steps:

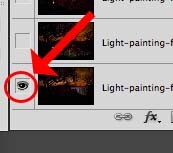
    eyeball-icon

    Figure #3

    • Turn on just your bottom layer by clicking and holding the Option or Alt key on your keyboard, then clicking on the little eyeball icon (next to the thumbnail of the layer) of the bottom layer. That will make that one active and hide all the others. (See Figure #3 right)
    • Next one by one turn on each layer by clicking the eyeball next to them. If you notice that any of the images seem to jump a bit as you do that, you’ll want to run an alignment. If not but you just want to be sure anyway, continue on to the next step
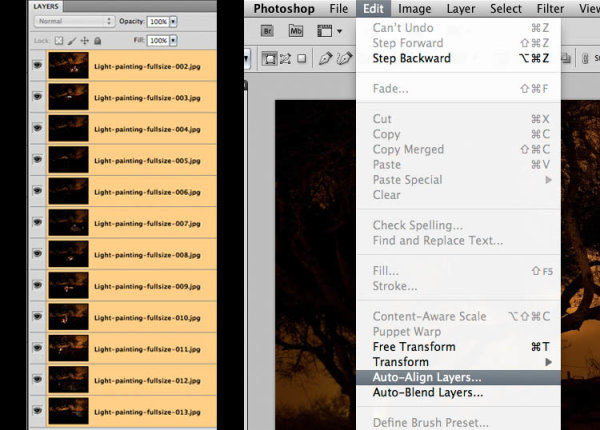
    • Select all your layers, click the bottom thumbnail, then shift>click the top one so all layers are highlighted (as shown below in Figure #4 below)
    • Align the layers by going to the Edit Menu> Auto align layers (see Figure #5 below) and just choose the auto method from the pop up box. If it adjusts any of the layers you may have to crop the result to get rid of any odd edges.
    Figure #4 left - Figure #5 right

    Figure #4 left – Figure #5 right

    STEP THREE BLENDING THE LAYERS

    Now that your images are aligned perfectly we’re ready to do some magic!  In this section we’re going to “turn on the lights” from each image one by one. Here’s how:

    Rename darkest image, put it as bottom layer

    Figure #6

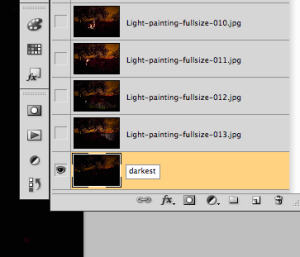
    • find your darkest image by going through each layer one at at time.  This should be the image you shot before you added light with your flashlight. The base image you created in Part One of the Light Painting Tutorial.  
    • drag the layer with your darkest image to the bottom of your layers panel.  Just grab the thumbnail for the layer and drag and drop it below the bottom one.  You can rename that layer “darkest” if you like by double clicking on the layer name and typing in your new one. See Figure #6 right.
    • turn on the layer just above the bottom one and make it your selected layer – use the eyeball icon, they should all be turned off except your “darkest” layer and the one above it now
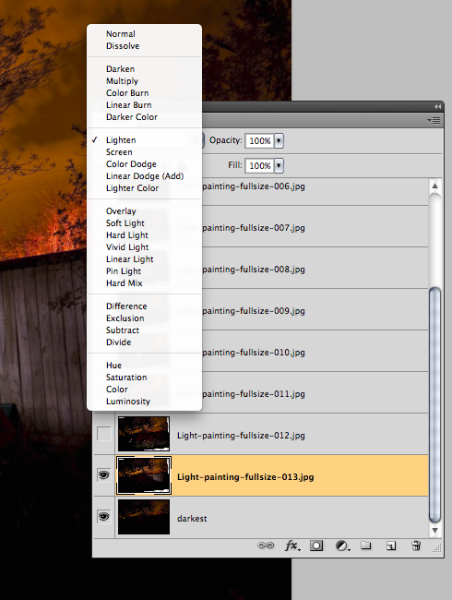
    • change the blend mode of the selected layer to “lighten” – you do this by going up to the pull down menu in the upper left corner of your layers palette, right under the tab that says “Layers” and to the left of where it says “Opacity”. See Figure #7 below.
    • copy the layer style – right click on the layer itself and choose “copy layer style”
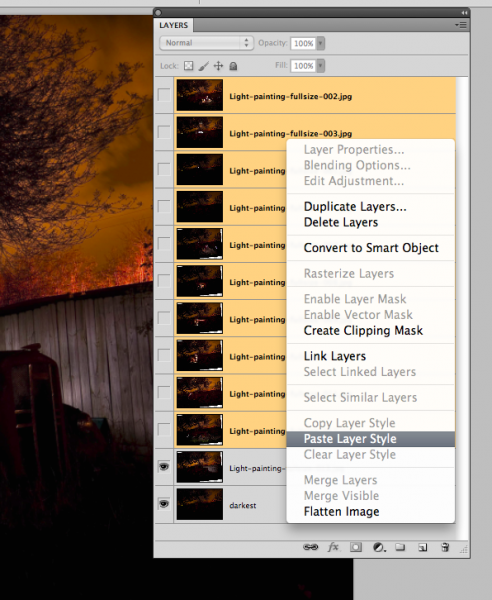
    • change the blend mode of all other layers to lighten – select all other layers, right click and choose “paste layer style”. That is the only way I know of to change them all quickly without having to do them individually, one by one. See Figure #8 below.
    Figure #7

    Figure #7

    Figure #8

    Figure #8

    TURNING ON THE LIGHTS

    Now if you click on each of the Eyeball icons for the layers above, you will see the lights turn on in the different spots you painted in each exposure. In the example of the firetruck here are a few views of the overall image as I turn on a layer above one at a time.

    lights-on

    REVIEW AND REFINING THE IMAGE

    I’ve skipped a couple here, but you get the idea. Notice how as I turn each subsequent layer on a new part of the truck is magically lit up. There are a few issues however, as it’s never, or rarely perfect right out of the camera. But we can fix those things easily too using layer masks. Do you notice the following issues in the image above?

    • a few stray light bugs in places we don’t want them (on the fence to the right of the truck)
    • the sky got overly bright as well (caused by some of the exposures being longer than the “darkest” base layer)
    • there are some double images of the tree branches in a few places (caused by wind and the tree moving from one exposure to the next)

    To fix any issues and clean up the image follow these steps:

    Figure #9

    Figure #9

    • turn on just the bottom layer again (alt/option click the eyeball for that layer)
    • turn on each layer one at a time, let’s do the one above the bottom one first
    • review the image and look for any issues such as – areas that got too light, stray light bugs, your body showed up in the photo, etc.
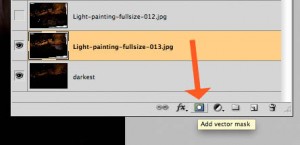
    • create a layer mask by clicking on the “layer mask icon” in the bottom of the layers panel. See Figure #9 right.  ***Important to note: you can do this two ways. Just clicking it directly will create a mask that shows the whole layer (mask will be white).  Alt/option clicking on it will make the layer hidden or “masked” (mask will be black). If you only have a few issues to “paint out” use the direct click method.  But if you have a lot of issues you need to paint out, I suggest using the second method so the mask hides the layer and then you just paint in the good areas. Either way you’ll get the same result just with less painting or adjustments needed so choose the method that is best for each layer.***
    • mask-selected

      Figure #10

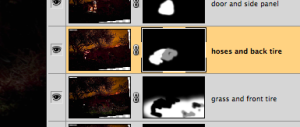
    • paint on the mask to show or hide the parts you want – TIPS: hit the “D” key on your keyboard, that will set your swatches to the default black/white for foreground and background colors. Then hit “B” to get your brush tool. Select a soft edge brush so you don’t get a harsh line where you paint on the mask. Paint at 100% using Black to over areas you want to hide and switch to white for areas you want to show. To switch the foreground/background colors back and forth use the X key. Here’s what it looks like – make sure you are painting ON the mask not the image. You’ll be able to tell because there will be little corner markers around the mask and not the layer thumbnail. See Figure #10 right.
    • repeat for each layer – turn it on, add a layer mask, paint to hide and show the areas you want. TIP: if you want to see what it looks like without the layer mask (especially useful if you are using a black mask and painting IN areas you want to show), hold SHIFT and click on the mask itself. A red X will appear and the mask is just disable. Do the same to turn it back on. 
    • if any of your images appear too bright you can tone them down by simply lowering the opacity of that layer, or by painting over the parts that are too bright with the layer mask to partially hide them (just set your paintbrush opacity to 20% and brush over that area gently)

    This is what my layers look like with the masks added and areas painted to show only the bits I want from each exposure. Remember to save your file in two formats:  PSD to preserve all the layers, and a final JPG you can use for printing or sharing online (you may have to make a smaller one for email sharing).

    all-layers

    SUMMARY AND REVIEW

    Okay so it seems like a lot of steps but once you get the hang of it, then it really doesn’t take that long to make something you can wow your friends with. They’ll be asking you “how’d you do that?!” in no time! Let’s take a look at the steps in short form again:

    • open your files as layers into one document
    • align the layers in perfect registration
    • change the layer blend modes to “lighten” (all except the bottom layer)
    • add a layer mask to each layer and paint in areas you want, or hide areas you don’t want to appear in the final image
    • save as a layered PSD file
    • flatten and save again as a JPG (full resolution, no compression)

    I hope you enjoyed this two part series, once again here is the final image.

    "1956 Le France Pumper" Corpus Christi, Texas

    “1956 Le France Pumper” Corpus Christi, Texas

    Post originally from: Digital Photography Tips.

    Check out our more Photography Tips at Photography Tips for Beginners, Portrait Photography Tips and Wedding Photography Tips.

    Light Painting Part Two – Photoshop


    Digital Photography School

  • Lighting In Layers on Lynda.com

    I am happy to announce that Strobist’s video series, Lighting in Layers, has by special arrangement been adapted for the video tutorial site Lynda.com. Those of you who are Lynda subscribers can now view the videos there. (This includes Lynda’s many corporate subs, so check with your company.)

    Last week saw the launch of the first segments, which are primarily aimed at beginners. Additional sessions will be released each week.

    So even if you are not a newb, stick around. It’ll get more complex soon enough…

    -30-


    Strobist

  • Readers Shoot Back: Vivian Chung

    Dontcha hate it when your bride-and-groom portrait gets photo-bombed?

    Okay, maybe not if it's by a Beluga whale. And for Vancouver wedding photographer (and Strobist reader) Vivian Chung, this well-planned cameo was no accident.

    Complicating things, she only had a little time—and a key technical restriction—to make this shot.

    Read more »
    Strobist

  • How to Master Sunrise Photography in the Most Effective Way Possible

    Sunrise photography is underappreciated. Heck, many people take the sunrise for granted; after all, it happens every day! If this is the way you actually feel, you are missing out on a golden opportunity to capture some of the most breathtaking pictures on Earth. People seem to be more captivated by sunsets, but that’s really regrettable when you think about Continue Reading

    The post How to Master Sunrise Photography in the Most Effective Way Possible appeared first on Photodoto.


    Photodoto

  • What the Mona Lisa Can Teach You About Taking Great Portraits

    Mona-Lisa

    When it comes to famous images the Mona Lisa by Leonardo Da Vinci is one of the most recognized in the world.

    When I visited the Lourve in Paris a couple of years ago I was stunned by the crowds of people gathering around this small image, pushing and shoving to get close and to take a picture of it (I got some great shots of the crowd).

    The Mona Lisa has been at the center of much debate and speculation over the years but why is it an image that intrigues people so much and what can we learn from it as photographers today?

    While we live in a different time (the Mona Lisa was painted in the 1500′s) and use different technology – is there something in this famous image that we can be inspired by as image makers today?

    Lessons from the Mona Lisa for Photographers

    Today I want to explore some of the different aspect of the Mona Lisa and point out some things that Leonardo did in painting this image that I think we could take away as portrait photographers today.

    Composition
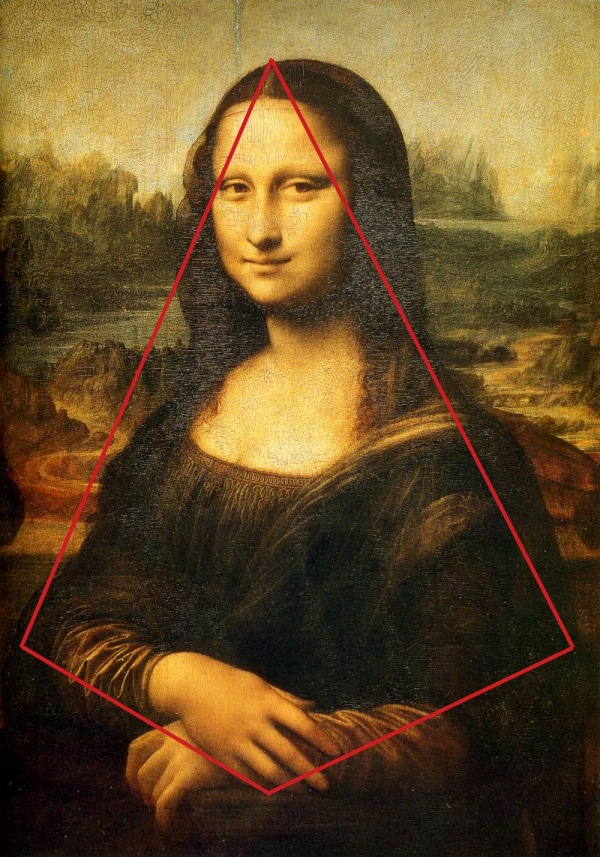
    mona-pyramid.pngWhile we look at the Mona Lisa today and see it’s composition as fairly standard and simple – for it’s time the composition of the Mona Lisa was ground breaking and has set new trends in painting which have been followed for centuries since.

    One of the compositional elements that the portrait is known for is Leonardo’s use of a pyramidal composition which shows the subject with a wider base at her arms and her hands forming the front corner and everything is in place to draw the eye up her body to her eyes and her infamous smile.

    Take Home Lessons for Today

    The same form of composition can work for us. While I wouldn’t dare suggest that this is the only or best way to set up a portrait shot – the pyramidal composition is one worth trying.

    The Pose

    Again – today we look at Mona Lisa’s pose and it seems fairly normal but for it’s day it was quite revolutionary as most portraits at the time were rigid, stiff and quite often profiles rather than front on.

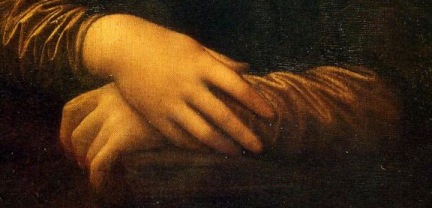
    In contrast Mona Lisa is somewhat relaxed and at ease as she leans upon the arm of a chair with her hands crossed in a relaxed fashion.

    While she’s slightly turned to one side she sits open to the viewer and holding their eye.

    Also unusual for the time was the fact that Leonardo went against the norm with the framing of this image and opted for a three quarter length pose rather than a full length one. In this way he filled the frame with his subject which lends itself to an intimate image and little room for distraction by her context.

    One last aspect of the pose is that the Leonardo has positioned Mona Lisa’s eyes at the eye level of the one viewing the image. This brings a sense of intimacy to the image as we the viewer gaze directly into her eyes (there’s not a sense that we’re looking down on her or that she’s doing that to us).

    mona-hands.png

    Take Home Lessons for Today

    This classic pose works today. Fill your frame with your subject by using a three quarter length pose, relax your subject, have them turn their body slightly away from the camera and look directly at the camera. Give their hands something to lean on (they can look awkward otherwise). Most of all – attempt to relax your subject.

    The Background
    mona-background.png
    Much has been written about the background of the Mona Lisa and we can draw out a few things from it for today.

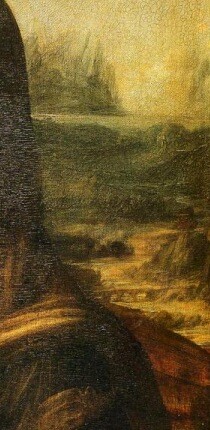
    One thing worth noting is that while paintings of the day generally had both the subject and background in sharp focus with lots of detail – the background of the Mona Lisa seems to ‘fade’ or become more blurred and out of focus the further from the subject it extends.

    This was unusual for the time and is an effect that many portrait photographers use today by choosing a large Aperture to make for a blurred background that leaves the viewer of the image to focus upon the subject.

    While there is definitely points of interest in the background (there’s a lot of debate about whether the two sides of it ‘match’ and whether it’s supposed to be some kind of a fantasy/imaginary background) the colors in it are somewhat bland, muted and subtle – again leaving the focus upon Mona Lisa.

    Take Home Lessons for Today

    There are different ways to use a background of a portrait. It can either be used to put your subject into context by showing their surrounds – or it can be used as a backdrop that is largely a blank canvas with few features so that your subject stands out.

    In a sense Leonardo has done both with his background. It doesn’t take the focus away from the subject – yet the landscape behind her does have an element of mystery and interest to it. It’s also visually complementary to the subject with some of the shapes and colors almost mirroring colors and shapes in the subject’s clothing.

    The lesson is to carefully consider your backgrounds – they can greatly enhance or detract from your portraits.

    Light

    One of the things that I like about the Mona Lisa is the way in which light falls upon the subject. Leonardo uses light to draw the eye of the viewer to the parts of the image that he wishes to be highlighted (the face and hands) and balances the image nicely by placing hands and face in positions that counter one another.

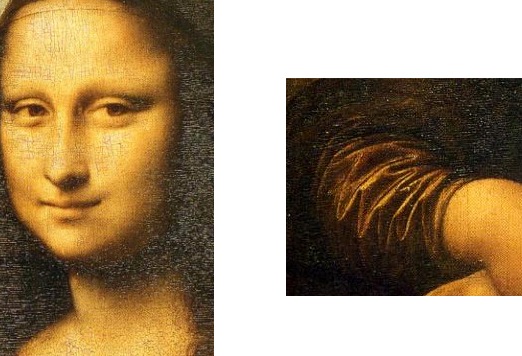
    Leonardo also uses shadow (or a lack of light) to add depth and dimension to different aspects of the image – particularly the area around Mona Lisa’s neck and in the ripples on the dress on her arm.

    light-1.jpg

    Take Home Lessons for Today

    Think about how your subject is lit. Use it to draw the eye to key parts of your image but also use shadow to create depth and dimension to your shots.

    Clothing

    We’ve talked about clothes and portraits here at DPS before and Leonardo takes the approach of darker less obtrusive clothes in this image. Once again – this is a little different to other portraits of the time which are renowned for being bright.

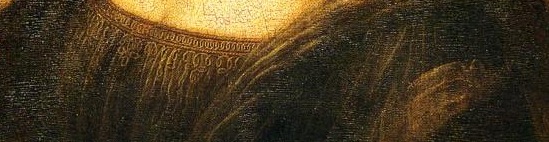
    While her dress has quite a bit of detail (the lace work is quite fine and the detail in the folds on her arms are lovely) and it all is within keeping of the feel of the image – everything works to highlighting her face.

    mona-lisa-clothes.jpg

    There’s also a lack of any kind of jewelry or any other kind of accessory to distract the viewer away from Mona Lisa’s face.

    Leonardo obviously wants something about the woman herself to shine through in this image rather than anything else.

    Take Home Lessons for Today

    Clothes are another element that can be a real distraction in a portrait. Take a lesson from Leonardo and use clothes that fit with the subject and give them context – but which don’t distract your viewer.

    Framing

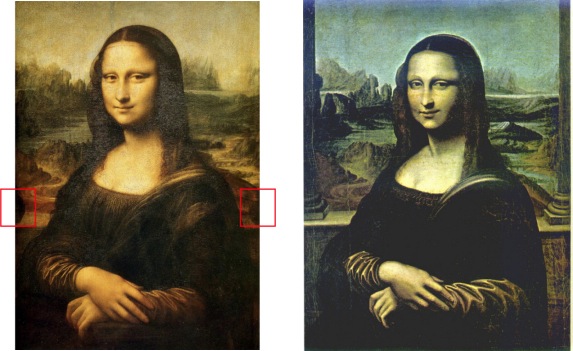
    One of the things that I’d not noticed about the Mona Lisa before that i read about today is that on either side of the subject just under and to the side of each of her shoulders there is half of a round ball shape (see the images below on the left).

    It is believed that what we see of currently of the image is actually slightly smaller than the original. Part of the image was lost when the image was re-framed at some point. What were the balls?

    The most widely accepted theory is that in the original and full version of the painting two columns extend up from the balls on either side of Mona Lisa. She’s actually sitting on a balcony overlooking the view behind her. You can see the horizontal edge of the balcony extending between the two columns.

    Here’s how one artist reproduced the Mona Lisa with the extra columns.

    mona-lisa-framing.jpg

    Whether or not the columns in the original looked exactly like this reproduction or not I’m not sure – but it seems that Leonardo used a technique that we call ‘framing‘ in photography today. This technique is all about drawing the eye of the viewer of an image to your main subject. It also has the potential to add a little context to a portrait (with the columns it would be more obvious that Mona Lisa is sitting on a balcony).

    Take Home Lessons for Today

    Learn to use techniques like framing to draw the eye of the viewer of your images to your main subject. Frames can be subtle and a natural part of the environment around your subject. Don’t use them in every shot but do keep your eye out for opportunities to include them to add another dimension to your portrait work.

    Mystery

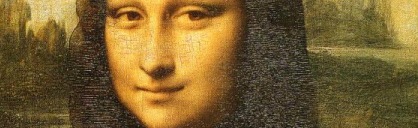
    Who is the woman (its been argued that she is anyone from a female form of Leonardo himself through to the wife of the man who commissioned the image)? What is the background? Why is she smiling (or is she)?

    mona-smile.png

    There’s something mysterious both about the subject herself (her look is both alluring and aloof) and the way that the image was painted (Leonardo used a technique called ‘blurring’ around the edges of the subject that was new for his time that give it a mysterious quality). This leaves the viewer of the image asking questions and entering into it with imagination. Leaving elements of the image open to interpretation can make an image impact it’s viewer.

    Take Home Lessons for Today

    One of the elements that takes a proficient image and makes it a great image is that it goes beyond being a record keeping exercise and becomes a story telling one.

    The Mona Lisa has drawn viewers to use their imagination and have conversation about it for centuries simply because it leaves parts of the story untold. This is something that can’t really be learned as a photographer – but is something that comes with experience.

    What Lessons Does the Mona Lisa Teach You about Photography?

    What have I missed out on? What do you see in this famous painting that could teach us about photography?

    Post originally from: Digital Photography Tips.

    Check out our more Photography Tips at Photography Tips for Beginners, Portrait Photography Tips and Wedding Photography Tips.

    What the Mona Lisa Can Teach You About Taking Great Portraits


    Digital Photography School
  • Tell Us What You Want Out of a dPS Redesign

    It has been a couple of years since we did a complete overhaul of the design of dPS so over the coming months we’ve commissioned a team of designers and developers to give our site a once over – and we’d LOVE your feedback!

    So now is your chance to tell us what features and design elements you’d love to see on the newly designed dPS.

    Is there something missing that you’d like to see added? Is there a feature on another site that you’d love to see here?

    You’re welcome to give feedback upon the blog area, the forum area or even our social media accounts (Facebook, Twitter, Pinterest etc).

    Feel free to tell us what you honestly think (as long as you’re constructive that is) – we’ll keep this post open for comment for a day or two before closing it off to pass onto our team.

    Thanks – ultimately dPS is nothing without you as readers so we can’t wait to hear what you’d like to see to make it even better than it is.

    It’ll be a couple of months before you notice too many changes but rest assured we’re listening to your feedback today!

    Post originally from: Digital Photography Tips.

    Check out our more Photography Tips at Photography Tips for Beginners, Portrait Photography Tips and Wedding Photography Tips.

    Tell Us What You Want Out of a dPS Redesign


    Digital Photography School

  • 18 Stunning Self Portraits

    This post is by Anna Gay – creator of our eBook – The Art of Self Portraiture.

    by Ali Uher

    For thousands of years, artists have used self-portraiture as a means of perfecting their technique. From ancient cavemen, to the classical masters, to Salvador Dali in the 20th century, artists have looked to self-portraiture not only to discover new aspects of their artform, but also as a means of self-discovery.
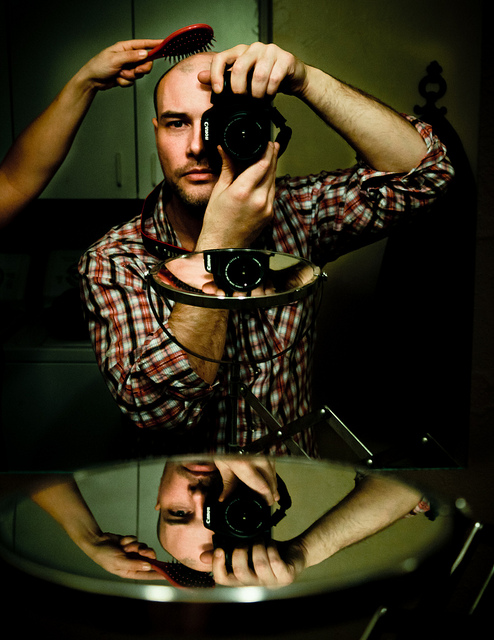
    Today, photographers world-wide are stepping out from behind the camera, and placing themselves in front of the lens. Thanks to photo-sharing websites that display thousands of beautiful and unique self-portraits, many photographers are finding that not only is self-portraiture a wonderful, exhiliarating way to practice composition and lighting – amongst many other skills which are valuable to portrait photographers – it is an honest expression of self, and a way to share their experiences with other photographers.

    Each of the photographers whose work is featured in this post has their own unique way of expressing themselves in front of the camera. Some use natural light, while others use studio lighting. Some take a more natural approach to post-processing, whereas others take a more conceptual route. Whether you consider yourself an amatuer, or a full-blown artistic self-portrait photographer, these self-portraits are sure to inspire you to step in front of the lens.

    by Lila Limited

    by Kelly Kardos

    by Brian Day

    by Boy_Wonder

    by Miguel da Silva

    by Bunny Spice

    by ICT_Photo

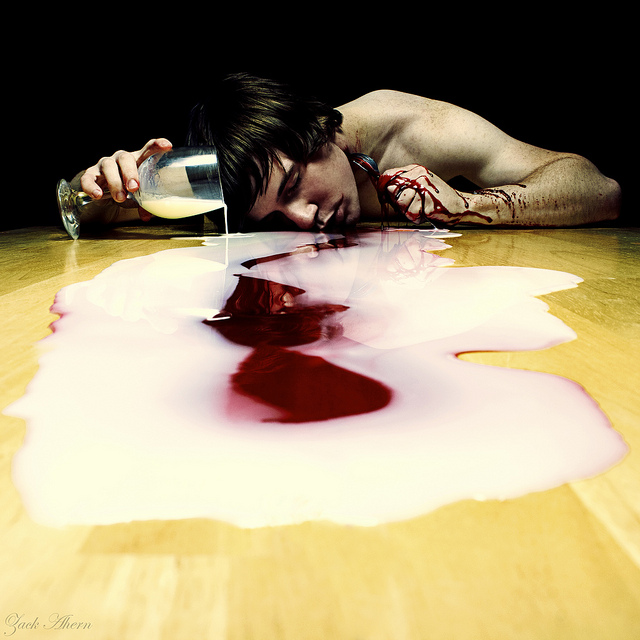
    by Zack Ahern

    by Misha

    by Viva Deva

    by Steve Pontbriand

    by *iNiNa*

    by Zee Anna!

    by KatB Photography

    by FaceNorth

    by sparkleplenty_fotos

    by Lucem

    Interested in improving your Self Portrait Photography? Check out Anna Gay’s eBook – The Art of Self Portraiture.

    Post originally from: Digital Photography Tips.

    Check out our more Photography Tips at Photography Tips for Beginners, Portrait Photography Tips and Wedding Photography Tips.

    18 Stunning Self Portraits


    Digital Photography School