Category: Photography

  • How I Took This Award Winning Night Sky Group Photo

    Last weekend one of my photos was selected as a category winner in the national night sky photography competition, the David Malin Awards. The category was “People and Sky”, and Darren asked if I could write a post describing how the photo was created.
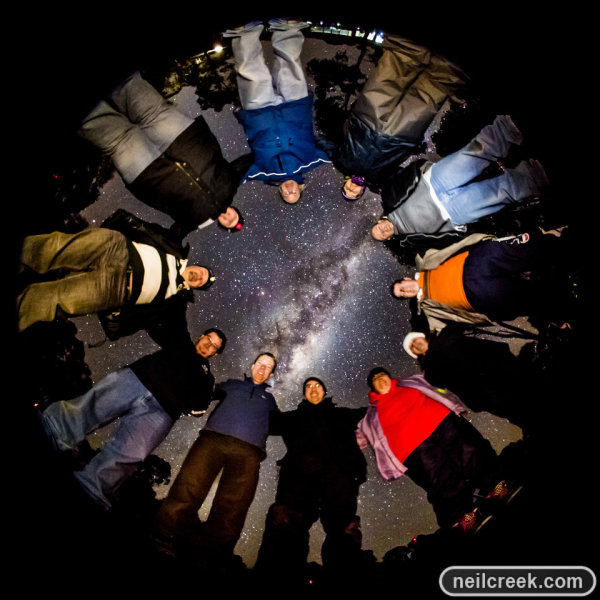
    creek-120812-012-X2

    I assist friend and colleague Phil Hart with regular night sky photography workshops under the beautiful dark skies of country Victoria (Australia). Knowing my love of fisheye photography, Phil had an idea for a photo to help promote the course: A group photo under the stars by fisheye lens.

    I immediately had a vision in my head of the photo and knew it would look cool, so I set myself to working out how to achieve the difficult task of composition and balancing light. Once night fell and we made sure the students were all confident with their new skills and happily taking photos of the night sky, I put my Sigma 8mm f4 circular fisheye on my full-frame Canon 5D MkIII. To achieve this effect you will need a circular fisheye lens and a full-frame camera, or a fisheye lens designed to give a circular image on a cropped sensor. A diagonal fisheye will not capture the whole hemispherical field of view needed to image the whole sky.
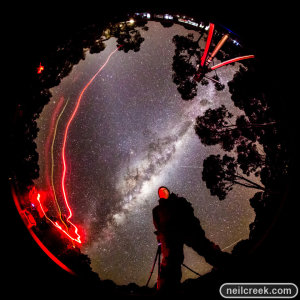
    Testing the setup and lighting.

    Testing the setup and lighting.

    From experience shooting the night sky with this lens, I knew that I would be shooting at the widest aperture of f4 and the full 30 seconds shutter speed. Balancing noise and sufficient exposure I chose an ISO of 8000. These settings give me a good exposure of the night sky and particularly the milky way, which would feature in the shot. This is incredibly faint! My main problem was how to light the faces of the students to approximately the same brightness of the Milky Way.

    At first I considered using a flash, but even at the lowest setting, even with significant diffusion, the exposure was too difficult to control. The other problem is that I’d need the light to be omnidirectional so that all of the people in the shot would be evenly lit. Ultimately the solution I came up with was to use my LED video light, dialed down to its lowest power setting and laid face down on the ground on a piece of white paper. Only a little bit of light leaked out from around the edges, but it was even and spread out in all directions. Due to the relatively warm white balance of the Milky Way I adjusted the light’s white balance to be warm to match.
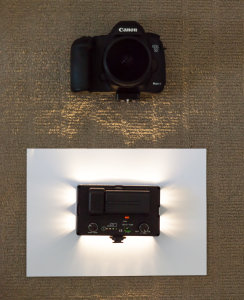
    A recreation (in my office) of the setup I used. The video light is pointing straight down into the paper.

    A recreation (in my office) of the setup I used. The video light is pointing straight down into the paper.

    I took a few test shots to make sure the exposure, focus, white balance and everything else was working just right, and when the galaxy had risen to it’s highest point and was nearly directly overhead we called everyone together. We formed a circle and put our arms over each others’ shoulders to ensure even spacing, and tried to keep where the camera would be in the centre. Linking arms also helped us all to stand as still as possible for the 30 seconds of the exposure. Once we were all ready, I set the camera to 10 second self timer mode and placed it on the ground pointing directly up.

    There were a couple of confused comments as people tried to work out how it would look, and jokes about how we all must have looked to anybody watching us from the outside. But once we got a look on the back of the screen, everyone was convinced. This was a truly unique group photo.

    Join me on Facebook to learn more and see new photos daily: http://facebook.com/neilcreekphoto.

    Post originally from: Digital Photography Tips.

    Check out our more Photography Tips at Photography Tips for Beginners, Portrait Photography Tips and Wedding Photography Tips.

    How I Took This Award Winning Night Sky Group Photo

    Digital Photography School

  • Aspect Ratio: What it is and Why it Matters

    Aspect ratio

    This article is written by Andrew S. Gibson, the author of Square, on sale now at Snap N Deals for a limited time.

    Today I’d like to draw your attention to an area of composition that you might not have given much thought to: aspect ratio.

    Aspect ratio is the term used to describe the dimensions of an image by comparing the width to the height and expressing it in ratio form.

    The aspect ratio of your images is primarily determined by the dimensions of your camera’s sensor (or the film type plus camera design with film cameras). As these physical aspects are fixed, it is easy to take the aspect ratio of your images for granted, and to not consider the implications of the aspect ratio you are using in relation to composition.

    Camera makers have realised that sometimes photographers like to work in different aspect ratios, and most recent digital cameras let you change the aspect ratio using the camera’s menu. You can also crop an image to a different aspect ratio in post-processing.

    Why aspect ratio matters

    Why does aspect ratio matter? It’s all to do with the relationship of the main subject to the sides of the frame, and the amount of empty space you end up with around the subject.

    An awareness of the characteristics of the aspect ratio of your particular camera can help you compose better images. It also helps you recognise when cropping to a different aspect ratio will improve the composition of your image.

    What is aspect ratio?

    Aspect ratio describes the relationship between the width and height of an image. It’s written as a figure, in this form – width:height (width always comes first).

    Virtually every digital camera comes with a sensor of one of two aspect ratios:

    3:2

    Aspect ratio

    An aspect ratio used by 35mm crop sensor and full-frame SLRs, some Leica medium format cameras, mirrorless cameras, high end compacts and most 35mm film cameras. This aspect ratio has been with us ever since Leica made the first 35mm film cameras early last century.

    35mm crop sensor and full-frame SLRs have an aspect ratio of 3:2. The sensor is 1.5 times as wide as it is high.

    A full-frame 35mm sensor measures 36 x 24mm. You can express this figure as a ratio: 36:24. Mathematicians always like to simplify ratios so that the relationship between the two numbers is easy to visualise. In this case, you can divide both dimensions by twelve. That gives you 3:2.

    Crop sensor cameras have smaller sensors, measuring approximately 22.5 x 15mm (the exact measurements vary, depending on brand and model). These figures conform to the 3:2 aspect ratio of the full-frame sensor.

    4:3

    Aspect ratio

    This aspect ratio is used by micro four-thirds cameras, many compact cameras, some medium format digital cameras plus medium format film cameras using the 6 x 4.5cm format.

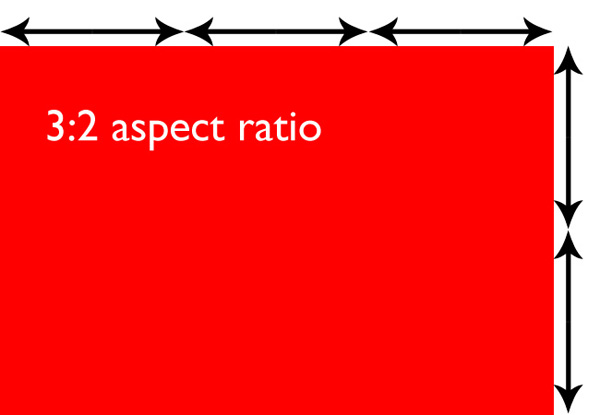
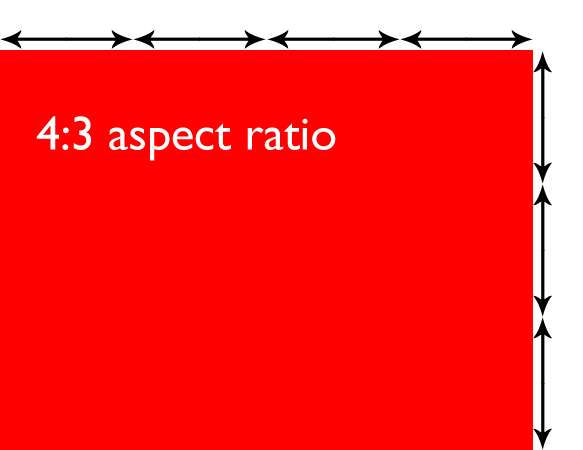
    Let’s compare the two:

    Aspect ratio

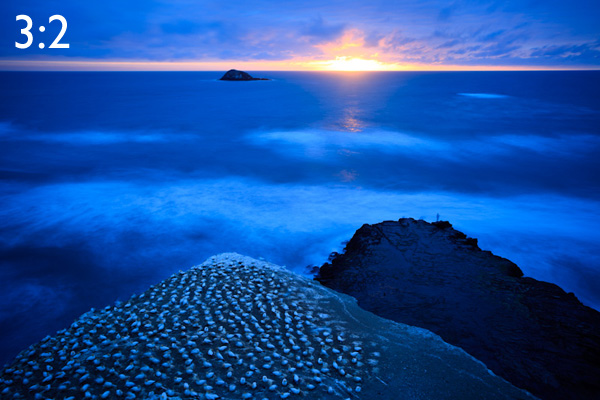
    You can see that the 3:2 aspect ratio used by most digital SLRs is slightly longer than the 4:3 micro four-thirds frame. This may not seem like much, but it has great implications for composition. Take a look at the following images to see why. Here’s the original, 35mm version with a 3:2 aspect ratio:

    Aspect ratio

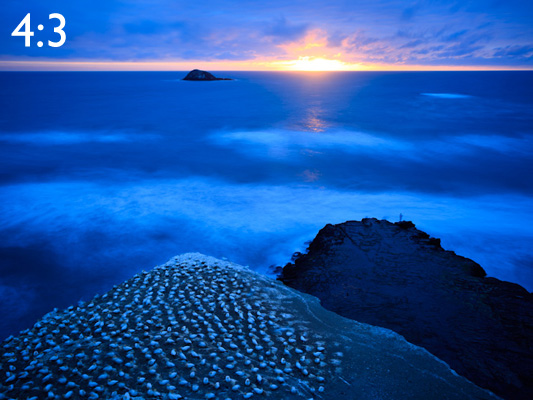
    And here’s the same image cropped to the 4:3 aspect ratio, as if it had been taken with a micro four-thirds camera:

    Aspect ratio

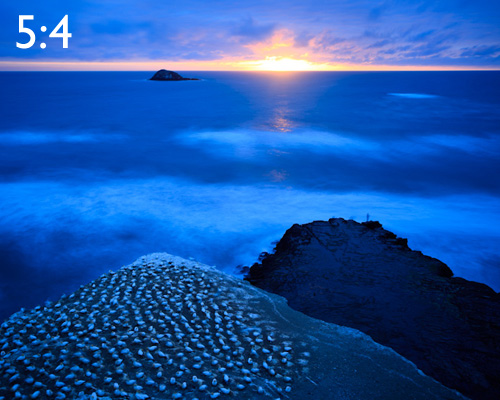
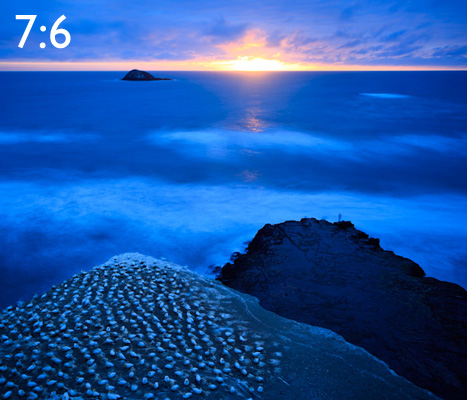
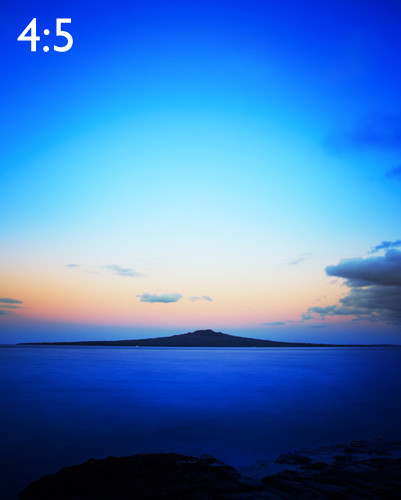
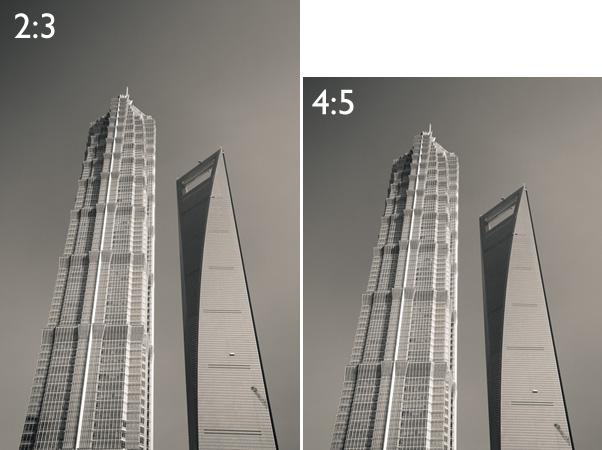
    Do you see the difference? It’s subtle but it’s there. The 35mm frame is longer. And that can be challenging when it comes to composition, because you have to find a way of filling that length effectively. Landscape photography in particular often benefits from a shorter frame, and that’s one of the reasons for the popularity of the 6x7cm medium format (7:6 aspect ratio) and 5×4 view cameras (5:4 aspect ratio) amongst landscape photographers that use film cameras. Here’s what the same landscape would look like cropped to these formats:

    Aspect ratio

    Aspect ratio

    For me, the 7:6 aspect ratio is too short, but 5:4 is a very pleasing aspect ratio to work in.

    Now, so far you may be thinking that the difference between aspect ratios is not a big deal. And often, when you are using the landscape format (ie. the camera positioned so that the frame is horizontal), the difference is minimal. It’s not so difficult to work within any of the above aspect ratios.

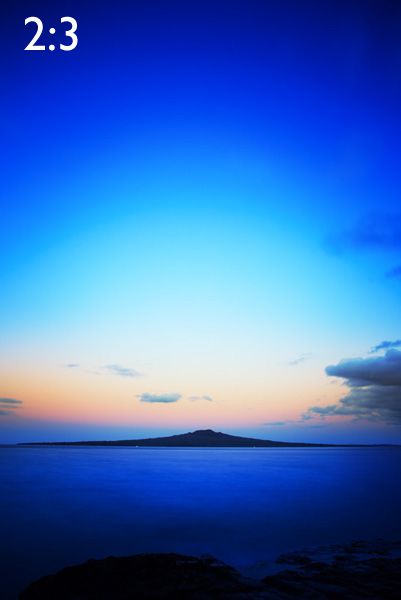
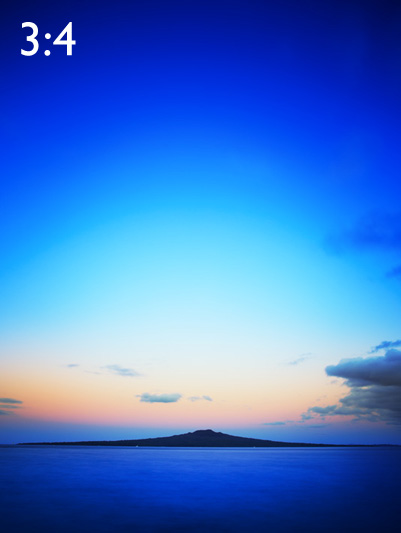
    But change to the portrait format (a vertical frame) and it’s a different story. The 35mm frame suddenly becomes a lot harder to fill effectively, and the composition often benefits from cropping to a shorter rectangle. Here are some examples to show you what I mean:

    Aspect ratio

    Aspect ratio

    Aspect ratio

    The difficulty that I had with this landscape is that there was too much empty sky in the original image. I solved the problem by cropping to a shorter rectangle. The 4:5 aspect ratio seems to work nicely.

    Of course, not all images will benefit from a crop to a shorter rectangle. But if you find yourself struggling to fill the frame, especially if you have a 35mm camera with the 3:2 aspect ratio, then it may be a sign that you would benefit from using a different aspect ratio.

    Adventure and landscape photographer Bruce Percy has written an interesting article on this topic.

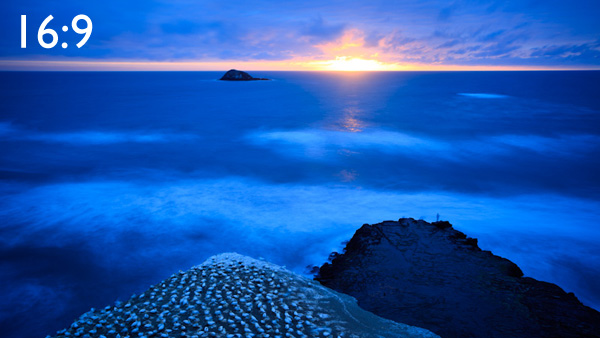
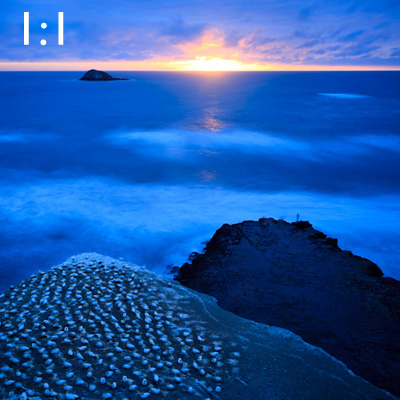
    Out of interest, here is the first image cropped to a couple more common aspect ratios. They are the panoramic format (16:9) and the square format (1:1)

    Aspect ratio

    Aspect ratio

    Adjusting aspect ratio in-camera

    Many recent digital cameras give you the option of adjusting the aspect ratio using the camera’s menu. If you have a camera with an electronic viewfinder, it may be able to display the cropped image in the viewfinder.

    If your camera doesn’t have an electronic viewfinder, you will need to use Live View mode in order to take advantage of the aspect ratio function. The camera will display the cropped image on the camera’s LCD screen.

    Whichever option your camera has, you should be aware that if you use the JPEG format, the camera will crop the image. You won’t be able to retrieve the cropped part of the image. If you use Raw, the camera will save the image as captured by the entire sensor, and you can change your mind about the crop in post-processing. Check your camera’s manual for details if you have any doubts.

    Cropping in post-processing

    It’s often easier to crop in post-processing than in the field. If your camera doesn’t have an aspect ratio function it’s the only way you can do it. Another benefit is that you can go back to old images to see if they would benefit from cropping.

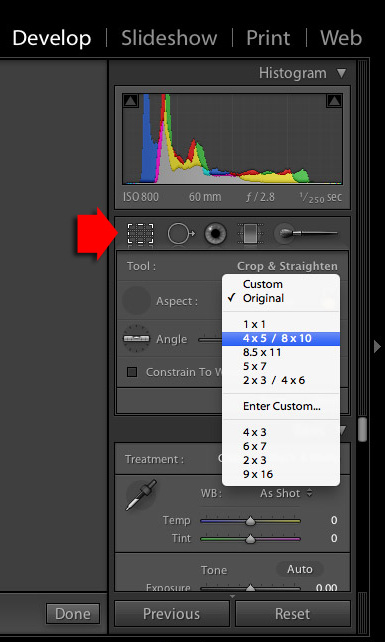
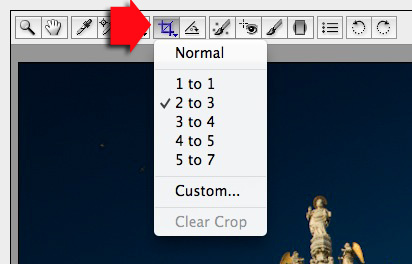
    If you have Lightroom, cropping is easy. Just click the Crop icon and select an aspect ratio from the list provided:

    Aspect ratio

    If you have Photoshop CS/CC, the Crop Tool in ACR works in a similar way:

    Aspect ratio

    Square

    Aspect ratio

    My ebook Square explores the square format from the digital photographer’s perspective. It shows you how to use the square format on your camera, and how to make the most out of what I think of as the fine art photographer’s format.It’s available now at Snap N Deals for a special price for a limited period.


    Post originally from: Digital Photography Tips.

    Check out our more Photography Tips at Photography Tips for Beginners, Portrait Photography Tips and Wedding Photography Tips.

    Aspect Ratio: What it is and Why it Matters


    Digital Photography School

  • How To Create Your Own Unique Textures and Apply Them To Your Photography

    I would like to take you through a journey today and show you how some very ordinary looking photographs of the world around us can be combined to create some very interesting and one-of-a-kind pieces of art. Some might argue that what I’m doing is no longer considered photography, but I’d argue that everything presented within the final image was at one point captured using a camera, and therefore still falls under the category of photography albeit slightly manipulated.

    The world around us is filled with textures and abstract patterns that often go overlooked in pursuit for larger more dramatic subjects. No matter what type of photographer you are and whether or not you’d go so far as to do what I’m sharing today I do think it’s worth it to spend some time learning about how to capture these kinds of images as it will help you see the world differently.

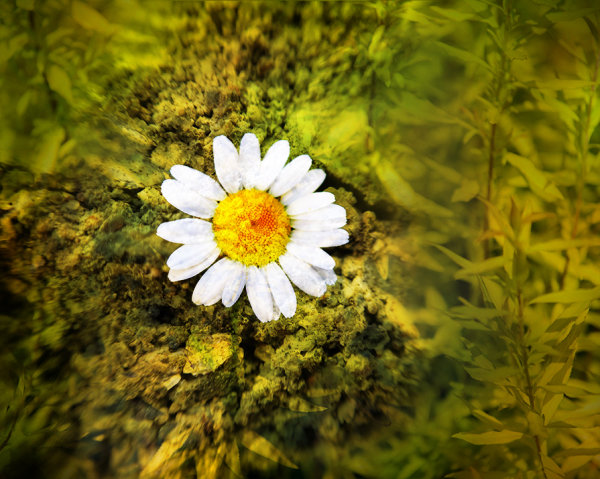
    Texture-11

    So What Is A Texture?

    Texture in art (at least in how we’re using it today) can be defined as: the visual ”feel” of a two-dimensional work.

    When I first started getting into photographing textures I wasn’t sure that it could be all that interesting. I thought that a texture had to be something very traditional like sand, or wood, or rust. I soon realized that in reality just about anything can be considered a texture if you want it to be, you just have to use it as such in your final image.

    That said I do think the best textures are more abstract images with a bit of depth to them. If the image you’re using as a texture is too clearly defined then you’ll end up having a difficult time separating your texture from the subject of the image you end up applying it to.

    Capturing Textures

    texture2

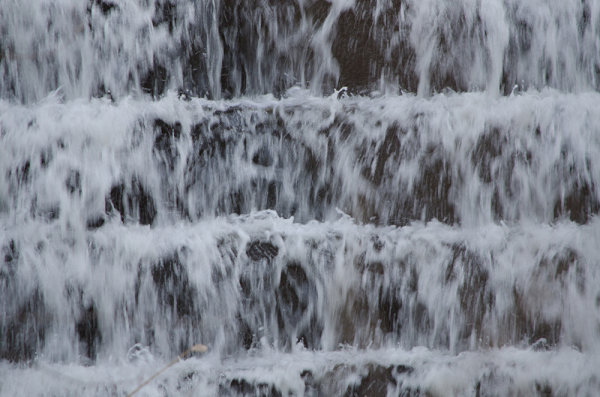
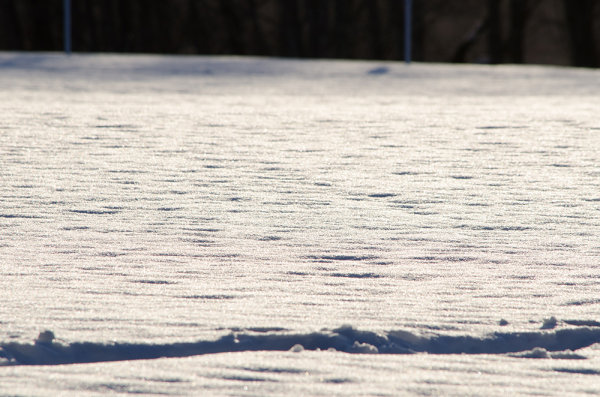
    There are simple textures like – wood, rust, paint, sand, stone – and more complex textures like – a dirt path through the woods, a canopy of a forest, a collection of flowers, the list goes on forever.

    Ideas to Keep in Mind When Capturing Textures

    • Fill the Frame
    • Look for Compositional Elements (Like the beam in the photo above)
    • Don’t rule something out just because it doesn’t look like a texture.
    • Don’t worry too much about your camera’s settings
    • Be creative

    Texture-8

    Creating & Using Textures in Your Workflow

    The first step in the process is to take the individual textures that you’ve collected and create your own unique texture.

    Texture-8

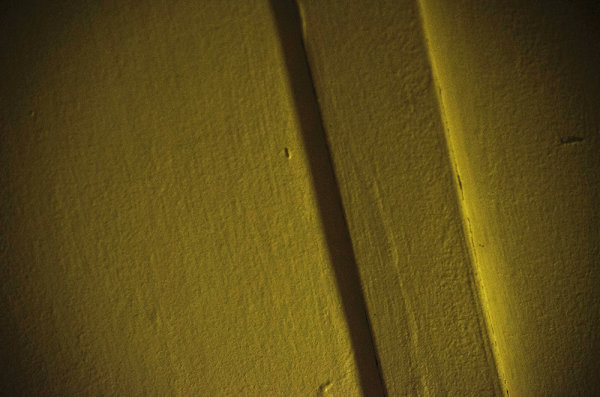
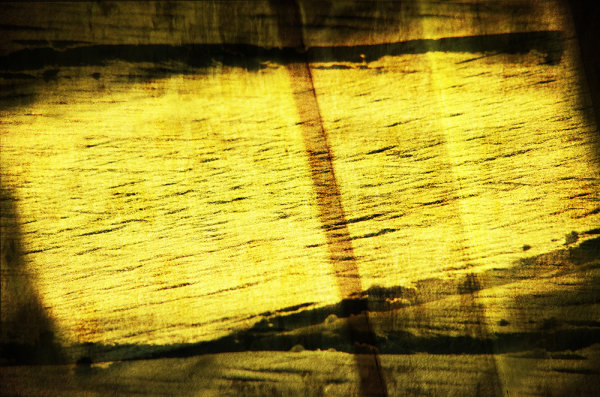
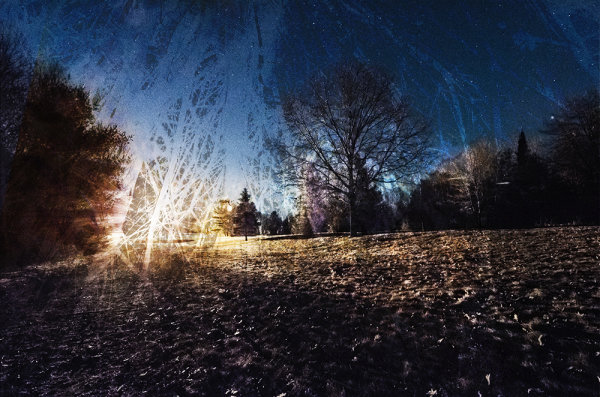
    This texture is the image that I applied to the lightning bolt photo at the bottom of this post and is a combination of the three textures that you’ve already seen above (the waterfall, the ceiling and the frozen lake).

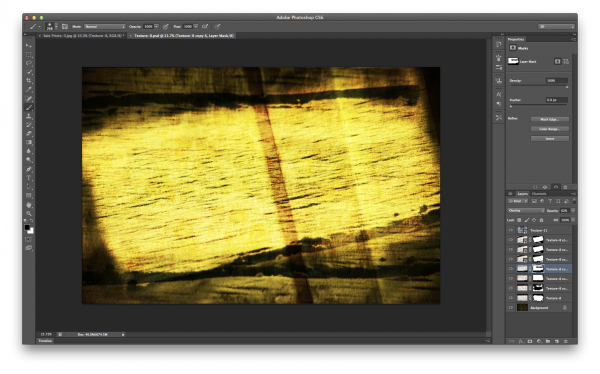
    I won’t go through every step, but instead I’ll give you a general idea of how I went about creating this texture in a simple five step process that you can use as a guideline to create your own.

    Screen Shot 2013-07-14 at 4.01.37 PM

    Click to Enlarge

    • Bring all your textures into photoshop as different layers
    • Determine what you’d like the strongest element of your texture to be – here I choose the ceiling and placed it as the bottom layer (the background).
    • Determine if you want to duplicate any of your textures for a stronger appearance . Here I choose to duplicate the frozen lake a total of 7 times.
    • You don’t have to keep all your layers in the same orientation. Here I’ve rotated two of the frozen lake layers slightly and flipped one upside down. I then applied various layer masks and blending modes to get the final look that I wanted.
    • Play with different blending modes. I find that overlay is my go to blending mode, but subtraction and soft-light work well too. Try them all and have some fun – after all this is creative expression through experimentation!

    Once I create the texture I save it as a JPEG and toss the PSD. I find that there’s no need to really save the PSD as they take up more space and if I want to change the texture in the future I’d rather just try and create something completely different than make subtle changes to one I already have. Of course you’re free to do that differently if you so choose.

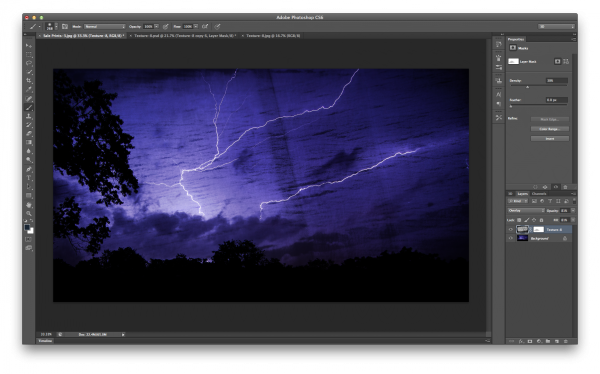
    The next step is to apply our newly created texture to our subject photo and create our final piece of photographic art. To do this you pretty much do the same process as we went through above. Bring your texture and your photo into Photoshop as layers, set your photograph as the background and then blend your texture into your photograph.

    Screen Shot 2013-07-14 at 4.44.02 PM

    Click to Enlarge

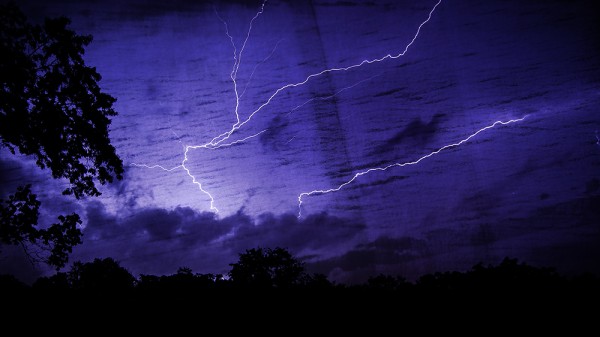
    For this photograph I dropped my texture in on top of the lightning bolt photo, popped it to an overlay and reduced the opacity slightly. I then applied a quick mask to remove some of the brightness that was created around the base of the lightning bolt, and finally converted the textured layer to black and white to let the true colors of the background layer show through.

    I realize this style of processing photography isn’t for everyone and I might be pushing the limits of creativity and for some this might be too much, but I do find it fun and enjoyable to go about creating these images and I hope you’ve learned something today and maybe even got inspired to try it yourself.

    A Few Examples Before I Go

    In closing I’d like to share with you a few examples of what I’ve been able to come up with so far and I hope you enjoy what I’ve created.

    Some Fun with Textures

    TexturedExample3

    lightningtextured

    Post originally from: Digital Photography Tips.

    Check out our more Photography Tips at Photography Tips for Beginners, Portrait Photography Tips and Wedding Photography Tips.

    How To Create Your Own Unique Textures and Apply Them To Your Photography


    Digital Photography School

  • Photo Gift Ideas That Every Photographer Should Know About

    When it comes to exchanging gifts with friends or family members, we really are spoiled for choice. Ironically, this abundance of novel ideas makes it near impossible to hone in on that one perfect gift for a loved one. Whatever you chose, it is always the thoughtful and personal gift ideas that are the most touching and well received. And Continue Reading

    The post Photo Gift Ideas That Every Photographer Should Know About appeared first on Photodoto.


    Photodoto

  • 6 Accessories to help you Improve your Landscape Photography

    At the most basic level, all that you need to take landscape photographs is a camera and a location.  One of the reasons that landscape photography is so popular is that it is so accessible, without the necessity for the newest camera bodies or most expensive lenses.  You can pick up any entry-level DSLR and kit lens and be able to make great landscape images.

    However, there are a few extra tools that, if included in your camera bag, will help you improve your landscape photography in terms of both your technique and resulting images.  Below is a selection of accessories that serious landscape photographers do not leave home without and the majority are cheaper than a basic kit lens.

    1. Tripod

    This has the potential to be the most expensive item on this list, but it is probably the most crucial accessory for every landscape photographer.  They come in all weights and sizes, and therefore costs, however a tripod can be key to ensuring you can capture sharp landscape images.  A lot of landscape photographs are captured at the beginning and end of the day, under low light conditions, meaning that it is not always possible to handhold the camera and still achieve shake-free images.  Also, a tripod is a good way of becoming more methodical in your approach to composing your landscape images, forcing you to slow down and critically assess the view through your viewfinder

    2. Graduated ND Filters

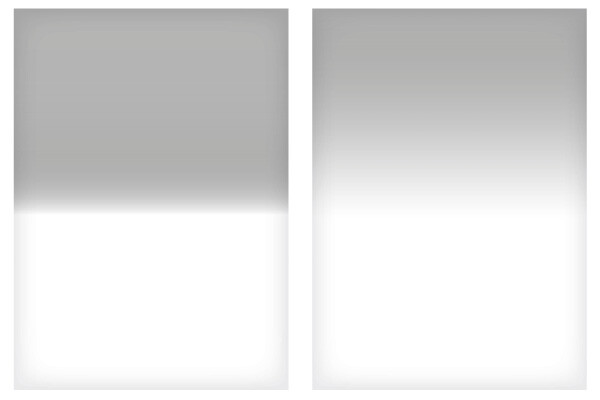
    Graduated neutral density (ND) filters are crucial for balancing the exposure between bright sky and dark land, overcoming the limited dynamic range of most DSLR sensors.  Generally, half of the filter is darker to reduce the amount of light allowed though across half of the frame.  Without them, if you expose for the sky the land will be in silhouette or if you expose for the land, the sky will be blown out.  You can use exposure bracketing to overcome this, however that will then require more time spent in front of a computer blending the multiple exposures.  Using graduated ND filters allows you to capture both the sky and land, correctly exposed, in one shot.

    ND Grad fitlers

    Graduated neutral density filters.  A ‘hard’ grad is shown on the left, a ‘soft’ grad is shown on the right.

    Check out this recent article on the basics of choosing, buying and using graduated ND filters.

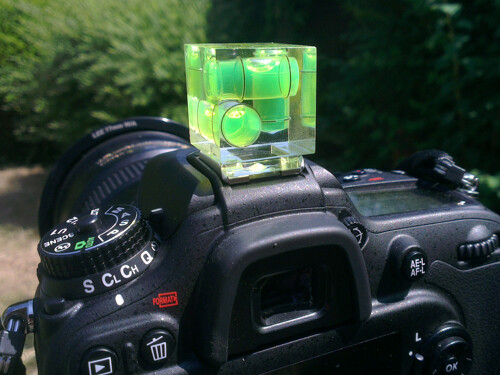
    3. Hot shoe spirit level

    Probably the cheapest accessory on this list, but a valuable tool none the less.  Just slide the spirit level in to the hot shoe to help ensure your horizons are perfectly level.  Some of the latest cameras now come with in-built level gauges, however they struggle to match the fidelity of an actual spirit level.

    Hot-shoe spirit level

    A three-axis hot shoe spirit level

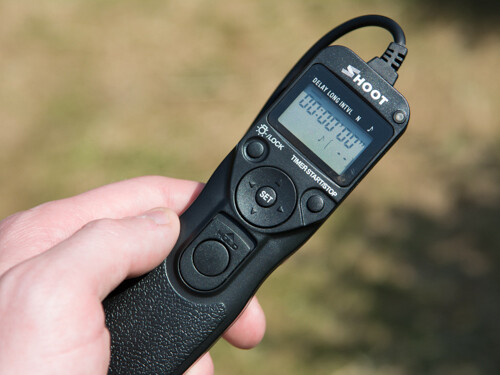
    4. Remote Shutter Release

    A remote shutter release allows you to release the shutter, when your camera is on a tripod, without touching the camera and introducing any movement.  Also, as these remotes allow you to lock the shutter open, they are very useful if you want to make exposures over 30 seconds, using ‘bulb mode’.  In some instances, the remotes also have a digital display telling you how long the shutter has been open or a programmable timer mode so you can define the exposure length before taking the shot.

    remote shutter release

    Remote shutter release – if you avoid the official accessories from the big brands, you can find these relatively cheap on eBay.

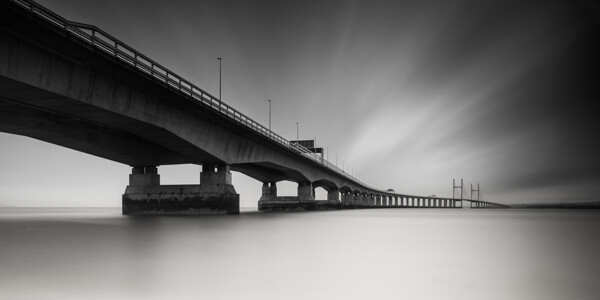
    5. Neutral Density Filters

    Similar to the graduated filters mentioned above, however in this instance, the entire filter is of uniform density, meaning that light is blocked out across the entire frame.  You can get them 1-stop, 2-stop or 3-stop densities if you want to marginally slow the shutter speed for shooting waterfalls or introducing some movement, or you can get them as dense as 10-stops for seriously long shutter speeds.

    10 stop neutral density filter

    An example of the use of a 10-stop neutral density filter to achieve a long exposure time of 5 minutes

    6. Polarising filters

    Polarising filters are often used to increase the saturation of blue skies, however they are more useful in suppressing reflections from non-metallic objects, such as foliage or water.  This helps to increase the saturation of foliage, even on overcast days, and remove glare from the surface of any water in the scene, revealing detail below the waters surface.  An invaluable tool when shooting landscape scenes that include water.

    Effect os using a polarising filter

    A polarising filter was used to reveal the detail in the stones beneath the surface of the heavily reflective lake

    The items above could almost be considered the essentials to go along with your camera and lens.  There are options that cater to all budgets meaning that you can build your self an effective landscape photographers toolbox without breaking the bank, and once you start using them, you will find you can exert much greater creative control over your landscape photography, and improve the images you make.

    Post originally from: Digital Photography Tips.

    Check out our more Photography Tips at Photography Tips for Beginners, Portrait Photography Tips and Wedding Photography Tips.

    6 Accessories to help you Improve your Landscape Photography


    Digital Photography School

  • How to use the new Radial Filter Tool in Lightroom 5

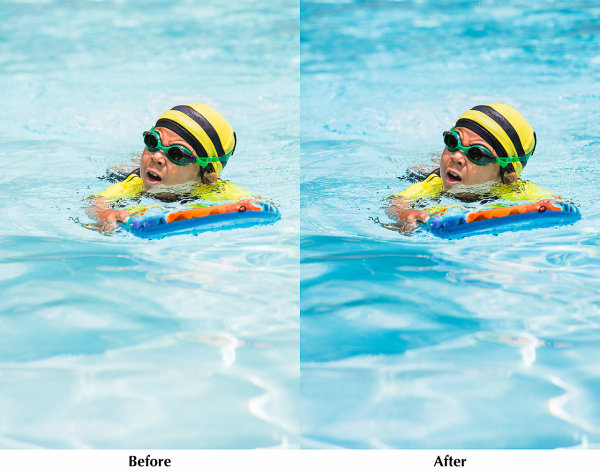
    Radial Filter Before and After

    Adobe PhotoShop Lightroom version 5 was released in June, and I’ve been digging into the new features. In this article I’ll share some tips for selective editing with the new Radial Filter tool.

    The Radial Filter allows you to draw an ellipse around an area of an image, and apply edits to the area outside or inside the ellipse. This is a great technique for highlighting portions of an image.

    Radial Filter Settings

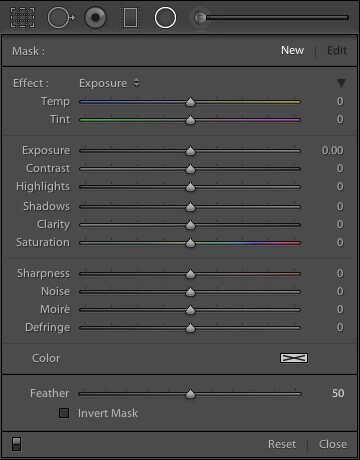
    Lightroom 5 Radial Filter SettingsThe Radial Filter tool in Lr 5 gives you the same set of standard adjustments as the Graduated Filter and Adjustment Brush. Note that this screenshot is from an image that is using the 2012 process. Read more about process versions here.
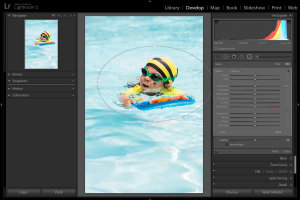
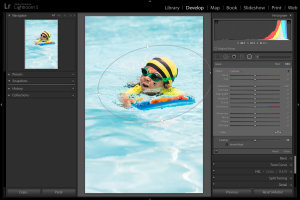
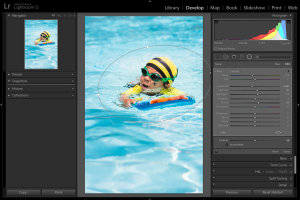
    Keyboard Shortcut: Shift M

    If you read my article on improving your Lightroom workflow, you’ll remember that I’m nuts about keyboard shortcuts. The shortcut for accessing the Radial Filter tool is Shift M. Just remember that the shortcut for the Graduated Filter is M, so Shift M makes sense for the new Radial Filter. After all, if you took a Graduated Filter, and curled it into a circle, you’d have the new Radial Filter tool.

    Using the Radial Filter Tool

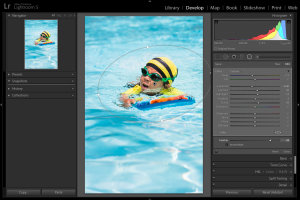
    In the above photo of my son enjoying a summer day at the pool, I used the Radial Filter to make the water a little darker, and a little more blue, without changing the exposure or white balance over the subject. This has the effect of emphasizing the subject by making him brighter and warmer than the rest of the image.

    Lightroom 5 Radial Filter Usage
    1. Select the Radial Filter tool and draw an ellipse around the subject. Start by clicking at the center of the subject, and dragging outwards.

    Lightroom 5 Radial Filter Usage
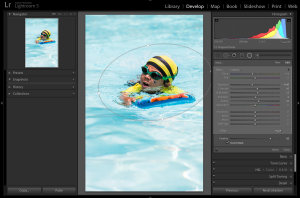
    2. If necessary, rotate the ellipse. Hover your mouse just outside the ellipse until the cursor changes to that rotation indicator thingy, then click and drag.

    Lightroom 5 Radial Filter Usage
    3. Apply the desired settings. In this example, I’m cooling the white balance, reducing exposure, and increasing contrast, highlights, and clarity. Increased clarity often make water look more interesting by bringing out the reflections.

    Lightroom 5 Radial Filter Usage
    4. Feather the adjustment. Feathering the adjustment is important to ensure your image looks natural, not “Photoshopped.” Feature is 50 by default, I’ve found that for more image, I like it around 85 or so. Note that after increasing the feather, you may need to back and increase the size of the filter.

    Inverting the Mask

    Lightroom 5 Radial Filter Usage
    When the Invert Mask box is not checked, your edits apply to the area outside the ellipse. If you check the Invert Mask box, your edits apply to the area inside the ellipse.

    Conclusion

    By varying the exposure, contrast, and white balance of the subject, relative to the setting, you can direct the viewer’s gaze and increase the impact of your photo. I hope this simple example has given you some ideas of how to incorporate the new Radial Filter tool into your workflow. I appreciate feedback, please comment below or feel free to connect with me through Facebook or Google+. I’ll do my best to answer questions and reply to comments.

    Post originally from: Digital Photography Tips.

    Check out our more Photography Tips at Photography Tips for Beginners, Portrait Photography Tips and Wedding Photography Tips.

    How to use the new Radial Filter Tool in Lightroom 5


    Digital Photography School

  • DEAL: Save 30% off James Brandon’s Lightroom Presets Bundle (and get a FREE ebook)

    LR_presets_adOver on our sister site – SnapnDeals – we have a great offer running right now – it gets you 30% off of an incredible collection of Lightroom presets by DPS contributor James Brandon. You’ll also receive a free copy of his newest ebook “10 Tips For Improving Your Photography Today.”
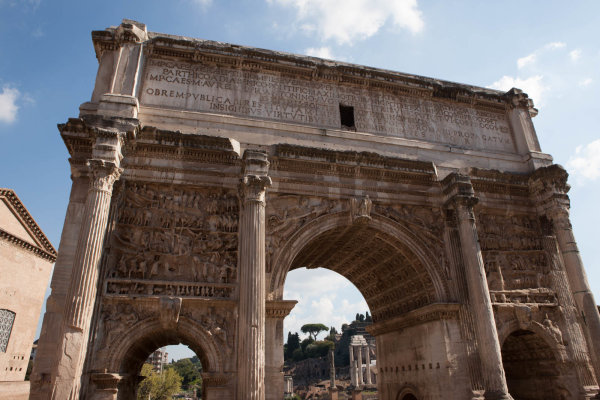
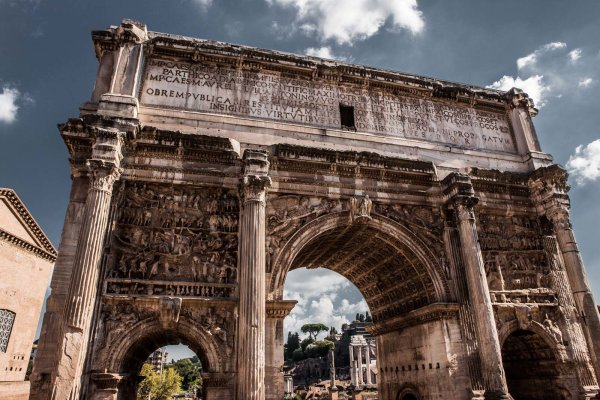

    This collection includes 80 presets in 7 different groups and will take your images to a whole new level! Presets are a great way to speed up your workflow in Lightroom and discover new looks and effects for your photos.

    James has been stockpiling and optimizing these presets for years, and narrowed them down to just the best. Each collection is targeted towards a specific genre of photography or a specific photo processing need. Highlights of this bundle include the JamesB Filter Pouch; a collection of presets that mimic the filters landscape and travel photographers use out in the field. The JamesB Travel Presets; a collection that will work great for those vacation and adventure images. And the brand new JamesB Family Lifestyle Presets; a collection that James has created specifically for pictures of his family and friends.

    His ebook 10 Tips For Improving Your Photography Today is included free with this purchase and will be a great companion for any photographer looking for quick, useful tips that will give your creativity and photography a boost.

    Check out full details of the deal here

    Before and After Samples

    Before

    Before

    After - Using 'Rome' in the JamesB Travel Preset collection

    After – Using ‘Rome’ in the JamesB Travel Preset collection

    Before

    Before

    After - Using 'Day at the Zoo' in the JamesB Family Lifestyle collection

    After – Using ‘Day at the Zoo’ in the JamesB Family Lifestyle collection

    Before

    Before


    After - Using 'Sweet Pea Vintage' in the JamesB Nostalgia Film collection

    After – Using ‘Sweet Pea Vintage’ in the JamesB Nostalgia Film collection


    Post originally from: Digital Photography Tips.

    Check out our more Photography Tips at Photography Tips for Beginners, Portrait Photography Tips and Wedding Photography Tips.

    DEAL: Save 30% off James Brandon’s Lightroom Presets Bundle (and get a FREE ebook)


    Digital Photography School

  • Canadian Travelogue -Newfoundland- Gros Morne National Park

    Gros Morne National Park is to Atlantic Canada what Banff is to Alberta: a treasure trove of photographic opportunities. One major difference between the two National Parks is that Gros Morne receives only about 120,000 visitors per year, while Banff gets four million.

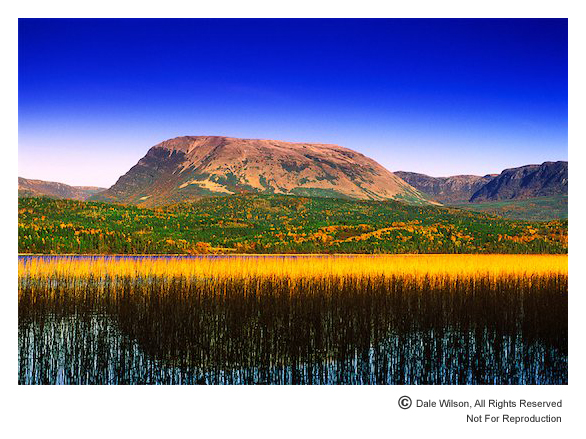
    Gros Morne Mountain as seen from Rocky Harbour Pond. Filters used: Cokin 173 Blue/Yellow Colour Polarizing, Cokin 2-stop blue soft edge graduated and Singh-Ray Colour Intensifying

    Gros Morne Mountain as seen from Rocky Harbour Pond. Filters used: Cokin 173 Blue/Yellow Colour Polarizing, Cokin 2-stop blue soft edge graduated and Singh-Ray Colour Intensifying


    Designated a UNESCO World Heritage Site, Gros Morne is best photographed by concentrating on a given topic or subject matter, be it wildlife, flora, seascapes or landscapes. Each geographical region in the park offers its own rewards and anyone planning to explore and photograph Eastern Canada’s premium photo destination should schedule a minimum of four days.

    While each month offers its own special attractions and challenges, I prefer to photograph Gros Morne in September when the air is usually clear of atmospheric haze and there are few tourists. Late in September many of the animals –moose in particular—become more active as they enter the rutting season. July is prone to a lot of atmospheric haze and August is the warmest month, averaging around 20 degrees Celsius and rarely going above 25 degrees.

    Even during the summer months snow can be found at higher elevations in the cirques and shadows zones of north facing mountains, and evening can be quite cool. In addition to foul-weather gear, warm clothing and wind breakers are a must for personal comfort. Even during the summer months finger-less are invaluable for handling the cold legs of a tripod and providing some shelter against chilly winds.

    Access is gained by driving along route 430 (the Viking Trail) from Deer Lake to the park’s epicentre at Rocky Harbour, about 71 kilometres. Or, turn off route 430 onto route 431 at Wiltondale to access the south side of the park, where you will drive past the Tablelands mountains and eventually arrive at the fishing hamlet of Trout River.

    Often overlooked, the Tablelands mountain range is one of the most unusual geological formations in the world. The yellowish-brown rock known as peridotite was thrown heavenward by the continual bump-and-grind of plate tectonics. Exposed from the earth’s mantle, this rock is devoid of plant supporting nutrients, and consequently the Tablelands Range hosts only a few varieties of flora, with most to be found along the banks of Winterhouse Brook.

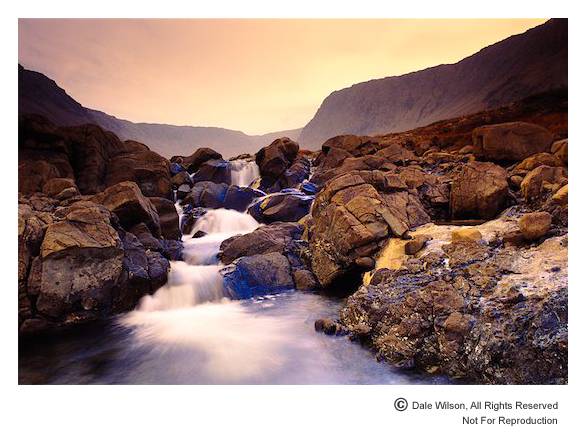
    Winterhouse Brook in the Tablelands.  Filters used: Cokin 173 Blue/Yellow Colour Polarizing and Cokin 2-stop Grey soft edge graduated

    Winterhouse Brook in the Tablelands. Filters used: Cokin 173 Blue/Yellow Colour Polarizing and Cokin 2-stop grey soft edge graduated


    Photographically, the Tablelands is a challenge that demands the photographer’s full attention to make creative images. The light is unique due to the topography; both morning and evening is in shadow and light only makes its way into this valley during high noon. However, if you must make a choice, opt for evening when you can drive along route 431 and view the mountain range to the south. On those few occasions when the evening light bathes this unique landscape the colour of the rocks will be sublime and unparalleled in eastern Canada.

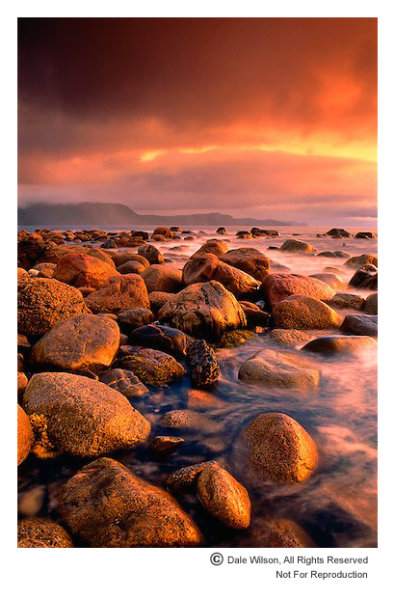
    One of the most exciting areas to photograph seascapes is the north side of Bonne Bay, just a few kilometres past Lobster Cove Head lighthouse. Green Point, on the Gulf of St. Lawrence, provides an ideal vantage point as the large rocks turn a lovely shade of orange in the sweet light of sunrise and sunset – and you can photograph both from this location.  The best access is via a single lane gravel driveway on your left about 500 metres beyond the Green Point Campground. You will recognize the spot when you find fishermen’s seasonal cabins along the shoreline. As this is a working area for the fisherfolk, it is courteous to park at the top of the bank and walk over the hill to the shoreline. There are no tips with respect to how best create images from this location, simply walk along the shoreline and change lenses as your creative vision dictates.


    Green Point at dusk in pending storm light. Filters used: Cokin 173 Blue/Yellow Colour Polarizing, Singh Ray Colour Intensifying and Cokin 2-stop grey soft edge graduated

    Green Point at dusk in pending storm light. Filters used: Cokin 173 Blue/Yellow Colour Polarizing, Singh Ray Colour Intensifying and Cokin 2-stop grey soft edge graduated


    Other attractions not to be missed in Gros Morne National Park are Western Brook Pond and the boat tour of this land-locked fiord. Secure your reservations at least a day in advance from the tour office located in the Ocean View Hotel in Rocky Harbour.  As awe-inspiring as this trip down the fiord is, it is incredibly difficult to capture creative images as you are restricted by the movement of the boat and the lack of light reaching the 675 metre high south wall. Given the choice, opt for the last run of the day for best light.

    As mentioned above, bring warm clothes, sturdy footwear, lots of media cards and allow at least four days and you will be rewarded with the most exciting, photographic diversity and easily accessable region in Atlantic Canada.

    Post originally from: Digital Photography Tips.

    Check out our more Photography Tips at Photography Tips for Beginners, Portrait Photography Tips and Wedding Photography Tips.

    Canadian Travelogue -Newfoundland- Gros Morne National Park


    Digital Photography School

  • Before and After: Weekly Photography Challenge

    This week your challenge is to take and/or process an image on the theme of ‘Before and After‘.

    the before / after

    This idea was submitted by a number of readers on our Facebook page recently and lends itself to you showcasing your post processing skills – but you’re welcome to take a different approach if you’d like and just photograph a ‘before and after’ of some other kind.

    It is totally up to you – get your imagination into gear and have some fun with this challenge!

    Once you’ve taken your ‘Before and After’ photos upload your best ones to your favourite photo sharing site either share a link to them even better – embed them in the comments using the our new tool to do so.

    If you tag your photos on Flickr, Instagram, Twitter or other sites with Tagging tag them as #DPSBEFOREANDAFTER to help others find them. Linking back to this page might also help others know what you’re doing so that they can share in the fun.

    Also – don’t forget to check out some of the great shots posted in last weeks YELLOW challenge – there were some great shots submitted.

    Post originally from: Digital Photography Tips.

    Check out our more Photography Tips at Photography Tips for Beginners, Portrait Photography Tips and Wedding Photography Tips.

    Before and After: Weekly Photography Challenge


    Digital Photography School

  • On Assignment: Cookie Ride

    Having lit a full-sun outdoor group shot with a Fuji X100s and a couple speedlights, I had been itching to see what a couple Einstein e640 monoblocs would do.

    Way too much, as it turns out. The leaf shutter of the X100s and the insane t.1 times of the Einsteins are a match made in heaven. We had to dial them waaay down for this shot of a local food truck scooter operator…

    Read more »
    Strobist