Category: Photography

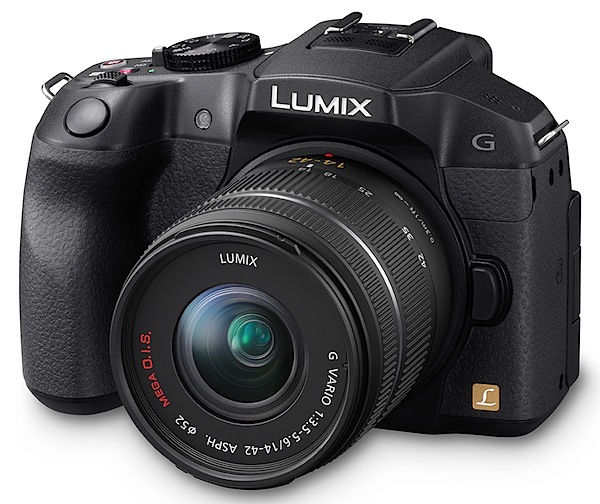
  • Panasonic Lumix DMC-G6 Review

    Panasonic Lumix DMC-G6 Review.jpg

    If it looks like a DSLR, feels like a DSLR, works like a DSLR and takes pictures like a DSLR, it probably is a DSLR. Izznit?

    Nup. This ‘un is a MILC — mirrorless interchangeable lens camera … one of the many models now proliferating on the market like rabbits.

    In reality, the major difference between this MILC and true blood DSLRs is that, with the former, the top Live viewfinder presents an electronic view of the shot you’re about to fire, while the DSLR delivers an optical view, thanks to a prism and a series of mirrors …just like the ole time film cameras used to do!

    True, the electronic view is not as razor sharp as the optical, it does look a bit ‘electronic’ and very alike to the view delivered on the rear LCD screen, but when you’re outdoors, as many of you know, the rear screen can be washed out in bright light, so Live View to the rescue.

    Panasonic Lumix DMC-G6 back.jpg

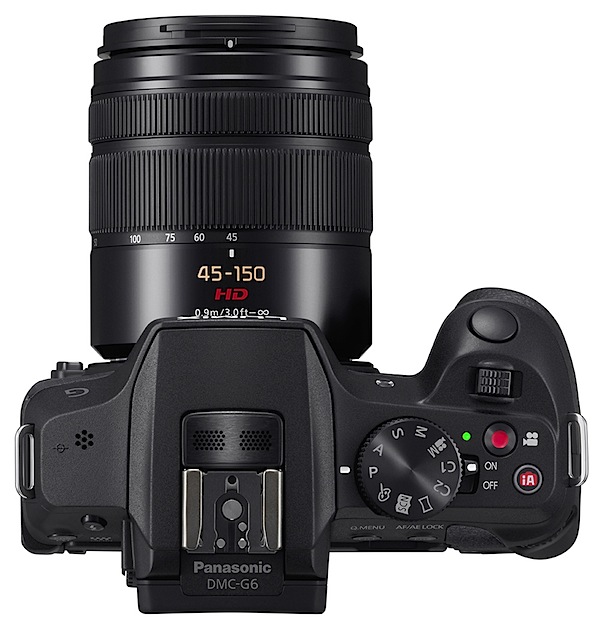
    Panasonic Lumix DMC-G6 Review Top.jpg

    The review camera was furnished with a Panasonic-made G Vario lens of f3.5/14-42mm specs.

    The G6 is a welcome addition to the lineup. In stills, it can pull a maximum image size of 4608×3456 pixels, leading to a 39x29xcm print.

    In video capture, it can shoot AVCHD or MPEG4 formats at Full HD 1920×1080 pixel resolution using a Class 4 card or better. And you can shoot stills while recording video. Auto focus tracking locks on the subject and maintains focus even as it moves.

    Panasonic Lumix DMC-G6 Handling

    It sure feels like a DSLR! And it is a comfy feel in the hand, mostly thanks to the pronounced speed grip and overall good balance.

    Top deck controls: there’s a hot shoe on top centre to accept an auxiliary flash (in addition to the lower powered internal flash beneath the hot shoe).
    Creative Guides.JPG

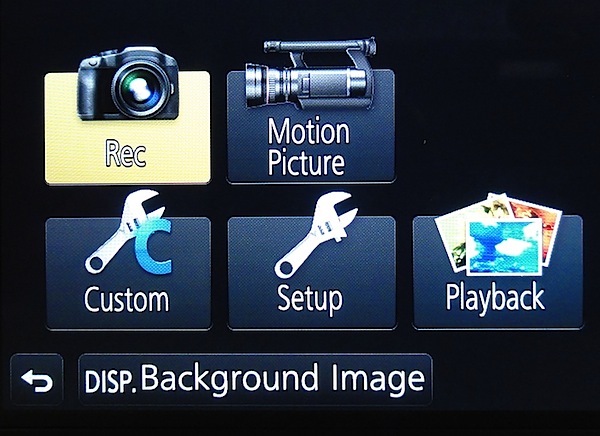
    Panasonic Lumix DMC-G6 Menu 1

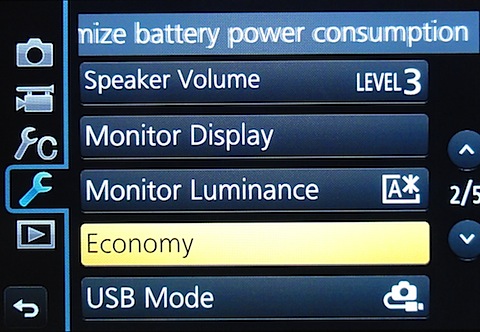
    Panasonic Lumix DMC-G6 Menu 2

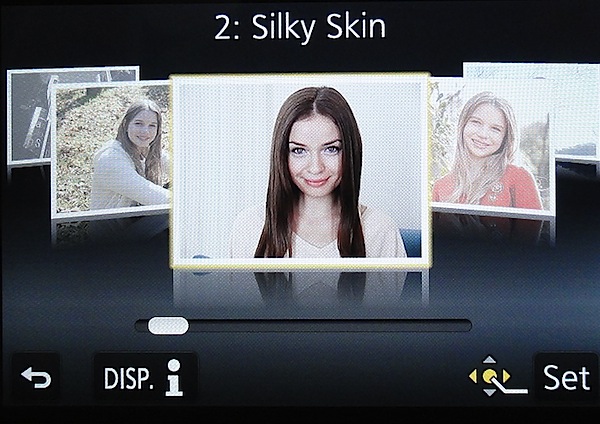
    Farther right is the mode dial with positions for PASM, creative video, two custom modes, panorama, a scene guide and a creative control mode. The scene guide offers 23 sample pictures shot by pro photographers which you can use as a helper in making your own shots …like silky skin, glistening water etc. The creative control mode has 19 filters (old days, sunshine, retro, etc. The effect parameter of each mode is adjustable.

    And, for what it’s worth, the camera can only shoot panos while held in an horizontal attitude, unlike the methods that some other cameras can deliver.

    If you want to shoot in auto mode you move your finger farther right and tap a tiny red button marked ‘iA’. The power lever is set into the side of the mode dial. Close by is the familiar video record button, hemmed in by the mode dial, power lever and intelligent auto button …it is not the most ideal position for this button and takes quite a bit of precise pressure to operate.

    Forward on the top deck is a control I had not seen before: a lever that could be used in either of two ways: it could drive any exposure compensation you desire by +/- five f stops; or with specific power-driven lenses, it can operate the zoom. Additionally, just to the rear and over the corner edge of the camera is a control dial which adjusts aperture or shutter while in those modes.

    Rear: the 7.6cm LCD touch screen is a vari-angle screen that can be rotated 180 degrees laterally and 225 degrees vertically. At the extreme left is the internal flash release and a function button that switches between top and rear finder; to the right are two more function buttons. Flanking the screen are the replay button, another for display options plus two more function buttons. The jog dial has positions for menu; ISO setting; direct setting of options for AWB, colour balance etc; continuous shooting and self timer; AF options.

    A 3.5mm terminal is set into the camera’s right side to accept an external microphone.

    Overall, not a fully packed brigade of external controls. The viewfinder menu is not overly complex.

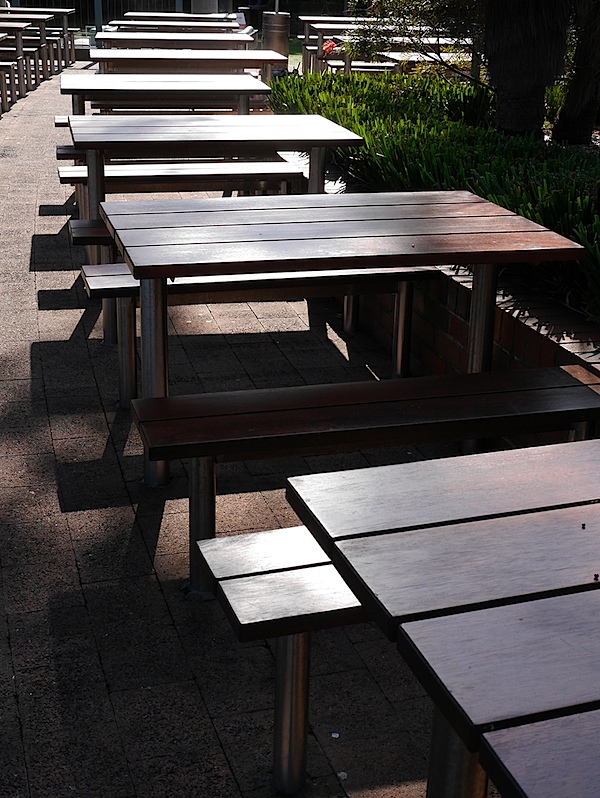
    Narrabeen lake 2.JPG

    Seats 2.JPG

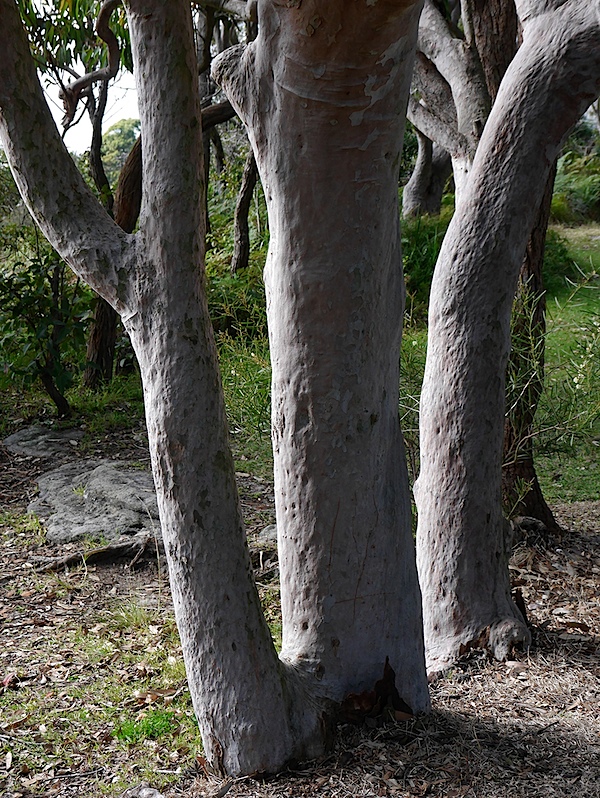
    Trees 2.JPG

    Panasonic Lumix DMC-G6 Features

    A Wi-Fi connection allows users to connect the G6 to their smart phone or tablet at a touch, while still and movie shooting can be driven remotely from the smart phone screen.


    Roof original.JPG

    Roof retouched.JPG

    And a couple of unusual features: time lapse and stop motion video shooting; a novel Clear Retouch function lets you edit out unwanted parts of a picture after shooting by simply tracing over them on the monitor with a fingertip; I tried this and it works (above)! But only with large areas of unwanted image data: don’t think you can remove wicked Uncle Ted from a family group shot!

    Panasonic Lumix DMC-G6 ISO Tests

    Panasonic Lumix DMC-G6 ISO 160.JPG

    Panasonic Lumix DMC-G6 ISO 400.JPG

    Panasonic Lumix DMC-G6 ISO 800.JPG

    Panasonic Lumix DMC-G6 ISO 1600.JPG

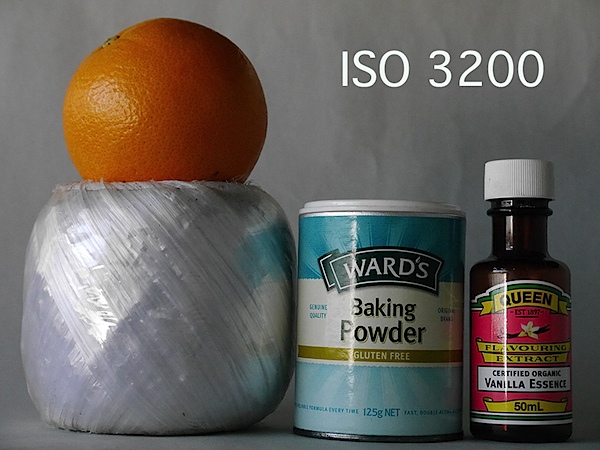
    Panasonic Lumix DMC-G6 ISO 3200.JPG

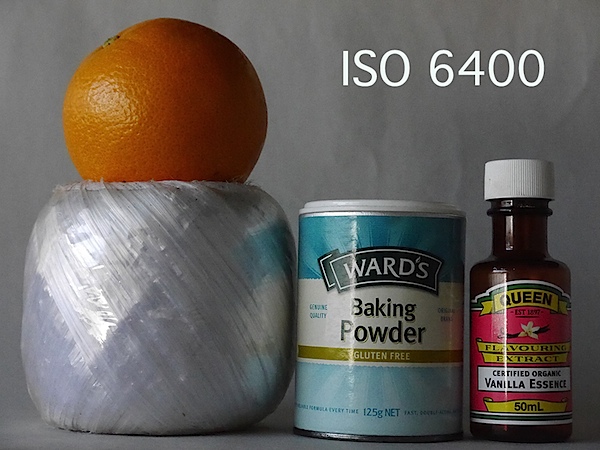
    Panasonic Lumix DMC-G6 ISO 6400.JPG

    Panasonic Lumix DMC-G6 ISO 12800.JPG

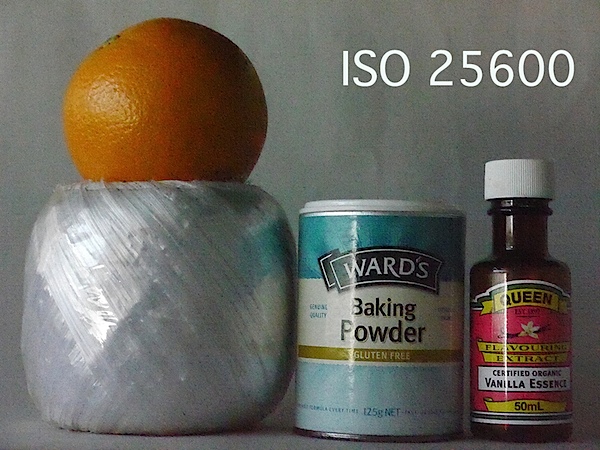
    Panasonic Lumix DMC-G6 ISO 25600.JPG
    It’s only at ISO 6400 that the image begins to degrade. Much the same at ISO 12800.

    By ISO 25600 the show’s over: much noise, artefacts and a washed out image.

    Panasonic Lumix DMC-G6 Review Verdict

    Quality: above average.
    Why buy the Panasonic Lumix DMC-G6: looks and works like a DSLR.
    Why not: a bit complex for the raw amateur.

    If you get the feeling that this camera attempts to bridge the needs of the enthusiast and the dabbler, you’re right. Just check out the creative and scene guides.

    However, I would not be unhappy to use it on an advanced shoot!

    Panasonic Lumix DMC-G6 Specifications

    Image Sensor: 16.1 million effective pixels.
    Metering: Multiple, centre-weighted and spot.
    Effective Sensor Size: Four thirds 17.3×13.0mm CMOS.
    Lens Factor: 2x.
    Compatible lenses: Micro Four Thirds.
    Exposure Modes: Auto, Program AE, shutter and aperture priority, manual.
    Shutter Speed: 60 to 1/4000 second; flash sync 1/160 sec.
    Burst Speed: 7 fps.
    Memory: SD/SDHC/SDXC cards.
    Image Sizes (pixels): 4608×3456 to 1712×1712. Movies: 1920×1080, 1280x720p, 640×480.
    Viewfinders: Turret finder: 1,440,000 pixels. 7.6cm LCD screen (1,040,000 pixels).
    File Formats: JPEG, RAW, JPEG+RAW, AVCHD/MPEG4, MPO (3D).
    Colour Space: Adobe RGB, sRGB.
    ISO Sensitivity: Auto, 160 to 12800 (25,600 with boost).
    Interface: USB 2.0, AV, HDMI mini, WiFi, DC input.
    Power: Rechargeable lithium ion battery, AC adaptor.
    Dimensions: 122x85x71 WHDmm.
    Weight: Approx. 390 (inc battery).
    Price: Get a price on the Panasonic Lumix G Series DMC-G6 with 14-42mm II Lens Kit or body only.

    Post originally from: Digital Photography Tips.

    Check out our more Photography Tips at Photography Tips for Beginners, Portrait Photography Tips and Wedding Photography Tips.

    Panasonic Lumix DMC-G6 Review


    Digital Photography School

  • 10 Things I Learnt from Daily Shooting

    A Guest Post by David Powell from Shoot Tokyo 

    Dave.jpegHere are a few lessons I have learnt from daily shooting… I hope you enjoy.

    1. “Do or Do Not…. There is no Try”

    A lot of people shoot daily as they are lucky enough to have a career in photography. Others embark on a 365 project while others just take photos all the time. I decided after I started ShootTokyo that I wanted to shoot daily as a way to try and rapidly improve my photography.  

    Shooting daily isn’t hard. It does require dedication, creatively and planning. It actually gets significantly easier with time as well. When I first started I would rack my brain for something interesting to photography but now you can put me just about anywhere for 10 minutes and I can find lots of ways to photograph it.

    2. Bring your Camera Everywhere

    To capture great images you need to have your camera with you.  People always ask me where I find the time to shoot. Honestly I shoot whatever is in front of me where ever I am going. Most of the great shots you will take aren’t planned or set up. Events or situations unfold and you capture them.

    Having my camera with me allowed me to capture the events of the March 11th Earthquake in Japan as I was experiencing it and share it with my family, friends and ultimately strangers worried about their loved ones in Tokyo. 

    1.jpeg
     
    Having a camera allowed me to capture this woman checking the news about the earthquakes while on a break.
     
    2.jpeg
     

    3. Take Pictures of People

    One of the most interesting pictures you can take is of people. I’ll let you in on a secret. Most people love having their photograph taken. Many photographers are very shy about asking people if they can take their photo so they end up trying to sneak a shot. This is just something you have to get over.  While most people like having their photo taken, they also like to know it is happening. I have found that 9 out of 10 people will say sure and give you a big smile or pose of whatever you are looking for when asked. The approach I have taken that seems to work is being genuine and I simple ask ‘Do you mind if I take your photo?’. Often I will ask them to continue doing whatever they are doing and I take my shot. I also carry these business cards that I call ‘photography cards’ that I give people and let them know they can email me and I will happily send them a high resolution photo for their troubles. Probably 10% actually email me but giving them a card makes the interaction more ‘legitimate’ and puts people at ease.

    3.png

    I have learnt to not be shy about asking if I can take someone’s photo and I am so pleased with the results I can get now… Check out this hip chick at Shibuya’s Hachiko…

    4.jpeg

    This beautiful girl passing through Shibuya Station…

    5.jpeg

    and dogs…

    6.jpeg

    4. The Less Gear you Carry the More Photos you take

    This is a lesson I learnt the hard way after dragging excessive amounts of camera gear across Tokyo and when I was traveling. Typically I would leave the house with my Canon 5DMKII. I wanted to ensure I would catch any shot so I will make sure to bring a good assortment of lenses; 16-35mm, 24-70mm, 50mm, 135mm and maybe my 70-200mm. I would also have an assortment of filters, a flash or two and other odds and ends. At the end of the day, I spend all of my energy lugging gear around that I didn’t spend nearly as much time shooting. The reality is you can make great photographs with whatever gear you have granted you know how to use it.

    Now more often than not, I leave the house with a single prime (fixed focal length) lens. This allows me to focus on taking pictures and bringing out my creativity to capture the shot I need with the only focal length I have. I carry the most minimal of accessories; extra card, extra battery, an ND filter and a cloth to wipe the lens. That’s it.

    Do I miss some shots due to my limited gear? Sure, but what I missed is easily made up by all of the other shots I get.  

    7.jpeg

    5. Force Yourself to Shoot one Lens for a Week

    A big part of making #4 work is knowing how to use your gear. I realized I would often carry multiple lenses as I didn’t know how to get a shot or the shot I wanted with the tools I had. I would feel like I was limited with a 50mm so I would want to make sure I had a 70-200mm if it was far away, and a 24-70mm in case I needed to zoom to capture what I needed, or maybe a 16-35mm in case I needed to capture it wide. I now shoot almost exclusively prime lenses. With my Leica M9 I shoot a 21mm f/1.4 Summilux, a 35mm f/1.4 Summilux and a 50mm f/0.95 Noctilux.

    8.jpeg

    The reality is you can capture a great shot with probably any lens you have with you provided you understand how to use the gear you have.  What I mean by this is what shots work for a given lens. What angle or distance do you need to be at for this particular focal length to give you the perspective you want.  I was great at shooting my 50mm lens but I really struggle with my 35mm and had just purchased a 21mm and did not really understand how to get the most out of it. I forced myself into a lens rotation where I shot a single lens for a week. I’ll be honest, it was incredibly frustrating for me. At times I wanted to just switch to a different lens as it was impossible to get the shot I wanted or needed but after a few days it became much easier to get the shots I was looking for and soon I was able to pre-visualize the shots before I even lifted the camera to my eye.  Now I can walk the streets at ease with any of my prime lens and come home with a card full of shots that I am happy with.

    9.jpeg

    10.jpeg

    11.jpeg

    6. Develop a Personal Style

    There is no right or wrong with photography. Some people love flashes.  Others just shooting with their iPhones. Some love to photoshop their pictures for hours. Do what you love doing.  One thing shooting daily has helped me to do is develop a personal style of shooting. When I first started I was always watching people and trying to see if I could shoot like ‘them’. This was helpful to get me to learn to use my gear but once you know how to use your camera, you need to develop a style that is yours.  I don’t have a name for my style but I like a lot of selective focus and clean, natural pictures.  I do next to no post processing on the photos. The most I will do is clean up any dust spots, crop a little, or adjust exposure but for me photoshop on my Mac is to correct little imperfections but not for making pictures.
    I like to use very narrow depth of fields to tell my stories. There are no hard and fast rules to what you can and can’t do, should or shouldn’t do. Learn the basics and then decide how you choose to apply them.

    12.jpeg

    I love to use a narrow depth of field and throw primary colors out of focus.

    13.jpeg

    I’ve learnt to love photographing people once I got over the initial fear of asking people if I can take their photo.

    14.jpeg

    I love combining shallow depth of field with lots of contrast like in this picture of ‘Dark Shibuya’…

    15.jpeg

    7. Shoot out of Airplane Windows

    I have never been one of those people who shoot out of airplane windows. I have flown probably close to 1,000,000 miles in my career and can’t believe all of the subjects I have missed; Alaska, Mt Fuji, the slums of Mumbai, Chicago skyline, arrivals in Boston. This is something that I started doing this year and I have been so pleased with the results.

    16.jpeg

    8. Try new Things

    Try different types of photography as you are trying to learn what it is you like. I was surprised to find out how much I enjoyed photographing the moon, how easy it is and that I already had all of the things I needed.  If you want to learn how to photograph the moon, read THIS. (link to: http://shoottokyo.com/photograph-moon/ )

    17.jpeg

    I also developed a love for HDR. This is the only time I am using software to modify my images. HDR can easily be overdone so I need to be careful but I found I really enjoyed it. My inaugural post on Shoot Tokyo was on HDR. You can read it HERE.

    18.jpeg

    Panning is a great way to bring motion and movement to your photos to make them come alive.  If you don’t know how, read THIS.

    19.jpeg

    9. Shoot at Night

    I do the majority of my shooting at night. I am surprised how many people stop shooting when the sun goes down. What you need is a tripod, a low ISO and some practice. There is so much to photograph when the sun goes down.

    Like light trails…

    20.jpeg

    Evening construction sites…

    21.jpeg

    Cities

    22.jpeg

    10. Backup Everything

    I can’t stress this point enough.  I had a serious run of bad luck with Macs last winter and this spring.  I actually had 5 complete hard drives failures on my Mac(s).  Each time I was able to get Apple to do a complete replacement of my machine but it kept happening.  They were never able to root cause the problem but I am running safe and sound on a Mac outfitted with Solid State Flash Drives. I am very paranoid by nature so I was fortunate enough not to lose a single photograph throughout these issues. This experience just reinforced what I already know; backup everything, often and to multiple locations. I have friends and know fellow photographers that have lost their hard drives without backup.  I can’t imagine the feeling of losing all of my photos but I am do my best to ensure this never happens to me.

    23.jpeg

    Currently I backup using Apple’s Time Machine to Western Digital drives connected with FireWire. I do this as I travel often and the backup drive comes with me. A lot of people stop backups while traveling is when you can run into an issue such as losing a drive, downloading a virus, or having a laptop stolen. When I pull the data off cards and onto my Mac it is backed up before I delete the data off of the cards. I also have several additional drives that I rotate copying my entire ‘pictures’ folder to once a month as an additional backup.

    I hope you found this useful!

    Dave Powell is a blogger and photographer based in Tokyo, Japan. He writes Shoot Tokyo photography blog. You can see more of his work at www.shoottokyo.com or follow him on Twitter and Google +.

    Post originally from: Digital Photography Tips.

    Check out our more Photography Tips at Photography Tips for Beginners, Portrait Photography Tips and Wedding Photography Tips.

    10 Things I Learnt from Daily Shooting


    Digital Photography School

  • On Assignment: Scout and a Shoot Pt. 2

    Okay, so we're back shooting at the MCE after our scout a couple of days ago. The weather is hot, so I am glad I choose speedlights. Much less to lug.

    Leading off is entrepreneur Biplab Pal, of Zreyas Technology, whose company facilitates product development and manufacturing for other companies.

    Let's walk through this and the other shoots…

    Read more »
    Strobist

  • 3 Steps to Gorgeous Landscape Images

    A Guest Contribution by Todd Sisson – author of our brand new Landscape Photography eBook (currently 33% off).

    During the writing of Digital Photography School’s latest eBook, Living Landscapes, I was forced to do some heavy thinking about how I approach creative landscape composition in the field. At this juncture, it is important to note that I avoid heavy thinking at all costs. Thinking truly is the hardest work, especially when you are attempting to simplify a process that is almost instinctual to you.

    However, my fear of hard thinking is eclipsed by my fear of Editorial wrath, so I set aside a day, dusted off a tantric chants CD and retired to my sweat-lodge teepee for some quality time with sub-conscious me. Thirteen hours later I emerged, 12 kg lighter and armed with two revelations, the first; I approach landscape composition as a three step process. The second; my sub-conscious is a freaky place that is best avoided in the future.

    Luckily for you, it is the brief overview of the first revelation that I shall share with you here today; the three component steps to creating a successful landscape image:

    • Choose a subject
    • Find the right light
    • Create a composition

    NZ NO Pataua South 4 1

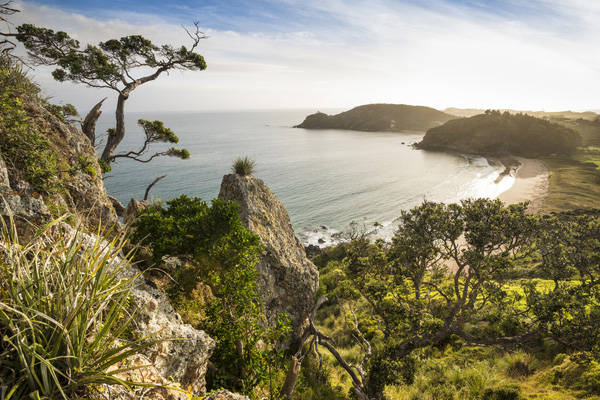
    Successful landscape images result from a combination of interesting subject matter, quality light and a strong composition. This particular image nicely illustrates the point that you don’t need towering mountain peaks, blazing sunsets and extraordinary foreground features to make a pleasing image.

    Choosing a Great Subject

    Not everything in nature is destined to make a great photo. It is our job as a photographer to sort the wheat from the chaff and identify subject matter that will translate beautifully into the two dimensional constraints of the photographic medium.

    To my mind, the best landscape subjects convey visual themes such as ‘energy’, ‘grandeur’ and ‘tranquility’ to the viewer. Mountains, bodies of water and coastlines all make happy hunting grounds for photographers because, as viewers, we instinctively know how to interpret these scenes. We sub-consciously know that a snow covered mountain peak must be big, or that a wave crashing on rocks is imparting large amounts of energy, and we know, without thinking, that a reflection on a pond occurs only under calm conditions. In short, we can easily ‘read’ these types of photograph.

    NZ WA Lake Wanaka Willow Reflection 01

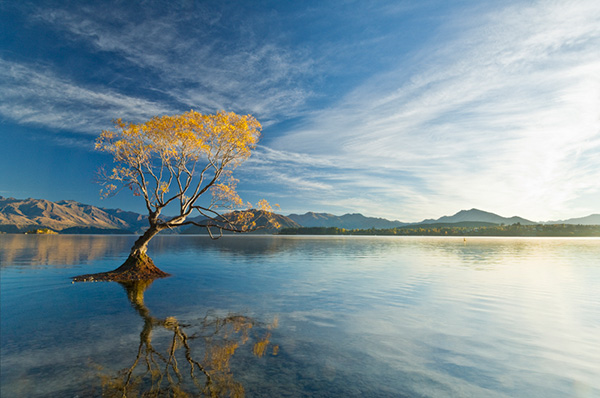
    The best photographic subjects communicate multiple visual themes and have a very broad appeal as a result. To me this scene speaks of tranquility (reflections), natural change (Fall color and the building cloud cover) and stoicism (the lone tree clinging to life on the outer limits of it’s natural environment). You may ‘read’ this scene quite differently depending upon your outlook on life – for example, a hardcore environmentalist may see no more than an introduced species of tree clogging a lake that has been flooded by unsustainable farming practices in the lake’s headwaters. Photography, and life for that matter, is a very subjective affair…

    You don’t need to travel to Nepal (or New Zealand, for that matter, to find great photographic fodder. Sure, it is lot easier to make interesting landscape images when surrounded by Tolkien-esque mountains but subjects don’t need to be grand in scale to make great images, they just need to be visually interesting. Learn to seek form, patterns or color in a scene and you may well find a subject from which to create a landscape image.

    Sisson Wanaka 29

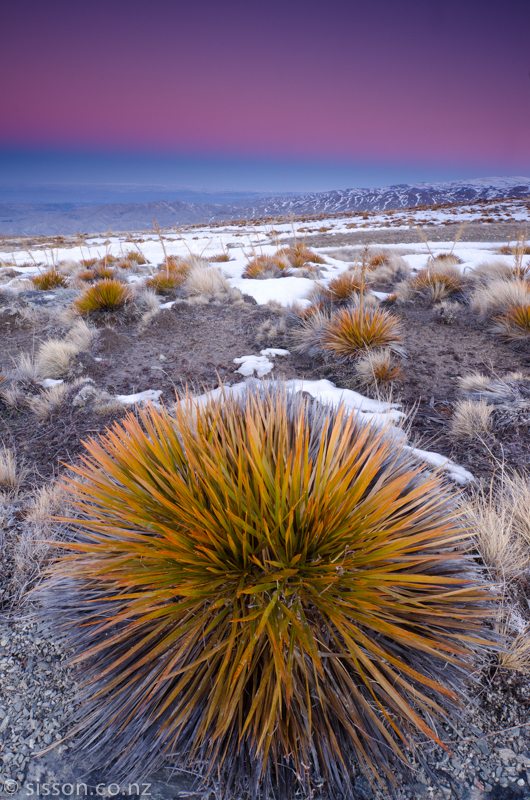
    To me, this is a visually interesting image despite the absence of towering mountains, lightning bolts and grazing Unicorns. I was initially drawn by the beautiful evening pastels and the earth shadow (the blue line in the sky near the horizon) but I needed something to ‘anchor’ the shot. The strong geometric pattern and form of the Spaniard grass created a terrific foreground element for the composition. By getting low and getting close an ultrawide lens the grass gains ‘visual weight’ – compare it to the nearly identical grasses a couple of yards back.

    Seek the Right Light

    I would happily argue that great light is the single most important element in a successful landscape image. In fact, I dedicated a significant number of ePages in Living Landscapes to doing just that. Great light is truly transformative.

    Fortunately, seeking great light doesn’t entail shooting only Ferrari-red sunsets. In fact, I will pull out the camera in almost any light if it complements a scene. The skill is learning to judge what constitutes the best possible lighting conditions for a given location – this is where you have to practice the art of observation and pre-visualization to judge how the sun will play out during the course of the day. I use digital tools to assist in this process, namely Focalware, which is a nifty little app that shows the arc of the sun and moon throughout the day with freakish accuracy.

    Before after

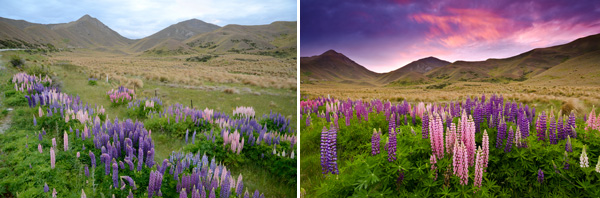
    Great light is transformative. In Living Landscapes I detail the many steps and decisions that led from the scouting shot on the left to several portfolio-grade images of this scene.

    Create a Composition

    Composition is where it all comes together artistically. You may have lined up an amazing subject and be blessed with a veritable pyrotechnics show in the sky but if you combine these in a dreary, sloppy and uninspiring composition all is wasted.

    I personally divide landscape compositions into two broad (and absolutely unscientifically defined) categories;

    • Dynamic landscape compositions
    • Static landscape compositions

    Dynamic compositions are the show ponies of the landscape photography world. They employ a suite of visual ploys to imbue an image with an almost 3-D feel and/or impart a sense of dynamic energy. Dynamic compositions used to be difficult to create in ye olde film days but the learning curve is vastly accelerated by the digital workflow and easy access to educational information such as this dPS blog post written by yours truly.

    NZ CO cathedral cove 6

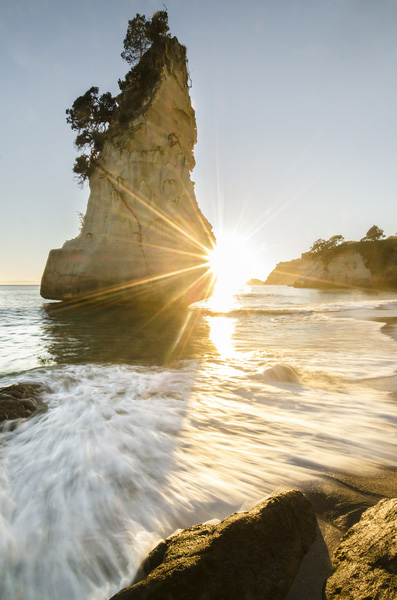
    Show pony. Dynamic compositions employ techniques such as leading lines, motion blur and vivid colors to draw the viewer’s attention into the frame.

    Static compositions subscribe to a more traditional photographic aesthetic and, I feel, are more faithful to the two-dimensional constraints of the art form – most of Ansel Adams’ images would be considered static as opposed to dynamic compositions. I have a personal preference for beautifully executed static compositions – probably because I am fairly ancient, in internet years at least…

    Static compositions rely upon a more subtle repertoire of visual techniques to achieve a sense of drama. Successful static compositions use a combination of layers, contrast, texture, form, localized lighting and color to engage the viewer.

    NZ WR Sunset Sheep

    No place for show ponies. Static compositions such as this rely upon layers of visual interest, form and spot lighting to succeed.

    Mixing it Up

    It is important to note that there is no particular order for executing these three steps. I will often stumble across great light (always it seems when driving with a car full of tired & hungry kids ) and then have to find a subject and a composition to capitalize upon the situation. This is, of course, where strong craft and technical skills kick in – readers of Living Landscapes will know that I promote a policy of keeping it simple with regards to camera settings and technical considerations, this allows me to work fast and seek out compositions – even while being bombarded with requests for snacks from the back seat!

    Todd & Sarah Sisson are full-time landscape photographers based in Central Otago New Zealand.

    Their work can be found as fine art prints & canvas prints at www.sisson.co.nz  They can be found on Facebook, Google Plus and Twitter.

    Post originally from: Digital Photography Tips.

    Check out our more Photography Tips at Photography Tips for Beginners, Portrait Photography Tips and Wedding Photography Tips.

    3 Steps to Gorgeous Landscape Images


    Digital Photography School

  • 5 Milestones for dPS This Week!

    This week has been an exciting week around dPS headquarters as we’ve celebrated a number of milestones – all of which are thanks to you our amazing community of readers!

    Let me share a few of them with you!

    1. 750,000 Newsletter Subscribers!

    NewImage On Monday we noticed that our newsletter passed the magical 750,000 subscriber mark! Back in 2006 when I started the dPS newsletter so that a family member could get our latest tutorials (because he didn’t know how to subscribe to our RSS feed or wasn’t on Twitter) I had no idea how important our newsletter would be to three quarters of a million people!

    Our weekly newsletter is the #1 way that people get updated on our latest free tutorials and if I ever happen to be late in sending one – boy do we hear about it from our subscribers – it is much anticipated each week!

    If you’re not a subscriber yet – just add your email address below and we’ll send it out to you each Thursday!

    We can’t wait to hit the million subscriber mark – we’ll have to think of a way to celebrate that one!

    2. 18,000 Pinterest Followers!

    NewImageOn Tuesday we our Pinterest account had it’s 18,000th follower. While there are plenty of bigger accounts around we’re really proud of what we’ve built on Pinterest.

    Jade – our Pinterest Guru – has set up 170 different ‘boards’ – each one dedicated to a different category of photography and each day she hunts for and shares some great photographic content from around the web.

    So far she’s shared over 7000 great tutorials! Just be warned – if you follow us on Pinterest you may never get any work done again – it’s an amazing resource!

    3. 170,000 Facebook Followers

    NewImageOn Wednesday we celebrated our 170,000th Facebook follower!

    Our Facebook page is a great place to get the latest updates from our blog as well as connect with other readers.

    PS: you can also follow us on Twitter. We’re approaching the 100,000 milestone there!

    4. New dPS Redesign Preview

    On Thursday we got a preview of the new dPS redesign that our design and development team have been working on. We’re still a few weeks away from launching it fully but we are REALLY excited by how it is shaping up.

    The new design will be great for viewing on your mobile phone (a much requested feature, has an improved comments section, some new gallery features and is a lot more colourful to look at. We think you’ll like it.

    We can’t show the full thing but here’s just a teasing glimpse of what’s to come! It’s taken from our new front page.

    Dps

    5. More Great Reviews of our Landscapes eBook

    Landscapes cover 1It’s been 9 days since we launched Living Landscapes and we’ve been overwhelmed by the amazing feedback we’ve been getting about it.


    Here’s another comment left on the blog yesterday from one of our readers – Robin Grant:

    I bought this eBook last week.

    It was the first eBook I’ve ever bought and I was pleasantly surprised how much I enjoyed reading it on my iPad. Todds photos are amazing (I am seriously thinking about booking a trip to New Zealand) and he writes really clearly.

    I’ve already taken my camera out of town to experiment with some shots and can see my photos are improving already. Thanks for writing this dPS.

    Save 33% on Living Landscapes and go into the draw to win a great $ 1500 photographic prize (lenses and bag) when you pick up a copy of Living Landscapes today.

    Thanks to our Readers

    None of the above would have been possible without our amazing readership. Thanks so much for being a part of what we do and for sharing us with your friends.

    Thanks!

    Post originally from: Digital Photography Tips.

    Check out our more Photography Tips at Photography Tips for Beginners, Portrait Photography Tips and Wedding Photography Tips.

    5 Milestones for dPS This Week!


    Digital Photography School

  • Composition, Balance and Visual Mass

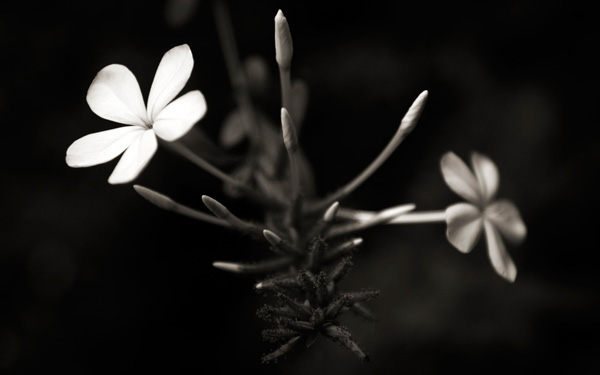
    Black and white photo

    In previous articles I wrote about the concept of balance in relation to the colours orange and blue, and in relation to composition in the square format. Today I think it will be interesting to explore the concept of balance in relation to photographic composition in more depth.

    Central composition

    Black and white photo

    This is a portrait that I created with a central composition. There are a couple of interesting things going on here. One is that the composition is virtually symmetrical. One half of the image is a mirror image of the other, with a few variations. In this case, that reinforces the sense of balance created by the central composition.

    What happens if we crop the image to move the girl’s face off-centre, closer to a third? Let’s take a look. Here I’ve cropped it to the 4:3 aspect ratio:

    Black and white photo

    Do you see the difference? In this example the eye is encouraged to move around the frame more by the off-centre composition. Placing the girl’s face off-centre has created a more dynamic composition.

    The first version is about balance, the second is about being off balance and adding a kind of tension to the image. The subject is the same, but one simple variation in composition creates two different effects.

    Tonal contrast

    The portrait is also an interesting study in tonal contrast. The light tones of the face and scarf contrast with each other. Roughly one-third of the image is made up of light tones, and the rest dark tones. What we’re looking at here is an example of what some photographers refer to as visual mass. Light tones pull the eye more than dark tones. Therefore, to create a balanced image, there needs to be more dark tones than light tones. If the ratio was around equal, the image wouldn’t feel so balanced.

    This is what happens if we crop the portrait to a square. The ratio of light to dark tones is about even. But the sense of balance between dark and light tones in the original has been lost:

    Black and white photo

    Here’s another example of balancing the visual mass between light and dark tones:

    Black and white photo

    Now, here’s another example to illustrate the same concept:

    Black and white photo

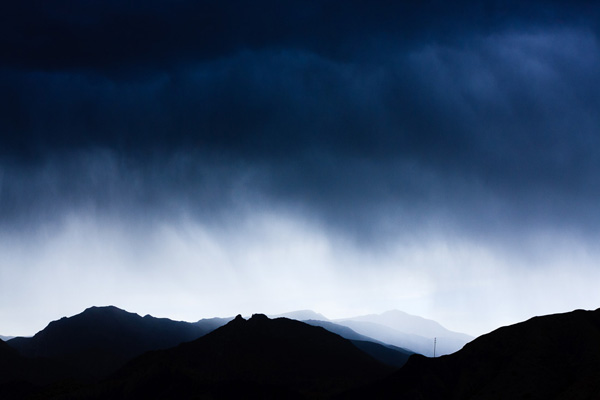
    The photo is split into three bands. The strips of dark tones at the top and the bottom are balanced by the band of light tone in the middle.

    There are other ways this image is balanced too. The mountains occupy the bottom part of the frame, and are balanced by a large expanse of stormy sky. The mountains have more visual mass than the sky, therefore the photo benefits from having more sky in it.

    The telegraph pole in the bottom right third is the focal point of the image. It has a lot of visual mass, assisted by its placement on the thirds. The visual mass of the telegraph pole is so strong that even at this small size it is balanced by the rest of the image.

    Finally, an image with a composition that at first glance seems to be at odds with what I said earlier about tonal balance:

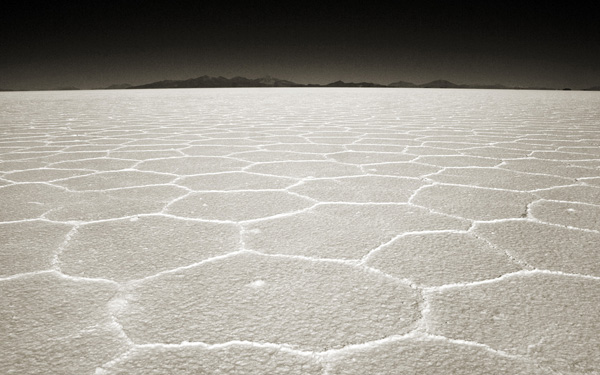
    Black and white photo

    In this image, the light tones of the salt flats are balanced by the brooding dark tones of the mountains and sky in the distance.

    The thing about visual mass and balance is that they are difficult concepts to condense down into rules like the rule-of-thirds. Every scene is different and the best composition may depend as much upon your intent (ie. would you like a balanced image, or a less balanced one with more dynamic tension?) as it does upon the subject.

    One of the best ways to improve the composition of your images is to read as much about these concepts as you can, absorb them, and then compose according to ‘feel’. Does the image feel right when you look through the viewfinder? As your understanding of composition improves, so will your photos.

    Mastering Photography

    Black and white photo

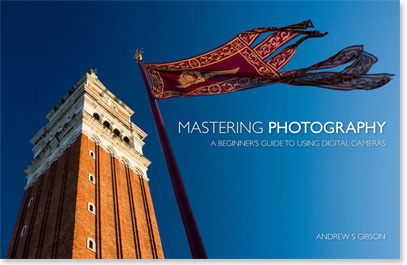
    My latest ebook, Mastering Photography: A Beginner’s Guide to Using Digital Cameras introduces you to digital photography and helps you make the most out of your digital cameras. It covers concepts such as lighting and composition as well as the camera settings you need to master to take photos like the ones in this article.

    Post originally from: Digital Photography Tips.

    Check out our more Photography Tips at Photography Tips for Beginners, Portrait Photography Tips and Wedding Photography Tips.

    Composition, Balance and Visual Mass


    Digital Photography School

  • CGI vs. Photography – The Great Image Debate

    As photographers we are now being faced with a new type of image revolution. It’s one that is so serious it could change the way that images are created, bought and sold. So what is better a real or CGI image? This new revolution threatens the very professional photographic industry that each of us aspire to be a part of. Continue Reading

    The post CGI vs. Photography – The Great Image Debate appeared first on Photodoto.


    Photodoto

  • Win a $1500 Bag and Lens Prize Pack with Living Lanscapes

    Landscapes_cover.jpgLast week we, with great excitement, let you know about our anticipated new Landscape Photography eBook with a 33% discount for early birds.

    We just love everything about this eBook. The cover, the subject, and the engaging and easy to follow writing style of Todd.

    It’s seems as though you do too …

    Here’s some feedback we received 24 hours after it went on sale!

    “I got this eBook first thing this morning and have spent the rest of the day reading, dreaming and then taking an impromptu short road trip into the mountains outside of the town where I live to practice my landscape photography. I can’t thank you enough for the motivation and teaching to improve my work!” – Brenda Mason

    “I love this eBook. It is so cool to learn from people like Todd. I can’t wait to use what I have learned today by reading it. I have so many new ideas!” – Gavin Banyard

    Given the fantastic response to this eBook, we’re going to celebrate by giving you the chance to win a Landscape Photography Pack worth $ 1500!

    You’ll win an awesome rotation180° Professional Deluxe backpack (worth $ 500)  from MindShiftGear, plus $ 1000USD worth of lenses you can use for your landscape photography.  (Todd includes some great information on this in the eBook)

    To enter all you need to do is pick up a copy of Living Landscapes.

    If you’re already a proud owner of a copy then congrats, you’re already entered.

    The Prize

    The winner will receive a rotation180° Professional Deluxe backpack (worth $ 500) from MindShiftGear. You can say thanks on their Facebook page here. Plus you can choose either a single or combination of lenses to suit your needs up to the value of $ 1000 USD.

    So, Canon owners can choose Canon mount lenses. Nikon owners can choose Nikon mount lenses. Micro 4/3 camera owners can choose lenses to suit their cameras.

    prize

    FAQ

    Based upon previous competitions I know we’ll get a number of questions so here are some FAQs:

    • What if I already purchased Living Landscapes? You’re in the draw and don’t need to do anything else.
    • Is this open to all international readers? Yes. We’ll ship the prizes to you anywhere at our cost. Our preference for the lenses is to use B&H Photo and Video but if you live outside of their delivery area we’ll work with a local supplier to get your prize to you.
    • Can I enter more than once? No, there is only one entry per person. Multiple purchases of the eBook only get you one entry.
    • Are there any conditions of entry? Yes, just one. The only condition of entry is that you allow us to publish your name on the blog when you’re drawn as a winner (we’ll keep any other details private). This way everyone will know who has won (we’ve previously had winners ask not to be named which has been difficult to be transparent about winner announcements).

    Here’s the deal in a Nutshell

    Buy Living Landscapes before Thursday 15th August and you get:

    • 33% off the eBook – worth $ 29.99, you get it for $ 19.99
    • An entry into the $ 1500 USD Landscape Photography Prize Pack Prize Draw
    • Plus (and most importantly) you’ll come away from reading the eBook with some inspired landscape photography skills!

    We’ll draw and notify the winner on the 16th August and then publish their name here on the dPS blog. If the winner doesn’t respond within 7 days we’ll draw another winner and publish their name on the blog.

    Pick up a copy of Living Landscapes today.

    Post originally from: Digital Photography Tips.

    Check out our more Photography Tips at Photography Tips for Beginners, Portrait Photography Tips and Wedding Photography Tips.

    Win a $ 1500 Bag and Lens Prize Pack with Living Lanscapes


    Digital Photography School

  • The New SmugMug, Awesomize Your Photo Sales on the Web

    My Home Page on the New SmugMug

    SmugMug, widely regarded as one of the best internet sites on the web for amateurs and pros alike to share, and especially sell, their photos, unveiled an entirely new SmugMug this morning.

    I’ve had early access to the new site redesign and have been playing around with it for the past few weeks — I’m a huge fan.

    The new SmugMug brings fresh, updated, design and functionality to the service and is probably the most significant upgrade to the service since it started.

    Most significantly, the new SmugMug brings a new line up of beautifully designed templates that allow even the most basic internet user the ability to have a photo commerce site up within minutes.

    As much as I enjoyed the old SmugMug as a place to sell my prints, one of the negatives of the old site was that it could be complex and complicated to get a attractive looking interface up. The old SmugMug offered the ultimate in customization, but many photographers are not web design experts and it could be challenging to do it yourself. While you could hire outside pros to customize your site, this added a layer of cost and complication to the equation.

    While the new SmugMug still allows advanced users an incredible amount of customization, they also now offer a series of basic templates that are pretty much plug and play. The new templates are stunning right out of the box and you can easily use a new series of tools to do minor edits to add in basic elements that you want to use to present your photos uniquely.

    These new templates have been optimized to look good on the three basic interfaces, web, tablet and mobile. They have also added custom links that can be added to your blog, Facebook, Google+ and Twitter as part of any design interface.

    In addition to the new design choices, SmugMug also rolled out today a new photo organizer that allows some of the most advanced functionality in photo sharing today.

    When Flickr redesigned their site earlier this year, some users were disappointed that Collections lost visibility on the site. The primary way that Flickr manages photos is with sets. Sets can be one dimensional though. Sometimes you need sets of sets. Sometimes you even need sets of sets of sets. The new SmugMug allows seven layers of photo organization.

    So if you want to have a page of American photos organized by states you can do that. If you want to be able to drill down into each state and look at the various cities, you can do that too. If you want to drill down even further and look at the various neighborhoods in each of the cities, you can do that.

    More control over hierarchy was the number one feature request that SmugMug users had asked for in their user forums.

    The new SmugMug organizer also offers lots of ways to bulk edit your photos, allowing you to batch add keywords, delete files, apply custom captions, etc.

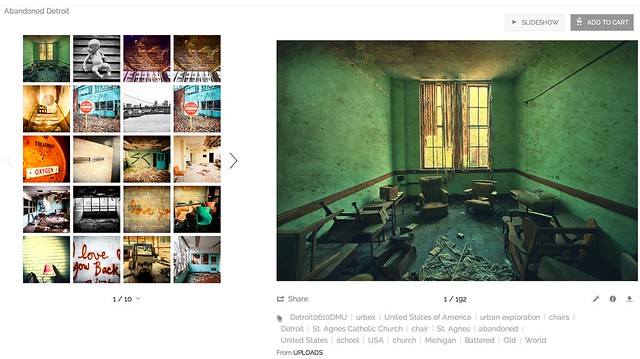
    Personally, I do 99% of my metadata work at the file level in Lightroom, but here is where SmugMug offers me one of my favorite features, Smart Galleries. Smart Galleries are not something new with this release, but Smart Galleries allow you to build highly customized automated galleries based on keywords. If I want to build an album of all of my photos of abandoned buildings in Detroit, I can do this simply by building a set that includes any of my photos keyworded with abandoned AND detroit. Now anytime I upload any new photos to the site that have these keywords, they will automatically be added to that album.

    Creating a Smart Gallery on the New SmugMug

    My Abandoned Detroit Set on the New SmugMug

    One of the problems with redesigning photo sharing sites is it doesn’t matter how good a job you do at it, there will always be naysayers from the “who moved my cheese” crowd who will moan about it. It doesn’t matter how much better you make something, some people just love to complain. Haters gonna hate, gators gonna gate, tators gonna tate, all that stuff. One of the smart things that SmugMug did with this redesign is that they gave control over the new site to the user. If you are already a SmugMug user and *don’t* want to opt into the new site design, you don’t have to.

    From SmugMug:

    “Unlike many other services, we’re not forcing you to ditch your existing site. You’ll have your very own secret preview mode that contains all your galleries, so that you can personalize it and get familiar with the new features. While it sounds scary, migration simply copies your website contents into a virtual sandbox that only you can see. When you’re ready, YOU unveil your changes and make it public.”

    I’m sure that there will *still* be some who complain, even though they get their *choice* over new or old SmugMug, but this should go a long way towards the inevitable backlash that comes with every redesign.

    Also, the pricing is staying the same for the service and they are even adding unlimited video uploading to all levels of account with no price increase. At present SmugMug’s pricing remains: Basic: $ 5/month or $ 40/year, Power: $ 8/month or $ 60/year, Portfolio: $ 20/month or $ 150/year, Business: $ 35/month or $ 300/year.

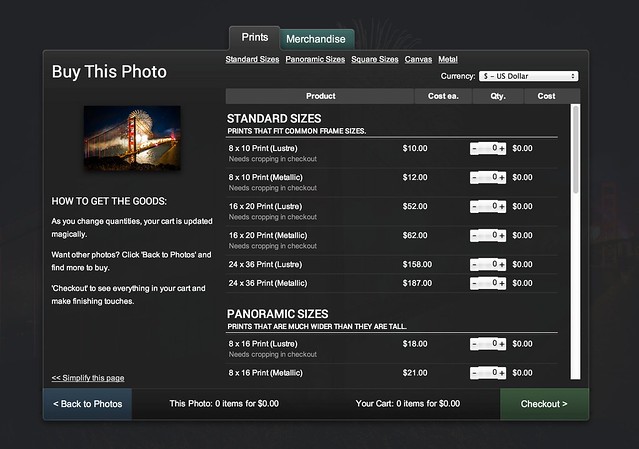
    Buying a Print on the New SmugMug

    If you are a photographer who has thought about selling your photos on the web, but has held back, now is the time to jump in. With the new SmugMug today, you can easily have a professional looking photo commerce site up and running within minutes. SmugMug offers a generous 85% payout on all sales and gives you a great place to send people to who want to buy your prints.

    I’ll be on a special episode of the Trey Ratcliff show tonight where we’ll talk about the new SmugMug — 7pm PST.

    There is a live vidcast of the new designs with SmugMug CEO Don MacAskill at 10:30am PST today here.

    If you want to check me out on my SmugMug, you can find me here. I’m in the process of adding several thousand new photos to my SmugMug. Feel free to buy a print if you’d like. :)

    More from SmugMug on the new design here.

    Two new videos about the new SmugMug here and here.

    More from David Pogue at the New York Times here.


    Thomas Hawk Digital Connection

  • Digital Still Life Photography [Book Review]

    Digital Still Life PhotographyThis is a sumptuous book in a number of departments: it’s large, beautifully printed and full of useful, easily navigated information.

    So why the word ‘digital’ in the book’s title?

    Author Sint explains ‘I hate using Photoshop to correct my mistakes because I feel the time required to do so is both unproductive and unprofitable. … what I really love more than Photoshop is downloading pictures that I find pretty close to perfect the moment I open the image’s file.’

    The book’s style is thoroughly disarming and direct to the point: when approaching a still life photograph the first step, Sint suggests, ‘is to spend a moment thinking about what type of photograph you are trying to create.’

    He then describes the techniques in shooting simple setups on a plain background, the need for speed and the need to plan your shoot efficiently. After all, time is money and the more shots you can pack in per hour the higher your financial return. This book Sint affirms is about ‘how to make a living taking pictures …’

    An initial step is to select a suitable shooting space. It should ideally be a big space, one that includes an office, shooting area, storage for props etc, conference area, makeup room and maybe a kitchen. However, in an effort to describe how little you really need, the author describes his own first studio: a room 250 square feet in area, containing his own twin bed, a dresser, small nightstand … with the remaining 225 square feet dedicated to the studio!

    Next, you should assemble the necessary tools to make the space work: timber and the necessary power and hand tools; some form of canned compressed air or even a compressor and more. This is followed by three simple building projects: building a simple set flat; a diffusion screen; a light table.

    The important subject of lighting gets serious attention, with tips on how to assemble and use a continuous light array, electronic flash, reflectors, barn doors and snoots, hair lights, scrims, a lighting umbrella etc. The variations in continuous and flash light are explained thoroughly and examples given as to which type suits what subjects.

    To give an idea of the depth of detail found in the book, just go to pages 150 and 151 on clamps but not just ordinary clamps but ‘super clamps’! These can do so many more things on a still life shoot than merely position a light as they come in handy to build backgrounds etc.

    More follows on soft and hard lighting, the colour of light sources, how to vary a lamp’s colour balance and filtration plus a useful primer on working with fluoro lighting and how to mix it with flash. Fluoros may be 20-30 per cent green in hue so you may filter the flash output with green gels and then add a magenta filter to the camera lens to bring everything back to a daylight balance.

    A superb eight page section takes you step-by-step through the shoot of an expensive Cartier watch: how to pose it, light it, position fill lamps. And then there is the fundamental advice never to perform post editing on the original digital file: duplicate! And only work on a copy.

    This book will be invaluable to the photographer who wants to move into the studio. Big time!

    Author: S Sint.
    Publisher: pixiq.
    Distributor: Capricorn Link.
    Size: 28x22x2cm.
    Length: 271 pages.
    ISBN: 978 1 4547 03273 3.
    Price: Get a price on Digital Still Life Photography at Amazon (currently 50% off).

    Post originally from: Digital Photography Tips.

    Check out our more Photography Tips at Photography Tips for Beginners, Portrait Photography Tips and Wedding Photography Tips.

    Digital Still Life Photography [Book Review]


    Digital Photography School