Category: Photography

  • Weather – Weekly Photography Challenge

    This week your photography challenge is to capture the weather, good or bad!  Too many photographers pack up their gear when the weather turn inclement but some of the most spectacular images can be had in less than ideal conditions.

    weather-photography-challenge-02

    I noticed this big thundercloud rolling over the prairies from a shopping mall parking lot. I used the sign in the shot and capture the streaming rays of the last of the sun.

    Keep in mind weather is ALL kinds of conditions including a lovely sunny day, or a bitter cold winter frost. So wherever you live in the world you do have some kind of weather. Give yourself a challenge to show it and use it to your best advantage and share your images.

    Don’t be afraid to get out and get dirty, just make sure your gear stays dry!

    weather-photography-challenge-01

    This is a closer version of the same storm, minutes later. The sun just hitting the horizon made for dramatic lighting. The lighting that happened 10 minutes later was also pretty dramatic! People were shooting this with their ipads in the parking lot out their car windows.

    Related articles that might help you get idea

    • How to photography dramatic clouds at sunset
    • The Yukon’s Northern Lights – behind the scenes
    • Include Clouds in your Landscape

    The thing with storms and crazy weather is you have to be ready. I had  my camera and tripod in the car with me so was able to capture these images. “They” say (they say a lot don’t they?) that the best camera is the one you have with you. So even if it’s your Smart phone, grab some shots. Better yet carry your camera with you, always, and be ready.

    Once you’ve taken your ‘weather’ shots we’d love to see them in comments below. Simply upload your shot into the comment field (look for the little camera icon in the Disqus comments section as pictured below) and they’ll get embedded for us all to see or if you’d prefer upload them to your favourite photo sharing site and leave the link to them.

    If you tag your photos on Flickr, Instagram, Twitter or other sites with Tagging tag them as #DPSWEATHER to help others find them. Linking back to this page might also help others know what you’re doing so that they can share in the fun.

    Also – don’t forget to check out some of the great shots posted in last week’s  Show us your Gear challenge – there were some fantastic shots, many self portraits, submitted.

    Happy shooting and have a great weekend!

    Cheers,

    Darlene-1-250x130


    Post originally from: Digital Photography Tips.

    Check out our more Photography Tips at Photography Tips for Beginners, Portrait Photography Tips and Wedding Photography Tips.

    Weather – Weekly Photography Challenge

    The post Weather – Weekly Photography Challenge by Darlene Hildebrandt appeared first on Digital Photography School.


    Digital Photography School

  • Working with a Second Shooter – Legal Ins and Outs

    The Importance of Being or Having a Second Shooter

    second-shooter-event-photography-02

    If you have ever done any kind event photography, weddings in particular, you already know how important it is to hire a second shooter. You’re trying to adequately photograph hundreds of people, often in multiple locations in the same venue. You’re good, but you’ve yet to master the finer points of time travel and being in two places at once. Similarly, if you’re still looking for your way into professional event photography, you already know how important it is to be a second shooter. This is your chance to learn from someone who has already walked in your footsteps. It is the opportunity to hone your skills, connect with a mentor, establish relationships, and start building your portfolio.

    Ownership of the Images

    But who owns the second shooter’s photographs?

    Common sense would dictate that if I am contracted to shoot an event, all of the photos taken by me or anyone working for me fall under my copyright, and therefore belong to Guyer Photography. One of the main things I learned in 14 years of practicing law, however, is that contractual situations are rarely ever common, and are often devoid of sense.

    “Whoa. Hold On. Did you just say, ‘contract?’”

    Yes, but relax, we’ll come back to that in a minute.

    For now, it’s important to know that copyright law makes two facts abundantly, and undeniably clear. First, an image is copyrighted from the moment the shutter clicks. I’m not going to get into copyright registration  in this article, except to say that registration is not necessary for copyright protection to take effect. Compose, focus, click, done. Copyright protection. That’s it. Just like magic. It is the second fact, though, that creates a potential problem for photographers and their second shooters. Not only does the copyright spring to life  at the very moment of capture, but the copyright actually belongs to the photographer who presses the button.

    I’m going to go get myself a snack while you ponder the ramifications of that point.

    guyer-photography-second-shooter-copyright-1

    Okay, so by now you’re thinking about your images showing up on your second shooter’s website and the value of those images deflating like a hot air balloon in a thunder storm. But, have you also considered that if the second shooter owns the image they may also be able to prevent you from sharing, blogging, posting, tweeting, advertising, marketing, printing,  or doing anything with it other than passing it along to the client? There are so many ways that this copyright ownership technicality can take an otherwise great working relationship and turn it sideways if you aren’t careful. It’s a scary proposition, but it’s a minefield which can be easily avoided if you just take a few simple steps to protect yourself.

    Put it in Writing

    Most photographers who hire second shooters, do so on a job-by-job basis. They are there to do what you need them to do, when you need them to do it, but technically they are independent contractors, not employees. As such, having a contract in place is essential. A photography work for hire contract will cover everything from copyright and compensation, to confidentiality and liability.

    Copyright – Retain It, But Be Fair

    This is going to be the most important paragraph in the entire contract. Here is where the photographer stakes their claim to the copyright of all images taken by their second shooter in the course of photographing the event. The language must be clear that the photographer retains all copyrights associated with the second shooter’s images. If your contract contains nothing else, make sure it contains this copyright protection. Without it, it’s your second shooter who owns the images outright, not you.

    This is also where the photographer may choose to outline what rights, if any, the second shooter has to those images. I may choose, for instance, to allow the second shooter to use his or her photos in a print portfolio but not on a website. Or, I might tell them they can have unrestricted use of the images, but not until six months after the wedding date. Another option might be to let them use the images on their website, as long as it bears a credit line that reads “Photographed for Guyer Photography.” You can come up with any set of conditions you feel to be reasonable, but you are also well within your rights to explicitly state that they cannot use the photos ever, for any reason. Obviously, this is an extreme example and I do not recommend it. A good second shooter works hard and should have something to show for it.  They also have their own communities in which they share their experiences and opinions. If word gets out that you aren’t letting your second shooters use their images, good luck finding any who want to work with you down the road.

    You are in business for a reason, and giving away your copyright is not that reason. As outlined below, there are other important elements to the contract, but getting the ownership question answered early and clearly is crucial to the survival of your business.

    guyer-photography-second-shooter-copyright-2

    The Relationship

    It is important to clearly state that the second shooter is not an employee, but an independent contractor. If they are an employee, you could be responsible for liability issues, as well as insurance and taxes. Any one of these could push you into a variety of financial pitfalls. Be clear, and spell it out. Leaving it open to interpretation will only lead to headaches down the road.

    Compensation

    This is pretty basic. You have to make sure that the contract properly reflects whatever compensation you’ve negotiated with your second shooter. Be specific. If you are paying them a flat rate for the entire job, indicate that in the contract. If you are paying them hourly, make it clear what the rate is and how many hours you plan to cover, as well as an agreed-upon rate for overtime. Events rarely stick to a schedule and often run longer than expected. If you are contractually bound to pay for six hours, plan for what happens when the reception is still going strong at six and a half hours. You don’t want to be negotiating this while you’re waiting to get the shot of the bride and groom leaving. This is also the section of the contract where you need to cover expenses like parking, meals, travel, etc.

    Gear

    This is the perfect place to spell out what gear you expect your second shooters to have with them when they show up at the venue. Whenever I hire a new second shooter, one of the first things I do is email them a complete list of my gear and ask them to send me a complete list of theirs. By detailing what is expected of them up front, I avoid unpleasant surprises on the day of the wedding.

    Delivery Schedule

    Some photographers put delivery schedule in the contract, and some don’t. I put it in, not because I feel the need to tell you how much time you have to get your images to me after the event, but to make sure you understand that I will hide your car keys in the bushes if need be to ensure you go absolutely nowhere before clearing your memory cards onto my laptop. I realize this comes off a bit harsh, but there are practical reasons behind it. First, I was burned once and had to refund an entire wedding because the second shooter lost an important memory card. Second, unless the second shooter is going to be editing the images, there’s really no reason to wait.

    second-shooter-event-photography-01

    Liability

    As long as you’re getting everything else in writing, why not take a few lines to address what happens when your second shooter breaks your equipment, or gets broken himself. What unforeseen expenses are you willing to take on and which will you make certain he understands are his personal responsibility?  If you don’t deal with it as a possibility in the contract, it will be too late to deal with it as a reality in the emergency room.

    Confidentiality and Non-Compete Clauses

    I was extremely lucky when I started out in this business. I found amazing photographers who were generous with their time, knowledge, and gear. I believe in giving back and paying it forward. If you work for me as an assistant or second shooter there is virtually nothing I won’t share with you. I’ll answer your questions, make suggestions, offer critique, and tell all my friends about you, to help get you more work. I’ll do all of that and more, right up until that moment when you break my confidence. My event is not the time or place for you to be handing out your freshly printed business cards. When you meet your friends for drinks after the job do not discuss my prices, my marketing materials, or even this contract. You’re looking for your place in this profession and I want to help. Look out for me and I’ll look out for you.

    Ideally, you and your second shooter should be able to view this contract as a mere formality. If you can’t, you may not be right for each other. But if you can, the two of you could be on your way to a long, mutually beneficial relationship. Honest and open communication of expectations is an important two-way street. Nobody wants to train a new second shooter every time an event comes along. You want someone in your corner who has your back and knows how you want things done. As much as you may like and respect your second shooter, you both need to get on the same page and make sure that reasonable expectations are met, particularly and most importantly when it comes to ownership of the photos.


    NOTE: The advice in this article and the accompanying sample contract is based on my experience as a professional photographer and does not constitute legal advice. While the principles discussed are widely applicable, every jurisdiction is different and you should consult a local attorney for specific legal advice. – JJG

    Editors note: Please keep in mind this article is the writer’s opinion on how to handle this issue. I’m sure each photographer has a different approach to hiring second shooters. If you have any suggestions or comments please add them below and let’s have a discussion. 

    Post originally from: Digital Photography Tips.

    Check out our more Photography Tips at Photography Tips for Beginners, Portrait Photography Tips and Wedding Photography Tips.

    Working with a Second Shooter – Legal Ins and Outs

    The post Working with a Second Shooter – Legal Ins and Outs by Jeff Guyer appeared first on Digital Photography School.


    Digital Photography School

  • 10 Tips to Motivate You out of a Photography Rut

    Are you stuck in a rut?

    Have you reached a point where all your photos start to look the same? Feeling uninspired? Or maybe you haven’t gone shooting for a while at all?

    It happens to us all now and then, kind of like writer’s block. When we get too comfortable with what we do, we get into a routine and everything starts to look the same. This is why it’s important for artists to break out of our own molds from time to time.

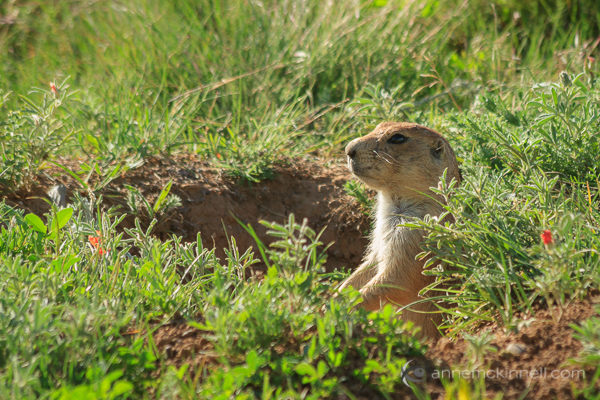
    photography rut and motivation Prairie Dog, Devils Tower National Monument, Wyoming, by Anne McKinnell

    Prairie Dog, Devils Tower National Monument, Wyoming.

    To help motivate you out of your photography rut, here are some of the best ways to get your creative juices flowing.

    10 Tips to Motivate You out of a Photography Rut

    #1 Explore other art forms

    First of all, just remind yourself that it’s okay to think about something other than photography for a little while! Allowing your mind to take some time off will relieve the stress and tension that builds the scaffolding for creative blocks. Instead, devote some time to exploring other art forms to feed your creative soul – go watch a play, listen to music, check out a museum, or read some poetry. All of these experiences feed the muse, where they become thoughts, which associate with other thoughts, to then become new ideas.

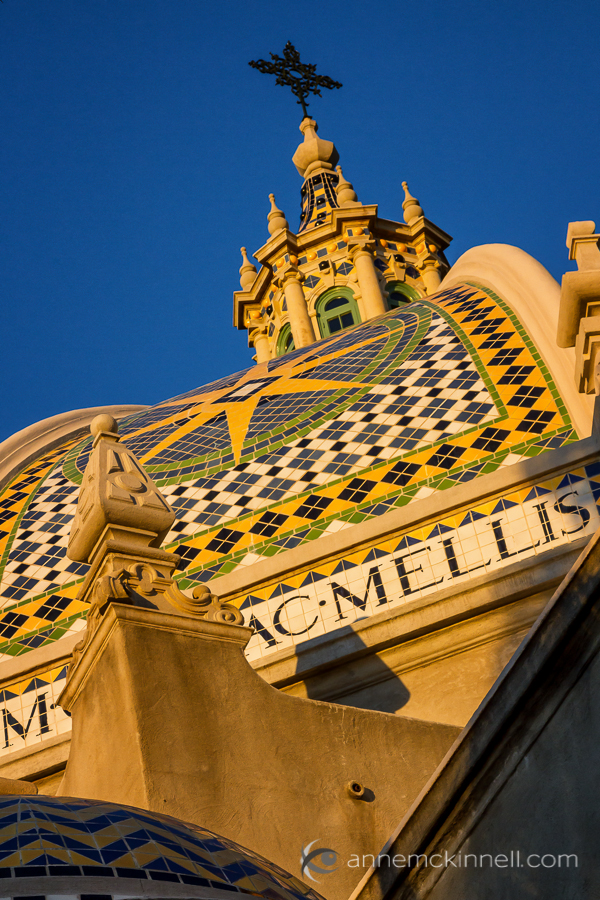
    photography rut motivation - The Museum of Man, Balboa Park, San Diego, by Anne McKinnell

    Museum of Man, Balboa Park, San Diego

    #2 Look at other artists’ work

    But how do you know what to do, if you’ve never done it before? For inspiration, see what other people are doing. Look at pictures from other visual artists that you admire, or find a photography exhibit at a local gallery or museum. Go to the library and flip through photo books. Absorb as much as you can. Which photographers do you like best? What is it that you like about each of them, and what do they all have in common? Think about how each photograph was created and ask yourself: which direction is the light coming from? What focal length, aperture, and shutter speed do you think were used?

    #3 Look at your own work

    Open up your boxes and folders of old photos – the older, the better! As you look over them, think about how you’ve progressed as a photographer. With each photo, ask yourself what you would do differently if you were taking it now, with all you’ve learned since that time. Be honest with your self-critique; admit to yourself when something doesn’t work out, but be sure to congratulate yourself when something does. Feelings of accomplishment build your confidence to create new things.

    #4 Try a new style

    There are many styles of photography – portraiture, nature, street, abstract… the list can go on and on. If you’re getting too embedded in your usual style, step out of it and try something completely different. If you usually photograph people, photograph animals or still life instead. If you’re into landscapes, you could try your hand at street or architecture photography. You could even shoot exclusively in black and white for a while. Just do something you’ve never done before!

    Try some new processing techniques too!

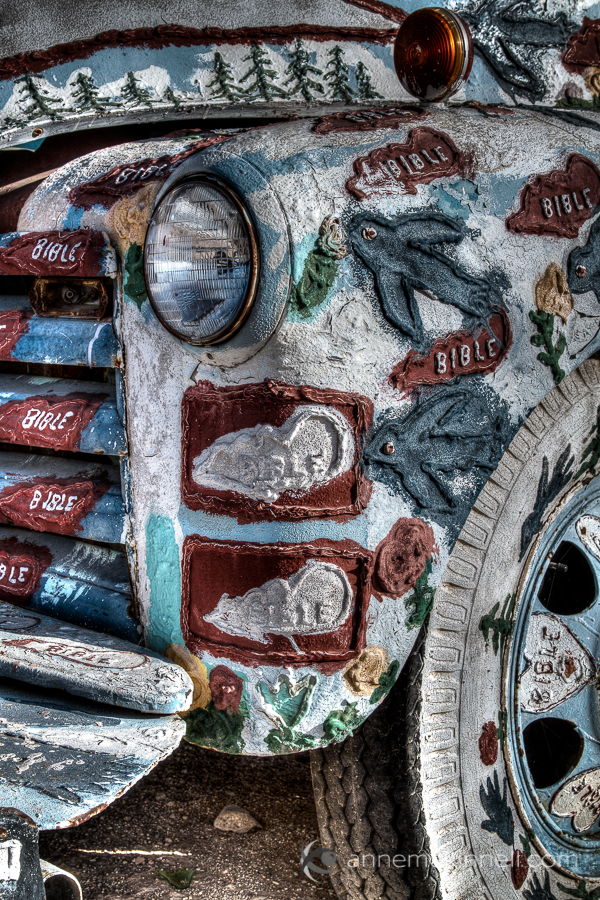
    photography rut motivation - Anne McKinnell

    Car decorated with bible quotes at Salvation Mountain, California.

    #5 Re-create an image

    If you find an image (either yours or someone else’s) that really interests you, grab your camera and do your best to emulate it. Look closely at the settings, lighting, depth of field, degree of blur (or lack thereof), the camera’s angle of view, and try mimic it with the tools and locations you have at your disposal. This is a fun and educational exercise that really gets the blood flowing through your creative brain.

    #6 Take a class

    Talking to others about photography can do wonders to rekindle your passion; seek out other photographers and try to connect with them. This could mean taking a recurring class, a one-day workshop, or joining (or creating) a local photography club. The artistic critique – the practice of discussing your work, as well as the work of others in a group setting – offers so many new opportunities to see things from differing points of view. Feedback, whether strictly positive or even constructively helpful, is very nourishing to the creative spirit.

    #7 Borrow some new equipment

    Having a new toy to play with can spark all sorts of ideas and inspiration in your imagination. If you are lucky enough to have a fellow photo friend who happens to shoot with the same kind of camera that you do, maybe you can share lenses or other accessories (flashes, etc.). You can also check with your local camera store about renting lenses and camera bodies, or borrow through a reputable online lens rental agency.

    On the other hand, if you want to go lo-fi instead, you could opt to get your hands on a 35mm camera (they’re everywhere – try a thrift store) and some film (yes, they do still make it). Limiting yourself to the 36 shots per roll forces you to think about each frame more carefully, and is a completely different way to approach photography.

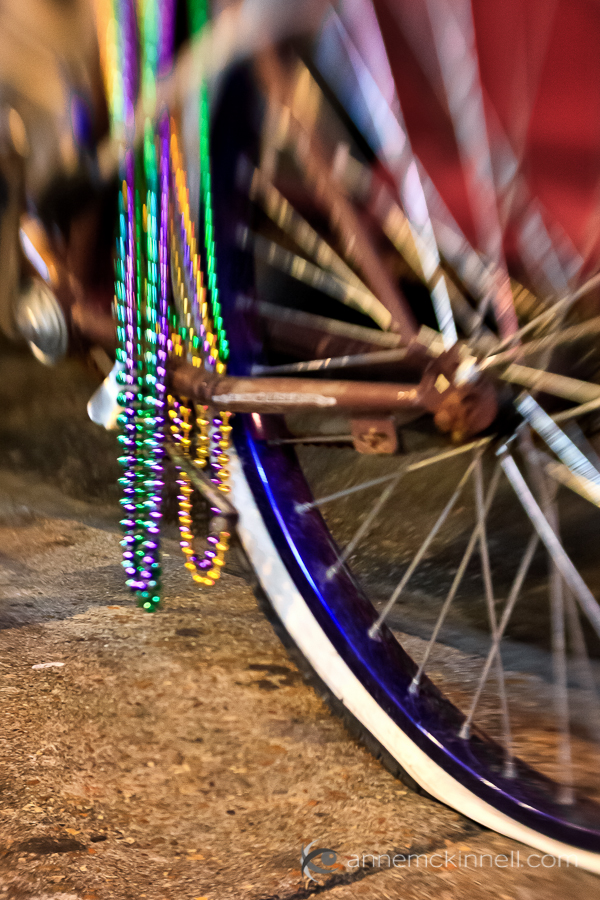
    photography rut and motivation Bicycle with flat tire and Mardi Gras beads in New Orleans, by Anne McKinnell.

    The effects in this image of a bicycle’s flat tire were achieved using a Lensbaby.

    #8 Offer your services

    If the opportunity arises, volunteering your time and skills for a good cause is a great way to challenge yourself and help others. You could run a photo booth at a local fundraiser or offer to take portraits of your friends and family, and there are countless charity organizations that would jump at the chance to have their fundraisers and other efforts documented.

    #9 Get a new perspective

    Look at the world from a different point of view. This can be as simple as getting up high – on a ladder, a building, or anything else – or down low, by crawling on your knees and belly to get a worm’s-eye shot. But it can also mean a more dramatic change, such as altering your surroundings all together. Try finding a brand new location to shoot in, whether that location is just another neighbourhood or whether you’d prefer to…

    #10 Take a trip

    This is, of course, my personal favourite way to keep my outlook fresh.

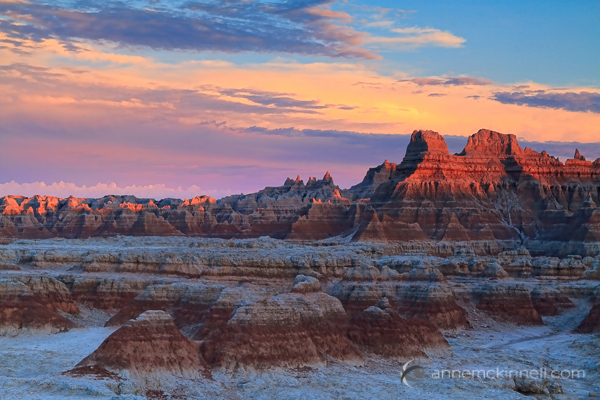
    Sunset at Badlands National Park, South Dakota, by Anne McKinnell.

    Sunset at Badlands National Park, South Dakota.

    Going to a completely new place lets you view the world with fresh eyes and renewed wonder, and lets you see all the little details that get glossed over when you’re accustomed to the place you’re in. For me, traveling and photography are almost inseparable.

    Creative ruts and blockages happen, but sometimes it’s our own hesitation that makes them seem so daunting. A lot of the time, all we need to get over that wall is to try jumping on a trampoline instead!

    Post originally from: Digital Photography Tips.

    Check out our more Photography Tips at Photography Tips for Beginners, Portrait Photography Tips and Wedding Photography Tips.

    10 Tips to Motivate You out of a Photography Rut

    The post 10 Tips to Motivate You out of a Photography Rut by Anne McKinnell appeared first on Digital Photography School.


    Digital Photography School

  • The 5 Stupidest Photography Errors You Don’t Even Know You’re Making

    They can happen to anyone who thinks he’s a good photographer. They can even happen to a professional photographer who has had years and years of experience in the industry! What…is “they?” In this case, “they” is a reference to the absolutely worst photography errors that you don’t even know you’re making. No matter how good you are or think Continue Reading

    The post The 5 Stupidest Photography Errors You Don’t Even Know You’re Making appeared first on Photodoto.


    Photodoto

  • Balancing Flash and Ambient Light Using an Incident Light Meter

    Contribution by Shiv Verma

    Balancing Exposure

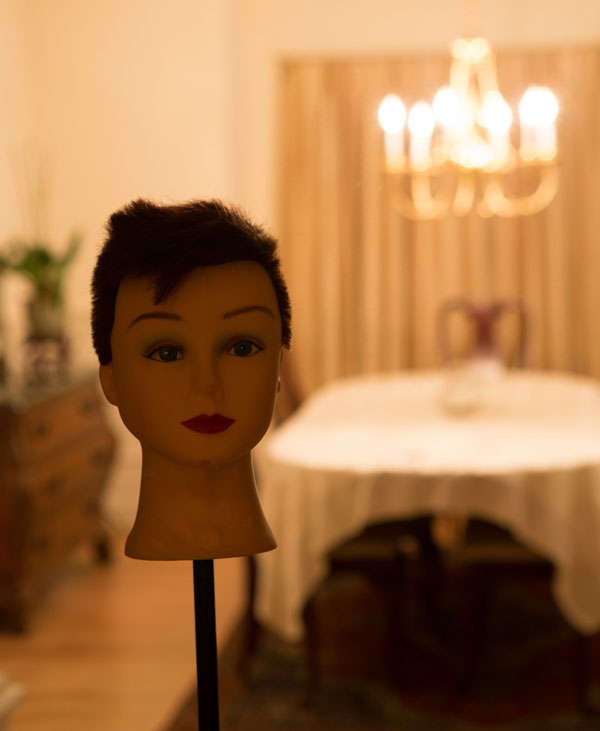
    Ambient underexposed by two stops by changing the shutter speed to 1/40th of a second

    Why is an incident meter important for flash photography?

    How often have you struggled trying to capture a well-exposed portrait in a dimly lit room or hall. All you have is the ambient light and your speedlight. With an understanding of exposure and flash techniques you can learn to successfully balance ambient and flash exposures to create exceptional photographs. Ones that look natural, without the harsh appearance of flash, and without detracting from the ambient light.

    For the most part, your camera’s meter and exposure evaluation will be just fine when you are capturing images in even light situations.  However, the onboard system will usually fail when you are trying to properly expose a subject in a dimly lit room.  In these situations, you must be in a position to balance the ambient light that is in the room ,and the light from the flash that will light your subject.  The same concept applies to photographing subjects in low light situations outdoors.

    The camera’s metering system is not capable of evaluating the two light sources and establish the correct exposure for the scene, or in other words, balancing flash and ambient light.  The camera’s meter when set to evaluative (Canon) , matrix (Nikon), centre-weighted, or spot metering works great for a balanced scene, but not when the exposure of the environment is vastly different than the exposure of the flash lit subject.

    Two examples of how in-camera metering systems fail

    Choose a camera capable of using a hot shoe or off-camera flash to follow along.  The pop-up flash is not suitable for this exercise. Keep the aperture value at f/4 and the ISO at 400 for each scenario.

    In the first image, below, the flash is set to ETTL (electronic through the lens meter system).  The camera is set on aperture priority and evaluative metering mode.

    Notice that the subject is reasonably well lit but the background is under exposed.

    Notice that the subject is reasonably well lit but the background is under exposed

    For this next example, set the meter to the spot metering mode and take the reading for the background. All other settings remain the same and the flash is still on ETTL. Notice the overall image is now underexposed.  The metering system is unable to properly evaluate the scene and the primary subject. (image below)

    flash-photography-lighting-metering-02b

    For the third image in the sequence turned off your flash, and set your camera evaluative/matrix metering.  The idea is to try and get the best exposure for the background. Make note of your shutter speed and exposure settings.

    Shutter speed 1/13th second and the background is reasonably well exposed, though not perfect

    Shutter speed 1/13th second and the background is reasonably well exposed, though not perfect

    Using a hand-held incident light meter to solve the problem

    Good hand-held meters have multiple modes: a spot metering mode which is a reflective reading (usually 2 degrees or less), an incident mode using the meter’s light dome, and one or more flash modes.  It is imperative you learn the proper use of these modes in order to be successful at flash photography.

    You want all your images to be good, not the occasional 1%.  You need to stop struggling and juggling settings to produce the image you want.  Experiments are good only if you know what you are doing and what your tools are.  Realize that there are infinite ways to light your subject with strobes, as there are infinite scenarios that your subject can be in. So learn how to expose correctly, learn how to balance ambient light and flash, but most of all, learn how to read light.

    Set up the ambient exposure first

    Let’s go back to the scene as we had above.  Set your camera to manual exposure mode. As before, keep your aperture at f/4. Next, to properly expose the room you measure the ambient light using the spot meter function of the hand held meter pointed at an area that is mid tone (approximately the same as medium grey) in the scene.  In this test case the meter indicated 1/10 sec at f/4.  Set your camera to these settings. Take a test shot to ensure your exposure is correct for the ambient light. See below:

    Test exposure using ambient light only

    Test exposure using ambient light only

    Next set the flash exposure for the primary subject

    You can experiment with off-camera flash if you do not have remote triggering capability, using an off-camera remote flash cord (for Canon, or Nikon). On-camera hot shoe flash use is not recommended as it produces harsh, flat lighting. But in order to simplify this exercise, you can use the hot shoe flash mounted on you camera.  It will be just slightly off center when you have your camera oriented in portrait mode.

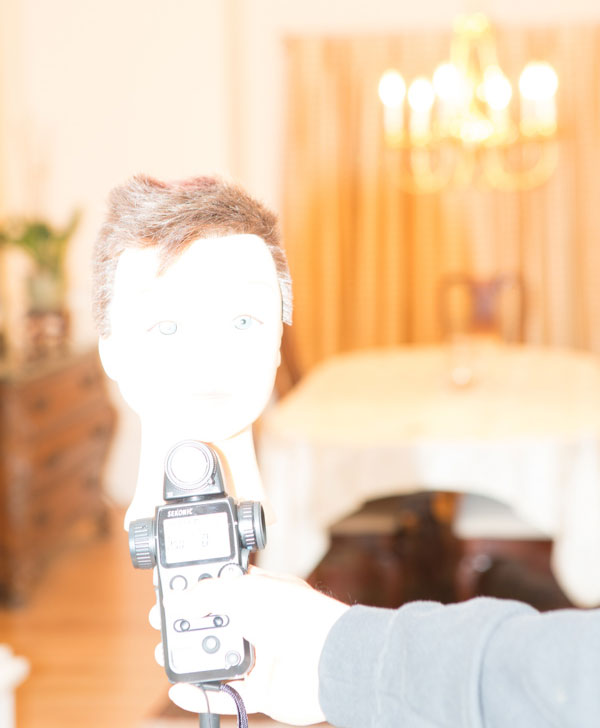
    To read the flash exposure, set the hand held meter to “incident” mode, and the exposure on the “flash non-cord” setting (do not use the corded or triggered setting). This will read the light falling on the subject when the flash is fired.  If you are using a remote trigger, then the next step is easy.  If not, then have someone assist you for the next reading.  Position the meter such that the dome points to the camera and fire the flash.  At full power, in this test case, the reading was f/19.  See the image below:

    How to point your meter and measure the flash

    How to point your meter and measure the flash, this is obviously too much power

    An f/19 reading indicates overexposure, as your camera is set at f/4 for the depth of field you want. To resolve this, you need to dial down the output of the flash by five stops (f4 > f5.6 > f8 > f11 > f16 > f19>.  Set the flash to 1/32 power which is five stops below full power. It is always good to take another test reading and adjust the distance of the flash to subject to compensate for a half stop variance (to f/19).  Now you should get a reading of f/4 and you are ready to shoot.

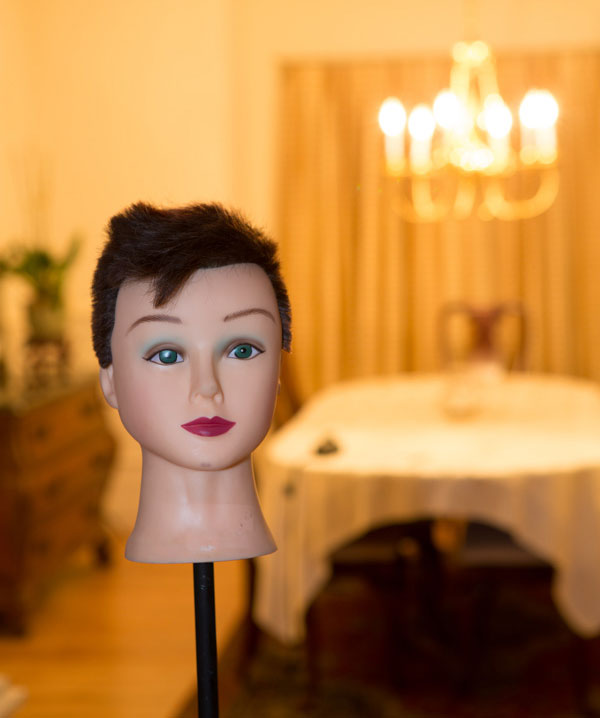
    Flash and ambient balanced successfully

    Flash and ambient balanced successfully. The exposure on the subject is perfect and the room is properly exposed too.

    Adjust shutter speed to feature the subject more

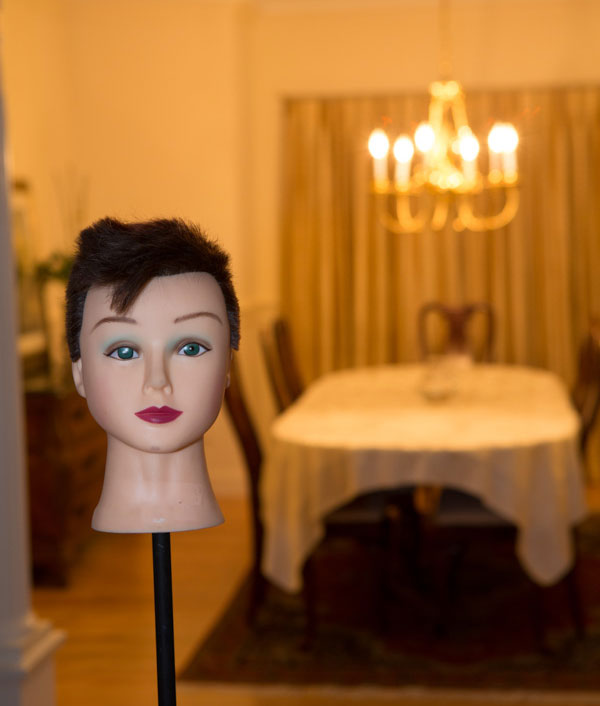
    Basically, the settings on camera indicate equal exposure and you can see that both the subject and the room are exposed correctly at an aperture of f/4.  This is good. But, if you want to emphasize the subject more, you want to underexpose the room. With the way you have your exposure already set up, this is really easy. All you need to do is increase the shutter speed by a stop, two stops, or more. This under exposes all the areas lit by the ambient light but the exposure on the subject remains the same and is always correctly exposed.

    Ambient underexposed by one stop by changing the shutter speed to

    Ambient underexposed by one stop by changing the shutter speed to 1/20th of a second

    Ambient underexposed by two stops by changing the shutter speed to 1/40th of a second

    Ambient underexposed by two stops by changing the shutter speed to 1/40th of a second

    The reason for this is that the meter reading for the background is based on the ambient light. The subject however, is lit using the flash, an instantaneous light source. Your flash exposure is controlled by its power output, increasing or decreasing the flash’s distance from the subject and by the aperture setting on your camera. Typically, flash exposure is not affected by shutter speeds as long as your camera’s shutter speed is set to the flash sync speed or slower. As a result, changing the shutter speed affects the ambient light exposure (the exposure of the room) without affecting the flash exposure (the exposure of the subject).

    Summary and action plan

    In conclusion, relying on your camera’s metering system, be it evaluative, spot or centre-weighted, never gives you the kind of exposure control that you can achieve when using a good hand-held incident light meter.

    If you have additional tips or tricks please share them in the comments below, and if you haven’t tried your flash off the camera yet why not give it a go!? Grab yourself a light meter and try it!


    shiv-smShiv Verma, is a photographer, educator and technologist and lives in Wrentham Massachusetts. He is an avid wildlife and commercial photographer and conducts photo workshops and tours worldwide. You can check out more of his work on his website at: www.shivverma.com. Follow him on:  Google+, Facebook  and Twitter  

    Post originally from: Digital Photography Tips.

    Check out our more Photography Tips at Photography Tips for Beginners, Portrait Photography Tips and Wedding Photography Tips.

    Balancing Flash and Ambient Light Using an Incident Light Meter

    The post Balancing Flash and Ambient Light Using an Incident Light Meter by Guest Contributor appeared first on Digital Photography School.


    Digital Photography School

  • Trade Secret Cards by Nice Industries – a Review

    What’s the Most Important Part of Photography?

    The Chase Jarvis Portraits set takes you behind the scenes on the lighting solutions for several national and international campaigns.

    Trade Secret flash cards by Nice Industries – lighting tips on the go! 

    If you talk to five different photographers, you’ll get five different answers to the question, “What’s the most important part of photography?” One might tell you proper exposure, while another might insist that it’s composition. Numbers three and four might debate the need to connect with the subject, but as the self-appointed fifth photographer in this roundtable, I’ll have to insist on lighting.

    Obviously, there is no right answer. The truth is, they all play a vital role in successful photography. We can debate the meaning of “successful” another time, but for me it really does come down to knowing how to see the light and make it work for you.

    Lighting is Key

    As both photographer and photography teacher, I’ve reviewed a lot of books on lighting over the last several years. Some have been amazing and truly elevated my photography, becoming well-worn friends on the shelf. Others have been epic disappointments. Regardless of success or failure, though, I applaud them all for the effort. They all tried to bring something new to the conversation.

    An unfortunate reality that all of these books share, however, is that you really can’t take them with you on a shoot. Think about it. The very last thing you need is to be standing there in front of a client, basically saying, “I’ll be with you in a minute. I just have to look something up.” Secondly, even if you’re experimenting on your own for future client work, dragging a lighting book along with you out on location is just plain cumbersome and inconvenient.

    That’s why I love these Trade Secret Cards from Nice Industries.

    trade-secret-cards-001These books we’ve been talking about are full of helpful lighting diagrams, set side-by-side with anecdotes and instruction from the photographers about how they set up the shots. But what if you could have all that great information in a more convenient, user-friendly package?

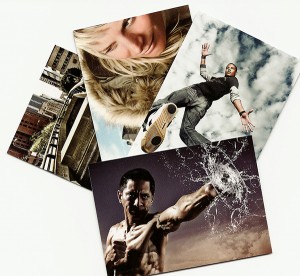
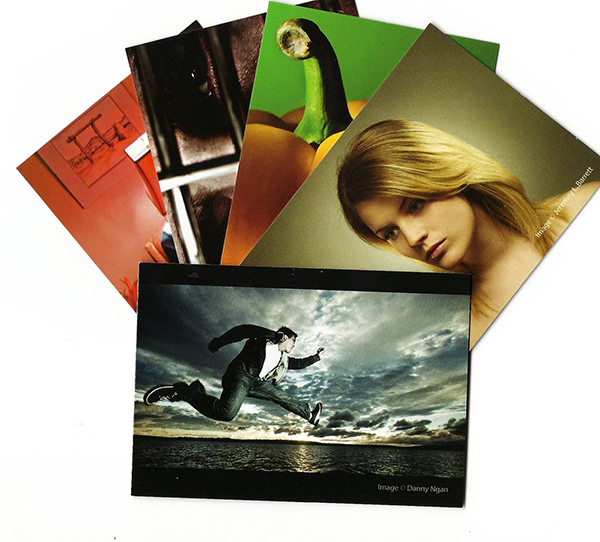
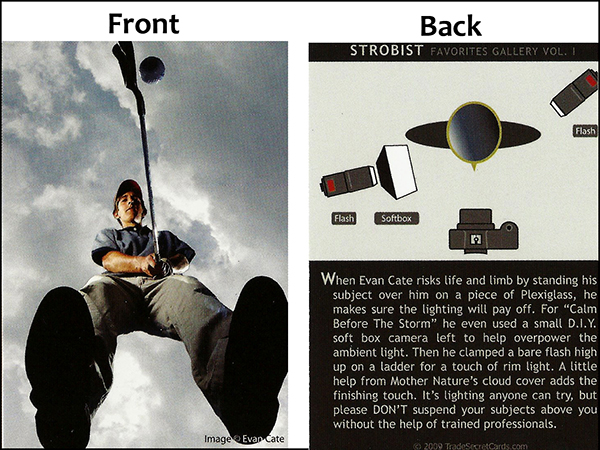
    Trade Secret Cards provide just such a package and are available in two sets:  Strobist or Chase Jarvis Portrait Sessions. Each contains 24 high-gloss “trading cards” with a photo on one side, along with the lighting diagram and a “How-They-Got-the-Shot” story on the other.

    The Strobist set runs the gamut from portraits to products to landscapes to light painting, and lots of cool stuff in between. Each of the 24 photographers’ lighting diagrams and tips were carefully selected to help take your lighting to the next level. The Chase Jarvis set gives you a front-row seat, as he walks you through a collection of portrait sessions he designed and shot for both his personal work, as well as several national ad campaigns, including the Hasselblad Masters Series.

    trade-secret-cards-004

    Each deck of 2.5″ x 3.5″ wallet-sized cards gives you instant access to quality tips and information aimed at a single goal– making you a better photographer. Printed on thick, semi-durable card stock, each image has been reproduced with a high-quality resolution and UV finish. With the photo on one side and all the info you need on the other, these easy-to-follow cards are also perfectly portable, making it easy to drop a card or two or ten in your bag and head out to tame the lighting beast.

    If you’re a photographer who really knows your lighting, these trading card-sized refresher courses are a great way to stay sharp. If you’re still learning, these images will inspire you to experiment and see why lighting really is the most important element of photography.

    Post originally from: Digital Photography Tips.

    Check out our more Photography Tips at Photography Tips for Beginners, Portrait Photography Tips and Wedding Photography Tips.

    Trade Secret Cards by Nice Industries – a Review

    The post Trade Secret Cards by Nice Industries – a Review by Jeff Guyer appeared first on Digital Photography School.


    Digital Photography School

  • Portrait Gear Essentials – by dPS eBook author Gina Milicia

    portrait-gear-essentials-02

    My Portrait Gear Essentials – Images by Gina Milicia

    What’s the best equipment for taking amazing portraits?

    portrait-gear-essentials-12

    I’m often asked what the best equipment is for taking great portraits. Many people assume that a great camera will take great portraits. That is simply not true. A quick scan through Flickr, Instagram or any photo sharing site will reveal thousands of beautiful portraits, some taken on mobile phone cameras, and yet others using very basic entry level equipment.

    A great photographer can take great photos using any kind of camera. A great camera in unskilled hands will still deliver mediocre photos. Before you invest the big bucks in high end gear take the time to learn the craft first.

    I started out my professional career with a borrowed camera and very cheap lens. I worked this way for a few years and then invested in a high end second hand camera and lens. If I were starting out again now I would do exactly the same thing. My advice on buying a camera is always buy within your means and upgrade as your skills start to improve.

    Most girls love buying shoes and handbags. I admit I’m a self-confessed gear-a-holic!

    It’s taken me 25 years to accumulate this gear. My gear is subjected to punishing workouts, with my average shoot being approximately 2000-3000 images. I need gear that is built to last and won’t curl up and cry for its mama when I push it too far.

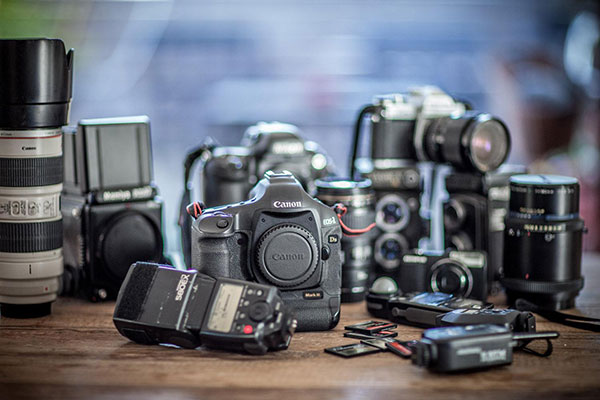
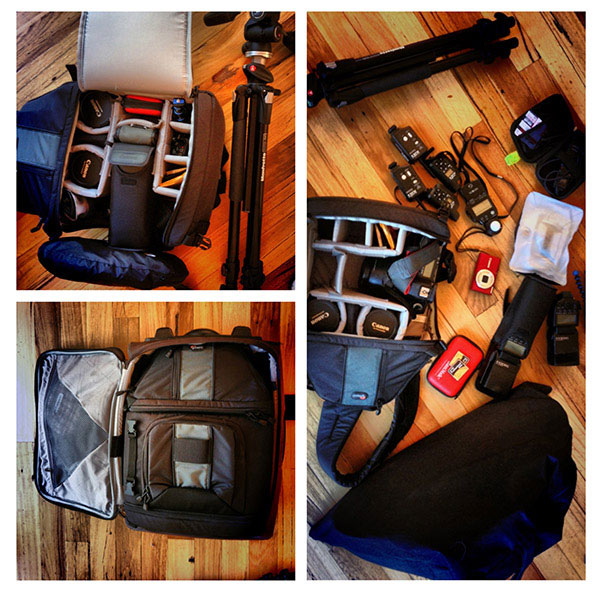
    My portrait gear essentials – what’s in my bag

    Cameras

    • Canon 1Ds Mark III – this is a pro-level camera, so it’s more expensive and a lot heavier but it’s designed to survive heavy usage. I would say I use this camera for 80% of my shooting.
    • Canon 5D Mark II – I’ll favour this camera body if I know I have to shoot with a high ISO (in very low light or on a night shoot). At 400-1600 ISO this camera is amazing.

    Lenses

    I like to work with a focal length between 70mm and 200mm. With a long lens, facial features are slightly compressed, which is really flattering for portraits.

    The workhorse

    Canon EF 70-200mm f/2.8L IS lens – this lens is my workhorse and I use it for 70% of my shoots. It’s fast, sharp and consistently gives amazing results.

    I like working with zoom lenses because they give me the luxury of zooming in to get tight head shots and mid-shots, or zooming out to get full length shots. All without moving my camera. As a result, I can stay out of my model’s personal space, which can be intimidating or confronting, and keep the momentum of the shoot flowing.

    The traveller

    Canon EF 24-105mm f/4L IS lens – this is the lens I use for events, lifestyle and travel shoots. It’s light, compact and my go to lens when travelling.

    Makes my heart skip a beat

    Canon EF 85mm f/1.2L lens – it’s expensive, heavy, and slow to focus but I quickly forget all of this when I see the gorgeous results. I love using this lens for head shots, beauty, portraits, and events.

    This lens will give amazing results in very low light conditions and the shallow depth of field will eliminate any background clutter giving me the luxury to use it lens in any location.

    Tripods

    portrait-gear-essentials-11

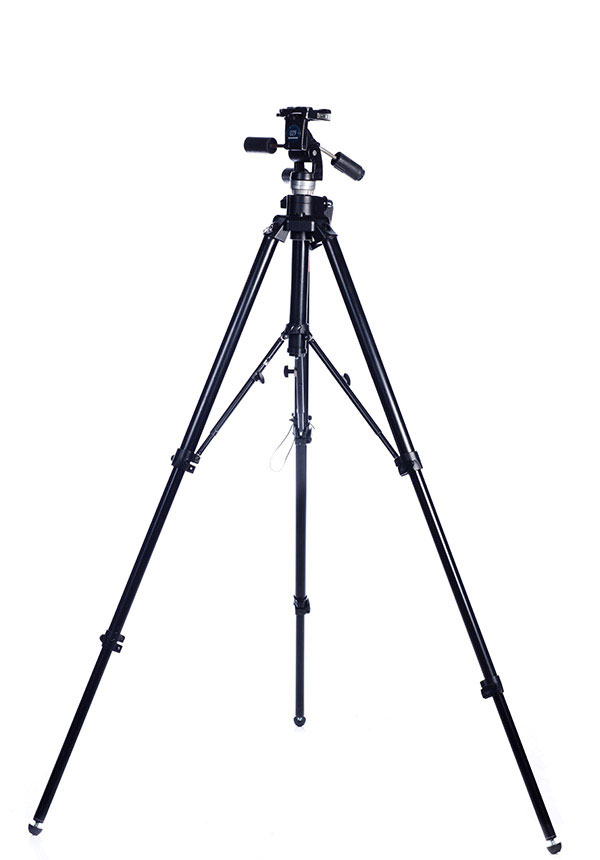
    Most of my portraits are shot using tripods. I like to set up my shot, position my model and then focus on their expression. Keeping my camera fixed in one position allows me to do this and really suits my shooting style.

    Having my camera on a tripod also allows me to focus 100% of my attention on my model and frees me up to gesture with my hands, or step away from the camera without breaking the shot.

    I have four tripods:

    • Manfrotto 190XPROB – small, light-weight tripod that I use when I travel
    • Manfrotto 475B Pro – great sturdy tripod for location shoots
    • Manfrotto 058B – heavy duty tripod for studio use
    • Manfrotto 679B Monopod – for film, TV stills, and theatre

    portrait-gear-essentials-07

    Remote flash triggers

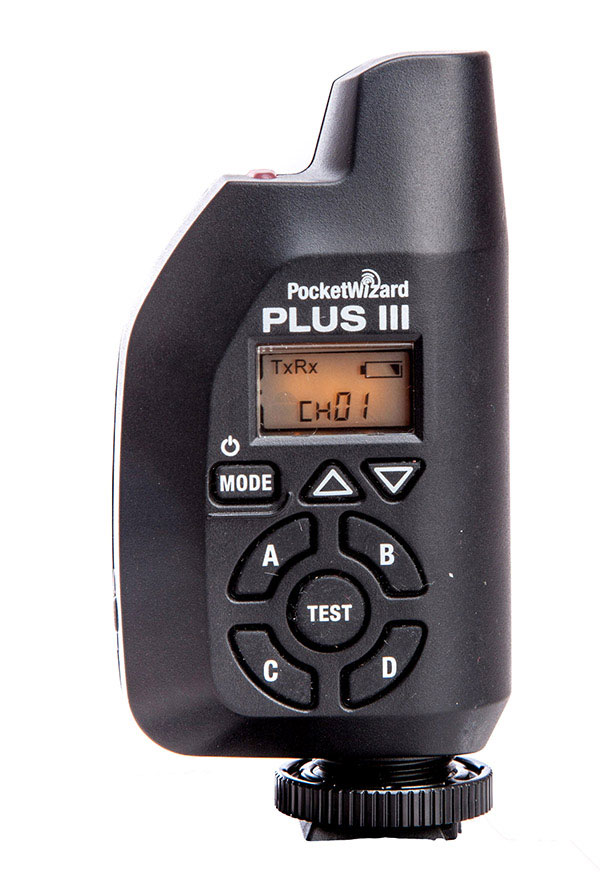
    PocketWizards

    I have six PocketWizard remote flash triggers because I’ll often have three different sets running. I love the PocketWizards because they are reliable and rarely misfire.

    Light meter

    This model isn't available any more, try one in the Sekonic line

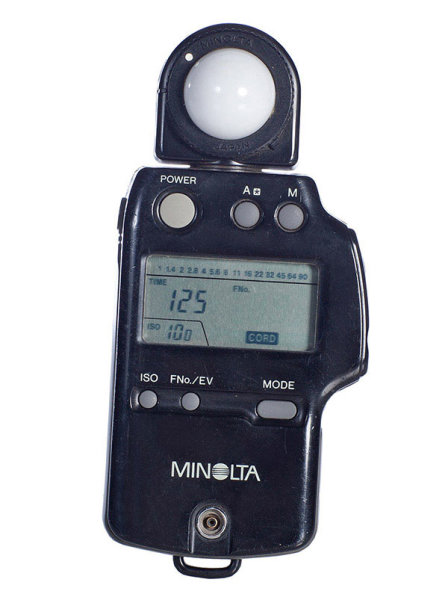
    I believe the light meter is an essential tool in good portrait photography and would never leave home without one. When you use a light meter you know you have most accurate readings.

    Minolta IV (not available any more) – I’ve had this light meter for over 23 years now and I’ve grown rather fond of it. As a basic meter it’s excellent, reading ambient light or flash, and it’s perfect for most lighting conditions.

    Lighting

    Speedlights

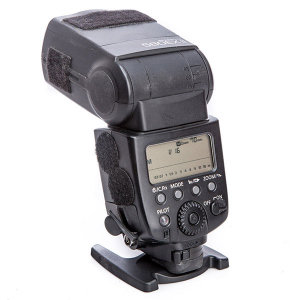
    portrait-gear-essentials-01I use a speedlight off camera for about 20%-30% of my photo shoots. Like any piece of gear, they have their pros and cons, but they can light you out of some tight spots (quite literally).

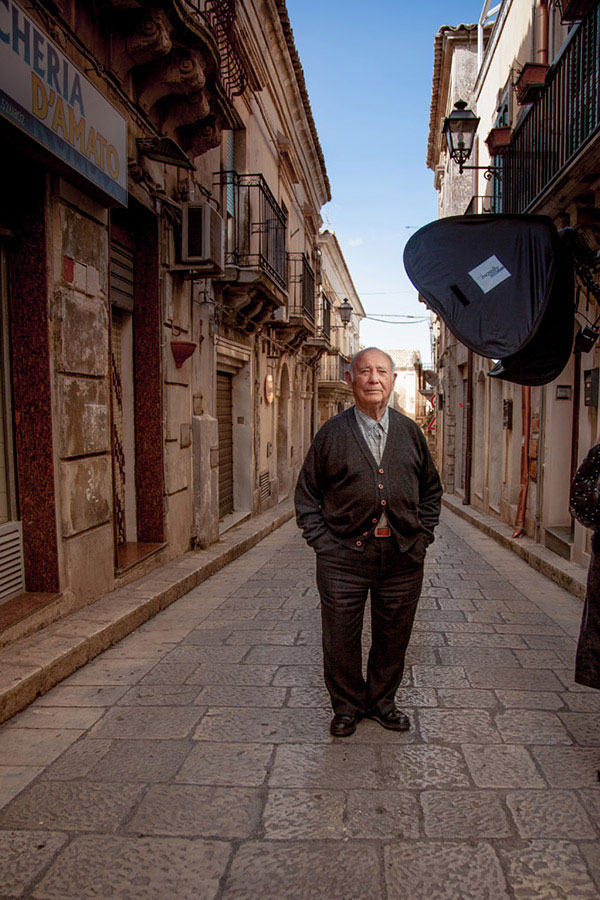
    I use Canon 580EXii speedlights as my preferred lighting when I am travelling or need to work quickly or in tight locations. I will also use a Photoflex medium size softbox that folds flat, and is perfect for lighting one person and couples.

    portrait-gear-essentials-09

    Portrait of Vito shot on location at my Sicily Photography workshop

    My complete travel location portrait photography kit:

    • One Canon 5D MKII (much lighter than the Canon 1Ds Mark III 
    • Two Canon 580EXii speedlights
    • Four PocketWizard remote flash triggers
    • Six 8GB memory cards. I prefer smaller cards because I don’t like to have an entire day’s worth of images on one card. I’ve had several cards fail over the years ,and also lost one once.
    • Minolta IV light meter (this model is no longer available, try one in the Sekonic line)
    • Canon EF 24-105mm f/4L IS lens
    • Canon EF 85mm f/1.2L lens  or Canon EF 70-200mm f/2.8L IS lens

    portrait-gear-essentials-04

    Studio lighting

    Elinchrom Lights

    60% of my shoots require studio lighting, so I need heavy duty monolights with fast recycle times, and a high quality of light. When I’m working on location, I still need a great quality of light and I give my Elinchrom Rangers a work out in those situations.

    portrait-gear-essentials-06

    Behind the scenes for Piperlane.com

    Large Softboxes

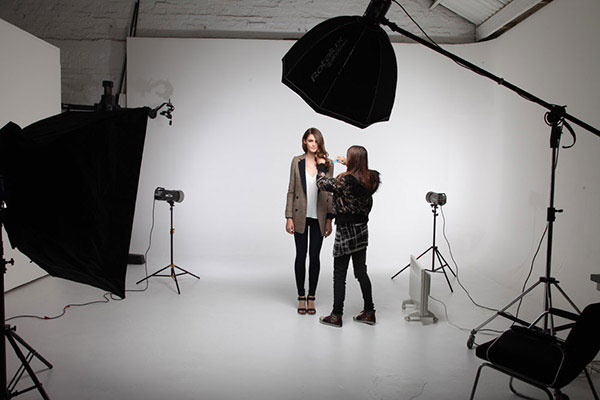
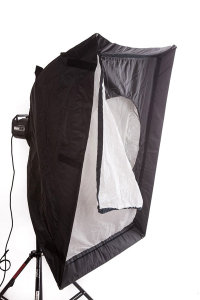
    portrait-gear-essentials-08If I could only pick one light modifier to take to a deserted island, it would have to be a softbox. Small, medium or large this little puppy is my go to light source for 80% of my shoots.

    Why? The quality of light is soft, flattering and malleable. Changing the angle and proximity of the softbox to the subject, easily changes the quality and direction of light.

    A softbox, I feel, recreates the effect of soft daylight through a window.

    I think what I like most about softboxes is that they are subtle. Highlights gently merge to shadows.

    If it’s a studio shoot I love using my Chimira Medium softbox, with white reflective interior. The white interior creates a softer light and this particular softbox has an extra layer of diffusion on the inside, adding even more softness to the light.

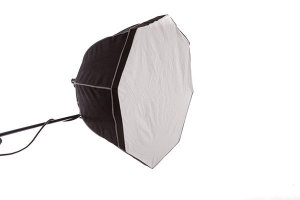
    portrait-gear-essentials-05Rotalux Deep Octabox

    Rotalux deep octabox would be the result if a softbox married a beauty dish and made babies. This, as far as I’m concerned, is a match made in heaven for lighting single person portraits.

    Laptop

    MacBookPro 15”

    portrait-gear-essentials-10

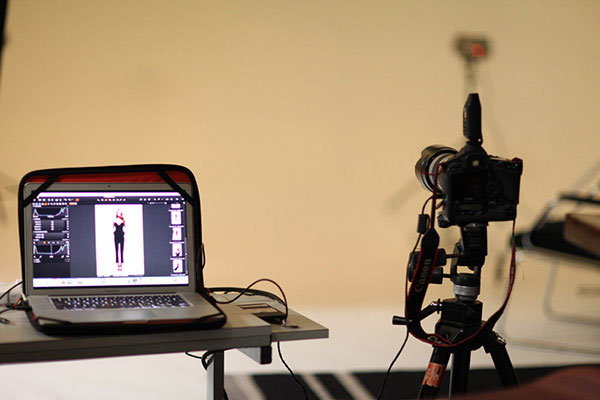
    Shooting tethered to a computer has made my life as a photographer so much easier, because I can use my computer as a teaching tool. ?I can show my model a series of great images, with slightly different poses. We can talk about how the poses are different and what I want them to do in the next series. They can see what I mean and it makes more sense, straight away.

    Note from the Editor

    For more information on how Gina works and does her portraits, pick up her dPS eBooks “Portraits Lighting the Shot” and “Portraits Making the Shot”

    You also might want to grab our brand new eBook “Photo Nuts and Gear – know your gear and take better photos” if you’re trying to decide what equipment you need to purchase. Spend a little on an eBook, so you don’t spend a lot on the wrong gear.

    Post originally from: Digital Photography Tips.

    Check out our more Photography Tips at Photography Tips for Beginners, Portrait Photography Tips and Wedding Photography Tips.

    Portrait Gear Essentials – by dPS eBook author Gina Milicia

    The post Portrait Gear Essentials – by dPS eBook author Gina Milicia by Gina Milicia appeared first on Digital Photography School.


    Digital Photography School

  • How to Calculate Your Cost of Doing Business – And Other Necessary Numbers

    Cards on the table time. Math and I are not friends. Never have been. From those dreaded flash cards in elementary school to my scary geometry tutor in high school, math and I have always been at odds with each other. In college, when it was suddenly optional, I avoided the subject like the plague. Even in my professional life, I’ve managed to get a handle on what I need to know and not much else. Thankfully, this mutual disdain that the mathematical arts and I share, seems to have skipped a generation. My 12-year-old son is doing high school algebra this year, and has been instructed by my wife to never, EVER, ask me for help. Ever.

    Into every life, however, some math must fall, even those of professional creative types like photographers. Most of us don’t have the resources to hire business managers or year-round accountants to crunch the numbers, tell us what they mean, and how they need to change (although hiring such an individual is top priority when I win the lottery this weekend). Since we are left to our own mathematical devices, it is crucial for us, as photographers, to have a solid grasp on the numbers and how to calculate them. A common mistake among photographers is that they don’t take a methodical approach to calculating things like their creative fees, licensing fees, or even just the photography itself. Many seem to just pluck a number out of thin air. The difference between knowing, and not knowing, how to do this properly can be the difference between staying in professional photography or going to work at Starbucks, and I don’t drink coffee.
    cost-of-doing-business-digital-photography-school1

    Cost of Doing Business – What it Is and How to Figure it Out

    Before you can even think of  putting a number on any of your services, you need to have a solid grasp and understanding of your cost of doing business (may be referred to as CODB). By the name alone, you’d think this would be an easy calculation. It certainly can be, but only if you take a logical, comprehensive approach.  Your cost of doing business is the result of an equation. Non-reimbursable expenses, plus your desired salary, equals your total annual costs. Your total annual costs divided by your number of billable days equals your cost of doing business.

    I can practically see your eyes glassing over right in front of me. Stick with me, all will be made clear.

    What are “non-reimbursable” expenses? These are the costs associated with keeping the lights on and the doors open. Rent, computers, phones, internet, insurance, gear, office supplies, etc., fall into this category. The American Society of Media Photographers has a great online calculator to help you with this, as does the National Press Photographers Association.

    Obviously, we all want our salaries to be as high as possible. But, as with all things, you need to be realistic. Would you rather have the occasional, higher-paying assignment and sit around worrying the rest of the time, or maybe price yourself a little lower and work more consistently? Be realistic.

    Billable days is exactly what it sounds like. As photographers, we don’t really work a “normal” week. We work early in the morning, late at night, on weekends, and everything in between. That doesn’t mean, though, that we don’t need time off. I know that I keep throwing the word “realistic” around, but it’s crucial for coming up with accurate numbers. There’s no way you can profitably work seven days a week, 52 weeks a year. Sick kids, your wife’s birthday, your anniversary, vacations, emergencies, car repairs, stopping to smell the roses and not just photograph them – there are going to be plenty of days where you can’t work or simply don’t want to. Being able to set a number of billable days is important to setting your fees (and maintaining your sanity).

    Instead of thinking in terms of “billable days,” you may find it easier to think in terms of your number of shoots per month. You can download a basic Monthly Cost of Doing Business Worksheet here. As you can see, it requires taking a long, detailed look at your monthly expenses, both professional and personal, and it is by no means an exhaustive list. Everybody’s list will be different. You may find it useful to spend one full month accounting for each and every expenditure and seeing where it falls on the worksheet. Once you have a handle on your expenses, dividing that number by the total number of photo shoots you can do each month determines your monthly cost of doing business.

    Once you’ve properly calculated your CODB, you are in a must better position to do the same for your creative and photography fees.

    Setting Creative Fees

    Unfortunately, this is not a fee that you can charge just for sitting around and thinking creatively. If it was, I’d be a multi-billionaire living in a medieval castle on my own private island. Instead, the creative fee is charged by the photographer for his or her efforts in bringing a project to a successful completion. In addition to time spent, the creative fee may be calculated to include factors like the photographer’s experience, special expertise, or anything that contributes to the overall creative effort. While this is where some of the intangibles like reputation, etc., can come into play, this is no place for your ego. You still have to start with your CODB. It is the foundation of your house. If it’s weak, everything else is going to crumble around you. You may be left with some nice stuff, but without the walls and the roof, you won’t have it for long.

    cost-of-doing-business-dPS2

    Pricing Your Photography

    KNOW YOUR MARKET

    Just as with the salary variable in calculating CODB, we all want to be able to price our photography as high as possible, but if you are going to succeed over a sustained period of time, you also have to be realistic (there’s that cursed word again!). For starters, you need to know what the market will bear.

    A photographer in Manhattan is likely to have much higher expenses and overhead than a photographer in Detroit. On the other hand, a photographer in a more remote area might be able to charge similar rates to the New York photographer because the client may have fewer local options. Photography is a service industry and is subject to the same prevailing economic factors as any other. This is where research, networking, and relationships come into play. If you aren’t sure what your market will bear or why, you absolutely need to find out. Talk with other photographers, not only within your market, but within your specialty as well. If you are a commercial portrait photographer, knowing the value of wedding photography isn’t going to do you a whole lot of good.

    KNOW YOUR CLIENT

    You should also remember that you can (and should) charge different amounts for the same photograph under different circumstances. I may photograph a cup of coffee for a local coffee house identically to how I would photograph it for Starbucks, but guess who’s paying more for it?

    KNOW YOUR PRODUCTION COSTS

    Another factor in pricing your photography has to be your production costs for the specific assignment. Recurring production costs will show up in your cost of doing business analysis, but individual shoots can, and often do, require job-specific expenses. Will you have to rent equipment or studio space? Will you have to cater meals for your models and crew? Will you need to secure permits in order to shoot at your preferred location? These are just a few of the questions you need to ask yourself in order to evaluate your own investment in the shoot. How much do you have to make on this particular shoot in order to cover not only your CODB, but any additional expenses that it requires?

    Convincing the Client

    You already know you’re good. Now it’s time to make sure the client knows. You can have your Monthly CODB Worksheet all filled out. You can know everything about your market and specialty. You can even know how much your time is worth down to the penny. To the uneducated client, though, the biggest question they want answered is, “Why does this cost so much?” You need to be ready with an answer and it had better be a good one.

    Now is the time for confident, not cocky. You need to be ready to explain exactly why your quote is what it is. Remember that old line, “Never let them see you sweat”? The moment a prospective client senses a lack of confidence, you’ve lost them. You already know the question is coming, so be prepared with a good answer. As with all things client-related, you have to listen to them and be ready to lay their objections and concerns to rest. Yes, I am an artist, but I’m also a businessman (I’m sure much to the chagrin of my high school geometry tutor). I have a family to feed and I can’t always be drawing lines in the sand around my artistic principles. If that means looking for compromises, so be it. If I know my CODB, though, I’m in a much better position to negotiate those compromises and create added value for the client.

    Knowing When to Walk Away

    Your cost of doing business is not just a number. It’s a ruler, against which you can measure many things, including the potential success or failure of a project. Remember that this number is a minimum. The rock bottom number that you need to meet on every job just to make sure your business survives another month. If this client isn’t going to let you do that, you have to be prepared to walk away. Do it nicely. Do it respectfully. Agencies, art directors, publishers all talk to each other. What do you want them to say about you?

    Despite our differences, math and I have reached a sort of detente. I’d describe our relationship as being more of cautious respect than admiration, but we work well enough together to get the job done.  Now if my 12-year-old could just graduate college already, and become my bookkeeper, I’d be all set.


    Post originally from: Digital Photography Tips.

    Check out our more Photography Tips at Photography Tips for Beginners, Portrait Photography Tips and Wedding Photography Tips.

    How to Calculate Your Cost of Doing Business – And Other Necessary Numbers

    The post How to Calculate Your Cost of Doing Business – And Other Necessary Numbers by Jeff Guyer appeared first on Digital Photography School.


    Digital Photography School

  • Image-editing Tools for the Photographer in All of Us

    Few hobbies in the United States have become more popular in recent years than photography, with iStockPhoto and KRC Research suggesting that two in five Americans pursue the art of taking snapshots for fun. Knowing the basics of a DSLR camera or which interchangeable lens you need can be helpful with pure photography, but with excellent-quality smartphone photos and free Continue Reading

    The post Image-editing Tools for the Photographer in All of Us appeared first on Photodoto.


    Photodoto

  • First Impressions on Flickr’s New Book Publishing Service

    I Just Published My First Book

    I just published my very first book.

    I’ve been meaning to do a book forever and today I finally did it. Flickr launched their new book publishing service today and I wanted to try it out, so I created a 200 page book called America in Progress.

    The book is comprised of 200 photos I hand selected from the almost 88,000 I’ve got published to Flickr. It cost me $ 137.94.

    The basic charge for the new Flickr book is $ 34.95 for a 20 page book. Additional pages are 50 cents each with a 200 page maximum. In my case shipping was another $ 12.99. ($ 34.95 for the basic book + $ 90 for an extra 180 pages + $ 12.99 for shipping).

    The Breakdown on What My New Book Costs
    My book cost me about $ 138 for the maximum 200 page book.

    The book should arrive in the next 5 to 7 business days.

    It took me about 2.5 hours to make the book. It’s a photo only book and the only text I was able to add was the title of the book — which is on the cover and on the spine. I didn’t see any way to change the font of the title so I went with what they offered by default.

    The Breakdown on What My New Book Costs
    My book should be here in 5 to 7 business days.

    There were a lot of glitches when I built my book — which is to be expected when you try out a new service within the first hour of launch. The first book I tried to create sent me to a non-existent page when I tried to check out. The publishing page was also running very slowly for me at one point. It would take me about 45 seconds to add a new page to my book. My session crashed and when I refreshed the page it went faster. Fortunately Flickr auto-saves the progress on your book as you go, so I didn’t lose any work when this happened.

    The Layout Tool For Flickr's New Book Service Was Super Easy to Use
    Despite some glitches, Flickr’s layout tool for creating books was really easy to use.

    I was also warned when I tried to check out that there were print quality alerts on some pages of my books, but I carefully checked every single page and didn’t see any alerts anywhere. It would be nice if you could click a link which would tell you what pages specifically Flickr was concerned with.

    As far as book publishing goes, it was really easy to create the book. I could either pull from my Flickr photostream or from any of my sets. You just drag and drop the photos into a book publishing sort of layout and you can move pages around so that things go where you want them.

    Because I have so many photos in my Flickrstream and so many sets in my Flickrstream, I found it difficult to find all of the photos that I wanted to use in the book. Most users won’t have 88,000 Flickr photos though, so it should be easier for them. It would be nice if Flickr also offered a third way to find photos to publish, search.

    The book will be 11” x 8.5 and will be a hardcover. Flickr says it will be printed on “premium white proPhoto paper with a Lustre finish,” and will come with a dust jacket.

    If you change your mind on buying the book after you create it and check out, you have an hour to cancel your order.

    I will report back more when I actually get the book as to the quality of it compared to other self publishing group books I’ve been involved with. Books can only be delivered to the Continental U.S.

    I think it’s smart for Flickr to get into the book publishing business (and their timing is pretty good with the Holiday season approaching). It’s a natural way for them to grow and make money. I suspect that today’s offering is only the beginning. I could see Flickr also offering a way for book publishers to sell their books as well in the future, like blurb offers.

    For more feedback on this new book service from Flickr you can check out this thread in the Flickr Help Forum.

    When I First Tried to Check Out Flickr Took Me to a Non-Existent Page
    An error sent me to a weird non-existent page when I first tried to checkout and pay for my book — Flickr seemed to want to send me to giantsouthern’s photostream instead.


    Thomas Hawk Digital Connection