Category: Photography

  • 12 Photography Documentaries You Should Watch

    Everyone loves well-made, interesting photography documentaries that share secrets and allow us to take a glance behind the scenes of famous, influential photographers of the past. Similar videos possess magic to impress and inspire a person to work toward his own achievements. Black-and-white film gives documentaries a special charm and makes us feel the spirit of days gone by. A Continue Reading

    The post 12 Photography Documentaries You Should Watch appeared first on Photodoto.


    Photodoto

  • Why I Moved Comments to Twitter

    The traditional blog commenting format may be convenient, but it is in many ways a broken system.

    The last couple of posts have been an experiment of sorts, deigned to help me regain some of my sanity. I have turned off comments and instead created a Twitter hashtag around which to group post-related discussion.

    And if the early results are any indication, things are already getting better. Here is why I am not going back.

    Read more »
    Strobist

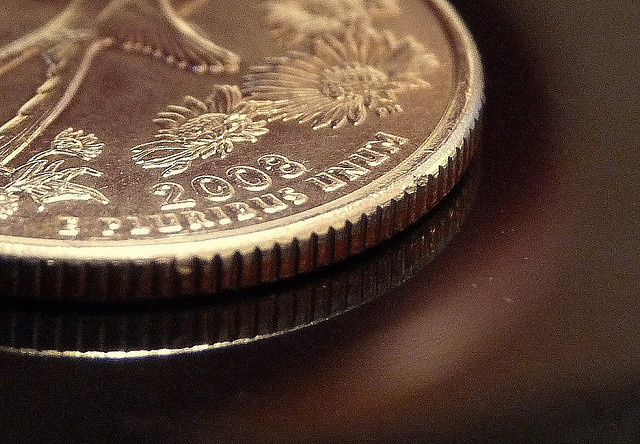
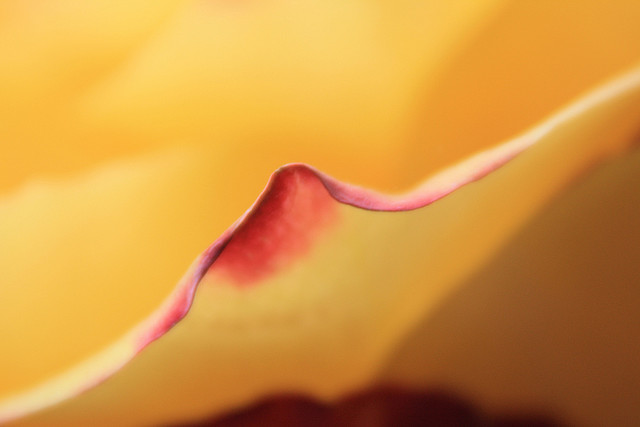
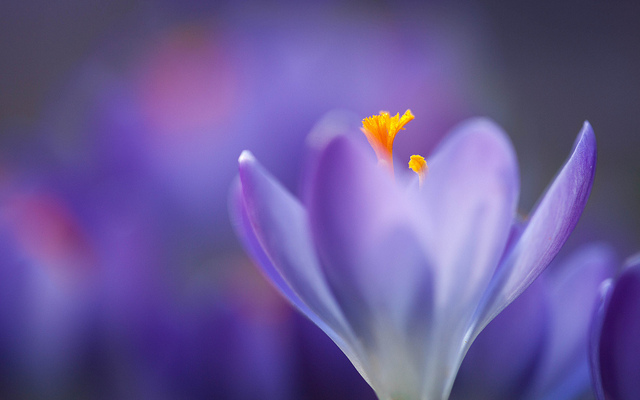
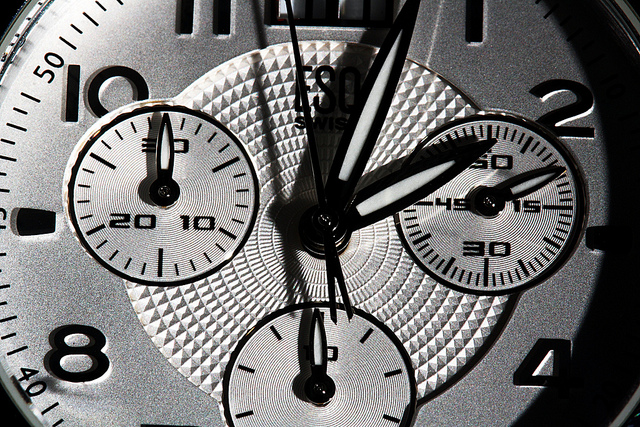
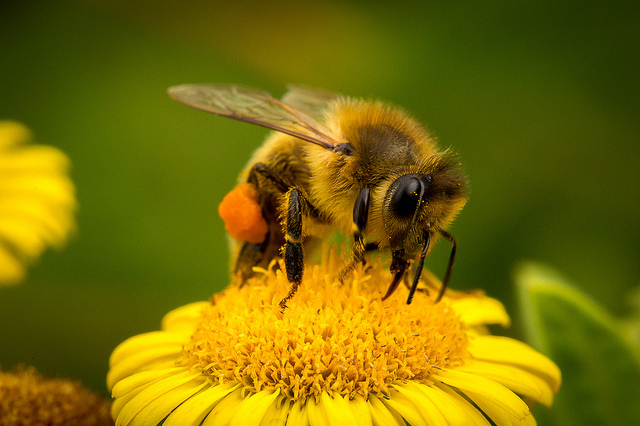
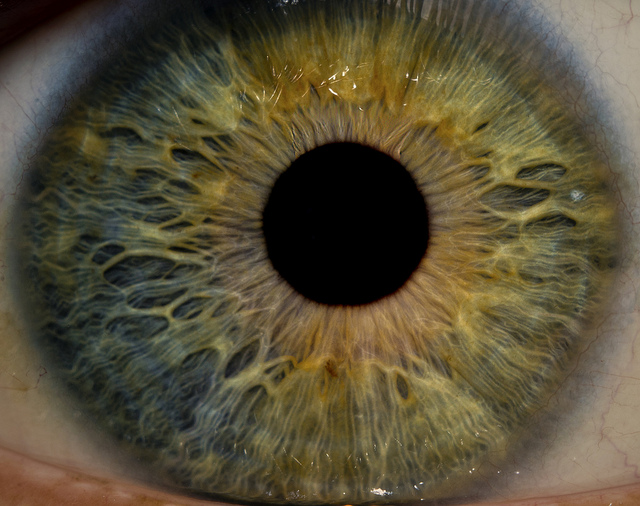
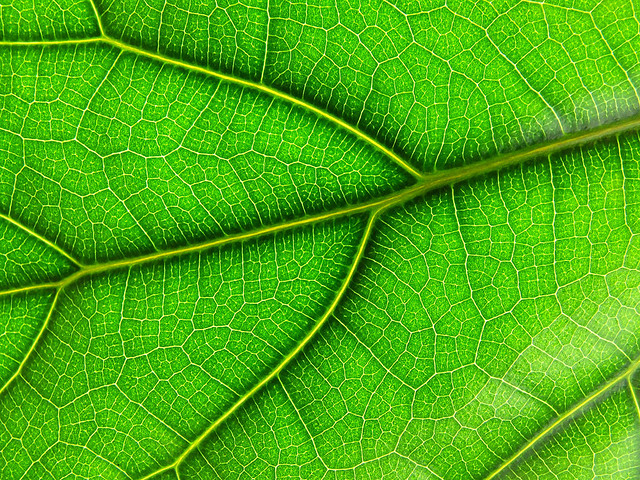
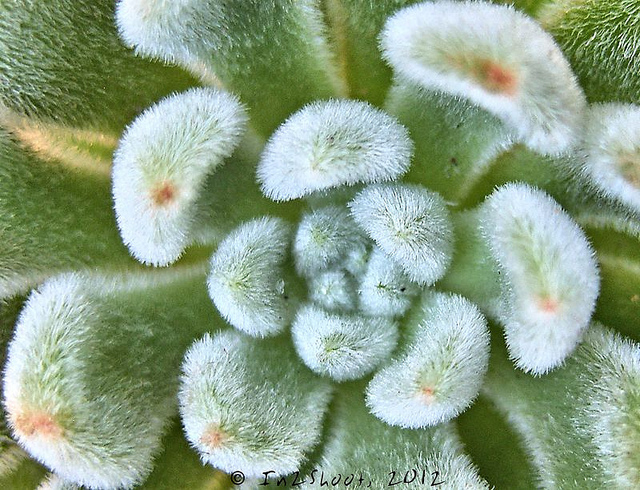
  • It’s a Small World – the World of Macro Photography

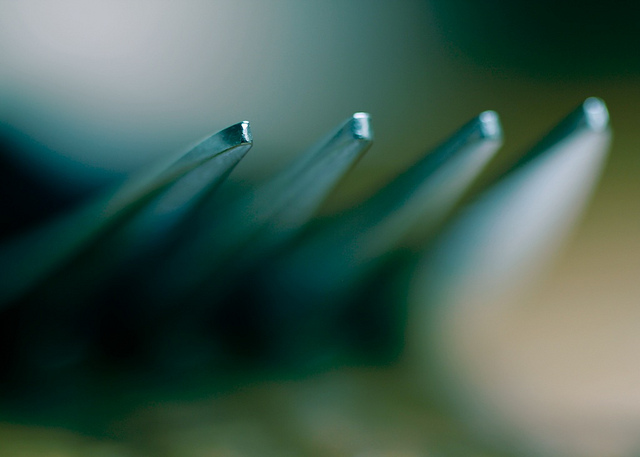
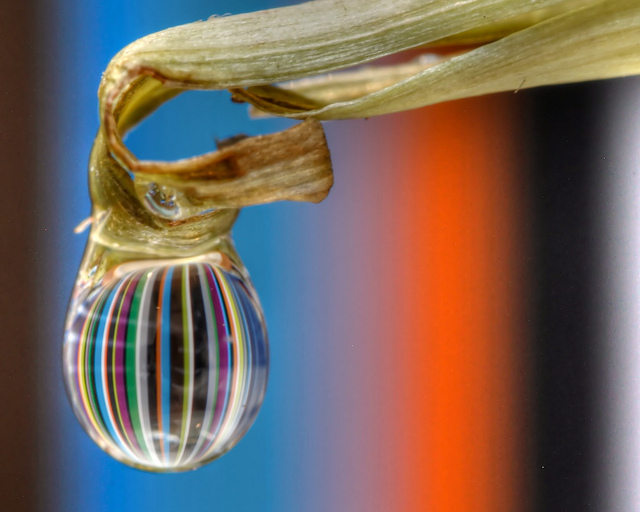
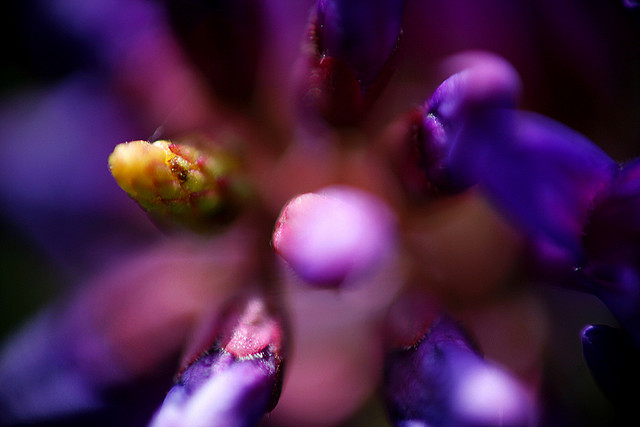
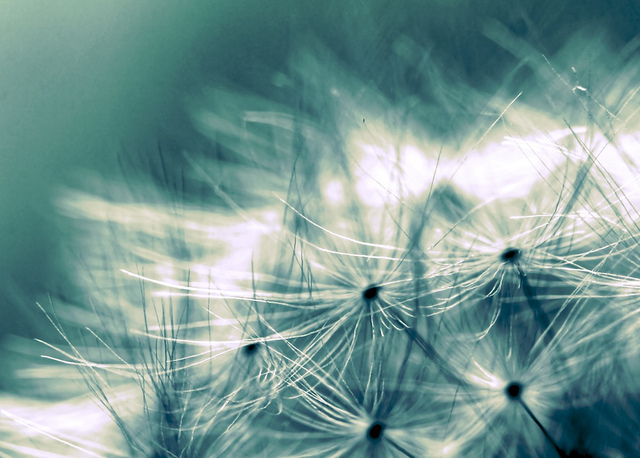
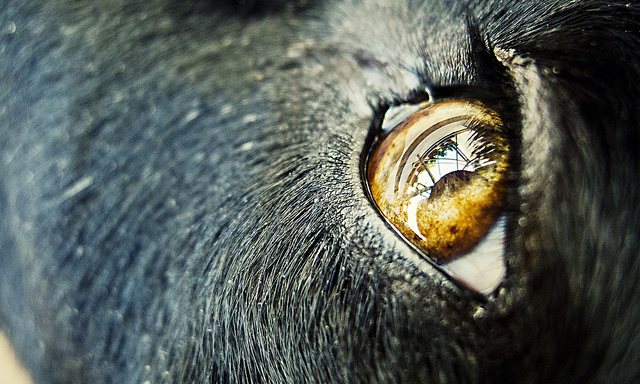
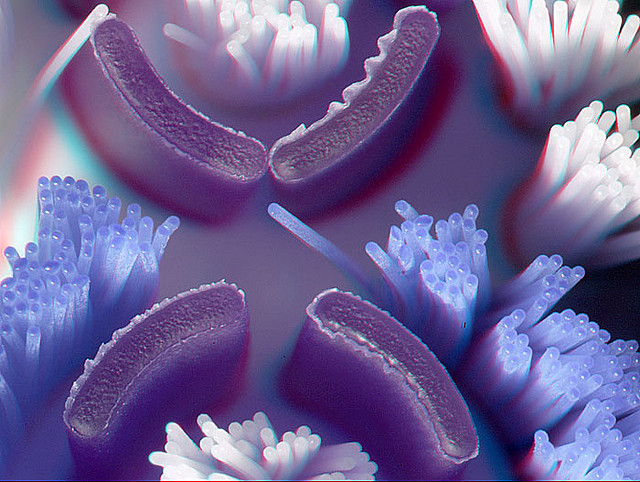
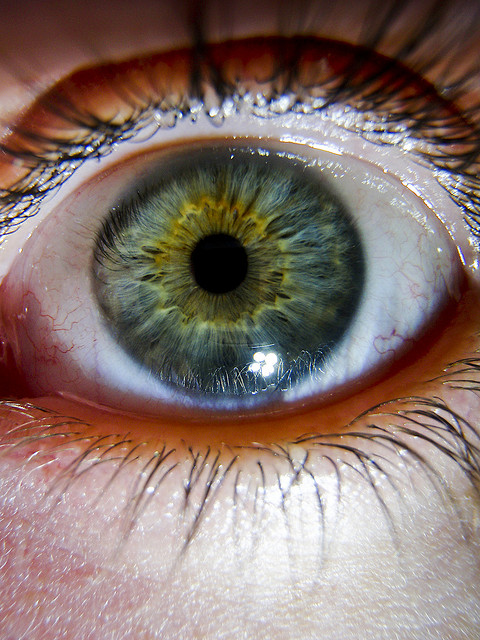
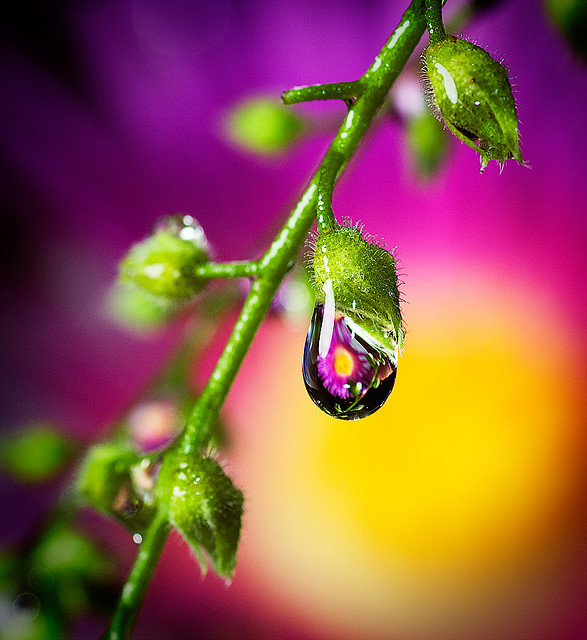
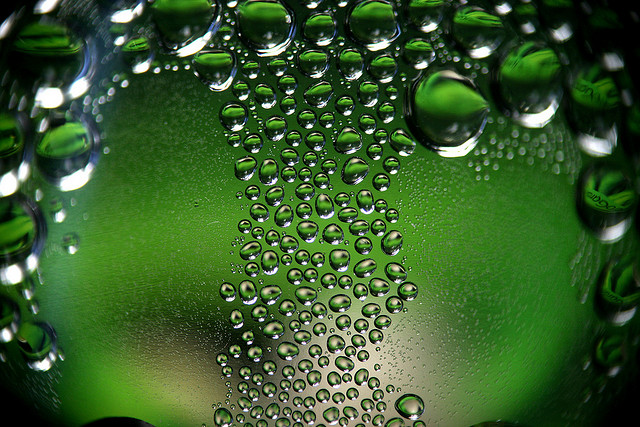
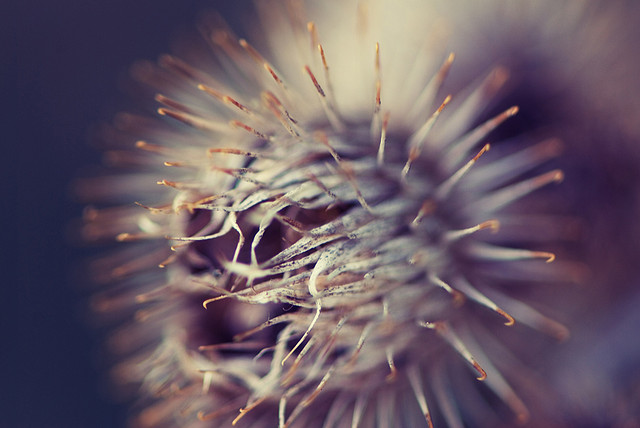
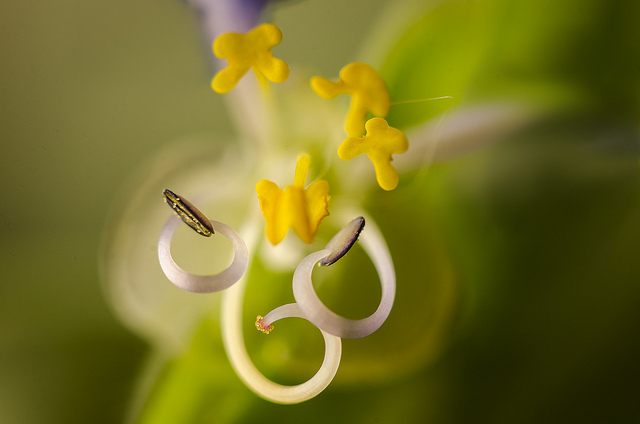
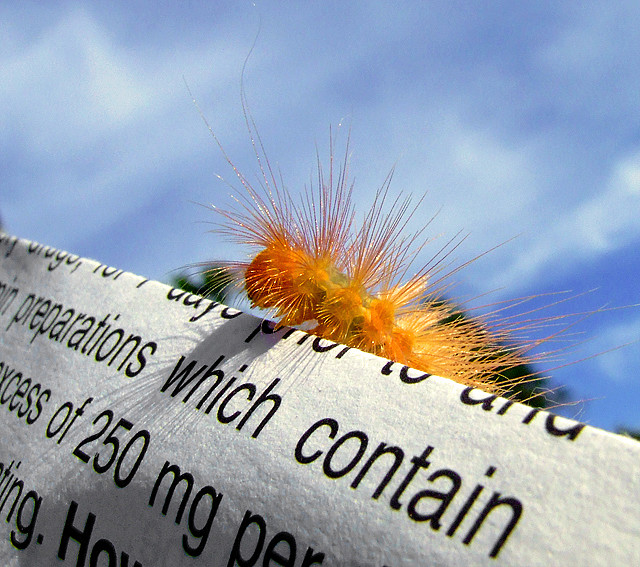
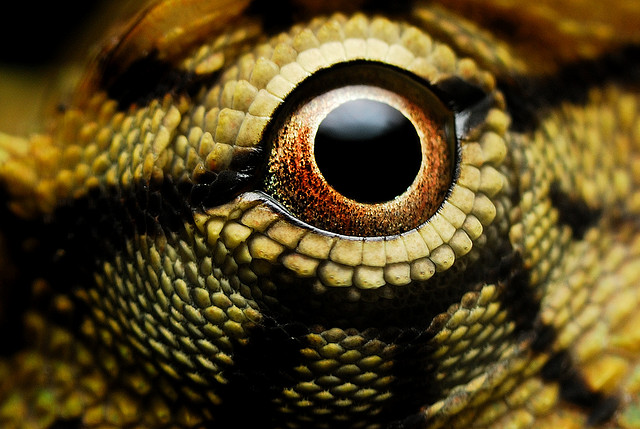
    Macro photography is like a secret world. You can capture ordinary objects in a way that the human eye cannot see them, and create captivating images.

    Many people immediately think flowers and bugs at the mention of the word macro, but there are so many other great options. This is meant to inspire you to get out there and look at the world a little closer. Find interesting subjects right under your nose – hey, maybe you can even photograph your dog’s nose!

    Here’s a few ideas for you including some flowers and bugs:

    By @Doug88888

    By @Doug88888

    By Tasumi1968

    By @Doug88888

    By @Doug88888

    By cobalt123

    By tony babcock

    By Becky

    By Ben Kreunen

    By Mahmoudreza Shirinsokhan

    By Johann Coetzer

    By Brian Wolfe

    By Randy Pertiet

    By Jonathan Cohen

    By Eduardo Millo

    By syvwlch

    By Martin Heigan

    By maury.mccown

    By Johan J.Ingles-Le Nobel

    By Guy Sie

    By Nick Fedele

    By Chris Moody

    By Brent Pearson

    By Paul clarke

    By Nick Fedele

    By seeks2dream

    By Antonio D’Emanuele

    By mcdarius

    By Mike McCune

    By Bram Cymet

    By Chechi Peinado

    By Vanessa Pike-Russell

    By MEMANG RIZALIS ENT.

    For more reading on Macro Photography check out these articles:

    • How to focus stack macro images using Photoshop
    • How to photograph snowflakes with a DSLR
    • Tips for near-macro photography with a telephoto lens
    • Fun with macro photography

    The post It’s a Small World – the World of Macro Photography by Darlene Hildebrandt appeared first on Digital Photography School.


    Digital Photography School

  • Day 1 of 12 Days of Christmas… Get our Natural Light eBook for $7

    Welcome to Day 1 of the 12 Days of Christmas Sale where we’re about to release 12 days of mind-blowing photography deals for you!

    Day 1: Two Amazing Deals on dPS eBooks

    The countdown to Christmas 2013 begins today with 2 great deals on eBooks by award-winning travel photographer Mitchell Kanashkevich.

    Working with natural light and colors to create enchanting travel photography is Mitchell’s main game.  In his 3 beautifully presented eBooks, Mitchell shares practical advice, information and tips on how anyone can create beautiful travel imagery by simply harnessing the power of natural light and color.

    Deal 1:  Natural Light eBook – just $ 7 Today Only!

    day1Single

    Natural Light is a powerful ally for every photographer.  Mitchell’s eBook reveals his top tips for mastering the dynamic nature of natural light to create striking photography. The best part is – you don’t need to buy any extra equipment! Mitchell’s tips and information can be applied to any brand of camera, including your smartphone.

    Mitchell explains essentials such as the role and power of natural light, light as a creative tool and even the philosophy behind working with light. You’ll then learn the essential technicalities of metering, exposure and using the histogram.

    The eBook also helps you understanding the changing characteristics of natural light such as quality, direction and color. Learning to create sculpting, interplays and silhouettes by controlling light is also covered.

    Nine detailed case studies are included, showing you step-by-step how to optimize light. You’ll be carefully guided through the process of using light to creating compelling images guaranteed to convey mood, emotion and meaning.

    Natural Light is one of the best guides on the market written specifically with beginner photographers in mind.  Written in easy to understand language, this eBook will certainly help you improve the quality of your photographs… using nature’s free gift to photographers – sunlight!  

    Natural Light is available for the next 24 hours for only $ 7… save yourself a massive 65% off the recommended retail price and grab this Super Single deal right now!

    Deal 2:  Three eBooks for only $ 29.99! [58% off]

    day1Bundle

    Want more from Mitchell? Our second deal is for you and bundles all 3 of his books at a bargain price. You’ll get Natural Light, Captivating Color and Transcending Travel.

    Captivating Color – inside this popular eBook Mitchell reveals his top tips on using color to spark the imagination, create stories and convey intense emotions.  You’ll learn about the way light and cool work together, as well the impact of color on visual weight and attention. Tips on post-processing and shot manipulation for maximum effect are also included.

    The imagery included in the 48-page eBook beautifully illustrates the power of captivating color.  Mitchell includes stunning photographs taken throughout his travels around the world, all using color to powerfully capture the viewer’s attention.

    You’ll gain access to Mitchell’s rare professional insights and experience in using color to create magic.  If you need inspiration to get your creative juices flowing and your imagination all fired up, this eBook is well and truly for you… and it’s included in our Bargain Bundle for a seriously cheap $ 29.99!

    Transcending Travel – You won’t ever risk taking bad travel shots ever again – because todays Bargain Bundle also includes Mitchell’s popular ebook Transcending Travel. In this gorgeous 80- page guide, Mitchell gives you brand new tips on how to take the mesmerizing travel imagery most people DON’T know how to create!

    Preparation is key – researching your trip, making the correct choices in lenses, camera body and other gear.  Every traveller knows packing light is critical; so let Mitchell help you avoid making expensive excess-weight mistakes.

    You’ll also learn to communicate effectively to viewers through the basics of composition – framing, focal points and perspective. Using light to your creative advantage at any time of the day or evening, as well as flashes and reflectors, is also covered.  The eBook also walks readers through the 5 elements of making the photographic process, as well as essential information on freeze motion and blurring.

    Photographing people of diverse ethnic and language backgrounds can be raise some ethical issues of which you may not be aware.  Mitchell gives you tips and advice based on years of experience working directly with people around the world – make sure you’re well informed before you go.

    Landscapes, interiors, buildings and still-life shots are also covered.  You’ll be inspired to pack your bags and get going once you’ve finished reading beautifully illustrated classic…included in our Bargain Bundle for only $ 29.99.

    Download now and save up to 65% OFF!

    Your Day 1 deals are all easy PDF downloads you can take with you anywhere… without risking any excess baggage charges! We hope you enjoy these classics guaranteed to make your photography even more beautiful.  Stay tuned for Day 2 deals coming up next!

    The post Day 1 of 12 Days of Christmas… Get our Natural Light eBook for $ 7 by Darren Rowse appeared first on Digital Photography School.


    Digital Photography School

  • The Top 13 Camera Bags Among Our Readers

    Over the past few weeks we’ve shared with you the best selling DSLRs and most popular DSLR lenses among our readers. Today it is time to turn our attention to camera bags.

    Following are the best selling* camera bags among our readers based upon what you’re buying at Amazon in the last quarter.

    Here’s the top 13!

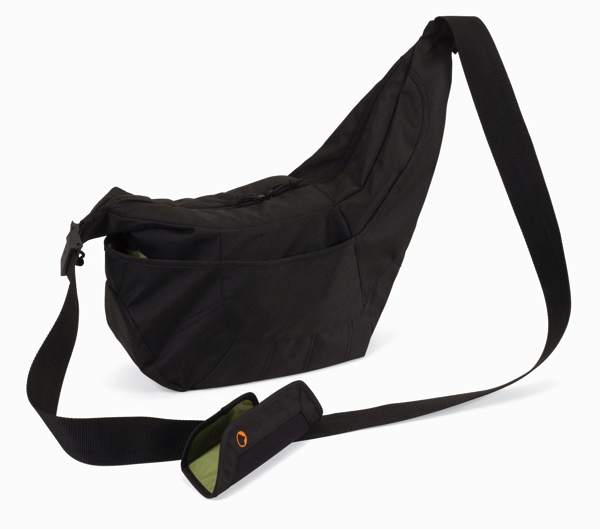
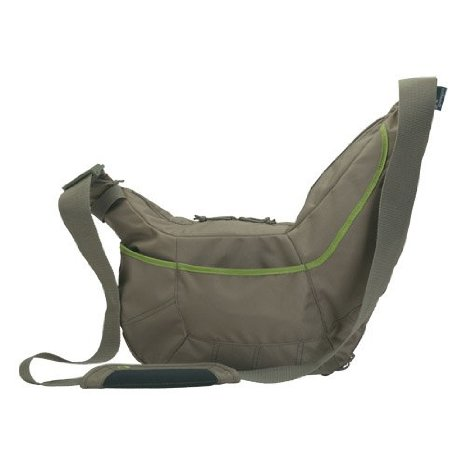
    1. Lowepro Passport Sling

    NewImage

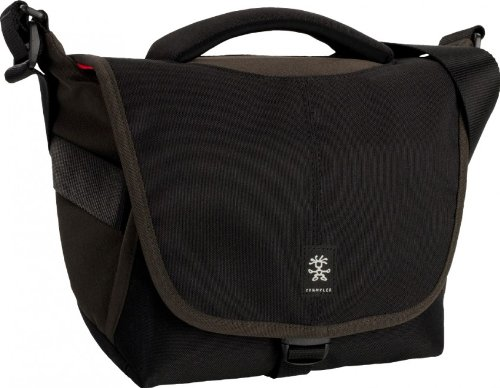
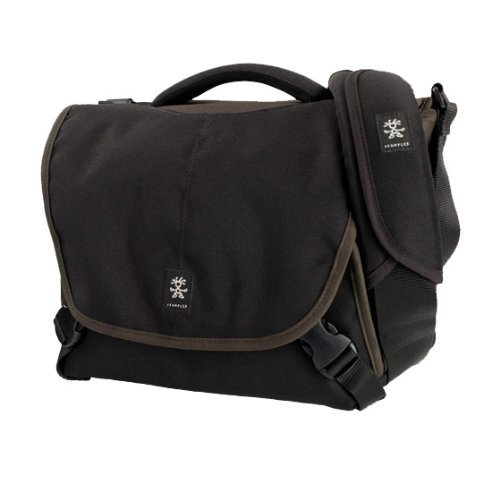
    2. Crumpler *NEW* 5 Million Dollar Home Camera Bag

    NewImage

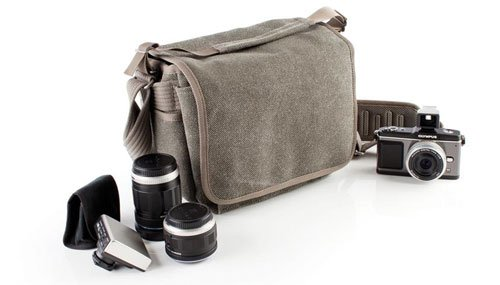
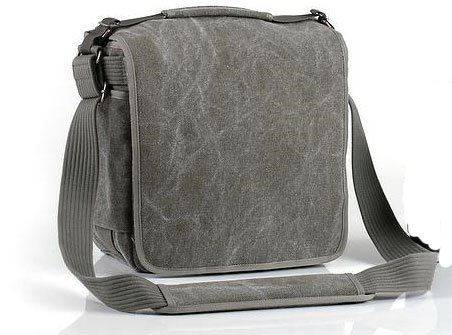
    3. Think Tank Retrospective 5 Shoulder Bag

    NewImage

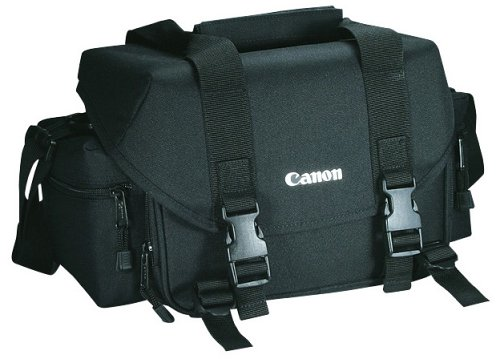
    4. Canon 2400 SLR Gadget Bag for EOS SLR Cameras

    NewImage

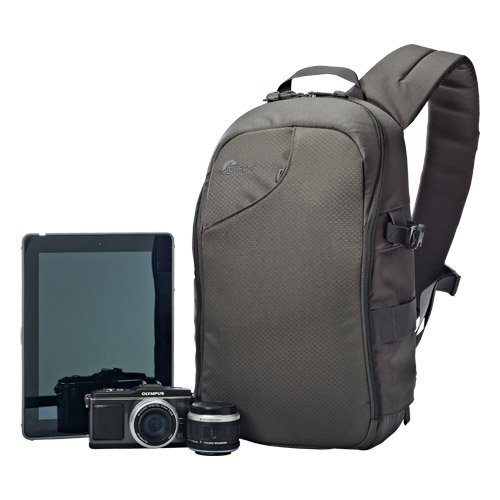
    5. Lowepro LP36576-PWW 250 AW Transit Sling Bag

    NewImage

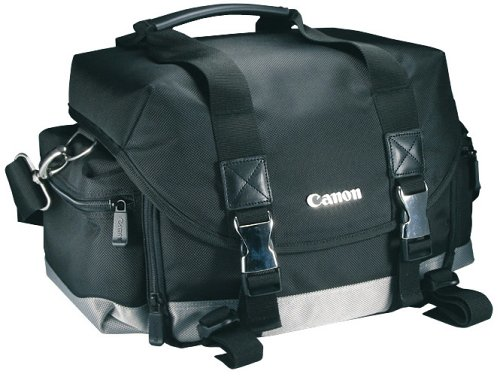
    6. Canon 200DG Digital Camera Gadget Bag

    NewImage

    7. Crumpler *NEW* 6 Million Dollar Home Camera Bag

    NewImage

    8. Lowepro Passport Sling ll

    NewImage

    9. Think Tank Retrospective 20

    NewImage

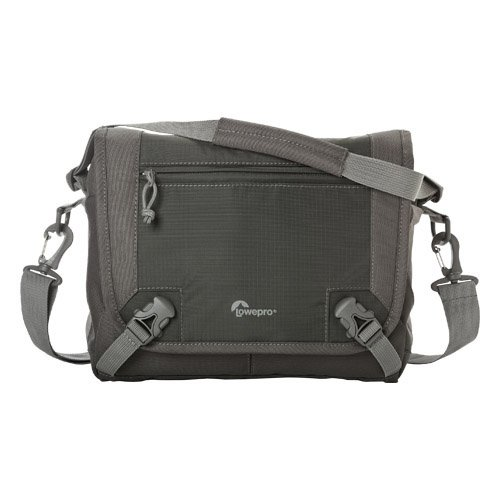
    10. Lowepro LP36610-PWW Nova Sport 17L AW Camera Bag

    NewImage

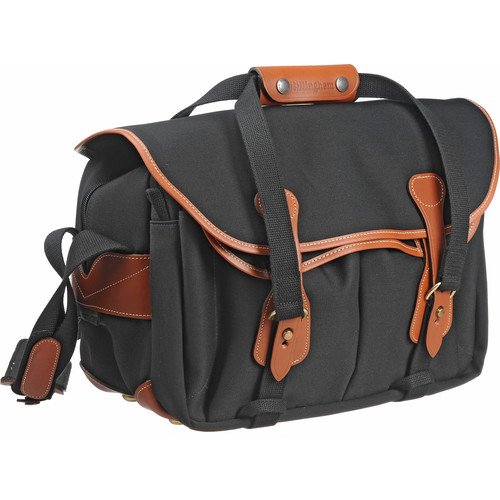
    11. Billingham 335 Camera Bag

    51GhGrK8o7L

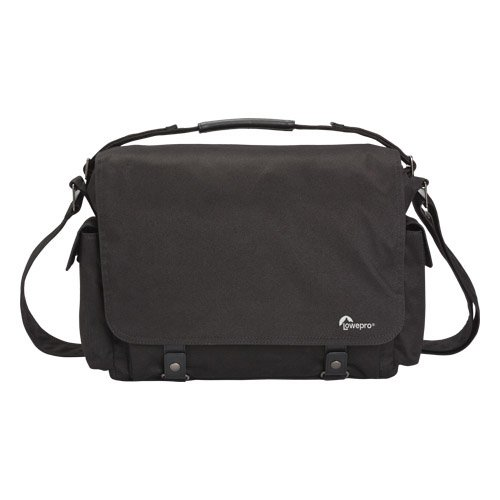
    12. Lowepro LP36615-PWW Urban Reporter 250

    NewImage

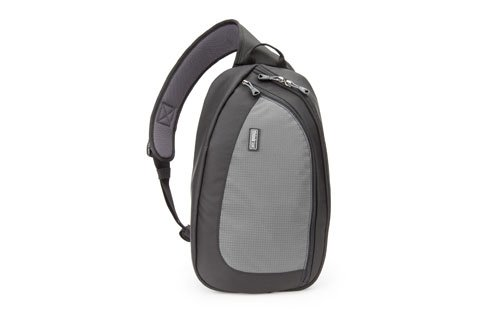
    13. Think Tank TurnStyle 20 Convertible Sling Bag & Belt Pack

    NewImage

    * Note: these lists were compiled from reports supplied to us from Amazon.com where we are affiliates. One of the ways dPS is able to cover its costs and be a sustainable business is that we earn a small commission when readers make a purchase from Amazon after clicking on our links (including those above). While no personal details are passed on we do get an overall report from Amazon about what was bought and are able to create this list.

    The post The Top 13 Camera Bags Among Our Readers by Darren Rowse appeared first on Digital Photography School.


    Digital Photography School

  • Tips for Learning to Love Photoshop Actions

    This is a guest contribution from Meghan Aileen Schirmer at The Shoppe Designs & Photoshop Actions. Their In Vogue Action Set is available on Snap N Deals now for just $ 29! (until December 24, 2013)

    Learning to Love Photoshop Actions

    Photoshop actions tips 04

    When it comes to Photoshop Actions or presets photographers tend to love them or hate them. But, when done right they can really enhance a digital image in a way that a straight out of the camera digital image cannot achieve. If you use film, that is very different, and the variety in types of film and processing techniques allows for a greater variety of beautiful looks for your images. However digital photography, in general, is limited to that digital look we all know, especially when we are in the context of a commercial photography workflow. You can of course edit your images individually in Lightroom, ACR or Photoshop. But when you use Photoshop Actions and presets it is simply speeding up this process. When you have hundreds of images to edit, time savers are very valuable.

    What can you use Photoshop Actions for?

    Photoshop Actions can be used for workflow speed, such as simply adding a little contrast and saturation to all of your straight out of camera images. They can also be used to specially edit key images or to add a unique style or look to your images that makes you memorable amongst the sea of competition. Action sets at The Shoppe Designs & Actions usually each contain, several specialized Photoshop Actions that you can use at different opacities and different combinations for various style looks, as well as some utility Actions such as adding contrast or grain.

    Action styles

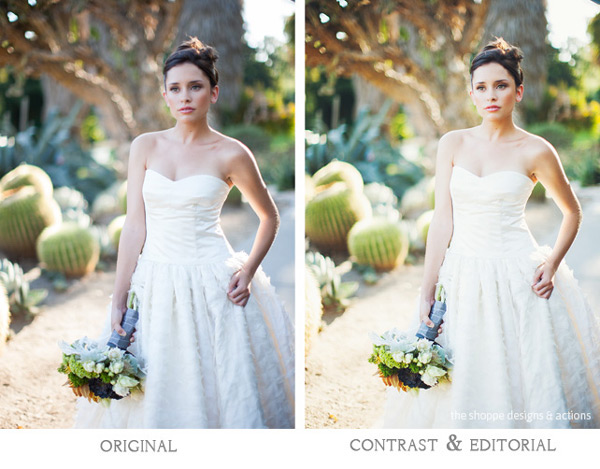
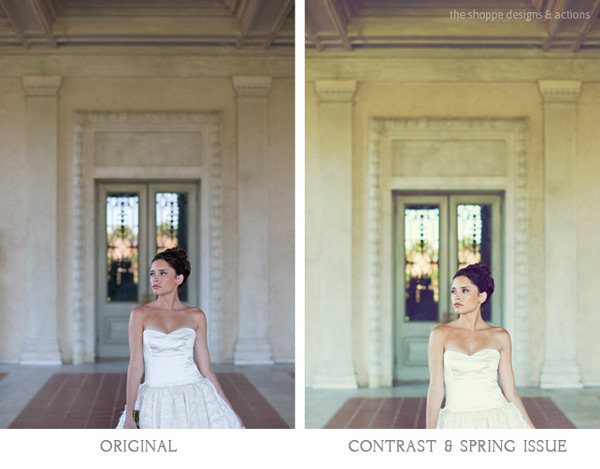
    Our In Vogue set was inspired by the pages of high end fashion magazines. In this set you will see the matte look and slight toning of modern fashion photography, as well as the clipped blacks of vintage black and white film. When shooting film is not an option, using Actions to mimic the look of film is a great alternative. Maybe you love the look but are not in a position to switch to shooting film.

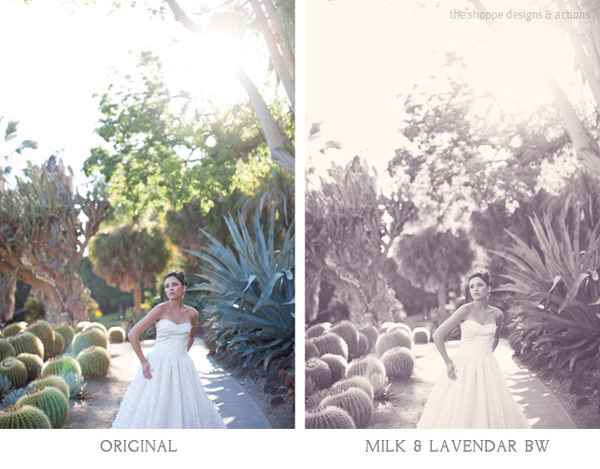
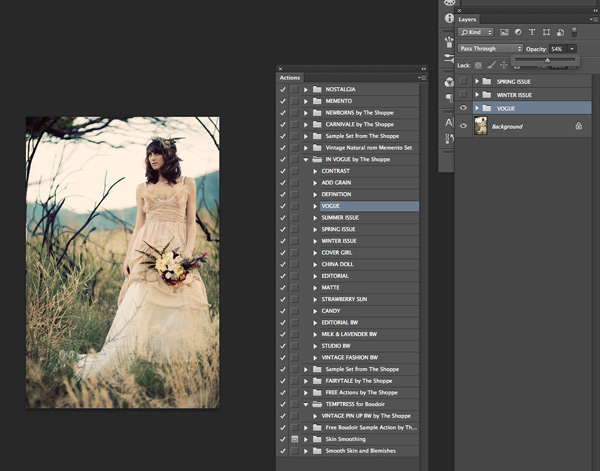
    Here you can see the plain digital image and then the sample using the In Vogue Action Set. Our Actions are set up to leave you with a folder on top of your background layer in Photoshop, so that you can easily adjust the strength of the action. We give them to you at 100% strength or a bit less, and then you can adjust them to say 20% for a more subtle look. Perfect when you don’t want the image to look like you edited it with Actions, but just want to get rid of that digital feel. See how in these samples the actions are used at a lower opacity to simply enhance the image and not heavily alter it.

    Photoshop actions tips 01

    Photoshop actions tips 02

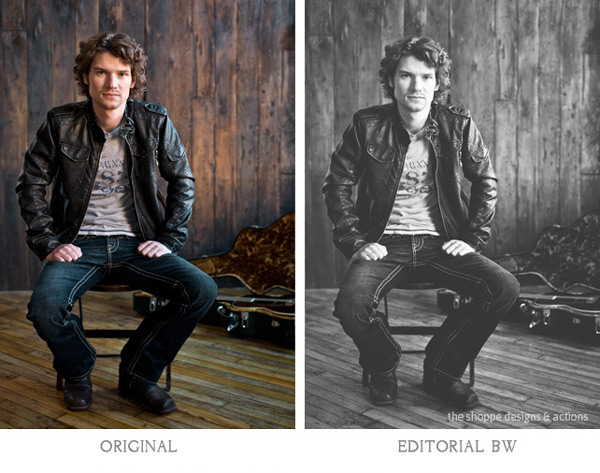
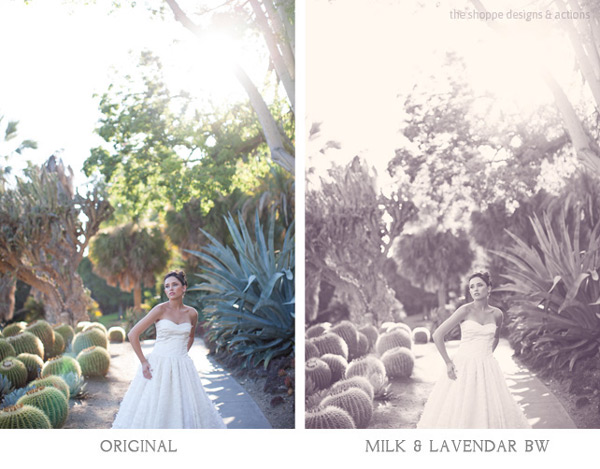
    Black and white Actions

    Using Actions to make your images black and white is an excellent use of them. Especially if you like the black and white film look. Just reducing the saturation on an image in Photoshop is not going to get a gorgeous black and white image, it will be flat and digital looking. Our Actions create different tones, different depths of contrast, flat or deep blacks and some even add grain for that authentic film look.

    Photoshop actions tips 03

    Photoshop actions tips 04

    Applying Photoshop Actions

    When using Photoshop Actions, we recommend trying a variety of them on several different types of photos with different lighting conditions. Not all Photoshop Actions work the same on all images, it is just not possible. Some greatly enhance one image, but may not work at all on another. As you use them often you get to know which works best on the different types of images. Some will really bring out the color in one image, while diminishing the color in another. As I mentioned our Photoshop Actions leave a folder on top of your image in your layers palate in Photoshop. We recommend playing each one on an image, then turning the folder off and on to see the effects. Then adjust the opacity of the entire folder and see what looks best. Then you can play another to add different effects and keep adjusting the folder opacity until you love it. It is best to go back to the background layer before playing each one.

    Photoshop actions tips 05

    In general, I recommend doing basic image editing in a RAW editing program before starting to play with Actions, unless you are using the utility Actions such as ADD CONTRAST. Stylized Photoshop Actions are simply meant to enhance while utility Actions like adding contrast, boosting saturation and sharpness can be used on original camera images.

    If you want to use a utility type Action on a bunch of images at once, or a stylized action on a set of similar images, you can do that as well. In Adobe Bridge, go to TOOLS > PHOTOSHOP > BATCH and then choose the folder of images, the action to use, and the destination for them. I recommend saving them in a different folder and not saving over your originals in case you want to edit them differently later.

    However you decide to use them, Photoshop Actions can be very versatile and very useful. It is a matter of fitting them into your workflow and discovering how Photoshop Actions in general as well as which Photoshop Actions in particular work best for you and the way you work.

    The Shoppe Designs & Photoshop Actions has many well respected action sets to choose from, and the In Vogue Action Set from is available on Snap N Deals now for just $ 29! (until December 24, 2013)


    Designer and Photographer Meghan Aileen Schirmer is the owner of The Shoppe Designs, Inc. Meghan has designed and photographed for some of the most well-known companies in the world over the past 15 years. From Sony to Nickelodeon, as well as Grammy winning artists and musicians. She lives in Nashville, TN with her family.

    • Try a FREE sample set of Actions by liking The Shoppe Designs Facebook Page
    • See more available Actions on their website  The Shoppe Actions
    • See the In Vogue Actions set, regular price.

    The post Tips for Learning to Love Photoshop Actions by Guest Contributor appeared first on Digital Photography School.


    Digital Photography School

  • Our 21 Most Viral Photography Tutorials This Week

    This week has been a busy week on our social media accounts with unprecedented amounts of sharing of dPS articles. In fact the last couple of weeks have seen us smash our previous traffic records.

    So we thought it might be fun to do a wrap up of the most viral dPS photography tutorials being shared on our different accounts. As you’ll see the lists are quite different depending upon which social media account you follow!

    Top 7 FaceBook Shares – Follow dPS on Facebook

    Facebook-logo-ICON-02

    1. 21 Settings, Techniques and Rules All New Camera Owners Should Know
    2. 17 Forced Perspective Technique Examples
    3. Five Photography Bad Habits to Quit Today
    4. Beauty and Portraits on a Budget
    5. 9 Crazy Cross Eye 3D Photography Images and How to Make Them
    6. 10 Tips to Take Great Family Portraits
    7. 30 Popular DSLR Lenses Among Our Readers [November 2013]

    Top 7 Pinterest Shares – Follow dPS on Pinterest

    Pinterest-Logo-Vector-by-Jon-Bennallick-02

    1. Posing Guide: 21 Sample Poses to Get You Started with Photographing Couples
    2. The Ultimate Guide to Learning how to use Your first DSLR
    3. Advanced Tips for Tack Sharp Images
    4. DIY Lighting Hacks for Digital Photographers
    5. Three Lenses Every Photographer Should Own
    6. 6 Techniques for Avoiding Camera Shake
    7. How to Photograph Snowflakes

    Top 7 Twitter Shares – Follow dPS on Twitter

    Twitter-Logo-Icon-by-Jon-Bennallick-02

    1. 3 Lightroom History Tips
    2. 10 MORE Quick Composition Tips
    3. 16 Digital Photography Tips for Christmas
    4. Start To See Photographically In Six Easy Steps
    5. 3 Ways to Improve Your Images With Composition
    6. “Does my butt look big in this?” – What Clothes to Wear in Portraits
    7. 5 Tips for Building Your Photography Portfolio

    I hope you enjoyed this quick round up of what’s being shared around the web from dPS. Thanks to everyone for your engagement and shares!

    The post Our 21 Most Viral Photography Tutorials This Week by Darren Rowse appeared first on Digital Photography School.


    Digital Photography School

  • Photoshop Tips – Using the Blend If Feature

    blendif_opener_alt

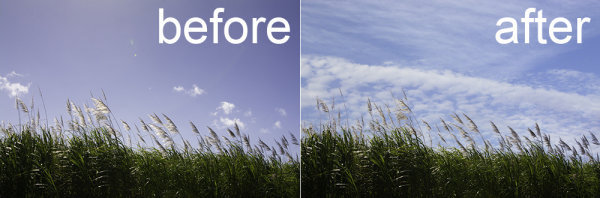
    The Blend If feature in Photoshop blends one layer into another based on the content of either of the two layers. It can be used, for example, to replace a sky by making it easy for you to knock out the blue sky without having to make a complex selection.

    In this article, you’ll learn some Photoshop tips on how to use Blend If to replace a sky.

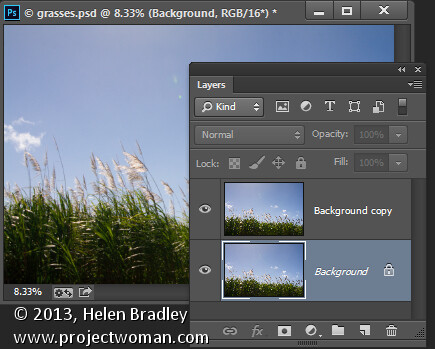
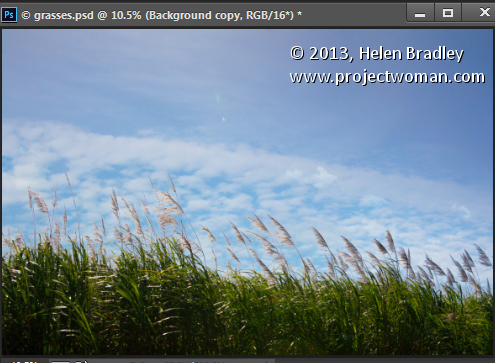
    Start by opening an image such as the one shown here. Right click on the background layer and choose Duplicate Layer to make a second copy (keyboard shortcut is “command/control + J”). You now have two layers with the same content.

    using the "blend if" feature in Photoshop

    Make a duplicate layer

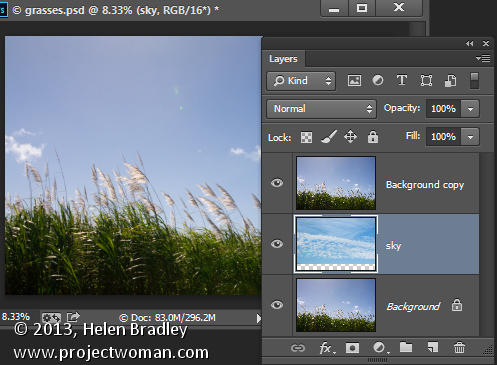
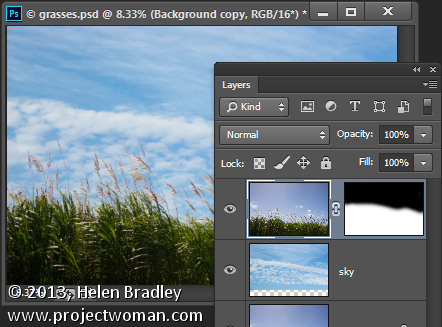
    Open an image with good sky. Choose Select > All and then Edit >Copy. Click on the main image and choose Edit > Paste. Drag the sky layer between the two image layers. Size the sky layer, if necessary, so it is big enough to replace the unwanted sky in the original image. Alternately you can use File>Place to choose the new image, and Photoshop will automatically add it as a layer and make it a Smart Object (so it can be resized without any quality loss).

    blendif_2

    Put the layer of the new sky in between the other two

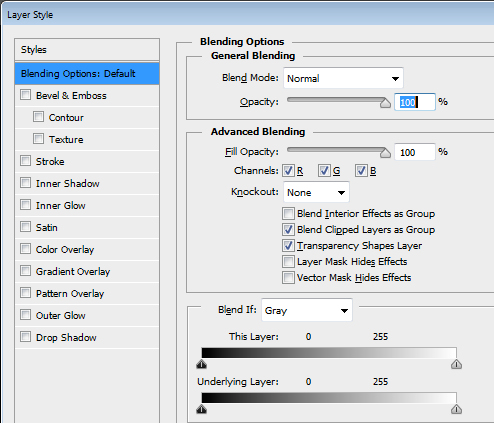
    Target the top layer, click the Add Layer Style icon (fx)at the foot of the Layers palette and click Blending Options to open the Layer Style dialog box (see below).

    blendif_3

    The Blend If sliders and channel selector are at the foot of this dialog. To start, you will choose the channel to use. The Gray channel is the luminance channel so it lets you make your adjustment based on the lightness/darkness of either the image layer or the layer below. If you choose Red, Green or Blue you’ll be using that channel as the basis for your blending.

    blendif_4

    The layer underneath the current layer contains the sky that we want to use. So you will use the sliders called This Layer to remove the existing sky, to be able see through to the sky underneath. If we were to select the Gray channel we won’t be able to make the selection very easily because both the sky and the grasses have similar luminosity or lightness values.

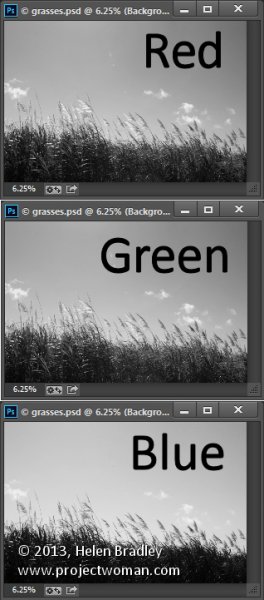
    However if you exit this dialog for a minute and take a look at the individual channels in the image, you may find one where there is plenty of contrast between the area you are seeking to hide (the blue sky) and the areas you want to keep (the grasses).

    To do this close the dialog box temporarily, choose Window > Channels and click on the Red, Blue, and Green channels in turn to view them.

    In this case the Blue channel displays the sky as a lighter tone than the grasses, which are darker. This channel has the most contrast in the area we are interested in so it will be a good one to use.

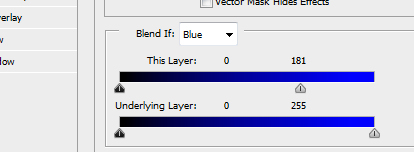
    Select the RGB channel again before you leave the Channels palette. Return to the Layers palette and target the top most layer again. Display the Blending Options dialog again and choose the Blue channel in the Blend If pull down.

    Drag the right most slider in the This Layer area to the left. As you do so, the lighter blue areas will disappear and you will see through to the sky layer underneath.

    Blendif_5a

    Pull the right slider for “This Layer” to the left

    Blendif_5b

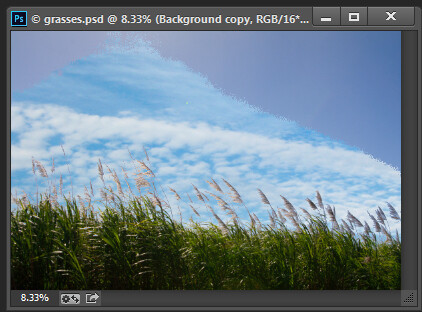
    The result is the the layer below will start to appear, but the transition is not smooth

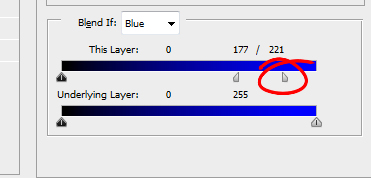
    To smooth out the transition between the area being removed and the area which remains, break the slider in two. You do this by holding the Alt key (Option on a Mac) and drag half of the slider away from the other half.

    The rightmost half of the slider indicates the point at which the blending effect is fully impacting the image. So pixels which have a value greater than the value indicated by this slider will be fully transparent. The left half of this slider controls the point at which the blending ceases. Any values in the blue channel that are smaller than the value indicated by this slider will be fully opaque. Pixels which have values in the blue channel that match the values between the two sliders are partially transparent.

    blendif_6

    For some images you may get better results by combining multiple channels. So you might use the blue and the red channels but use the rightmost slider on the blue channel and the leftmost slider on the red channel. You’ll need to experiment to see what works for your image. When you have a good result click Ok.

    In a perfect world you’ll be able to fully remove the unwanted sky with just this adjustment. Chances are your results will be less than perfect! Mine certainly are, see below.

    blendif_7

    If this is the case, make sure that the Blend If adjustment gives you the best results in the area that would require you to make a complex selection. For me that is where the grass meets the sky. Selecting around the grass would be a big job so I want the Blend If results to be good in this area. That it doesn’t get rid of the rest of the sky is just fine – that it is easy to get rid of manually.

    Target the top layer and click the Add Layer Mask icon at the foot of the Layers palette. Target the mask by clicking on it. Choose a soft round brush and paint using black over the mask to hide the remainder of the sky. Using a soft brush (0% Hardness) will ensure you get a seamless transition between the original image and the new sky.

    blendif_8

    Problems elsewhere

    Occasionally you will find that using the Blend If sliders to remove the sky also results in some unwanted transparency appearing elsewhere in the image. If this occurs you can use content from the background layer to fill the transparent areas.

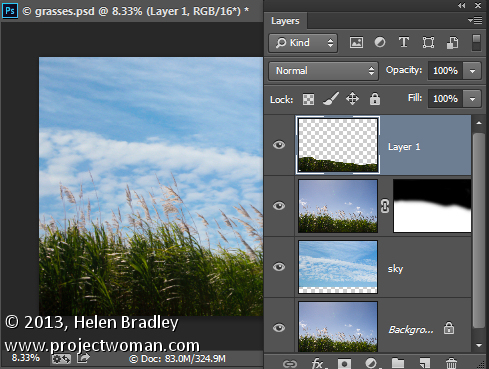
    Make a selection over the area to fix, click on the Background layer to target it and choose Layer > New > Layer via Copy. Drag this layer to the top of the image and it will cover the areas that were made transparent.

    Although this wasn’t a problem with this image, this is what the layer stack might look like if you do need to fix some transparency appearing elsewhere in the image.

    blendif_9

    The Blend If sliders are a useful way to blend layers without needing to make complex selections. You can make even better use of these sliders when you use the channel data as a guide to determine which channels to use for your blending.

    Post originally from: Digital Photography Tips.

    Check out our more Photography Tips at Photography Tips for Beginners, Portrait Photography Tips and Wedding Photography Tips.

    Photoshop Tips – Using the Blend If Feature

    The post Photoshop Tips – Using the Blend If Feature by Helen Bradley appeared first on Digital Photography School.


    Digital Photography School

  • Improve Your Black-and-White Photography Skills

    In today’s world of digital, taking pictures in black-and-white is something of a lost art form. Color is the dominant way to go, which is something of a pity. While color photography naturally provides a far wider range of shade, a big portion of the appeal of black-and-white photography is the relatively subdued monochromatic character. Still seen as the purest Continue Reading

    The post Improve Your Black-and-White Photography Skills appeared first on Photodoto.


    Photodoto

  • Maximizing Sharpness with a Telephoto Lens

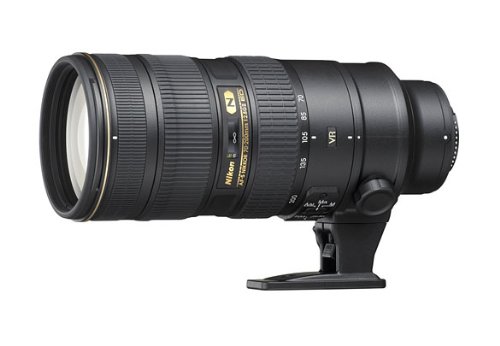
    Telephoto lenses are perhaps one of the first people buy to add to their kit, as they are useful in many genres of photography.  The reach that a telephoto lens can offer is crucial for a lot of sports, wildlife or other ‘action’ photography. However, it is that same reach that can introduce the problems that prevent people getting sharp results.  Here are six tips to help you perfect the technique of maximizing sharpness with a telephoto lens.Maximising Sharpness when shooting with a telephoto lens
    1. Shutter Speed Selection

    One of the biggest hurdles to overcome when shooting with a telephoto lens is camera shake – softness introduced by not being able to hold the camera steady for the duration of the exposure.  One of the easiest ways to overcome this is to make sure that the shutter speed you select is faster than the reciprocal of the focal length. For example, in order to minimize the effect of camera shake with a 300 mm lens, a shutter speed faster than 1/300th second is recommended.

    To take this one step further, it is best to consider the “effective focal length” (EFL) of the lens by taking the crop factor of your sensor into account.  If you are not shooting with a full frame camera, you are most likely shooting with a crop sensor (or APS-C) camera.  The sensors within these cameras are smaller than full frame sensors and, as such, give the result of multiplying the focal length of any lens put on the camera (see Crop Factor Explained for further explanation).  The result is, when you are using a 300 mm lens, on a camera with a 1.5x crop factor, the effective focal length is 450 mm. Thus meaning you need to be looking to use a shutter speed quicker than 1/450th second.

    So just make sure you are aware of the crop factor of your camera, so that you can quickly approximate the required shutter speed, if shooting handheld.
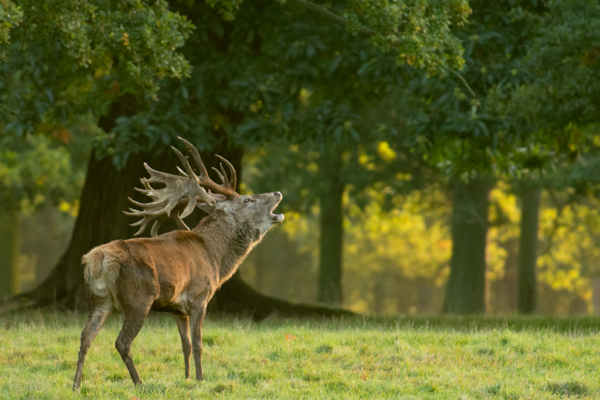
    Maximising sharpness when shooting with a telephoto lens

    Shot at 340 mm (510 mm EFL), f/5.6, ISO2500 using 1/320th second shutter speed. Use of a tripod here meant that I could be confident that the resulting images of this Red Deer stag would be sharp, even though shot only at 1/320th second.

    2. Use a Tripod

    Another very simple way to overcome image softness due to camera shake is to use a tripod.  Not everyone enjoys carrying or using a tripod at all times. However, it is a really quick and simple way to help minimize camera shake and to give you more flexibility in using slower shutter speeds, compared to shooting handheld (i.e. not a necessity to stay at “1/EFL”, though still recommended where possible).

    There a numerous tripod heads available that have the freedom of movement that is often needed when shooting sports or wildlife. You can also be safe in the knowledge that even at the end of a long day of shooting, when your arms would usually be tired, the tripod will continue to hold the camera steady.

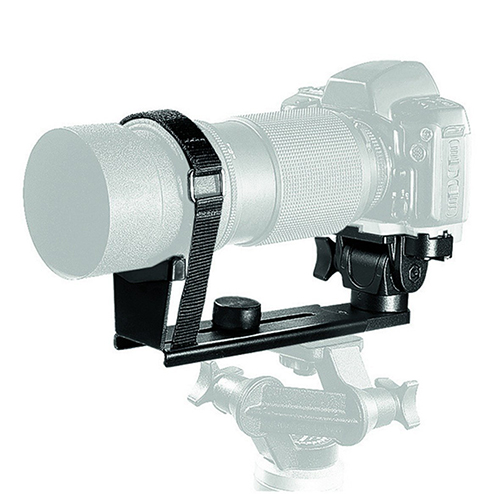
    A lot of larger lenses come with a tripod collar which mounts the lens to the tripod, rather than the camera. Most of the smaller, lower budget (but still very long, in terms of focal length) telephoto zoom lenses do not have one, meaning that the camera is mounted to the tripod and the lenses are left dangling off of the camera, susceptible for small vibrations.  Some tripod manufacturers make special brackets to overcome such situations, allowing smaller telephoto zoom lenses to be tripod mounted and become more stable (see image below).
    Maximising sharpness using a telephoto lens

    Consider tripod mounting your telephoto lens to improve stability when shooting at extreme focal lengths.  Pictured: a Manfrotto 293 telephoto lens support.

    3. Image Stabilization

    Obviously if shooting handheld, image stabilization (IS or VR) can again help overcome camera shake.  Though you will want to avoid this if you are opting to shoot on a tripod, as image stabilization will actually introduce movement in that situation.

    4. Aperture Selection

    Shutter speed selection, as mentioned above, was all about considering shutter speed in relation to freezing motion. Aperture selection, however, is two-fold:

    a) Diffraction – this is generally a rule for all, but the top of the range telephoto lenses, but shooting at the widest aperture (smallest f/ number) your lens allows will often result in image softness due to diffraction.  This is where light entering the camera is diffracted before hitting the sensor, resulting in the appearance of soft focus throughout the frame (though generally far more noticeable in the corners).  Therefore, if you choose a slightly smaller aperture, e.g. from f/5.6 to 6.3 or 7.1 (known as stopping down) you will minimize the diffraction and see an increase in the sharpness of the resulting images.

    b) Ensuring you have enough depth of field – a key component of wildlife and action photography is depth of field.  Often, you shoot as wide an aperture (small f/ number) as possible, to try and isolate the subject and give a soft diffuse background.  However, at long focal lengths, with a close subject, the depth of field (i.e. the region of the image which will be captured in sharp focus) can be as small as a few millimetres, meaning that tiny errors in focusing accuracy will mean that the crucial part of your wildlife shot that needed to be in focus, will be soft.  There are plenty of mobile apps or websites that help you calculate the depth of field for your given camera, aperture and focal length, so make sure you have an awareness how small an aperture you actually need in order have enough depth of field.
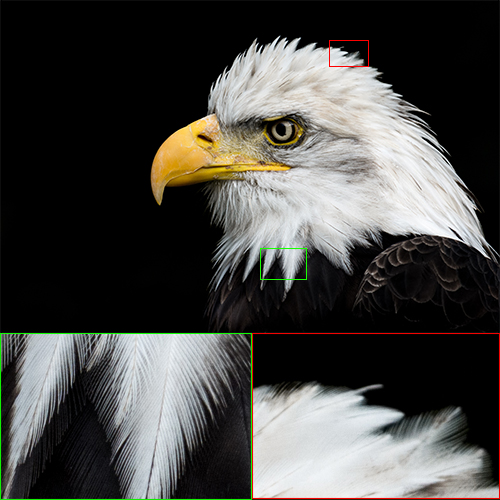
    Maximising sharpness using a telephoto lens

    Here, even though shot at f/9.0, you can see that there was not sufficient depth of field to render all of the head feathers of this bald eagle, completely sharp.

    5. Bump the ISO

    Don’t be afraid to boost the ISO on your camera.  Wildlife and sports photography is a constant compromise between shutter speed and aperture to ensure that you are using a quick enough shutter speed to freeze motion and overcome camera shake, and a suitable aperture to give you enough depth of field and avoid diffraction.  To alleviate this, you can increase the sensitivity of your sensor by increasing the ISO.  This will let you use quicker shutter speeds for the same given aperture and exposure.  Increasing the ISO will introduce more noise into the final image, but it’s better to have a sharp, yet noisy photo, than to have missed whatever fleeting moment you were trying to capture by not being able to use a fast enough shutter speed.

    6. Teleconverters

    Often available in 1.4x or 2x magnifications, teleconverters are great for extending the focal length of your lenses on a budget.  The increase in focal length does come at a cost however, as they increase the maximum aperture of your lens by one or two stops respectively.  Most consumer DSLRs do not allow autofocus with lenses with a smaller aperture than f/8.0 (i.e. f/5.6 + one stop) so you are limited in what teleconverter/lens combinations you can use. You need a fairly fast lens to begin with, i.e. a wide maximum aperture of f/2.8 or f/4.0, to make the most of a teleconverter.  Once the teleconverter is attached, autofocus will generally be slower (less light to play with) and any flaws of your current lens will be magnified – so stopping down, as per in point #4 above, becomes even more important.
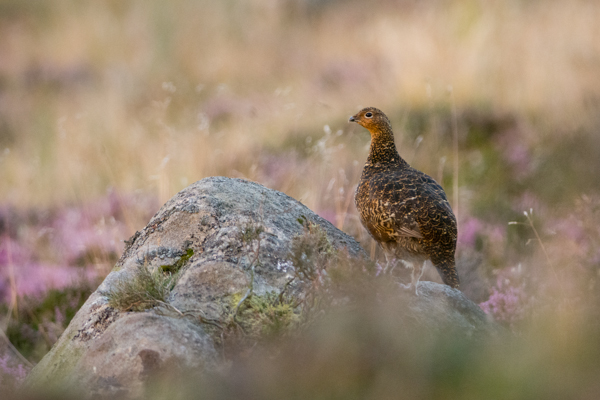
    Maximising sharpness when shooting with telephoto lenses

    Red grouse at sunset. This is a shot of compromises: 300mm (450mm EFL), f/5, ISO4000, 1/125th second, tripod mounted. Even at ISO4000, the shutter speed was still only 1/125th of a second, but mounted on a tripod the results were nice and sharp.

    Summary

    Overall, the above tips are just a few considerations for maximizing performance of your telephoto lenses. It’s easy to get carried away thinking that you need more focal length, just to get that little bit closer to your subject. However, it is important to understand the complications of working with such lenses and learn the techniques you can use to overcome the difficulties introduced by such long focal lengths.

    Do you have any other techniques that you frequently use to help ensure sharp images when shooting with your telephoto lenses?  Please share them in the comments below.

    Post originally from: Digital Photography Tips.

    Check out our more Photography Tips at Photography Tips for Beginners, Portrait Photography Tips and Wedding Photography Tips.

    Maximizing Sharpness with a Telephoto Lens

    The post Maximizing Sharpness with a Telephoto Lens by Elliot Hook appeared first on Digital Photography School.


    Digital Photography School