Category: Photography

  • ATNX Photoshop Actions Review

    "Photoshop Actions" from ATNX Digital provides an affordable, user-friendly actions alternative for Photoshop users.

    “Photoshop Actions” from ATNX Digital provides an affordable, user-friendly actions alternative for Photoshop users.

    Let’s face it– Photoshop is a beast, and a tough one to tame. There are at least half a dozen “right” ways to do just about everything, and I think it’s safe to say that most of us don’t use it to anywhere near its full potential. I’ve lost track of how long ago I started using PS (version 4, maybe?), and I’ve yet to unlock all its secrets– which I think is a good thing. For me, the best Photoshop work is that which my clients never even notice. To that end, I strive to get it right in the camera, and to the extent that post-processing is necessary, I try to keep it to a minimum. Smooth a little skin. Bump some contrast. Open up the shadows. Darken the highlights. A few simple tweaks to help make sure that people notice the photo– not the editing.

    Keeping the edits simple, though, is not always an option. Try as I might, I’m not always going to get it right in the camera. Keeping the sky nice and blue when properly exposing for the ground isn’t always easy. And don’t even get me started on the myriad of ways to run a black & white conversion. Learning how to tackle some of these editing challenges can be slow, meticulous work, and it can often feel like you’re re-inventing the wheel for every photo. Who wants to spend that kind of time in front of the computer? This is where Photoshop Actions come in handy.

    “I’m Still New to Photoshop. What’s an Action?”

    A Photoshop action is basically a recorded set of steps which allows you to reduce any series of long, complicated, time-consuming steps to a single click of the mouse. What might ordinarily take minutes or even hours to achieve by going step-by-step, becomes a much more convenient, time-saving, automated process. Some actions provide a simple, global adjustment to the photo, while others will apply several customizable adjustment layers, allowing the user to fine-tune the action and target specific areas of the image.

    While anyone can record their own actions in Photoshop, companies like Kubota Image Tools, Totally Rad Actions, MCP Actions, and others, have been creating action packs for years, allowing photographers to achieve editing results they might not otherwise have the time or Photoshop expertise to achieve on their own. Contrast adjustments, black & white conversions, sun flares, vintage filters– even teeth whitening– are all just a click or two away. Most action packs come with more than you will ever need (or want) to use, but if you’re lucky enough to find even just a few that help your workflow, you’ll find them to be well worth the cost.
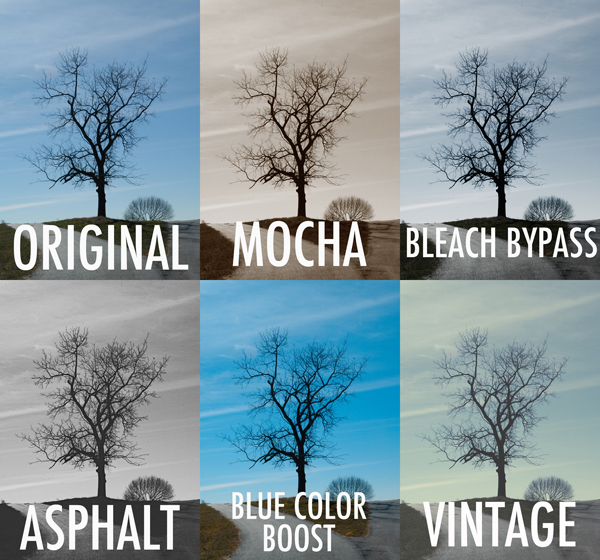
    atnx-actions-collage1

    Set One – In this first set, “Lonely Tree” gets a sampling of actions from each of the four sets in the pack.

    Photoshop Actions from ATNX Digital is a new option, providing users with 90 actions in four sets– Primary, Mono, Color, and Special.  The Primary set consists of 20 actions, helping to automate tasks like boosting contrast, dodge & burn, noise reduction, and soft focus. Mono– as the name implies– consists of 26 different black & white conversion tools, while the Color set goes the other direction, using actions like Bleach Bypass, Color Boost, and Custom Toning to make color adjustments you could never achieve in-camera (see image above). Finally, the Special set brings effects like center lighting, selective focus, light leaks, and 17 different textures to your digital palette.  It’s a pretty extensive selection, with a variety of options for many post-processing tasks.

    First Impressions

    What I like about these actions is that most are customizable and can be adjusted to the specific needs of the image. This is achieved in a variety of ways, depending on the selected action. Since most actions are applied by adding various types of adjustment layers, the original image (the Background layer) is left untouched on the bottom of the stack. By adjusting the opacity of the new layers, selecting which of them are even visible, or tweaking the layer masks, you open up a world of adaptable possibilities.

    All of that sounds great, but it’s important to keep something in mind. The quality of any action is only as good as the Photoshop skills and aesthetic of the person who programmed it in the first place. Most actions are good starting points, but since every image– and every photographer– is different, you are hardly ever going to simply apply an action and walk away. You may have to tweak it, finesse it, and sometimes even bend it to get the right look. Hopefully, the structure of the action makes it easy– perhaps a final step in a relatively streamlined process. That’s why it’s so important to find actions that fit well with your workflow. If applying an action is only the first step of a 30-minute editing process, you’ve completely missed the point. They only save time and effort if you are off doing something else.

    I haven’t tried all 90 of the actions yet, but I’ve gone through a good sampling from each set to have a pretty good feel for them. Of the 40 or 50 that I’ve put to the test, I’ve probably found five or six that I can see incorporating into my workflow. While that might sound like a bad review, I assure you that it’s actually pretty high marks coming from me. Of the hundreds of actions installed on my computer, I probably use a grand total of anywhere from six to ten of them with any regularity. While that may sound like a waste of money, if they get me away from my computer so I can spend more time with my family, it’s worth the price.

    Examples

    For purposes of this review, anything labeled “Original” is straight off the camera, with no edits other than resizing.  Anything labeled with an action name has had the action applied, with no additional editing of the image or tweaking of the action. See Set One examples above.

    Not all actions are universal. What might work well with landscapes can fail miserably with portraits. Experimenting with how different actions affect different photos can lead to interesting and creative results.

    Set Two- not all actions are universal. What might work well with landscapes can fail miserably with portraits. Experimenting with how different actions affect different photos can lead to interesting and creative results.

    Easy on the Budget

    Speaking of cost, this is where ATNX actions really shine. While some companies charge hundreds of dollars for smaller action packs, the complete set of 90 ATNX actions comes in at a very budget-friendly $ 25.00 (USD). This is particularly helpful for photographers who may be new to Photoshop actions and still aren’t quite sure how they’ll fit with their workflow. While you might hesitate to spend anywhere from $ 80.00 to $ 200.00 on a maybe from another company, at $ 25.00 you can afford to take a chance. That’s not to take anything away from higher priced sets, but if you’re still learning your way through the post-processing labyrinth and want to give actions a try, ATNX might just be a good place to start.

    Wrap up

    Anything negative that I might have to say would be based only on my own personal aesthetic, through no fault of the product. If an action’s initial output requires too much tweaking to get the look I want, then it’s not for me. Objectively speaking, though, Photoshop Actions from ATNX Digital combine strong, user-friendly editing tools with an affordable price tag– not an easy combination to find.

    ATNX Digital Photoshop Actions are available for digital download on their website.

    The post ATNX Photoshop Actions Review by Jeff Guyer appeared first on Digital Photography School.

    Digital Photography School

  • Beginner’s Guide to Waterfall Photography

    There are few things more majestic than a flowing waterfall, whether it’s on the Niagara river or the little stream behind your house. There are many ways to photograph these natural wonders, and I’ve compiled a few tips, tricks, and techniques to help you get waterfall images that do justice to their elegant beauty.

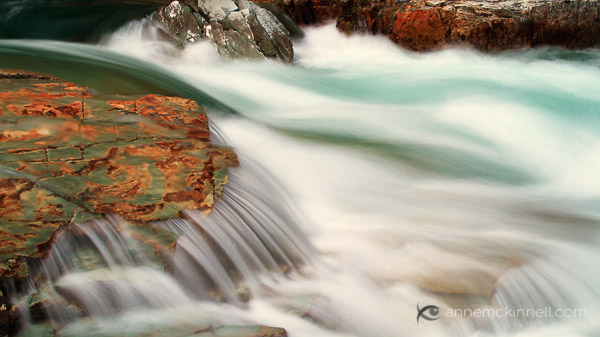
    waterfall-photo-2b

    Equipment Choices

    The equipment you need will depend on what type of photo you want to make. But you probably won’t make that decision until you are on location, so here is what I usually keep in my camera bag if I’m planning on shooting a waterfall.

    • Tripod – As with most forms of landscape photography, a tripod is your best friend. It will allow you to compose your scene very precisely and give you the flexibility you need if you decide to shoot long exposures.
    • Circular polarizing filter – This is an essential piece of equipment when photographing water to allow you to remove reflections and glare from the water’s surface. You might not need this if the frame is filled with the waterfall, but you will want it handy if you decide to include a pool of water in the foreground. It will remove the reflection and allow you to see through the water to any interesting rocks underneath.
    • Neutral density (ND) filter – If you decide to shoot a long exposure and it happens to be the middle of the day when there is a lot of light, you will need this gray-tinted piece of glass placed in front of your lens. It blocks some of the light from hitting your sensor, allowing you to use a slower shutter speed. These are sold in varying strengths, and can be stacked for different levels of light absorption.
    • Lens cloth – Useful for cleaning water spray off of your lens or filter. I like to use little pieces of ShamWow for absorbing water drops. They are helpful for cleaning water off the rest of your camera too, and even your tripod legs when you are done.

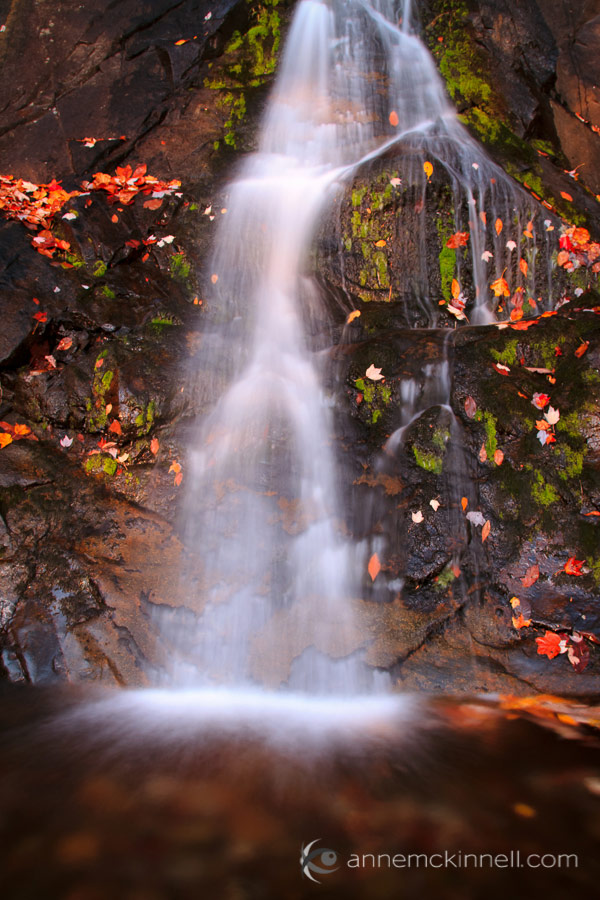
    waterfall-photo-1b

    Camera Settings

    The camera settings you use will depend on what kind of photo you’re after:

    Silky waterfalls

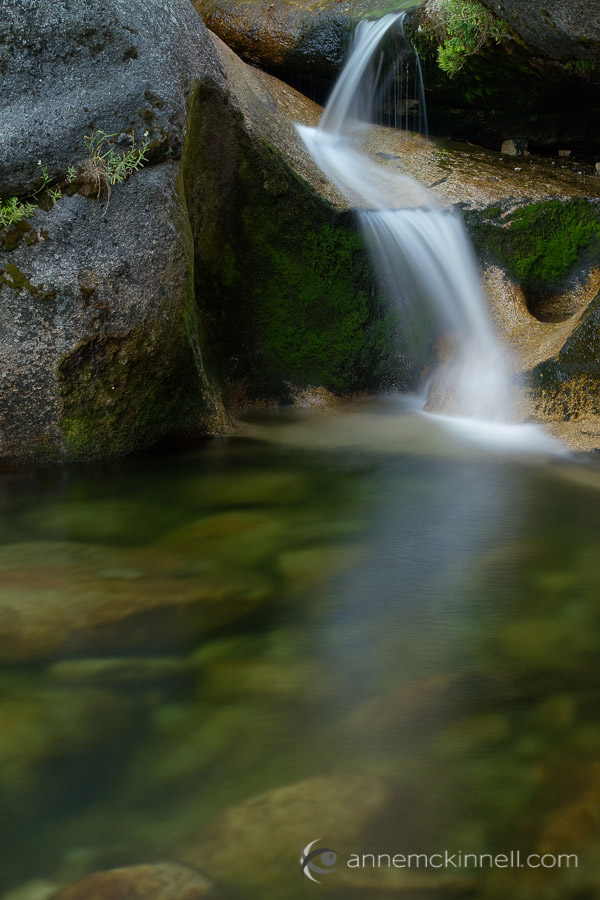
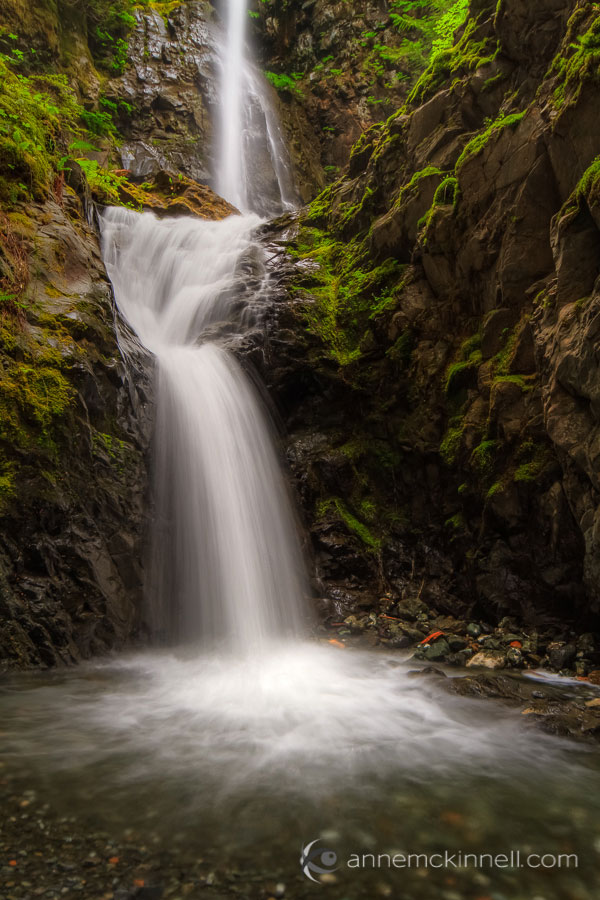
    To create that silky smooth blur popular with waterfall photography, you’ll want to use a slow shutter speed for a long exposure. With your camera mounted firmly on a tripod, set it to shutter priority mode (usually “S” or “Tv” on your camera’s mode dial) and set your ISO as low as it will go (usually 100). Then, select a shutter speed between one half second to four seconds to achieve a nice amount of blur.

    waterfall-photo-5b

    Experiment with different shutter speeds to get the amount of blur you want. The best shutter speed will depend on how fast the water is moving, so getting the shutter speed just right takes a bit of experimentation. If you cannot get a slow enough shutter speed for the effect you want, use a smaller aperture so that less light enters the camera. That will allow you to select a longer shutter speed. If you still need a slower shutter speed, that’s when you can use a neutral density filter to block some of the light.

    Keep in mind that when using a long shutter speed, if there are any plants or trees in your frame they may have an opportunity to move if there is any wind, and then everything in the image will be blurry. For this type of a scene, it is usually better to photograph earlier in the day when there is little wind.

    Freezing the motion

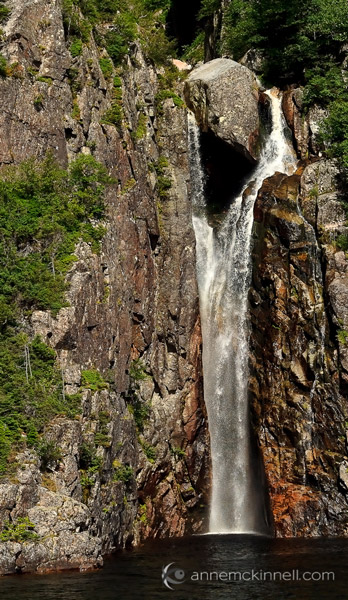
    Especially interesting when photographing violent falls, this requires just the opposite technique – you want a fast shutter speed to capture a brief moment and suspend the water’s movement in the air. Use shutter priority mode and select a faster speed such as 1/500th of a second or faster.

    waterfall-photo-3b

    For this technique you wont need a neutral density filter and you might even be able to get away without using a tripod. If you are in a low light situation, to get a fast shutter speed you may need to use a larger aperture such as f/5.6 to let more light in, and you can increase the ISO to 200, 400 or as high as you need to go to allow a fast shutter speed.

    Detail shots

    Instead of getting a broad landscape style shot, you might want to close in on an interesting rock, plant, or other detail of your scene. For this, compose your shot (use a tripod if possible) and turn your camera to aperture priority mode – “A” or “Av” on your mode dial. This will allow you to have control over the depth of field, or how much of the picture is in focus from front to back.

    The aperture value is shown as an f-stop. F-stop numbers are a little confusing because the smaller numbers represent a larger opening and vice versa. I find it helpful to think of it as a fraction. F/8 is smaller than f/4 because 1/8 is smaller than 1/4.

    waterfall-photo-6b

    Small apertures let less light in, but they increase the sharpness in the foreground and background. Large (or “wide”) apertures, on the other hand, mean that only part of the picture is in focus, while the rest becomes soft and out of focus.

    Look at your scene and decide what you want in focus and what should be blurry. If you want to isolate your main subject, choose a large aperture (small f/number) such as f/4 or f/2.8 to make the background out of focus. If the background is important to the picture, choose a small aperture (large f/number) like f/16 or f/22 to make the entire scene sharp and clear.

    Composition

    There are many compositional techniques to employ when creating waterfall images. First and foremost, remember the rule of thirds and how your eye is drawn through the image. Use the leading lines inherent in flowing water to create visual pathways for the viewer to follow, remembering that corners are very strong entry and exit points in the frame. Pay attention to both the foreground and background, and don’t forget to pay attention to what’s around the water, as well as the falls themselves.

    waterfall-photo-4b

    Field techniques and summary

    • When you arrive at any scene, the first thing to ask yourself is, “What makes this place unique?”. Pay special attention to that quality.
    • Bracket your shots to make sure you get the best possible exposure – this means taking several pictures using different apertures and shutter speeds, and also making several different images using the camera’s exposure compensation (+/-) to brighten or darken each shot to a different degree. See your camera’s manual for specific instructions on how to use these features.
    • Shoot in the uncompressed RAW format to allow for more flexible fine tuning in post processing. RAW images must be processed with a compatible photo editing program, or software that was included with your camera.
    • Experiment – most of all, don’t get stuck making the same type of photograph all the time. Try to make a long exposure, a fast exposure, some detail shots, and try different perspectives so you come home with a variety of images from your photo shoot.

    Gear mentioned in this article

    • tripods – link to some of the best, and most popular brands
    • neutral density filters – make sure to get the right filter size for your lens, or biggest one and a step down ring to your smaller ones
    • lens cleaning cloth

    The post Beginner’s Guide to Waterfall Photography by Anne McKinnell appeared first on Digital Photography School.

    Digital Photography School

  • All That You Need in Your Camera Bag for a Successful Wedding Photography Shoot

    There are many challenges to successful wedding photography, and it can be a hectic day, even for skilled photographers.It includes the photography of activities involving the wedding and photographs of the family members, friends and couple before the marriage, as well as coverage of the wedding day and post wedding. It’s a viable endeavor that supports the efforts of many Continue Reading

    The post All That You Need in Your Camera Bag for a Successful Wedding Photography Shoot appeared first on Photodoto.


    Photodoto

  • Review Canon Powershot S120 Digital Camera

    Review Canon Powershot S120 Digital Camera

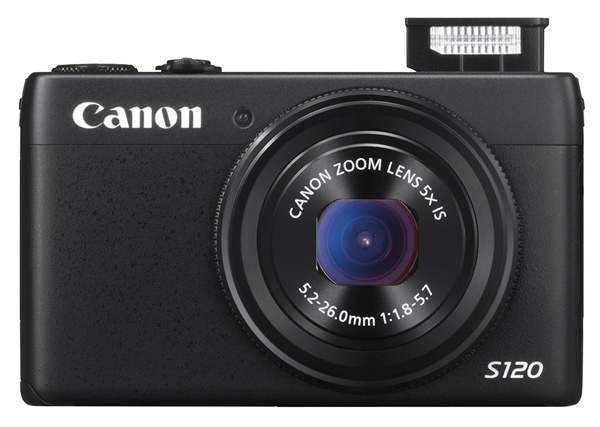
    Canon S120 review Blk front 2

    You could wonder at my bravado in reviewing this tiddler when all it seems to offer is a digicam with moderate specs and little else. Aah! But look further!

    Features and Specs

    Its story begins with Canon’s well-tried DIGIC 6 processor, along with a relatively large CMOS sensor. The maximum aperture is a generous, optically stabilized f/1.8, which does, quickly fall to f4 once you start zooming. However, it is the first S-series model to feature an f/1.8 lens and the 24mm wide end is extremely useful for tight interiors.

    But the S120′s specs are well worth comparing to the highly regarded SX50 HS, which I reviewed a year ago, equipped with a powerful 50x optical zoom.

    Canon S120 review Black Back

    This one is a much less powerful beast optically, with a moderate 5x optical zoom, but it also has a larger CMOS sensor and a continuous shooting speed of up to 12fps. It’s also considerably smaller, more easily pocketable and easier to use.

    Much like almost every camera offered in 2013, the S120 has inbuilt WiFi connectivity, so it can hook up directly to smart devices and social networks. Settings can be adjusted in a number of ways: through the dedicated control buttons, via the 7.5 cm touch screen or with the lens control ring. The camera also supports GPS tagging via a mobile, allowing location data to be added to shots using Canon’s dedicated app for smart phones/tablets.

    Maximum image size is 4000×3000 pixels, leading to a final print size of 34x25cm print (13.4×9.8″) at 300 dpi.

    Video can be shot in 1920×1080 Full HD quality MPEG4. If you shoot stills during a video record the latter stops.

    A look around – physical features and controls

    The camera is, as I have said, very pocketable and viewable, thanks to the 7.5cm LCD screen which does not, unfortunately, tilt. Oh well!

    Top deck, at left is the tiny pop up flash; to the right is the power button and the shutter button that encircles the zoom lever; at the extreme right is the mode dial with positions for auto and hybrid auto shooting, P,A,S,M, custom settings, movie, camera effects (high dynamic range, fish eye, background defocus, mono etc) and scene effects (portraits, snow, starry skies, fireworks, time lapse etc).

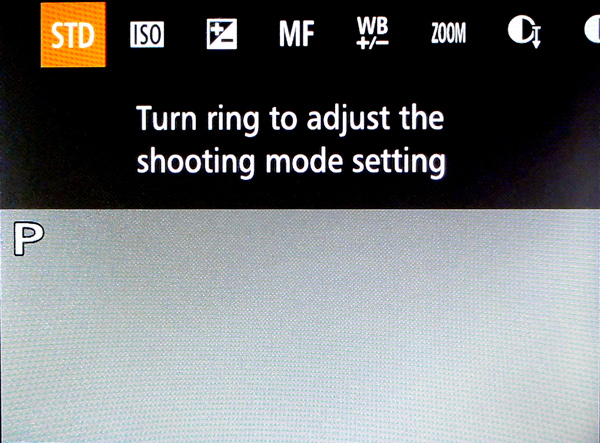
    You can adjust shutter speed or aperture — and manual — value by rolling the control dial to that setting (Tv, Av or M), then twirl a ring at the base of the lens. Simple! Just like a real camera!

    There are plenty of people out there who will enjoy the easy access to the camera and scene effects offered by the camera and I wouldn’t mind betting there are plenty of newbie DSLR owners who still have no idea how to set the camera to handle these off-beat beat subjects.

    The only flaw I found in the top deck layout was the difficulty of tapping the recessed power button. For the life of me, I can’t suggest an alternative arrangement!

    Canon s120 review Ring Function

    Rear: at top right is the familiar red video record button and, to its left, is a button titled Ring Function which gives direct access to such things as ISO, exposure compensation, manual focus, white balance correction, dynamic range and shadow correction. The latter takes the S120 into a totally different area, with access to high control of your picture making. Worth some study. Lower, we find the control dial with settings for exposure correction, macro shooting, flash and display options.

    Canon S120 reiew Menu

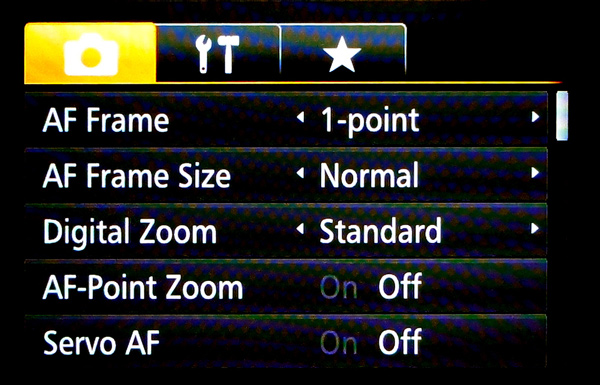
    Beneath the dial are found the replay and menu buttons, with the latter offering a fairly extensive extensive list of options. Noteworthy also is the on screen level indicator, and that’s about it.

    Sample images from the Canon S120

    Canon s120 review Centre screen 1

    Canon S120 review Decorations 2

    Canon S120 review Flowers 2

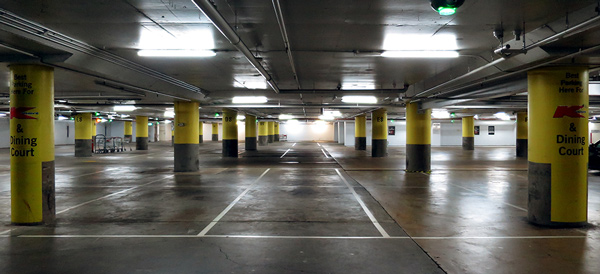
    Canon S120 review Parking 2

    Startup time

    It took two seconds from power on the first shot, then about a second between shots.

    Distortion

    There was a small amount of barrel distortion at the wide end of the zoom but no problems at the telephoto end.

    ISO Tests

    Canon PowerShot S120 ISO 100

    Canon PowerShot S120 ISO 400

    Canon PowerShot S120 ISO 800

    Canon PowerShot S120 ISO 1600

    Canon PowerShot S120 ISO 3200

    Canon PowerShot S120 ISO 6400

    Canon PowerShot S120 ISO 12800

    Noise begins to creep in at ISO 3200. By ISO 6400 noise is up a little more but what is really noticeable is the fall off in definition, both of which factors make shooting at ISO 12,800 a none event, compounded by some ugly pixel clumping at that setting.

    Overall comments

    • Quality: average
    • Why you’d buy the camera: small; a surprisingly generous list of picture control options; nice wide 24mm wide end of the zoom
    • Why you wouldn’t: zoom is not long enough for sports photography
    • It’s not a big deal, but the S120 is one of the few digicams that let you replay your images by tapping that button — and not needing to fire up the power button first

    If you’re still using a simple digicam but have higher ambitions, shoot-wise, this would make an ideal bridge camera to sharpen your camera skills before you leap into the fast running waters that encircle a DSLR!

    Good gear!

    Specs

    • Image Sensor: 12.1 million effective pixels
    • Sensor: 15mm CMOS
    • Metering: Evaluative, centre-weighted, spot
    • Lens: f1.8-5.7/5.2-26mm (24-120mm as 35 SLR equivalent)
    • Exposure Modes: Auto, Program AE, shutter and aperture priority, manual
    • Shutter Speed: 15″-1/2000 second
    • Memory: SD/SDHC/SDXC (UHS Speed Class 1 compatible)
    • Image Sizes (pixels): Stills: 4000×3000 to 640×480
    • Movies: 1920×1080, 1280×720, 640×480
    • Continuous Shooting: 9fps
    • Viewfinder: 7.5cm LCD screen (922,000)
    • File Formats: RAW, JPEG, MPEG4
    • Colour Space: sRGB
    • ISO Sensitivity: Auto, 80 to 12,800
    • Interface: USB 2.0, HDMI mini, AV, WiFi, DC input
    • Power: Rechargeable lithium ion battery
    • Dimensions: 100x59x29 WHDmm
    • Weight: 217 g (inc. battery, card)
    • Price: Approximately $ 400 see Amazon
    • Web: Canon.com

    DPS Rating: 3

    The post Review Canon Powershot S120 Digital Camera by Barrie Smith appeared first on Digital Photography School.

    Digital Photography School

  • Day 3 Deals – Turn your Dreams of Going Pro into Reality

    Day 3 of the 12 Days of Christmas sale is all about inspiring and equipping people keen to turn pro. Secretly wish you could be a full-time photographer?  Not sure where to start? No problem – Digital Photography Santa has all the answers in these mega-special Day 3 deals.

    Deal 1: Save 60% Off our popular eBook – Going Pro

    Day3Single

    Learn first-hand from experienced magazine photo editor Kelly Kingman about selling your images the way YOU want. Going Pro covers everything from choosing the right business model to teaching you the practicalities of building a successful business.

    For just $ 20, it’s guaranteed to pay for itself many times over!

    You can read about what’s included in Going Pro here.

    Deal 2: Total Training in Commercial Photography – Online Course by Charlie Borland for only $ 124 ($ 499RRP) Massive 75% off!

    Day3Bundle

    Download this fantastic deal now and save 75% off!

    Commercial photography is one of highest paid areas in the industry. It’s true; rates can run $ 1000, $ 2000, and even $ 5000 per day plus expenses.

    After watching 125 lectures by veteran commercial photographer Charlie Borland; you’ll be fired up, totally prepared and ready to compete in the lucrative commercial photography market.

    Start 2014 with a real plan to start living your dreams.

    But don’t hesitate… both these incredible deals are only available for the next 24 hours.

    The post Day 3 Deals – Turn your Dreams of Going Pro into Reality by Darren Rowse appeared first on Digital Photography School.

    Digital Photography School

  • Using a Video Slideshow to Showcase Your Photography

    This is a guest contribution by Alison Dias-Laverty

    Take your Photos and Videos to the Next Level: Create a Video Slideshow

    One of the most memorable photos I have taken was on the highlands of Scotland. It is one of the most beautiful and breathtaking views and experience that changed my life.

    Yet as many times that I have tried to capture my feelings and emotions of being in that present moment of magnificence, I could never rekindle those same feelings in all my still photos. Technology is truly exciting for the creative. You can now use your photos and video clips, mix them to music to create a video slideshow.

    What is a Video Slideshow?

    It is not just about displaying your photos to music. It is about giving your audience an unforgettable experience through your photos and videos. There is an art to creating stunning slideshows and it is in the story from your images.

    Five Great Tips to Help you Start Your Video Slideshow

    1. Know your Audience

    Your photos must connect and speak to your audience. Your story needs to touch their hearts for the right reason. Whether it is to bring joy or make a strong statement about life. Knowing your audience will make it easier to connect to them.

    2. Your Message

    Why did you take that photo? Was it to embrace the moment, in the hope it would last forever? Therefore, your message must create that awareness of what you want to share. Even a simple text that connects your photo to your audience will give them cue to your message.

    3. Tell a Story

    Everyone loves a story and when you show your photos, let the beauty of your photos speak out loud. Photos speak louder than words and in many ways, can take your breath away and touch someoneís heart.

    4. Choose Appropriate Music

    I cannot stress the importance of choosing music to create the mood, because it will carry your slideshow to its climax. Music can evoke feelings and emotions that will take your audience on a journey through your lens. If your music in your video is used for anything other than private use, depending on which country you come from, there are Music Copyright Laws that you need to follow. YouTube has a list of Royalty Free Music to use for free as well as a couple more options – Free Play Music and Incompetech.

    5. Take your Audience on an Emotional Journey

    What you want your audience to feel is the ìWow Factorî. You can create that dramatic effect with your photos to amaze your audience, by using motion effects and transitions, synchronized to your chosen music.

    Summary

    Creating a Video Slideshow is a great way to showcase your photography portfolio. You can create a short introduction video clip to connect with your audience or display a showcase of your best works. All it takes is a little practice and creativity to amaze your audience with your stunning photos.

    Resources for creating your own slideshow:

    • Online Slideshow Website Tool – Photodex ProShow
    • Animoto slideshow creator

    Alison Dias-Laverty is a Video Slideshow Designer and the founder of Photoshow on DVD, based in Brisbane, Australia. Her love for music is expressed in every video slideshow created and bound with the essence of her passion for taking photos. Visit her YouTube Channel to see more videos.

    The post Using a Video Slideshow to Showcase Your Photography by Guest Contributor appeared first on Digital Photography School.

    Digital Photography School

  • Why Blocking is Important for a Social Network

    Why Blocking is Important for a Social Network

    Earlier today Twitter reversed their decision to change how user blocks are handled after a backlash reaction on their network.

    From the Twitter blog:

    “Earlier today, we made a change to the way the “block” function of Twitter works. We have decided to revert the change after receiving feedback from many users – we never want to introduce features at the cost of users feeling less safe. Any blocks you had previously instituted are still in effect.”

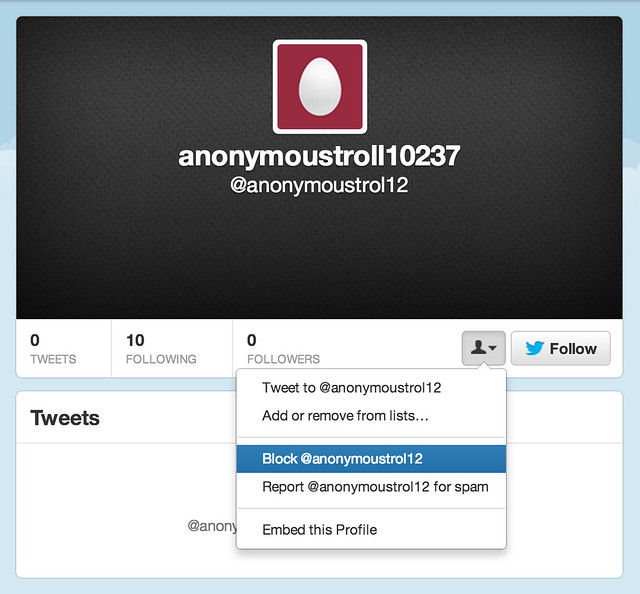
    In a way, the current block at Twitter is sort of ineffective. If I block someone, the only thing it really does is prevent them from seeing my tweets when they are logged in (which also serves as notification to them that I’ve blocked them). They can still open up an unlogged-in version of Twitter (as easy as cmd-shift-N in Chrome, or cmd-shift-P in Firefox) and see everything I’ve tweeted publicly. Still, Twitter’s reversal shows that users really do care about blocking functionality and want more control and powerful blocking tools, not less.

    I would argue that there are three key benefits that come from strong blocking tools on a social network.

    1. Users feel empowered when they are more forcefully able to deal with harassment on a network. If someone is saying something offensive, why shouldn’t I personally be able to take control over that situation? If someone is making me uncomfortable, why shouldn’t I be empowered to deal with that for my own personal experience?

    2. More effective blocking tools encourage more civil interaction. The thing that most trolls, haters, griefers, offensive jerks, etc. want on a social network is attention. By making it super easy to mute them or diminish them (especially by an intended target) it provides a disincentive for anti-social behavior in general.

    3. Empowering users with blocking tools provides immediate relief for a user. Since oftentimes harassment is happening in real time, this can be more effective than waiting for customer service / community management reps at a social network to respond to reports of community violations. It is frustrating for a user to have to suffer even an additional 12 hours of harassment while a complaint works its way through to a community manager.

    As far as best practices go, I’d hold up Google+ and Facebook as the networks that provide users the best blocking protection on the internet today.

    Like Twitter, on Google+ and Facebook when you block someone they cannot see your public posts.

    Google+ and Facebook take it one important step further though. Not only do they prevent someone you’ve blocked from seeing your public posts, they *also* filter the blocked user entirely out of your G+ or Facebook experience.

    On G+ and Facebook when you block someone they become completely invisible to you everywhere on the network. It’s like they no longer exist in your social utopia.

    That second block function is even more important than the first.

    Flickr by contrast has some of the weakest blocking tools on the internet. When you block someone on Flickr, all it does is prevent them from private messaging you or commenting/faving your photos. Because of Flickr’s weak blocking tools, I’ve seen many of the most active, social accounts on Flickr leave due to harassment. This is bad design.

    What makes harassment even worse on Flickr, is that (unlike G+ and Facebook) they allow anonymous troll accounts. So if a Troll1022 is harassing you anonymously on Flickr, and you report them, and three days later that account is deleted, all they need to do is set up Troll1023 and continue with the practice. Flickr’s weak blocking function allows virtually unlimited harassment on their network by anonymous trolls.

    Protecting users and providing more control over your experience on a social network is important. It’s your most social and active users who will most likely sooner or latter run into friction. These are the users that any social network should be striving to empower.

    I’m glad Twitter reversed their block policy after user reaction, and hope all networks realize how important the block feature is.


    Thomas Hawk Digital Connection

  • How to Upload Photos to Flickr and 500px using Lightroom 5

    Lightroom 5 Publish Services

    The main benefit of Lightroom’s Library module is that it saves you time. It is much quicker, and ultimately simpler, to organize your photos using Lightroom Collections, than it is to search through the folders on your hard drive containing those photos when you need something.

    The skills you’ve learned so far in this series (yes, there is a series – I’ll provide links to the relevant articles at the appropriate points) all come together with Lightroom’s Publish Services. You can use these to publish photos to photo sharing websites like Facebook, Behance, Flickr, 500px and more. Today I’ll concentrate on the two you are most likely to use for your best images: Flickr and 500px.

    How to Upload Photos to Flickr and 500px using Lightroom 5

    Publishing Collections

    Lightroom 5 Publish Services

    Lightroom’s Publish Services use a special type of Collection called Published Collections (there are also Published Collection Sets and Published Smart Collections). These are the same as regular Collections (which you can learn more about in my article Use Lightroom Collections to Improve Your Workflow) except for these key differences:

    • Published Collections have one purpose only:  to publish your images to either a hard drive location or a photo sharing website such as those listed above.
    • Published Collections are dynamic. They tell you if a photo has changed after you have published it, so you can re-publish it.

    Here’s how it works. You create a Published Collection containing the photos that you would like to upload to a website (for example, Flickr). Lightroom tells you which photos have already been uploaded, and which ones haven’t. But wait, there’s more: if you publish a photo to Flickr, then make changes to that photo in Lightroom’s Develop module, Lightroom’s Publish Service marks it and gives you the option of uploading it again.

    That’s clever, and very, very useful, as it enables you to see at a glance whether you have uploaded the most recent version.

    Setting up a new Flickr Publish Collection

    That’s the theory, let’s see how to put it into action:

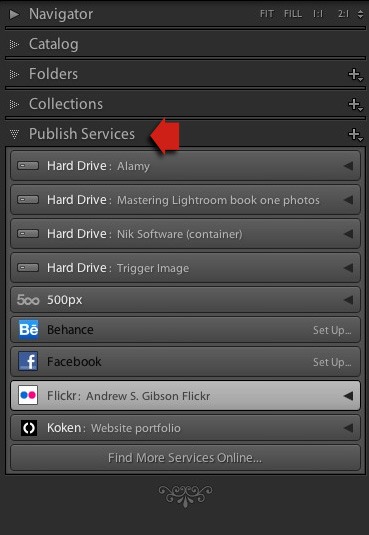
    Step 1. Go to the Publish Services panel. It’s at the bottom of the left-hand panels in the Library module (see below)

    Lightroom 5 Publish Services

    Step 2. Click the New Published Collection icon and select the Go to Publishing Manager option.

    Lightroom 5 Publish Services

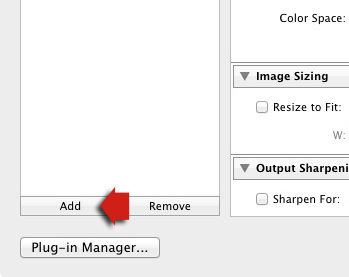
    Step 3. Click the Add button in the bottom left of the Publishing Manager window.

    Lightroom 5 Publish Services

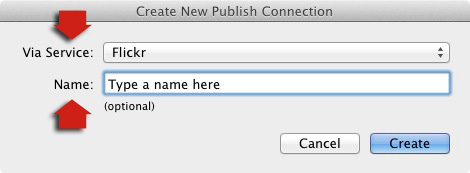
    Step 4. In the next window, select Flickr from the Via Service drop-down menu. Type a name for your service underneath.

    06

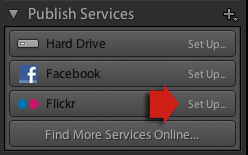
    Alternatively, if this is the first time you’ve done it, you’ll see something like the screenshot below. Click the words Set Up next to the Flickr icon to get started.

    05a

    Step 5. Start by clicking the Authorize button and entering your Flickr log-in details. This authorizes Lightroom to access your Flickr account.

    07

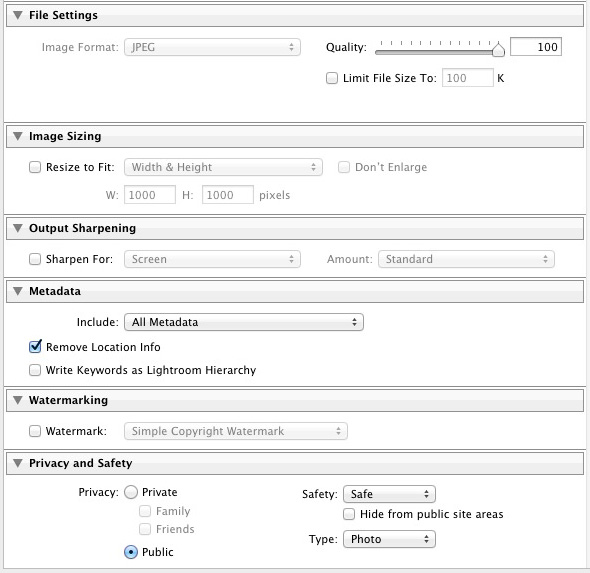
    Step 6. Now it’s just a simple matter of adjusting the settings to what you want. The most important ones are near the bottom of the Publishing Manager window. You can set things like image quality, image size and sharpening, add a watermark, set which metadata (if any) to include and select the appropriate privacy setting. Press the Save button at the bottom-right of the window when you’re done. The Flickr Publish Service is now set up.

    08

    Using the Flickr Publish Service

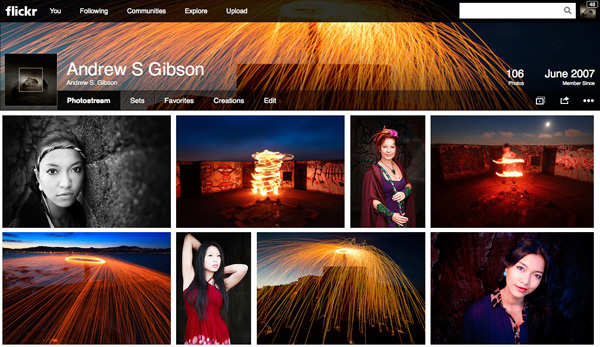
    You’ll see that there is a Published Collection called Photostream in the Flickr Publish Service. Any photos you add to this Published Collection will be uploaded to your Flickr account using the size and quality settings you selected earlier.

    Lightroom 5 Publish Services

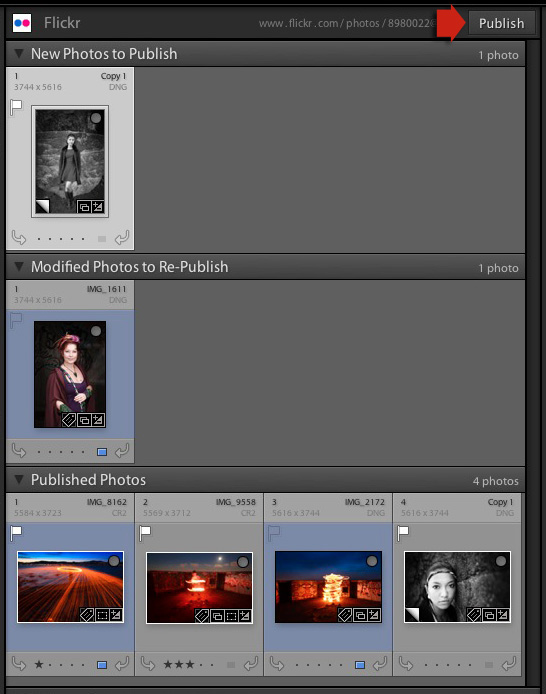
    Click on the Photostream Publish Collection and you’ll see something like the image below if you’re in Grid View – press ‘G’ on your keyboard if you aren’t. If you’re not familiar with how Grid View works, then see my article Making Sense of Lightroom’s Grid View.

    09

    There are three sections:

    New Photos to Publish: photos added to the Published Collection but not yet uploaded to Flickr. Click the Publish button at the top right to publish them.

    Modified Photos to Re-Publish: these are photos already uploaded to Flickr that have changed since being published. Note that any change, however minor, will result in a photo appearing in this section. That includes things like adding keywords, or any tweaks you make in the Develop module. Modified photos are uploaded again when you press the Publish button. If you don’t want to upload the modified photo, right-click on the thumbnail and select the Mark as Up-to-Date option.

    Published Photos: Photos already published to Flickr.

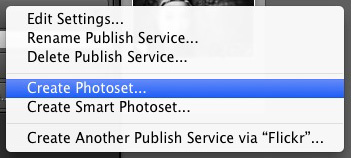
    You can also manage Flickr Photosets from within Lightroom. Right-click the Flickr Published Collection heading and select Create Photoset from the menu. This lets you add photos to Sets as well as your photostream.

    10

    Finally, another benefit of using Lightroom’s Publish Services is that you can add keywords and a description to your images in Lightroom and these are populated automatically when you upload your photos to a photo sharing website. That means you only have to type in those details once, instead of multiple times. You can learn more about keywords in my article Creative Ways to Use Keywords in Lightroom 5.

    Publishing to 500px

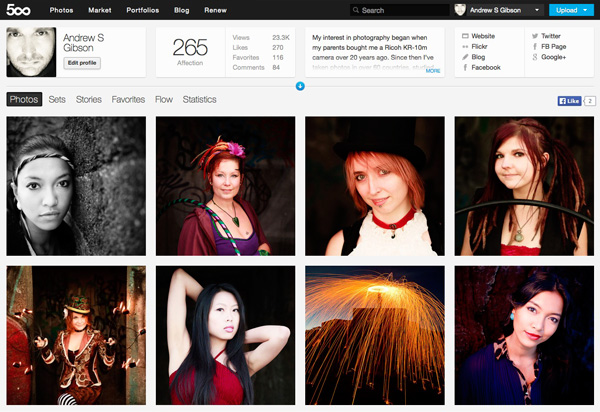
    The 500px Publish Service works in a similar way to the Flickr Publish Service except that it is not built-in to Lightroom. You need to download the plug-in from the 500px website, which you can do here.

    Unzip the file and move it to your Programs folder (PC) or Applications folder (Mac). Go to the Lightroom Plug-in Manager (File > Plug-in Manager) and click the Add button to install the plug-in. Once installed, it works virtually the same way as the Flickr Publish Service. The main difference is that the 500px plug-in downloads any photos you have already uploaded to 500px and adds them to your Lightroom Catalog.

    Mastering Lightroom Book One: The Library Module

    Mastering Lightroom ebook

    My latest ebook Mastering Lightroom Book One: The Library Module is a complete guide to using Lightroom’s Library module to import, organize and search your photo files. You’ll learn how to tame your growing photo collection using Collections and Collection Sets, and how to save time so you can spend more time in the Develop module processing your photos.

    The post How to Upload Photos to Flickr and 500px using Lightroom 5 by Andrew Gibson appeared first on Digital Photography School.


    Digital Photography School

  • Day 2 of 12 Days of Christmas…Great Deals from James Brandon

    On the 2nd day of Christmas dPS gave to me …

    A massive 75% saving on James Brandon’s fantastic video course, 2 eBooks and loads of presets — yours today only for just $ 19! (normally $ 76).

    Day2Bundle

    Yes you heard us right – today’s deal is pretty amazing – for under $ 20 you get some great photographic training and software.

    Click this link to check it out.

    Here’s what you get in this great investment in your photographic learning:

    1. Video course: Video Course: 10 Common Photography Mistakes and How to Fix them.
    2. eBook: Tack Sharp (a really popular book amongst dPS readers)
    3. eBook: 10 Tips For Improving Your Photography Today
    4. Lightroom Presets: All 80 of them! Fully customisable, yours forever.
    5. onOne Presets: His whole collection

    Usually sold for $ 76 – it is all yours for just $ 19.

    Regular dPS readers will know James Brandon’s work – he’s penned some of our most popular posts and has many fans. If you’re one of them you don’t want to miss this deal.

    It’s live for just a few more hours now so grab it now here.

    PS: if you already have James’ eBooks you can grab his brand new video course for just $ 12 (60% off). Details of this are here.

    The post Day 2 of 12 Days of Christmas…Great Deals from James Brandon by Darren Rowse appeared first on Digital Photography School.

    Digital Photography School

  • Weekly Challenge – Macro Photography

    By Pison Jaujip

    Earlier I posted several macro, or close-up images to give you some ideas. Now it’s time for you to get out and try it. If you don’t have a macro lens there are plenty of other methods you can use that are less expensive if buying a new lens isn’t an option.

    Here’s a few articles and resources on different options for doing macro photography:

    • Getting up close with close-up lenses – part one of four on macro photography
    • Extension tubes – part two of four on close-up photography
    • Reverse lens macro – part three on close-up photography
    • The wonderful world of macro lenses – part four of four
    • Up Close: A Guide to Macro & Close Up Photography – an eBook by dPS author Andrew S Gibson

    So there’s your reading material, now show us your macro images!

    Remember get creative with what you photograph. Try shooting everyday, ordinary things and see what they look like close up – even the dog! Make sure you still keep in mind all the other aspects of good photography like: composition, lighting, and camera settings.

    By Casey Myers

    By Sean Rogers

    By Martin Heigan

    By nick@

    Once you’ve taken your macro shots we’d love to see them in comments below. Simply upload your shot into the comment field (look for the little camera icon in the Disqus comments section as pictured below) and they’ll get embedded for us all to see or if you’d prefer upload them to your favourite photo sharing site and leave the link to them.

    The post Weekly Challenge – Macro Photography by Darlene Hildebrandt appeared first on Digital Photography School.

    Digital Photography School